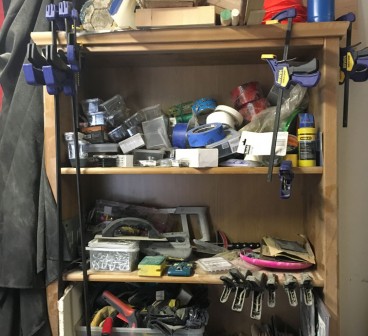
Our garage is like an old comfortable pair of shoes. Well worn, often used, but not well cared for, and not very pretty. The garage is where things get built, tools and motorcycles get stored, and where things that have no place in the house go to die. Oh and everything is covered with a solid layer of sawdust and/or cobwebs. I’m painting quite the picture, aren’t I? After two renos, and copious amounts of projects, our poor garage was really in a sad state. Continue reading “The garage is a black hole”
Author: El Granto
El Granto is Kristen's devoted husband. When he's not listening to what she tells him to do he's a motorcycle maniac and an avid beer, whiskey and cigar connoisseur.
Kubb: The Viking Field Game
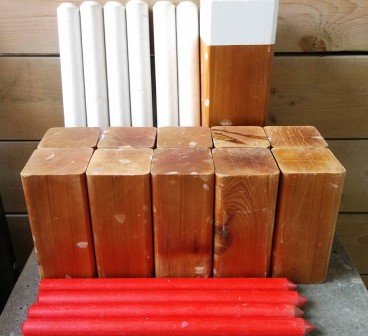
A few months back I heard about a new (old) game that’s been picking up some popularity and it sounded very interesting. The game is called Kubb and was supposedly invented by the vikings and sounded like a lot of fun so I decided I’d look for a set on the internet.
Oh it’s over $120 you say… and I have thousands of dollars worth of tools in my garage you say… well this won’t stand! It won’t stand I say! How can I be shopping online for wooden game sets!? To the El Granto cave! Continue reading “Kubb: The Viking Field Game”
DIY Notebook Tool Roll
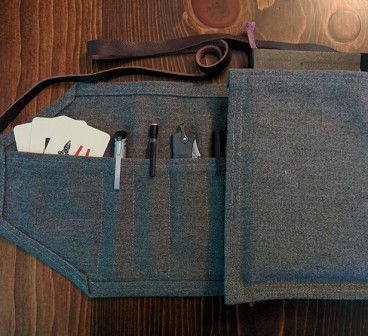
Hey, I don’t know if you’ve noticed the author name on this post or on the homepage but it’s not Kristen. Yeah, I know you don’t see the author name of El Granto here a lot. Frankly Kristen’s just better at it. But I’m here now and I’m all you’ve got for today, so you better like it! Continue reading “DIY Notebook Tool Roll”
Making your zapper zap through walls
You may know of our Printmakers media cabinet build. We love our cabinet. But there was one major design flaw (well not so much a flaw, more of a drawback). If we wanted to watch TV or control the volume on anything in the cabinet we needed to have at least one door open so that the remotes could reach the components.
I looked around for a solution and couldn’t come up with much. Until one day I was listening to a podcast and off topic one host started talking about an IR repeater and how he put all his components in to a closet. DING!
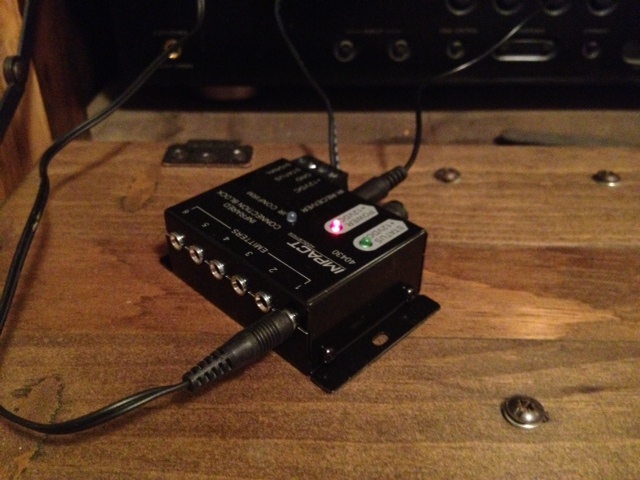
I headed over to Amazon and promptly purchased the Cables To Go Impact Acoustics 40430 Infrared (IR) Remote Control Repeater Kit. Long name. Tiny thing. Great product.
An IR repeater takes the infrared signal from your remote and “blasts” it out out of little stick on modules. It’s super simple to hook up and took no time at all to get working.
Step 1:
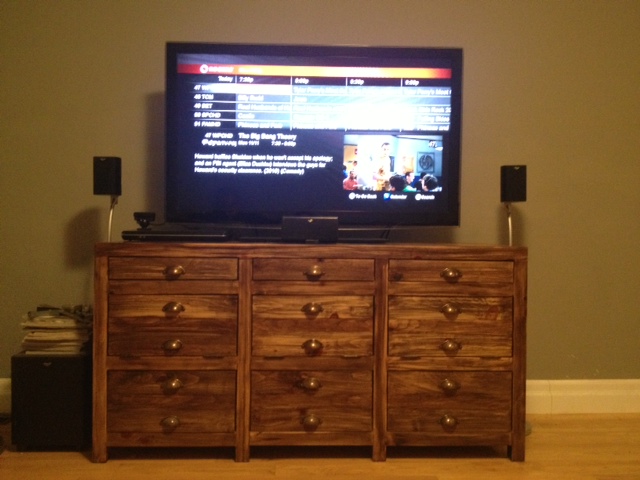
Position the IR receiver:
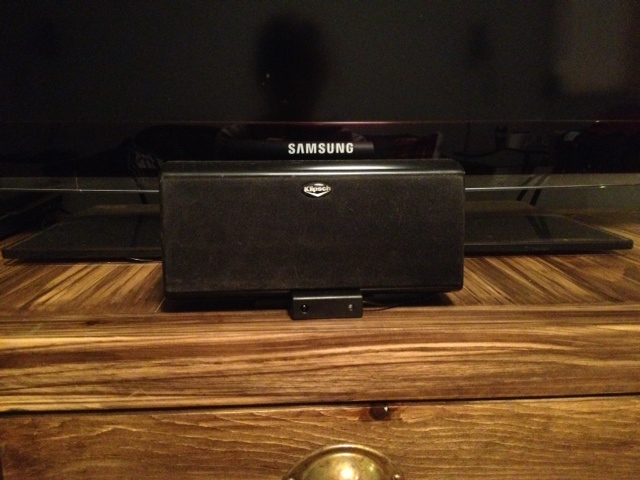
I chose just under the center speaker. Even with our bluetooth remote out of habit we always point it at the TV. This can sometimes be a problem when your components are a foot below the tv. This takes all the guesswork out of changing channels.
Step 2:
Plug the IR receiver in to the base unit.
Step 3:
Plug your IR Blasters in to the base unit (while you’re at it plug in the power cable too).
Step 4:
Position your base unit somewhere hidden. Mine is actually sitting right on top of our audio visual receiver.
Step 5:
Position your IR blasters over the IR sensors on your equipment.
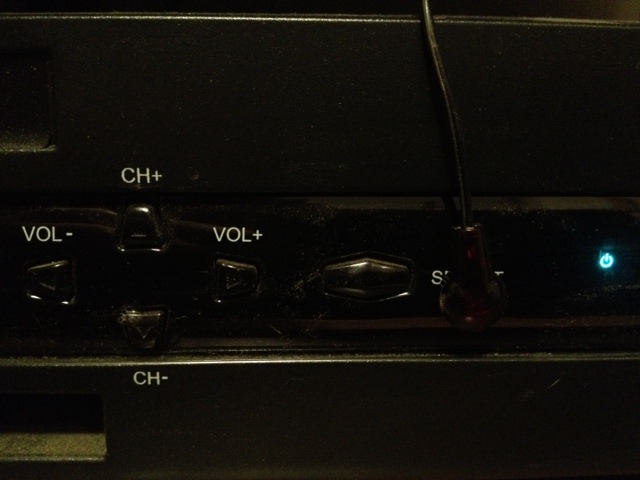
You can figure out where your IR sensors are by shining a flashlight on to the front of your components at a 45 degree angle. You’ll see a circle under the translucent plastic (usually about the size of a nickel). Peel off the sticky back of the blaster and stick it on.
The kit I purchased came with two double blaster cables. We only have two IR controlled components in our cabinet so I only needed to use one cable.
The IR repeater will now take any signal it gets and blast it out to all the components and you can leave your cabinet doors closed!
Two unforeseen advantages came along with installing the IR repeater too! One, the dog is no longer tall enough to get in the way of the remote signals and two, there’s a little blue LED on the IR receiver so you know 100% when you’re sending a signal.
I’m 100% so happy happy happy that this little guy came in to our entertainment world. No more unsightly audio visual components hanging out in open doors. No more dog smashing in to them while playing and no more getting up (after forgetting they’re closed) to open the door when you’ve finally sat down after a long day at work! That last bit happened WAY too often.
Fall Home Maintenance

As the leaves are turning and the daylight is fading, now its the optimal time to do some fall maintenance around your home.
Nest: Day Four-Hundred and Sixteen: The post that never happened

We had an idea to use the Nest as a reoccurring post for a few months. But the simplicity of Nest kind of got in the way of those plans. Continue reading “Nest: Day Four-Hundred and Sixteen: The post that never happened”
Quick no Plan Project: Beer Can Carrier
Last weekend while Kristen was sanding a new project and I had little to do. Sure I could have helped. But why not whip together a quick project while she did all the boring work?
I have seen many beer/can carriers on the internet and decided to give it a try myself.
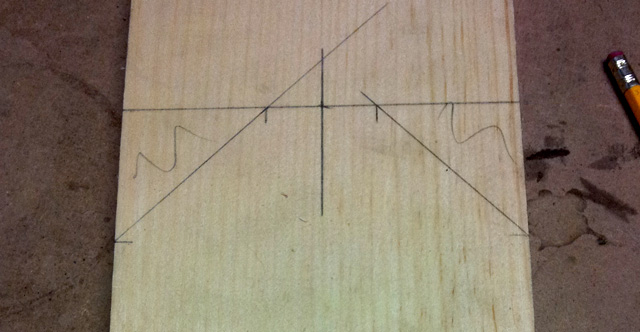
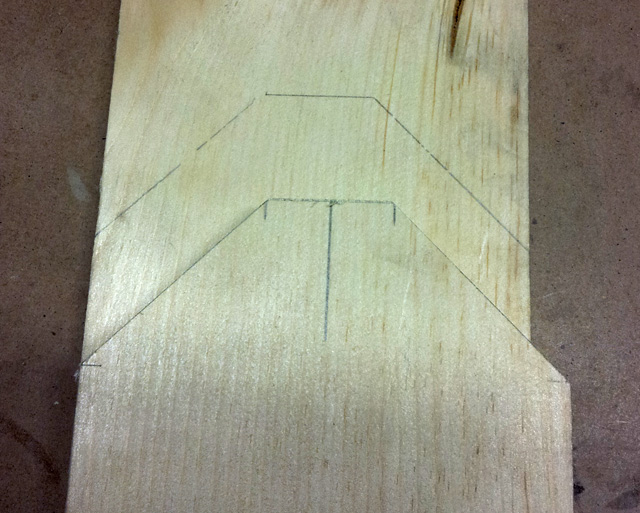
I started by measuring a can and adding some inches to the height to give some room for a handle (9 inches tall) and measured two cans beside each other for the width (giving a little breathing room for easy removal of frosty brews it came to 5 1/2 inches). Then I used a combination square to add 45 degree corners to the template (the flat top section is 1 3/8 inches).
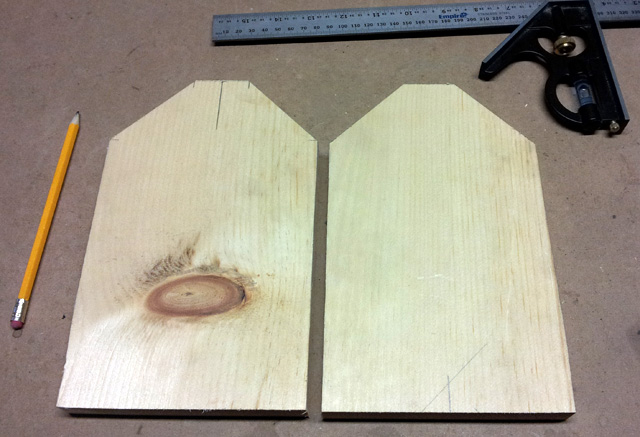
After cutting out the first side of the carrier with the miter saw I decided I was happy with the size and traced the outline to the 2nd side.
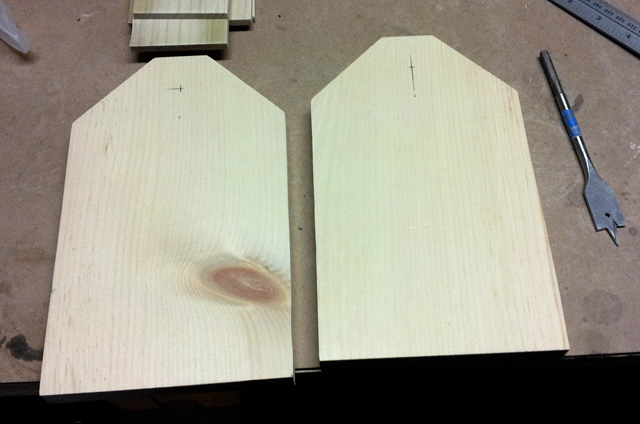
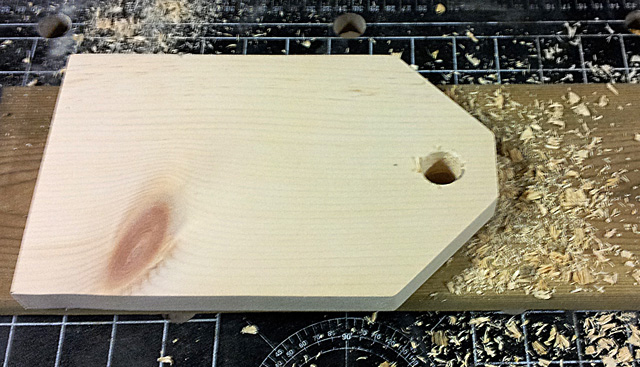
I measured and drilled a 3/4 inch hole in each side for the handle to pass though.
DIY Tip: place a scrap board beneath your piece to stop tearout when drilling holes that will be seen or are large
I then lined up three cans and and measured their width and found that with a little breathing room 9 1/2 inches suited three cans quite well.
I found some poplar that was laying around the garage and cut 4 strips to 9 1/2 inches long and ripped two of them down to 2 5/8 inches to make the bottom of the carrier with a little gap on either side for the escape of any condensation that may build up and drip down the sides of my nectar vessels during transport.
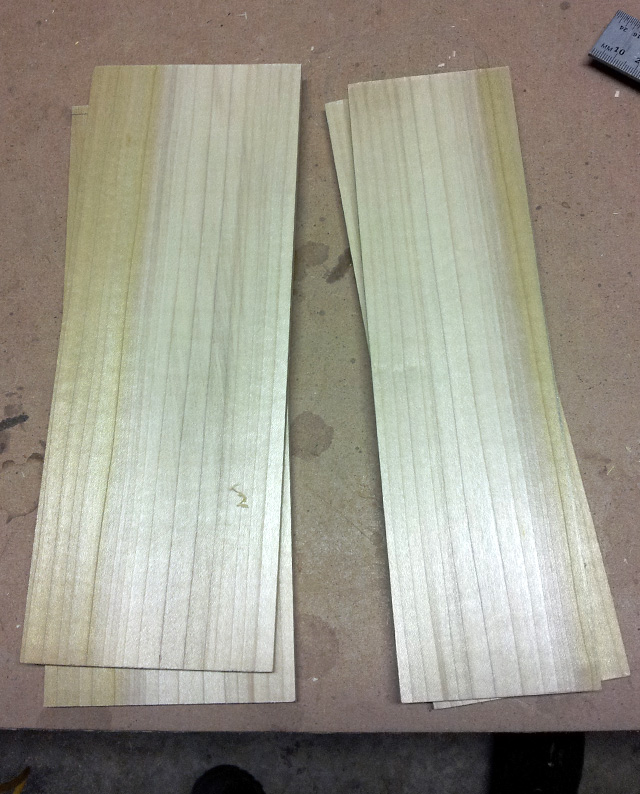
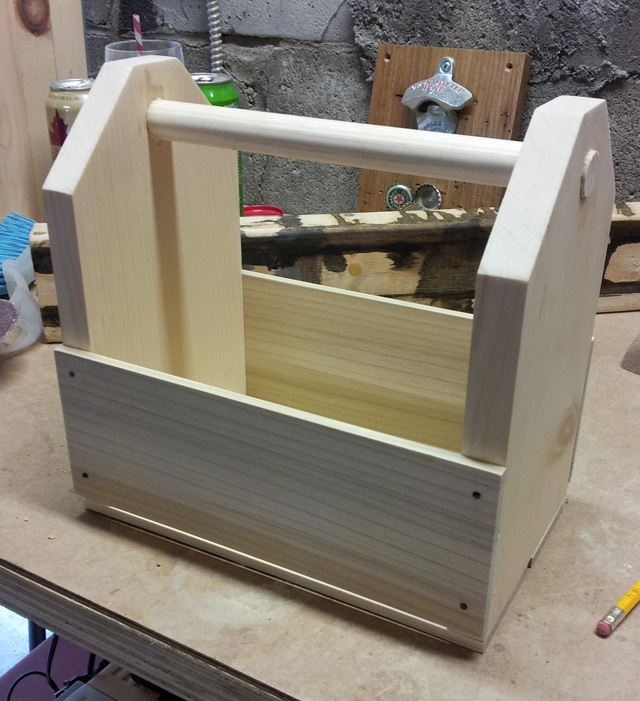
After all the pieces were cut they were sanded down to 220 grit and I attached them all together using some black finishing nails that were left over from ages ago when we made the Liquor Cabinet. Leaving a gap between the sides and the bottom (more condensation relief).
I then cut the handle (some 3/4 inch dowel left over from a project you’ll see in the future) to size leaving a little room for it to poke out just for looks and inserted it in to one side of the carrier. I then coated the inside end and the outside end of the handle with glue and slid the entire thing in to place so that no glue got where it shouldn’t be. (Wiping up any excess that squidged out.)
I picked a random jar of stain (Minwax Weathered Oak) and set to staining. Then I hated the stain.
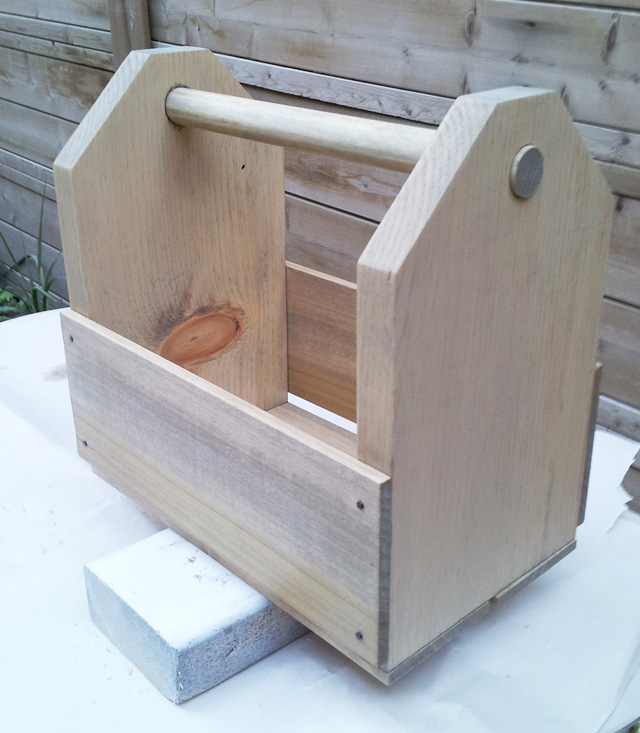
So I restained it darker using Minwax Jacobean.
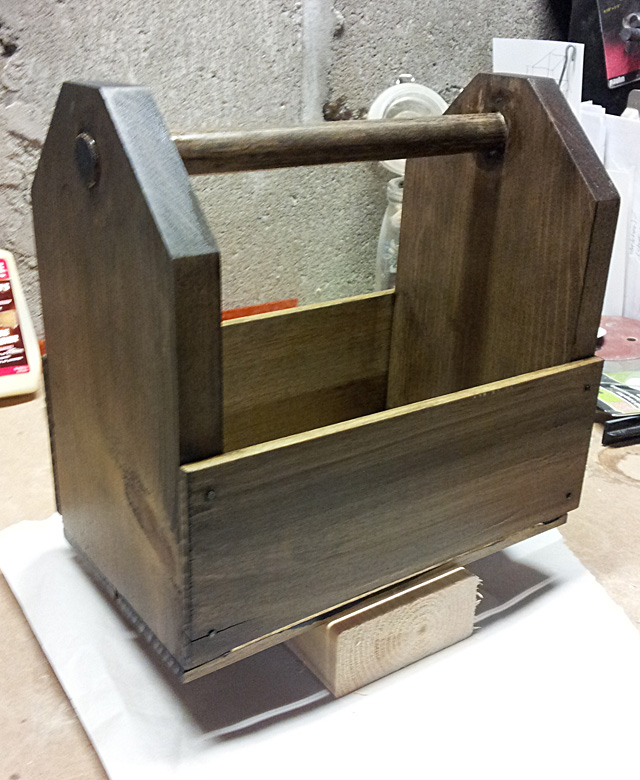
Happy with the stain I set to four coats of Varathane Oil Modified Polyurethane in Satin finish. Using the process outlined in the finishing post.
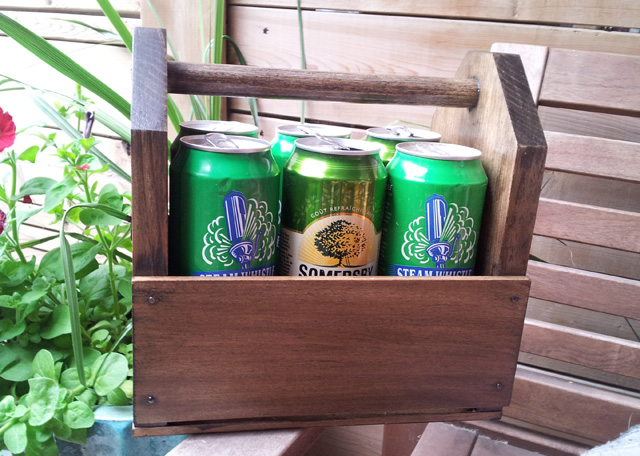
In all I think this probably took about an hour and a half including stain and finishing. The entire build only took about 45 minutes and was a great way to get me out of sanding other projects. AND now we have a great way to carry our Friday Libations out to the patio (or the park shhhhh).
SOURCE LIST:
Materials:
Scrap Pine (1×6 x 2′)
Scrap Poplar (1/4″)
Scrap Dowel (3/4″)
Scrap Finishing Nails
Cut List:
2 – 9″x5 3/4″ – 1″ thick Pine
2 – 4″x 9 1/2″ – 1/4″ thick poplar (sides)
2 – 2 5/8″ x 9 1/2″ – 1/4″ thick poplar (bottom)
1 – 9 1/2″ dowel (handle)
Tools Used:
Miter saw
Combination Square
Drill
3/4″ Spade Drill Bit
Orbital sander
Measuring Tape
Difficulty Level (on a scale of 1-5):
one out of five
Total Cost: $0!!!
Woodworking for woodworking’s sake
I don’t typically think of myself as an old man. There’s only a few times that I do. One was just the other day when I told a kid (twenty-something) to get-the-f off my garage roof (He was fetching a football. It’s a silly expletive filled story). After doing so I felt so old I had to do something to calm my nerves. Some old man stuff. “Why not some wood working” I thought.
I have a pintrest board (yeah I know I know. Not typically a place for guys like me. It doesn’t see a lot of use.) that is absolutely FULL of things I want to make. I won’t link to it because I think a lot of it will end up being posted here at some point. Probably even before Christmas as I really enjoy making gifts for family and friends. It’s cheaper and it really shows you care when you can make something for someone that’s genuinely cool.
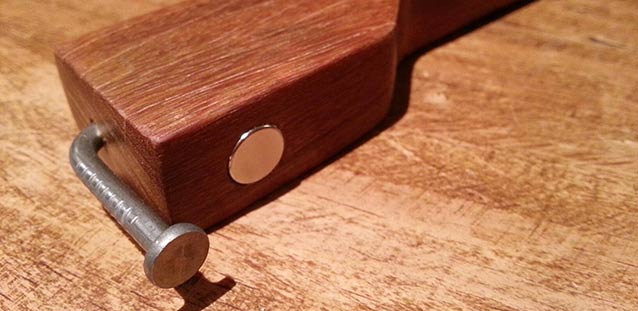
So my first adventure in woodworking was to create something functional and not too hard to make. I checked out my pin board and found the perfect item. The Nail Head Bottle Opener.
Wood… I need some nice wood… all I have is pine. Hmmm. The next door neighbors have LOTS of wood! And nice wood! Ipê Iron Wood.
I ended up securing a piece of wood from my neighbor Dietrich (on his birthday. Happy birthday! Can you give me a gift instead?!).
Enough story time. Let’s get to it.
I started by drawing the outline for the bottle opener on a piece of card paper that I had laying around in the garage. I modeled it somewhat off of a wire brush that I liked the handle shape of and modernized it a tad to fit with the feeling I wanted from the piece.

I then traced the outline on to a small piece of wood that I cut down to size with the miter saw and cut the general shape out with a jigsaw being careful to cut just outside the lines so that I had room to sand down in to the final shape I wanted.


Once the shape was cut it was time to sand. I started with a rough 60 grit paper on a palm sander and got the exact shape I wanted. This was also when I found out that our jigsaw doesn’t quite cut on a 90°. Darn. Sand away the angle. Once that was done I switched to a 100, 150 then 220 grit paper and sanded by hand. To get the curve near the top to feel just right I took the sand paper and wrapped it around some spare pipe so that I would get a consistent groove without too much hassle. Sand sand sand sand sand. Now sand more. Sand till your fingers are raw and the wood is buttery smooth.

I took the finished wood inside to the warm and applied and buffed 5 coats of finishing wax. Man did it pop after the wax!
With the wood all sanded and shiny I then set to bending nails. Kristen picked me up some special nails for this project specifically. I wanted nails with a large flat head that still looked nice. Luckily the rep for the nail company was visiting HD that day and was able to show her to the absolute perfect ones. I bent 4 nails in the bench vice using a hammer and a rag wrapped around the bottom of the nail before I got the result I wanted.


I had a magnet laying around that I wanted to put in to the opener to catch the bottle cap so I carefully drilled a hole that was purposely a little too small for the magnet to fit in to then I hammered it in to place using more rags to protect the piece from getting marred by the hammer. The magnet will stay in place strictly through friction.

I then clamped the opener in the vice (more rag protection) and drilled a hole in the top just big enough for the nail to slip in to easily. I didn’t want to force the nail in by just driving it in as it could split the wood OR mar the nail leaving the whole piece useless. I applied a generous amount of wood glue to the nail and slipped it in place cleaning up any that splooged out with a wet cloth.

Applied and buffed one more coat of wax and I’m ready to pop bottles!


Making this bottle opener was actually quite simple. I will however drill the holes for the nail and magnet BEFORE waxing next time as drilling requires more sanding.
Working with a strange wood was a great learning experience. Hard woods take longer to cut and work with and you have to be careful of burning or scorching the wood. During the drilling of the nail hole I was glad I don’t have a smoke detector in the garage (on the to do list for sure) but there was a lot of smoke.


SOURCE LIST:
Materials:
Ipê Iron Wood – Dietrich the friendly neighbor
3″ Common Framing Nails – Bright Finish – Home Depot – $4.00
Pretty magnet – Repurposed (I have since picked more up at Lee Valley – 3/8″ diameter 1/10″ thickness – $0.46 each)
Minwax Paste Finishing Wax – Home Depot – $9.99
Tools Used:
Drill
Jigsaw
Miter Saw
Palm Sander
Sand Paper
Bench Vice
Hammer
Difficulty Level (on a scale of 1-5):
Three out of five
Due to time and patience.
Total Cost: $4 Only bought the nails!
El Granto’s Barbecue Skillet Cornbread
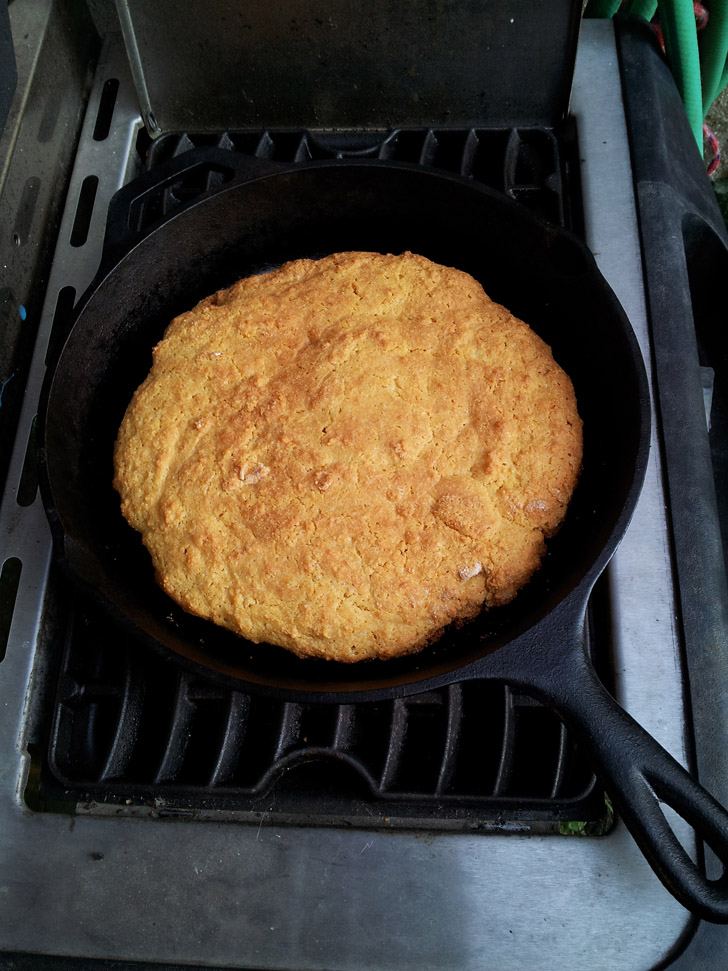
I loves me some cornbread!
El Granto here to share with you how to make some of the tastiest cornbread out there. Continue reading “El Granto’s Barbecue Skillet Cornbread”
Friday Libation – The Turbo Shandy
Today marks the start of Toronto Beer Week. From beer tastings, pairings, a homebrewing competition and of course BEER QUEST (which we will be competing in this Sunday!).
So as the Storefront Life resident beer drinker and connoisseur and in the spirit of Toronto Beer Week I bring to you… Da–da-dada!
The Turbo Shandy

A typical Shandy (or Shandygaff) is beer mixed with citrus flavored pop (7-up, sprite, or lime-it-up). But let’s not be sissies here. Lets turbo this thing up. It’s time to get… Tur-blasted!
It’s super simple.
- 3/4 beer
- 1/4 Smirnoff Ice
Done.
Adjust for your taste. I prefer more beer flavor to my Turbo than Smirnoff flavor. I also prefer to use a Pilsener for my Shandies or my Turbos. I also don’t use expensive beer for these. Buck-a-beer will do. I usually use Lakeport.
Whatever you do don’t buy in to the corporate re-branding of this drink and call it a “Smirnoff Rocket”. That’s some BS right there. Taking an established drink and just renaming it for your marketing purposes. There are LOTS of variations on the shandy.
- Beer + Cider = Snake Bite
- Beer (stout) + Sparkling wine = Black Velvet
- Beer (stout) + Cider = Poor-man’s Black Velvet
- Beer + Amaretto = Dr. Pepper (sometimes beer + Cola + a drop shot)
There’s a small list of possible Shandies for you kids. As usual drink safe and never drink and drive.