I feel like we’ve been working on the media cabinet forever (check out part one, two, three, and four). The whole being a grown up and having to work 40 hours a week really gets in the way of project time. The end is however finally in sight. In fact, this will be my last update before the reveal.
Where we left off, we had made the drawer boxes for the upper and lower drawers. We then had to cut down the upper drawers as they were too tall. Oops.
Trimming the height of the drawer boxes.
We used our new table saw to cut everything down to size (setting the fence and ripping each side of the drawer until they were all the proper height.) After a quick sand, we installed the drawer slides and had operating upper drawers! (woot!)
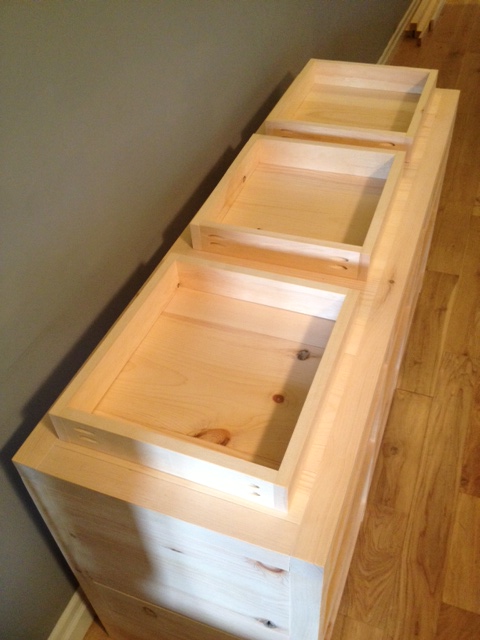
All the drawer boxes installed (the drawers will have fronts on them to make them look all fancy like)
The way this cabinet is designed, the drawer boxes are fabricated and installed, then drawer fronts are attached to them (to cover the unsightly visible hardware and gaps.)
The center portion of the cabinet also gets fold down doors to hide all the electronics.
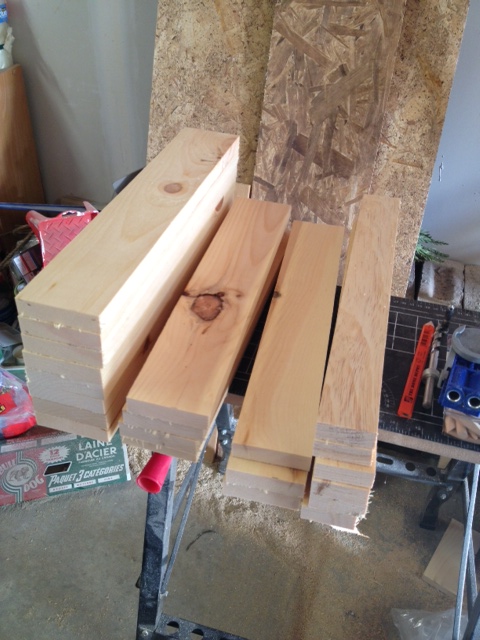
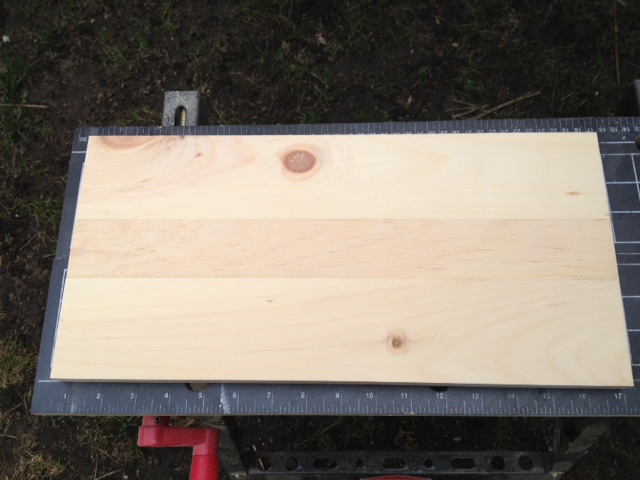
Now we needed to make the drawer fronts & doors. We headed to the garage and ripped down a bunch of lumber to size, then did all our length cuts on the miter saw.
All the wood cut and ready to assemble
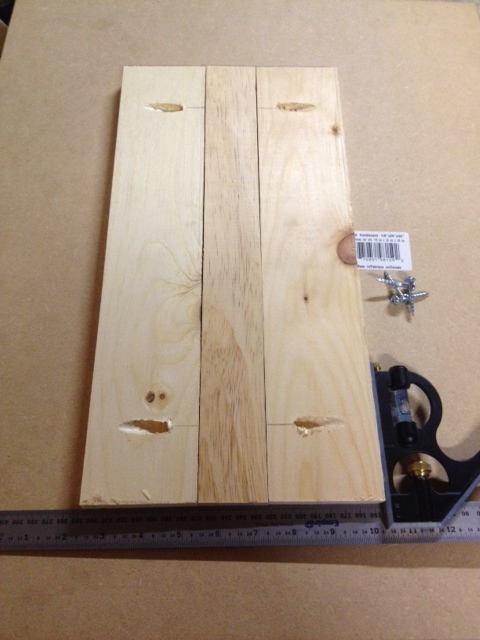
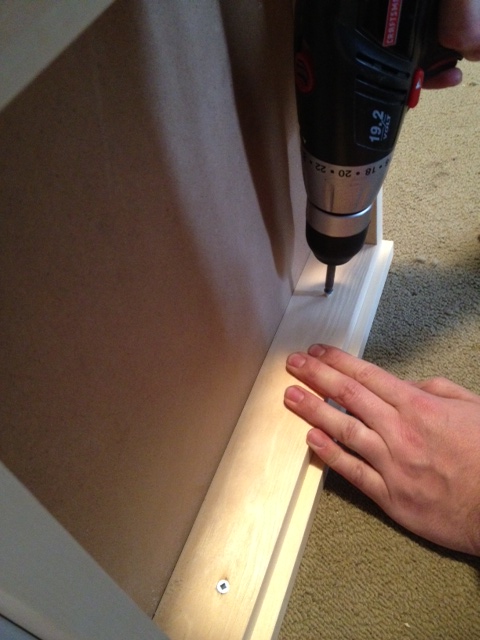
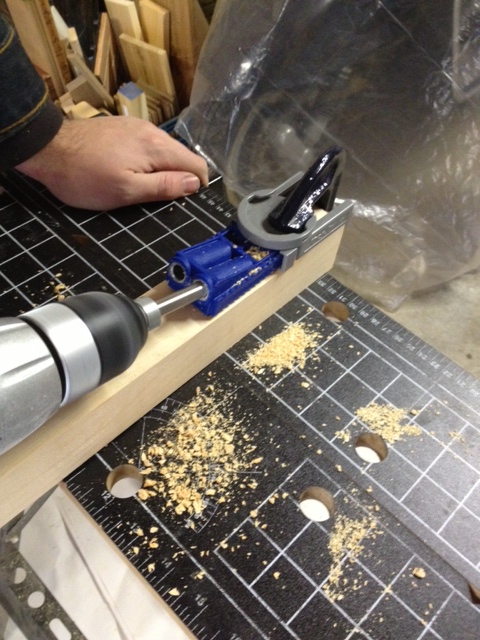
The larger doors & drawers are actually made up of three pieces attached together so that they look like two small drawers and a spacer. (as its supposed to be a printmakers cabinet that looks like it has lots of little drawers.) To attach them together, we used pocket holes and screws.
Assembling the drawer fronts using the pocket hole system. (also note the use of a square to keep everything all nice and straight & square.)
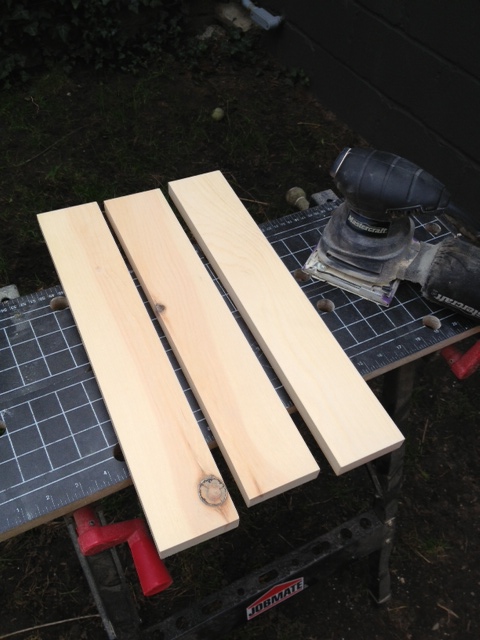
After everything was assembled I spent the afternoon filling and sanding everything.
The three small drawer fronts ready to goOne of the large drawer fronts. You can see how its made up of three different pieces.
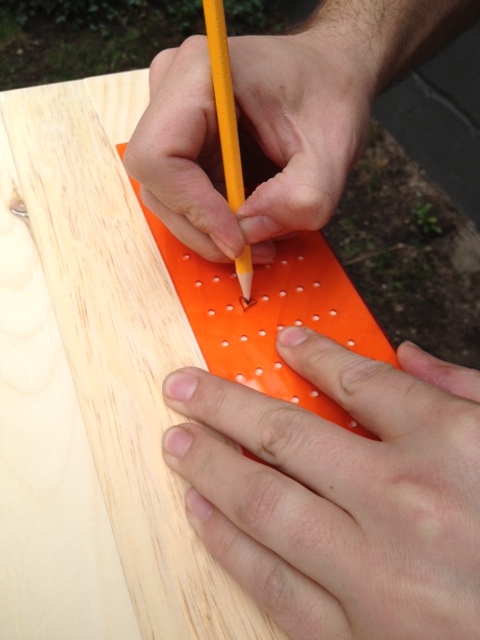
Then we used our Ikea Fixa drill template to mark where we needed to drill holes for all the handles. We have gotten so much use out of that darn template. Worth every penny.
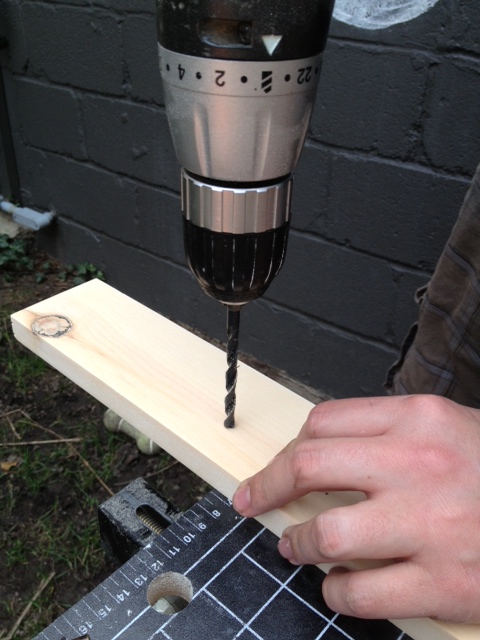
Marking holes for the cabinet hardwareDrilling the cabinet hardware holes
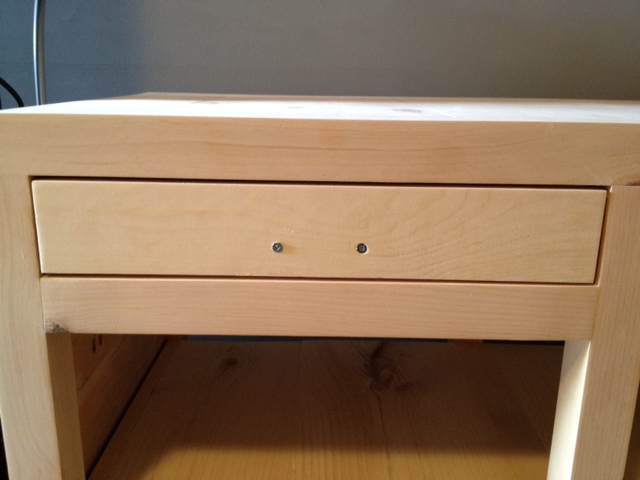
Next up we needed to install the fronts. The plans call for a very ingenious way to do this. (Sorry for the lack of pictures, this was an all hands on deck kind of task.) Essentially you space the drawer fronts perfectly in the cabinet, and attach it temporally with two screws through the cabinet hardware holes.
Temporary screws through the hardware holes holding the drawer front in place until it can be attached from inside the drawer
Then you take the drawer out, and attach the front permanently by putting a few screws through from the inside of the drawer.
Attaching the drawer fronts with some screws inside the drawer
Then you can remove the temporary screws from the hardware holes, and drill all the way through for the hardware. We continued on and attached all the drawer fronts this way. (Note, we didn’t attach the fold down doors, as we didn’t want to do that until everything was stained & finished.)
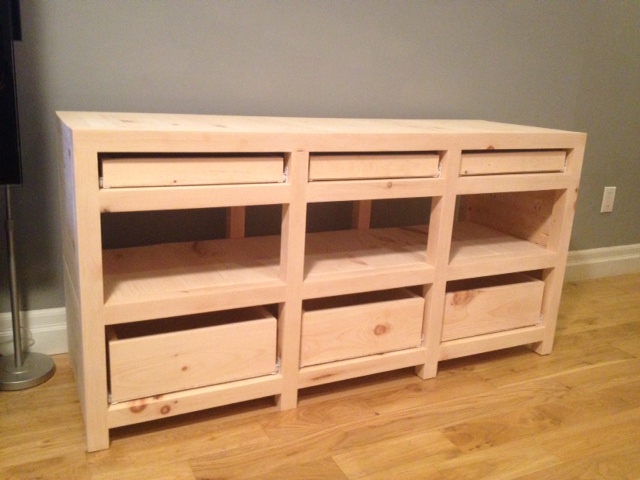
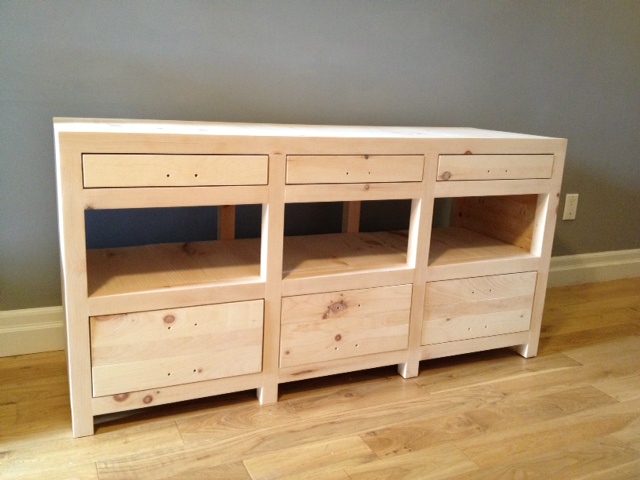
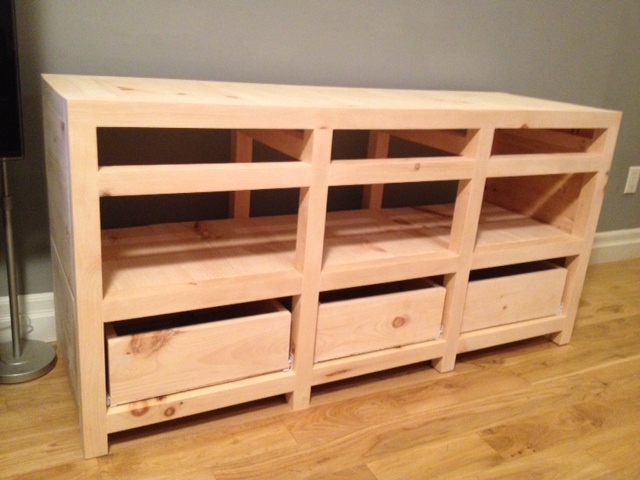
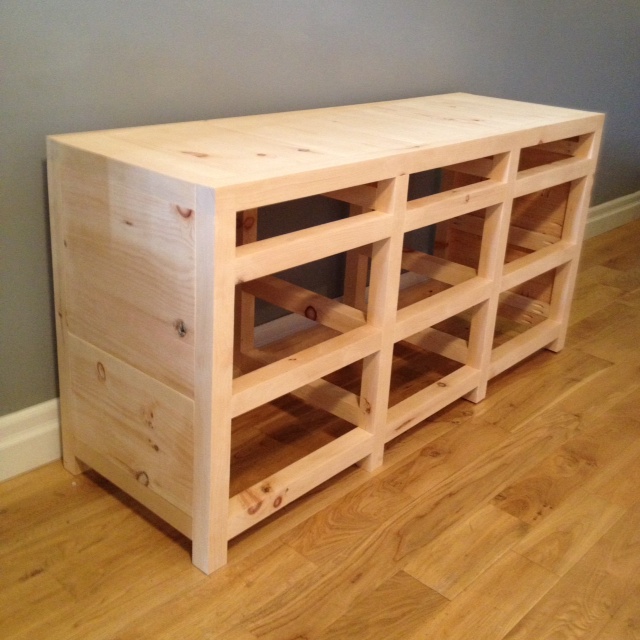
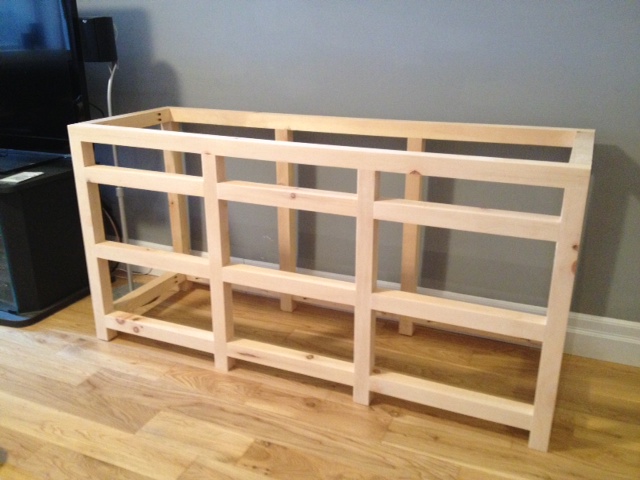
Now the whole cabinet is built, sanded and ready for finishing.
Cabinet built and ready for stain & hardware
Ta da! All that’s left is stain, poly & hardware! Stay tuned for (hopefully) the big reveal next week.
Cabinet drawers, not underpants. Get your head out of the gutter.
A big part of our Printmakers Media Cabinet project is the 6 storage drawers to hold remotes, and our DVD’s & video games. The cabinet has three shallow drawers at the top (for the remotes), and then three deep drawers at the bottom. Where we last left off was that we had built the small drawers.
Drawer Box. These skinny drawers go at the top of the cabinet to hold small things such as remotes and magazines
Last weekend we cut some hardboard bottoms for the drawers and attached them with brad nails.
Attaching drawer bottomsCompleted drawer
We gave the drawers a final sand, and headed inside to install the drawer slides. At this point in time the whole cabinet build had went very smoothly. No major hiccups, everything was great. Usually every project has it caveat. Its one pain in the ass task, or something liable to go wrong. Well we hit that with the drawers. We had tested the size of the drawers to make sure the drawer slides would fit on either side of the drawer into the hole in the cabinet. What we did NOT take in to account was that we purchased regular old kitchen drawer slides, which require at least 1/2″ in clearance in the height of the drawer to be able to take the drawer in and out. (The drawer slide has two rollers, and to take the drawer in or out you have to lift the drawer roller over the cabinet roller, thus the 1/2″ height clearance requirement. Our drawer boxes were 2 3/4″ tall and our hole in the cabinet is only 3″ high. So when you tried to put the drawer in, the drawer box hit the frame of the cabinet. Oops.
There were three options on what we could do to fix things.
Option A.)
Head back to Lee Valley and return our traditional drawer slides and buy the fully extending expensive slides. The reason we didn’t buy the fancypants full extending slides to begin with was that they were FOUR TIMES THE PRICE of the regular ones. If it was my kitchen and drawers that I would open and close several times a day, I would have went with the expensive ones. However, for a media cabinet that will maybe get used a few times a week, I was not ready to invest $120 in drawer slides when I could have something that worked for $30…. So I wasn’t too keen to this option.
Option B.)
Rebuild the drawer boxes shorter. This would mean essentially tossing out the drawer boxes we had made and making new smaller ones. A decent option, still cheaper than buying new slides, but it meant another trip to the lumber yard and a few hours work.
Option C.)
Cut the drawers down 3/8″ in height. This would involve no cost, but the potential for disaster was huge. (Our biggest worry was hitting a pocket hole screw with the saw blade, ouch.)
While we debated on what to do with the small drawers, we decided to build the large drawers (albeit to a shorter height than the plans said) to make sure that the drawer slides would in fact work. Cause I would be really pissed if I rebuilt the small drawers only to find that it still didnt work.
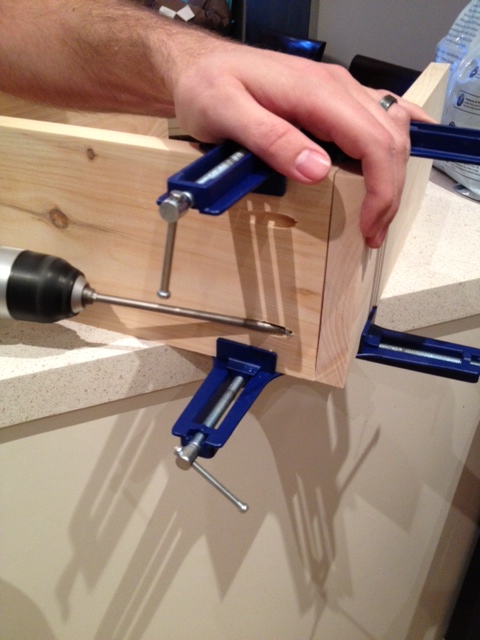
So we cut, sanded, drilled, clamped and screwed the big drawer boxes, and added drawer bottoms.
Assembling large drawer boxes
Then we gave a shot at installing the drawer slides. I was a wee bit worried at this point, and even watched a YouTube video on installing drawer slides. (Yep, that happened.) However it was one of those worry for nothing tasks. It was easy as pie to install. We had measured everything properly, the drawer slides fit in perfectly, and after a mere 20 minutes everything was installed correctly and moving without problems.
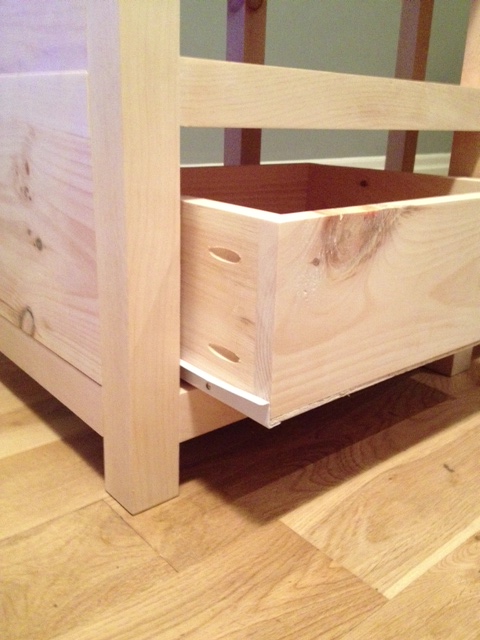
Bottom Drawers InstalledHoly crap, they actually work
The drawers still need their drawer fronts (which will cover up all the hardware and gaps etc.) But hey, it’s actually starting to look like a cabinet! Yay us!
So I bet you’re wondering what we decided to do with those small (but too tall) drawers?
The Printmakers media cabinet project is coming along (if you’ve missed it, check out part one, two and three)
We checked a few things off the list last weekend. First up, we headed down to Lee Valley Tools to pick up the hardware. I had pre-scouted online but wanted to go to the showroom to take a look at everything in person. Turns out, we walked out of the store with the exact things I had picked out online! (not that I minded wandering the isles full of awesome tools and hardware at Lee Valley…)
Here’s what we bought:
Inset HingesCup PullsDoor Stays
We also picked up standard drawer slides (350mm) and some door latches. The purchase set us back $135 but it was actually considerably less than I was expecting. I will give you a breakdown of all the fees once the cabinet is finished.
On the same day as our hardware adventure, we also trekked out to the lumber yard and picked up the wood for our interior shelves and drawer boxes.
We got to work installing the shelves. They are inset into the frame, so we were trusting our fabrication to have everything go in perfectly. I was expecting disaster, but it went smoother than expected. It was a tight fit, but with some persuasive hammering we were able to get everything in and screwed into the frame using pocket holes. It needs a good sand, but overall we are pleased with how its shaping up.
Media Cabinet with Shelves Installed
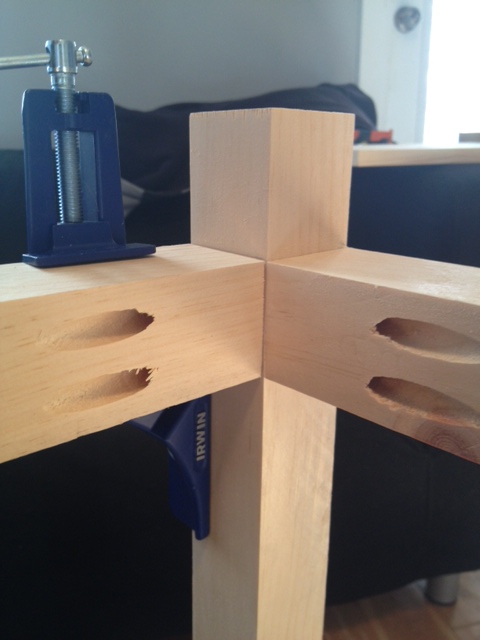
We also got started on the drawer boxes. We cut the sides and fronts of the boxes to length, pre-drilled pocket holes, then assembled using our corner clamps and a square to ensure the boxes were perfectly square. (Un-square boxes will cause us a ton of headache when we try to install them.)
Assembling the Drawer Boxes using corner clamps and a square
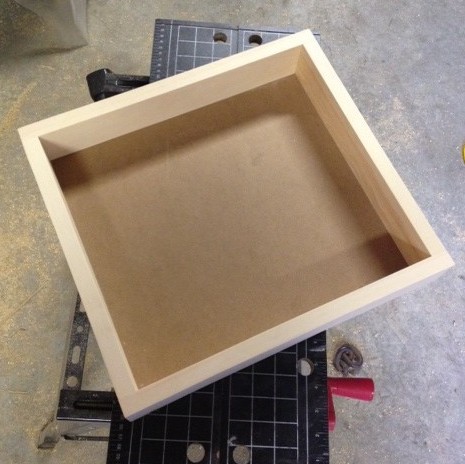
The assembly of the drawer boxes went fairly swiftly and smoothly. Now they’re ready for the drawer bottoms and then we can install them (which I am super stoked about!)
The Drawer Boxes ready for drawer bottomsDrawer Box. These skinny drawers go at the top of the cabinet to hold small things such as remotes
We also spent a good chunk of time trying out more staining options. I am still not in love with anything, but am getting closer.
Three stain options using Varathane “Kona” stain. I love the one on the left, but have been unable to reproduce it
I think this is the most indecisive I have been about anything in the house. I have a wildcard option that I am going to try out this week, and I will let you know how it goes (that is if I don’t light the house on fire while trying it.)
Hopefully this weekend we can install some drawers and get some staining done!
I know exactly what I want, but I cant find it. Isn’t that infuriating?
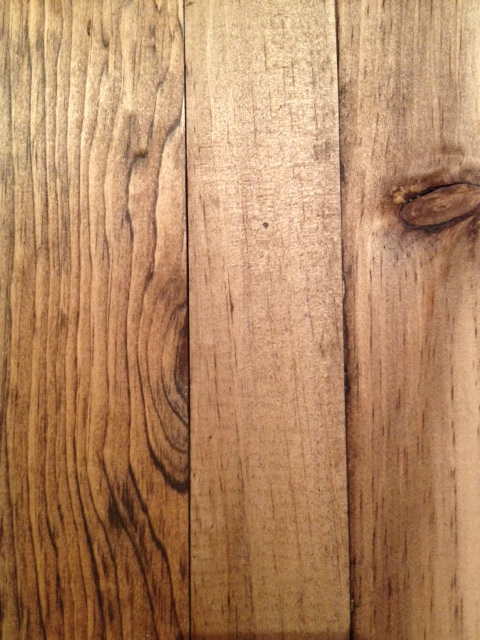
I heart the look of the reclaimed pine from Restoration Hardware. Its a grey undertoned warm finish that looks old, but not dirty. (I hate how some reclaimed wood looks so dirt ridden that you’d never want to have it in your house.)
Restoration Hardware Antiqued Pine Finish
I want to find a stain that will turn my raw pine media cabinet into a fantastically aged awesomesauce masterpiece (yeah I know I got a bit carried away with my adjectives there). I went on a quest for stain. A quest for stain is not nearly as fun as you’d expect a quest to be. There was no ring and not even one Hobbit.
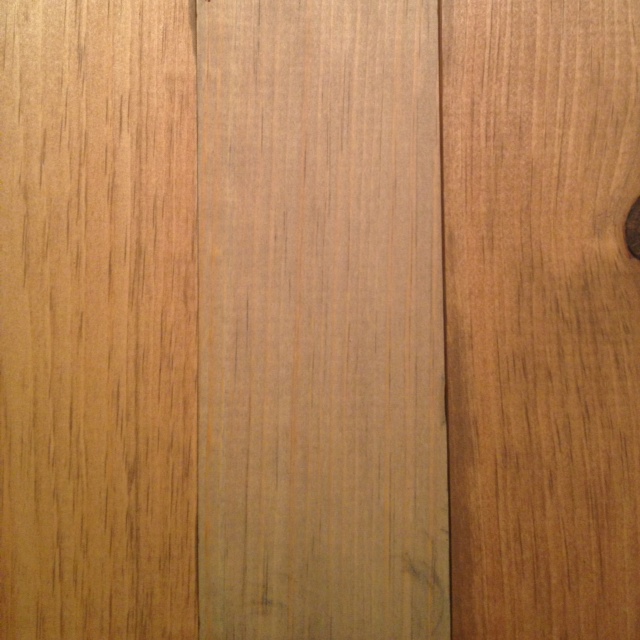
Left: One coat of “Kristen Mix”. Middle: Weathered Oak Right: 2 Coats “Kristen Mix”
Here’s the list of contenders:
First up, Minwax Classic Grey. Conclusion: Too flat and weirdly unnatural.
Next stop, one coat of Classic Grey and one coat of Early American. Conclusion: Too dark, the grey got lost entirely, and it ended up much too red.
Thirdly, Minwax Weathered Oak. Conclusion: I had high hopes for this fellow, as the swatch online looked just like the RH finish. Its a new stain, so none of my hardware stores carried it. I had to special order it, and waited with bated breath for my miracle finish. Conclusion: Looks exactly like Classic Grey… it is lacking the warmth I wanted.
Fourth try, six parts of Classic Grey mixed with one part of Early American. aka “Kristen Mix” Conclusion: One coat equals the closest result yet, it’s still a bit warm/orangey, but at least has the grey tones I’m looking for. Two coats got muddy and grey again, and lost the bit of contrast one coat had.
Left: One coat Classic Grey + One coat Early American, Middle: one coat “Kristen Mix”, Right: two coats “Kristen Mix”
I now need to decide if one coat of “Kristen Mix” is good enough, or if I should continue on my search. I would still like a bit deeper tone in the knots, cracks etc.
The other option I am considering is doing the one coat of my “Kristen Mix” then some Annie Sloan Dark Wax. I think it will give me the darker hue I am looking for, especially in the cracks and crevices. However, Toronto has yet to get a Annie Sloan retailer. Our closet stop is Bracebridge or St. Thomas Ontario. Both of which are a bit far away for a girl without a car.
Anyone used Annie Sloan’s Dark Wax? If so, is it the magical remedy to my stain woes? How about shoe polish? Yeah, I know it sounds a bit cray cray, but swear I remember Norm using it on an episode of This Old House.
To me, hardware on cabinets is like jewelry. The finishing touch, a hint of sparkle, a bit of shine. Shopping for hardware is like buying the final accessories to go with a fab outfit.
So, I am very excited that we’re at a point where we need some hardware for the Printmakers Media Cabinet project.
The plans call for the following hardware:
3 pair of inset or concealed hinges
3 cabinet clips (to keep the doors closed)
6 lid stops (3 – right, 3 – left)
3 sets 14” drawer slides
15 – drawer pulls
That’s a lot of hardware… As the cabinet is a faux printmakers cabinet, it looks like it has 15 little drawers (printmakers cabinets used to have tons of shallow drawers to hold metal and wood type and plates). So we need 15 drawer pulls, and traditionally for a printmakers cabinet they should be cup pulls.
If anyone has done a kitchen reno lately, you’ll know that pulls are expensive. From the big box stores, you’re looking to pay between $5-$15 per pull. From a high end hardware shoppe, you can pay in excess of $25 each. Ouch, that’s not in our budget. As much as I love the hardware from Gingers or Restoration Hardware, I was not about to drop that kind of cash.
So where can you get nice, inexpensive hardware?
There are a ton of cheap online shops. However, Canadians beware. Most of the time the online knobs/pull companies will ship UPS or other courier from the US to Canada. UPS is a carrier that charges brokerage to cross the border. Brokerage SUCKS. It’s an unknown fee that the delivery guy will charge you before he will hand over your package. We have been charged upwards of $40-100 in brokerage on things that didn’t even cost that much. So by the time you’ve paid for the purchase, paid for cross border shipping, and paid for the brokerage, you’ve negated any savings from purchasing online. If you’re going to purchase online, try to buy from a Canadian supplier, or where they ship USPS or FedEx, both of which (normally) have the brokerage covered.
Your other option is purchase locally. Often local business can offer you the same or even better rate than buying online. Check out your local hardware store, and ask if they have a catalog of special order pulls. Also take a look at the special order hardware displays at your local big box stores.
My go-to spot for hardware is Lee Valley Tools. Even if you don’t have a Lee Valley in your town, they have an awesome hardware catalog and online store and they will ship to you.
So here’s what I’ve found from Lee Valley for our cabinet:
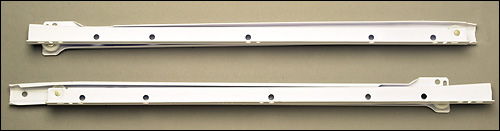
Drawer Slides:
Drawer Slides
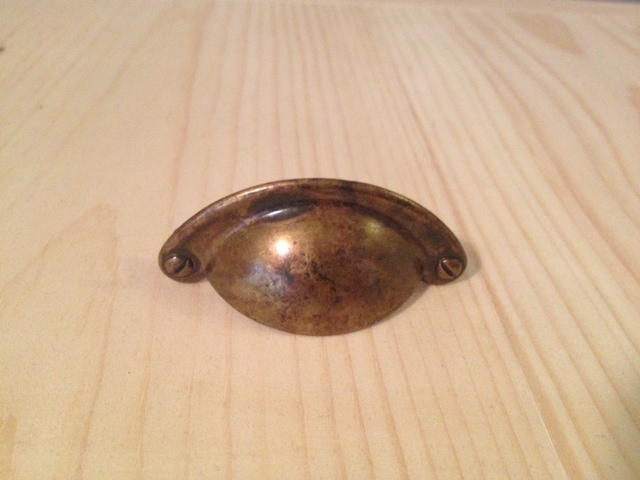
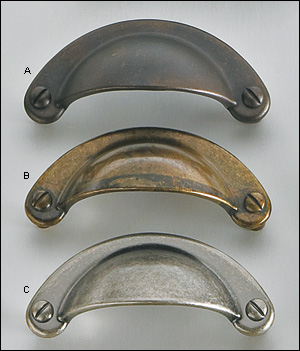
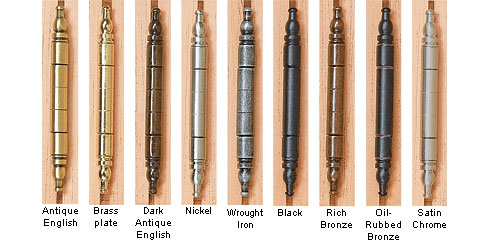
Cup Pulls:
Cup Pulls
Hinges:
Hinges
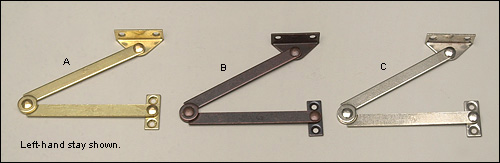
Stays:
Stays
Lee Valley carries everything in stock at their warehouses, and yep, we even have a location in downtown Toronto (King Street between Bathurst & Spadina). The best part of Lee Valley is their volume discount. Most of their items have a 10+ or even a 25+ volume discount (the price goes down if you buy more than 10 etc.) So for the 15 cup pulls we need, they will only cost us $2.55 each. (excuse me while I do a little crazy Elaine dancing.)
Do you have any go-to hardware stores? Grabbed any great deals lately?
*In case you’re wondering, no one paid me in anyway for my views. I just to pass on my recommendations for places I like to shop.
How was your Easter/Passover weekend? We enjoyed some well deserved good weather, which meant many a good dog walk as well as a lovely Easter dinner and ruckus Yahtzee game with the family.
We also used the long weekend to get a bit more work done on our media cabinet project.
We started with the cabinet frame assembly, and quickly discovered that it would be near impossible to hold everything straight and square while screwing it all together without more hands or some sort of corner clamps. (Of course El Granto said we needed the clamps from the onset, but eager me said we should try without them. Kristen fail.) The problem with pocket holes is that you have everything lined up, and start to screw everything together and at the last second it all goes to hell. The last bit of the screw tightening somehow pulls it all out of whack. Swearing ensues.
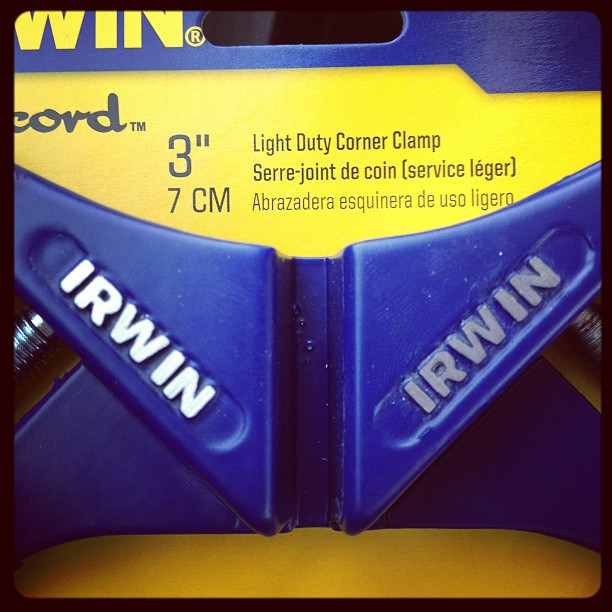
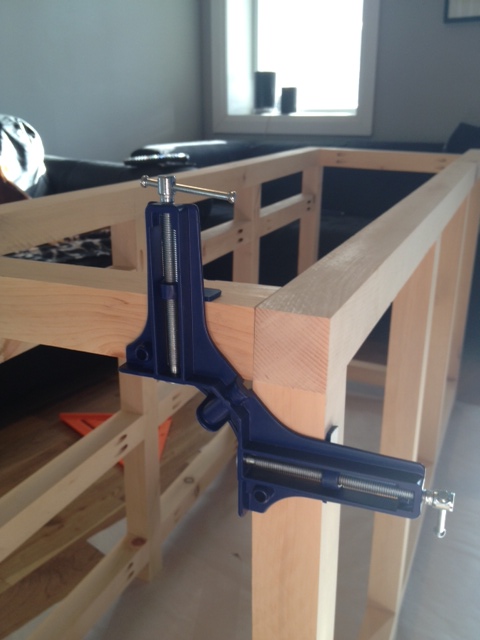
So we headed to the hardware store, and picked up two Irwin corner clamps. Best $25 spent, ever.
3″ Irwin corner clamps
We then were able to pretty quickly assemble the rest of the cabinet frame. We were a little assembly machine, clamping, gluing and screwing.
Corner clamps in action holding everything in placeEl Granto assembling the frame using pocket holes and self tapping screws
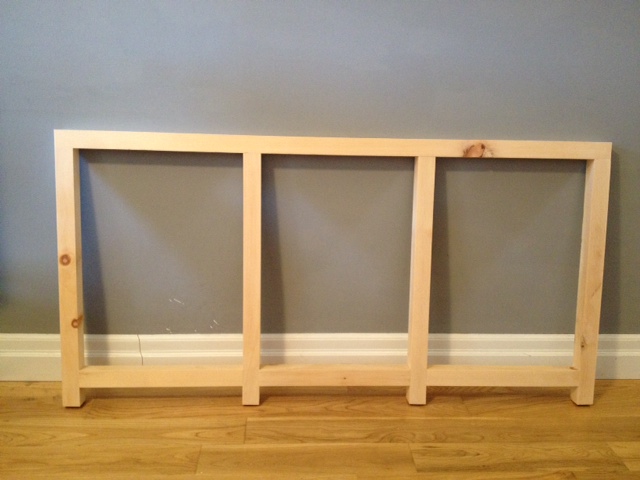
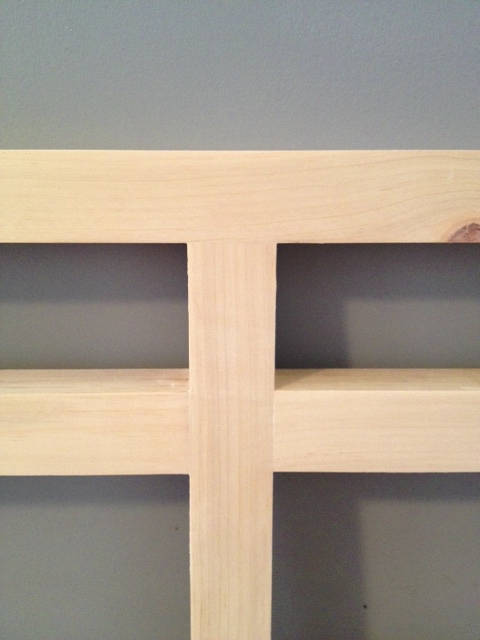
After a couple hours work we had the front and back frame built. (The front is more complicated as there is the whole exposed framework for the drawers and doors.)
The frame backThe frame front. I really need to touch up that wall…Yay for dogs scratching your walls trying to get a ball.Detail shot of one of the (many) joints made perfect by the corner clamps
The next day we set to attaching the front to the back of the frame. According to the directions, we should have attached the sides before attaching everything, but of course we didn’t have the wood for the sides and impatient Kristen wanted to go ahead anyways. (It’s OK, it turned out fine!)
We used the corner clamps again to make sure everything stayed where it was supposed to be, then we screwed everything together from inside.
*TIP* The Kreg jig comes with an extra long drill driver. It normally works perfectly, however when we were trying to assemble the cabinet it was too long, and made it so the drill was not able to fit inside the cabinet. Oops. So we headed to the hardware store and picked up a mid sized #2 driver. This will come in super handy as the rest of the cabinet installation will be done from inside the cabinet!
Inside view of how the sides attached to the front and back of the frameThe sides being attached to the front and back of the frame
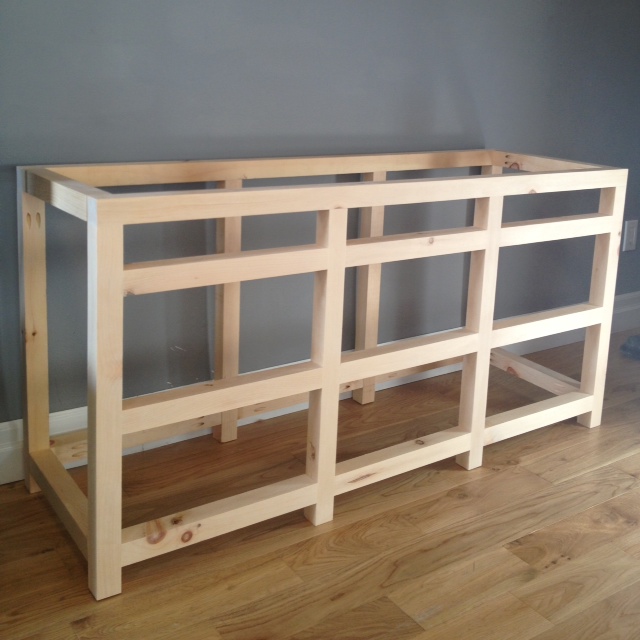
After almost 100 pocket holes and screws, this is our completed frame!
Cabinet frame assembledframe frame frame
Starting to look like a cabinet now right? Remember this Restoration Hardware cabinet is our inspiration.
Restoration Hardware Printmakers Media Cabinet
The frame that we built will actually be exposed (you can see it in the RH version).
The front still needs drawers and doors, and of course the top and sides, but we’re actually over half way done! Woot.
Are you working on any big projects? Ever built a cabinet?
It’s starting to get warmer out again. Do you know what that means? It’s finally warm enough to stand out in our unheated garage for more than 30 seconds, and be able to operate saws and equipment without mittens. Yep kids, that means it’s project time.
I have had my eye on a new media cabinet for the living room for a good long time. There’s nothing wrong with out current cabinet per see, it has just seen better days, and its not really our style. The little cabinet was a big box purchase of El Granto’s from his college days. It has done us well, but its not really big enough for all our electronics, and its center shelf is sagging a bit from the weight of our receiver.
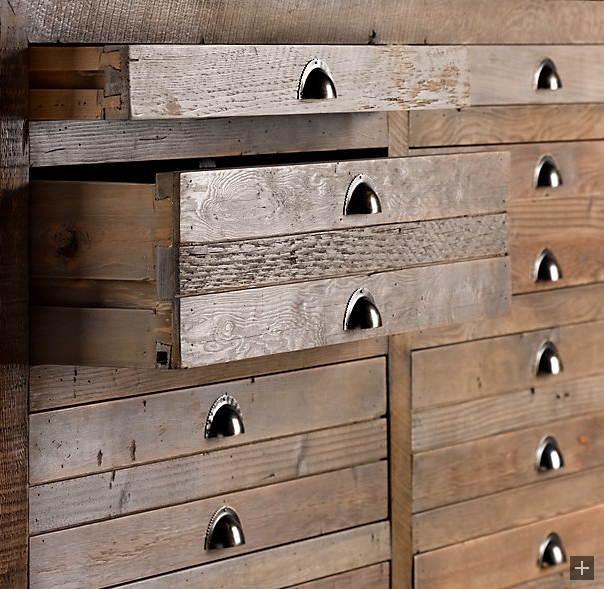
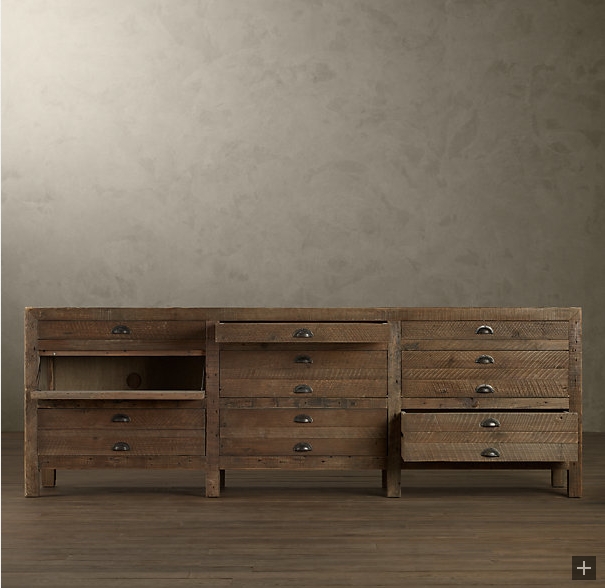
So a new cabinet it is! As we love Restoration Hardware, I fell fast and hard for this fellow; the Restoration Hardware Printmakers Media Cabinet.
Restoration Hardware Printmakers Media Cabinet
The cabinet has three shallow drawers for remotes, magazines and the like. Three fold down doors to hide your electronics, and three deep drawers for dvd and other assorted storage. There are two sizes available. We liked the 55″ wide one, as it would hold our 46″ tv and not be too big for our small space. The only problem is that the cabinet has a price tag of almost $1000. Not really in our budget, especially when we want to add a new sofa to the living room sometime in the next decade.
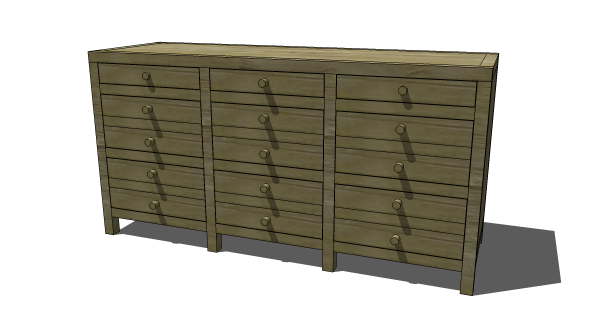
So we did decided to take things into our own hands, and looked into building a similar cabinet. I checked my go to spot for furniture plans; The Design Confidential, and low and behold they had plans for a similar cabinet. Awesomesauce.
The Design Confidential’s plans to build an RH inspired Media Cabinet
We printed out the plans, looked at the vast lumber and cut lists, cried a little, and then decided to nut up and take on this project. I had helped my dad make drawer boxes in the past (and by helped, I mean watched) and the rest of the cabinet was held together by pocket screws, so I felt confident that we could bumble our way through it.
The first hurtle was deciding on wood. I loved the antique pine finish of the RH cabinet, so I decided pine was the way to go.
Last weekend we walked the dog and our Ikea cart to my favorite place on earth; our local lumber yard Downtown Lumber. I love this place. I have yet to find a wood product they don’t have, and they’re happy to rip things down for me on request, which is awesome since we don’t own a table saw. I called ahead and confirmed that they could cut me 2×2 pine boards that we needed for the first step of the project; the frame.
When we got to the lumber yard, paid for our order and went to the back to pick it up. We watched the yard worker pull beautiful solid straight as an arrow kiln dried pine 2×10’s down from the shelf, and rip them into our 2×2’s. Yep that’s right, they used 2×10’s to cut our 2×2’s. Now if you’re unfamiliar with wood, 2×2’s are like the lowest wood on the totem pole, and quality is usually crap. The 2×2’s are cut from the smallest pieces of wood, often young wood, and they are usually found twisted and turned like a corkscrew. That’s why a framing grade 2x2x8 will only cost you about $2 at the big box store. To have 2×2’s cut from 2×10’s is like making hamburgers with prime rib. Expensive, but amazing.
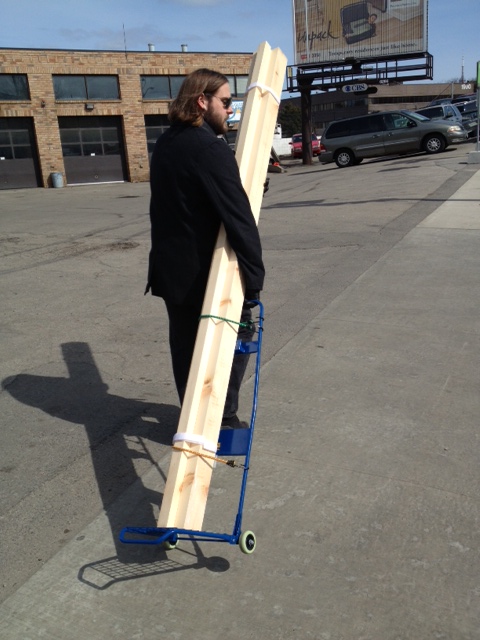
We watched in awe as they ripped down our lumber order and smiled like bank robbers as we carted it all home. (Yep, I say “carted” as we literally dragged it the 3.5km home on a cart. Hobo style.)
Cartin it up
After we got the wood home, we set to making our cuts. I soon noticed that our 2×2’s looked a bit bigger than I was expecting. The big box stores 2×2’s usually measure in at 1 1/2″ x 1 1/2″ . Our fancy schmancy lumber yard boards were 1 3/4″ x 1 3/4″.
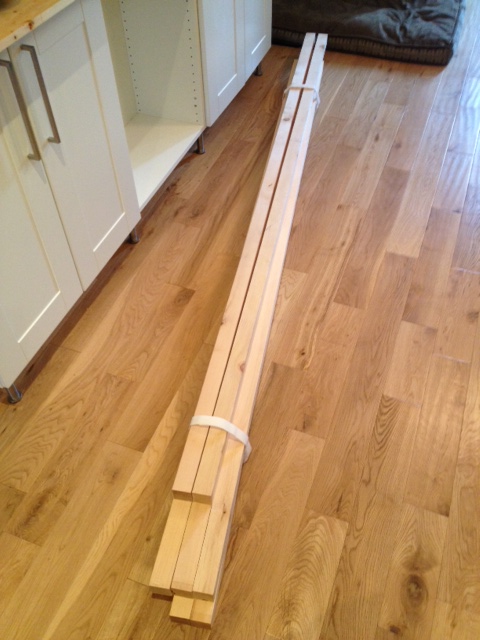
The lumber safely arriving at home
That was great news for us (who doesn’t like bigger wood, eh eh?) however it threw the plans a monkey wrench. After some quick math we opted to lengthen the frame by an 1″ to compensate (as to not skew the drawer sizes). However we didn’t want to futz with the height, as it was already quite high, and we didn’t want the TV to be any taller, and harder to see.
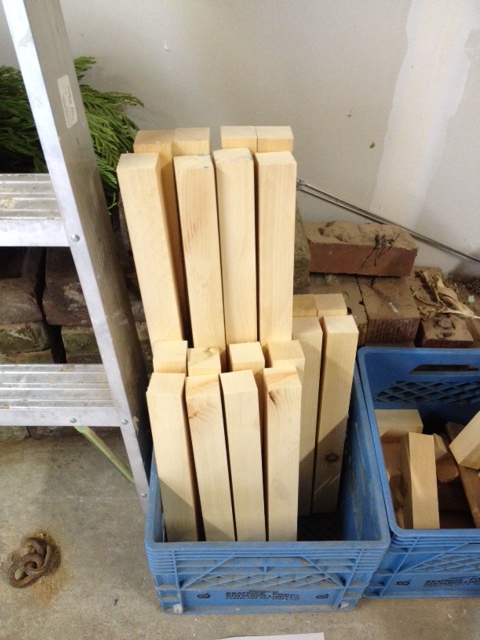
El Granto measured the cuts, I cut them on our new miter saw; Martha. (It’s named Martha because the saw is a Mastercraft brand, and Martha Stewart is the master crafter…see it makes perfect sense, right?)
Martha the compound miter sawThe wood cuts waiting for pocket holes
DIY TIP! We keep all the cuts for one project in a milk crate. This keeps your offcuts from mixing with your good pieces, and ensures you don’t forget anything.
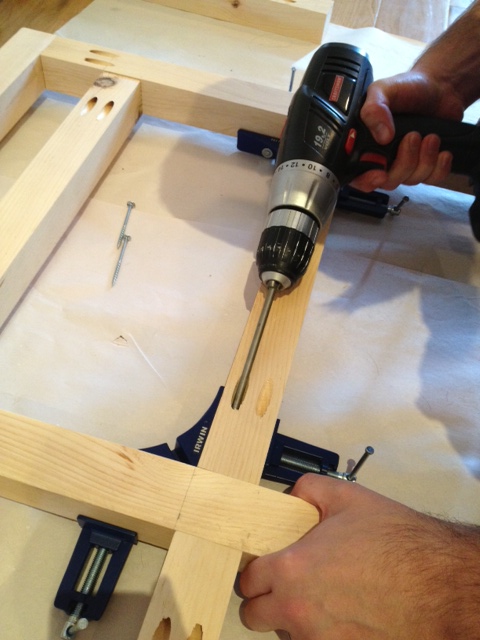
Then El Granto started drilling the pocket holes for assembling the frame. OMG there are a bucketload of pocketholes. We cut all the frame & supports, and drilled all our pocket holes. I counted them up and El Granto made a total of 104 pocket holes. This isn’t even counting the holes we’ll need for attaching the shelves, sides, back and top. Holy hell batman.
El Granto Drilling Pocket Holes
Here’s a video of El Granto drilling some pocket holes. He attaches the Kreg Jig with a regular clamp directly to his small work table. This makes the whole thing steady, and keeps the clamp from digging into the wood. Yep, that’s Green Day playing in the background. El Granto has his garage stereo hooked up to his phone so he can blast inspiration woodworking music, like punk rock or heavy metal.
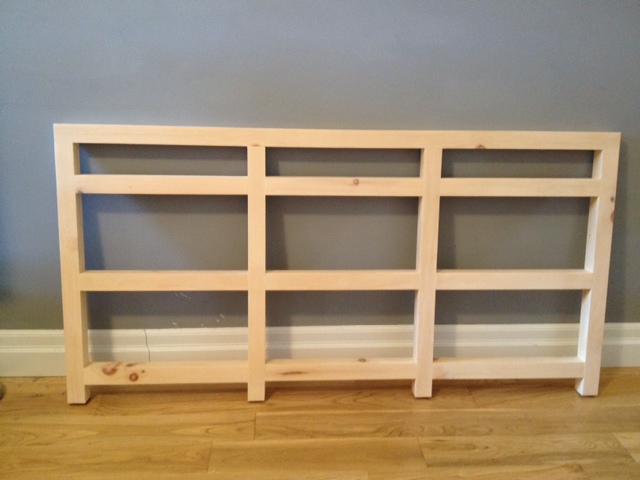
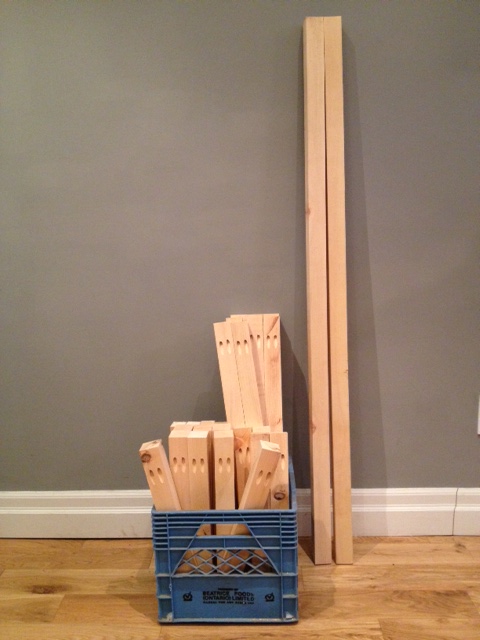
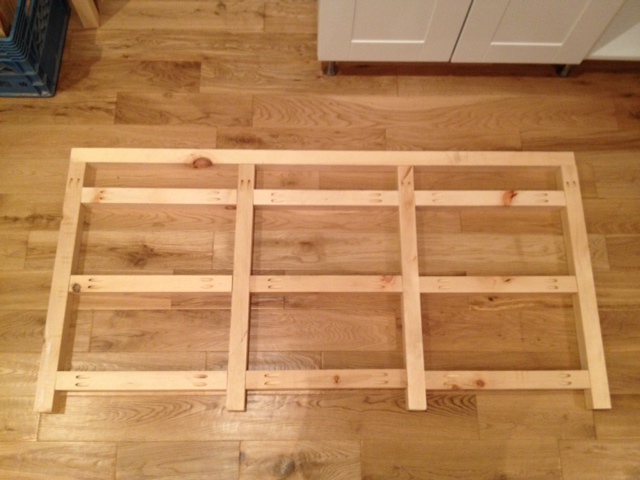
We brought the wood in, and let it warm back up, and I laid out how the front of the frame is to be assembled.
Wood cut, pocket holes drilled, ready to be assembledFrame laid out
That was enough work for one day! The frame assembly will have to wait for next weekend.
What did you get up to last weekend? Any big woodworking projects you’re taking on this spring?