Apparently when you are a preggo handywoman, the moment your second trimester kicks in, you instantly turn into a crazed “must baby-ize the entire house immediately!” monster.
So…..January rolled in, out went the Office, and in came the Nursery.
Our life in an edwardian storefront
Apparently when you are a preggo handywoman, the moment your second trimester kicks in, you instantly turn into a crazed “must baby-ize the entire house immediately!” monster.
So…..January rolled in, out went the Office, and in came the Nursery.
I enjoy having internet, hell without it I wouldn’t be posting this. However I hate all the technology required for it. Wifi cable modem, router, cables, wires…yuck. They are always a tangled mess of blinking lights and ugly plastic. So what do you do about it? Make friends with some cigar smokers (thanks El Granto & Father in-law) & steal some of their pretty cigar boxes.
Drill some holes for cables, antennas and air flow in your cigar boxes. Plunk your tech junk in them and stack em up.
All our tech fit into two boxes other than my stupid VOIP gateway which is giant and stupid, and wouldn’t fit in anything. There… I told it. (until I find a box or old book for the gateway to fit in, he will just sit below the boxes.)
No one would know these unsuspecting boxes on my bookshelf hold all that ugly crap. There may be dirty dishes in the sink and laundry piling up but it makes me sleep a little better at night knowing that my tech junk is neatly tucked away.
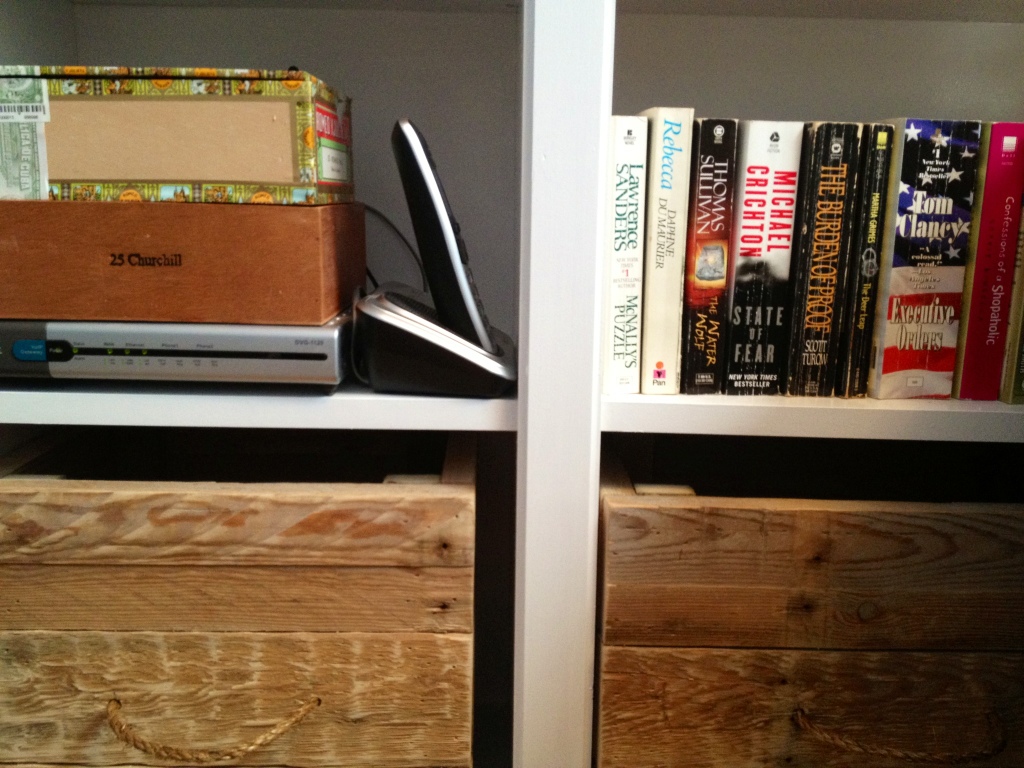
So now you have no excuse. Go hide your tech!
SOURCE LIST:
Materials:
Cigar Boxes: Unsuspecting Family
Tools Used:
Pencil, Drill,
Difficulty Level (on a scale of 1-5):
Total Cost: $0
A long long time ago, when El Granto & I moved in together, El Granto was still in school, I had just graduated and was working my first big kid job. We had no money, ate copious amounts of pasta and potatoes, and spent what was left on (cheap) beer.
Needless to say our furniture consisted of things we’d stolen from our parent’s houses. We did manage to purchase a few new things; some drapes, a few Ikea Lack side tables, and a Ikea Goliat drawer unit that we used as a night stand/little dresser in our bedroom.
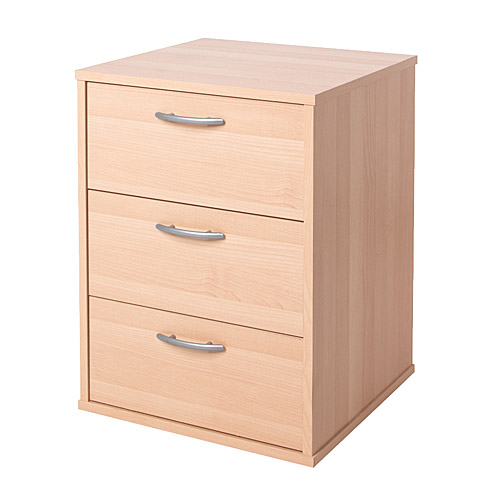
That unit later graduated to living in our office when we purchased real bedside tables, and has now lived through 8 years of our abuse. It holds all the strange things one accumulates. Also known as the junk drawer. It houses batteries, calculators, phone & camera chargers, memory cards, travel voltage adapters, a screw driver, camera batteries, luggage tags, a sling shot etc. “Important” stuff don’t you know where else to put.
When faced with the office reno, we wanted to keep our useful friend Goliat, but he needed some cosmetic help. His laminate “birch effect” finish looked like plastic, and the handles were not even trying to disguise the fact that they were plastic. He needed help! So we carried him out to the garage, took off the handles, scuffed him up with some sandpaper, and gave him a coat of Zinnsser B-I-N primer. In hindsight I should have given it two coats, it would have probably eliminated one of my coats of paint later.
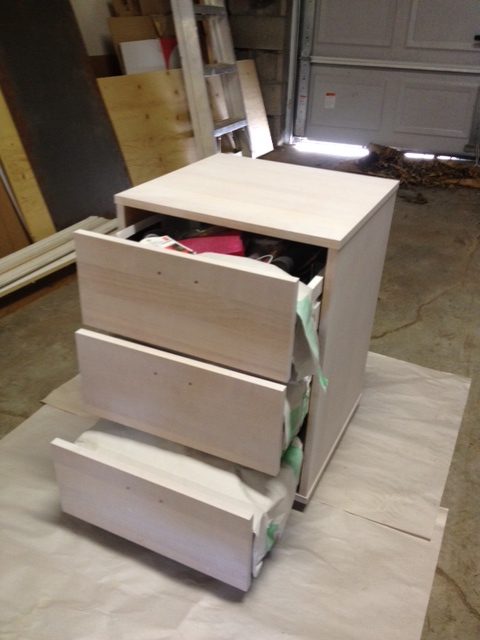
After priming I gave it a quick sand, and added 3 coats of white gloss interior/exterior paint. We let it dry, and added three new Martha Stewart 3 in. Channel Cabinet Hardware pulls from the Home Depot.
The hardware was a bit of a pain to be honest. I sourced from their website. The handle I chose said “in store only” so I walked the 3km to Home Depot to find the crappiest selection of in stock hardware ever! I was astonished at how dated and bad it was. After spending 20 minutes to finally track down the kitchen designer, I found my hardware on a sample board in a drawer. The Martha Stewart hardware was all spectacular and well priced, but SPECIAL ORDER! UGH. I hate the words special order. It means waiting, delays, incorrect shipments and anger. I had fallen in love with the handles, so I sucked it up and ordered.
I ordered on a Monday, and the kitchen designer said it should be in store in about a week. They arrived in store the following Monday (yay!) I brought them home and realized I had measured incorrectly. BLARG. Stupid Kristen. They’re too big. They’re not even the right size for other projects around the house that need new handles.
So… I had two options. Return them and order some new ones, or fill the holes in the drawer unit, touch up paint, and re-drill them. The problem with ordering new ones, is that the smallest any of the pretty Martha Stewart ones came in was 3″ and the Ikea drawer unit was SMALLER than that. Leave it to Ikea to not use standard sizes!
So I filled the holes… (AFTER I HAD ALREADY PAINTED IT) and then PAINTED IT AGAIN. Do my capitals express some of my angst?
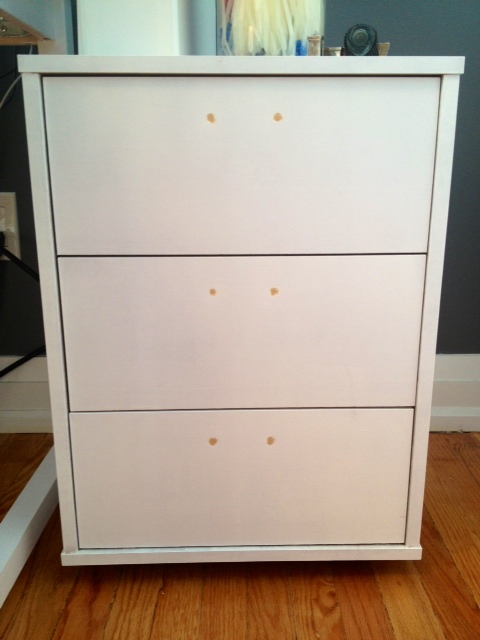
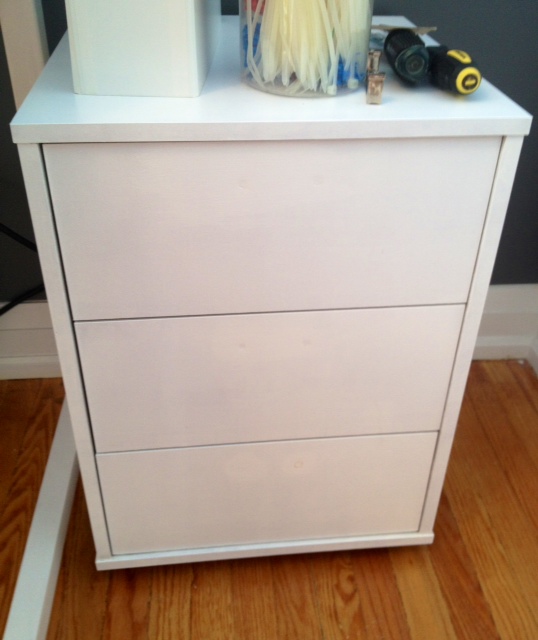
I then marked and drilled new holes for the new hardware, and FINALLY it was done!
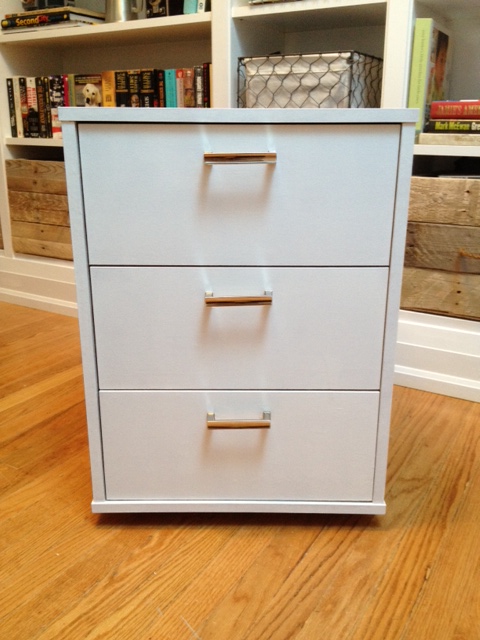

SOURCE LIST:
Materials:
Previously owned Ikea Goliat Drawer Unit
Zinnser B.I.N. Primer (spray can): Canadian Tire
Behr Premium Plus Interior/Exterior Glossy paint in Bright White: Home Depot
Frog Tape: Canadian Tire
Martha Stewart 3 inch Channel Pulls: Home Depot
Tools Used:
Paint Brush, Small Foam Roller & Tray, Sand paper, Screw Driver
Difficulty Level (on a scale of 1-5):
Total Cost: $25 (we already owned the Goliat unit)
We needed a desk for the office. We loved old bankers desks, and lovely chunky vintage desks, but we had one problem. Whatever desk we wanted in the office needed to be able to fit up our tiny staircase, or be hefted up and over our second floor deck. Otherwise it needed to be assembled on site. After lugging our mattress and other large furniture up and over the deck, I was in no way, shape, or form, about to do that again. So it looks like we were building something on site. We didn’t need anything fancy, just a desk to use the computer on and store unpaid bills. I cost out the materials to build a simple table ourselves, then I thought to myself: self just suck it up, be the cheap ass that you are and buy something from Ikea! It will be less expensive, less work, and you get to spend time with the happy little Ikea man assembling it. So we reviewed the cheapest Ikea desk solutions, and discovered that the Ingo Dining Table was exactly the size we needed, and was made of solid unfinished wood, and was SIXTY NINE dollars.
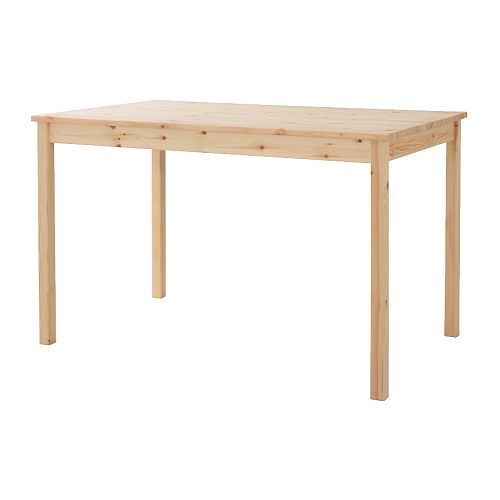
Yes that’s right, a solid wood desk for less a hundo. Sign me up. So we got our dining table, assembled, and then decide what to do with it. I loved Katie’s Ingo desk hack so I thought I would give that a try. Then my brad nailer and I got in a fight, he decided he would shoot nails sideways out of my project and after many a screaming match, we decided to divorce. So decorative trim on the desk just wasn’t going to happen. Instead, I installed a bottom cross piece, primed, sanded and painted it with two coats of white paint, wiped my hands, signed the alimony agreement, and called it a day.
SOURCE LIST:
Materials:
Ingo Dining Table: Ikea
Zinnser B.I.N. Primer: Home Depot
Behr Premium Plus Interior/Exterior Glossy paint in Bright White: Home Depot
Tools Used:
Paint Brush, Small Foam Roller & Tray, Sand paper
Difficulty Level (on a scale of 1-5):
Total Cost: $80
The office light was originally a Ikea Erbium ceiling light that the moment a truck drove by would shake and rattle so hard you thought it was going to explode and rain glass down on your head.
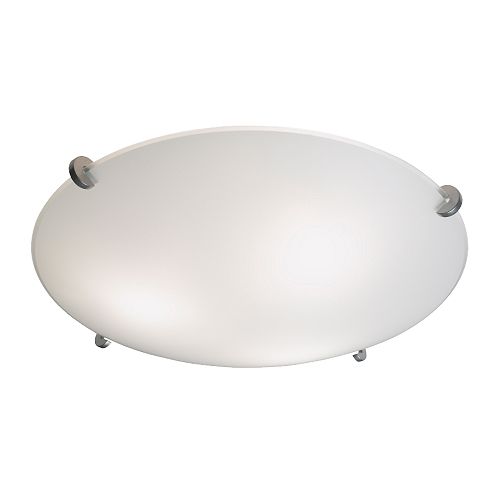
Not only was the light noisy, it was also b.o.r.i.n.g. So we needed to change things up.
We needed a fancy, pretty, shiny new light.
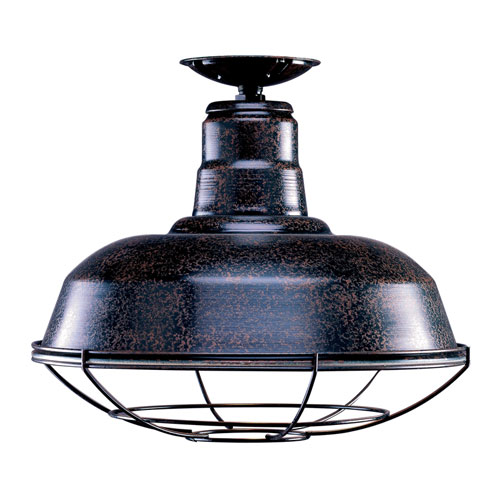
I started looking at Barn Light Electric‘s offerings and lusted after their Flush Mount Warehouse Pendant
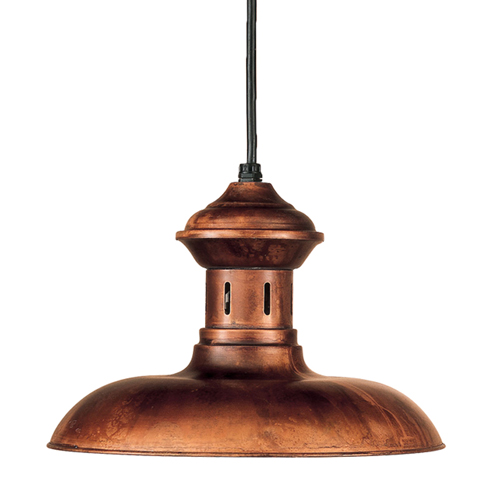
I dreamed about the Cimarron Pendant
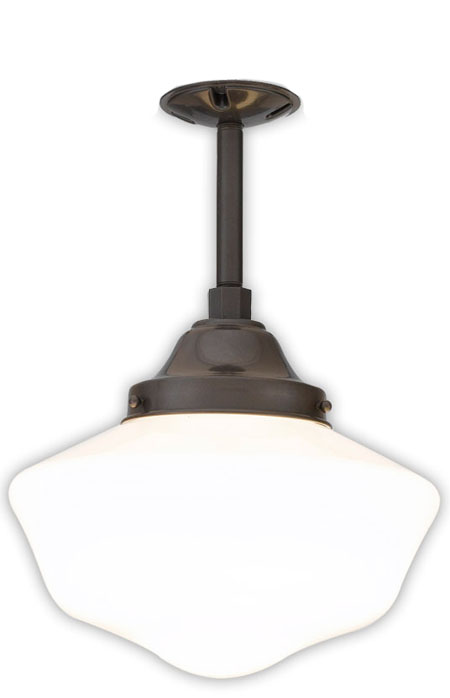
And I swooned over School House Pendant “The Volusia”.
Then I realized I had already long ago spent the whole budget for the room on the makings of the bookcase and the desk, and I had NO budget left for lights. That meant that buying from Barn Light Electric, shipping to Canada, and then paying brokerage & duty fees was not going to be a feasible endeavor. Enter sad sad Kristen face.
So ‘pretty’, ‘new’, and/or their friends ‘shiny’ and ‘fancy’ were out of the question. We needed something cheap.
We just so happened to have a random light we took down from our bedroom sitting around taking up space and we swiftly swapped it out. It’s better, its not great, but will make do for now. The room has so much natural light from the giant skylight, that the light wouldn’t be on much anyways. So here it is, the new old light.
Moving forward I will be daydreaming about changing it out for one of the lusty Barn Light Electric lights.
Yeah…I’m a lighting loving weirdo, I know…
I posted about my chair hunt less than a week ago.
By that point I had been scourging Craigslist & Kijiji for an antique bankers chair for weeks. I had dragged El Granto into many an antique store, and even shook my fist at the TV when I saw Sarah Richardson had found one at an antique store on queen street. I wasn’t mad at Sarah, I was mad that I hadn’t been there first!
So I wrote the post, and sent my Mom an email asking her to keep an eye out for a bankers chair (she’s even more resourceful than I am) I then forgot about putting my chair request out into the world, and got back to work.
Fast forward to Friday. My Mom comes for a visit, and shows up with not one but TWO bankers chairs. One antique that was in brilliant shape, and had the original chair mechanism and everything, and a second one that was a more modern version. I was flabbergasted. My Mom had found the vintage one on Craigslist for a steal, and the second one was found on the side of the road by my Mom & Dad’s friends.
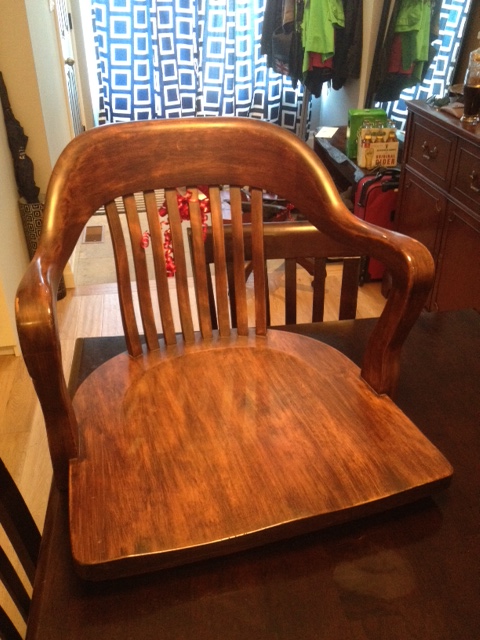
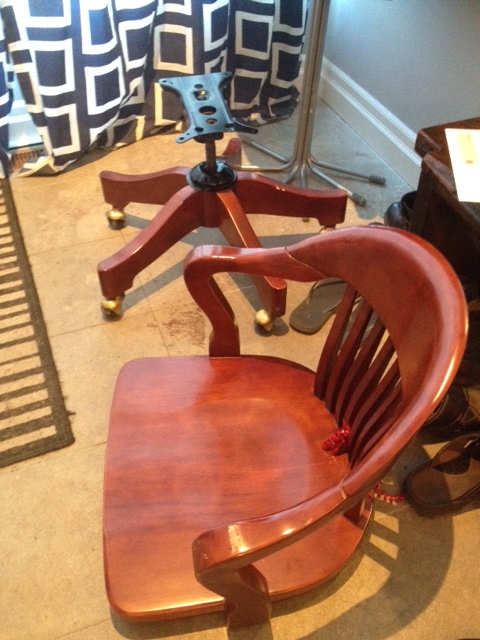
Then I go into work on Monday morning and get an email from a co-worker that says “Look what we found on the curb!”
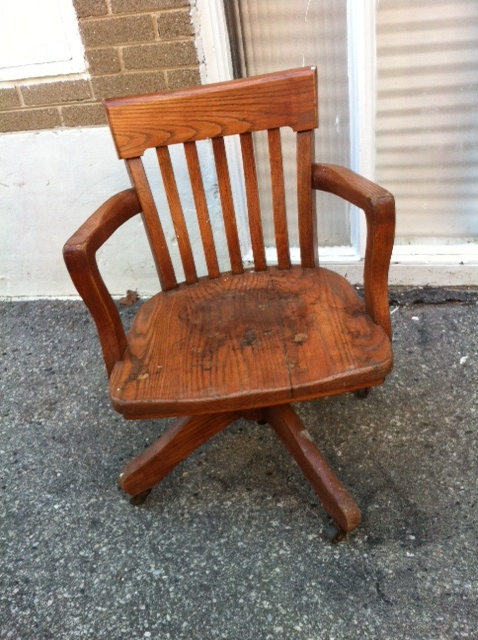
SERIOUSLY?! I couldn’t find one if my life depended on it, and two people managed to find ones thrown out for garbage on the side of the road?! Hell, I should just give up my searching for things, and make a list for everyone else to find. Thank you all so much.
I am also looking for old reclaimed red bricks for a new patio, and some old picture frames…just saying.
Here’s the antique chair assembled in the office

I love Amy Butler fabrics. When I stumbled upon the fact that Graham & Brown had an Amy Butler wallpaper line, I was in love. I drooled over the designs, ordered samples, and set my heart on the Fountain Pattern in Stone. Continue reading “Painting The Office”
I like trim & moulding. Scratch that. I am kind of obsessed with it. Especially in an Edwardian home, I feel like we should have trim everywhere. Baseboard, Wainscoting, Board & Batten, Chair Rail, Plate Rail, Crown Moulding. I love and want it all.
So every room we reno, I tend to try to sneak in some trim. The office was no different. It was crying out for a chair rail. The one problem with the office was well, the walls were about as straight as Elton John. My favourite chair rail, which is a solid oak, ¾” thick beauty from Central Fairbank Lumber would be amazing, but would not fair so well with my squiggily walls. I needed something a bit more pliable. So El Granto, Odin & I walked to Downtown Lumber and picked out a lovely simple mdf pre-primed chair rail, and carried it home. Yes, I said carried it home. We do not own a car. So when we need building materials, we either rent the home depot bring it home van, or we buy from Downtown Lumber and walk the 2.8km along the West Toronto Railpath to and from Downtown Lumber. If you ever spy two crazy looking people and their red dog carrying home a 2×4’s on the walking path, that would be us. It’s actually not that bad. One person can easily carry a few 8 foot boards, it’s when it comes to 10 or 12 foot boards, that it’s helpful to have a friend. The biggest thing we brought home were 2x8x12’s for the deck. Those suckers were heavy! The folks at Downtown Lumber are even so kind to tape together multiple boards for me, so it’s easier for me to carry home.
Back to the task at hand… We walked home with our chair rail, and I quickly measured up my walls, and made a cut list. As our miter saw is in the garage, I prefer to do a cut list with all my angles, and head to the garage to cut everything at once. I am anal retentive when it comes to measuring and my trim cuts, so they are usually bang on. I quickly cut all the pieces. It was really simple as the whole room was only 5 pieces, so 10 cuts. My chair rail was a shallower depth then my door molding, so we decided to do flush cuts at the door frames. This means out of my 10 cuts I actually only had to miter the two corners (hint hint, this means that the other two corners in the room house my built in bookcases.) I then marked where the studs were on the wall and brad nailed the trim in place.
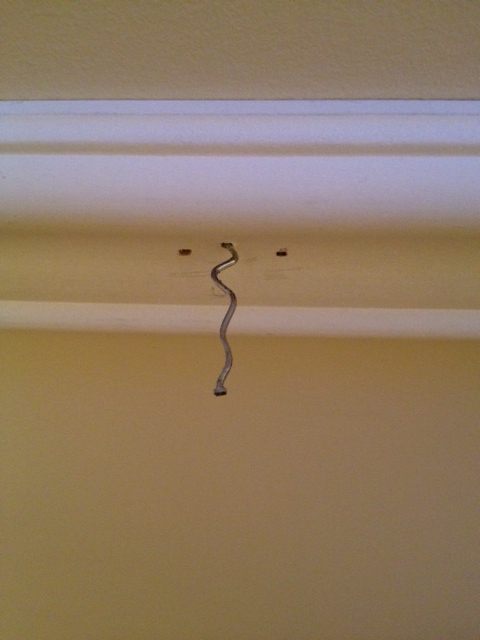
Now here is some edumacation for you. This is what a 2” brad nail looks like when you hit a drywall screw in the wall. He’s not a happy nail, neither was El Granto when he had to pull that angry nail back out.
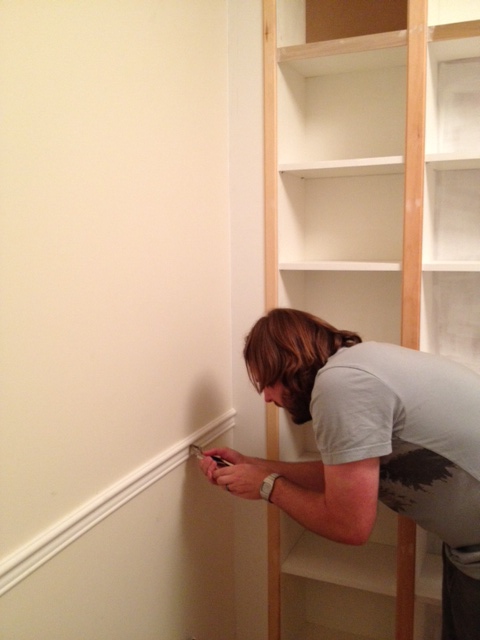
When setting the chair rail position, I originally laid it out level. As the floor is not the least bit level, it looked really off. Instead I decided to make it parallel to the floor, which meant to the eye it would look all nice and straight. In cases like this, doing it right will make it look all wrong. So there is my advice, DO IT WRONG. Brilliant eh? Using the flexible MDF chair rail worked so well. It curved to our wacky walls perfectly. Now, had we painted out the chair rail white it would have accented how crooked the walls are, but as we were painting the chair rail the bottom wall colour, it would (hopefully) blend in.
We then filled all the nail holes with paintable caulk, and ran a tiny bit along the top of the chair rail, which made it look seamless to the wall.
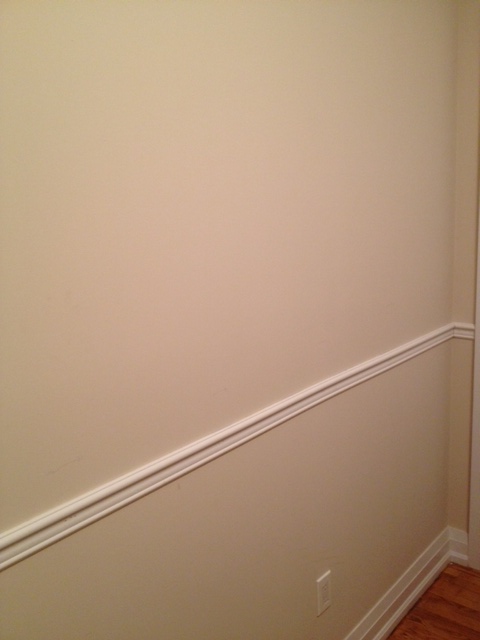
Then it was time to PAINT!
HAHA aren’t I a tease? Painting post tomorrow I promise.
SOURCE LIST:
Materials:
MDF Chair Rail: Downtown Lumber
Brad Nails: My Garage
DAP Paintable Caulking: Home Depot
Tools Used:
Miter Saw, Measuring Tape, Compressor & Brad Nailer, Level
Difficulty Level (on a scale of 1-5):
Total Cost: $40
Two years ago, El Granto & I were walking through the Junction headed for an Americano @ Crema, when we spotted a great worn black bankers chair outside the front of a reclaimed architectural salvage shop. The chair was great. It was worn in all the right places, had fabulous old castors, and was a steal for $25. Problem was, we were still living in the loft, had no place for it, and were walking about 3km from home. We decided to pass for now. El Granto sat brooding over the chair for the next day, and decided to go back to see if it was still there. Alas of course it was gone. Someone else had the same vision we did. Since that day, we have regretted that decision, and have been on a hunt for another bankers chair. Skip ahead to last spring. We were at my favourite place on earth; The Aberfoyle Antique Market when we spotted a guy selling not one, not two but THREE bankers chairs. He had stripped and refinished them all with an (ugh) honey oak finish, but they were in excellent condition. We could either live with the colour, or refinish them to something darker. Problem was, we were at Aberfoyle with El Granto’s Mum, and were driving a small car. The chair was not going to fit in the car. We visited Aberfoyle a month or so later, and (of course) all of the bankers chairs were long sold.
Now that the office is progressing, we really really need a chair. Do you think I can find one? Not a chance.
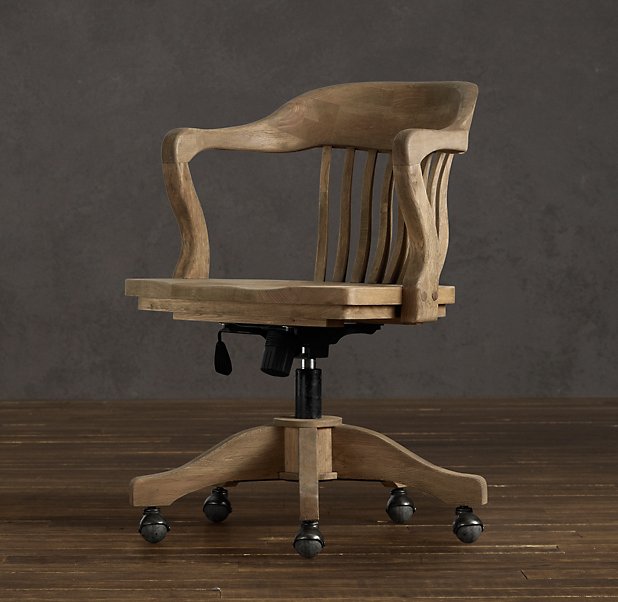
I could buy gorgeous one new at Restoration Hardware for $495. Uhhh no, that’s out of the question.
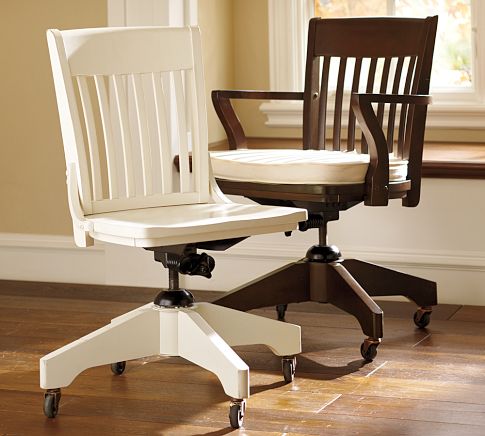
How about Pottery Barn’s Swivel Desk Chair? Oh wait, $533? HA.
So I will continue to haunt Craigslist & Kijiji in hopes of finding one in my price range (aka free – $40). I know, wish me luck.
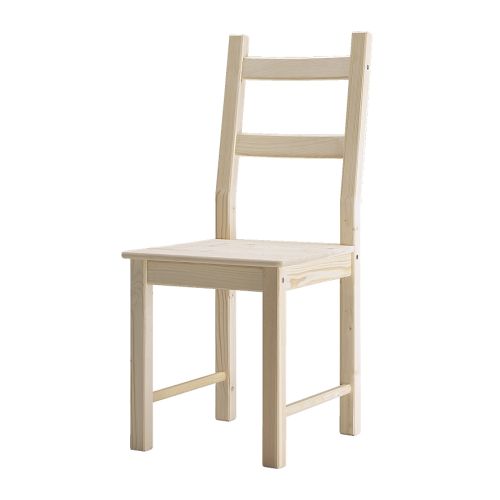
Our other temporary option, is buying a $35 Ikea Ivar chair, and giving it a paint job. Then finding another use for it once we finally find a bankers chair.
Why is it that every project always has one sticking point? One missing piece of the puzzle?! *sigh
I have been working on our office for SIX MONTHS now. That’s right, half a year! Having a clingy spazzy puppy around doesn’t help. The moment you try to get some work done, he wants to play, or is hungry, or wants to go for a walk, or chew on the baseboard, or just wants so sit there and whine until you stop doing work and pay attention to him.
If having a puppy is this bad, I have no idea how people with babies eat, go pee or bathe. If I ever have kids, I just know I am going to be one of those mothers who puts the baby in the crib screaming and goes downstairs and has a glass of wine.
Where was I? Oh yes the office.
Wrangling the puppy was especially difficult when we were painting, or doing things that he could in no way be near. We would take turns working while the other watched the dog, or built a dog play area in the hallway. Needless to say the simplest task ended up taking days or weeks. I am still finishing a few things up, and a few projects are still incomplete, but it’s finally gotten to a point where I may actually let someone see it.
As for furniture; in our last office we built in a custom desk so when we moved to the storefront the desk stayed behind. We also owned a crappy old office chair, that I happily pushed to the curb before we carried away our last moving box.
So coming into the office in the new house, we owned:
That is not a lot to work from…Try as hard as I did, you just cant make a desk out of crap. It topples over…
So for the first six months of living in the house we used my Grandmother’s 50 year old Ikea card table as a desk, and a folding chair. More often than not we ended up working with the laptop on the sofa downstairs.
Before I post pictures of all our office projects, here is some insight on what we had planned
My Pinterest Office Inspiration Board
This board is giving away a ton of hints of what we were up to, so stay tuned for the results!
And here is our great big office plan/project to do list.
TO DO:
UGH…I am tired just looking at the list…wheres my drink?