We have a nickname for the baby. It’s not your normal baby nickname of bean, or peanut, or little one etc. Nope… it’s Pixel. Yeah, I know. Totally a weird name. Why does the baby have such a strange nickname? Here’s how it came about:
We had a bunch of reason to worry about the baby when I was only a few weeks pregnant. Emergency ultrasound ensued, and when the ultrasound tech found the tiny, itty baby on the screen, it was nothing more than a tiny blob, with one, singular blinking pixel in the middle. The ultrasound tech, turned to tell us that not only was the baby okay, but that single pixel was in fact it’s heartbeat. Continue reading “Pixel Art”
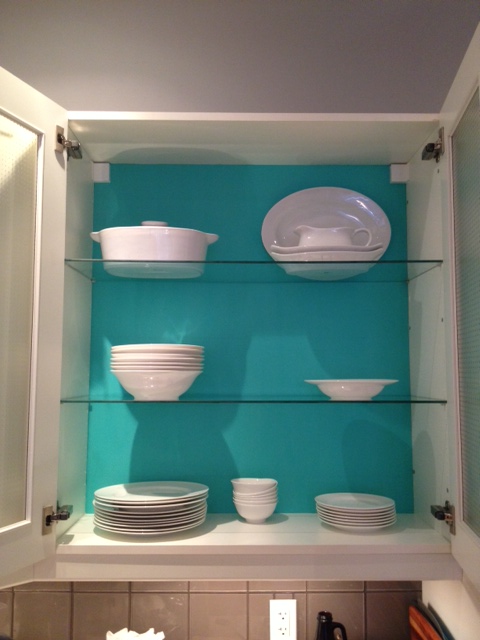
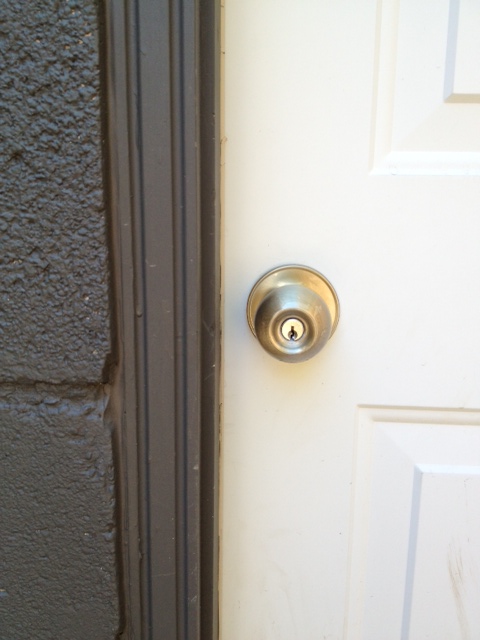
When we bought the Storefront there was an overwhelmingly large amount of stuff that needed purchasing. The house came without closet rods, window coverings, shower curtain or rod, or even a bathtub plug. So when we moved in, we took a big trip to Ikea and Home Depot and bought the things we needed. It all started to add up very quickly. We tried to save money anywhere we could, and new locking door sets was one place we saw the ability to save a lot of coin. We needed four locking doors. Two dead bolts & two locking handles for our exterior doors (front door, back door, garage & our master balcony). We spied a 4 pack of deadbolts & handles for a great price in stainless steel, brought it home and installed.
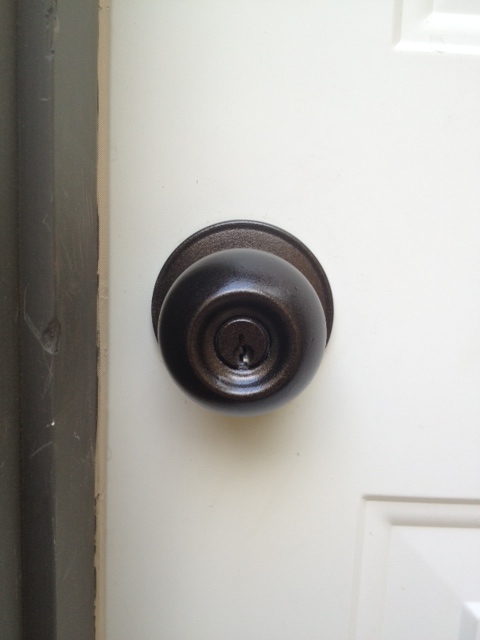
Stainless door knob
Two years later, and they’re looking shabby. They were covered in some sort of protective covering, which is peeling and looking pretty haggard. Something needed to be done. So what would it be, buy new ones, or try to refurb the ones we have? Time for some spray paint.
Practically everyone on the entire internet has painted doorknobs (don’t believe me? Do a google search for “spray painting door knobs”, or look on Pinterest.) See? The whole internet. Some with better results than others.
So I decided to jump on the bandwagon. I had previously spray painted closet handles with RustOleum Universal Oil Rubbed Bronze, and they are still in perfect condition, so I figured that was the way to go.
The problem is, (as most know) we live in a very urban environment. We live in a converted Storefront, on a very busy street, steps from the subway. While we have plenty of lovely neighbors, there is still a bit of crime, drugs, prostitution, and generally we try to be very aware of our surroundings, and try to keep our house (and us!) as safe as possible. SO, taking off all the door handles and locks for two days while we spray painted them, was not an option. Each of our doors has both a deadbolt and a locking handle. Overkill I know, but it came in handy for this project, as we were able to take off either the handle or the deadbolt and paint it, while the other stayed on the door keeping the ability to lock it.
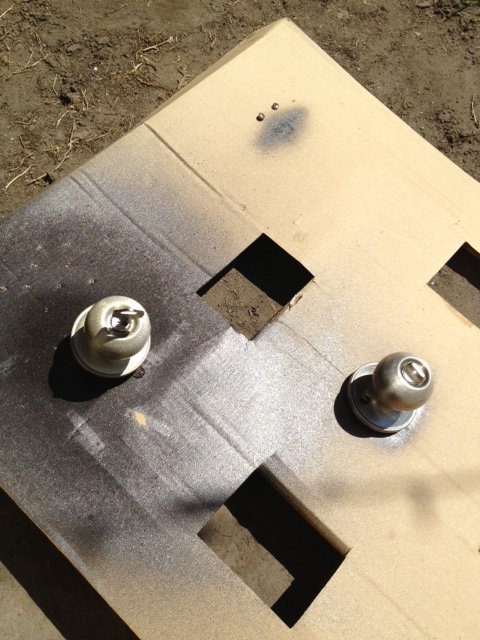
Doorknob removed, prepped and waiting for paint
So off came the locks, one at a time. They got lightly sanded (using 320 sandpaper), cleaned with a degreaser and dried. I then placed an old key in the lock and sprayed with several thin coats of spray paint. They dried for 24 hours, and then were re-installed.
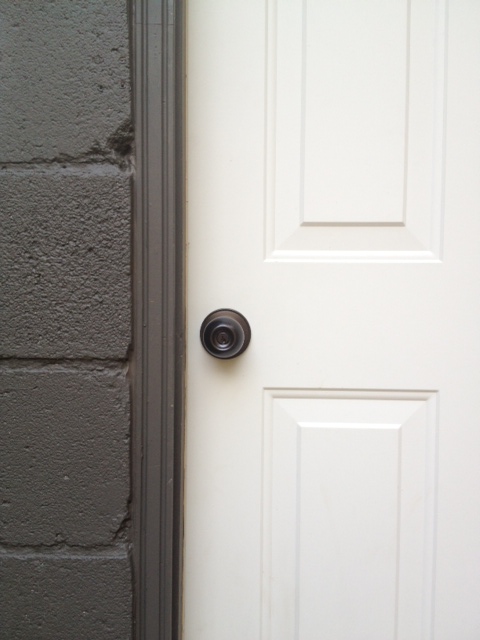
Painted door knobPainted door knob
We still have a few remaining knobs around the house, but so far the garage and back doors are looking snappy in their new ORB clothes.
We’re not dumpster divers, we don’t go out LOOKING for garbage to bring home, it just so happens that we have come across some good finds on the side of the road. We dragged home the rocking chair for the office a few months ago, repaired and refinished it with a coat of glossy black spray paint.
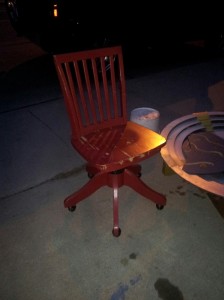
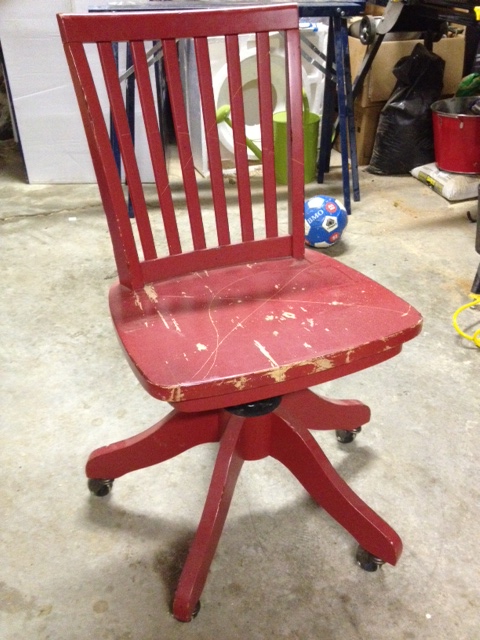
Just before Christmas El Granto happened to come across this guy, a red bankers chair with some nicks and scratches and a large X slashed across the seat and back.
El Granto snapped this pic with his phone of the chair on the curb
El Granto immediately spied the chairs potential and rolled it home and tossed it in the garage. We knew that we would not be able to refinish it untill the weather was warm enough to spray paint in the unheated garage.
Chair Before
I flipped it over to discover it was a Pottery Barn Kids chair. In fact it’s this $250 chair, but in red (guessing red was a seasonal colour). Have I mentioned lately how much I love my husband and his ability to spot fine craftsmanship?
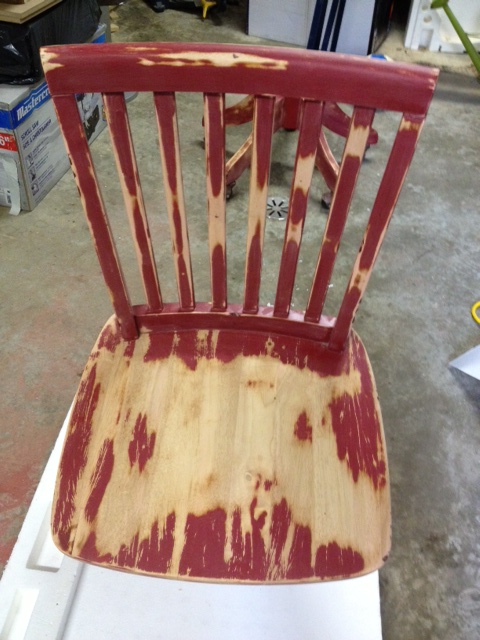
We got to sanding the nicks out and prepping the surface for primer, and man the paint finish on this chair was strong. It took both of us hand sanding the first layer of finish off with a rough grit sandpaper, then using a palm sander and a oscillating multi tool with a sanding attachment to finally get the paint sanded down.
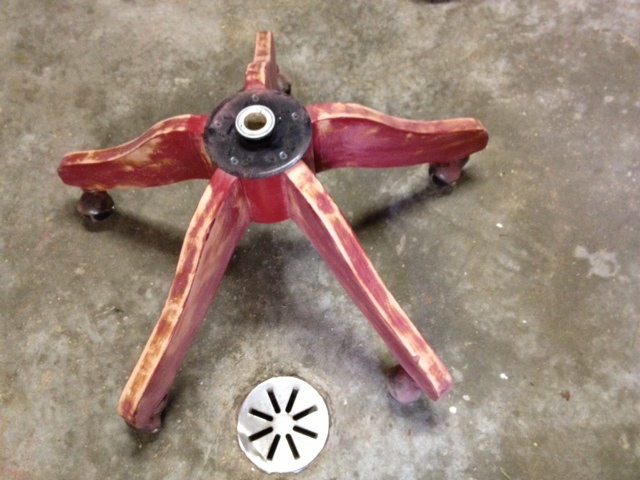
Chair Seat SandedChair Base Sanded
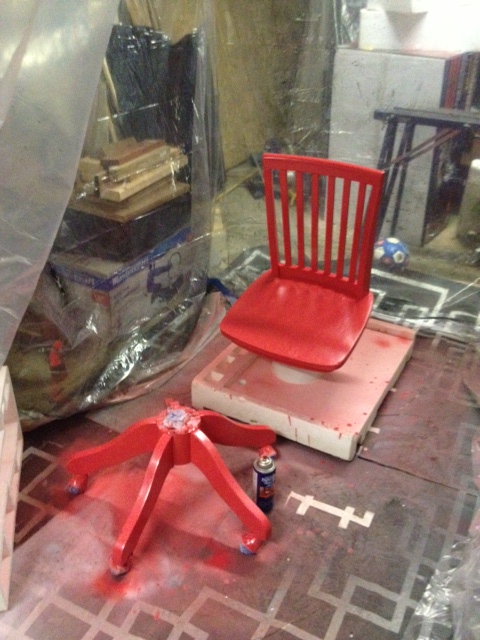
The X slashed in the seat of the chair was super problematic. We sanded and sanded and just couldn’t get it to disappear completely. When we had enough of sanding, we gave up and prepped for paint. We cleaned the chair of all the sanding dust with a damp cloth then a tack cloth, and masked off all the metal parts such as the wheels and the seat adjustment.
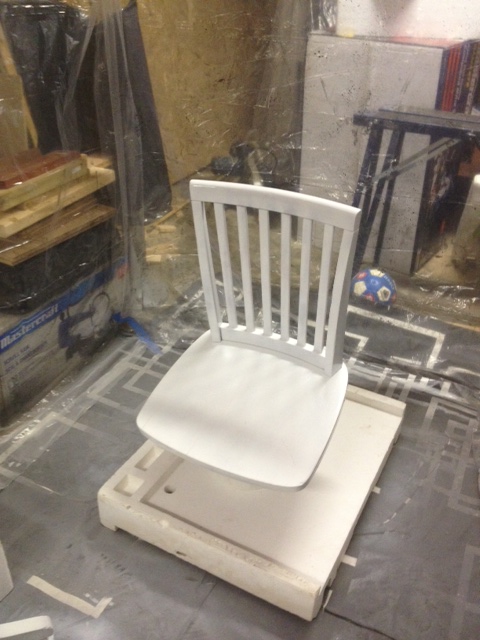
We took the legs off so that we could paint them easier, and we stuck the top of the chair into a bucket and styrofoam so that it would stand up (kinda) straight. We gave it two coats of primer in our spray booth.
Chair Primed
We let it dry, then painted two coats of RustOleum Watermelon spray paint. We usually use the RustOleum Universal paint, but their colour selection is limited, and we wanted a pinky-red-coral colour, so we went with the regular RustOleum primer + paint. I forgot how terrible regular spray can nozzles are. I got paint all over my hands, the nozzle dripped like crazy, and the round spray pattern doesn’t cover as effectively as the more linear spray of the Universal paint. So RustOleum, I beg of you, make more colours in your Universal line! xxo love Kristen
Chair Sprayed
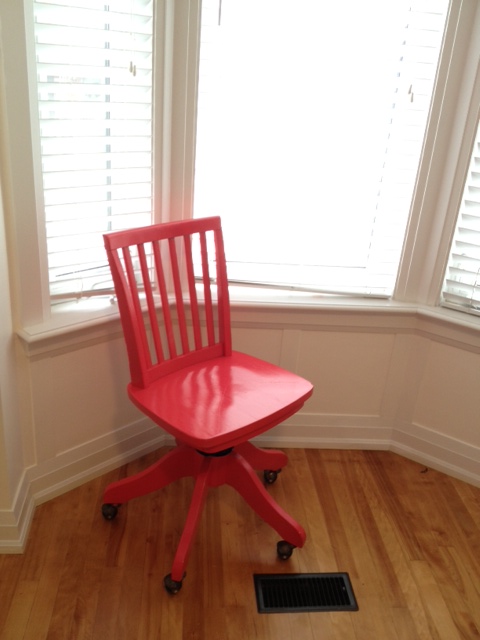
After I swore a bit, and gave the chair two coats of paint this is what we have.
Chair After
She will live in the guest room, and enable guests a place to sit and read, get dressed, or stash all the stupid pretty throw pillows. Not bad for trash on the side of the road!
SOURCE LIST:
Materials:
Rustoleum Spray Paint in Watermelon – Rona
Rustoleum Spray Primer – Rona
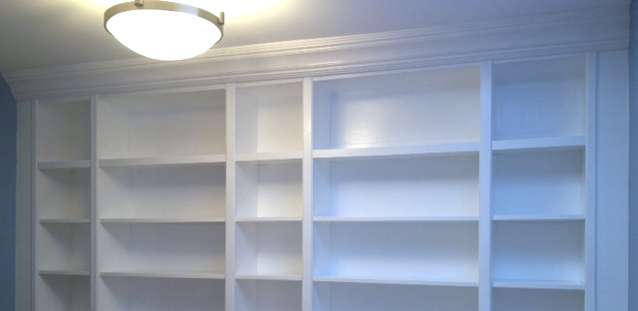
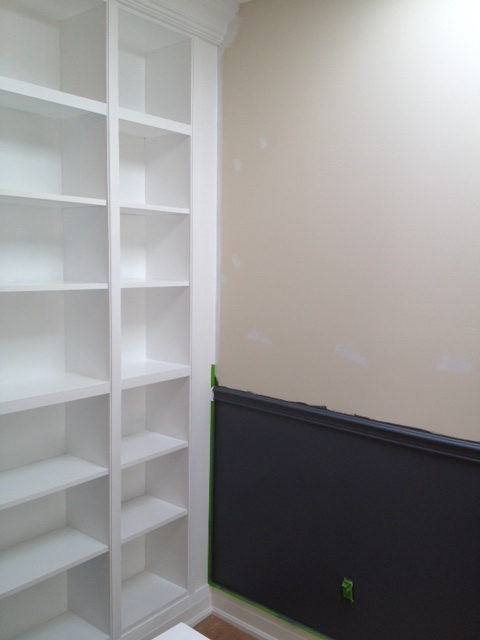
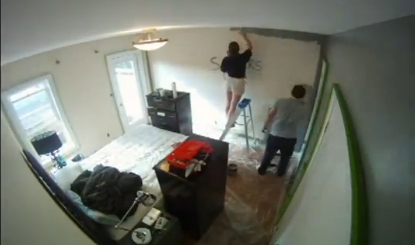
Our house is a three bedroom, two large bedrooms and one smaller. The smaller is of course the best choice for either an office or nursery. We wanted to plan for an office now, and if we ever needed it down the road, an easy transition to a nursery. Continue reading “From Billy to Built-Ins”
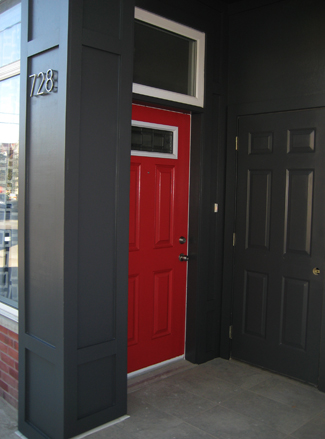
When we purchased the house it was beige. Beige exterior, beige on every single wall inside, and a beige garage. We knew right away that one of our first tasks would be to “un-beige” the house.
We decided to tackle the front of the house last fall. It was a simple project that had a lot of impact. We looked at lots of photos of historical storefronts, and decided to go with a simple dark grey colour. It would offset our storefront window, and look nice with the brick under it.
The project took two days, one day cleaning everything, the second taping and painting. We also have two doors at the front of our house which confuses delivery people to no end. Its actually a pretty smart design, as we are a row house of sorts, there is no place to store our garbage and recycling cans out of sight, other than having to keep them in the garage, and wheel them around the block on garbage day. So they built in a “utility room” into the front of our house. Its great, but confusing! So we wanted to make the door to it disappear, and make our front door stand out. We painted out the utility room door the same colour as the house, and our front door in a bright red.
We used Behr Premium Plus Ultra Paint + Primer and it painted beautifully! The door took three coats, but the house only took two.
Without further adieu, here are the before and afters!
Front of house before.Front of house after.Door before.Door after
SOURCE LIST:
Materials:
Behr Premium Plus Ultra Exterior Satin in Cracked Pepper: Home Depot
Behr Premium Plus Ultra Exterior Semi Gloss in California Poppy: Home Depot
2″ Frog Tape: Home Depot