Tool Test Drive – Milwaukee M18 Fuel 7 1/4″ Cordless Circular Saw

There is nothing more infuriating than being knee deep in a project, then realizing you don’t have the correct material or tool. It stops you dead in your tracks and you’re left spending your Saturday at the hardware store instead of working.

For instance, we were working on the tabletop for Project Nelson. We had planed, measured and glued up the top, and were just about to square up the edges. See it’s a lot easier to do a rough cut to length of all your boards, glue them together then draw a nice square line and then cut the top to square. We were just ready to cut when we realized we didn’t have the tool we needed. The tabletop was built with 1 3/4″ pine, and our corded circular saw had given up the ghost on the last project. Our cordless circular saw was a 6 1/2″, and does not have the cut depth to cut through 1 3/4″. Womp womp.

Our current saw with a blade depth if 1 1/2". Not deep enough to cut through our project.
Our current saw with a blade depth if 1 1/2″. Not deep enough to cut through our project.


We were at a standstill. What to do? Our options were to buy, rent or borrow. I don’t like renting woodworking tools from the big box store. They tend to have terrible blades, and it’s not worth risking your project on. So that left us with buy or borrow. I hate rushing to buy a tool without doing my research first. Borrow it is.

We happen have made friends with our local tool rep; James. I actually call him Toolman James. (Get it, like Tim the Toolman Taylor?) I shot him out an email saying “Hey James! We’re in a pickle! Do you have a circular saw we could borrow?” He responded with “Actually I do! But you have to promise to give it back, it’s brand new.” Fair enough. I can be a tad bit delinquent with my tool returns.

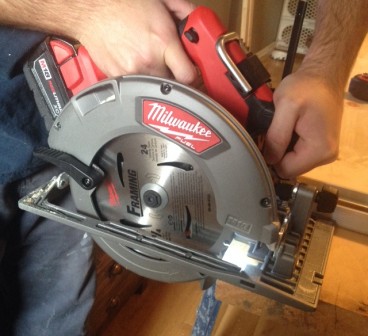
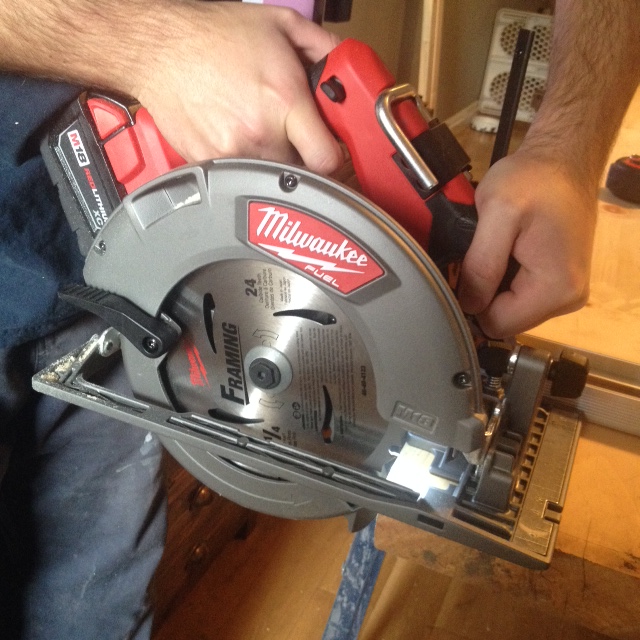
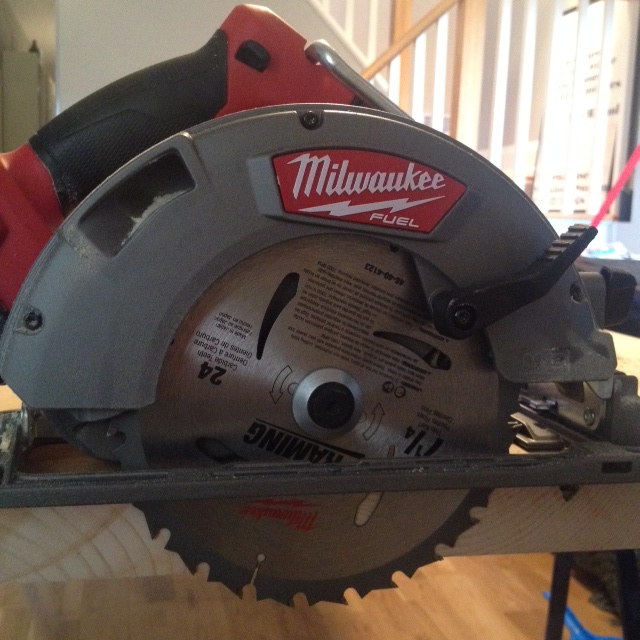
James sent over the saw, we took one look at it, and were pretty darn happy to have Toolman James as a friend. He sent us over the brand spankin new Milwaukee M18 Fuel 7 1/4″ cordless circular saw. Holy cow. Now this is a saw. Where our 6 1/2″  saw maxed out at a 1 1/2″ cut depth, the Milwaukee cuts through 2 1/2″. This is exactly what we needed.

Milwaukee M18 Fuel 7 1/4" Cordless Circular Saw
Milwaukee M18 Fuel 7 1/4″ Cordless Circular Saw

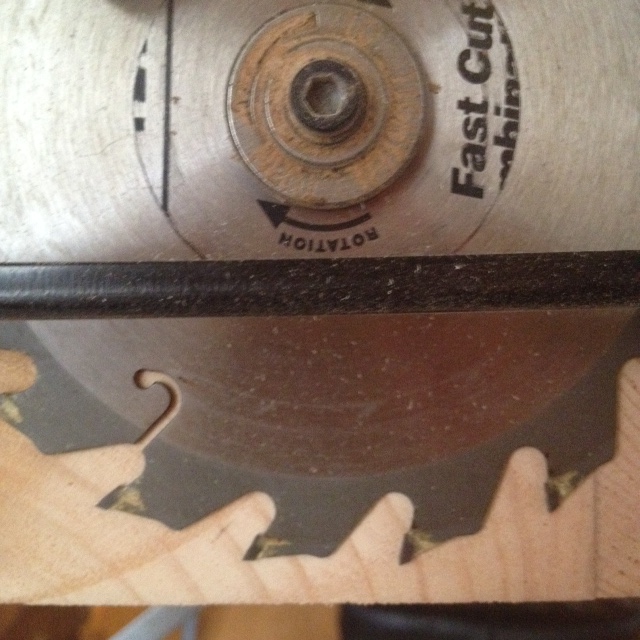
With saw in hand, we headed out to the workshop to do some test cuts. Cordless saws can often have a tough time of cutting thick lumber. They can burn and bind, and generally not have enough power. Our first cut was to put it to the test. We grabbed a scrap 2×12, drew a square line, and El Granto handheld the cut.

Milwaukee M18 Fuel 7 1/4" Cordless Circular Saw
Making a test cut

The saw had no problems with the 2×12. It cut through it like butter. No sticking or burning, and the best part; little to no tear out (even with the 24 tooth framing blade). The cut was spectacular. I was also impressed with El Granto’s cut. For handheld it was immaculate. When I commented on his prowess, he deferred credit to the saw saying it was smooth, didn’t kick back, fight him or try to drift. The saw was also incredibly quiet for such a big & powerful saw. It also has a handy LED to light up your cut area and a hook on top so you can hang the saw while not in use which is very handy for a large saw like this.

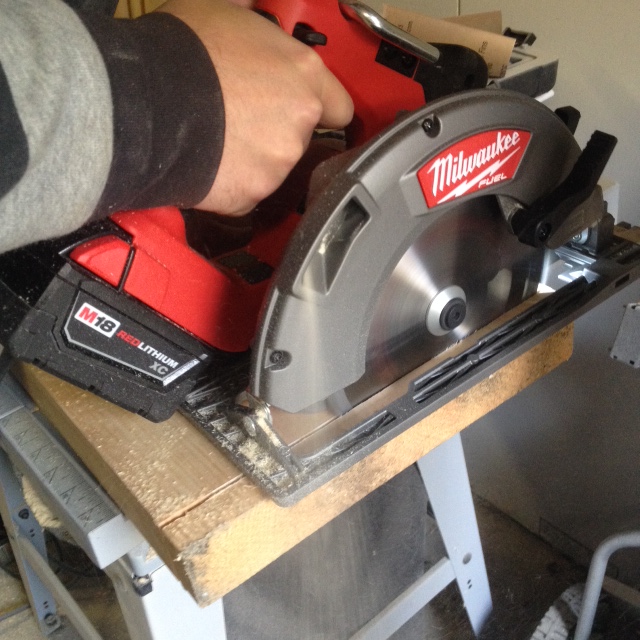
Impressed, we got ready for our big cuts. We set up a fence, raised the blade height so it would cut through our lumber, but the motor wouldn’t get in the way of our fence, and made the first of two cuts.

Milwaukee M18 Fuel 7 1/4" Cordless Circular Saw
Making the cut

Holy crap. The cut was perfect. Absolutely perfect. Even on the 30″ span, the brushless motor didn’t run out of power in the least. The cut was clean with no tear out, burning or blade wobble. The thin kerf blade didn’t produce a ton of sawdust, and the extended capacity M18 battery didn’t even register a drop on charge. It is hands down the most powerful circular saw I’ve ever used, and that’s corded or cordless. It has a heavy duty ridged metal base, a 50 degree miter swivel, and adjustable blade depth.

Milwaukee M18 Fuel 7 1/4" Cordless Circular Saw
Now that is a deep blade. Our lumber is 1 3/4″ thick, and the blade can cut even thicker, all the way up to 2 1/2″

A second hand hold makes it comfortable for two handed use, yet the saw is operable one handed. It’s powerful yet not heavy and unwieldy. I think the saw is perfect for job site use, yet still accessible to the amateur woodworker. Overall, I give the saw 4 1/2 hammers out of five.

five out of five
Milwaukee M18 Fuel 7 1/4" Cordless Circular Saw
Overall, an absolutely great saw.

Now, I need to think up some creative excuses for when Toolman James asks when I’m giving back his saw. “The dog ate it” really is not applicable in this situation.


Samsung Kitchen Appliance Review

We did some big updates in the Storefront kitchen in the past year. We added the 7 foot long coffee bar, enlarged our peninsula, added a new sink, ceramic tile backsplash and of course our DIY concrete countertops.

One thing we didn’t change was the appliances. The appliances came with the house and were two  years old and still looking/working like new. While we did not choose the appliances but we do get a lot of questions about them.

So here goes, our review on our Samsung Kitchen Appliances.

IMG_2490WEB

Samsung bottom mount refrigerator freezer. See here for current version of this fridge.

The fridge gets two thumbs up on appearance. It is a clean lined fridge with no visible handles (they are inset handles on the side of the fridge door and top of the freezer.) The controls are located on the top of the freezer and are easy to control and do have a child lock. The stainless steel is a high quality and polishes and cleans to a streak-free shine very easily. The interior storage is great with two climate controlled produce drawers at the bottom, and a mid level cheese drawer. The door has lots of shelves and cubbies to hold all of our condiments. (Why do I have more condiments than actual food in the fridge?!)

The freezer is large, but to be honest it’s a bit hard to access. It opens with a swinging door, then inside are two drawers. You have to completely open the door to access the drawers which makes it a bit more complicated to reach in and grab a few ice cubes. It does hold a fair amount of food and does a great job of self defrosting. However due to the self defrosting, it can “eat” ice cubes meaning that if you make a tray of ice cubes and leave them in there they will eventually shrink and disappear. The moral of the story is use your ice or lose it.

Overall score. Three awesomes out of five.


Samsung Dishwasher. Current model here.

When we moved in the appliances were brand new, and had never been used. The first time we turned the dishwasher on, it worked for ten minutes than turned off with a leak sensor activated. After three service visits we were told it was a manufacturers default. However the model had since been discontinued and we could either have the lower model, or we could have a store credit for the amount the previous owner paid (on sale) to buy the more expensive model. Being the broke new home owners we were, we opted for the lower model. Big mistake. Our new dishwasher has been disappointing from day one. The display system is unattractive and the stainless steel quality is poor. It does not clean up half as well as the fridge, and mars so easily with spots and splashes. It never looks good, and is dull in comparison to the fridge. We could overlook all of this if it worked well but… the dishes are perpetually dirty, especially things on the top rack. We purchased the recommended dishwasher tabs and use Jetdry, and yet there are always food particles on our dishes. Probably half of the dishes need to be rewashed after coming out of the dishwasher. Plus one cycle takes several hours to complete. If it meant clean dishes, I could live with it, but dirty dishes and a long cycle have me wanting to sink some cash into a new (quality) dishwasher.

Overall score. One awesome out of five.

IMG_2564WEB

Samsung electronic range. Current model here.

The stove is made with the same quality stainless as the fridge and cleans up great. The oven is fast to heat and has a very consistent temperature.  The oven door has a really great seal. Sometimes too good, and it can tend to steam things slightly. The broiler is very powerful (and has two settings) and is perfect for broiling. The one downfall is that it has a hidden bottom element, and if anything overflows or spills while cooking, it will hit the bottom of the oven and burn instantly making tons of smoke and causing a big mess. The oven controls are easy to use and the oven emits an “I’m hot!” noise when its done. The stove-top is a flattop electric. It has four burners. Two small, one large, and one combination small & large. It also has a 5th warming burner. The burners heat up fast and offer good control. There is a “hot surface” light that indicates one or more of the burners are still warm. The one con is the cleanup for the glass cook-top. It takes major dedication (and elbow grease) to keep that thing spotless! Luckily El Granto is a little bit… we’ll say “obsessed” with it being clean (which is funny because he rarely uses it).

When we renovated the Storefront, a gas line was run into the basement below the stove. When we are ready to update the stove, we will absolutely be switching to gas and the cooking performance and control gas offers. We are a foodie household, and while this stove does good enough, it has room for improvement.

Overall score. Three awesomes out of five.

IMG_2796WEB

Samsung combination microwave/vent hood. Current Model here.

This puppy is a little workhorse. It does a good job extracting moisture and smells from cooking. It also has a nice light perfect for shining light on the stove. It is also a pretty good little microwave. We’re not really microwave people, but it’s great at what we need it for (melting butter, defrosting, cooking a baked potato.) It’s got a lot of pre-programmed items, and they do work well. The potato & defrost are bang on. Its got a good display, and is easy to use. It comes with a removable “shelf” which makes it easier to reheat more than one item at once. While it is very good for a microwave, I would get more use out of a large exhaust hood in its place.

Overall score. Four awesomes out of five.

Closing Thoughts: We have quite a lot of Samsung items (I am typing this from a Samsung Chromebook in front of our Samsung TV.) We are happy enough with all of the kitchen appliances except the dishwasher. I would not recommend a Samsung dishwasher. It severely under-performs, and we will be tossing it and searching for a new (non Samsung) model soon. My favorites are the fridge and microwave/vent. BUT if you offered me a gas slide in range, I would throw my Samsung electric range under the bus, but it does work well, and is definitely a quality stove.

What kitchen appliances do you have and love? Can you recommend a good dishwasher?

*We have no affiliation with Samsung, and this is our unbiased, unpaid honest review.


Making your zapper zap through walls

You may know of our Printmakers media cabinet build. We love our cabinet. But there was one major design flaw (well not so much a flaw, more of a drawback). If we wanted to watch TV or control the volume on anything in the cabinet we needed to have at least one door open so that the remotes could reach the components.

I looked around for a solution and couldn’t come up with much. Until one day I was listening to a podcast and off topic one host started talking about an IR repeater and how he put all his components in to a closet. DING!

I headed over to Amazon and promptly purchased the Cables To Go Impact Acoustics 40430 Infrared (IR) Remote Control Repeater Kit. Long name. Tiny thing. Great product.

An IR repeater takes the infrared signal from your remote and “blasts” it out out of little stick on modules. It’s super simple to hook up and took no time at all to get working.

Step 1:
Position the IR receiver:

photo 1(1)

I chose just under the center speaker. Even with our bluetooth remote out of habit we always point it at the TV. This can sometimes be a problem when your components are a foot below the tv. This takes all the guesswork out of changing channels.

Step 2:
Plug the IR receiver in to the base unit.

Step 3:
Plug your IR Blasters in to the base unit (while you’re at it plug in the power cable too).

photo 4

Step 4:
Position your base unit somewhere hidden. Mine is actually sitting right on top of our audio visual receiver.

Step 5:
Position your IR blasters over the IR sensors on your equipment.

photo 2(1)

You can figure out where your IR sensors are by shining a flashlight on to the front of your components at a 45 degree angle. You’ll see a circle under the translucent plastic (usually about the size of a nickel). Peel off the sticky back of the blaster and stick it on.

The kit I purchased came with two double blaster cables. We only have two IR controlled components in our cabinet so I only needed to use one cable.

The IR repeater will now take any signal it gets and blast it out to all the components and you can leave your cabinet doors closed!

photo(1)

Two unforeseen advantages came along with installing the IR repeater too! One, the dog is no longer tall enough to get in the way of the remote signals and two, there’s a little blue LED on the IR receiver so you know 100% when  you’re sending a signal.

I’m 100% so happy happy happy that this little guy came in to our entertainment world. No more unsightly audio visual components hanging out in open doors. No more dog smashing in to them while playing and no more getting up (after forgetting they’re closed) to open the door when you’ve finally sat down after a long day at work! That last bit happened WAY too often.

In the Hood – Wallace Espresso

We love coffee. We love it so much we built a coffee bar in the kitchen to house all our coffee paraphernalia. As a coffee lover I am thoroughly enjoying the café explosion in the neighborhood. Cafés big and small are opening up at every direction. What does this mean for us? Winter dog walking has improved exponentially…

Wallace Espresso
Wallace Espresso

The newest addition to the neighborhood is Wallace Espresso. Aptly named it resides on the corner of Lansdowne and Wallace. WE opened quietly two weeks ago with a small sandwich board sign and a few turquoise chairs out front.

WE Exterior 2 (2)

That’s all it needed to get word out. Heck I knew it existed via Twitter before I even got home from work the day it opened.

In a small but cozy storefront they are serving up some excellent espresso and pleasant conversation. The shoppe is bright and adorned with a few stools, reclaimed barn lights, a gorgeous wood bar and a vintage map of Toronto (with more art to come from a local artist). It’s got just enough cool without being over the top.

WE Map (2)

WE Map (1)

The big draw to the space however is the espresso. The menu is non existent (no really, there isn’t one).  I am sure however they would be happy to make you any espresso based beverage you’d like. (I didn’t spy any coffee syrups so flavored latte fans you may be out of luck.)

On our first visit to the space we ordered two double americanos and they were made quickly and precisely. The barista confirmed cup size with us and asked how much water we would like. Both things the sign of a barista who cares about his patrons preferences (I hate nothing more than an over-watered americano with no space left for my cream and sugar!)

WE Exterior 2 (1)

The espresso was light and nutty with a nice crema. In fact I liked it so much I had almost finished mine before we even got to the subway.

The biggest surprise from WE is the prices. $2 for a double americano. Yes that’s right, I said TWO DOLLARS! That my friends is only 20 cents more than a coffee from Tim Hortons. Why suffer through mediocre coffee when you can have fresh espresso goodness for almost the same price?!

We have yet to try their lattes or cappuccinos, but I am sure they are just as excellent as the americanos. They also have a small selection of fresh baked goods to fulfill your sweet tooth craving.

WE Interior

WE is an excellent addition to the neighborhood and a spot we have quickly found ourselves visiting on a daily basis. They make you feel so welcome I witnessed a gentleman almost leave without paying. (He wasn’t running out on the bill, he genuinely got swept up in the conversation that he just strolled out!)

Stop in, try some amazing espresso and make some new friends!

In the Hood – Whipporwill Restaurant & Tavern

I know the blog is usually about our DIY projects, and I sneak a bit of lifestyle in here or there. In the last few months I have been thinking about including some details/reviews of the great local business in our west end Toronto neighbourhood. Continue reading “In the Hood – Whipporwill Restaurant & Tavern”