I have a new weekly feature on the blog starting today! It’s going to be called “What We’re Working On”. As we often have a bunch of larger projects on the go, our updates and project reveals are a long time in the making. As such, you don’t really see what we’ve been up to, and what we’re working on. This will be a weekly update with a quick check-in and summary of what we’ve got on our plate.
So here goes!
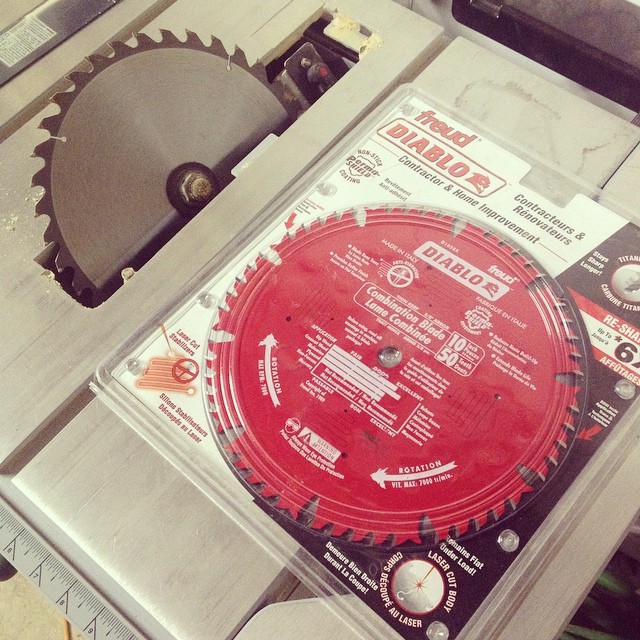
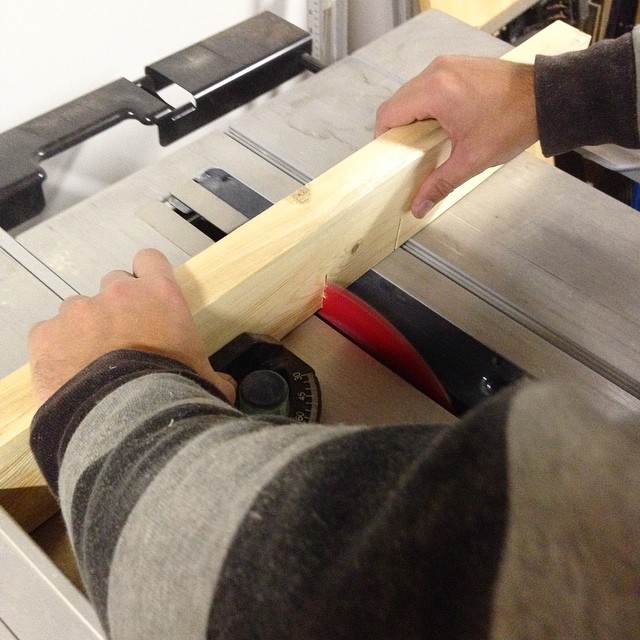
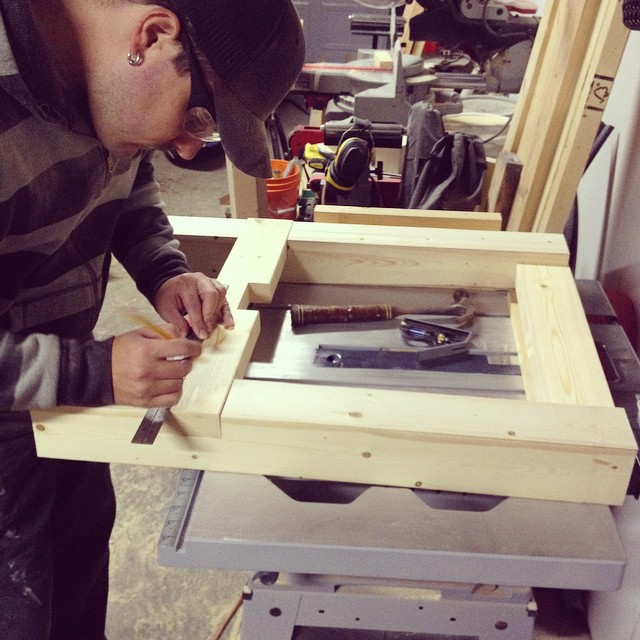
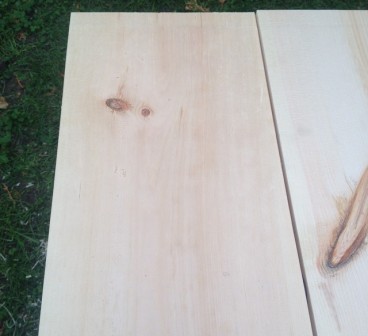
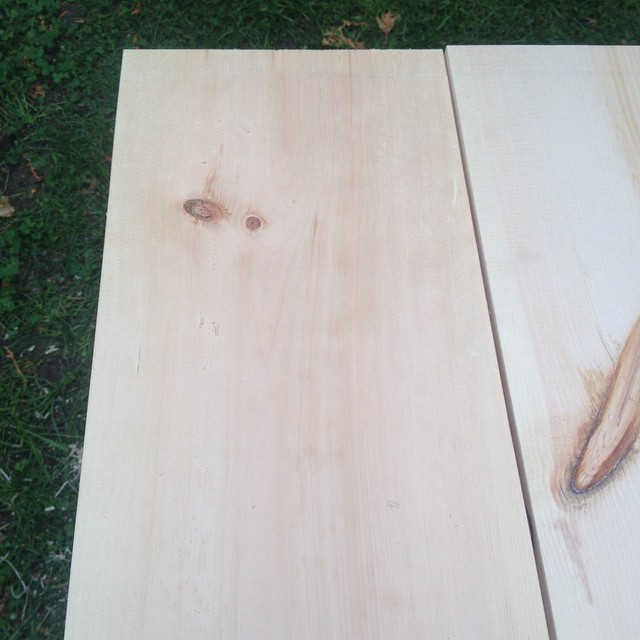
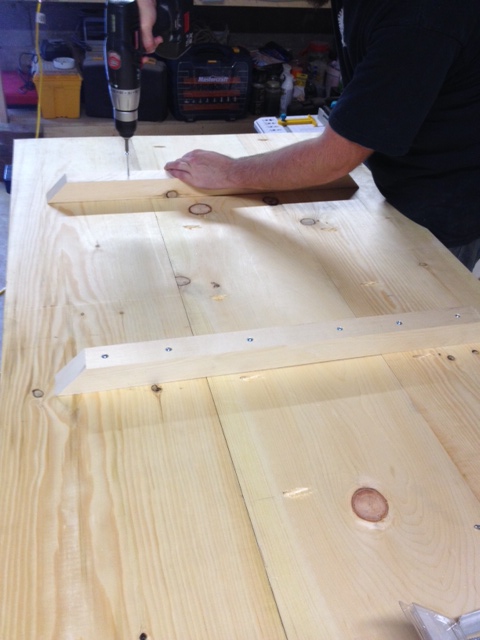
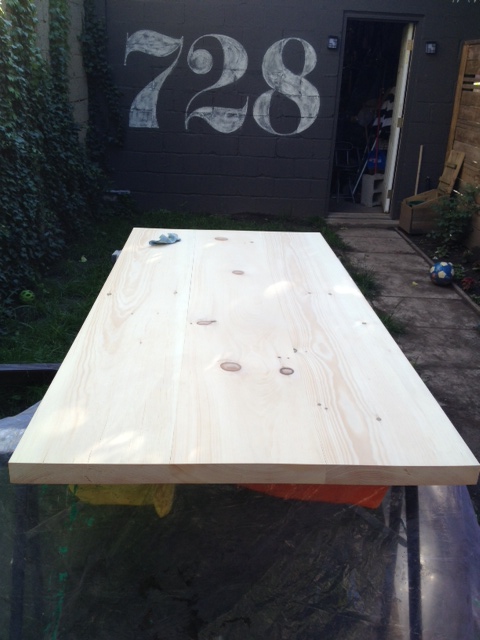
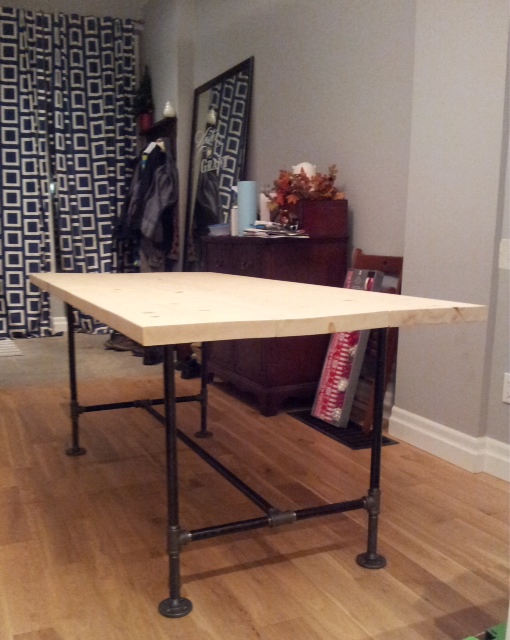
We are moving ahead well on the dining table & benches for Project Nelson. The table top is built, and this past weekend we got started on the legs after a quick stop to change the table saw blade. The new blade is an awesomesauce Freud blade. Once you switch to Freud blades, you will never go back.
With the new saw blade installed, we did all the kerf cuts for the table legs.
The legs are notched out for the stretcher support to fit in, as well as the stretcher support is notched for the stretcher. (lots of gibberish I know, but it will make sense when you see it.) El Granto kerfed away on the table saw, while I removed the kerfed slices of wood, and cleaned up the joints with a chisel and an orbital multi tool. (check out this post from a previous table build to see how kerfing/notching the legs is done.)
After everything was notched, it was all assembled.
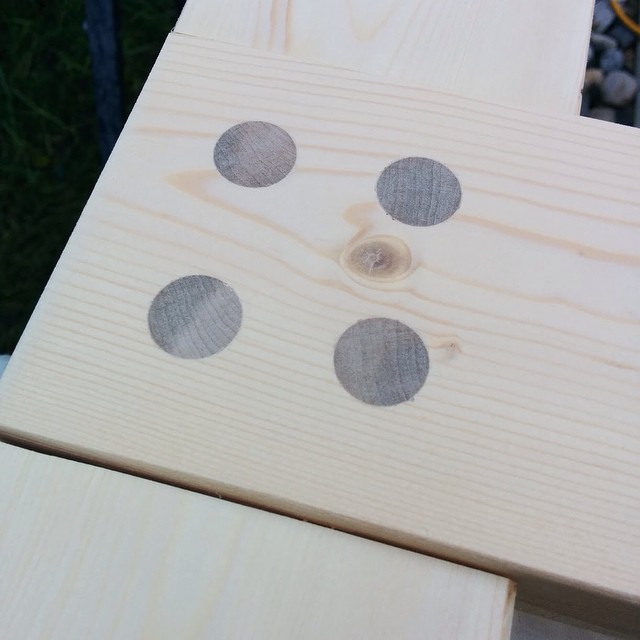
We made the dowels connecting the legs to the stretcher support visible for an interesting detail. El Granto then spent a morning sanding down the legs, and they are now ready for stain.
I am also slowing working away at the powder room. I got a print of a vintage 1930’s Toronto street barber, and set out to framing it. It’s not going so well. Love the print, but the framing situation is off the mark. The mat either needs to go, our the frame (or both!)
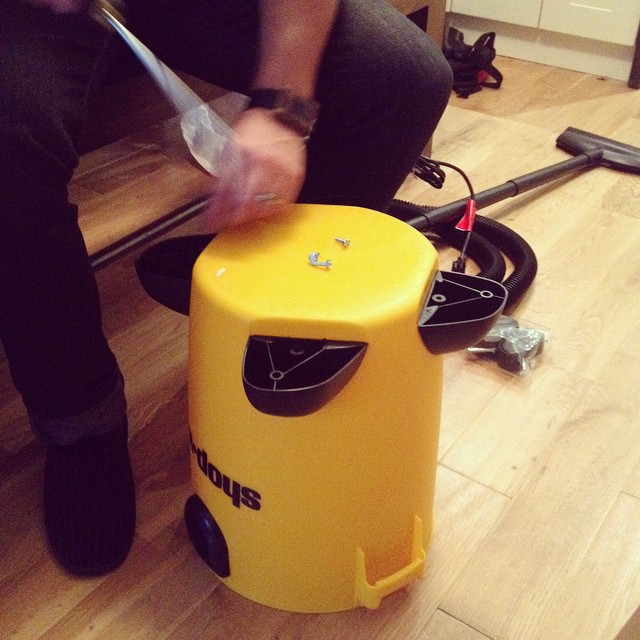
Last weekend we added a couple new things to the workshop. We picked up a small heater (this one). This will hopefully give us a bit more time to work in the garage. While picking up our heater, El Granto happened to stumble on Shop Vac’s on sale, so a new shop vac came home with us as well. This lil yellow fella will be a sawdust vacuum, and spend his life hooked up to various tools in the garage, in an effort to control the sawdust issues a bit.
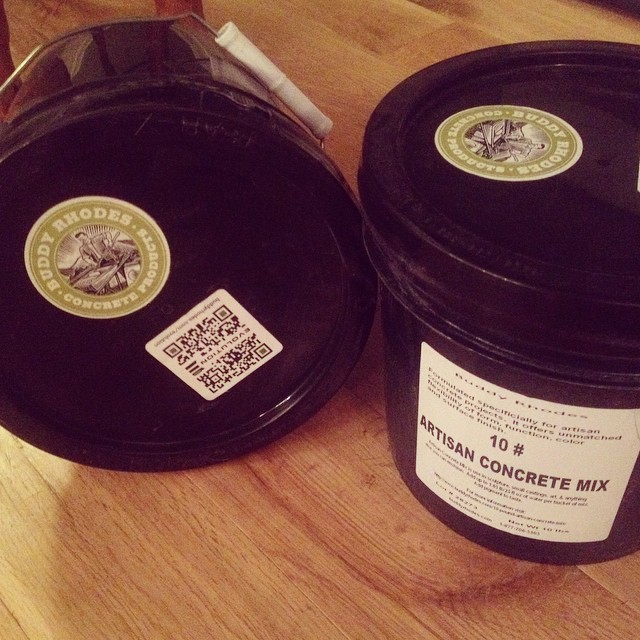
I arrived home to a super fun delivery last week. Jeremy from Buddy Rhodes sent me down some of their new 10lbs mix. Cant wait to try it out, and show you what projects I come up with.
So that’s what we’ve been working on this past week. What have you been up to?
We have started a new project in the Storefront garage; Project Nelson. We are making a Modern Farmhouse table and matching benches for a gentleman named Nelson. The table will be pretty much exactly the same as Dan’s table. As such, I won’t be boring you all with another build how-to from start to finish. I will however be popping in to share a few tips and tricks with you guys along the way, and keeping you up to date on the progress.
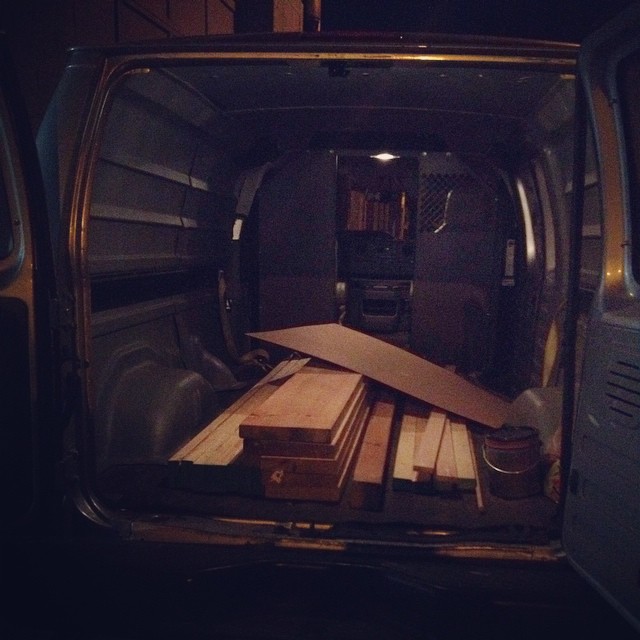
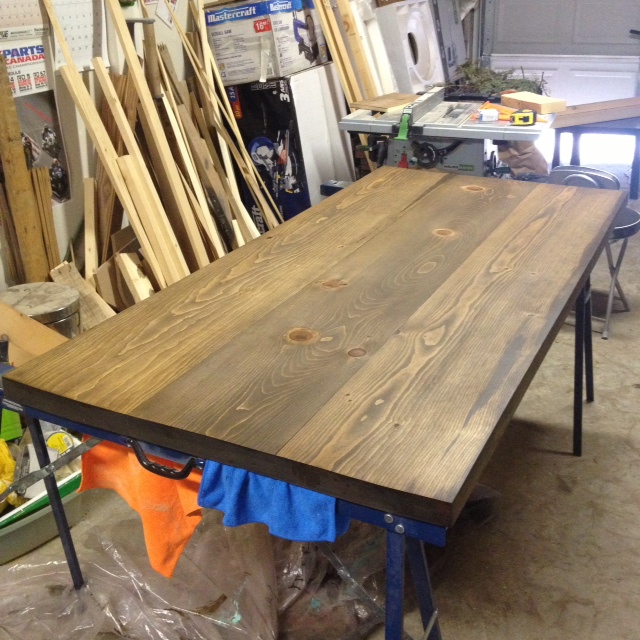
Progress got started this past weekend. A Zipvan was rented. Can I mention again how fantastic this concept is? We can have access to a large fully loaded cargo van without having to well… store or pay for a large cargo van. Instead we can get one once a month when we absolutely need it, and pay $30 or so for an hour and a half. With said Zipvan, we headed to Downtown Lumber and picked up lumber. We are using Canadian kiln dried 2″ thick pine for this project. (Although for the record, Downtown Lumber also sells 2×12 oak at about $18/board foot.)
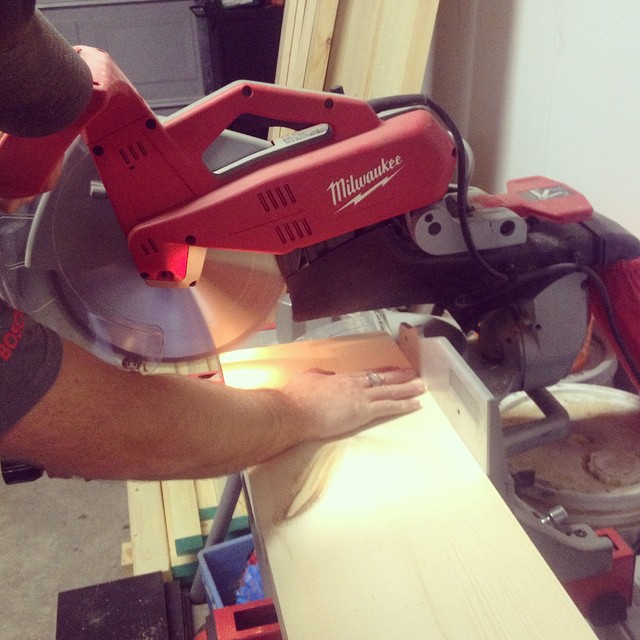
With lumber in the garage and a fine fall day, we planed all the lumber. My goodness, its amazing when you have the right tool for the job.
Maaaaan, the last table we built with our old Mastercraft saw. Comparing that saw to the Milwaukee is night and day. The beast Milwaukee cut through that pine like butter, not burning, sticking or generally seeming like it had to try very hard at all. AND it is accurate. Our old saw liked to waiver. Slowly creeping out of true and making us perpetually need to square it up, and never being happy with the results. We did a test cut with the Milwaukee, checked it with a square, and BAM it was perfect. That makes my life ever so much easier.
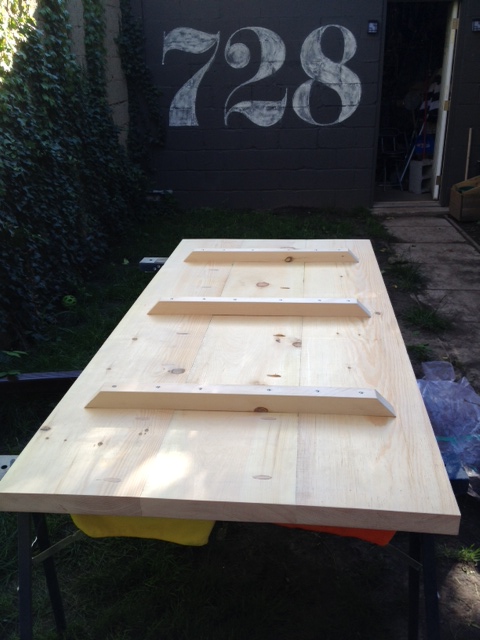
With everything cut to length. We glued up the table top, added some back supports, and filled a few knots with epoxy. Is anyone interested in how to epoxy knot holes? If so, let me know, and I will give a how to. While the epoxy & glue were drying, we cut down the legs, and got started on stain samples for Nelson. A good days progress. We hope to have Nelsons table finished and ready for delivery in a month.
We also got a bit of work done on the powder room, and will have a progress update for you later in the week.
I know you’re probably all “tabled-out” with my table talk last week, but I just wanted to give you all some ideas for creating your own dining table.
As you know, we made a new top for our pipe leg table. It was easy peasy. Three boards, some supports, sanding, staining and protecting and its as easy as pie. (Well maybe not pie. Pie is pretty hard to make.) So now I’ve convinced you to make your own table top, but what if pipe legs aren’t your thing… It’s too hipster for you, or too industrial, or not glam enough. So don’t worry, I got your back. I’m your girl.
This is what you need to do. Make the table top. Then pick your stain color and pick your legs. It’s like a choose your own adventure novel, but with FURNITURE!
I know, your mind is blow! (right? maybe? a little bit blown? a spark?)
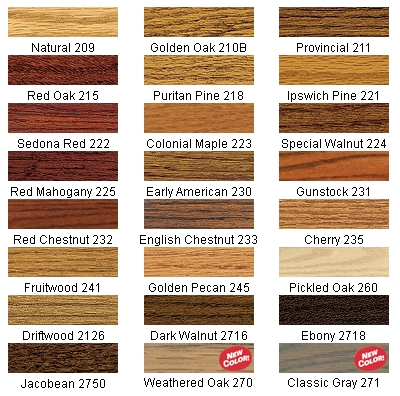
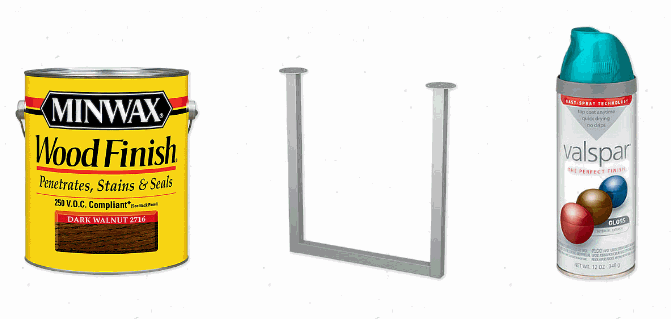
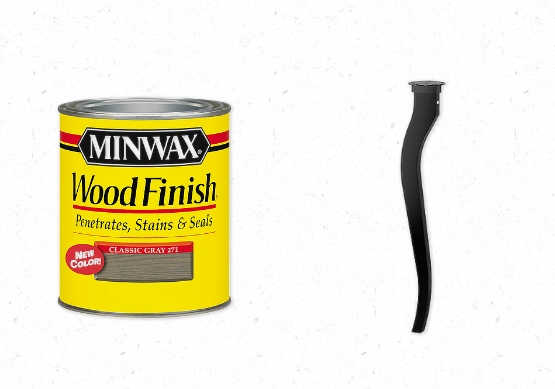
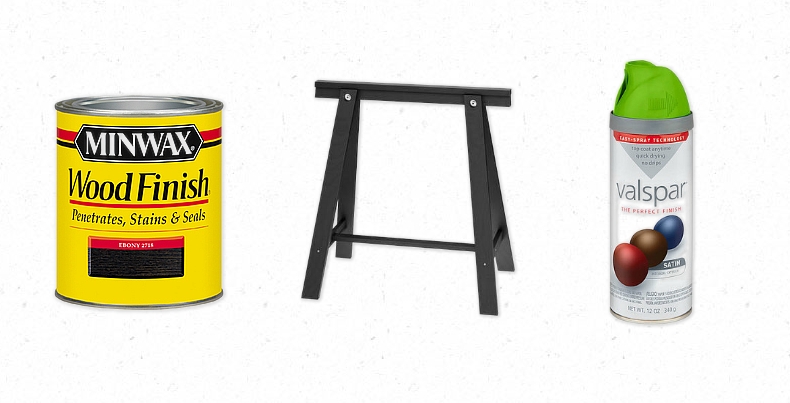
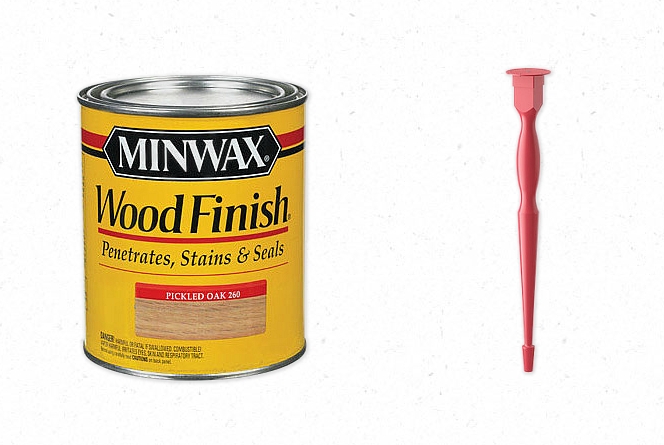
PICK A STAIN:
Minwax Stain Colors
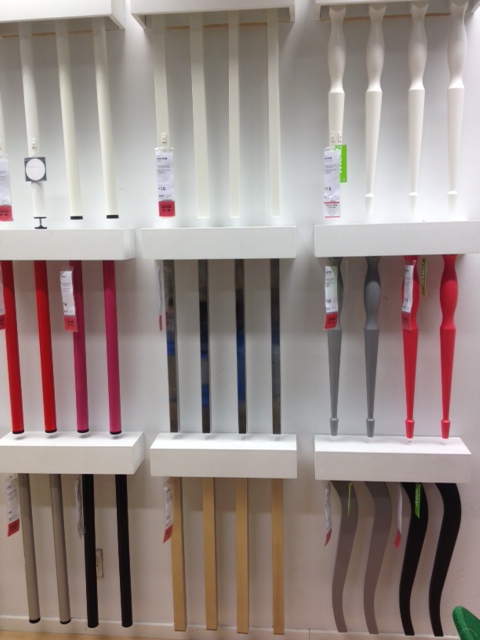
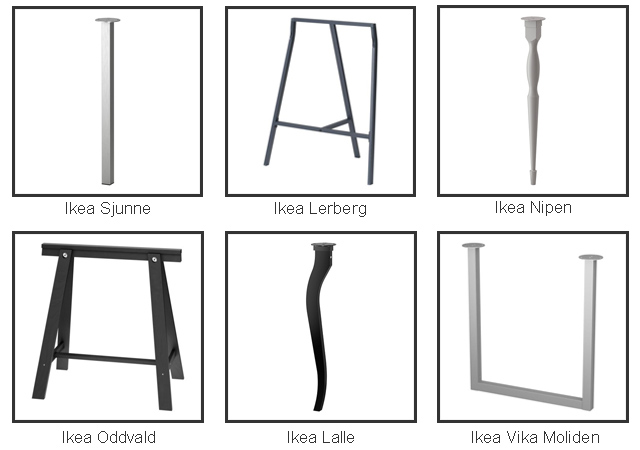
PICK A LEG:
Ikea LegsWall-o-legs at Ikea
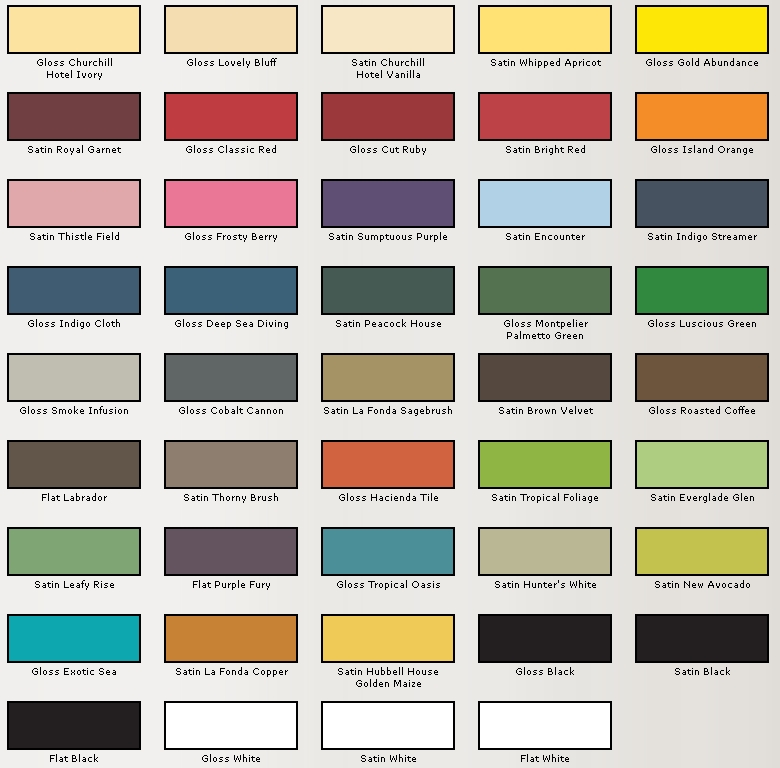
OPTIONAL: Pick a spray paint color to paint the legs:
Ebony top + Oddvald legs spray painted Troical Folliage
Minwax Pickled Oak + Red Nipen legs (which are more pink than red)
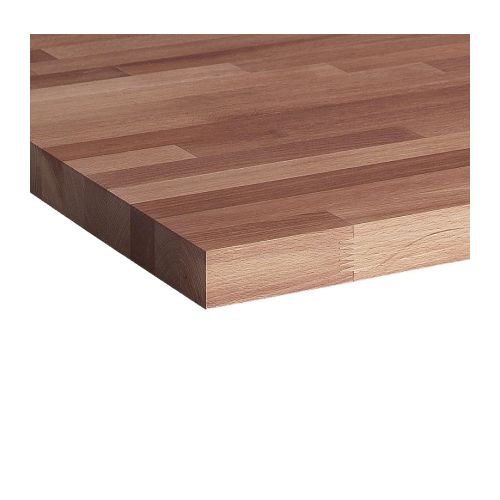
DIY TIP! If your idea of DIY & woodworking is watching HGTV in your PJ’s. Consider using a piece of prefab Ikea butcher block countertop as a table top. It comes in a 6’x3′ size (for $269) that would be perfect for a dining table!
Ikea Numerar Countertop. Perfect as an easy table top!
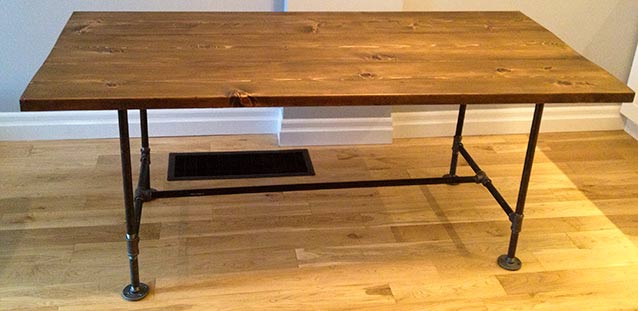
We loved our DIY Pipe & Wood table and bench. However, we started to fall out of love with it after living with it for a few months. In order to get the table done on a budget & quick timeline we used framing grade spruce lumber from the big box store. Over time the wet wood warped, and our table was looking a bit topsy-turvy. Oops. The framing grade spruce also had rounded edges, which made for serious crumb catchers between the joints. Thirdly, we used Tung Oil to finish the table, and after a while, the tung oil started to smell, well, like spoiled oil. Nowhere in all my research did I find anyone saying tung oil would smell like butt after a few months. Lesson learned. (Although as a finish the tung oil was doing otherwise great, not a single water spot or mark on the table, if you can get past the butt smell.)
Pipe & Wood Table
If you know me (and my neuroses) at all, you will know that I couldn’t just leave the table. I can live with dust bunnies rolling around the house becoming dust monsters, and I can live with dirty dishes in the sink, but a wonky smelly table? Not a hope.
So here it is kids:
DIY Pipe & Wood Table Version 2 (6’x 34 1/2″)
Lumber Buy List: (purchased from a local Home Hardware Building Center. Check your neighborhood to see if you have a Home Hardware Building Center or another lumber yard . They will carry a larger amount of lumber than the big box stores, at about the same prices.) If you’re in Toronto, try Downtown Lumber (a Home Hardware) or Central Fairbank Lumber.
3 – Kiln dried pine 2×12’s @ 6′ (square cut edges, not rounded ones)
1 – Kiln dried pine 2×2 @ 8′ (support pieces)
Cut List:
3 – 2×12’s @ 6′ (our lumber yard rough cut them to just over 6′, then we did nicer cuts with our sliding miter saw at home. If you do not have a sliding miter saw, or a circular saw that can cut through that thickness of wood, have your lumber yard cut it for you with their good saw, not their rough cut one.)
3 – 2×2’s @ 26″, cut to a 45 degree miter on either end.
Instructions:
Lay out your table top boards and decide which sides you want up. Make sure to flip the grain so that one board’s grain is up, and the next is down. When you have everything laid out (and square!) mark for Kreg pocket holes every 8″ or so on the bottom of 2 of your tabletop boards. Using the 1 1/2″ thick wood setting, drill your pocket holes. (see how to drill a Kreg pocket hole here.)
Deciding on board layout
Attach your tabletop boards together with wood glue and 2 1/2″ Kreg Pocket Hole screws. Make sure your table is square before attaching the boards together. (You can check it with a square and by measuring corner to corner diagonally. If both sides are the same, your table is square.) Wipe off any excess glue that may have squeezed up between boards with a wet rag before it dries.
Once glued and screwed, attach the support pieces. We put one in the middle, and two right behind where our pipe legs would go. The ends are cut to a 45 so that its looks nicer, and you’ll be less likely to whack your knee off it later. We used some 2 1/2″ screws to attach the supports, making sure we got at least 2 screws into each board. These support pieces will try to keep your table from warping. Remember wood is a living organism, and changes during high & low humidity and heat. So you can never guarantee your wood will stay exactly the same. (That’s why you leave an expansion joint on your hardwood floors, or else they might buckle.)
Attaching the supportsTable Supports
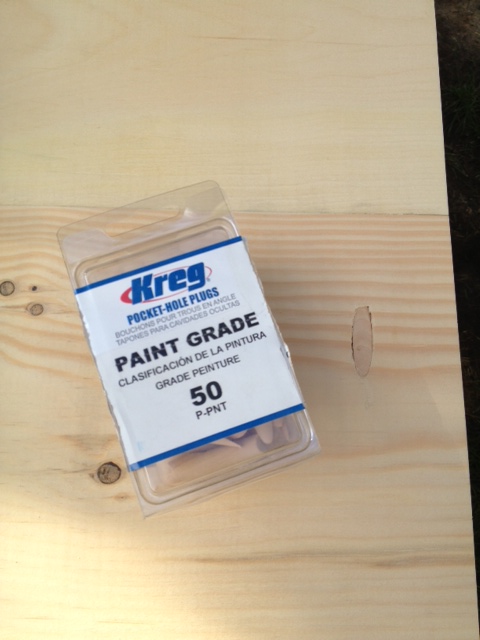
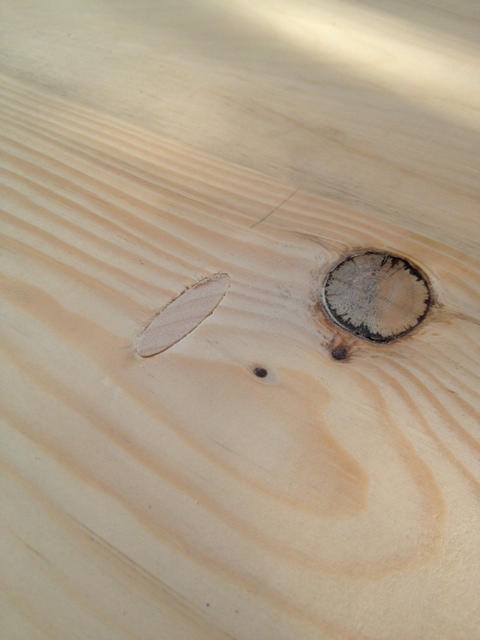
We also filled the pocket holes with Kreg wood plugs. You wouldn’t see the holes, but if you ran your hand along the underside of the table you would feel them. They also might catch on pants or stockings. The Kreg plugs are easy to use. A bit of wood glue and careful placement and they were done. After the glue dried we gave them a sand to ensure everything was nice and smooth.
Kreg Pocket Hole Plugs (we used paint grade as they would not be seen)Here they are in action
Now its time to sand. I like to sand outside in the summer, so out the table went. We sanded away, then I stained the table and royally screwed it up. OOPS. Time to fix my mistake, and try again.
Table top sanded (for the second time) and ready for stain.
After the sanding came two coats of Varathane Chocolate Stain (check out my finishing post to see all my steps in sanding, wood conditioning & staining.)
Here it is after one coat of stain. The second coat of stain (plus subsequent polyurethane) really bring out the depth of the wood, which you will see in the finished product.
I can tend to get a wee bit anal retentive, so when it came to polyurethaning the table, I had to stop myself at 6 coats. Any more would be a bit cray cray. Realistically as long as you have at least three coats, you should be good.
Now to re-attach the legs from the old table. A bit of measuring to make sure its centered, and a few screws and we’ve got legs people.
Legs Legs Legs
Want to see what it looks like all finished?! (ignore my terrible lighting, the dining room is impossible to shoot in.)
We are hosting my family’s Christmas at our house this year. We currently have a 4 person dining table. No way could we all perch around that table no matter how many chairs we pushed against it. We needed to scrap the kids table, and nut up and get a grown up table.
INSPIRATION:
Restoration Hardware’s Flatiron Dining Table
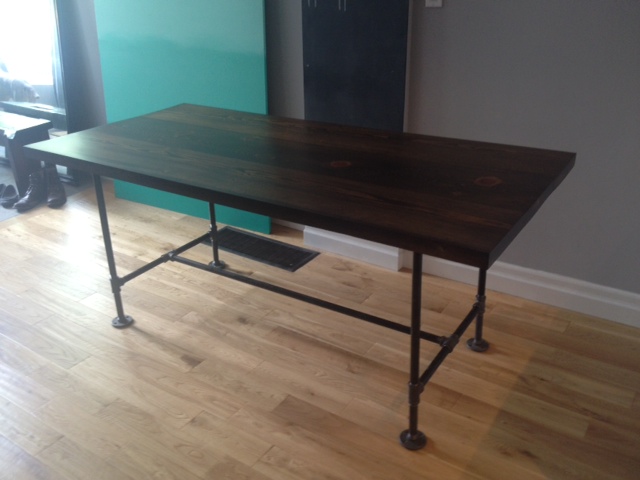
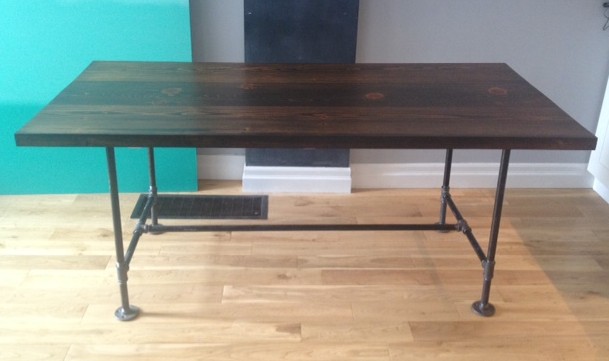
We put pen to paper and designed a simple tabletop with industrial black pipe legs. I had taken inspiration from this Restoration Hardware Flatiron table. Except we went with a basic “H” leg construction with a cross beam near the bottom of the legs.
We had originally wanted a nice thick reclaimed wood top, and had sourced a supplier, however that fell through and everything else we could lay our hands on was “city priced” (you know when you go to an antique store in the city and a simple item is priced 10 times higher that you ‘d find it at a flea market in the country? That’s “City Priced”.) So the cheap ass me wasn’t gonna pay city price for wood, so I nixed that idea and instead we decided to use 2×12″ construction lumber. We don’t have much invested in the tabletop, so if we get our hands on some nice reclaimed wood in the future, it won’t hurt our pocketbooks to swap it out. The legs are hardware store “black pipe” gas line pipe and fittings. These can be sourced at any large hardware store (orange & blue) and as they can cut and thread the pipe for you at the store, its super easy to work with.
We made a 72″ x 34.5″ table that is 30″ high. This is a standard 6 person table, but 8 can easily be squeezed around it.
Shopping List
1 – 3/4″x10′ black pipe $18.99
1 – 3/4″x6′ black pipe $13.80
4 – 3/4″x6″ nipple (heehee) $1.64/each
8 – 3/4″ Floor Flange $3.99/each
6 – 3/4″ Tee $1.64/each
1pkg 3″ felt furniture pads $4
2 – 2x12x12 spruce $17.50/each
Wood finishing materials (to be discussed in pt. 2)
Wood Cut list
3 – 2x12x6′
(Cut 2x12x12’s in half to make 4 – 6′ long pieces, and you can use the left over piece to make a bench.)
Pipe Cut list
The hardware store will cut and thread your pipe for you. There is a (substantial) fee for this. At our home depot it was $1 per cut and $2 per thread. We ended up having about $40 in cutting fees, which was actually more expensive that the pipe itself, but a necessary evil.)
1 – 3/4″ pipe 51″ long
4 – 3/4″ pipe 20″ long
4 – 3/4″ pipe 10″ long
The crazy machine that cuts and threads your pipe!
We got our pipe and wood cut, gathered all the rest of our supplies and like a strange hardware store parade, headed to the checkout. A word to the wise, the pipe is greasy and dirty and yucky. Make sure you put your nice wood on a separate cart, and bring a tarp to protect your car. Also have some dish soap and goo gone ready at home to thoroughly clean and de-sticker your pipe when you get it back. Be prepared to get little metal splinters that will hurt. A lot.
Pipe, and flanges, and wood stain oh my!
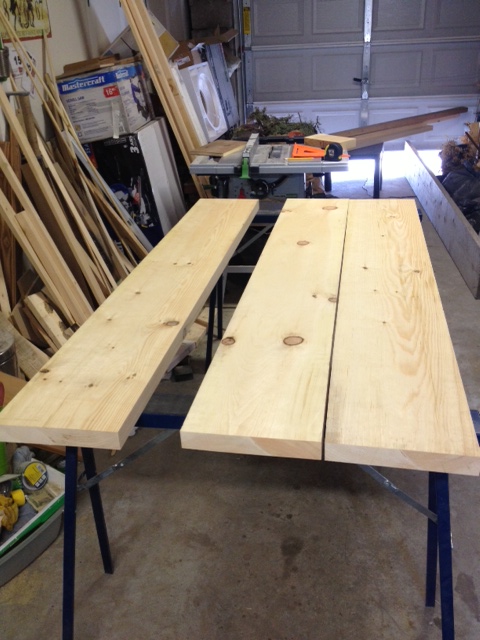
We decided to use the Kreg Jig for attaching our boards together to make the tabletop. This is quick and oh so very easy, and all the screws are under the table where no one other than the dog or a crawling child will ever see them. We laid out our three best boards on saw horses in the garage.
best three boards laid upside down ready to be Kreg jigged together
We decided on placement making sure to alternate the crown of the wood (the crown is the way the grain curves, look at the end of a piece of lumber and you’ll see the grain pattern). Once we were happy with how our board would be arranged, we flipped them over and aligned them, making sure they were square. Our saw guy at the local hardware store didn’t fare so well with making all the boards the same length, so we lined up one end, and let the other end overhang knowing we’d trim it down later. Then we marked our kreg jig screw placements.
We put two screws in 8″ from the edge of the boards, and about every foot for the rest of the table. We alternated which side the screws came from so that we would get a more stable and solid tabletop.
The Kreg Jig is super easy to use. We set the jig and drill bit to 1.5″ thick wood, clamped out the jig (with protection on the “good side” so the clamp wouldn’t mar the table top) and drilled. Easy-peasy lemon-squeezey.
Kreg Jig Clamped
After all the holes were drilled, we re-aligned everything, and got to screwin!
Screwing together boards using Kreg pocket hole system
After the tabletop was screwed together we trimmed off the scraggily cut edges using a circular saw. Then we gave the table a good sand with the palm sander. We wanted to leave a few of the rough wood’s imperfections, but ensure everything was nice and smooth.
After it had been sanded, we took it inside and got working on the legs. We thoroughly cleaned the pipes using a combination of citrus grease cutting cleaner, dish soap and goo gone. There was a lot of errant stickers and tape on the pipes along with the grease, so all these tools were needed. Be careful for any sharp metal or burrs, definitely wear protective gloves and eye protection.
To start out, attach each the 6″ pieces of pipe to flange. Next up attach a T to each of the 6″ pipes.
Flange + 6″ Nipple + T
Screw a 10″ pipe into the side of each T. Attach another T to 2 of the 10″ pipes. Attach two legs together by the middle T, then do the same to the other set.
Attach two feet together by 10″ pipes and a T
Now attach the 20″ pipe to the top of the T’s and another flange while the dog enjoys a peanut butter filled bone.
Forgot to take a good pic of this step! Oops, but you get the point.
Make sure all your legs are exactly the same height. You may need to tighten or loosen a few joints to get everything equal.
Here’s the tricky part. Grab a friend and attach the long 51″ piece to the two open T’s. One of you will have to spin a set of legs around to get this done. You will look like an absolute fool doing this, but its the only way to get it done. Once everything is screwed together, you’re ready to attach your legs to the table.
Legs AssembledLegs + Tabletop
Flip your tabletop over, and set the legs on top. Make sure everything is square, straight and level, and screw in your flanges using 1″ screws.
Apply your felt furniture pads to the bottom of the feet flanges, and flip your table back over. Now you’re ready for finishing! (we will be finishing the table inside due to the cold cold cold temperatures of our unheated garage.)
So here it with its legs attached and waiting for its finish work. Whatcha think?
Ta Da! Tabletable table table
One great thing we quickly found about this table is that if you have an uneven floor like we do you can unscrew certain parts to even the table out so it won’t wobble!
Promise, we’ll be back soon with how we finished the table, and a cost breakdown.
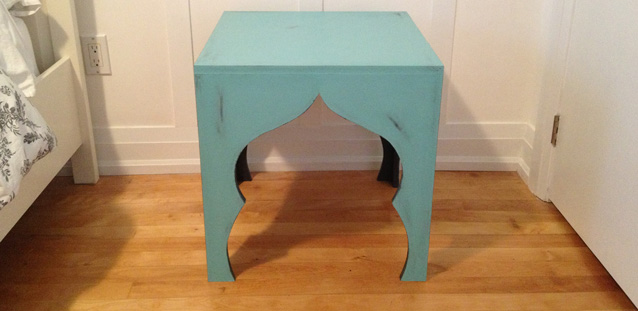
I have been scoping around Craigslist and local antique stores for the last couple weeks trying to find some tables to turn into bedside tables for the guest room. We were using two (well worn) Ikea $10 Lack tables that we’ve had since the dawn of time, but they really needed to go. I searched and searched, but couldn’t find anything I loved. I didn’t have the budget to spend a couple hundred on new bedside tables, so I decided to make some. I headed over to The Design Confidential to look at some of their furniture plans. (They have some amazing DIY furniture plans!). I took a look through their end table/bedside table collections and spotted this plan. I instantly saw it and thought I could do a more Moroccan version of it.
The plan calls for the tables to be 18″ high, but that was a bit short for my application. I wanted to make them as tall as possible using one 4×8 sheet of lumber to make two square tables. So I did some math and figured out that I could (just) get ten 19″ squares out of one sheet, so I headed to my local Home Depot and got a 5/8 sheet of MDF cut down to 19″ squares.
After getting my wood home I drew out a pattern for the table legs on a piece of scrap paper. I only did one side of the pattern (as its easier to just do one side, trace it onto your wood, and then flip it and trace the other side.)
Making the table patternTracing the pattern onto the wood
After I traced my pattern, I cut it out of the MDF using my jig saw, sanded any rough bits, and then used that one as a pattern for the rest of my pieces. (for two tables you need a total of 8 leg/side pieces, whatever you do, don’t cut all 10 of your pieces into the leg pattern, you need tabletops too! duh!)
One table leg cut
Now follow the rest of the Design Confidential’s instructions here. Essentially you have to cut down the width of two of your table legs so that they overlap nicely. Then you stand it all up, and nail it all together. I found that using some masking tape to hold the legs together temporarily helped a lot. I just dont have enough hands to hold everything and nail it all!
Attaching table legsThe Table Assembled
After you’ve assembled everything, if you’re using MDF as your wood, I HIGHLY advise going and getting yourself some spackle. Sand all your edges so everything is nice and pretty, and then take that spackle and rub in into the mdf edges. HUH? MDF edges are rough and not as nice as the flat parts, so if you want everything to look perfect, you need to spackle those edges. Once they’re dry, sand them to a nice smooth finish, then get ready to paint. (yes I know it looks like utter crap before you’ve sanded, but just trust me.)
The rough edges of mdf covered in a thin layer of spackle
I painted the tables (inside and out) with a coat of dark grey Behr Premium Plus Ultra Paint + Primer I had laying around. Now if I hadn’t been using paint+primer, I would have put a coat of stand alone primer on first.
Tables painted a base coat of charcoal gray
After my paint dried, I mixed up a batch of DIY Chalk Paint (come back tomorrow for my DIY on this). I painted 2 coats of chalk paint in robins egg blue on the front and top of the tables. I left the inside of the legs the base colour so you got a bit more contrast with the blue.
Tables painted with two coats of chalk paint (leaving the insides of the legs the base color)
Then I sanded and slightly distressed using sandpaper and a damp cloth (to see more on my distressing chalk paint using a wet cloth check out this post). After I was happy with the distressing and smoothness of the finish, I gave it a coat of furniture wax and polished it.
Materials:
1 – 4×8 sheet of 5/8″ MDF – Home Depot (cut into 19″ squares by HD’s cutting staff)
DAP Spackle: Home Hardware
Behr Premium Plus Ultra paint in Cracked Pepper – Home Depot
Chalk Paint – DIY


")
")
")
")
")
")
")
")
")
")
")