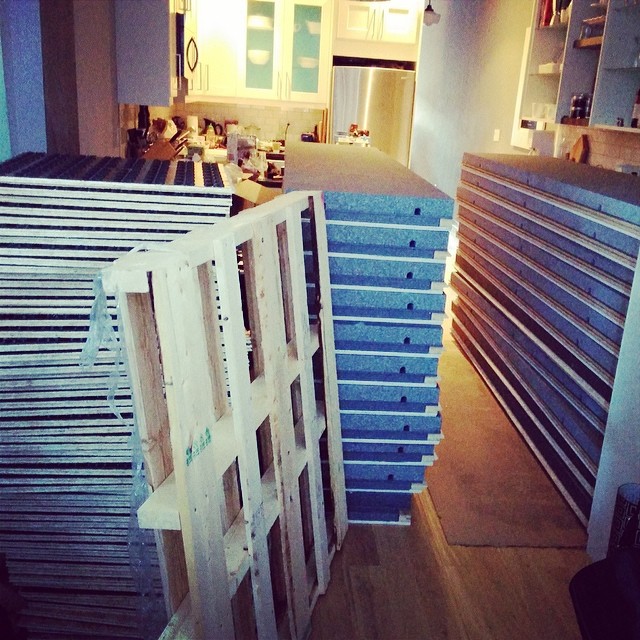
You may have been wondering what the big panels stacked up in our dining room were. Well those my friends have turned into a very big wall in our basement.
Tag: laundry
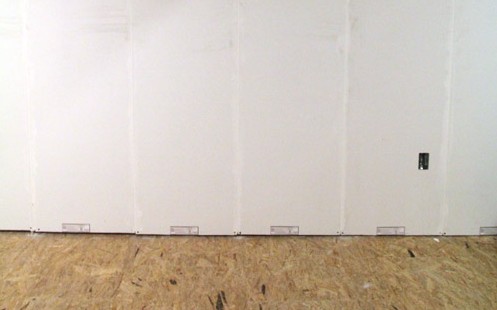
DRIcore Subfloor Installation
We have a basement subfloor!
Before I get to the install, I wanna take you back to what the basement looked like before:
Basement Progress Report
I was really hoping to have a completed DRIcore subfloor to show you guys today, but alas we ran out of leveling shims and left off about 80% done. We are pretty proud of how much we got done though! We got our DRIcore delivery on Friday and El Granto unloaded all the subfloor & SMARTWALL panels into our dining room. Thank goodness for big tough husband muscles. I would have broken down and cried just looking at all that stuff to unload!
We did knock a few other things off the list since we last spoke (pretend we’re old friends having a lovely chat over tea and scones).
I tried some more wiring scenarios with the basement hall light, and have still come up short. I can only manage to get either the staircase OR the rest of the basement lights to work, not both. Womp womp.
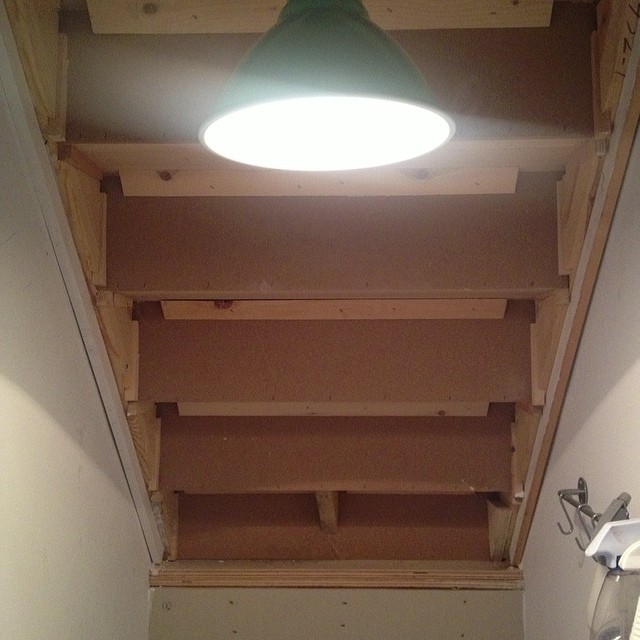
Not to be deterred, I switched gears and set up some DIY scaffolding, which consisted of a leaning ladder and a 2×12.

El Granto didn’t approve, but it actually felt quite sturdy to me! With the “scaffolding” in place I was able to reach most of the basement staircase ceiling (which happens to be the underside of the 2nd floor staircase). Now that we had access I could apply strapping to the staircase ceiling and prep for a new ceiling cladding.
After the strapping was up I could cut my V groove boards that I primed last week. A few cuts and out came the compressor and brad nailer. Most of the time my brad nailer and compressor do the job just fine, but when you’re standing 8 feet over the staircase putting up boards over your head and wrestling with the air cord, I really wish I’d splurged on a cordless brad nailer. This was especially so when my nailer kept misfiring and leaving nail-less holes in my board. Note to Santa, please bring Kristen a cordless brad nailer for Christmas, it will cut down on her volume of profanities exponentially. xox
Up went the first 8 boards and I was incredibly exited to see the transformation. The rest of the boards will have to hold off until I can fix the (insert string of expletives here) new staircase light. Then they need to be caulked, holes filled and painted.

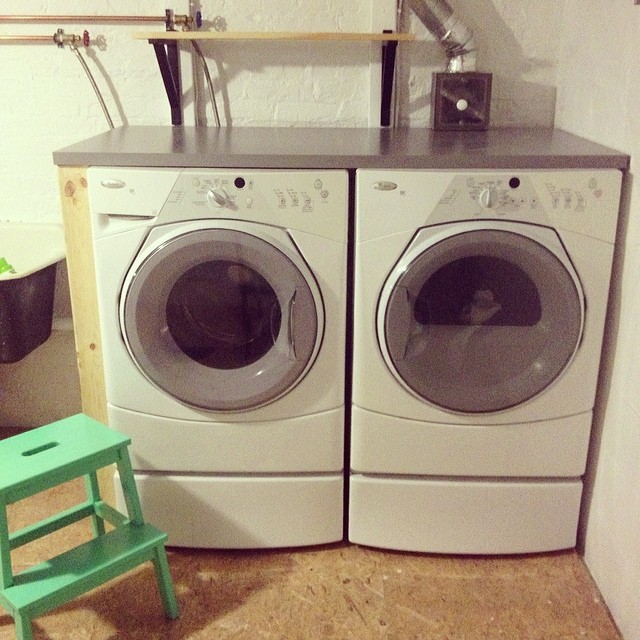
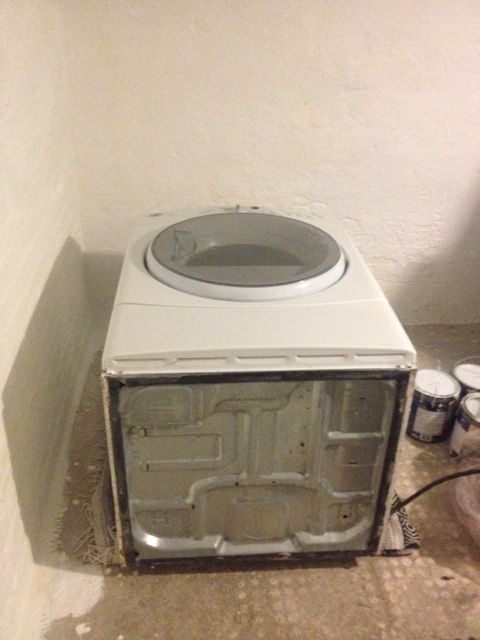
Next up was tackling another one of my problem areas from last weekend: the new washer & dryer countertop. It was too tall to fit under the wall mounted lint trap. So out came the washer & dryer (again!) and we lowered the leveling feet, re-leveled them and re-taped the dryer vent and voila! The counter now fits. To get the counter to slide all the way back to the wall we broke out the jig saw and cut a notch for the dryer vent. The counter slid in perfectly, and we will now have no lost socks behind the dryer! Can I get a woot woot?
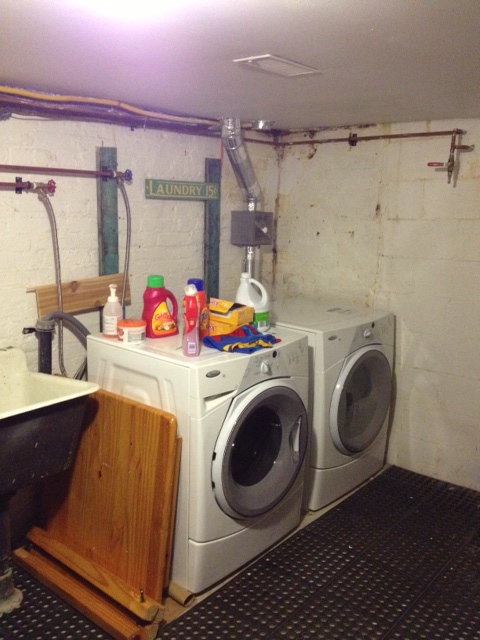
Next up on the task list was installing a little shelf over the washer & dryer to hold laundry detergent etc. Two Ikea black shelf bracket and a scrap piece of pine later as we had ourselves a shelf.
This week we would like to tackle painting the basement stairs, and this weekend finish off the DRIcore subfloor and start tackling the walls!
What project were you working on this weekend? How did it go?
Brass is Back
We have the most spectacular original farmhouse cast iron laundry sink in our basement. It’s one of the only original items left and as soon as we saw it we fell in love. I’m not gonna say it’s the only reason we bought the house, but damn… it helped sway us.
With the sink came an old brass faucet. It’s nowhere close to original, and it has seen better days. This sink and faucet went through two gut renos, countless paintbrush washings, and who knows what else. The faucet was tarnished and covered in dirt, grime and a myriad of old paint.

I was temped to replace it, hell even spray paint it, and put my thoughts out to the world on Instagram. Then Carrie and Lindsay stepped in and convinced me to give the poor brass faucet some TLC and see if I could save him.
Out came the scotch pad, a whole lot of elbow grease and some Brasso, and these are the results.
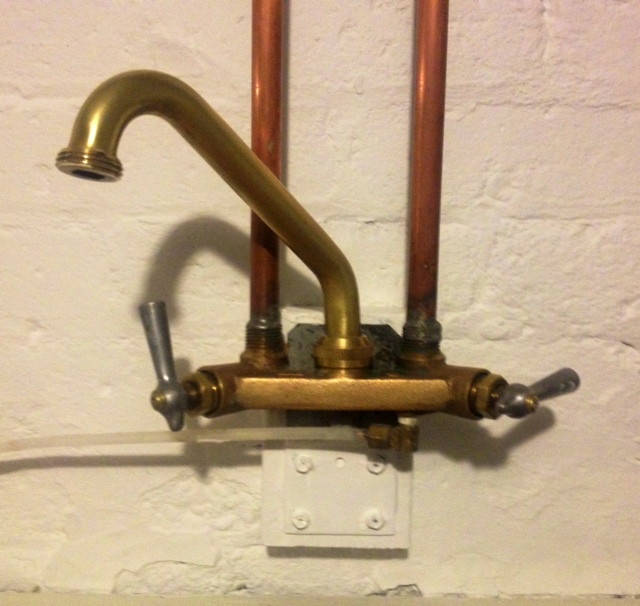
What do you think? Is brass back?
I still haven’t fixed the rotated handle, simply because I can’t find the shutoff valve for the sink! Really! I have six million shutoffs everywhere in the basement, including 4 right beside the faucet, but none of those shuts off my sink. Until I find the magic valve, poor little faucet will have a broken wing.
Next up, I’ve got to tackle the sink. Anyone have any magic products for cleaning cast iron sinks? I’ve got to clean the raw cast iron base and the enameled bowls. I see more elbow grease in my future.
——————————————————————————————————-
Dirty Laundry
About a week and a half ago we unhooked our washer and dryer and moved them to the middle of the room so we could waterproof paint behind them. We also wanted to attach the laundry pedestals we have had in the boxes for (cough cough) two years.
We accomplished that last week, but we couldn’t put the laundry pair back until we installed the DRIcore subfloor below it. However, our DRIcore delivery isn’t scheduled until later this week. Aaaand the dirty laundry was starting to pile up.
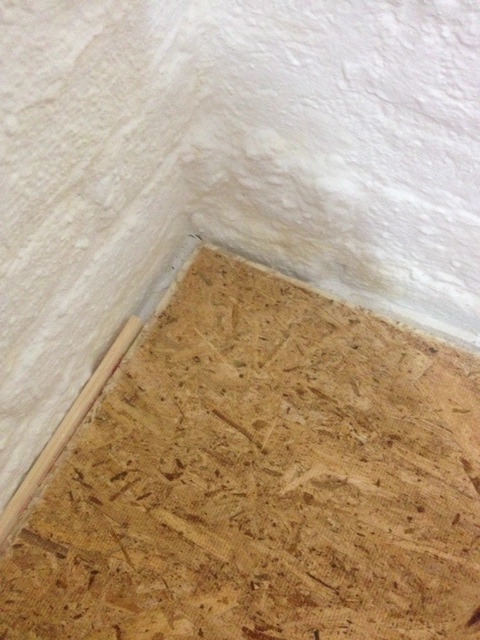
With the subfloor project at least a week away we decided we needed to remedy the laundry situation. We picked up 6 DRIcore subfloor panels and some foil tape, and set to reinstalling the laundry.
We measured our room and planned our DRIcore subfloor layout (more on this in another post), and installed 6 pieces under the laundry pair.
This isn’t ideal (we should really lay the whole floor at once) but this gal wanted some clean clothes to wear to the office that weren’t track paints and paint covered high school basketball T-shirts.
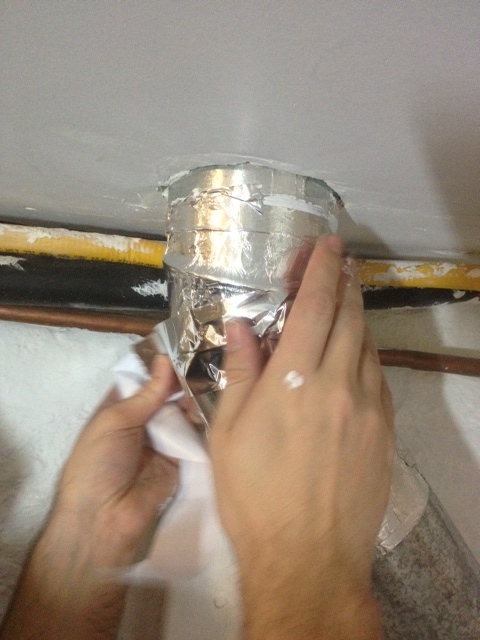
After the DRIcore was laid, we measured for our hard duct line for the dryer. As we had added laundry pedestals and the DRIcore subfloor, the vent line needed to be over a foot shorter. So out came the Dremel and a metal cutting wheel and El Granto cut down the dryer vent line.
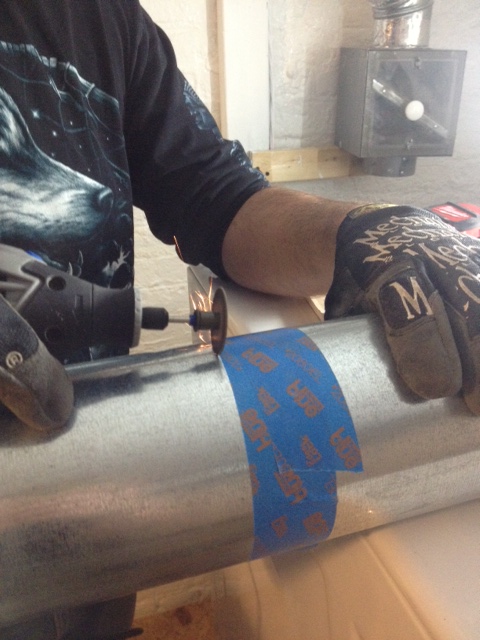
We reinstalled and taped the seams with new foil tape. (or should I say I cut El Granto some pieces of tape, and he reinstalled).
Now we could level the dryer using the adjustable feet in the laundry pedestals. A few turns of the wrench and everything was nice and level. Next we replaced the washer, hooked it up and leveled it as well. We then matched the heights of the washer an dryer and placed them side by side.
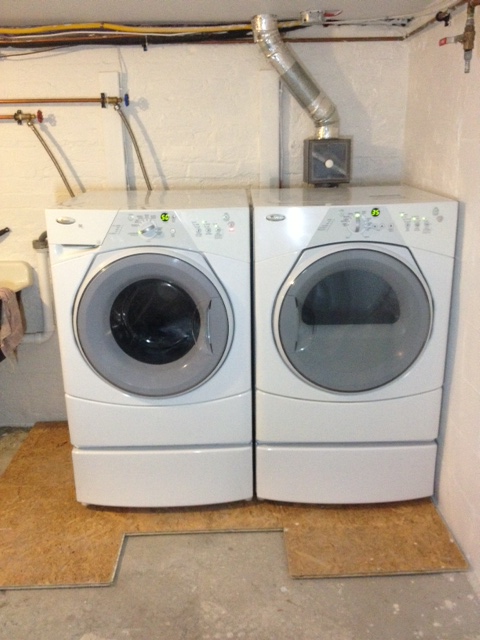
I am kicking myself for not installing the laundry pedestals sooner. It is so much nicer not to bend over to switch the laundry!
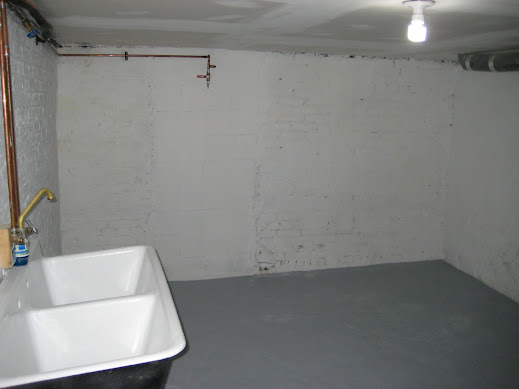
The room is also starting to come together. With the washer & dryer back in place, you can really start to see the contrast of what it used to look like.
Remember this?
I cant wait to get the rest of the DRIcore subfloor in and get started on the walls!
Mid Basement Project Progress
It’s about that time in the basement project where progress slows down, and it starts to lose its luster. This past weekend was a slog. It took all I had to muster up the courage for another two days worth of painting.
I adorned my battle gear (old boots, track pants and my work shirt) and grabbed my boom box & El Granto and headed into war.
The War against the spiders.
I’m a big, tough grown ass woman, but an eight legged arachnid will send me into a tizzy of screaming like a little girl and running away with my arms above my head.
The basement you see is home to an a colony of daddy long legs reminiscent of Aragog & his family from Harry Potter. They’re huge, mean and out to kill me. It’s true. They almost accomplished this feat by jumping out at me when I was painting the basement brick walls. They would crawl out from behind ductwork, or from behind the washer & dryer or (shudder) crawl out if the overflow drain on the sink. I even had one jump (I swear!) into my hair. Insert shrieking girl, hand waving freak out here.
All told I painted FOUR spiders into the wall, as my only weapon when they attacked me was my paintbrush. I stabbed countless others with the broom, a wire brush and a paint stirrer.
I love animals, but spiders you just don’t make the cut. They are horrible, horrible little creatures. They are almost as bad as those million legged house centipedes.
What else did we accomplish this weekend other than barely making a dent on the storefront spider population?
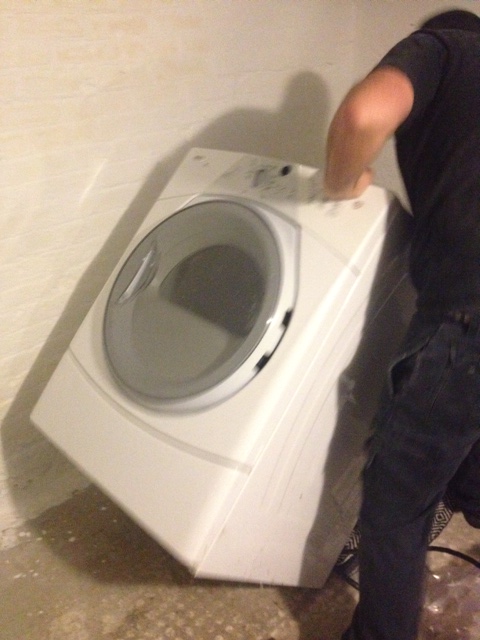
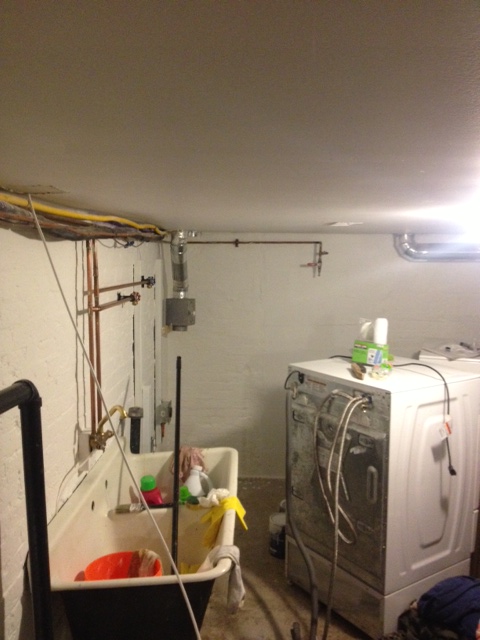
Painting. So much painting. When we left off last weekend we had painted the first coat of Behr Basement & Masonry Waterproofing paint on 3/4 of the laundry room brick walls. The reason only 3/4 of the walls got painted was the fact that we had to move the washer & dryer. We have a bunch of work to do with the washer & dryer, so once we removed them they would be gone for about a week. We left this until the last moment possible so that we could have clean underwear and socks. Those are vital luxuries I’m not willing to go without. So we washed every article of clothing and linens we owned, and removed the washer & dryer.
We have had two brand new Whirlpool laundry pedestals sitting in the boxes for (cough cough) two years. It was time to remedy that. So while I wire brushed and cleaned the walls, El Granto laid the washer & dryer on their backs and installed the pedestals.

With the washer & dryer in the middle of the room, I set to painting behind them. Like the rest of the walls I painstakingly brushed the first coat of paint ensuring I covered all the nooks and crannies.
We left it to dry overnight and yesterday I came back and rolled on a second coat throughout the laundry room. I used a long nap roller loaded with lots of paint and gave it a heavy coat, back brushing to ensure the paint covered well.
5 gallons of paint and 15 hours of work later, the basement waterproofing paint is done.
While I would love to show you a fantastic finished product, sadly that is not the case. The washer & dryer are still in the middle of the room, there is still dirt everywhere, the sink is full of (crap) and the floor is littered with paint cans and displaced tools.
Being mid project is like being in the eye of the storm.
Next up we need to get our Dricore subfloor down & leveled, re-do the dryer ducting & hook back up the washer & dryer. Install drywall (on some) of the walls, and then flooring, lighting, more paint, hiding the wires & plumbing, storage, curtains, pretty things and so much more.
Excuse me while I go wash the spider guts out of my hair.
Laundry Room Makeover?

Hey guys! We visited the Interior Design Show yesterday (which was awesome.) It really inspired us to get started on some new projects. I am still compiling all my pics and will have an inspiration post up for you in the next couple of days.
Speaking of new projects, on January 21st, 2013 I wrote this post (I have copied verbatim it below):
The entrance to the Storefront is level with the street. What that means for our basement is that it is completely underground and has no windows. At all. Most basements at least have some tiny windows. Not our house. Our basement is dark, damp, and the ceilings are about 6 1/2 feet tall.
So…a dungeon.
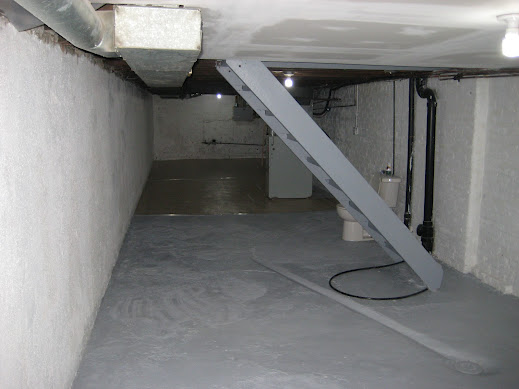
- Basement before we moved in, before the reno, before the water damage, and when there was still a strange toilet hanging out in the middle of nowhere… Now this part of the basement is storage for a lot of misc. stuff.
- Basement before the laundry was moved downstairs. Now the washer & dryer live beside the sink

- The “Laundry Room” as it is now. Note the water damage on the back wall
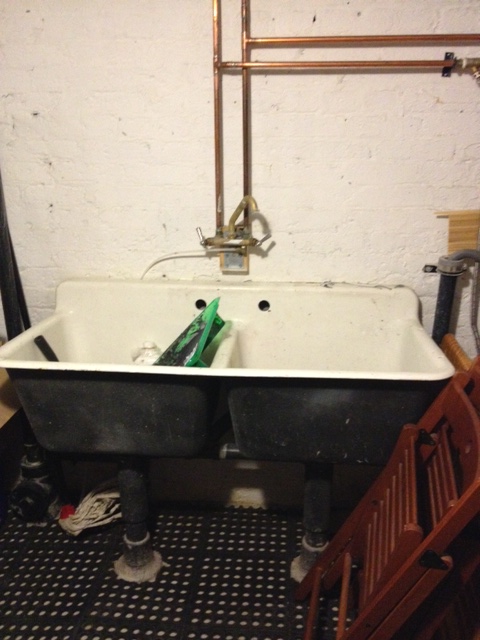
- The laundry sink. It needs some TLC
Its kinda depressing, right?
Couldn’t we just dig out the basement and make it nicer/finished? We could, but that would be expensive and hard. We could never have any windows, and a room without windows is just a bit sad. It would make a good dungeon, but a family room or guestroom? Not a chance.
So…what will become of our basement? Realistically, it can be some storage, a laundry room, a maybe a workshop. You wouldn’t want to spend HOURS working down there, but its warmer than the garage in the winter, and a good place to keep craft/DIY supplies. 1/3 of our basement is already drywalled on the ceiling in the laundryroom area. We’re thinking of adding the workshop to that room, and then using the rest of the basement as storage/utilities.
What do we need to do to get it in shape?
- Eradicate the spider population (shudder)
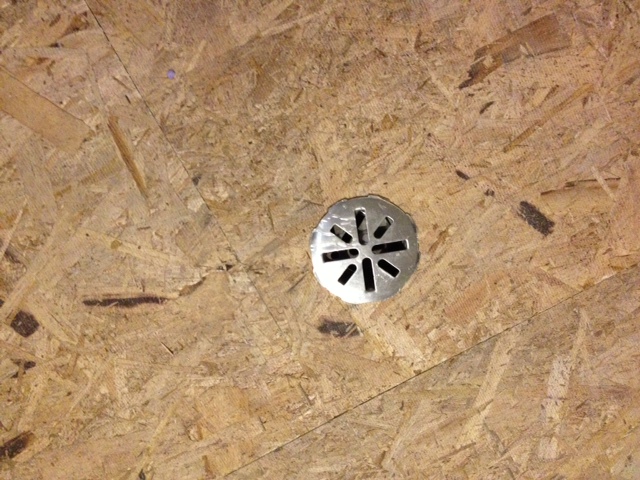
- Install a Dricore subfloor to allow any moisture that does get in, to get to the floor drain.
- Some sort of (cheap & cheerful) flooring over the Dricore
- Figure out what to do with the brick dust that the foundation bricks shed regularly and give the bricks some sort of finish (they have been previously painted but are flaking and yellowing from the water damage from a flood last year). I am thinking a breathable basement/masonry paint.
- Install the awesome laundry bases we have had sitting in boxes for the last year.
- Scrub our original cast iron utility sink, and refinish the outside of it. It’s beautiful, but has seen better days after the reno and copious amounts of paint brushes being washed in it weekly.
- Figure out something to cover/disguise the plumbing/electrical/dryer venting on the laundry wall. Thinking building a floating wall out of wooden slats
- Curtain or wall of some sort separating the laundry & workshop from the rest of the basement
- Adding some lighting to our dark staircase
- Prettying up the staircase ceiling (Paint or more wooden slats?)
- Adding a storage rail & hooks to the staircase wall to act as a mini utility closet
- Moving the rubber flooring that is currently in the laundry room to the storage area of the basement
- Fill some areas of the floor that are crumbling
- Organizing/purging the misc crap that has been growing in the basement
- Buying A full size ironing board (we only have a mini one, how do we survive?!)
- Building a drying rack (preferably one that folds away)
- Adding a counter of some sort to stop socks from plummeting to their death behind the dryer. Also a good spot to stack folded clothes etc.
- Shelving or cabinets above the washer & dryer for storage of laundry detergent and cleaning supplies
- Purchase a dehumidifier to try to control the moisture levels better (especially in the summer)
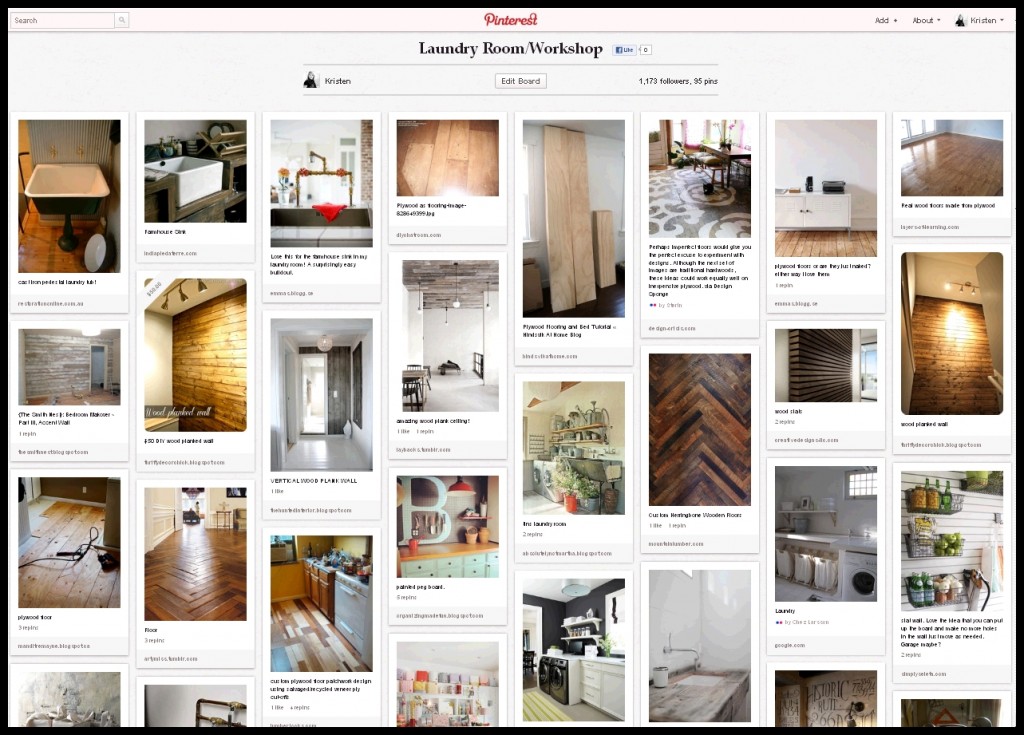
Here is some of my Basement Inspiration:
Laundry Room/ Workshop Pinterest Board
This isn’t a project that we’ll be focusing on, but we hope we can chip away at it and end up with a usable space (that’s a bit prettier and less scary.)
———————————————————————————————————————————————–
So that post was almost exactly a year ago, and guess what we’ve done to remedy the situation?
NOTHING.
Not. One. Thing.
Everything in that post holds true. We have not improved the floor, the light, or the storage, and the spider population is increasing exponentially.
Where does that leave us? Well its late January in a very cold Toronto. My garage is freezing, and I’m getting antsy to DIY. I miss the smell of sawdust in my nose, or paint in my hair. I need to be wearing ripped paint stained jeans, a giant hoodie, and some earplugs.
So I decided it was time to take on the great big project of our basement laundry room/crafting workshop.
Am I crazy? Absolutely! Is it nice and toasty warm in the basement? YES! So its decided, I am turning the sad, sad space into a pretty, useful space that I wont dread using.
NOW. Where do I start? Anyone? Anyone… Bueller… Bueller?