It started.
The project snowball effect is rolling into our backyard.
What started as some flaking paint, and a patch of grassless yard has now turned into a full on backyard makeover.
Our life in an edwardian storefront
It started.
The project snowball effect is rolling into our backyard.
What started as some flaking paint, and a patch of grassless yard has now turned into a full on backyard makeover.
Last week, I let you in on our secret of how bad the exterior paint really was.
It looked fine from afar:
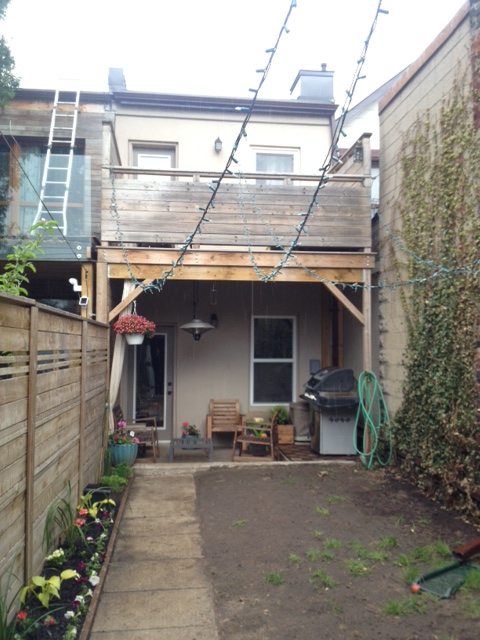
This winter was harsh, not only was it hard on us humans, but it also took a pretty big toll on the Storefront. You saw a sneak peek of my dirty little secret yesterday, but today I have even more shame to share.
This is our backyard:
Continue reading “Backyard Shame – The Grassless, Peeling Paint Edition”
I’m currently balancing two projects. Finishing the basement when the weather is terrible, and working outside on the daybed when the sun is shining. Oh and shopping when it’s just too miserable to do either.
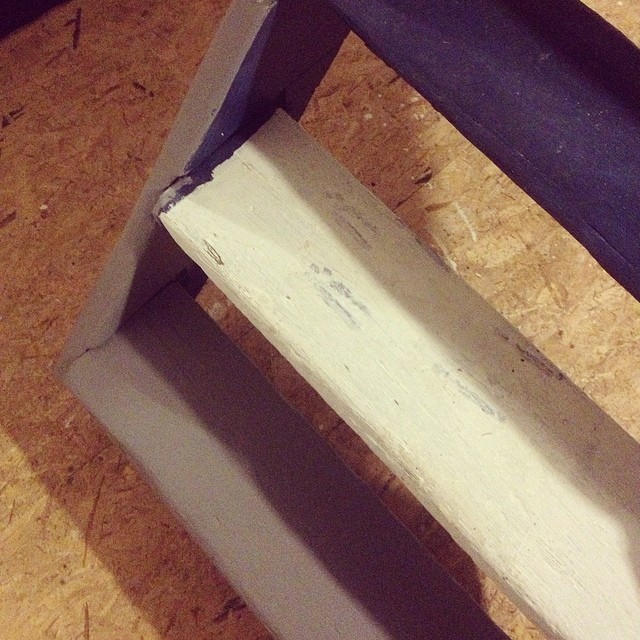
I made a stab at painting the stairs to the basement a few weeks ago.
The staircase is slightly sketchy looking, held together by magic, physics and luck. The stairs were made with what appears to be the left over rough sawn douglas fir floor joists. They were old, dirty, full of charcter and needed a little tlc.
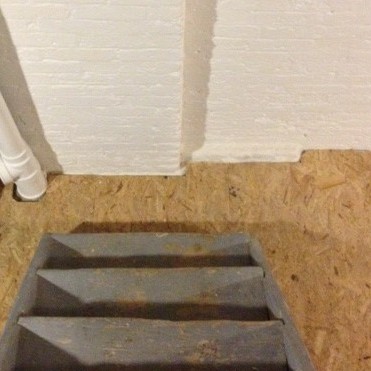
They would never be pristine, but hey, they could be a bit better. I scrubbed them down, gave them a sand, pulled out the errant nails on the stair treads (who puts nails on stair treads?!), and gave the whole staircase 2 coats of BIN primer.
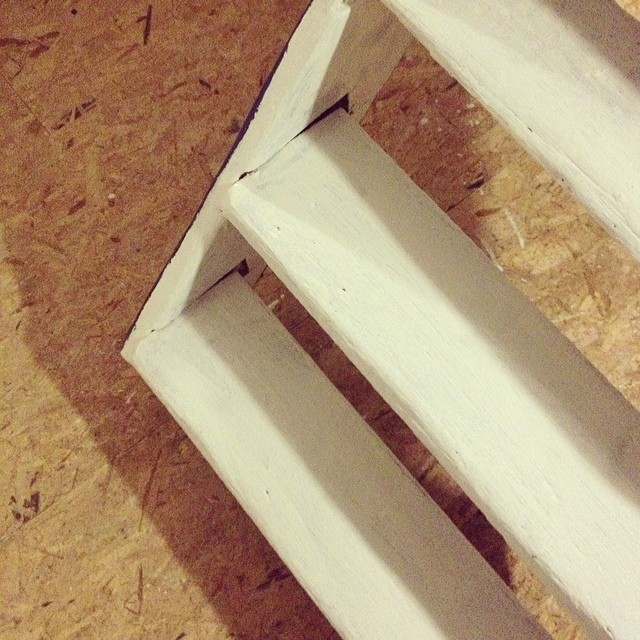
As I put the primer on the last step I realized I had painted myself DOWN the stairs, and had effectively trapped myself in the basement until the primer dried. Have I mentioned lately how awesome I am?
After I watched the paint dry (about as fun as it sounds), it was paint time. I picked up the color chart for Behr flooring paint, and said to myself: “Self, I know you want to pick grey, but maybe you should step outside of your comfort zone and pick something a little different”.
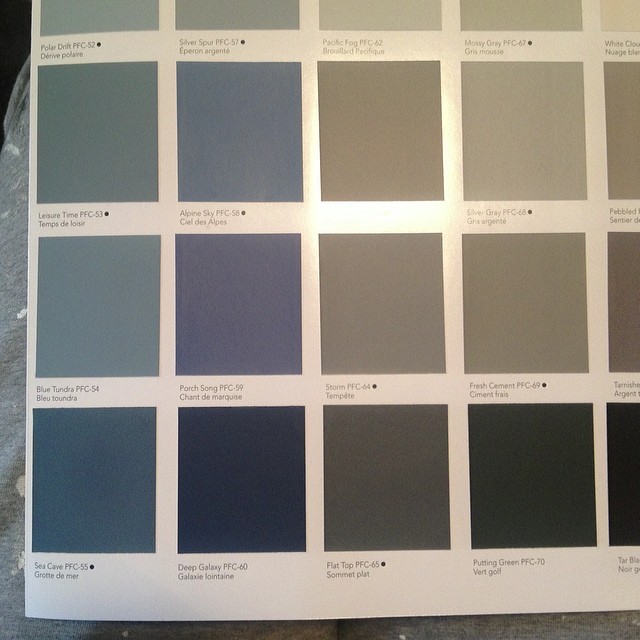
I jumped out of that comfort zone and went with the nice rich navy blue of Deep Galaxy.
With paint in hand, I started to paint the stairs, this time painting every other step so that I could escape and not have to live in the basement indefinitely.
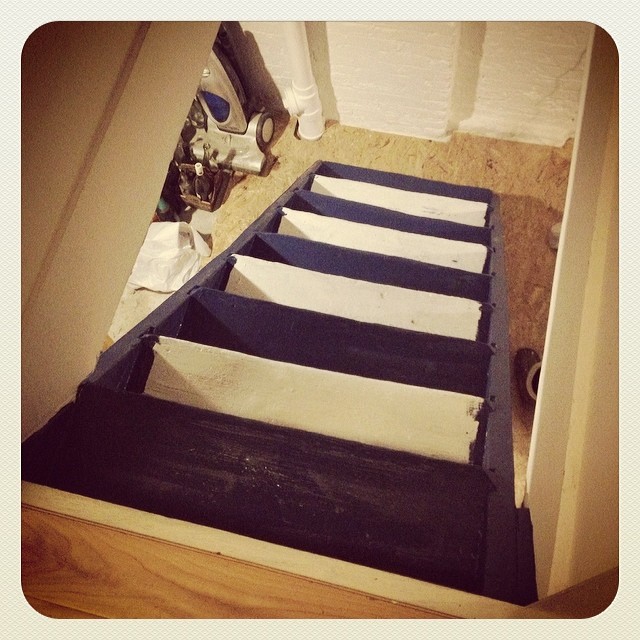
What do you think of my color choice?
Cause I HATE it.
I looked at it for weeks contemplating finishing the blue paint job and seeing if it magically grew on me.
Weeks later…It still sucks. It’s too dark, it makes the steps hard to see, and the color matches nothing in the rest of my plan for the basement.
I bit the bullet, headed back to Home Depot, and picked a new color.
Any guesses?
Yep…grey.
My old friend. My standby. My tried and true companion. My Amy Pond*.
Now. Anyone want to come over and paint my stairs? Cause painting stairs kinda sucks.
* That’s a Dr. Who reference for any non-nerdy (aka non-awesome) people out there.
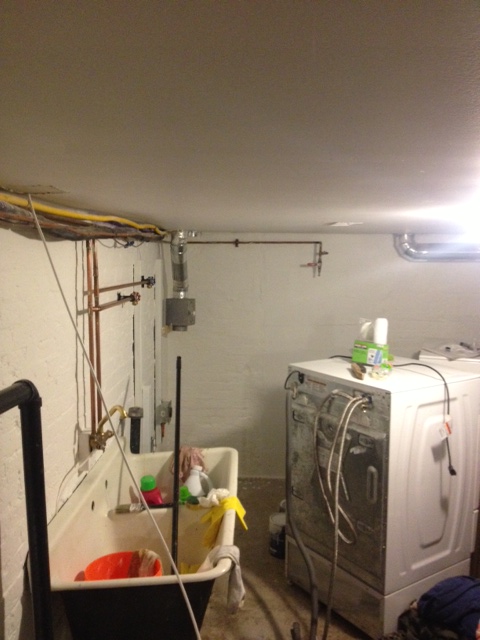
This is the view when you walk down the stairs into my basement.
It’s about that time in the basement project where progress slows down, and it starts to lose its luster. This past weekend was a slog. It took all I had to muster up the courage for another two days worth of painting.
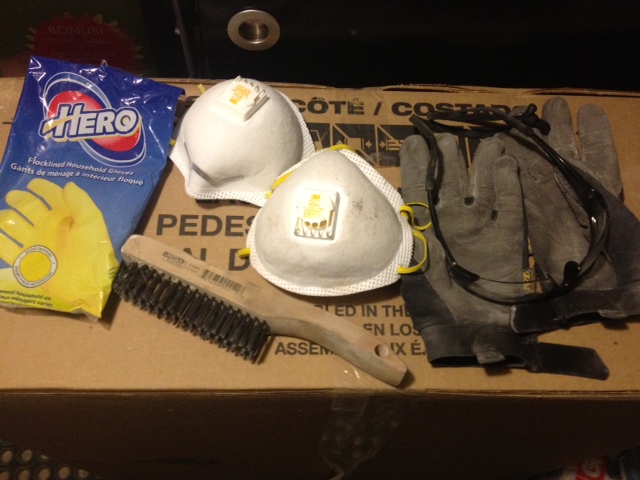
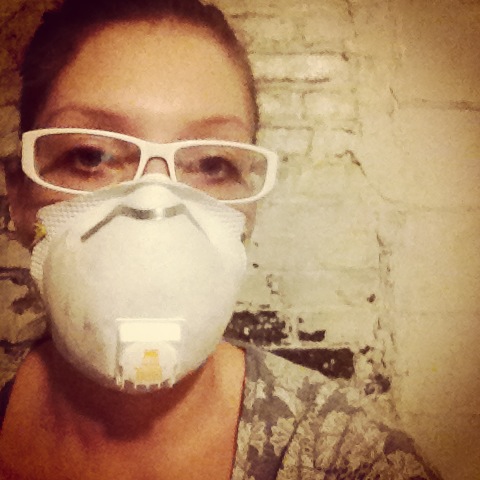
I adorned my battle gear (old boots, track pants and my work shirt) and grabbed my boom box & El Granto and headed into war.
I’m a big, tough grown ass woman, but an eight legged arachnid will send me into a tizzy of screaming like a little girl and running away with my arms above my head.
The basement you see is home to an a colony of daddy long legs reminiscent of Aragog & his family from Harry Potter. They’re huge, mean and out to kill me. It’s true. They almost accomplished this feat by jumping out at me when I was painting the basement brick walls. They would crawl out from behind ductwork, or from behind the washer & dryer or (shudder) crawl out if the overflow drain on the sink. I even had one jump (I swear!) into my hair. Insert shrieking girl, hand waving freak out here.
All told I painted FOUR spiders into the wall, as my only weapon when they attacked me was my paintbrush. I stabbed countless others with the broom, a wire brush and a paint stirrer.
I love animals, but spiders you just don’t make the cut. They are horrible, horrible little creatures. They are almost as bad as those million legged house centipedes.
What else did we accomplish this weekend other than barely making a dent on the storefront spider population?
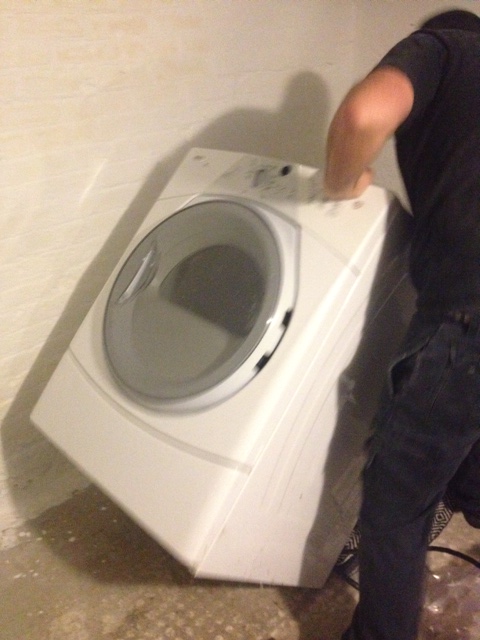
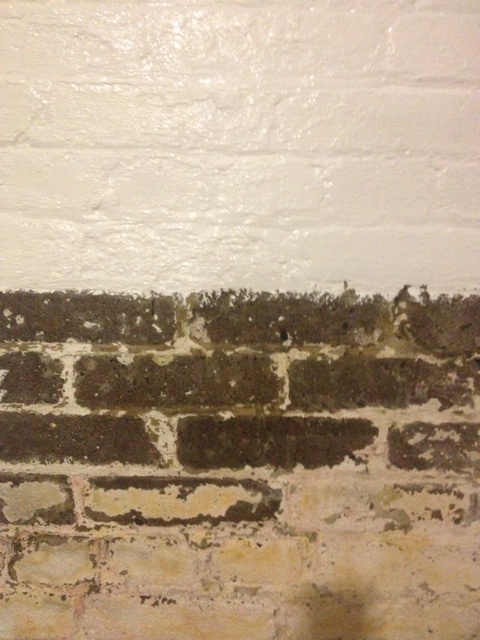
Painting. So much painting. When we left off last weekend we had painted the first coat of Behr Basement & Masonry Waterproofing paint on 3/4 of the laundry room brick walls. The reason only 3/4 of the walls got painted was the fact that we had to move the washer & dryer. We have a bunch of work to do with the washer & dryer, so once we removed them they would be gone for about a week. We left this until the last moment possible so that we could have clean underwear and socks. Those are vital luxuries I’m not willing to go without. So we washed every article of clothing and linens we owned, and removed the washer & dryer.
We have had two brand new Whirlpool laundry pedestals sitting in the boxes for (cough cough) two years. It was time to remedy that. So while I wire brushed and cleaned the walls, El Granto laid the washer & dryer on their backs and installed the pedestals.
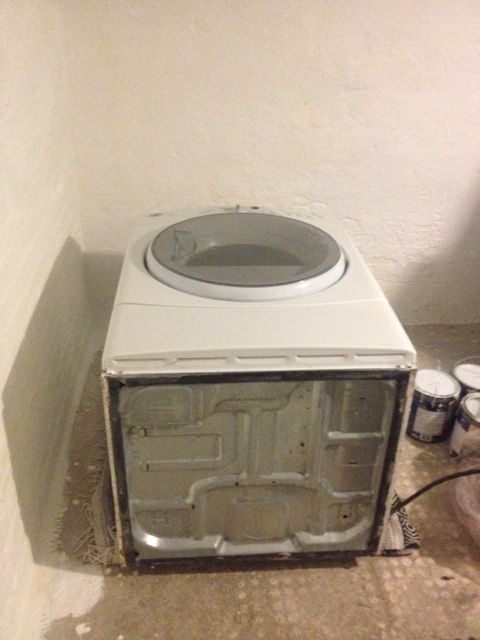

With the washer & dryer in the middle of the room, I set to painting behind them. Like the rest of the walls I painstakingly brushed the first coat of paint ensuring I covered all the nooks and crannies.
We left it to dry overnight and yesterday I came back and rolled on a second coat throughout the laundry room. I used a long nap roller loaded with lots of paint and gave it a heavy coat, back brushing to ensure the paint covered well.
5 gallons of paint and 15 hours of work later, the basement waterproofing paint is done.
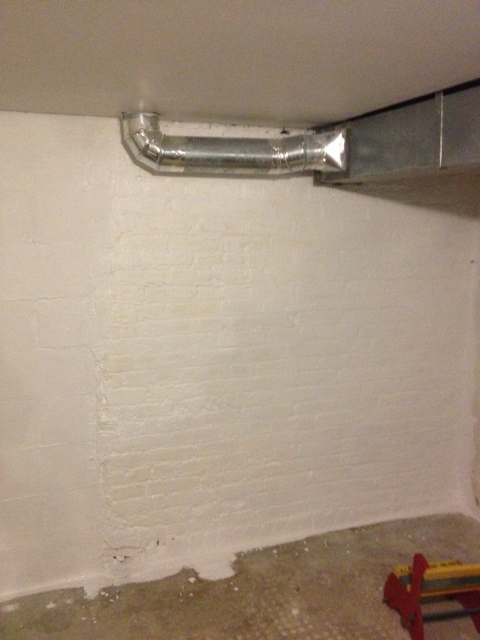
While I would love to show you a fantastic finished product, sadly that is not the case. The washer & dryer are still in the middle of the room, there is still dirt everywhere, the sink is full of (crap) and the floor is littered with paint cans and displaced tools.
Being mid project is like being in the eye of the storm.
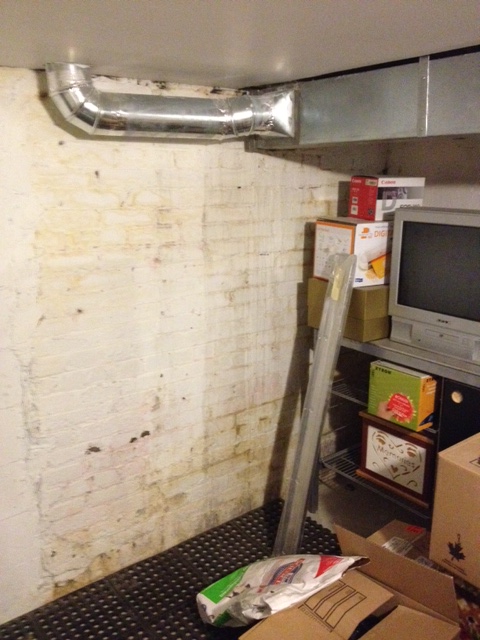
Next up we need to get our Dricore subfloor down & leveled, re-do the dryer ducting & hook back up the washer & dryer. Install drywall (on some) of the walls, and then flooring, lighting, more paint, hiding the wires & plumbing, storage, curtains, pretty things and so much more.
Excuse me while I go wash the spider guts out of my hair.
We finally got started on our laundry room project, but before a paintbrush was lifted, we did a lot of research and prep. Basements are notorious for having problems with water (especially ones that are over 100 years-old). As the ad for Dricore told me at Home Depot, 98% of homes have basement water issues.
Whether it’s a bit of condensation, dampness, or a basement floor that weeps when it rains, you probably have some sort of water hanging out in your basement. Before we could do anything with the basement we needed to get our water under control. We knew the water issue that occurred previously was from a blocked drain in the backyard. That has since been fixed, and the only water we’ve had in the basement since was a little puddle from the giant downpour we had this summer (remember the one with the flooded GO train and the abandoned Ferrari?) Even then the water puddled right beside the drain, and if our floor was sloped properly, it would have made it to the drain on it’s own. (We will be fixing the floor slope as well.)
So our brick foundation is without active leaks, cracks and is generally in good repair. We have a working outdoor drain and two basement floor drains. We have a back flow valve that was installed in the basement floor, and all our broken clay pipes were replaced with PVC.
How else could water possibly get in? Dampness can come up through our cement floor, or in through our unsealed painted bricks.
So we needed to tackle both of these items. After much deliberation we opted to do a waterproofing paint on the walls and a Dricore subfloor on the floor.
Why did we opt to just waterproof paint the walls? Several reasons: we didn’t have active water, and the bricks had been painted in the past. To do an interior waterproofing system we would need to strip all the bricks (possibly causing damage) and then add an interior waterproofing membrane and French drain. Lots lots lots of work, and $.
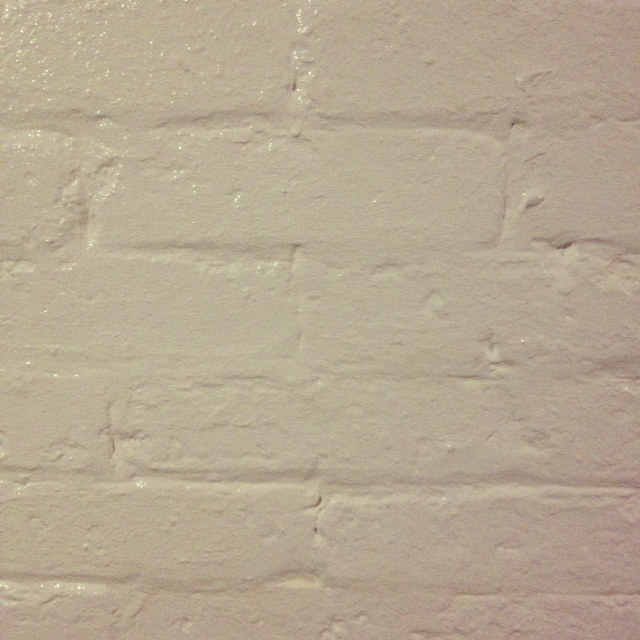
So option B, waterproofing paint. There are several of these on the market, but only one that I could find which you could paint over existing (in good condition) paint; Behr Basement & Masonry Waterproofer. We are big fans of Behr paint (we’ve painted most of the house in it). So we feel confident in using the Behr product. While our work wouldn’t be warrantied (Behr only warranties it on unpainted brick). We felt confident that if we did proper prep and application we would be good to go!
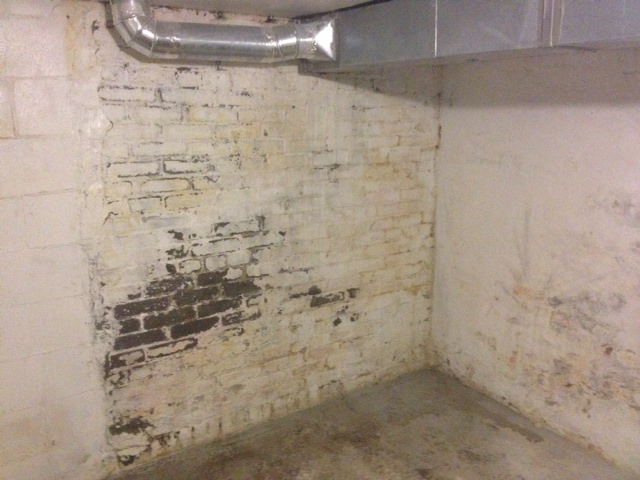
Now it was time to prep. A paint job (especially of the waterproofing variety) is only as good as your prep work. So we moved everything away from the walls and got to work. We wire brushed the walls from top to bottom, removing any loose paint, and checking the mortar and brick for any problem areas.
We were happy with the state of our foundation (no cracks, or problem areas! YAY!) So we moved on to cleaning the bricks. We mixed up a solution of TSP and scrubbed the walls with TSP and a scrub brush, then washed off with clean water, and left everything to dry overnight.
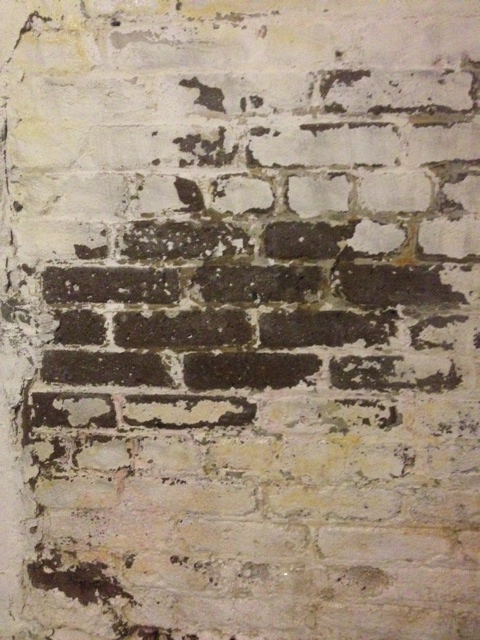
The next day we came back and started applying our Behr Basement & Masonry Waterproofer in un-tinted white . We opted to use a long bristle brush to apply. This would end up being tedious, but ensured that we got the paint into every nook and cranny. We went over all the brick, one brick at a time ensuring we got good coverage with our waterproofing paint.
6 hours later and we completed one coat on about 3/4 of the walls in the laundry room. A lot of work, but the results are looking great so far!
I can’t wait to get back down there and finish painting. We have to move the washer & dryer to get to the rest of the basement. Hopefully we’ll have more progress to show you next week.
I’m not a short girl. My Danish heritage has afforded a rather large frame of 5’10” however I am still completely unable to reach the top cabinet in our kitchen without standing on something. We have tall ceilings, and 39″ upper cabinets and those things are tall! For two years I have dragged over a kitchen chair, or straight up hopped up on the countertop to reach that top shelf.
I know what you’re thinking, why on earth have I not bought a kitchen step stool yet? You know those things MEANT for standing on to reach a cupboard?! Well, I just never thought about it when I was someplace that sold step stools.
That was until last week, when I was stuck at the Ikea kichen lineup, and noticed their basic Bekvam step stools situated behind the counter. For a whopping $16.99 I decided then and there that I would cure my inability to reach the top shelf! I wrote down the isle and bin number and when I (finally) reached the warehouse I added the stool to my cart, and was on my way to being able to reach whatever I wanted, whenever I wanted it. (It’s the small things people.)
I brought home my new prize, named him Sultan* and assembled it.

Hrm, its okay, but its a bit boring right?
So I got out the cabinet paint, and gave Sultan a couple coats of Thai Teal, then a couple coats of poly.
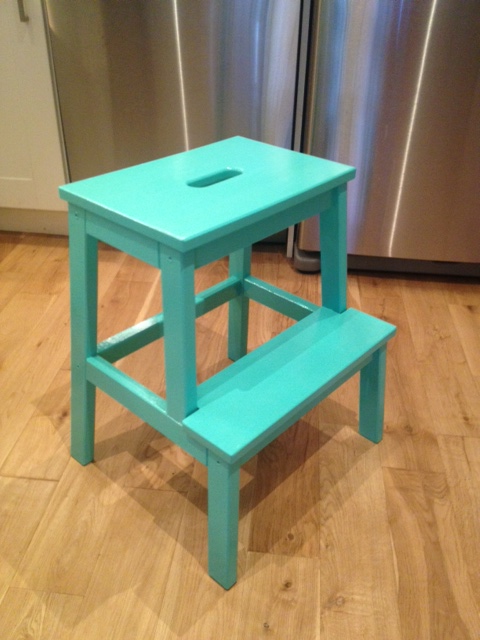
Isn’t he more handsome now?
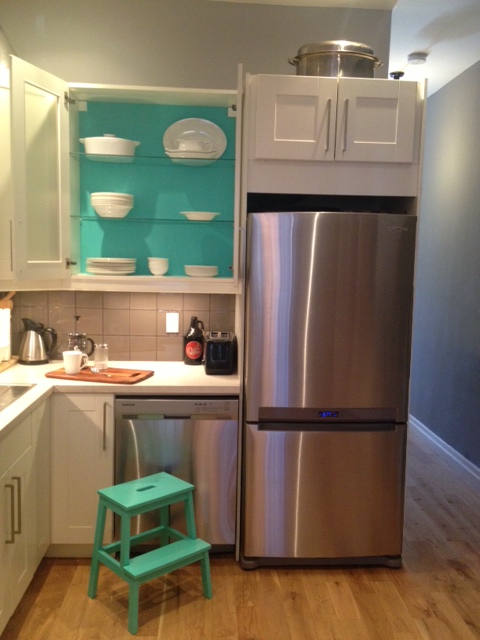
He matches the cabinet backs, so he fits right in. For now I have made beside the coffee bar his new home, where he can quickly be accessed to reach a cookbook or a casserole dish.
Not bad for a $17 stool and a bit of sample paint, eh?
* For those of you who don’t get the Sultan reference, clearly you didn’t watch enough Beauty and the Beast in your childhood. Sultan is the pet pooch who was turned into a foot stool. Now I am off to watch Beauty and the Beast, and maybe a bit of Aladdin…
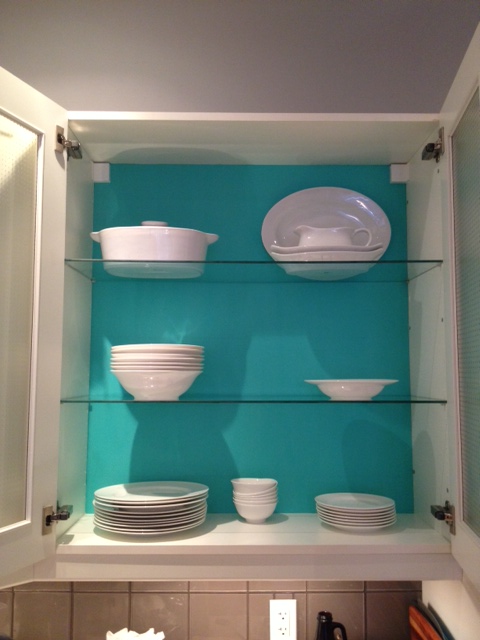
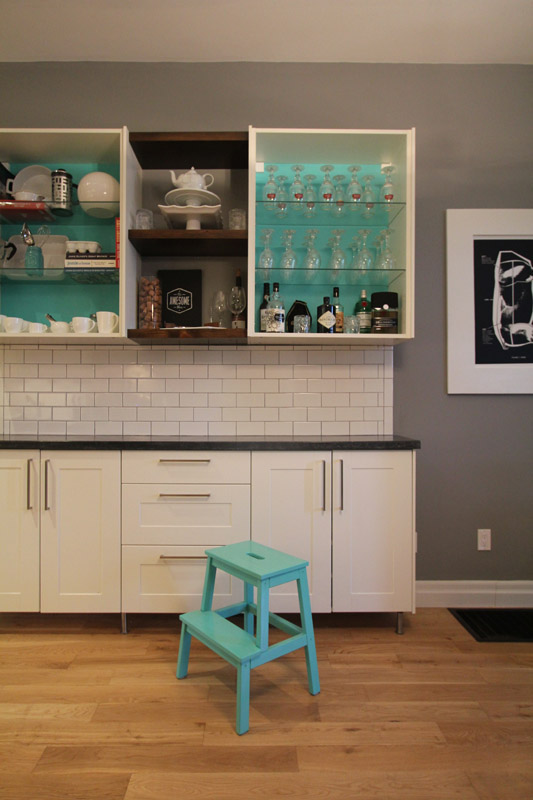
Last weekend on a whim I decided to paint the backs of my glass door kitchen cabinets. I gathered miscellaneous paint cans and did some tests. Continue reading “Painting Kitchen Cabinet Backs”
When we bought the Storefront, it had essentially been eliminated of all its character. It had been in bad shape, and the owners before us had brought it back, and modernized it, but in doing so had removed everything of the past. Don’t get me wrong, I love our spray foam insulation and skylights, but I’m not the biggest fan of the white vinyl windows and the lack of original trim & doors.
So in our quest to add some character back to the Storefront, I want to add in a bit of it’s past. When the Storefront was originally built it housed a Grocer. Later it did a stint as a Barber Shop, and until the 60’s it was a Tailor & Cleaner.
I have been scouring flea markets and antique shops for anything Grocery, Barber or Tailor related and have yet to find ANYTHING awesome for the house. Barber pole? Nope. Grocery Store sign? Not a hope.
Resigned to my failure, I decided to make things related to the past for the house. I started with a Grocery sign for the kitchen. (Cause a grocery sign was a shade easier than a barber pole…)
I headed into the garage and found a couple spare pieces of 2×12’s that were 6 feet long. I distressed one with some stain & a blow torch, and the other I whitewashed with some watered down chalk paint.
I then laid out my type. I made each letter about the size of an 8.5 x 11 sheet of paper, and just freehanded the letters with a pencil until they looked OK.
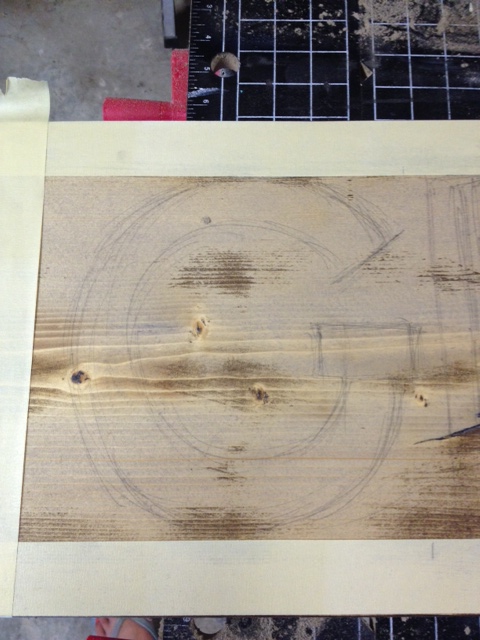
I grabbed some paint, and filled in the lettering with a small foam brush, and let it dry.
Then I sanded everything to give it a worn look, and I had two (yes TWO) grocery signs ready to go.
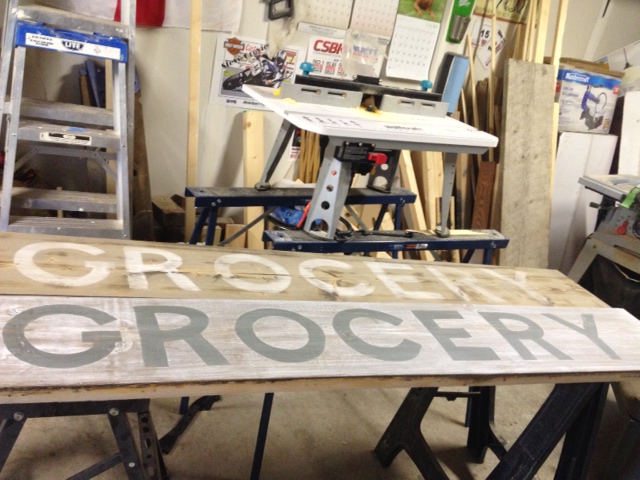
I then made El Granto put each one up on the kitchen cabinets so I could decide which one I liked best.
This one won out.


And now the other one is still hanging out in the kitchen leaning against a wall cause I have NO IDEA WHAT TO DO WITH IT. I’m really knocking it out of the park lately.
Anyone want a Grocery sign?