Waxed Cotton & Leather Mens Apron

This project is about six months in the making. I intended to make a mens canvas and leather apron, and have it ready to present to El Granto for our 3rd anniversary (the leather anniversary). That came and went, and I hadn’t moved beyond…well…thinking about making it. Fast forward to the beginning of February. Winter had officially set in in Canada, and it was so bloody miserable, one couldn’t fathom leaving the house. There is only so much Netflix and takeout a girl can handle before snapping and dragging out the sewing machine.

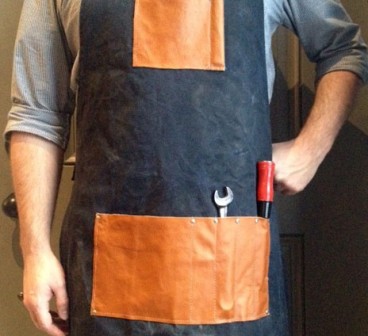
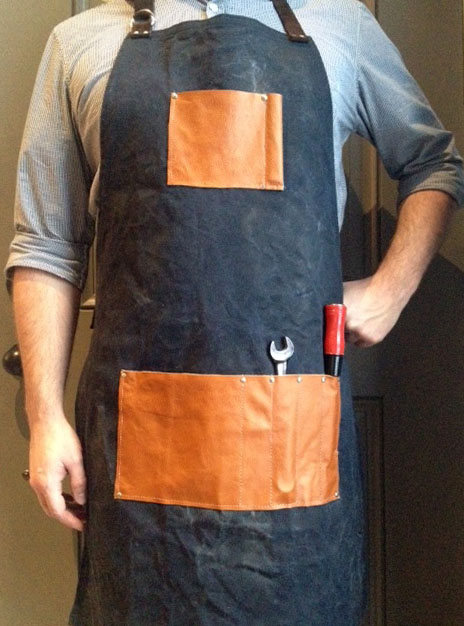
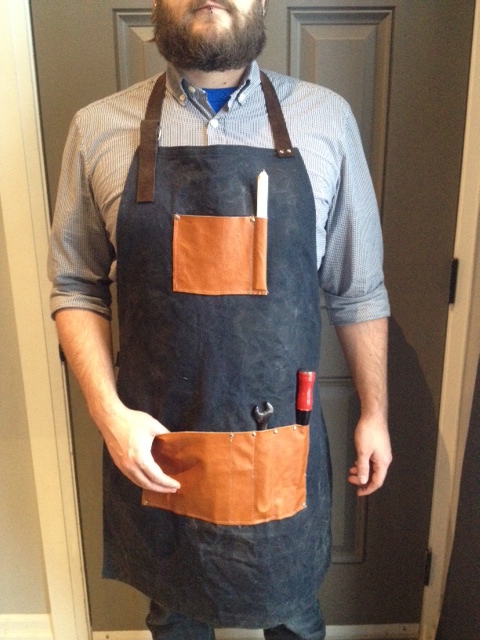
Only six months late, I was finally able to give El Granto his waxed canvas and leather apron. Perfect for wrenching on his motorcycle, or tinkering in the garage.

DIY Mens Leather and Waxed Canvas Apron

DIY Mens Apron DIY Mens ApronDIY Mens Leather and Waxed Canvas Apron

How To:

Cut a 36 1/2″ x 25 1/2″ piece of canvas. Fold it in half lengthwise. Measure 5 3/4″ from the fold on one short side. Mark with chalk. Measure in 15 3/4″ in on the long side, starting the measuring from the same short end you previously marked. Draw a concave curve between the mark on the short side and the mark on the large side. Cut through both layers of fabric along your curve.

Using an hot iron, roll and press a 3/8″ double hem (fold in 3/8, iron, then fold it over again and iron) on all the raw sides. Top stitch a 1/4″ hem all around the edges with a matching thread. That is now the base of your apron complete.

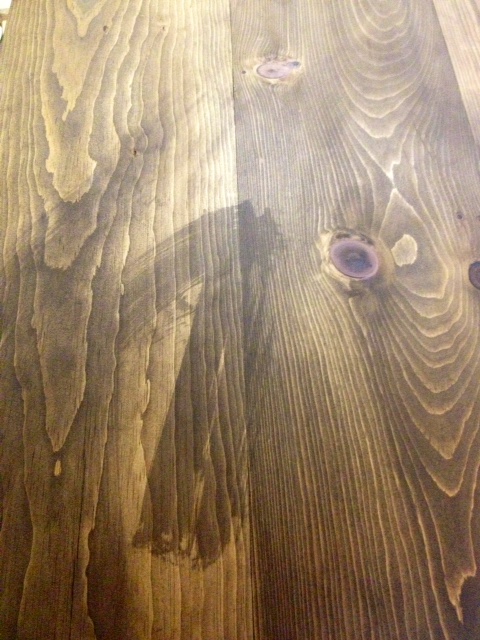
Using a mixture of melted beeswax and paraffin, wax the canvas. **I will be back with a whole post later in the week on how to wax canvas**

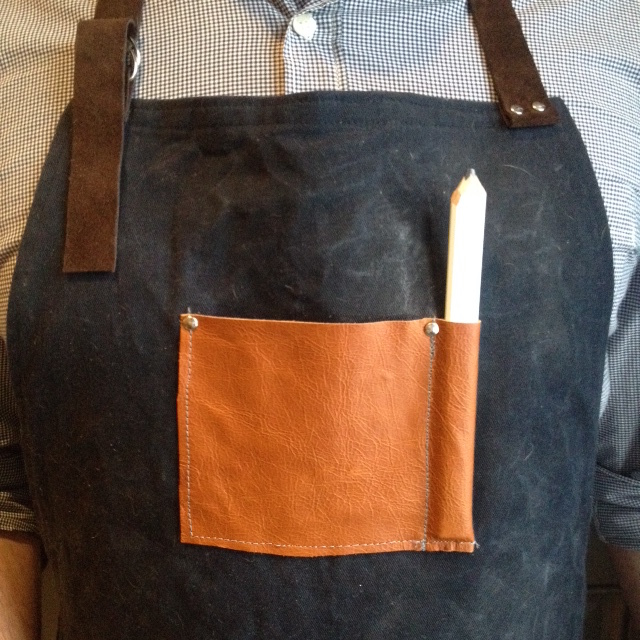
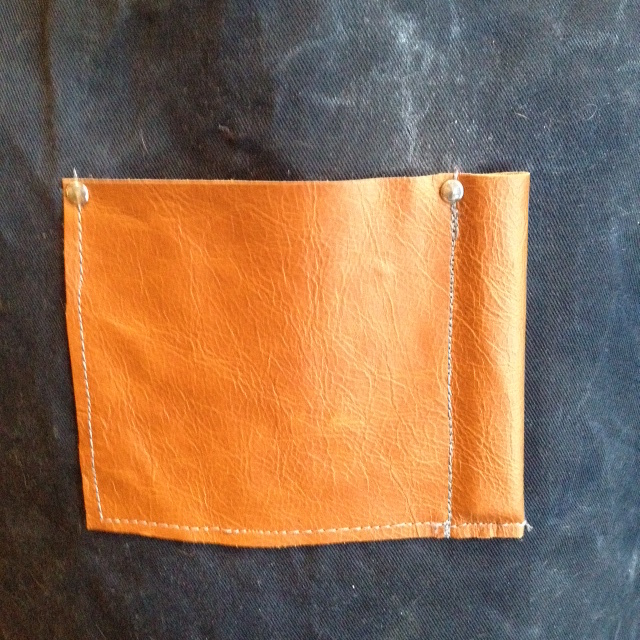
Cut your leather pieces to size (see cut list below). On the small pocket of leather, fold in one short side 1 1/4″. Stitch through both layers of leather on the folded side, 1″ in. This will make the pencil pocket.

Place the small pocket 4″ below the top of the apron, and centered. Topstitch with a 1/4″ hem along the pencil pocket stitch line, then the bottom and the other side. This pocket will hold a carpenters pencil or sharpie, as well as screws, nails or nuts and bolts.

Leather Waxed Cotton Apron

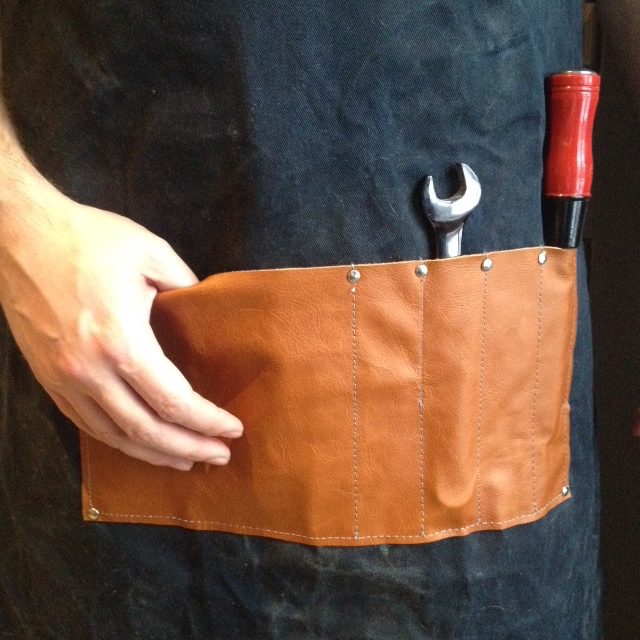
Place the large bottom pocket 18″ from the top of the apron and centered. Topstitch (1/4″ again) around the sides and bottom of the large pocket. Measure in  1 1/2″ from the right side hem of the large pocket, and mark. Mark again 1 1/2″ from the first marked line. Continue this another two times.

Topstitch along the marked lines. This will make the smaller pockets to hold wrenches, screw drivers and other long skinny tools. The larger pocket will hold an assortment of miscellaneous stuff (i.e. a rag, a notebook, an Allen wrench etc.)

DIY Mens Apron

Fold the D ring pieces of leather (see measurements below) in half and punch two holes on the end of each piece. Punch two corresponding holes in one side of the apron as well as one side of the top of the apron. Place two D rings on each piece of leather. Line the holes in the pieces of leather with the holes in the apron. Place a rivet post through each set of holes, and using a rivet tool, hammer in place. [Rivets are easy! Just place the post of the rivet through your materials, then set in the concave rivet setting tool. Place a rivet cap on top of the post. Using the setting part of the rivet tool, hammer the rivet in place.] The D rings will allow you to thread a piece of leather between them, to easily secure the leather apron straps.

photo 4(1)

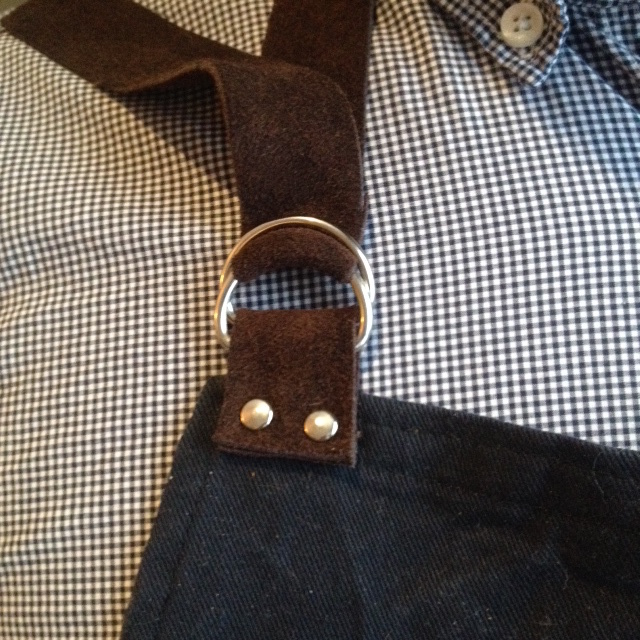
On one end of the neck and waist apron strings fold the ends over 1/2″ and punch two holes. Rivet to the neck strap to the top of the apron, on the opposite side of the D rings. Rivet the waist strap to the opposite side of the D rings.

Punch holes and rivet where the pockets meet the apron. This will ensure a long life to the apron, and take the abuse your man is sure to hand it.

Thats it! The waxed canvas and leather will weather and patina, growing nicer with age. The man in your life will thank you for making him such an awesome man apron, and for saving his clothes from motorcycle grease or saw dust. Not to mention having a place to stash a tape measure or screw driver.

DIY Mens Leather and Waxed Canvas Apron

Now…I want to make one for myself.


SOURCE INFO:

Materials:
Navy Blue Cotton Canvas – Designer Fabrics
Scrap leather – Designer Fabrics (all pieces were purchased from their scrap and trip leather bins, for a grand total of $1.50 spent!)
Bees Wax – The Bee Shop
Paraffin Wax – Michaels
Rivets – Michaels
1″ D Rings – Amazon

Cut List: (for a large mens apron)
36 1/2″ x 25 1/2″ piece of canvas (body of apron)
6 1/2″ x 13″ piece of leather (large pocket)
5″ x 7 1/4″ piece of leather (small pocket)
2 – 1″ x 2 1/2″ piece of leather (D Ring holds)
1″ x 25″ piece of leather (neck strap)
1″ x 30″ piece of leather (body strap)

Tools:
Fabric Scissors
Measuring Tape
Square
Leather Punch
Rivet Tool
Double Boiler
Blow Dryer

Difficulty Level (on a scale of 1-5):

three out of five


Total Time: 1 day

Total Cost: $27


Don’t Crank That

Sometimes in home ownership you make costly mistakes. Case in point: We close our skylight too tightly.

We have an opening skylight in our bathroom. It opens and closes with a big pole that you turn the handle and it cranks open.

When we had one of our cold snaps I walked into our bathroom to find out skylight had shattered. Don’t worry, it was just the inside piece of plastic (they’re double layered with air in the middle for insulation.) The skylight has a screen, which luckily caught all the jagged pieces of broken plastic.

It still caught me completely off guard. Who knew skylights could just shatter? Why did it happen?

3c1d4e8c558211e3ab71120275a1e6b3_8

We called our roofers and they assured us that it wouldn’t leak or anything, and it was marked as a low priority. Flash forward to the bitter cold snap we’ve been suffering from (grrr polar vortex grrr). Because it is just sooo darn cold out, and nice and toasty warm inside, we were getting a whole lot of condensation on our now uninsulated skylight. The condensation was dripping down onto our floor and making puddles. We called the roofers back, they upped the importance and scheduled a site visit on one of the coldest days of the year. Upon inspection they discovered that we appear to have tightened the skylight too tightly, and when it expanded with the cold it broke.

A new skylight was ordered, and it was safely installed yesterday taking all the broken pieces of plastic and condensation with it.

Our pocket is lighter, or egos a little bruised, but at least we have a drip free skylight back in our bathroom.

While talking with the roofing company we learned the following:

Only JUST close crank windows & skylights. Over tightening can warp the frame and put pressure on the glass/plastic risking breakage.

DON’T CRANK THAT SOULJA BOY!

On the positive side, dude I’m the freakin HULK. I am so strong my muscles break skylights!!!!


Staining Fail

Saturday a load of lumber was purchased from the lumber yard, and trip was made to the hardware store for supplies. Sunday was spent cutting, gluing, screwing, sanding and culminated with applying the first coat of stain on our current project. I let the stain soak in, then wiped it off.
This is what I saw:

Stain problem
UGH! Whats that?!

(Insert four letter expletive here)

What happened? No idea. Very clearly something was wiped on the wood that has left this mark. Best guess was that I used a rag to wipe off the wood before staining. I am guessing that there was something on the rag, that left residue on the wood, and mucked up my stain.

Obviously this can’t stay this way. So what’s next? Spend another several hours sanding and hopefully remove the swipe mark. Then re-stain and cross my fingers.

The moral of this story? It’s not always easy, things go wrong, we screw up, make mistakes. We’re human. I just happened to do it on $100 worth of 2″ thick, kiln dried lumber.

Stain screwup
Thats gonna be a whole lot of sanding…

What’s the biggest DIY screw up you’ve made? Wreck any projects lately? Were you able to fix it, or did you need to start over?

B-The Face Launch Party

We have a friend Chelsea who is one of those people that lights up a room as soon as she enters it. She perpetually has a smile on her face, and absolutely everyone adores her. She has an infectious personality, and is a hellovalota fun. Her day job is being a morning show radio host (I know, how cool is that!) and she also recently won the spot as the B-Playfull Social Media Ambassador for Mercedes-Benz B-Class in Canada for their B-The Face program. Check it out here.

B-Playful
Chelsea’s Pic on the B-Playful poster

Last night we were invited to celebrate with Chelsea and the other three Ambassadors at a launch party at a Mercedes dealership. We got to dress up, sip beverages and indulge in canapes while drooling over the Mercedes line up.

Chelsea

We also insisted Chelsea sign our posters with inspirational quotes.

BKWlKjtCcAACP-d

photo 5

It was a great night had by all, but was unfortunately cut short when a light in the dealership decided to catch fire (oops!) We had to be evacuated and the firemen had to come in and do their thing. Nothing says a party like sirens and flashing lights.

Firetrucks

Firetrucks aside, it was a great party!  Congrats Chelsea, and thank you Mercedes-Benz Canada for the event!

Cutting a Hole in the Wall

I cut a hole in the wall and I liked it. (There really are too many commercials for the Katy Perry DVD on TV right now). Back to the hole. YEP, there’s a hole in my wall, on purpose. Nothing was leaking, there were no fires and nothing had burst. I just wanted a hole.

You see, my upstairs hallway is a dark sad cave (see it with your own eyes here).

Our guestroom however is bombarded with natural light from a lovely big bay window. So I thought I would steal some of the guest room’s natural light, and give it to the hallway…by cutting a hole in the wall. Now now, I’m not gonna leave it as a big gaping hole. It will be turned into a transom. Transom’s are something that an Edwardian home would have had. We do have one operating transom above our front door.

So after cutting a great big ole hole in the wall, I will case it, trim it, paint it, get some custom glass cut, install it, and I will have a pretty transom.

Until then…HOLE