How To – Waxed Cotton

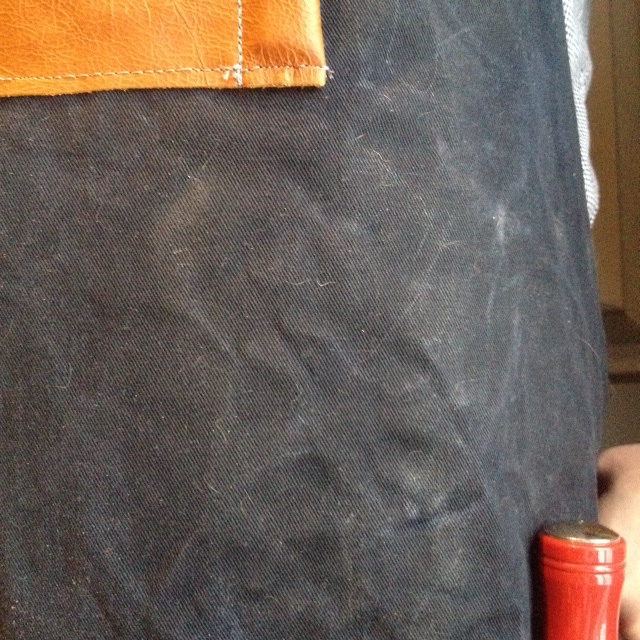
In my DIY leather and waxed canvas apron post, I promised to come back and dedicate a whole post to waxing cotton and canvas.  Consider the promise fulfilled!

Waxed canvas is big in the motorcycle and accessory scene. Pre-waxed canvas items can be pretty pricey. However….its pretty easy to DIY. You can take any cotton item, and with simple waxing make it water resistant. It also gives a pretty badass patina to dark colored clothing. So grab your denim jackets, canvas bags, heck even jeans, and wax on wax off.

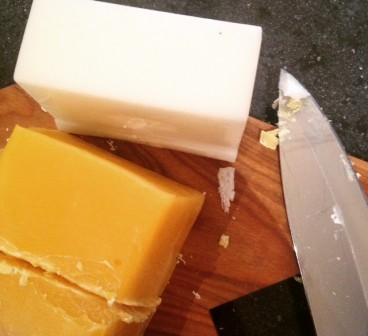
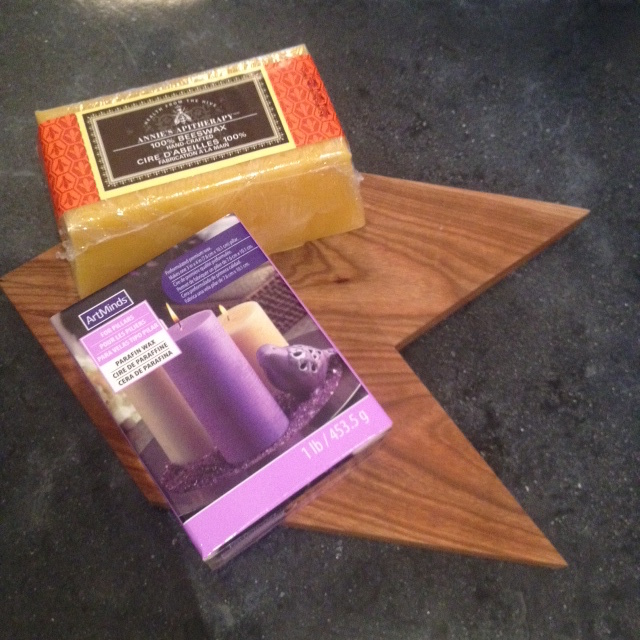
In a double boiler, or a metal bowl over a pot of simmering water, mix equal parts beeswax and paraffin wax. I sourced my beeswax from a local bee shop (really! I love living in the city) and the paraffin is from the craft store.

photo 4(4) photo 5(4)

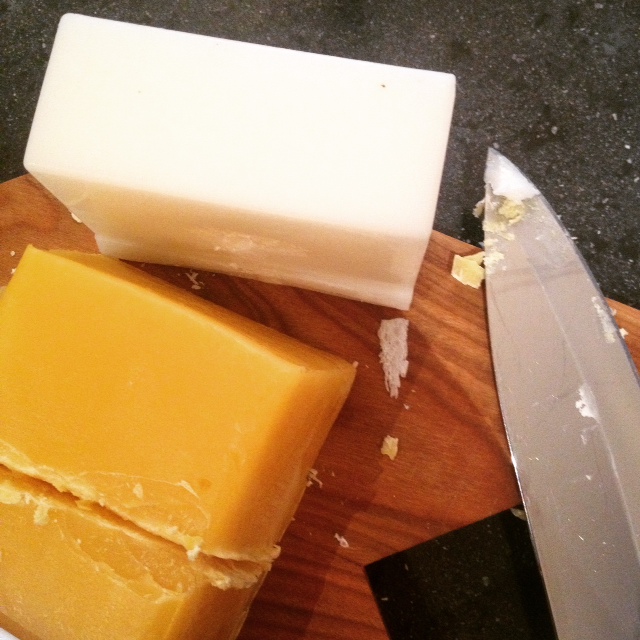
The hardest part is cutting up the wax. I couldn’t manage it at all. So I called for my muscles and El Granto came to the rescue. He placed a knife in a pot of boiling water for a few minutes and set to chopping. The knife went through like a hot knife through butter wax.

I like to use a popsicle stick or extra wooden takeout chopstick to occasionally stir the wax until it is completely melted.

Once your wax is melted, lay your cotton item on some old towels on a surface that won’t mind a bit of heat (I used our concrete countertops). Using a dollar store or other inexpensive paint brush, dip it in the hot wax, then quickly brush a thin layer onto your canvas.

Apply Hot Wax to Cotton

Apply Hot Wax to Cotton

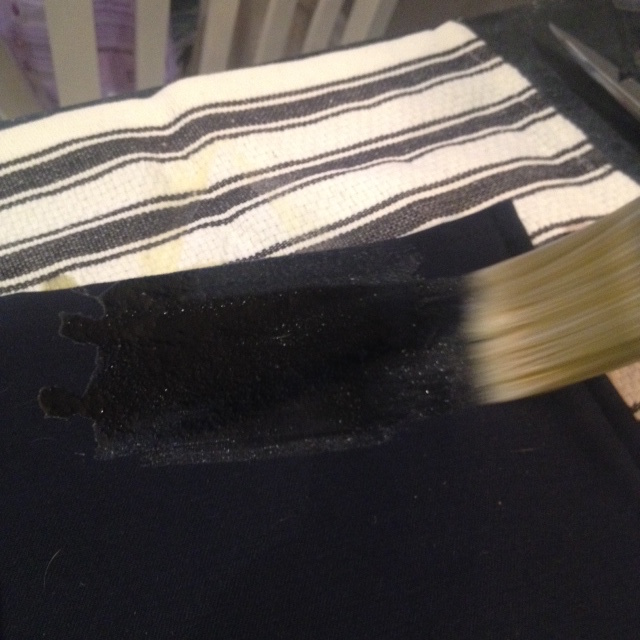
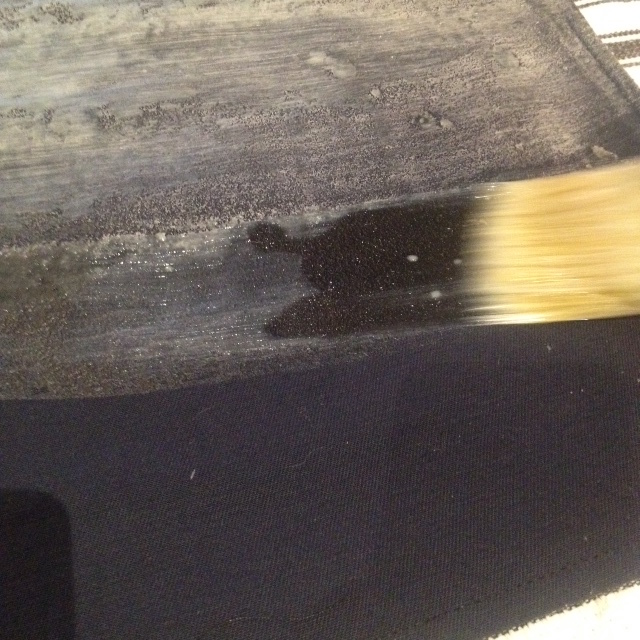
You don’t want a ton, just a light layer. It will start to harden almost instantly and dry white. Don’t worry, that is normal. You don’t need complete coverage. If there are some bare spots, that’s okay. It’s better to have less wax than more wax. It’s a whole heck of a lot easier to put more on than take some off.

Waxed Canvas Apron prior to absorption

After you have completely covered your item, get out the hair dryer. I read other tutorials suggesting using your clothes dryer instead of a hair dryer. I tried it, and my energy star dryer never got close to being hot enough. Skip the clothes dryer, and break out the hair dryer.

Holding the hair dryer a few inches from the waxed fabric, turn it on high and wave it over the fabric. In a few seconds, you will see the wax melt, and seep into the fabric. Going from white, back to the color of your fabric.

Apply hest to melt Wax into Cotton
Dark Blue: Wax has been heated and soaked into the fabric. White: Wax has not yet been heated, or absorbed into the fabric.

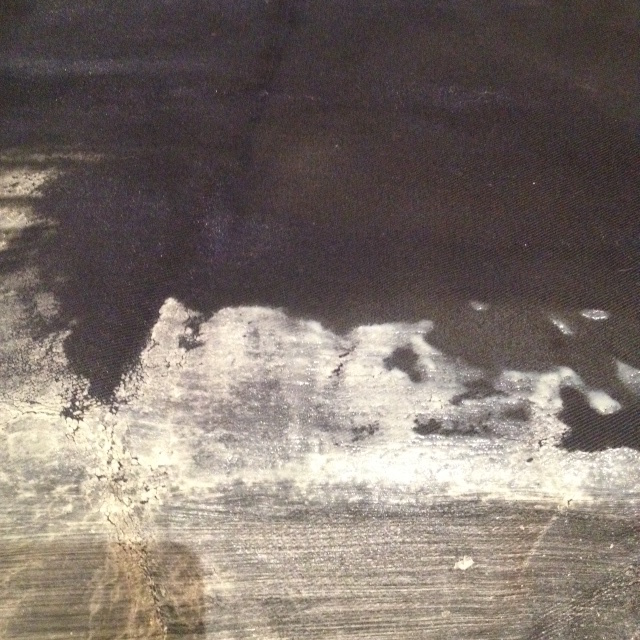
If you have applied too much wax it will not all soak in, and will puddle on the fabric. If this happens, use a popsicle stick to scrape off any excess wax. Continue heating up your wax until the whole item has absorbed all the wax. Let cool and dry.

If you want a more distressed look, after the waxed cotton has dried, scrunch it up with your hands.

Waxed Canvas Apron
Waxed Canvas Apron

Enjoy!

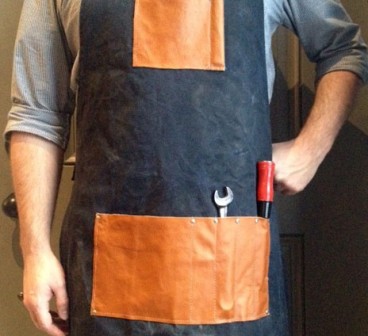
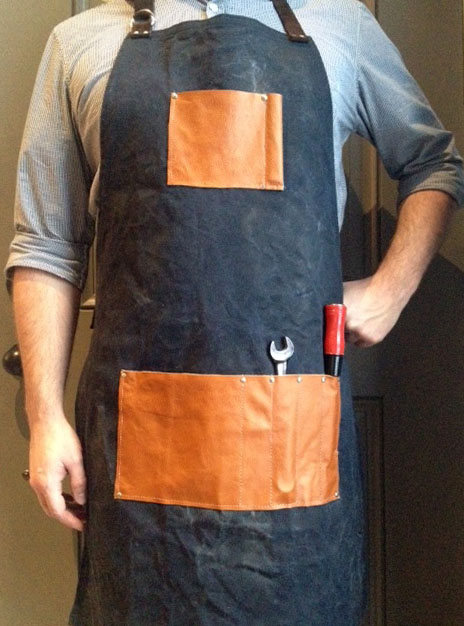
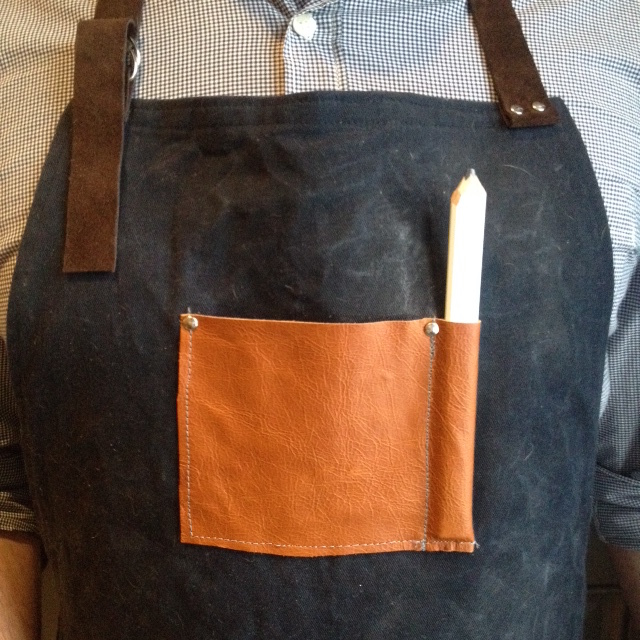
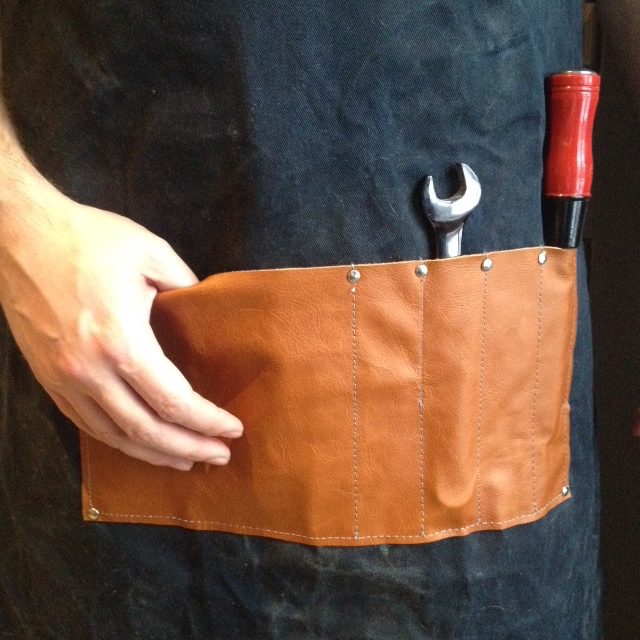
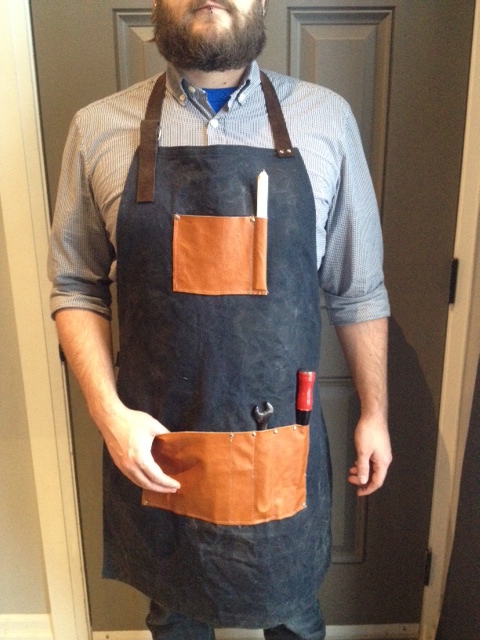
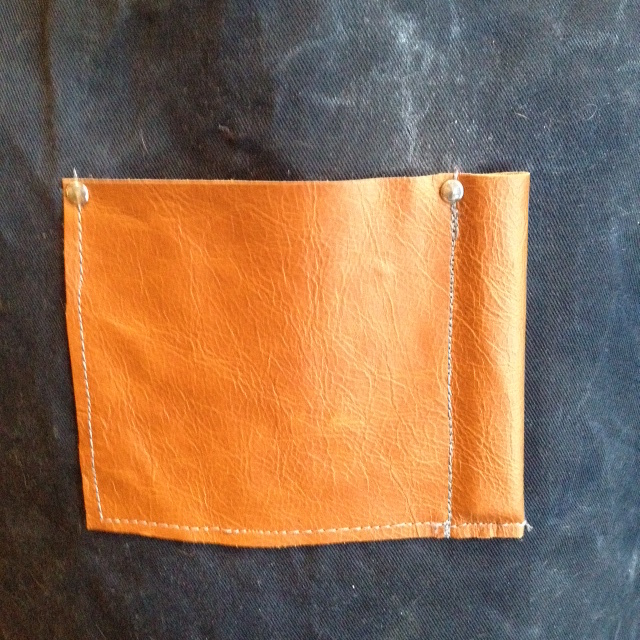
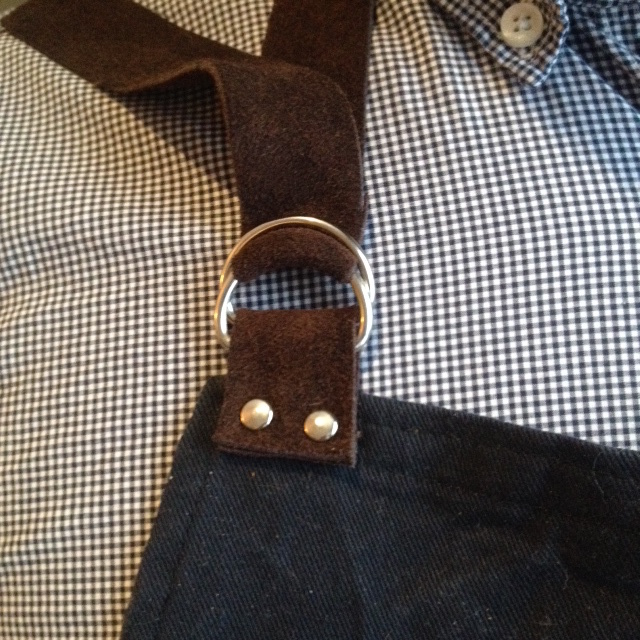
[See our post on how to make a DIY Waxed Canvas and Leather Apron here.]

SOURCE INFO:

Materials:
Navy Blue Cotton Canvas – Designer Fabrics
Bees Wax – The Bee Shop
Paraffin Wax – Michaels

Tools:
Double Boiler
Cheap Paint Brush
Blow Dryer
Scrap Towels

Difficulty Level (on a scale of 1-5):

two out of five


Total Time: 1 hour

Total Cost: $10


Waxed Cotton & Leather Mens Apron

This project is about six months in the making. I intended to make a mens canvas and leather apron, and have it ready to present to El Granto for our 3rd anniversary (the leather anniversary). That came and went, and I hadn’t moved beyond…well…thinking about making it. Fast forward to the beginning of February. Winter had officially set in in Canada, and it was so bloody miserable, one couldn’t fathom leaving the house. There is only so much Netflix and takeout a girl can handle before snapping and dragging out the sewing machine.

Only six months late, I was finally able to give El Granto his waxed canvas and leather apron. Perfect for wrenching on his motorcycle, or tinkering in the garage.

DIY Mens Leather and Waxed Canvas Apron

DIY Mens Apron DIY Mens ApronDIY Mens Leather and Waxed Canvas Apron

How To:

Cut a 36 1/2″ x 25 1/2″ piece of canvas. Fold it in half lengthwise. Measure 5 3/4″ from the fold on one short side. Mark with chalk. Measure in 15 3/4″ in on the long side, starting the measuring from the same short end you previously marked. Draw a concave curve between the mark on the short side and the mark on the large side. Cut through both layers of fabric along your curve.

Using an hot iron, roll and press a 3/8″ double hem (fold in 3/8, iron, then fold it over again and iron) on all the raw sides. Top stitch a 1/4″ hem all around the edges with a matching thread. That is now the base of your apron complete.

Using a mixture of melted beeswax and paraffin, wax the canvas. **I will be back with a whole post later in the week on how to wax canvas**

Cut your leather pieces to size (see cut list below). On the small pocket of leather, fold in one short side 1 1/4″. Stitch through both layers of leather on the folded side, 1″ in. This will make the pencil pocket.

Place the small pocket 4″ below the top of the apron, and centered. Topstitch with a 1/4″ hem along the pencil pocket stitch line, then the bottom and the other side. This pocket will hold a carpenters pencil or sharpie, as well as screws, nails or nuts and bolts.

Leather Waxed Cotton Apron

Place the large bottom pocket 18″ from the top of the apron and centered. Topstitch (1/4″ again) around the sides and bottom of the large pocket. Measure in  1 1/2″ from the right side hem of the large pocket, and mark. Mark again 1 1/2″ from the first marked line. Continue this another two times.

Topstitch along the marked lines. This will make the smaller pockets to hold wrenches, screw drivers and other long skinny tools. The larger pocket will hold an assortment of miscellaneous stuff (i.e. a rag, a notebook, an Allen wrench etc.)

DIY Mens Apron

Fold the D ring pieces of leather (see measurements below) in half and punch two holes on the end of each piece. Punch two corresponding holes in one side of the apron as well as one side of the top of the apron. Place two D rings on each piece of leather. Line the holes in the pieces of leather with the holes in the apron. Place a rivet post through each set of holes, and using a rivet tool, hammer in place. [Rivets are easy! Just place the post of the rivet through your materials, then set in the concave rivet setting tool. Place a rivet cap on top of the post. Using the setting part of the rivet tool, hammer the rivet in place.] The D rings will allow you to thread a piece of leather between them, to easily secure the leather apron straps.

photo 4(1)

On one end of the neck and waist apron strings fold the ends over 1/2″ and punch two holes. Rivet to the neck strap to the top of the apron, on the opposite side of the D rings. Rivet the waist strap to the opposite side of the D rings.

Punch holes and rivet where the pockets meet the apron. This will ensure a long life to the apron, and take the abuse your man is sure to hand it.

Thats it! The waxed canvas and leather will weather and patina, growing nicer with age. The man in your life will thank you for making him such an awesome man apron, and for saving his clothes from motorcycle grease or saw dust. Not to mention having a place to stash a tape measure or screw driver.

DIY Mens Leather and Waxed Canvas Apron

Now…I want to make one for myself.


SOURCE INFO:

Materials:
Navy Blue Cotton Canvas – Designer Fabrics
Scrap leather – Designer Fabrics (all pieces were purchased from their scrap and trip leather bins, for a grand total of $1.50 spent!)
Bees Wax – The Bee Shop
Paraffin Wax – Michaels
Rivets – Michaels
1″ D Rings – Amazon

Cut List: (for a large mens apron)
36 1/2″ x 25 1/2″ piece of canvas (body of apron)
6 1/2″ x 13″ piece of leather (large pocket)
5″ x 7 1/4″ piece of leather (small pocket)
2 – 1″ x 2 1/2″ piece of leather (D Ring holds)
1″ x 25″ piece of leather (neck strap)
1″ x 30″ piece of leather (body strap)

Tools:
Fabric Scissors
Measuring Tape
Square
Leather Punch
Rivet Tool
Double Boiler
Blow Dryer

Difficulty Level (on a scale of 1-5):

three out of five


Total Time: 1 day

Total Cost: $27