Tin Ceiling Part 1

**This is Part 1, as this is a lengthy (and wordy) project, so we’ve split it up to avoid you falling asleep in your coffee **

We’ve been a bit quiet on the DIY front as of late, don’t worry, we have been working albeit slowly on project for the last three weeks. If you remember we were brainstorming inspiration for our vintage reclaimed tin ceiling tiles. After much deliberation we decided to leave the tiles as they were in all their rusted peeling paint glory.

One of the tiles in better shape

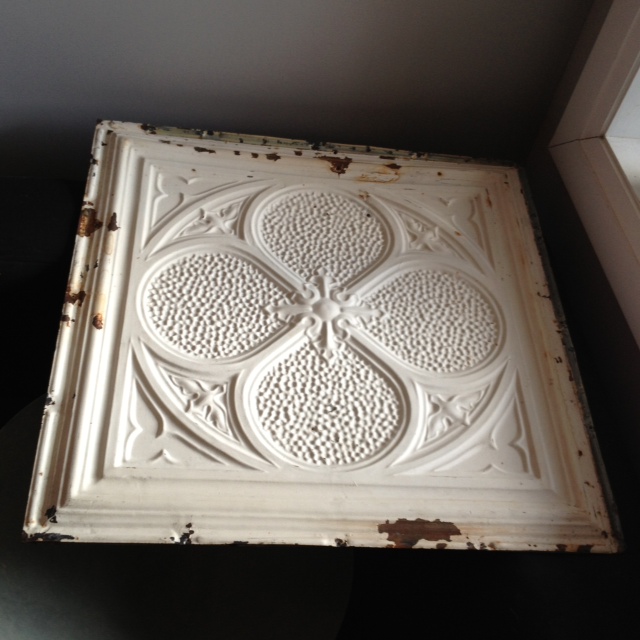
Why you ask? They are over 120 years old sporting their original paint. These tiles were reclaimed from a store in London Ontario. It seemed a shame to strip or paint over all their history just to have them look like brand new tin tiles. Our Storefront had been stripped of every single original detail when we bought it, and we drool with envy when we look at other homes with original details still in place (like the houses over at Old Town Home and Victoria Elizabeth Barnes Victorian house blog) in our hearts we knew we needed to leave the tiles as is.

We were also going to put the tiles on our master bedroom ceiling, then we thought it a shame as no one but us would ever see them (we’re not the type to have guests hanging out in our bed looking up at the ceiling…) So we decided to have the tiles grace our living room ceiling where they would be there for all to see.

Ceiling looking towards our backyard
Living room ceiling looking towards our backyard
Ceiling looking towards our staircase
Living room ceiling looking towards our staircase

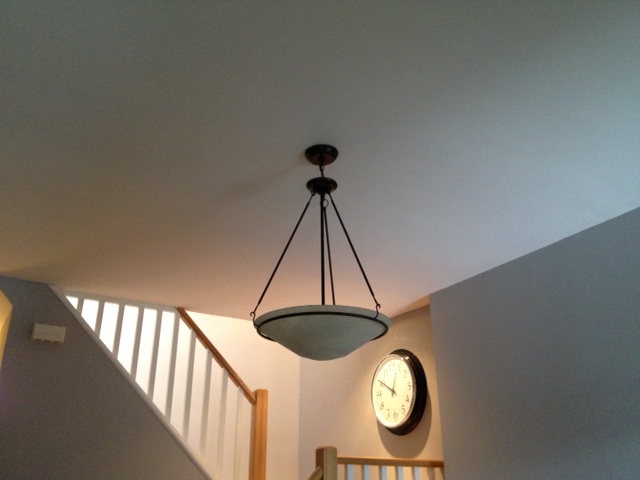
We have 20 tiles which means we can cover an 8×10 foot area. We decided to do a kind of panel inset in the center of the living room, centering around our lighting fixture. Now that we had it planned out (phew that was tiring!) we needed a plan of execution…

I don’t know if you know this about me, but I am a PLANNER (aka anal retentive). I always want to do something to the best of my ability, do it the easiest way, and for the least amount of money. So I research, and plan. I may not SHARE my plan with my husband, but I do always have one up in my noggin.  So for this project I contacted a tin ceiling expert, and picked his brain. What I learned was that you can put tiles up two ways; glue or nails (or both!) Glue is easiest, but does the most damage to both the tiles and the ceiling if you ever want to remove. Nails require more work, but do much less damage to the tiles, and your ceiling can always be patched. We decided to go with the nails.

Now we needed something to nail to…You cant just nail into your drywall, its just not strong enough. You need some wood for the nails to bite into.  Next up, we needed to decide if we were going to strap the ceiling or sheet it (run strips of wood in a grid to nail to, or just cover the area of the ceiling in plywood.) Both will work, its just whichever you prefer. We decided to go with the sheeting, as then we could nail anywhere we wanted without a problem. Another decision done!!

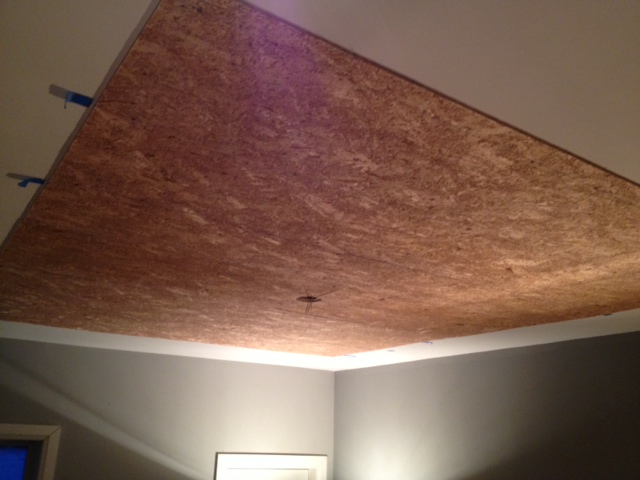
We sourced some 3/8″ chipboard from HD as our sheeting material. We got three 4×8 sheets of chipboard, and got one of them cut down into 2×4′ pieces at the hardware store (still waiting on that table saw Santa). We decided to do a 2×8 piece of wood in the middle of the ceiling around the light, then a full 4×8 sheet on either side. We also cut the 2×8 in half so that it would be easier to cut and put up around the light fixture.

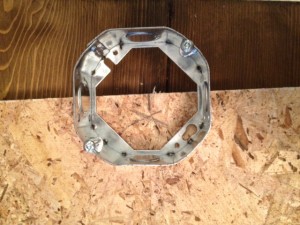
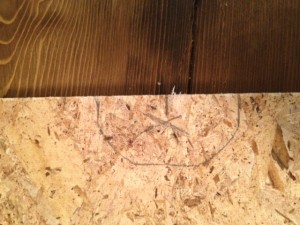
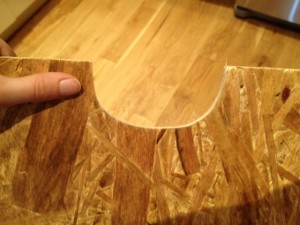
Speaking of the light fixture. We traced a spare electrical box onto the ends of the 2×4 sheets and cut it out with a jig saw. This would make it so that we could easily fit around the light fixture (which we would deal with later.)

boxtraced (2)boxtraced (1)boxholecut

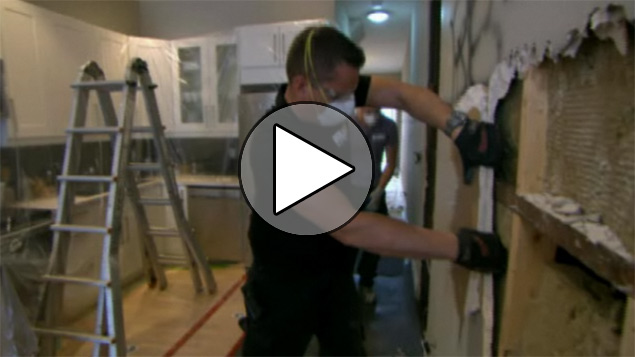
Now came the fun part…putting up the sheeting. Here’s what you need:

  • Two ladders
  • Drill & screws
  • Swear Words
  • Stud Finder
  • Chalk Line
  • Divorce Papers
  • Borrowed work lights from the neighbours (have I mentioned how awesome our neighbours are?! I need to bake them some cookies)
  • Tears

Mark your studs on your ceiling using masking tape. Mark them OUTSIDE the area you’re sheeting. If the ceiling joists in your 100 year old home magically change direction, you are not crazy, cause apparently that can happen, and defy all logic…

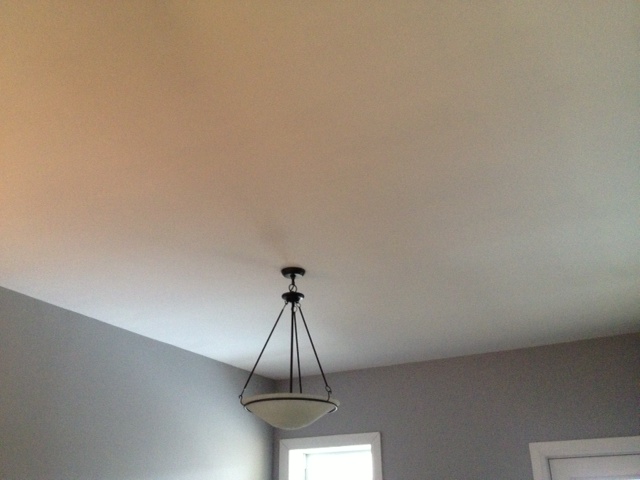
Now turn off the power and take down the ceiling light. Swear at wife for having insisted on re-installing repainted light fixture before it was completely dry. (Who would have thought that it would stick together?) oops

Put up the first pieces of sheeting, and make sure they’re straight (or straight-ish if you live in a crooked-ass-house.) Screw into the studs using at least 2″ wood screws

First Piece Getting Screwed into Studs
Second Piece Installed (my husband has long ass girly hair, but he drives a motorcycle and lives in a hipster neighbourhood so its all good)
Second Piece Installed. Yes my husband has long ass girly hair, but he drives a motorcycle and lives in a hipster neighbourhood so its sexy and not at all white trash

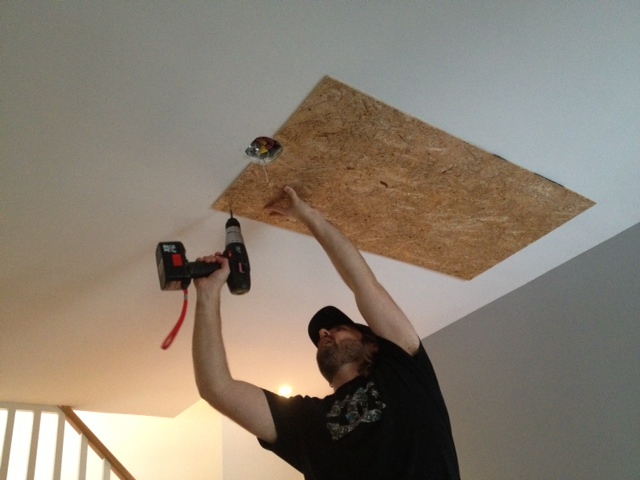
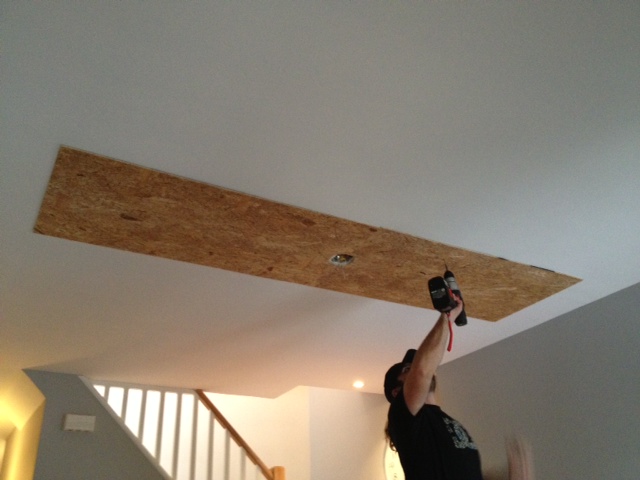
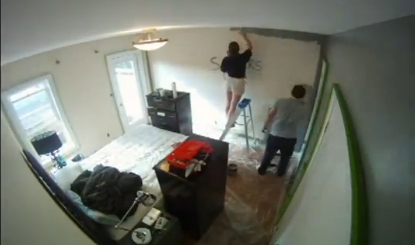
For the next sheets, both you and your spouse will need to simultaneously stand on ladders, holding a 4×8 sheet of plywood over your heads and screw it into your 10 foot tall ceiling making sure its straight and perfect. Name calling and/or tears are optional. If you eff it up, you MUST take it down and fix it. (that totally didnt happen to us… wait yes it did… shh)

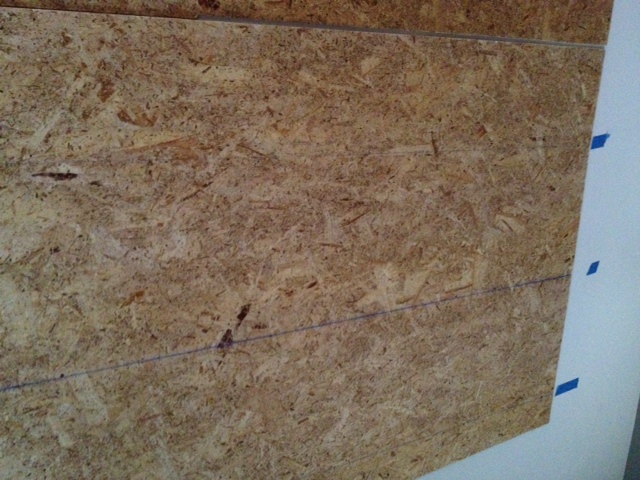
Once you have a couple screws in place around the edges, you can then chalk line between your screws to give yourself a guide where the studs are for easily screwing in more screws to make sure its super oober dooperly attached to the ceiling.

chalkline
Weird angle showing the chalk lines marking the studs

After you are finished, drink several beers and try to forget the urge to kill your spouse.

Ceiling Sheeting Installed (by now its dark, and you have no light in your room, and you give up and eat chicken wings and drink liquor)
This better be correct, cause I am never sheeting a ceiling ever again...
This better be correct, cause I am never sheeting a ceiling ever again…

If you’ve managed to make it through this entire post, I’m proud of you, perhaps a gold star is in order. Now come back next week while I bore you with more words, but actually put some tin tiles up (I know how dare I call this post Tin Ceiling Part 1 and there is in fact NO TIN CEILING.) I’m a jerk.

Installing Office Chair Rail

I like trim & moulding. Scratch that. I am kind of obsessed with it. Especially in an Edwardian home, I feel like we should have trim everywhere. Baseboard, Wainscoting, Board & Batten, Chair Rail, Plate Rail, Crown Moulding. I love and want it all.

So every room we reno, I tend to try to sneak in some trim. The office was no different. It was crying out for a chair rail. The one problem with the office was well, the walls were about as straight as Elton John. My favourite chair rail, which is a solid oak, ¾” thick beauty from Central Fairbank Lumber would be amazing, but would not fair so well with my squiggily walls. I needed something a bit more pliable. So El Granto, Odin & I walked to Downtown Lumber and picked out a lovely simple mdf pre-primed chair rail, and carried it home. Yes, I said carried it home. We do not own a car. So when we need building materials, we either rent the home depot bring it home van, or we buy from Downtown Lumber and walk the 2.8km along the West Toronto Railpath to and from Downtown Lumber. If you ever spy two crazy looking people and their red dog carrying home a 2×4’s on the walking path, that would be us. It’s actually not that bad. One person can easily carry a few 8 foot boards, it’s when it comes to 10 or 12 foot boards, that it’s helpful to have a friend. The biggest thing we brought home were 2x8x12’s for the deck. Those suckers were heavy! The folks at Downtown Lumber are even so kind to tape together multiple boards for me, so it’s easier for me to carry home.

Back to the task at hand… We walked home with our chair rail, and I quickly measured up my walls, and made a cut list. As our miter saw is in the garage, I prefer to do a cut list with all my angles, and head to the garage to cut everything at once. I am anal retentive when it comes to measuring and my trim cuts, so they are usually bang on. I quickly cut all the pieces. It was really simple as the whole room was only 5 pieces, so 10 cuts. My chair rail was a shallower depth then my door molding, so we decided to do flush cuts at the door frames. This means out of my 10 cuts I actually only had to miter the two corners (hint hint, this means that the other two corners in the room house my built in bookcases.) I then marked where the studs were on the wall and brad nailed the trim in place.

Now here is some edumacation for you. This is what a 2” brad nail looks like when you hit a drywall screw in the wall. He’s not a happy nail, neither was El Granto when he had to pull that angry nail back out.

What Happens When Your Brad Nail Hits a Screw
El Granto Removing Rogue Nail

When setting the chair rail position, I originally laid it out level. As the floor is not the least bit level, it looked really off. Instead I decided to make it parallel to the floor, which meant to the eye it would look all nice and straight. In cases like this, doing it right will make it look all wrong. So there is my advice, DO IT WRONG. Brilliant eh? Using the flexible MDF chair rail worked so well. It curved to our wacky walls perfectly. Now, had we painted out the chair rail white it would have accented how crooked the walls are, but as we were painting the chair rail the bottom wall colour, it would (hopefully) blend in.

We then filled all the nail holes with paintable caulk, and ran a tiny bit along the top of the chair rail, which made it look seamless to the wall.

Chair Rail Installed! Yay

Then it was time to PAINT!

HAHA aren’t I a tease? Painting post tomorrow I promise.

SOURCE LIST:

Materials:
MDF Chair Rail: Downtown Lumber
Brad Nails: My Garage
DAP Paintable Caulking: Home Depot

Tools Used:
Miter Saw, Measuring Tape, Compressor & Brad Nailer, Level

Difficulty Level (on a scale of 1-5):

Total Cost: $40

DIY Pallet Crates

If you have been being a good boy or girl, you will have read my Project Office post and you will know I have a lot to do! One of the items on the To Do list was crates for built in bookshelves. Bookscase DIY tutorial will come soon (I promise) but until then here is a sneak peak on how we made the crates to go ON the bookcase.

I was planning on sourcing some framing grade lumber and roughing it up a bit to get a worn look for my crates. Odin & I happened to be walking through an industrial area in our neighbourhood on Friday when we spied a pile of shipping pallets on the side of the road.

Stack of Pallets

I thought to myself, “self, there some rough wood, and its CHEAP rough wood”. You see, cheap is one of my favorite words. I like it so much that people often use it to describe me. So Saturday morning Odin and I took off to steal grab ourselves one of these pallets. I picked one that looked good, didn’t appear to have hobo pee or bugs on it, so I carried it home. By carried it home, I mean I walked 100 feet, rested, walked 100 more feet and had another rest all the way home. It was also a Saturday morning, and I had to walk past a hipster brunch spot in the neighbourhood looking like a crazy person. The dog happily trotted behind me wondering what on earth I was up to.

Stopping to take a break and admiring my “found” pallet

After lugging this darn thing home, swearing a few times, wishing I owned a car, and wondering what I was so damn crazy, I finally got down to work. I thought bringing it home was hard, I hadn’t yet met hard. Hard is not owning a crow bar, and trying to take out massive nails with a hammer and Mjölnir to pry and bash them apart.

Taking Apart Pallet While Trying not to Hit My Foot with a Hammer

Break time yet? GAH! This is hard work. You are probably asking right now, where on earth is El Granto? He was having a lovely day learning to drive NASCAR’s with his Dad and Brother. At about this point in time I was cursing him in every language that I know a curse word in. These include, English, French, Spanish and German. My mother would be disappointed that I don’t know any Danish curse words. The worst thing I know is how to say underwear in Danish. This was a hit when I was six…

So… I finally managed to pry apart some boards, and then bashed out the nails.

Striped Apart Pallet

As you can see the wood before sanding is…well kinda gross. It will get better, I promise. Now I put some super rough sandpaper in my palm sander, and set to work.

Getting Ready to Sand

Once I sanded everything, using the dimensions of my bookshelves, I decided on a size for the crates. I wanted them to fit in the bookcase nicely, but have a little room to slide in and out. I drew up a quick diagram on a piece of wood, and started cutting! The finished size for the crates are 29″x10″x11″ and 13″x10″x11″. I cut my front pieces 29″ long for the big ones and 13″ for the small. The sides were 8 1/4″ and each crate was 3 boards high. I cut the boards to length on the miter saw, and used scrap pieces of 1×2’s as corner braces. I attached the front panels to the corner supports using brad nails. I spaced the corner supports 5/8″ in from the edge to allow space for the sides to fit flush.

One Front of Crate Assembled

I assembled both the fronts, then attached them to the sides with more brad nails. I then traced a bottom for the crate onto some extra hardboard we had laying around the garage. I cut out the hardboard with the circular saw, and nailed it to the bottom of the crate.

Voila! Crate!

The wood is all different thickness, and I didn’t worry about having everything match perfectly. It just adds to the distressed look. After I had assembled it, I took the palm sander to it again making sure there were no sharp corners or splinters. There, I was done! It only took me 3 hours to make one crate. Wait, what, I need four more of these? DAMMIT! I better get back to work. I sanded and cut the wood to length for one more crate, but I ran out of brad nails. Uck. So I waited for El Granto to get home from his NASCAR adventure and then headed to Canadian Tire to pick up more nails, and some felt furniture sliders for the bottoms of the crates. We also stopped and pilfered one more crate on our way home, which I made El Granto carry, and he cursed me in the same fashion that I had cursed him earlier. Once I got home, a soft couch and a cold drink sounded better than doing more work, so I gave up, and left it for Sunday.

Sunday morning, we got all ready to start work (this time with El Granto in tow). When we went outside our neighbours were putting up a big glass panel on their amazing deck, and asked for some muscle. El Granto went to help, and I got back to work making more crates. El Granto’s work conveniently consisted of standing holding a piece of glass for an hour, then being rewarded with a plethora of yummy beverages. Of course he preferred doing this to helping me make crates…so once again I was bustin my ass alone. El Granto did stop in to help me take apart the second pallet (it’s much easier to watch him then to do it myself.) I proceeded to make one more big crate, and three little ones.

Small Crate

The little ones are cute. Like a puppy version of a crate. I finally finished all five of my crates, and stood back to appreciate my giant stack-o-crates.

Stack-o-crates!

Some of the wood turned out really cool. The ones that look all spotted were really really rough boards, that I sanded and sanded and sanded and they came out all spotty! I also really like the boards with the rough saw marks. I thought I may have to distress the crates more, but I think they look fairly worn. They look like driftwood almost. I was on the fence with staining them, but we like them just the way they are, so we’ll leave them as is for now. They do need some hardware, I am waffling between shiny fancy nickle handles (that I am using elsewhere in the room) or sticking with rustic and using some rope, either as a handle, or making small monkey’s fists and using them as pulls. What do you think?

Sneak Peek of a Crate in the Office

So what do you think? Free crates, were they a pass or a fail?

UPDATE!

My idea to use pretty polished handles on my crate was overruled by El Granto, my Mom, our neighbours, my co-workers and the garbage man. So rope handles it is!

We checked Rona, and their rope was too big, Home Depot had even bigger rope and some smaller rope. We went with the small one. In hindsight, I wish it was a bit chunkier. Will be keeping an eye out for some bigger rope. Also, check out the completed bookcase here.

SOURCE LIST:

Materials:
Wood Shipping Pallets : side of the road
1×2’s: Pile-o-wood in my garage
1/8″ hardboard: My garage
Brad Nails: Canadian Tire
Sandpaper: Canadian Tire
Felt Furniture Pads: Canadian Tire
Rope: Home Depot

Tools Used:
Maul, Hammer, Circular Saw, Miter Saw, Measuring Tape, Compressor & Brad Nailer

Difficulty Level (on a scale of 1-5):

Four out of Five

(cause damn those pallets were heavy!)
Total Cost: $7 for the rope & furniture pads

Painting in 30 Seconds

I lured you in with the post name didn’t I?

You figured I had some magic painting technique that would revolutionize your painting and blow your mind?
Sorry, no can do.

But I DO have a really cool video of us painting our master bedroom. Continue reading “Painting in 30 Seconds”

Building a Fence!

Before we got Odin we knew we needed a fence. There was a slightly dilapidated chain link fence between our house and our neighbors to the north (we have a 30′ brick wall to the South and a garage on the West end of our yard). We have an amazing relationship with our neighbors. They are a young family, who is currently renovating their entire house as well. We wanted a fence that would be functional, provide privacy but also allows us to socialize when we want to.

We put pen to paper, and designed a horizontal slat fence with 5″ boards and 2″ boards. We were going for a traditional meets modern design. We then set out to removing the old fence. We prepared shovels and tools, and mustered up the courage to start digging out deep concrete foundations. El Granto started pulling absentmindedly to one of the fence posts and the post easily started to come up, so he pulled more and more, and out came the post! All of the other posts came out just as easily, except one that was too close to our deck foundation, and must have got stuck in the deck’s concrete when it was poured.

Now it was time to build!

Fence Before

Our fence needed to be 26 feet long, and would be anchored on one end to our 2 story deck, and on the other end to our cinder block garage. We used 4×4 posts for our main supports. We used 10″ bolts to attach one 4×4 to the deck, and masonry screws to attach another to the garage. We then spaced out our two center posts equally so that all the fence panels would be the same size. This would involve loads more cutting, and more wasted wood, but visually it was much nicer.

As we were anchored at both the deck and the garage, we used post spikes for the two center posts. Now don’t you do shaking your finger at me… Yes, we could have dug post holes and filled with cement, but our ground is FULL of rocks, and the thought of digging those holes was, well…unplesent.  So we looked into other options. We found the level-able post spikes, and after considering our fence (it was a small span, well anchored at either end, was sheltered by a 30′ wall on one side). It wouldn’t be subject to gale force winds, or pole vaulters, so it would be.just.fine. I will hear none of your “you took the easy way out”. OF COURSE we did. The hard way sucks.

Back to the task at hand. We set the fence spikes and El Granto got to hit things with Mjölnir (yes.. that is what we named for our great big hammer. If you’re ever at our house and need the use of a big hammer, you must ask for Mjölnir, anything else and you will be ignored. (No “Maul”, “Big Ass Hammer”, nothin.)

Grant Uses Mjölnir to Hammer in the Post Spikes

We set the posts, leveled them, and then got to putting on the boards. This would have been a time when two cordless drills would have been handy (hint hint Santa). We spaced the boards right tight up to each other knowing that they would gap some as the wood shrinks.

Kristen Screwing on Fence Boards

When we got up to eye level, our fence was starting to look like a wall, not a fence, so we spaced out a row of the smaller 2″ boards, so that we would have a space that we could see and converse with our neighbours. Once we finished one fence panel, we dropped a chalk line and cut off the overhanging boards with a circular saw.

El Granto Setting the Chalk Line and Cutting off the Excess Boards
Getting Ready to Cut

Once we finished fencing all the panels, we placed fence boards vertically where the two panels met to cover the cut marks. We screwed in the last board just as the sun was disappearing. Finishing the top of the fence would need to wait for more daylight and lumber. That was one hard days work, time for a drink!

The Last Board Went On as the Sunlight Went Down

The fence stayed ugly like this for a few weeks until my Mom & Dad came down to help us reinforce the deck (that’s another story for later). While they were helping us, we used the opportunity to borrow Dad’s truck, and head to the lumber store for some 2×6’s to make top rails for the deck.

Here is the finished product!

Fence After Looking Towards House
Fence After
Fence After Looking Towards Garage

SOURCE LIST:

Materials:
Pressure Treated Lumber (1×2’s, 1×5’s, 4×4’s & 2×6’s) : Downtown Lumber
Fence Spikes: Downtown Lumber
10″ Bolts, 1.5″ Deck Screws: Home Depot
Titen Masonry Screws: Home Depot

Tools Used:
Maul, Circular Saw, Chalk Line, Drill

Difficulty Level (on a scale of 1-5):

How it all started

A year and a half ago, El Granto and I purchased our first home. A 100 year old storefront in downtown Toronto. It was recently converted, had a beautiful reno, was ideally located, had a yard for a future dog and a garage for El Granto’s motorcycle. Perfect. We signed the papers, and moved in a month later. Then the skylight leaked, the sink leaked, the brand new dishwasher didn’t work, the basement leaked, the storefront window leaked and the icing on the cake; the dryer vent leaked into our bedroom ceiling making for a hell of a mess days before Christmas. We were in trouble. Luckily we received some awesome help from Mike Holmes and his Holmes Inspection crew.
Here is our story!

Watch Moisture Madness
Watch our episode “Moisture Madness” on hgtv.ca