Kitchen Faucet

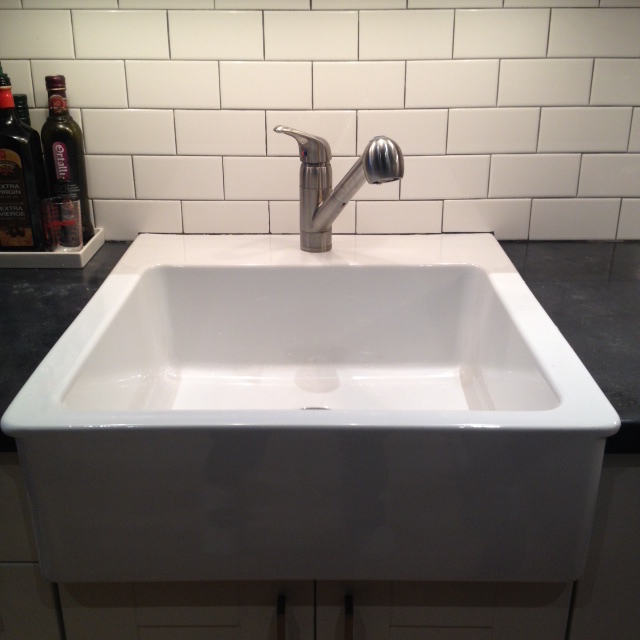
When we updated our kitchen waaaay back over a year ago, we had big intentions to upgrade everything. Pantry, faucet, lighting, storage. However…by the time we finished the projects we did take on, we had run out of time and money. Womp womp. Those last few little projects got put in the “next time” category, and we told ourselves that they would be the next things to be tackled. A year plus passes, and it’s a sad day when you look at your beautiful counters, sink and backsplash, and shake your head at your old kitchen faucet marring the beautiful otherwise finished space. (OH, or caulking the back of the sink, totally failed to complete that one too!)

photo 4(4) photo 5(2)

Kitchen faucets are a big decision. It’s the most used item in the kitchen. From cooking and cleaning, to filling the dogs water bowl. That sink and faucet get used all day long. I wanted to make the right decision on our kitchen faucet.

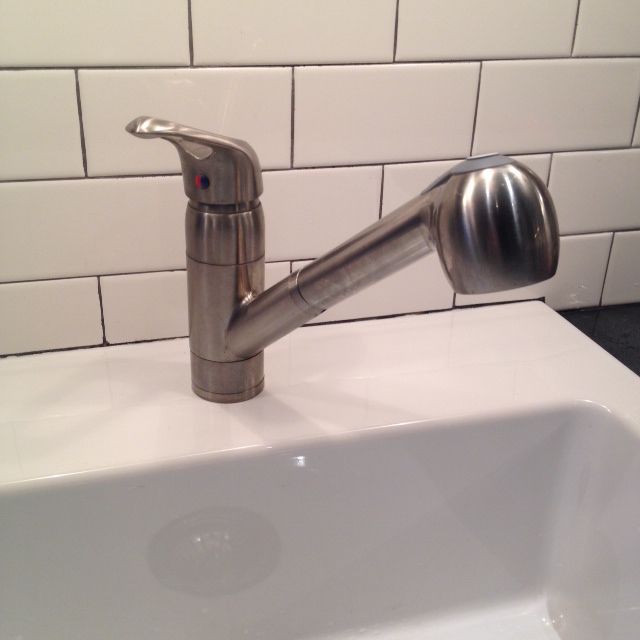
We had several considerations when faucet shopping. Firstly, we have a cabinet right above our sink (that could not be raised, as it sits asymmetrical to the sink). That cabinet severely limited our faucet height, and we needed to choose a faucet that was not too tall. Secondly, the white farmhouse sink is a bit high maintenance when it comes to cleaning. Its got a nice flat bottom, but food tends to hang about, not making its way to the drain. Our current pull out faucet is incredibly helpful for giving the sink a quick rinse, and keeping everything clean.

With that in mind, our faucet options were now limited to shorter faucets with pull out sprayers. This takes probably 75% of kitchen faucets out of the running!

After some pretty big deliberations, and weeks of himming and hawing, we had narrowed it down to two Riobel faucets.

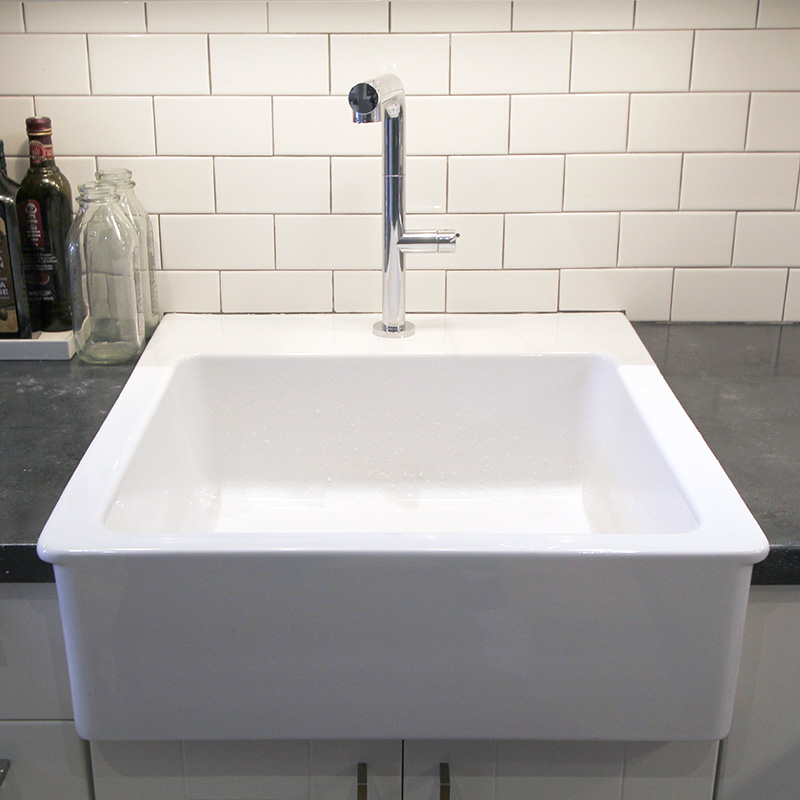
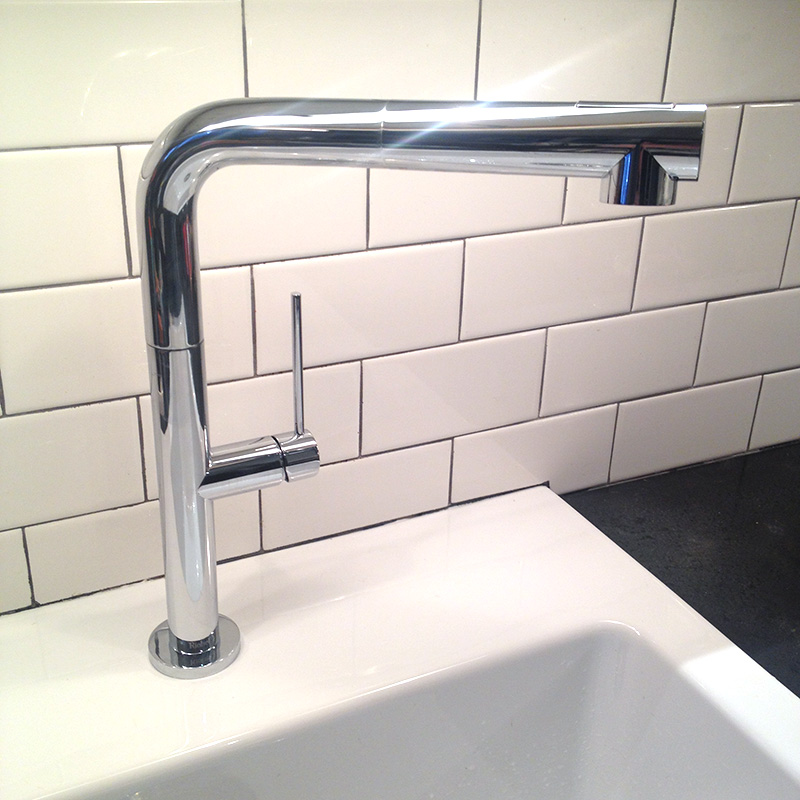
The modern but classic FE101, with sleek pull out sprayer, single temperature and water lever, swivelling spout and two spray settings.
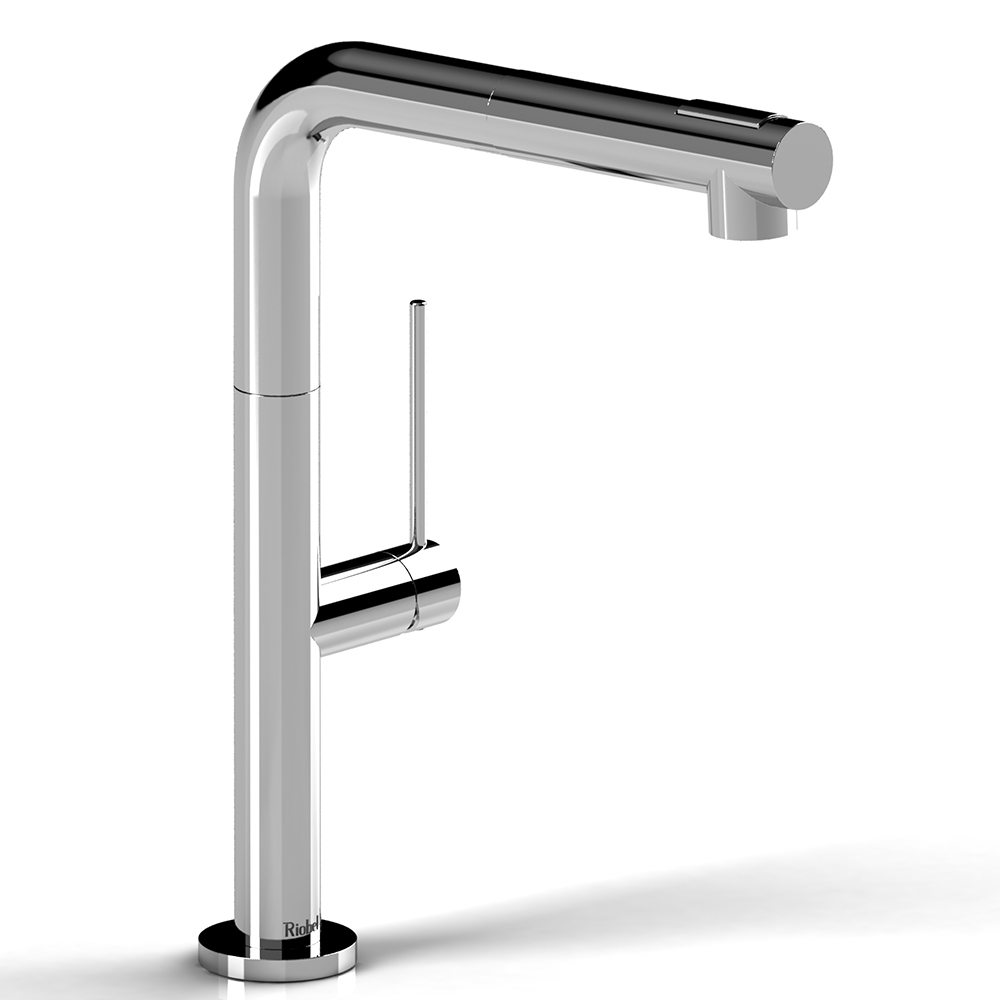
Riobel FE101C
Riobel FE101C


OR the BR400x classic yet refined bridge faucet with flat cross handles and side sprayer.

Riobel BR400XC
Riobel BR400XC

I loved loved loved the bridge faucet, but El Granto wasn’t a fan of the dual temperature adjustments and I was worried about drilling so many holes into my ceramic sink, and about how in style they would be in a few years. Bridge faucets are a big fad right now, and I was worried they would be the next mason jar or chevron.

After several restless nights sleep, I finally pulled the trigger, and ordered the FE101. We installed it in less than 15 minutes (it had a magical wrench free installation), and for the last month we have been putting it to the test.

IMG_3642-WEB

All of its mechanisms are smooth and responsive. The temperature and water control handle move with the slightest touch, and water can be easily adjusted for filling up things (like water bottles) where I tend to make a huge mess if the water is on full blast.

The swivel is smooth and the faucet stays where its placed, even when it is off to one side.

IMG_3632-WEB

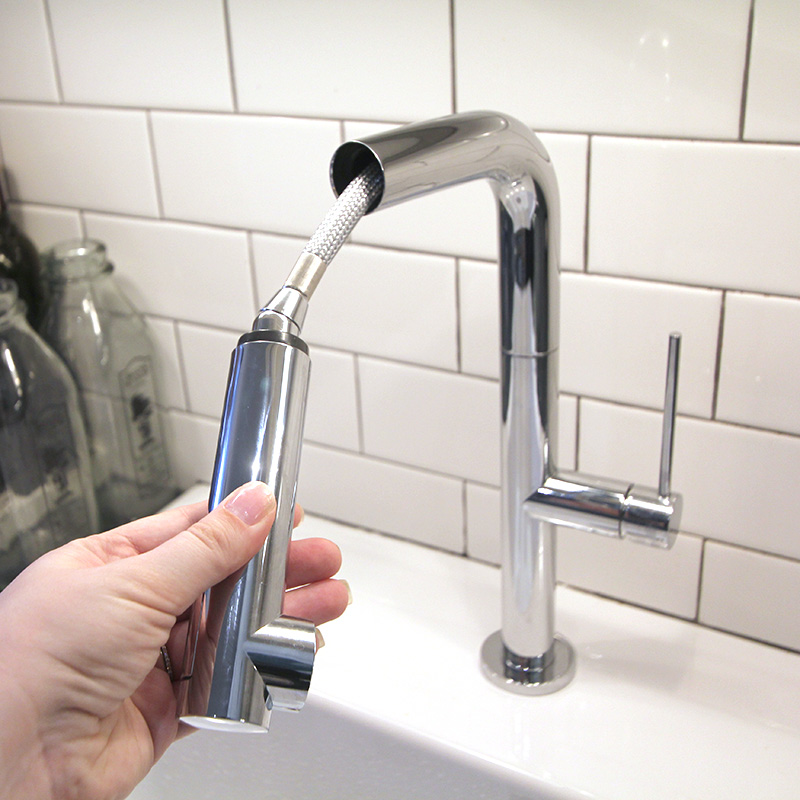
The pull out sprayer is easy to use, and the end has a ball bearing, so the directional control is incredible. The sprayer also has a magnet so it pops itself back in place when the sprayer is retracted. To change between sprayer settings, there is a hidden switch on the sprayer. When activated the stream of water turns to a nice spray that is perfect for washing vegetables.

Kitchen2web

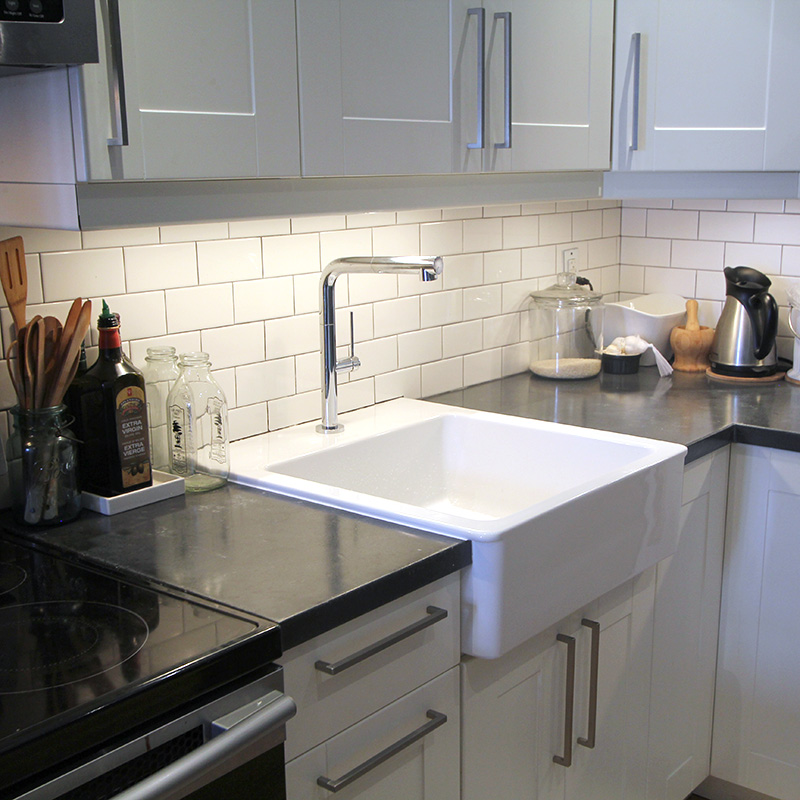
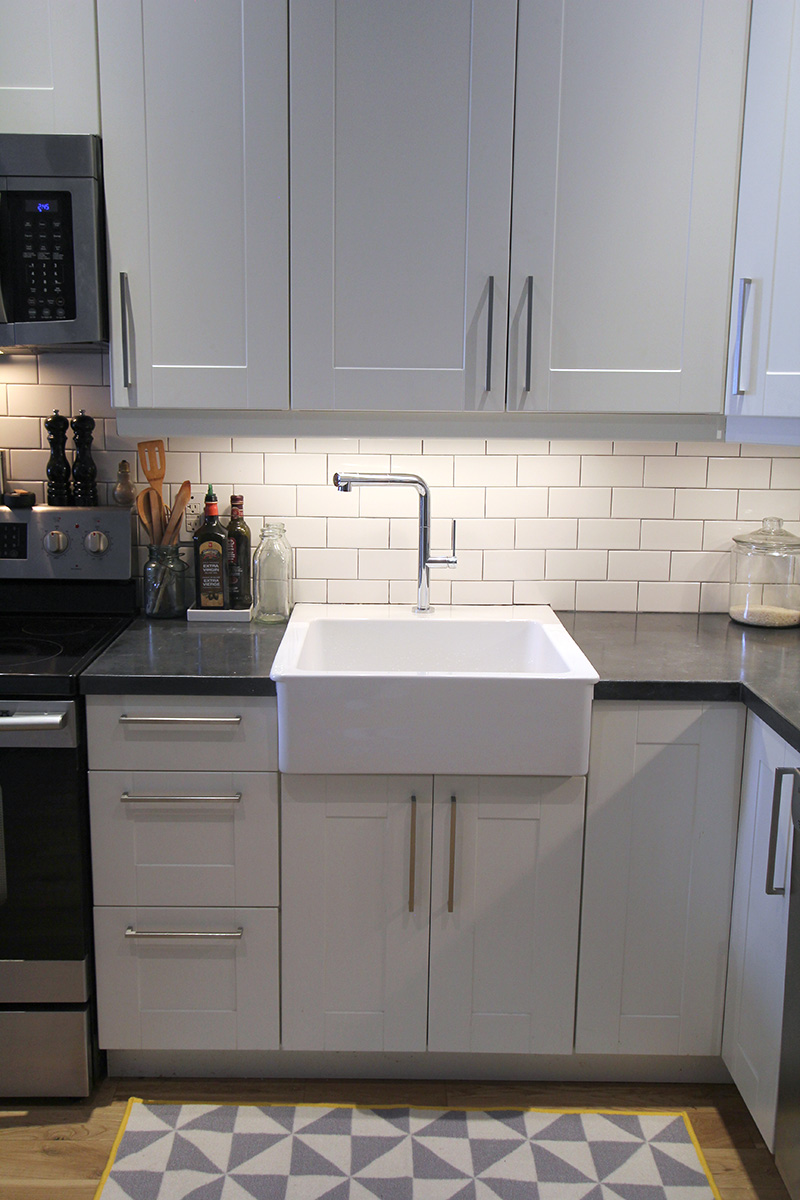
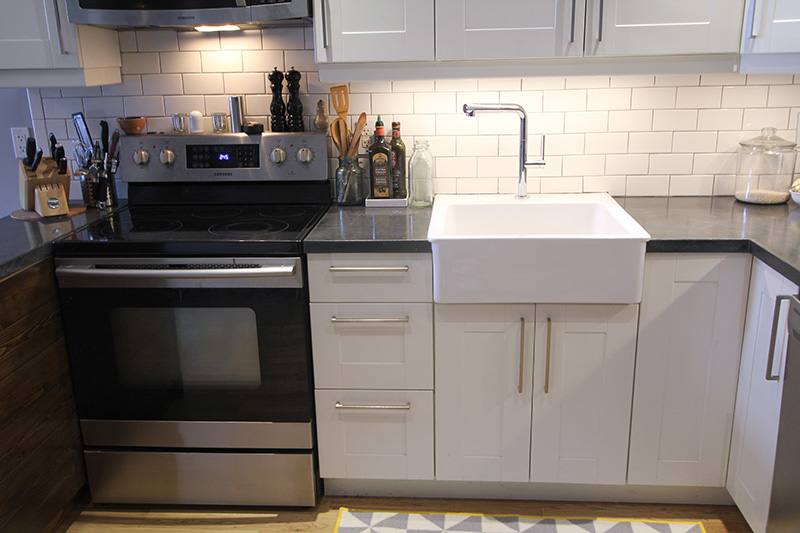
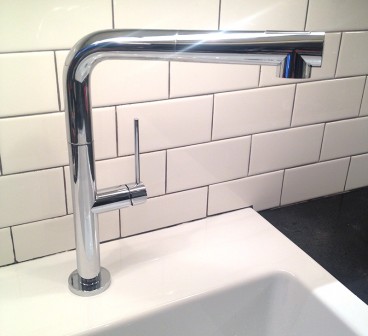
The faucet itself is chrome, which adds a lot of sparkle to the kitchen. We have under cabinet lighting, and the faucet catches the light and just glows. The chrome does easily show fingerprints, but a quick wipe with a tea towel and its spotless. Our last faucet had a lot more water spots on it, as the only way to turn it off was to reach your hand above the faucet. As your hands are wet, you were perpetually dipping onto the faucet. With our faucets controls on one side, any water drips fall to the sink deck, and not on the faucet. This has made keeping it looking good a lot easier.

photo(2) copy

kitchen4web

We have really run the faucet through its paces. From washing the smoker grill, to filling up watering cans and buckets. The hose on the sprayer is long enough that I can set the dogs water bowl on the counter and fill it up without having to put it in the sink. It has performed very well. We only had to make one modification. The sprayer water line is quite long, and was getting caught on the bottom of the P trap. To fix it, we changed the position of the hose weight, and it hasn’t gotten stuck in the last few weeks.

Also, I only managed to spray water all over the kitchen ONCE by accident. When I placed the sprayer back in, I did it so the spray was facing to the side, not down. When I turned the sink on again, a jet of water shot everywhere. Lesson learned; don’t point your guns at things you don’t intent to shoot.

Kitchen3web

All in all we are very happy with our faucet choice. We are just wishing we made this decision when we renovated the kitchen. It also classes up the joint! Bye bye builder basic faucet, and hellllo pretty lady!

If you haven’t heard of Riobel, you should check them out. They are an awesome Canadian company producing some pretty fabulous faucets. You can check out their dealer locator.

What do you think of our new sink candy? Have you installed a kitchen faucet?


Disclosure: We partnered with Riobel on this project, but all opinions, typos and missing commas are of course our own.


Project Pantry

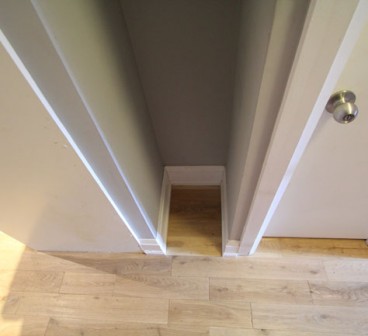
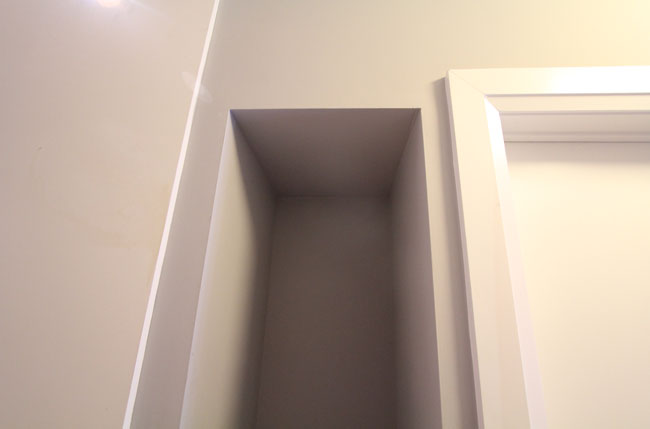
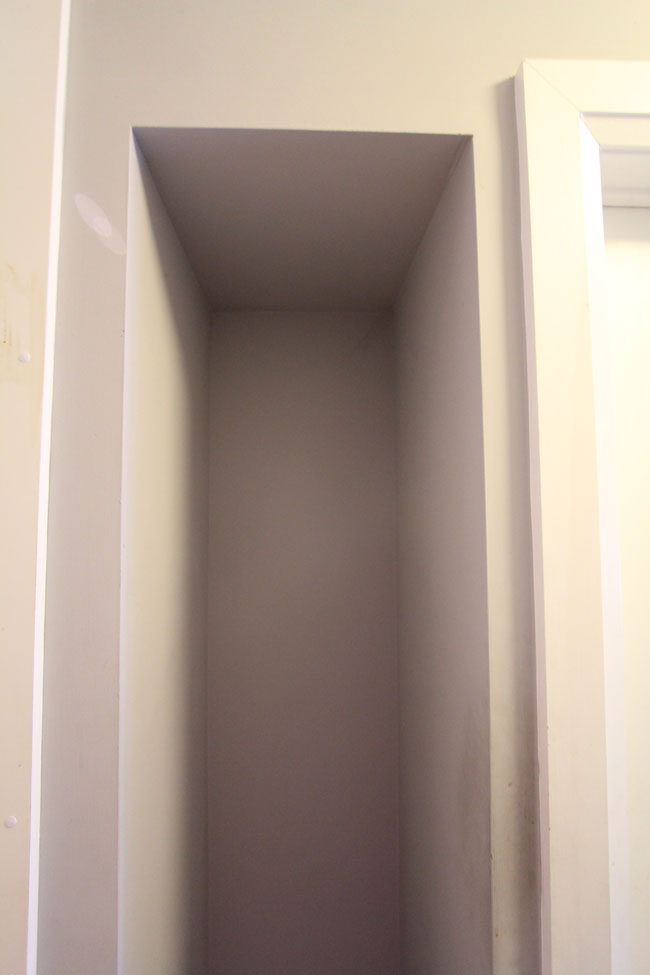
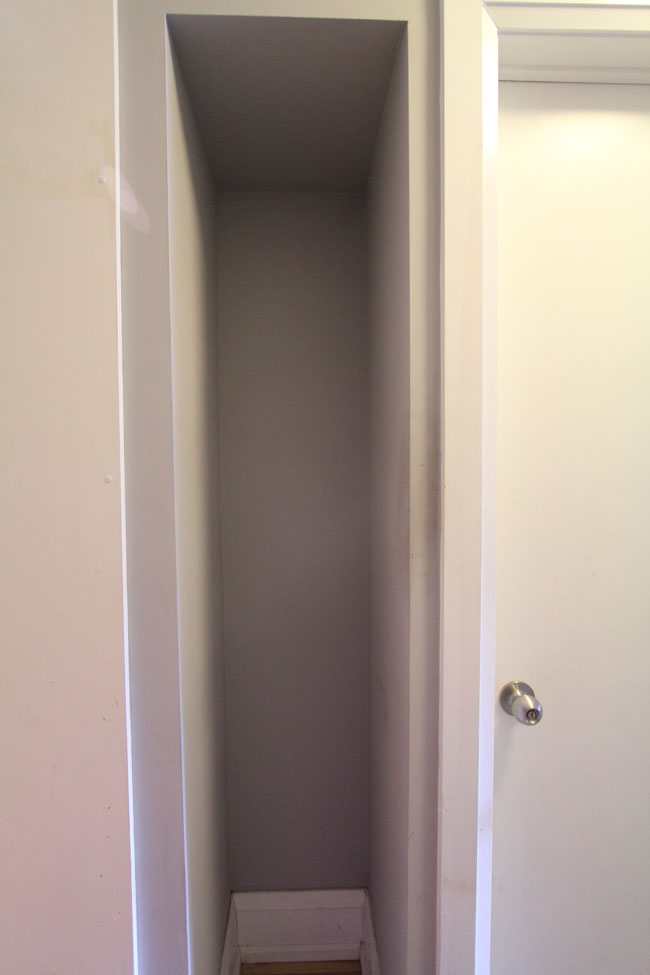
In our main floor hallway lives a strange small nook. He resides between the side of the refrigerator, and the powder room. He’s tall and skinny at 81″ high, 15″ wide and 18″ deep.

We have lived with this weird nook for four years, and during that time Mr. Nook has held the broom, dustbin, dog food, soda bottles, and a plethora of other things you had no idea where to put. At parties, I have come across one or more people just hanging out in the nook, having a jolly good time.

But seriously though, what the heck is Mr. Nooks purpose?! We live in a small 12′ wide house, and real estate is prime. Mr. Nook was taking up valuable space, and not being very helpful.

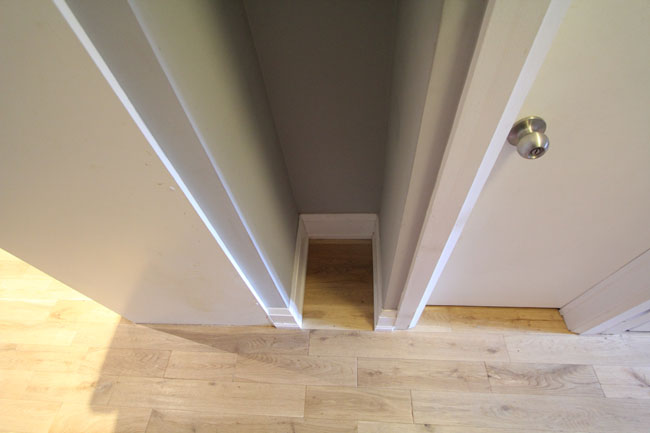
Here is a look at the nook in all its glory. Sorry for the closeups. Even with a wide angle lens, this nook is hard to photograph.

IMG_3006WEB

To the left of the nook is the cover panel covering the side of our refrigerator. To the right is the door to the powder room.

IMG_3010WEB

The nook is even trimmed out with baseboard! It’s like a tiny little room.


IMG_3005WEB

Here you can see that it is framed up to be the same height as a regular door (but only for really skinny people).

We were at Ikea the other day picking up the last of our glass doors for the coffee bar, as Ikea went and discontinued ALL their current kitchens. We were still missing a few glass doors, so we hustled there to grab them before they sold them off. As you know, I cannot go to Ikea without perusing the AS IS section for possible project supplies. I was sorting through loose cabinet doors when I struck upon these doors.

4dd4b32e38babc1a6216f401c5177275

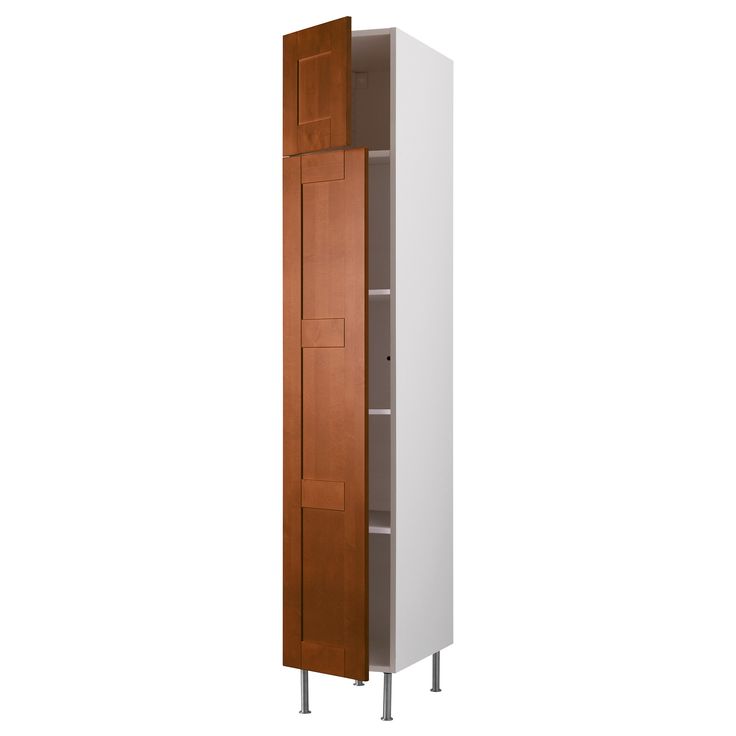
They are Adel brown high cabinet doors meant for Ikea’s pantry system. The door style is Adel (same as our Kitchen) but in brown. Armed with an Ikea paper measuring tape, I noticed that the doors were almost the same size as my nook. The total height of the two doors was 79″ (my opening is 81″) and the width is bang on at 15″.
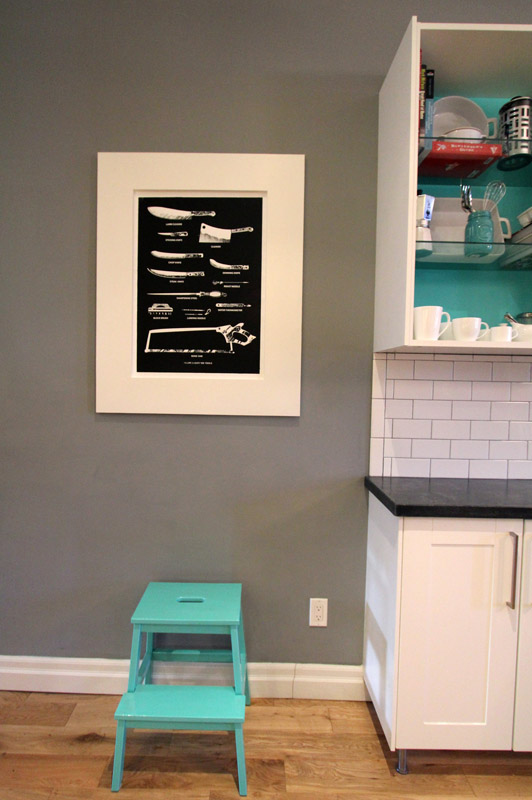
The doors were the wrong color for my kitchen, but they were…wait for it…$23 total.

The doors promptly got tossed onto the cart, and brought home with us, while I was giving fist bumps to random strangers and congratulating myself on a badass score.

I know what you’re thinking:

A.) The doors don’t even match my kitchen

B.) The nook isn’t even IN my kitchen

C.) I didn’t buy a cabinet to go along with the doors

All true. BUT I have a PLAN!

IMG_3001WEB

Step One: Lengthen the door an extra two inches. Fill the current hardware holes on the door, lightly sand, prime and paint to match my kitchen cabinets. (no really, it will match, I promise. I already tested it out by making my own cabinet cover panels for the coffee bar.)

Step Two: Trim out the door opening, add reinforcement for the hinges, hang the doors and add hardware.

Step Three: Deck out the inside of Mr. Nook with some badass storage solutions.

What kind of storage you say? Drumroll please…..PANTRY!

Here is the pantry plan:

Drawers for spice, pasta & boxed good storage.

Shelves for tins, bottles, jars and canisters of dry goods.

Sheet pan vertical storage.

Counter to set things down on. (Inspired by Karen’s pantry)

I will get started as weather permits (it’s darn cold in our garage right now!)

In the interim, check out my Kitchen board for some of my pantry inspiration.

Follow Kristen – Storefront Life’s board Kitchen: Modern + Industrial + Traditional on Pinterest.

What are your must haves for a pantry?


Samsung Kitchen Appliance Review

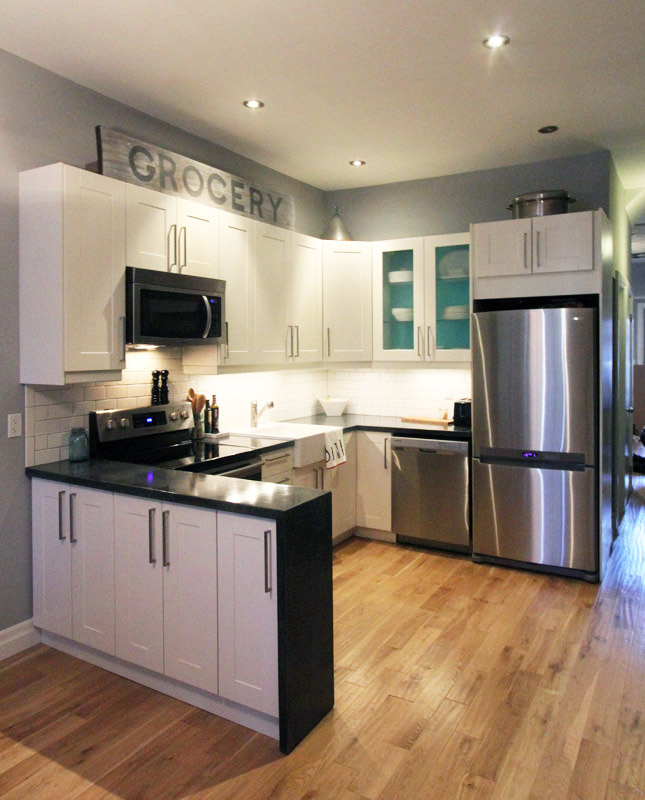
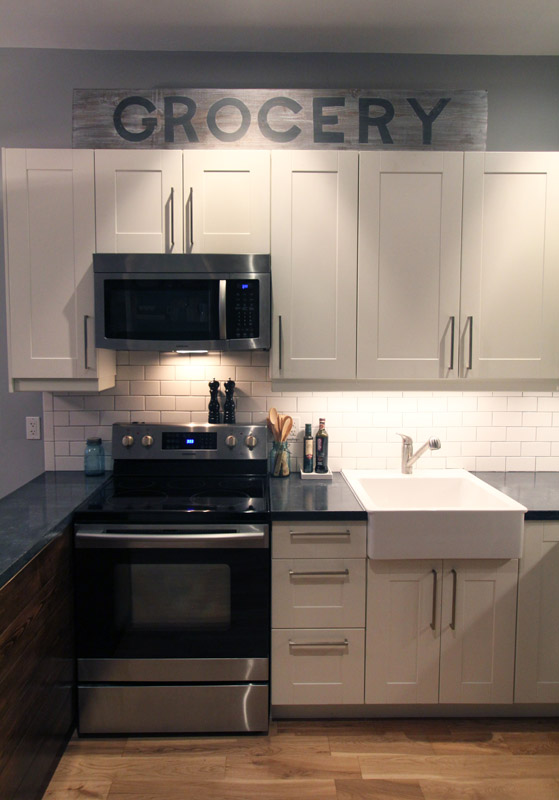
We did some big updates in the Storefront kitchen in the past year. We added the 7 foot long coffee bar, enlarged our peninsula, added a new sink, ceramic tile backsplash and of course our DIY concrete countertops.

One thing we didn’t change was the appliances. The appliances came with the house and were two  years old and still looking/working like new. While we did not choose the appliances but we do get a lot of questions about them.

So here goes, our review on our Samsung Kitchen Appliances.

IMG_2490WEB

Samsung bottom mount refrigerator freezer. See here for current version of this fridge.

The fridge gets two thumbs up on appearance. It is a clean lined fridge with no visible handles (they are inset handles on the side of the fridge door and top of the freezer.) The controls are located on the top of the freezer and are easy to control and do have a child lock. The stainless steel is a high quality and polishes and cleans to a streak-free shine very easily. The interior storage is great with two climate controlled produce drawers at the bottom, and a mid level cheese drawer. The door has lots of shelves and cubbies to hold all of our condiments. (Why do I have more condiments than actual food in the fridge?!)

The freezer is large, but to be honest it’s a bit hard to access. It opens with a swinging door, then inside are two drawers. You have to completely open the door to access the drawers which makes it a bit more complicated to reach in and grab a few ice cubes. It does hold a fair amount of food and does a great job of self defrosting. However due to the self defrosting, it can “eat” ice cubes meaning that if you make a tray of ice cubes and leave them in there they will eventually shrink and disappear. The moral of the story is use your ice or lose it.

Overall score. Three awesomes out of five.


Samsung Dishwasher. Current model here.

When we moved in the appliances were brand new, and had never been used. The first time we turned the dishwasher on, it worked for ten minutes than turned off with a leak sensor activated. After three service visits we were told it was a manufacturers default. However the model had since been discontinued and we could either have the lower model, or we could have a store credit for the amount the previous owner paid (on sale) to buy the more expensive model. Being the broke new home owners we were, we opted for the lower model. Big mistake. Our new dishwasher has been disappointing from day one. The display system is unattractive and the stainless steel quality is poor. It does not clean up half as well as the fridge, and mars so easily with spots and splashes. It never looks good, and is dull in comparison to the fridge. We could overlook all of this if it worked well but… the dishes are perpetually dirty, especially things on the top rack. We purchased the recommended dishwasher tabs and use Jetdry, and yet there are always food particles on our dishes. Probably half of the dishes need to be rewashed after coming out of the dishwasher. Plus one cycle takes several hours to complete. If it meant clean dishes, I could live with it, but dirty dishes and a long cycle have me wanting to sink some cash into a new (quality) dishwasher.

Overall score. One awesome out of five.

IMG_2564WEB

Samsung electronic range. Current model here.

The stove is made with the same quality stainless as the fridge and cleans up great. The oven is fast to heat and has a very consistent temperature.  The oven door has a really great seal. Sometimes too good, and it can tend to steam things slightly. The broiler is very powerful (and has two settings) and is perfect for broiling. The one downfall is that it has a hidden bottom element, and if anything overflows or spills while cooking, it will hit the bottom of the oven and burn instantly making tons of smoke and causing a big mess. The oven controls are easy to use and the oven emits an “I’m hot!” noise when its done. The stove-top is a flattop electric. It has four burners. Two small, one large, and one combination small & large. It also has a 5th warming burner. The burners heat up fast and offer good control. There is a “hot surface” light that indicates one or more of the burners are still warm. The one con is the cleanup for the glass cook-top. It takes major dedication (and elbow grease) to keep that thing spotless! Luckily El Granto is a little bit… we’ll say “obsessed” with it being clean (which is funny because he rarely uses it).

When we renovated the Storefront, a gas line was run into the basement below the stove. When we are ready to update the stove, we will absolutely be switching to gas and the cooking performance and control gas offers. We are a foodie household, and while this stove does good enough, it has room for improvement.

Overall score. Three awesomes out of five.

IMG_2796WEB

Samsung combination microwave/vent hood. Current Model here.

This puppy is a little workhorse. It does a good job extracting moisture and smells from cooking. It also has a nice light perfect for shining light on the stove. It is also a pretty good little microwave. We’re not really microwave people, but it’s great at what we need it for (melting butter, defrosting, cooking a baked potato.) It’s got a lot of pre-programmed items, and they do work well. The potato & defrost are bang on. Its got a good display, and is easy to use. It comes with a removable “shelf” which makes it easier to reheat more than one item at once. While it is very good for a microwave, I would get more use out of a large exhaust hood in its place.

Overall score. Four awesomes out of five.

Closing Thoughts: We have quite a lot of Samsung items (I am typing this from a Samsung Chromebook in front of our Samsung TV.) We are happy enough with all of the kitchen appliances except the dishwasher. I would not recommend a Samsung dishwasher. It severely under-performs, and we will be tossing it and searching for a new (non Samsung) model soon. My favorites are the fridge and microwave/vent. BUT if you offered me a gas slide in range, I would throw my Samsung electric range under the bus, but it does work well, and is definitely a quality stove.

What kitchen appliances do you have and love? Can you recommend a good dishwasher?

*We have no affiliation with Samsung, and this is our unbiased, unpaid honest review.


Concrete Countertops – Finishing Touches

Thanks guys for all the kind comments on last weeks concrete countertops reveal! Also a big thanks to Apartment Therapy for sharing our project, and welcome to new readers from AP!

We’ve got a bit more housekeeping to do on the countertops before we’re done. After we brought them into the house, they needed to be installed, sealed & caulked.

This may sound like the boring parts, but they are the most important (seriously). If you don’t seal the countertops properly, they will stain and mark and you’ll be peeved. I think most people that give concrete countertops a bad rap, have skipped this important step, or didn’t use the right sealer.

Okay, lets get sealing! Now, you do not want to go out and buy a concrete patio sealer from the hardware store. A.) You won’t know how it will turn out, B.) it could wreck your protect and C.) It’s probably not foodsafe.  So just buy actual concrete counter sealer, m’kay?

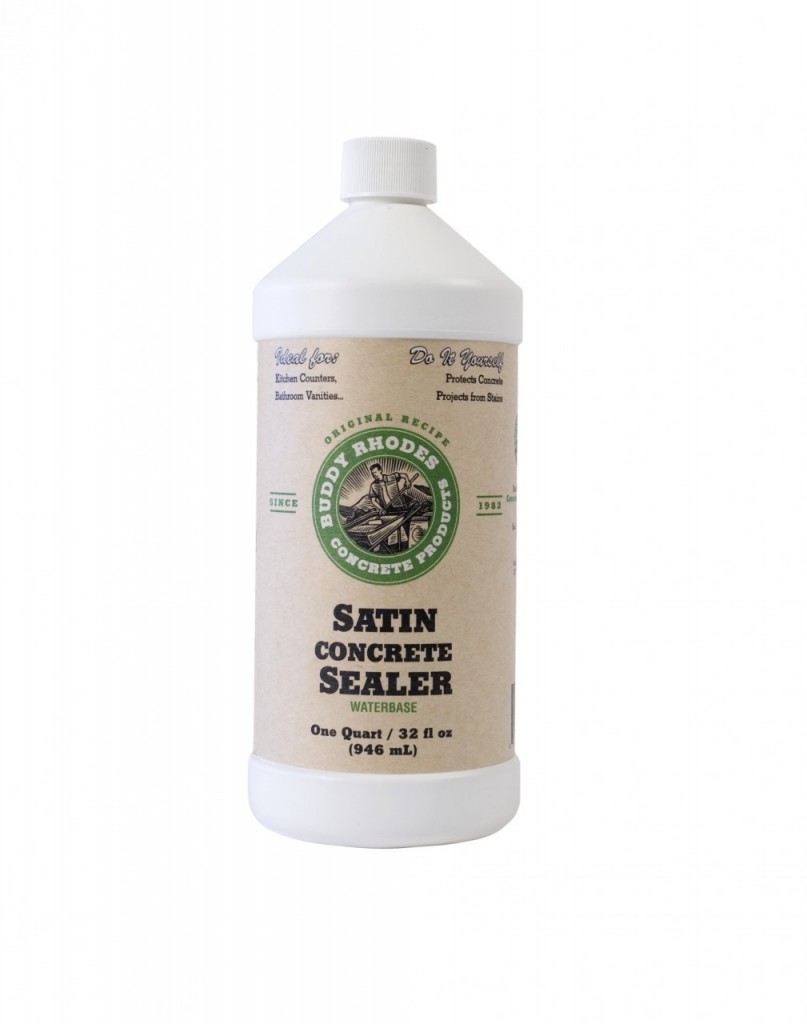
We used Buddy Rhodes Satin Sealer cause its super easy to apply and works well.

Buddy Rhodes Satin Sealer

After our counters dried a few more days (leave it a week if you can). We applied about 7 or 8 coats of sealer with a soft (clean) microfiber cloth.

I made a video of myself applying said sealer, then viewed it, and realized I maybe should have, oh I dunno, washed my hair, or changed out of my work clothes so that I didn’t look like a complete mess. So instead I give you a much better video of Buddy himself applying the sealer.

How do you know when to stop applying the sealer? Essentially when the surface of the concrete looks uniformly coated. Then do a test to see if it repels water (if the water beads up). If the water soaks in, you need more sealer (just wait for it to dry out first).

Our counters were a bit too wet when we first sealed them (and the sealer couldn’t soak in as much as it could have), so we ended up putting a few more coats of sealer on a week or so after when we noticed the counters were starting to absorb water.

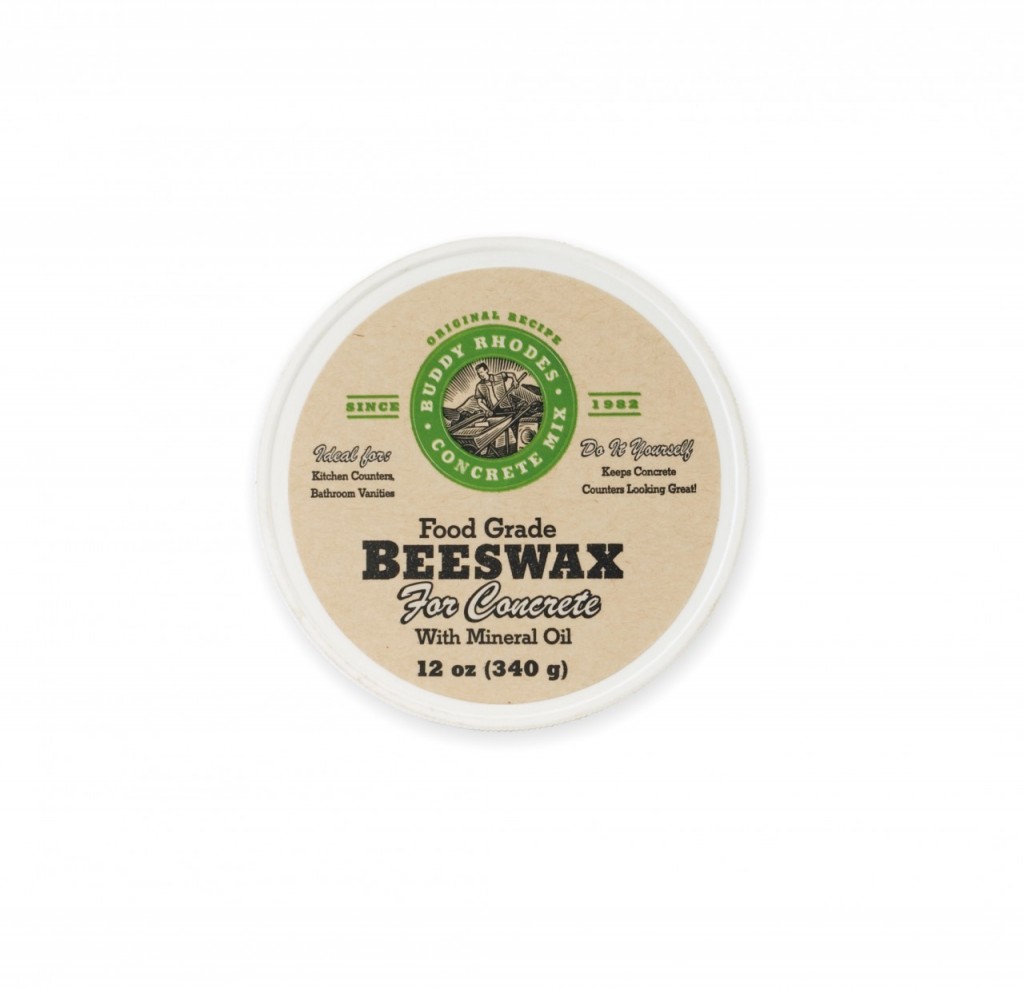
You can also finish with a beeswax to add even more protection (only after your counters are super sealed).

Buddy Rhodes Beeswax

After they were sealed and we were happy as clams, we attached the counters to the cabinets using some latex caulking w/ silicone. We lifted the countertops, squirted in some caulking (we used about a tube for the whole kitchen) and put the countertops in place and let everything dry.

Attaching Countertops to cabinets
Attaching Countertops to cabinets (sorry for the blurry photo!)

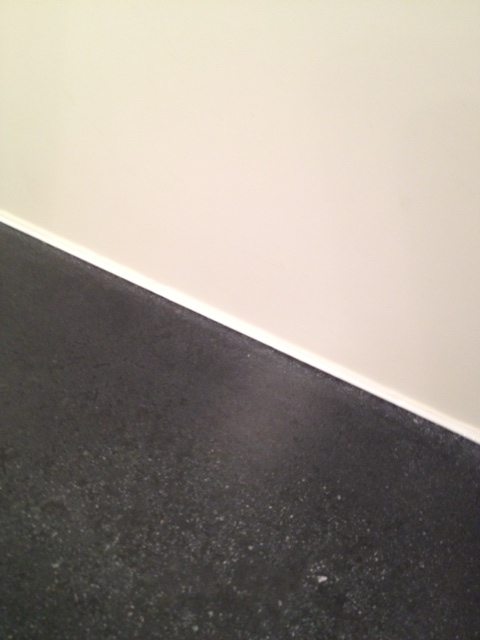
Then we caulked the countertop edges where they met the wall and cabinets.

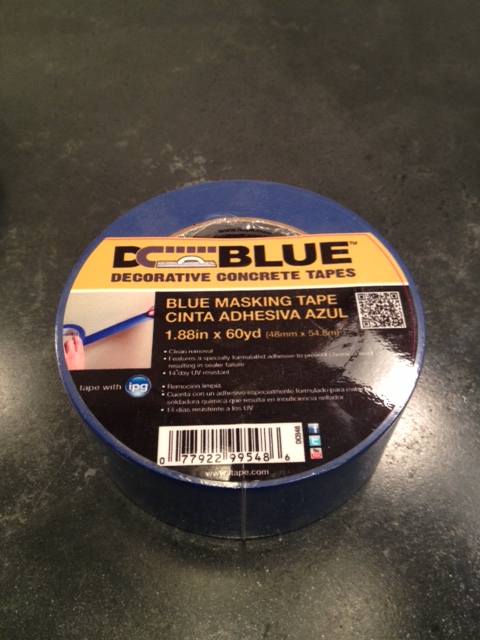
Do NOT put regular masking tape on your countertops while caulking. Regular masking tape can react with your sealer and cause huge problems (aka chemical weld). You NEED to use a concrete sealer safe tape. This one is well priced, works great and easy to find at your local big box hardware store:

DC Blue Concrete Masking Tape (safe for your sealer!)

Why is this so important:

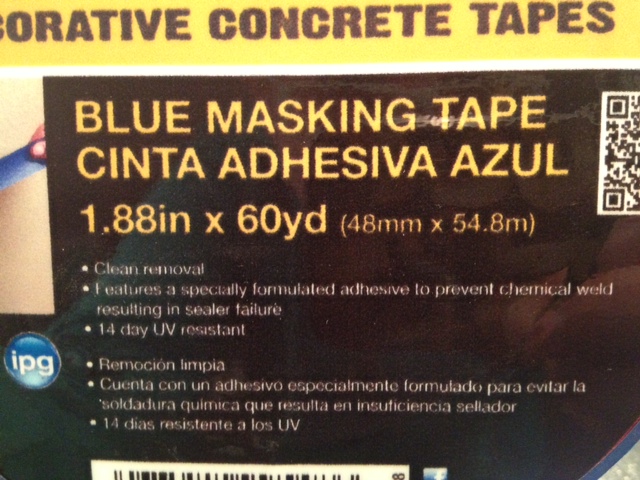
Listen to the tape packaging, it knows its stuff

“Features a specially formulated adhesive to prevent chemical weld resulting in sealer failure”

So yeah, don’t mess up your concrete by being a cheap-o and using regular tape.

Tape off your countertop & cabinets/sink with the concrete tape, and tape off your walls with regular masking tape, and apply your caulking.

Concrete safe tape applied to countertop & cabinet. Note that I did not use the concrete tape on the walls. Use regular painters tape for the walls.
Concrete safe tape applied to countertop & cabinet.

Smooth the caulking out, remove excess caulk, and then remove the tape & let dry.

Caulking Applied
Caulking Applied
Tape removed
Tape removed

At this point in time I actually started letting people touch the countertops, and even look at them!

The concrete is not indestructible. You still need to take care of it, and try to prevent stains. Aka don’t go cutting lemons on the countertop, and clean up oil after it splatters or spills. Oils & acids are the nemesis of almost all natural stone, and concrete is not exempt from that. Clean up spills, and don’t leave things hanging about, and your countertops will do just fine.

I am an avid cook, and usually have olive oil & balsamic close at hand. I used a small ceramic tray to hold my oft used bottles, to prevent possible rings forming on the countertops over time. (I can never manage NOT to drip oil down the side of a bottle!).

IMG_2688WEB
Use a tray to hold oil or vinegar (oil & vinegar are the arch nemesis to stone counters)

This project is part of Project Concrete Countertops. Make sure you check out the rest of the series starting with Concrete Countertops – The Mix, The Templates, The Forms, The Pour, Fill & Sand & The Reveal.

Buddy Rhodes

*We were gifted some (awesome) Buddy Rhodes Concrete Products, but all opinions are our own!

Concrete Countertops – The Reveal

Thanks guys for sticking with us through five yes FIVE posts on concrete countertops. The thing is, this project was BIG. Even with five posts I have probably bored you all to death with my insistence on telling you exactly how we did everything. The thing is, I want you guys to make your own counters too! You CAN do it! Real concrete, solid surface, with professional looking results. So thanks for sticking with me, cause I think it was totally worth it. Wanna see what all our hard work actually looks like?

IMG_2514WEB3

IMG_2643WEB

IMG_2490WEB

IMG_2659WEB

IMG_2644WEB

IMG_2796WEB

IMG_2731WEB

IMG_2667WEB

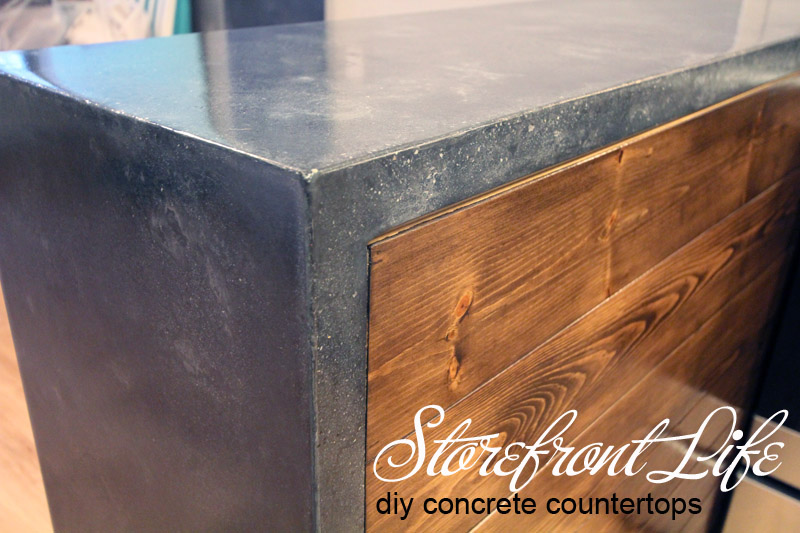
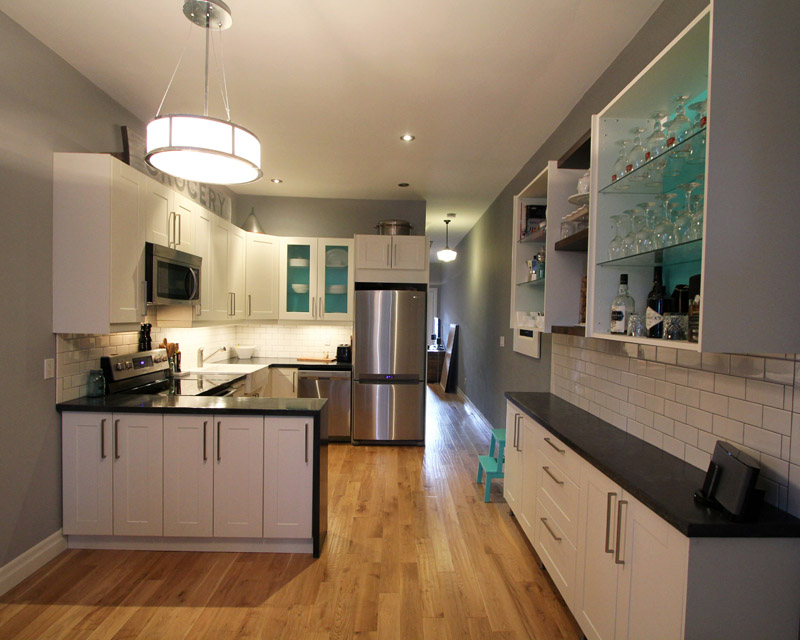
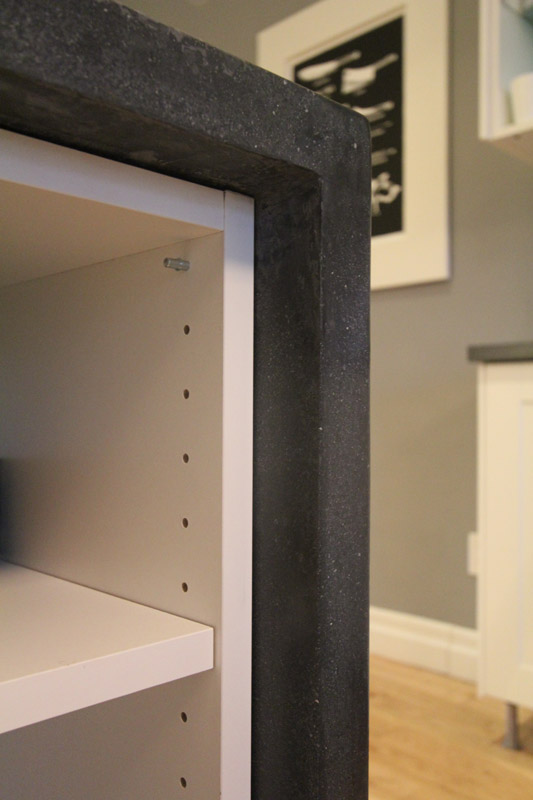
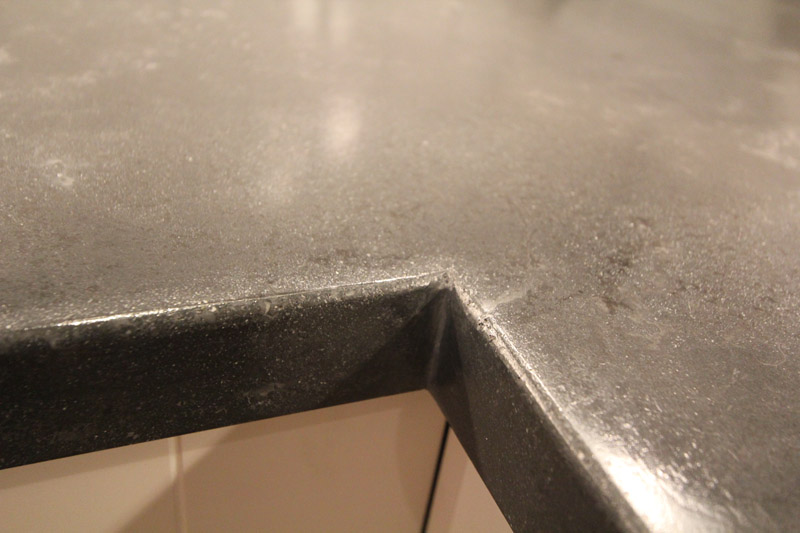
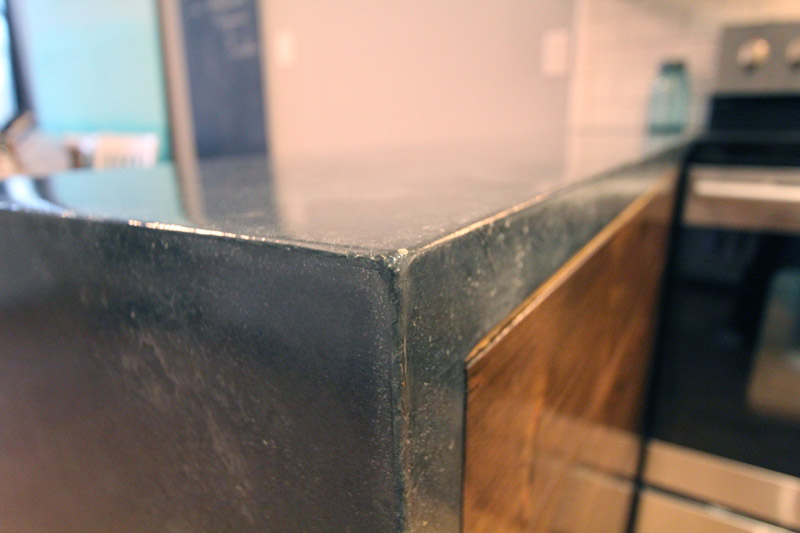
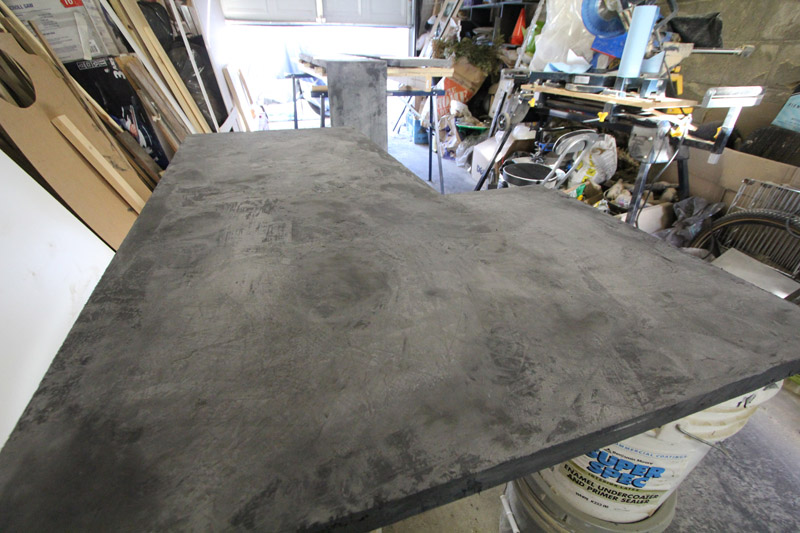
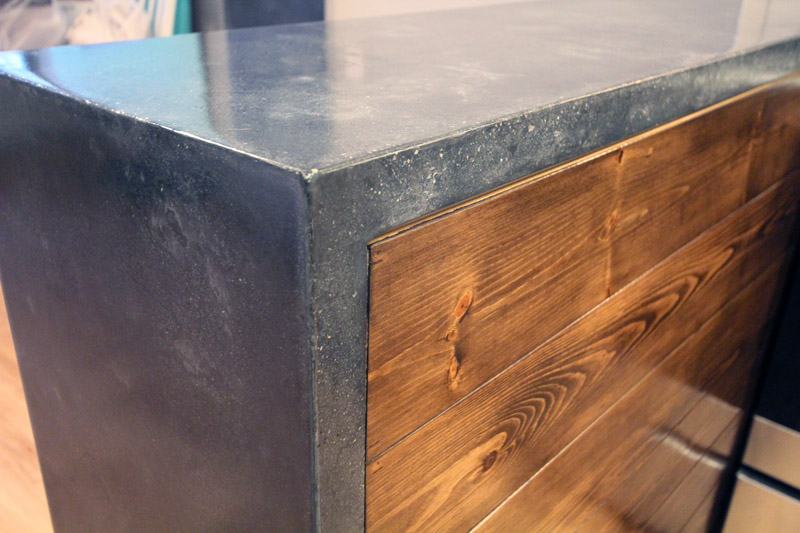
The counters were done in four pieces, including the single piece waterfall, which is by far my favorite piece! The color we used is “coal” but the color of the concrete can look very different at different times of the day. From a medium gray when the light is hitting it to a deep charcoal in the shadows. The color has so much texture and movement. I just love it! We paired the white cabinets with a pop of bright teal, and black and white accents.

IMG_2533WEB

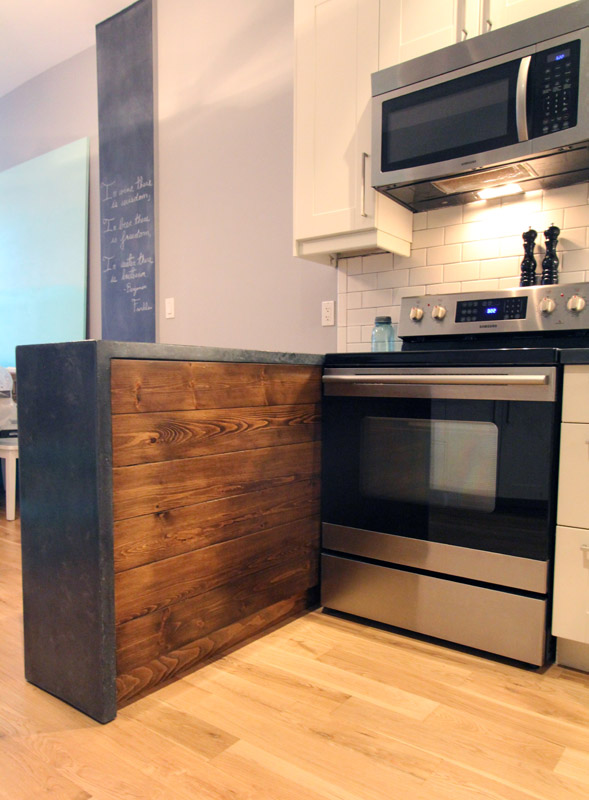
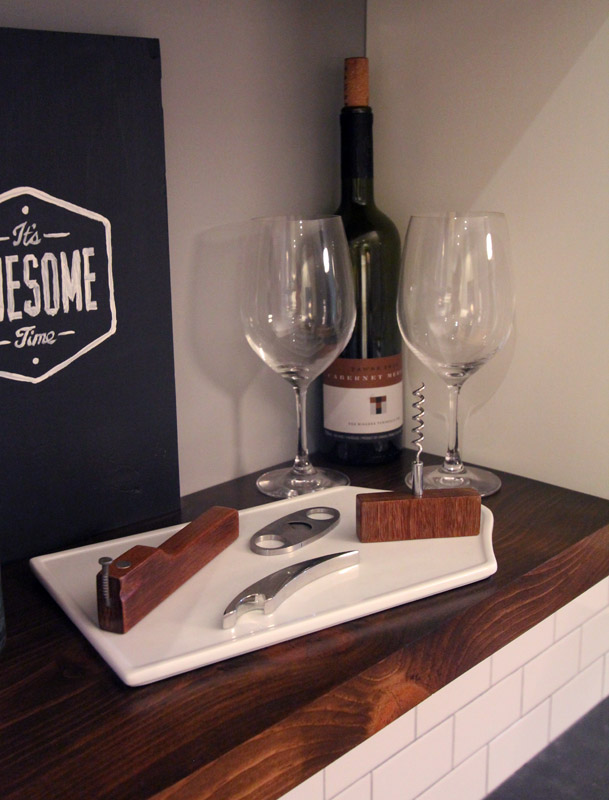
For the back of the peninsula we opted to add a pop of wood. The kitchen already had a lot of white, so adding wood really ties it into the dining room with its wood table & bench. It also matches the floating shelves on the coffee bar.

IMG_2514WEB

IMG_2697WEB

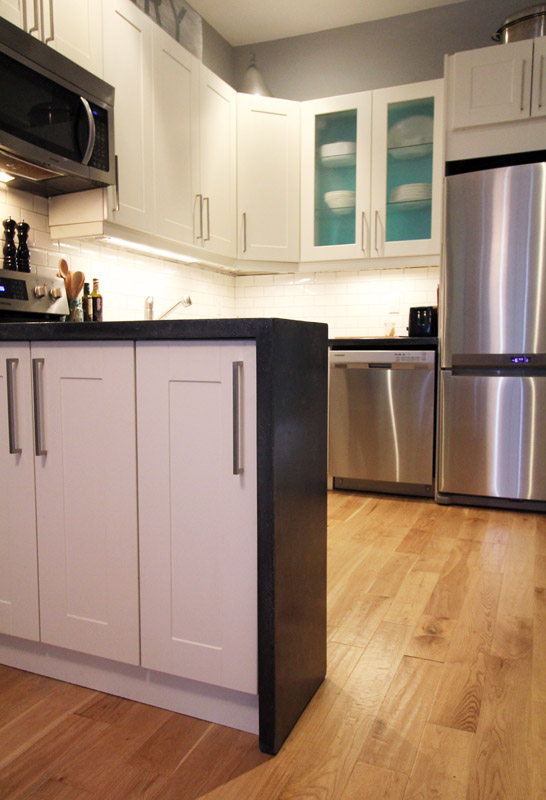
The waterfall is just sexy! I love how seamless it is. I would never have dreamed that we could do it in one piece. It is  simply a work of art.

IMG_2635WEB

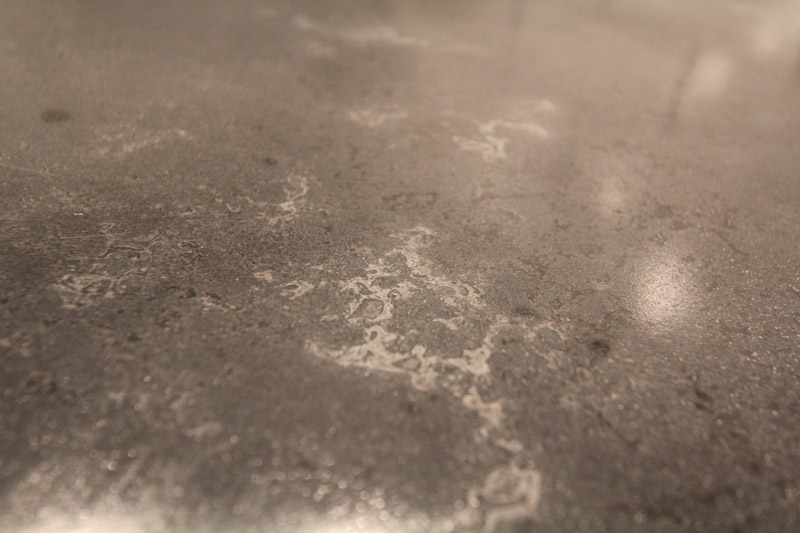
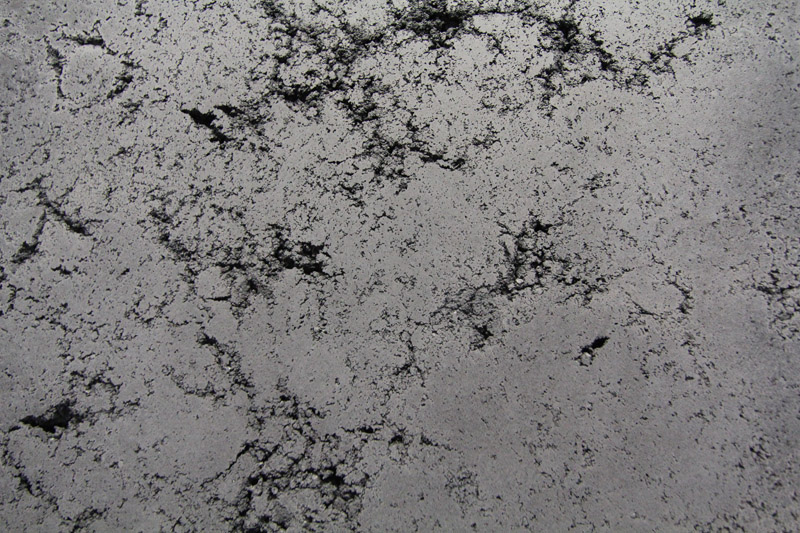
Speaking of the color varying. Here is one of my favorite spots with a lot of texture. This was produced by adding a slightly lighter color slurry for the middle slurry coat. I heart.

IMG_2755WEB

The front of the peninsula has cupboards, and when you open them you can see more of the exposed waterfall.

IMG_2643WEBIMG_2759WEB

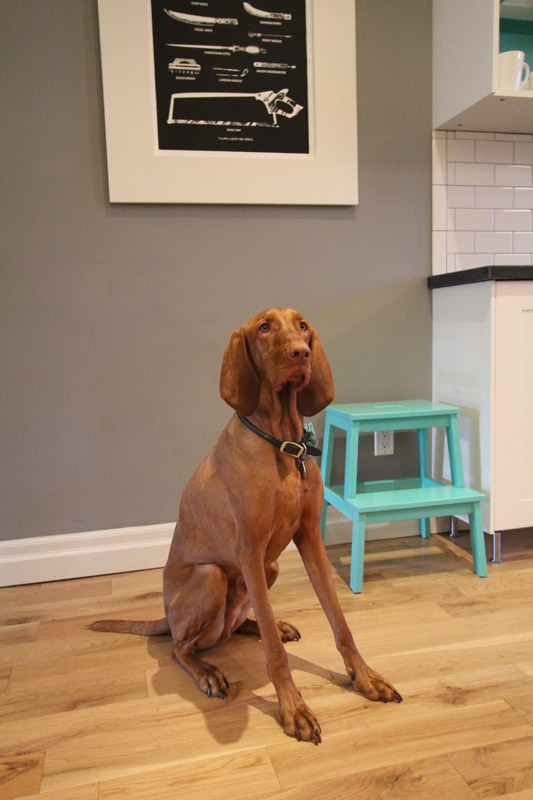
Sorry, had to throw one of Odin in. I can’t have my camera out and not take a photo (or ten) of him.

IMG_2580web

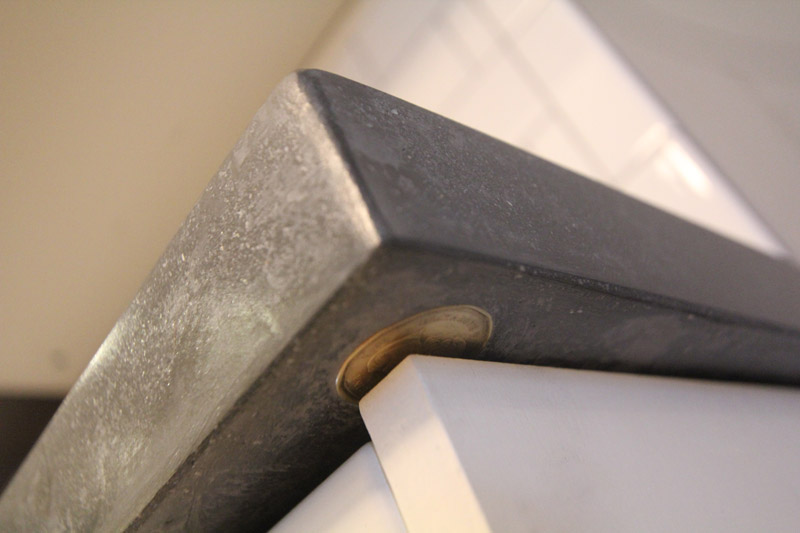
Do you remember when we hid a 2013 Loonie? Here’s the Queen peeking out from under the coffee bar counter.

IMG_2722WEB

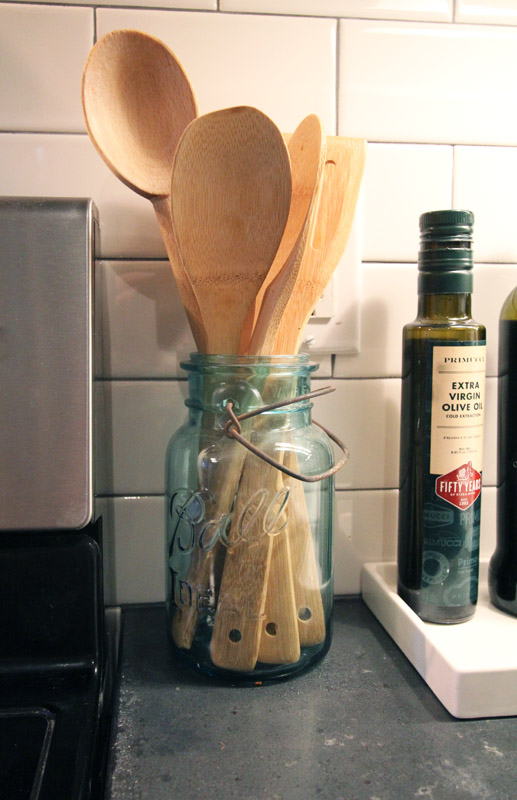
Now for a few of the other kitchen details. El Granto picked me up a couple vintage Bell jars one day at The Junction Flea. I love this one which holds my wooden spoons beside the stove. We also use a small ceramic tray to keep oil and vinegar off the counter (it would stain the tops).

IMG_2688WEB

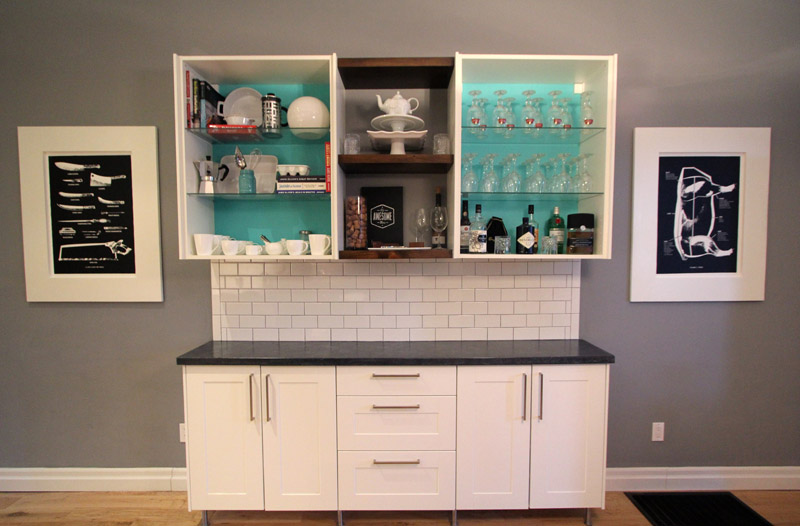
I am still very happy with the wood shelves we added to the coffee bar. Now with the wood clad peninsula, it really pulls the coffee bar into the kitchen.

IMG_2706WEB

The inside counter was one piece I worried about a lot, but in the end its imperfectly perfect.

IMG_2750WEB

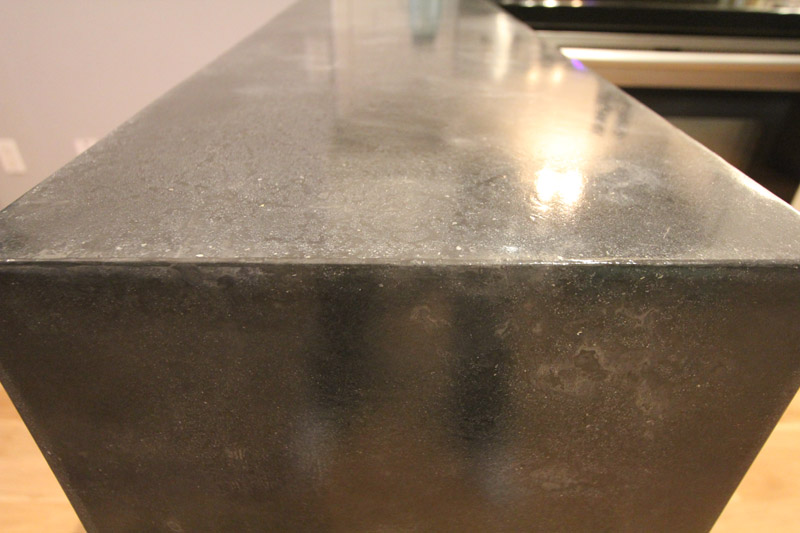
Okay, one more pic of the waterfall! We slightly rounded the counter edges. Littles and dogs wont poke their eyes out, and it makes me swear less when I bump into the counters.

IMG_2634WEB

So what do you think?! We’re super happy with them. They turned out better than we ever could have imagined!

I will be back later in the week with a few more kitchen items. Such as the source list, a few more project how to’s, as well as how we installed and sealed the counters. But for now, I am going to go and makeout with my counters. Wha? Uh. I mean stare at them lovingly, and maybe touch them a little. So smooth… and sexy…

This project is part of Project Concrete Countertops. Make sure you check out the rest of the series starting with Concrete Countertops – The Mix, The Templates, The Forms, The Pour, Fill & Sand,The Reveal and Finishing Touches.

Buddy Rhodes

*We were gifted some (awesome) Buddy Rhodes Concrete Products, but all opinions are our own!

P.S. We’re participating with Creating with the Stars this year! Make sure to check out East Coast Creative and vote for us!

Fill & Sand & Sand & Sand – Project Concrete Countertops

We’re getting so close in finishing our concrete countertop project! I am so very very excited to show you the reveal, (next week!) but before the reveal we still have some work to do! When we left off we had “poured” the concrete into our forms, and left it covered, moist and warm.

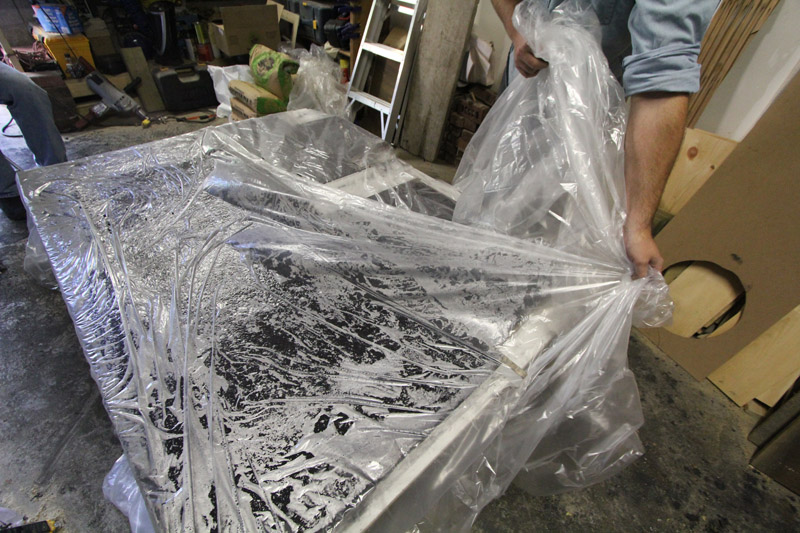
Now it’s time to unmold the forms and see what we’re working with! We removed the blankets and plastic to reveal a nice moist concrete.

Removing Plastic
Removing Plastic

We then got started pulling away the forms. Using gentle pressure, and ensuring we were not prying against the (still pretty soft) concrete, we removed the form sides.

Removing the form sides
El Granto removing coffee bar form sides
Removing Waterfall Form

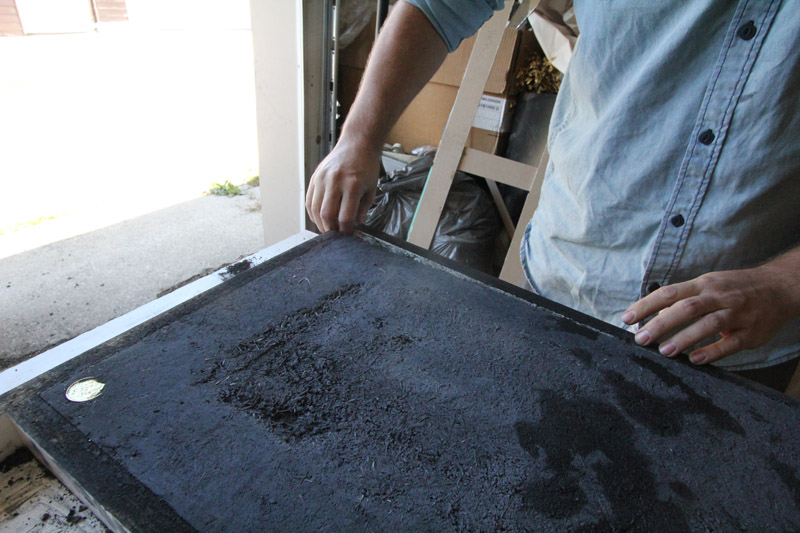
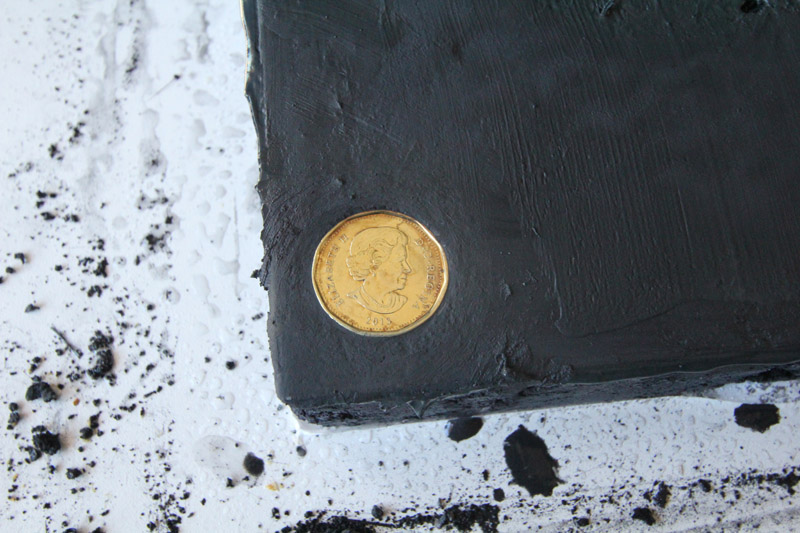
You will note a shiny gold object in the bottom of the coffee bar. We inserted a 2013 loonie into the form under one of the edges. I hope that if someone ever takes the coffee bar apart, or renos the kitchen in the future they will find the coin and know when we built it! It also never hurts to have the queen hanging out in your kitchen. She classes up the joint.

2013 Loonie (for all my Americans; this is our $1 coin)

Before we could flip everything over and see what we were workin’ with (remember we poured our counters upside down) we needed to do a bit of house keeping.

Our concrete mentor Jeremy made a very good point about how we interact with objects. When you go to touch and admire a countertop or a table, what so you do? You kind of grab the edge, placing your thumb on top and four fingers around the edge, touching the underside. If the underside of your table or counter is rough, everybody’s gonna know that you were a lazy sod who skimped on the finishing. Do you want to be the lazy sod? Exactly. So let’s sand the bottom edges of four counters so our friends don’t judge us.

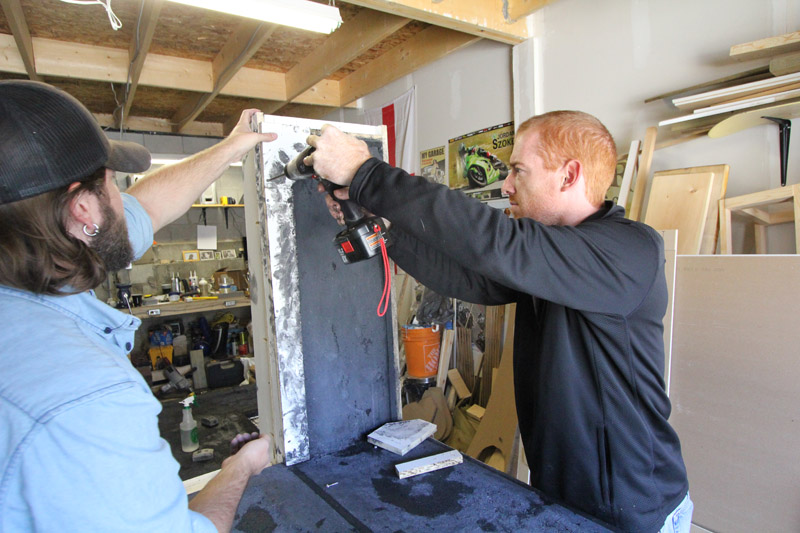
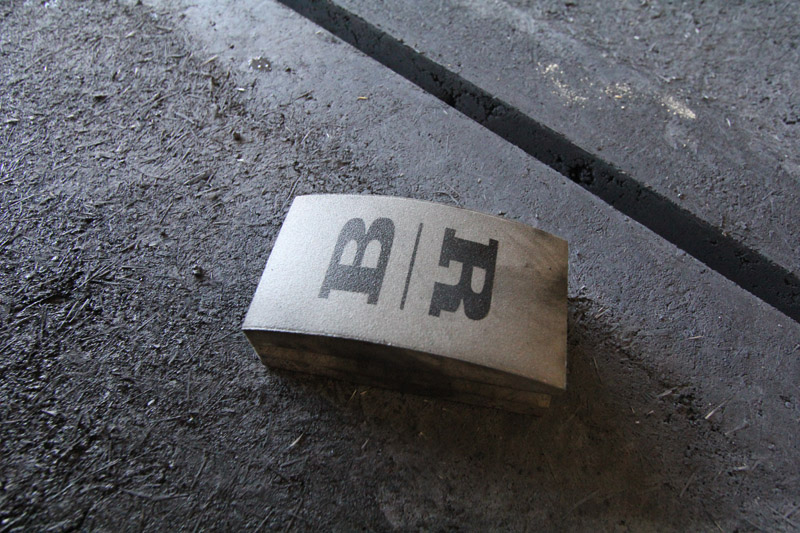
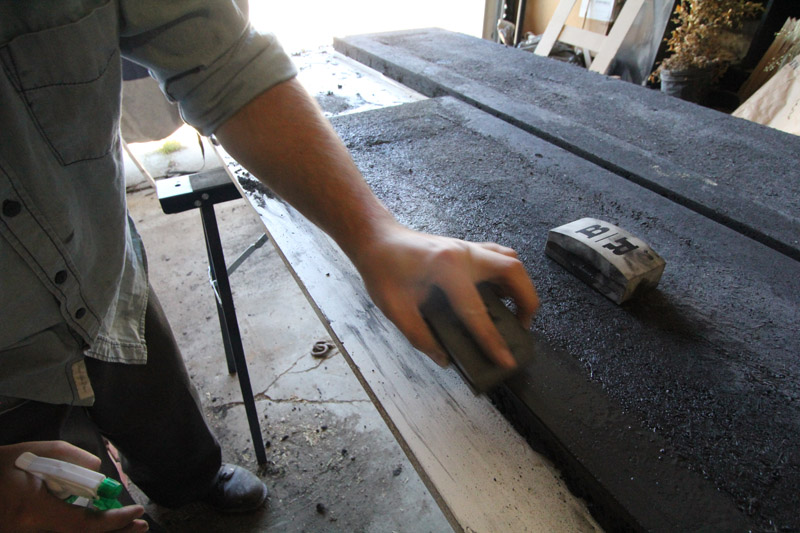
Using buddy Rhodes hand sanding pads, we wet sanded the bottom edges and used a chisel to remove any errant blobs of concrete. A few minutes work, that we will certainly appreciate later!

Buddy Rhodes hand sanding pad
El Granto wet sanding the undersides of the countertops

After an excruciating 20 minutes (I want to see my counters!) we were able to flip the countertops over.

El Granto seeing the waterfall counter for the first time

I really love that shot, as it is the first moment El Granto saw our waterfall countertop. I think this is the exact moment he realized how freaking awesome these counters were going to look!

Remember from our last post how we hand packed the concrete in, and purposefully left voids? This is what the result looked like:

Close up of the hand pressed technique right after unmolding

I think it looks amazing (and I will definitely have to do some sort of project soon that looks like that) but obviously for countertops, we need to make them smooth.

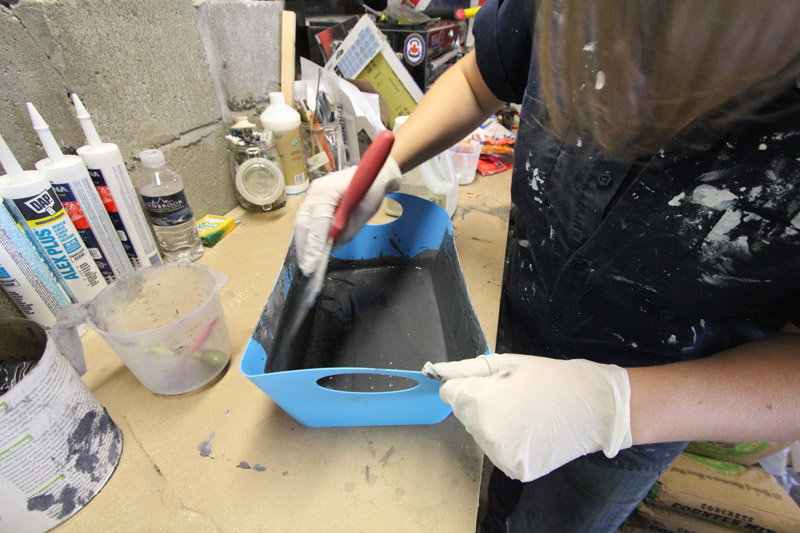
To do that, we mix up a slurry of bone paste (really fine concrete) and pigment and push it into the voids. It’s actually a lot like grouting tiles.

You can take this opportunity to add some colour, but in our case we wanted to stick with the same dark grey to keep with an industrial concrete look.

We mixed up a batch of slurry. (Two parts bone paste, one part acrylic additive & your color.)

Using a drywall mud knife & tray mix the slurry very well. Pressing out any clumps of pigment by pushing the knife against the tray. Now you will note that I’m not using a drywall mud tray. That’s because I forgot to buy one, and used some plastic bucket from the dollar store. Get a mud tray! We used a 5″ knife and it worked well.

Kristen mixing up the bone paste slurry
Mixing up the bone paste slurry

Once your slurry is mixed, start pushing it into the holes in your counter. Using a combination of your putty knife and a grout float. The grout float worked very well and shoving that slurry into the holes. You will need to do three coats of slurry, so don’t try to fill the voids entirely. They will get filled, don’t you worry. Thin coats are better, just give it a pass, scrape off any excess and let it dry.

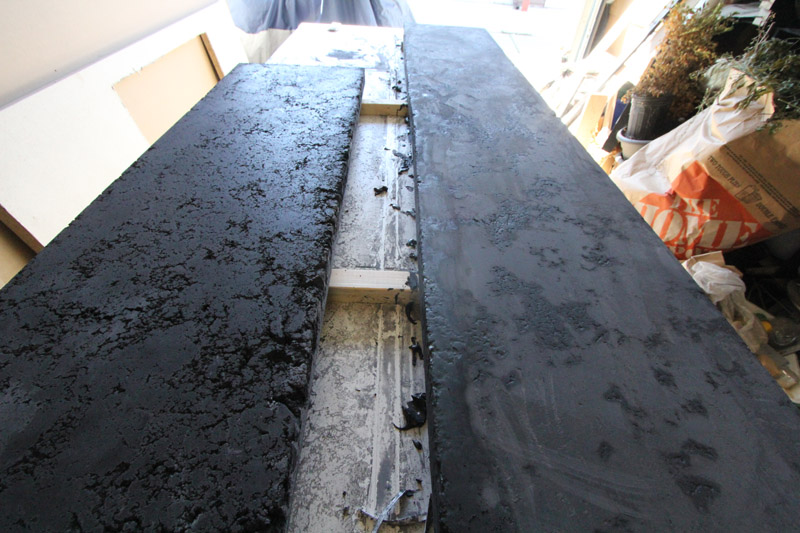
The piece on the left has not yet been slurried, and the piece on the right has had one coat of slurry

After our first coat was dry, we mixed up a slightly lighter version of our color, and did a second (light) coat with that. Our third coat was back to our original darker color. This will result in a bit of a lighter highlight in our cracks and crevices, giving a lot of texture to the concrete.

Slurried Concrete (is slurried a word?! It is now. BAZINGA!)

After three coats of slurry were applied, we left it to dry overnight (and ate some shawarmas.) Hey, hard work deserves delicious shawarmas, and maybe a samosa or two for good measure.

The next day we set to wet sanding everything. We covered the garage in plastic, donned aprons (and in Jeremy’s case, a drop cloth toga, cause we forgot to get him an apron, oops) and got to work. Ideally you would have a wet sander/polisher for this step, but we didn’t, so we used inexpensive orbital sanders and wet sanded away with the Buddy Rhodes diamond orbital sanding pads. We used the hand pads for the edges and areas that were hard to get to with the orbital.

It was a messy mess day, and we didn’t take many photos. However we did make a super awesome time lapse video for you of all our slurring & sanding fun. Here’s two days hard work in two minutes of video.

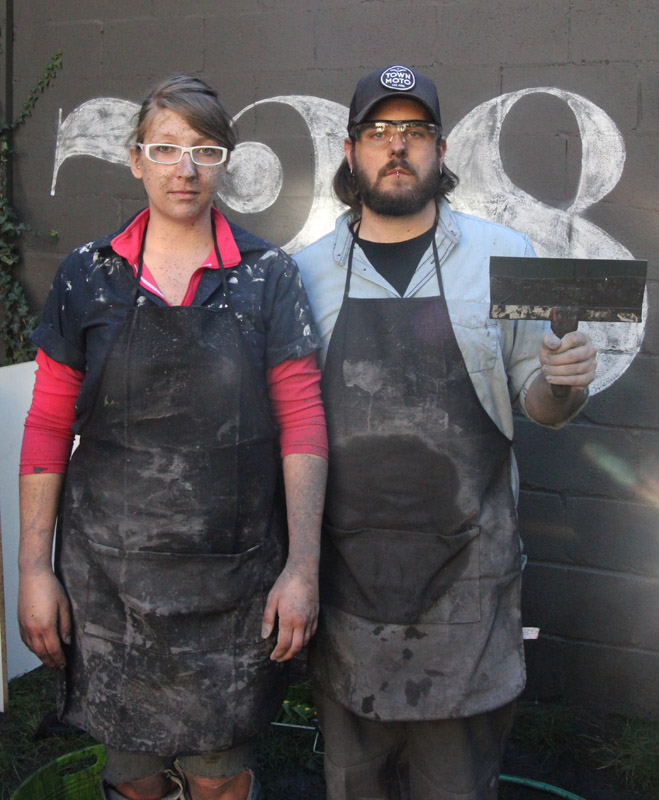
I leave you with an American Gothic version of exhausted Kristen & El Granto. Covered in concrete splatter and soaking wet.

IMG_2440-WEB

Next week check back for the reveal! SO EXCITED!

This project is part of Project Concrete Countertops. Make sure you check out the rest of the series starting with Concrete Countertops – The Mix, The Templates, The Forms, The Pour, Fill & Sand,The Reveal and Finishing Touches.

Buddy Rhodes

*We were gifted some (awesome) Buddy Rhodes Concrete Products, but all opinions are our own!

Tile Update

Thanks for all your opinions and help on subway tile last week!

If you follow us on Instagram, you will have seen a little flurry of progress.

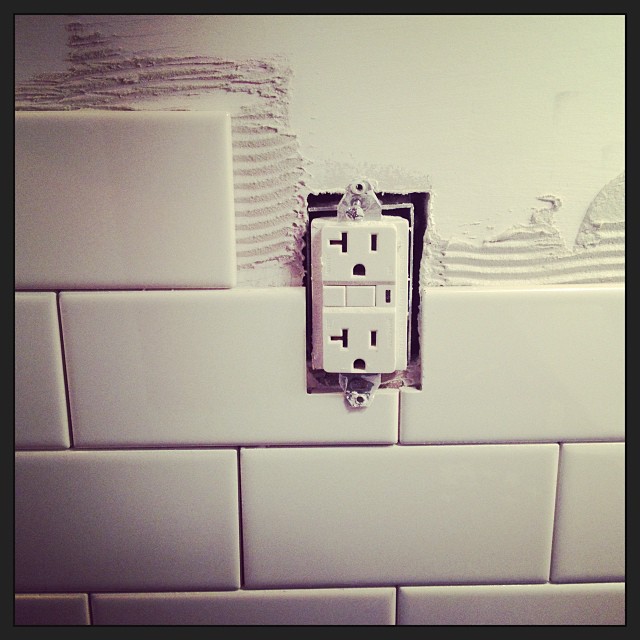
We weighted all our options, and decided to stick with our gut instinct and do a brick (or running bond) layout. I think what swayed our decision the most was that we would only have 18″ of tile total, and three inches of that would be covered by our under counter lighting molding. So 15″ wasn’t a lot of room to do a busy patterned backslash.

Tile Supplies
Tile Supplies
Running Bond Pattern

As for grout, we also decided to stick to a pretty traditional choice an go with gray. We picked out “Delorean Gray” and got it home only to look at it under our (bright!) under counter lighting, and decide it was too light.

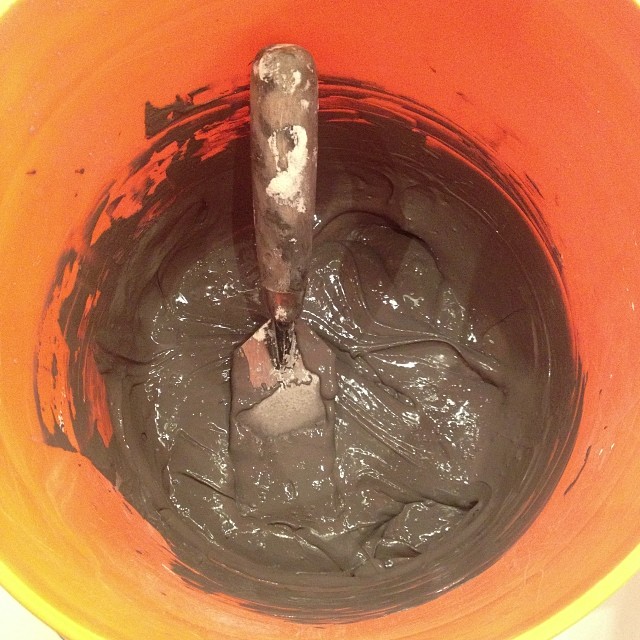
Back to the store I went, and came back with Pewter gray. After mixing up a batch we both sighed with relief at how much we liked the color.

Pewter Grout
Pewter Grout

It looked good in the bucket, but how about on the walls?

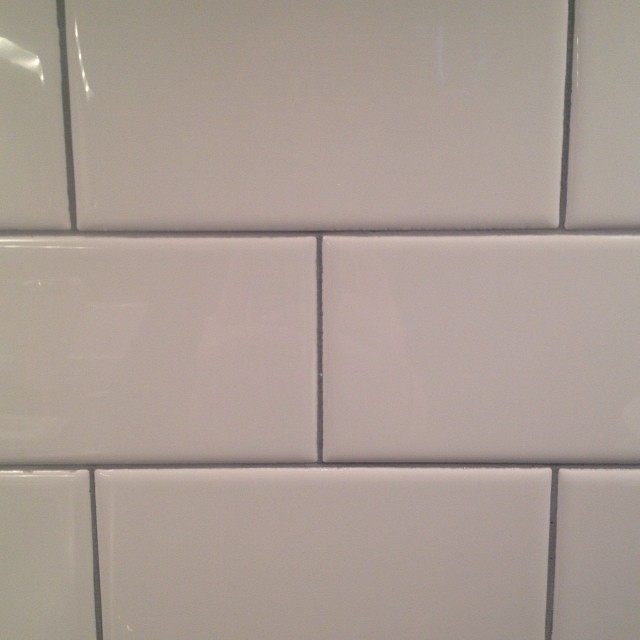
Pewter = Perfect
Pewter = Perfect!

We are still working away on the backsplash. The main part of the kitchen is tiled and grouted, but the coffee bar is still naked. Hopefully we can make some more progress on it this weekend!

What are you working on this weekend? Any tiling projects planned?

DIY Concrete Countertops – THE “POUR”

The title of this post lies. Such a dirty little liar.

The concrete product we are using; Buddy Rhodes Craftsman Mix and the way were mixing it: “Buddy’s hand pressed technique” is not poured at all. However “DIY Concrete Countertops – The Day We Made Mud Pies” doesn’t have the same ring to it, or credibility.

All joking aside, I want you guys to take me seriously now, because things are about to go down. It’s getting hot in here, and someone may have let the dogs out (oops!).
It’s time to make the countertops!

Like really truly put stuff in molds!

If you’re new (hi!), and haven’t yet read my previous posts on this project, well then get to it! You’ve got a lot to catch up on before this sh%t goes down!

First we picked out our mix, then we demo’d the kitchen, then made countertop templates, and finally made the forms. You up to speed? Awesome.

Let’s get messy!

Jeremy from Buddy Rhodes flew into Toronto, all the way from the Southern US to help us Canucks “pour”. You will note a continuing theme throughout our time with Jeremy. He was convinced all Canadians said nothing but “aboot” and “eh”. While El Granto & I had a good laugh every time he said “y’all”. While I tried very very hard not to let an “Eh!” drop. They regrettably slipped out, and I will never ever live it down.

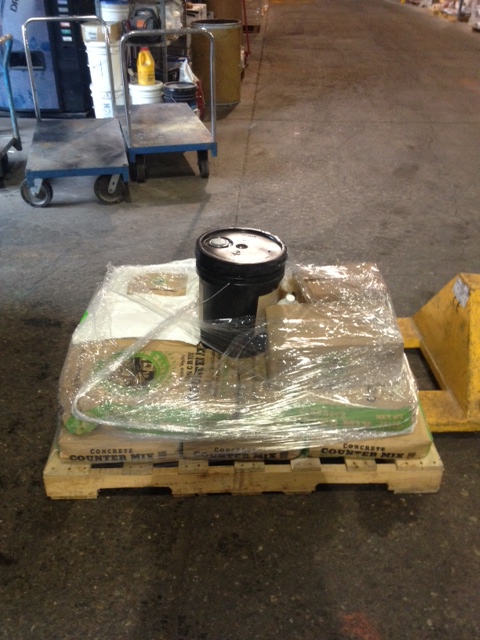
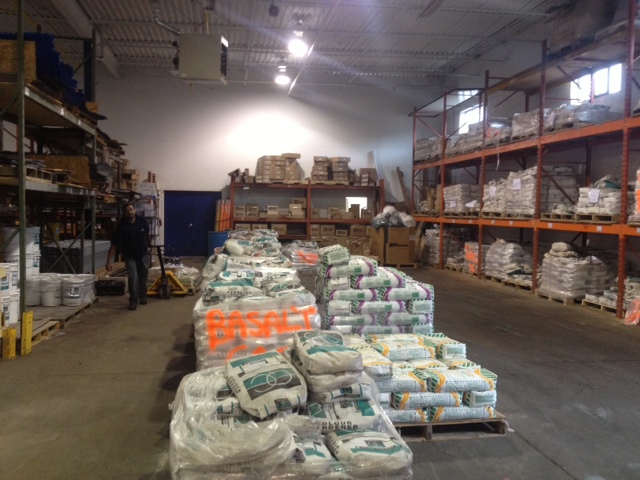
While Jeremy was making his way to Canada, EL Granto’s Mum and I headed to Form & Build in Mississauga to pick up our supplies. After much humorous banter with the Form & Build guys (including them playing a trick on the new kids, telling us the SUV wouldn’t hold the weight of everything!) we had all our supplies loaded and ready to go. (Thanks Form & Build warehouse guys, that stuff is HEAVY!)
The pallet full of our supplies at Form & Build
Form & Build Warehouse - it's like a concrete candy store
Form & Build Warehouse – it’s like a concrete candy store
What do you think, is it all gonna fit?
What do you think, is it all gonna fit? It did (and the CRV was fine!)
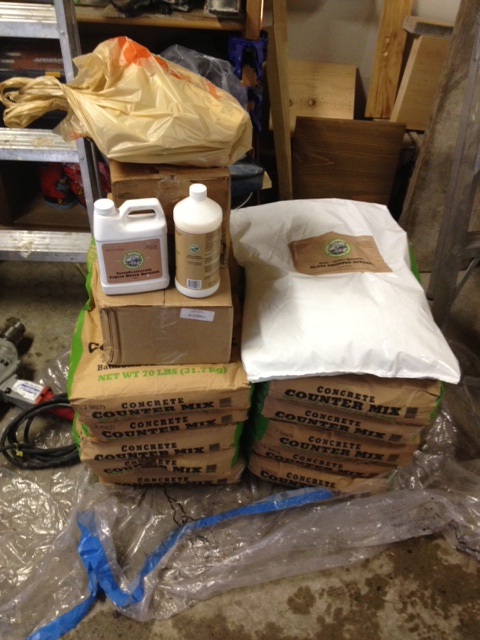
All the Buddy Rhodes supplies safe and sound back at the Storefront Garage

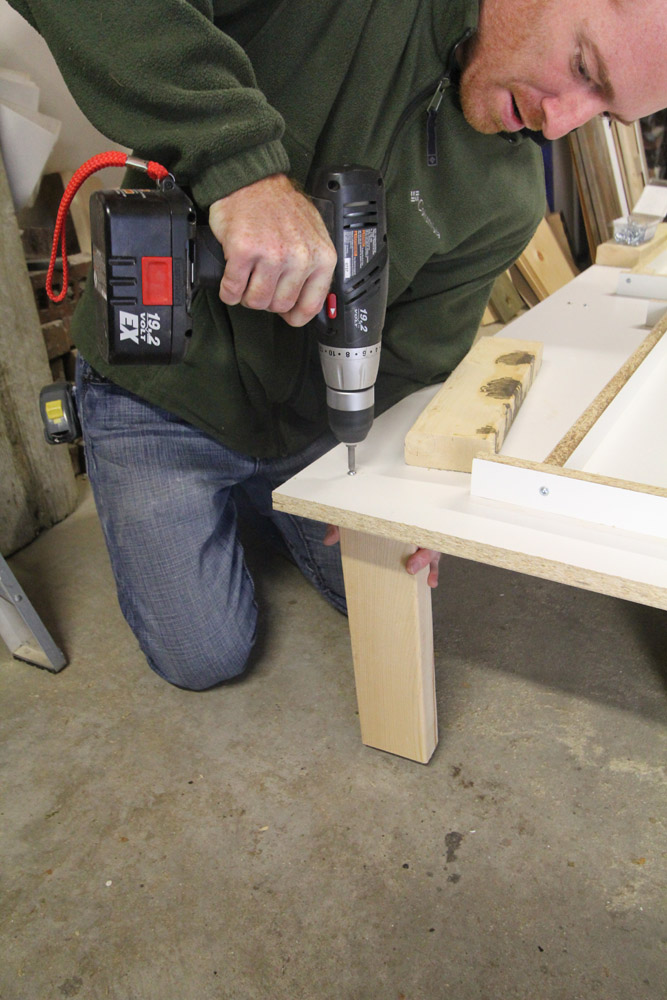
Back at the Storefront we laid out our previously built forms on perfectly flat sturdy surfaces (you CAN put them on the ground, but it’s much much easier if you’re working at waist height and our garage floor is anything but flat). We used saw horses for one of the forms, and we made a work surface out of 5 gallon buckets and some 2×4’s for the other.

Jeremy jerry-rigging a work platform for our forms
Jeremy building a work platform for our forms

This was all happening in our 240 square foot garage. (Which is full of tools eh!) This is urban DIYing at its finest! You gotta make do with what you’ve got.

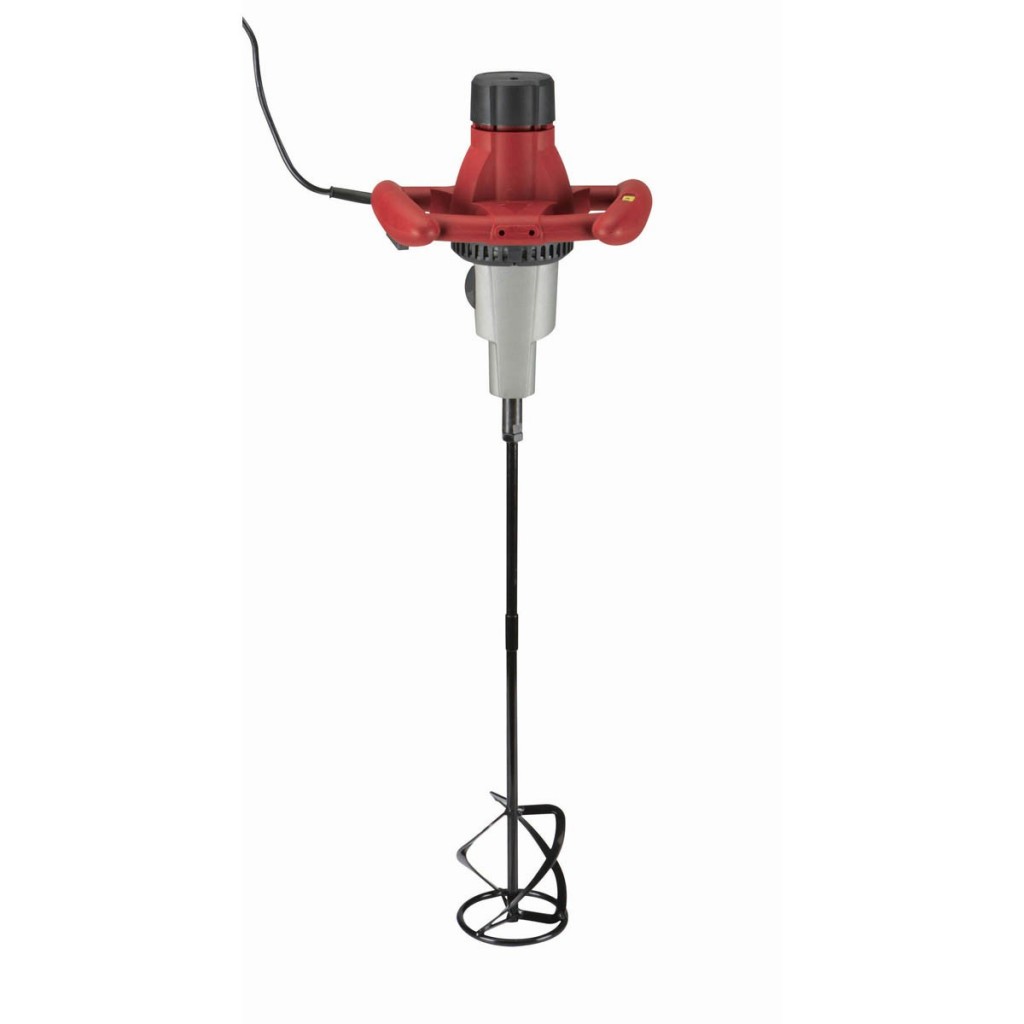
Once we had everything ready to go, we started mixing. Jeremy had previously suggested we get a mortar mixer like this:

Harbor Freight Tools Mortar Mixer

They are readily available in the US  but apparently in Canada they are hard to find. Home Depot carries one for sale online only, but unfortunately we didn’t have enough time for the shipping before Jeremy got into town. I called every tool rental place in the city, and alas no one rented them.

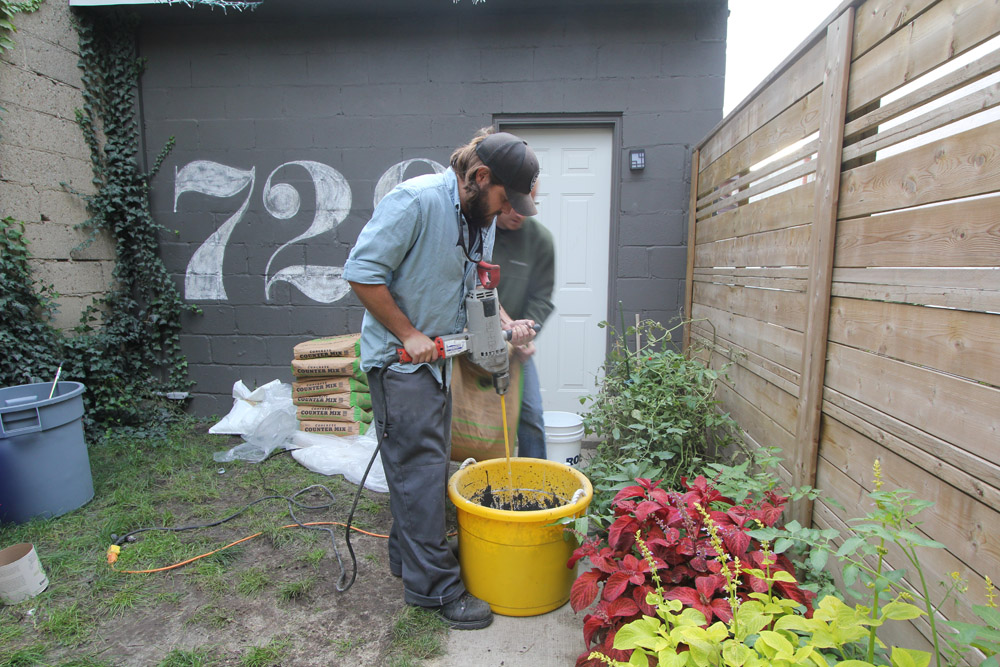
We settled for a rental mixing drill, and this thing was a beast. It was HEAVY, unwieldy, mixed too much air into the mix, and took forever to mix. Not ideal, but in the end it did get the job done. We all struggled with it, ended up cutting our mixing paddle shorter, and took turns. Next time, I am buying the right tool for the job! If you are thinking of doing this project, get a mortar mixer!!

We were mixing the Buddy Rhodes Craftsman Mix according to Buddy’s hand pressed recipe. This mix is not your normal concrete. It’s more the consistency of cookie dough, and truthfully mixing it is just like making cookie dough!

“Pouring” this mixture is a two stage process, you put a first coat of hand pressed craftsman mix in to your forms about a half inch thick, then you fill in the form with a backer coat of fiber reinforced craftsman mix. Use the Buddy Rhodes project calculator to determine how much of each product you will need.

 Here are the quantities we used for Stage One:

  • 2 bags Buddy Rhodes Craftsman Mix
  • 8 quarts water
  • 2 quarts polymer
  • 1 can pigment (coal in our case)
  • Water reducer to get the consistency we are after (only a little, about a cap full)

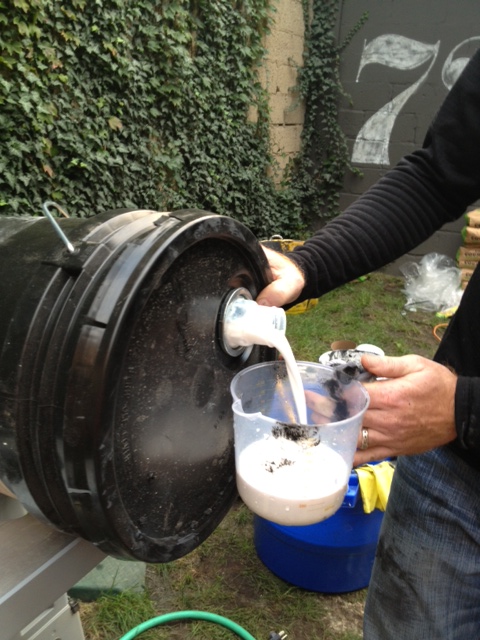
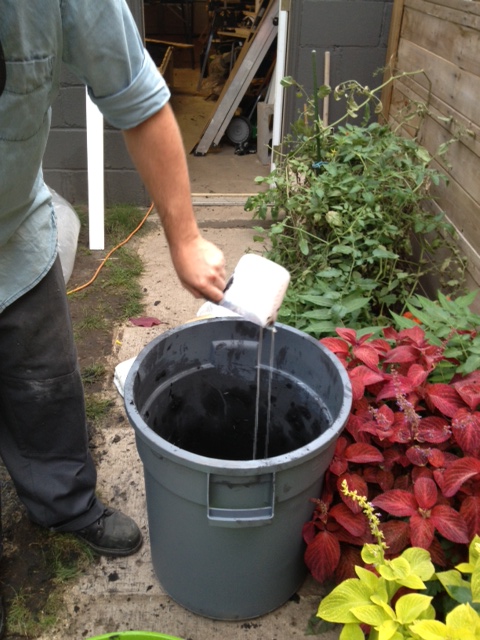
DIY TIP: Ever poured something out of a 5 gallon pail? Sucks right? It’s heavy and hard to control and slops all over the place! Here’s a tip, place the pail on its side on a work surface. Start with the spout facing up, and remove lid. Place your container below the spout, and slowly roll the pail. It will start gently pouring out of the spout into your container, and you wont spill anything! When you’re done, roll the pail back and put the lid back on. No heavy lifting and spilling required!

Easy Peasy Lemon Squeezy

Just like baking, we mixed all the liquids together first, and added in the pigment to get it evenly dispersed.

Add liquids first, then mix

Then we slowly added one bag of craftsman mix. If you’re doing this project, wear a dust mask, you do not wanna breathe in that dust!

Mixing everything together


Lifting the mixer up and down, and round and round helped everything mix more evenly.

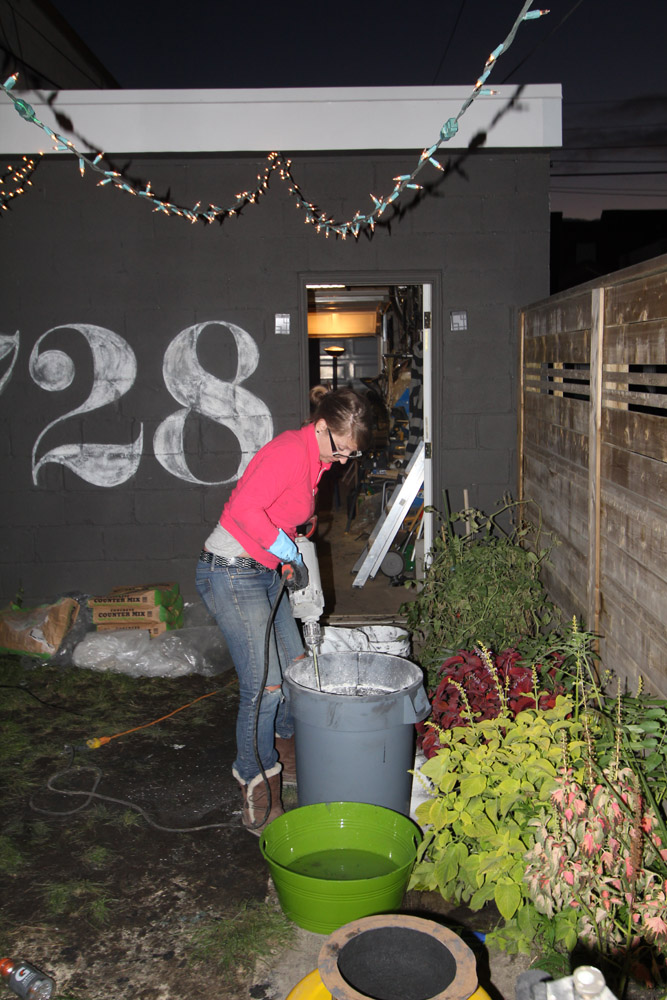
Everyone pulled together to mix. This was hard work!
Everyone pulled together to mix. This was hard work! Especially me with my girly muscles.

Everything is ready once the mixture reaches cookie dough consistency. It’s like play-dough for big kids who want new kitchens!

Now it’s time for the fun!

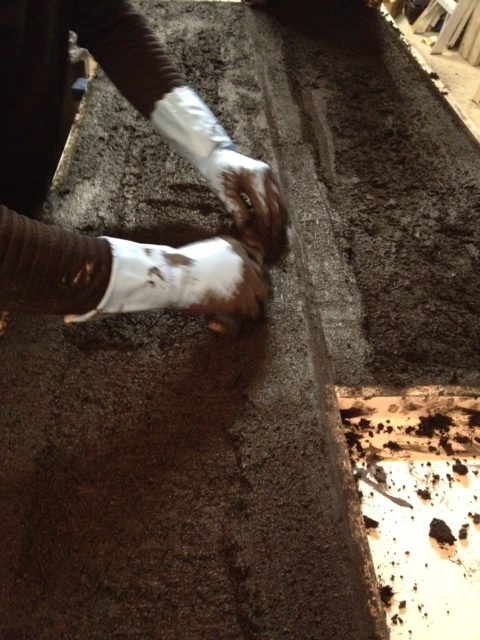
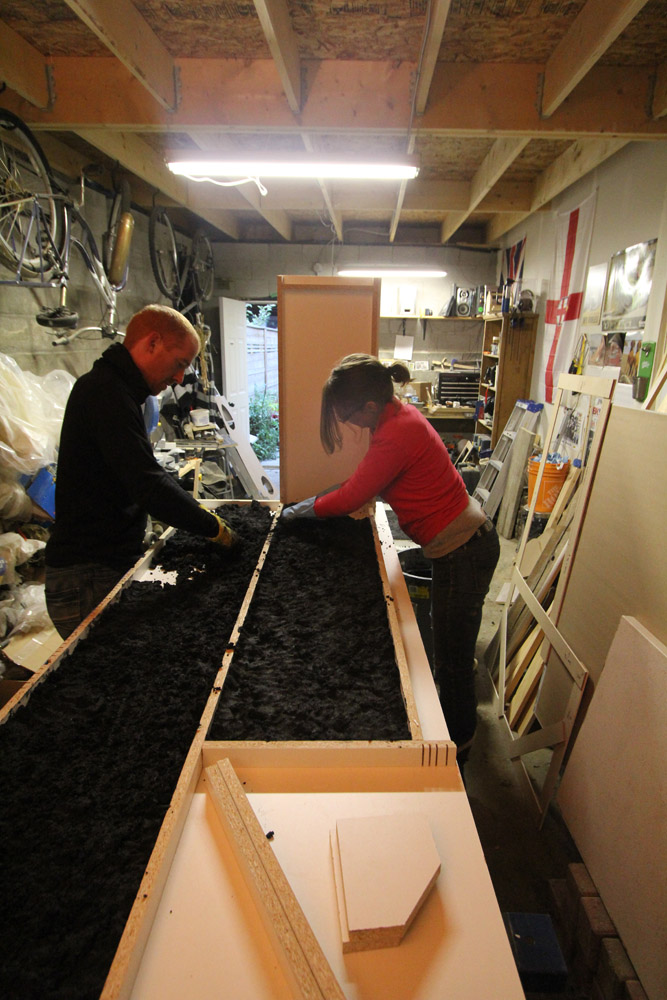
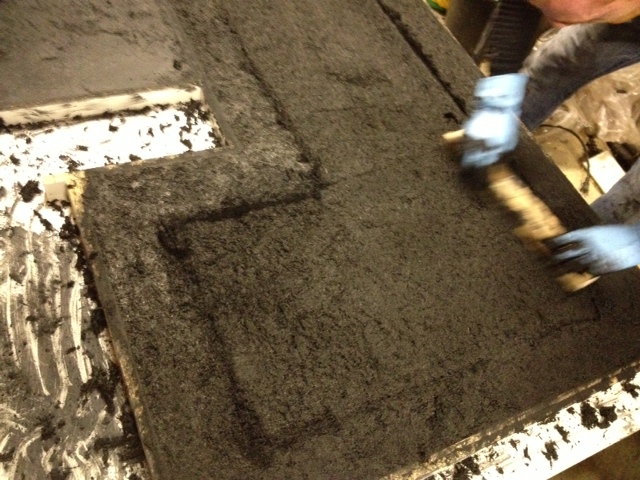
We donned gloves, and took handfuls of the mix and packed it (gently) into the forms. With this technique we actually want to leave some voids, so that the concrete will have a more organic look to it. If you pack it too hard you’ll squish out all the air and have no voids to fill later. We want voids because we will fill the voids with a bone paste colored slurry, which will give some character and depth to the finish. So this task meant that we were to do a bit of a crappy job in order to make it awesome.

We made handfulls of what I lovingly called mud pies, and placed them in the forms, making sure we got up the sides and all along the flat parts about 1/2″ thick.

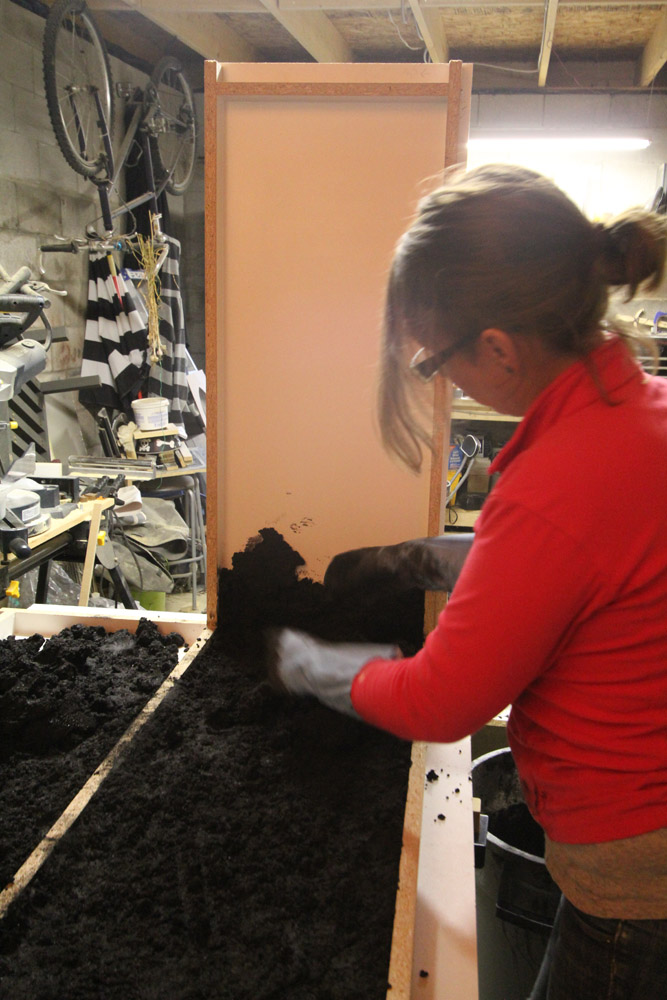
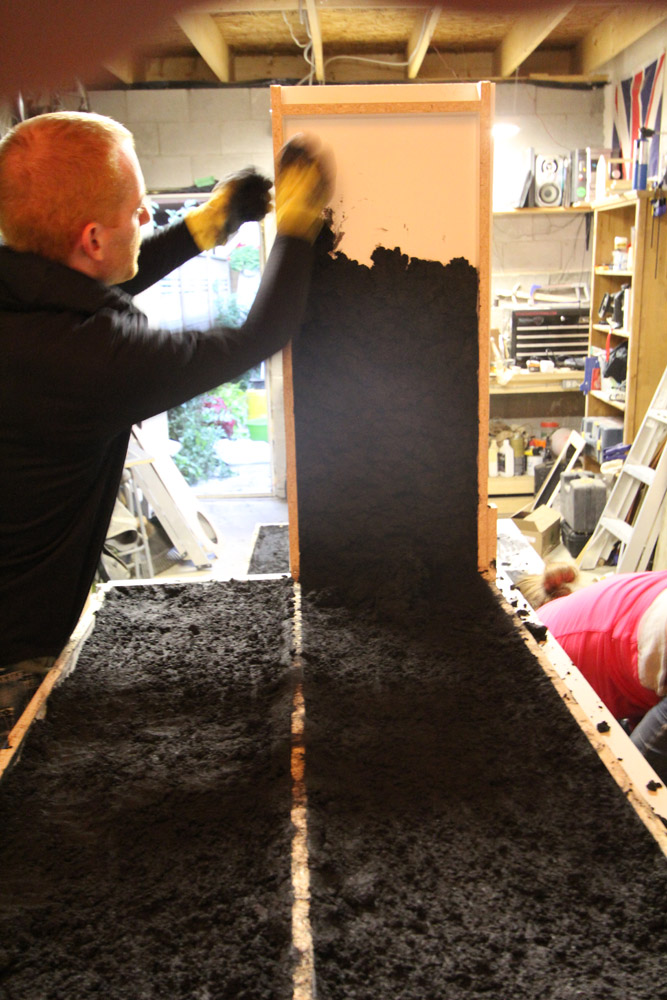
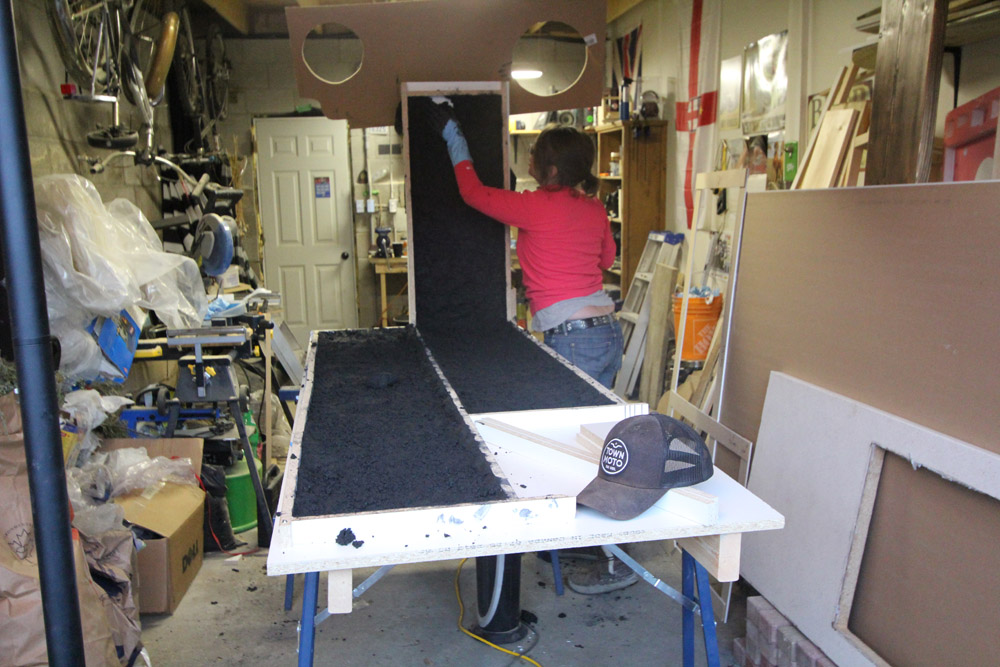
When we got to the waterfall countertop form, we did the flat part first, then started up the vertical. As the mix is nice and thick, it stuck to the form no problem.

Packing the bottom of the forms
Building the mix up the vertical form

Up and up the form we went.

Build that wall y'all!
Build that wall y’all!
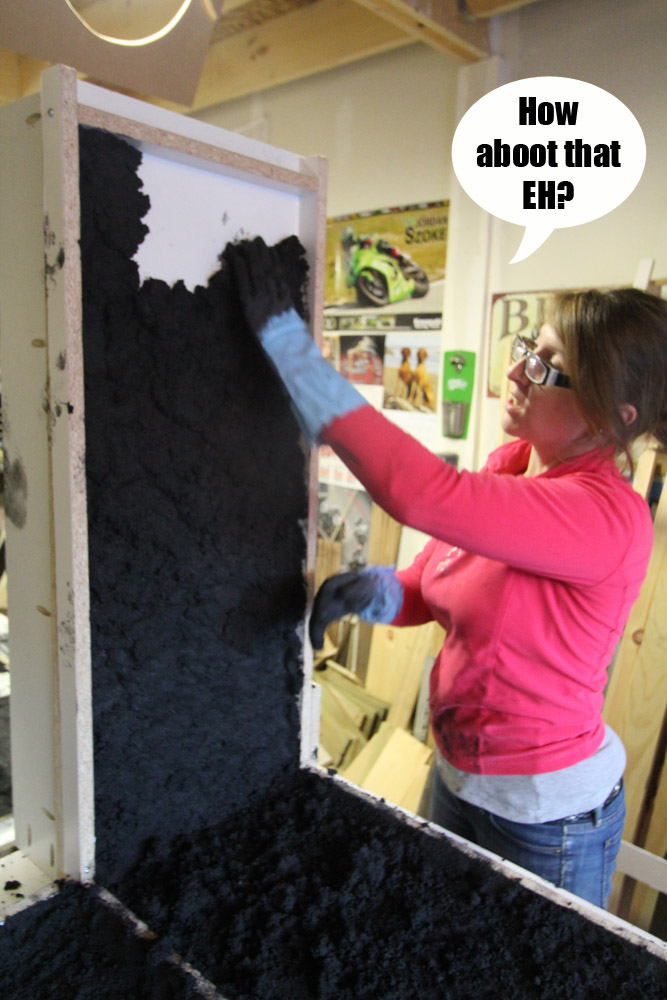
Am I doing it right?
Almost there!
Almost there!

After the forms had their 1/2″ of Stage One mix, we gently raked everything with our fingers making sure things were pretty well evenly dispersed and there weren’t any huge voids. Next up is Stage Two, the reinforced backer.

 Here are the quantities for Stage Two – The Backer:

  • 2 bags Buddy Rhodes Craftsman Mix
  • 8 quarts water
  • 2 quarts polymer
  • 1 can pigment (coal in our case)
  • Water reducer to get the consistency we are after (a little bit more than Stage One)
  • 2 1/2 lbs of glass fibers

Stage Two gets mixed exactly the same way as stage one, except the glass fibers are added (and mixed in gently) right at the very end. It’s important not to break all the fibers or they wont do their job. You don’t want lazy slacking fibers.

After the backer was all mixed up, we added it to the molds, filling it up entirely near the edges, and leaving it a bit less full in the middle of the forms (you don’t need to fill them all the way up in the middle, its just wasting concrete!). You want the forms completely full where they are going to touch the front and the back of your cabinets (so that everything lies nice and flat). You also want it to ensure your overhang is completely full.

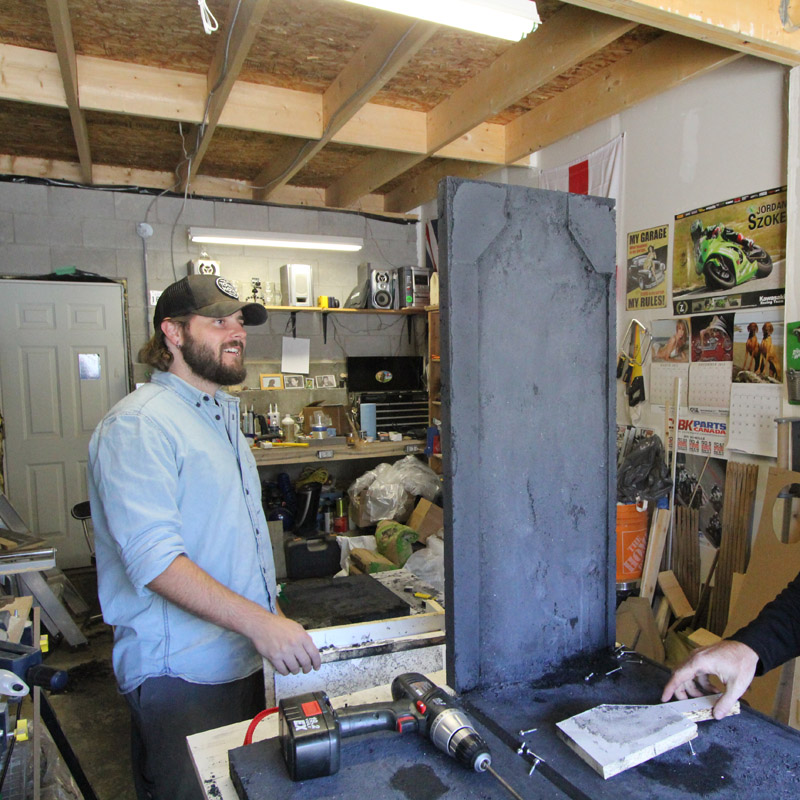
We then used a small piece of wood to screed the parts of the countertop that will touch the cabinets & the overhangs making everything nice and flat.

Jeremy using a piece of wood to screed and make flat the bottom of the countertop
Jeremy hollowing out the center of the large countertop piece. You dont need the form to be full in the middle. This way you can cut down on material and weight

On our waterfall, we made some smaller pieces to act as the backs of the mold where our toe kicks and overhangs were. This will ensure we get a nice pretty back side of our counter (as it will be visible.)

Check out the small pieces of melamine on the vertical of the waterfall mold. Also note the exhausted look on El Granto's face.
Check out the small pieces of melamine on the vertical of the waterfall mold. Also note the exhausted look on El Granto’s face and the sheer amount of mess everywhere.

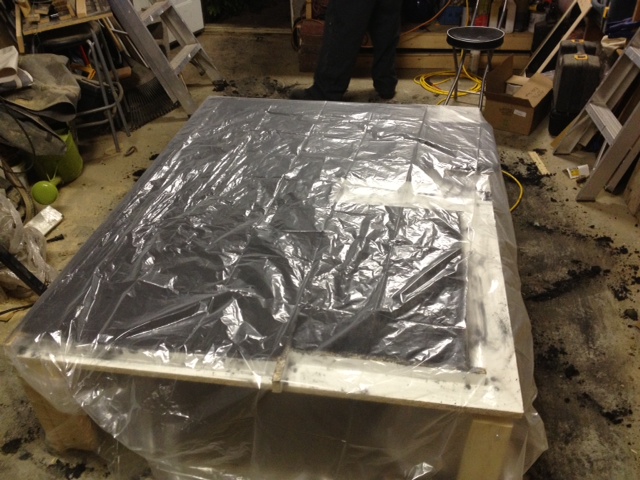
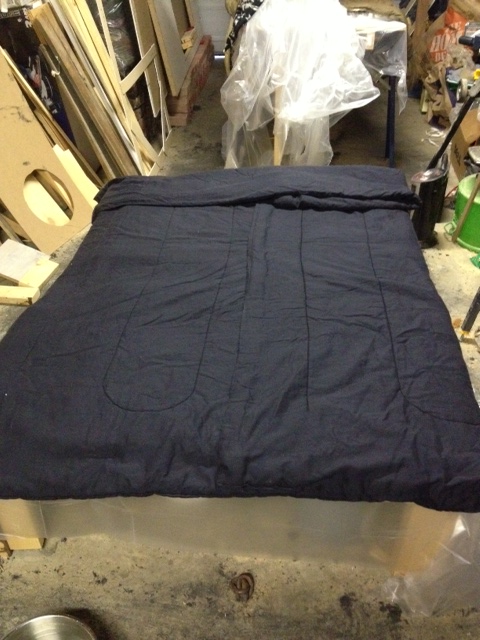
Once we were done, we covered our counters with plastic sheeting, then blankets to keep them warm. Heat is important to the curing process (in his shop Jeremy puts industrial heating blankets on his forms while they cure to keep them as hot as possible), and as it was fall in Canada, it was even more important to keep everything warm. We put all the concrete to bed with blankets and left the heat on high in the garage overnight.

Covering forms with plastic to keep in moisture
We covered the concrete with blankets and tucked it in for the night.

We occasionally went out and wet down the concrete with warm water and a cloth, then recovered. If you are doing this yourself, I would recommend doing your pour one weekend, then keep your concrete damp and warm for a week (this will ensure the strongest concrete possible), and unmold the next weekend. We were on a tighter timeline, and unmolded the next day.

It was a hard days work, but we actually made countertops! Next step is to unmold everything, make a bone paste colored slurry to fill any voids, and then sand.  We’re getting closer!!

***UPDATE – Check out the next stage in the project here ***

This project is part of Project Concrete Countertops. Make sure you check out the rest of the series starting with Concrete Countertops – The Mix, The Templates, The Forms, The Pour, Fill & Sand,The Reveal and Finishing Touches.

Buddy Rhodes

*We were gifted some (awesome) Buddy Rhodes Concrete Products, but all opinions are our own!