Thanks guys for sticking with us through five yes FIVE posts on concrete countertops. The thing is, this project was BIG. Even with five posts I have probably bored you all to death with my insistence on telling you exactly how we did everything. The thing is, I want you guys to make your own counters too! You CAN do it! Real concrete, solid surface, with professional looking results. So thanks for sticking with me, cause I think it was totally worth it. Wanna see what all our hard work actually looks like?
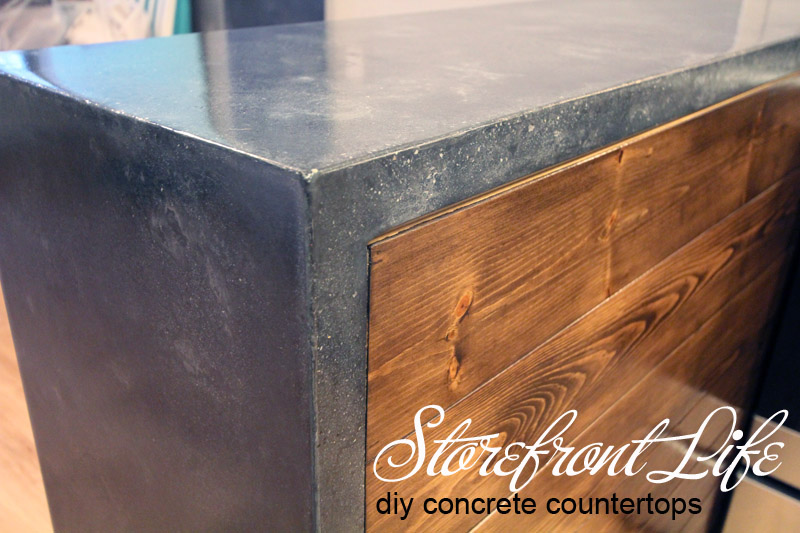
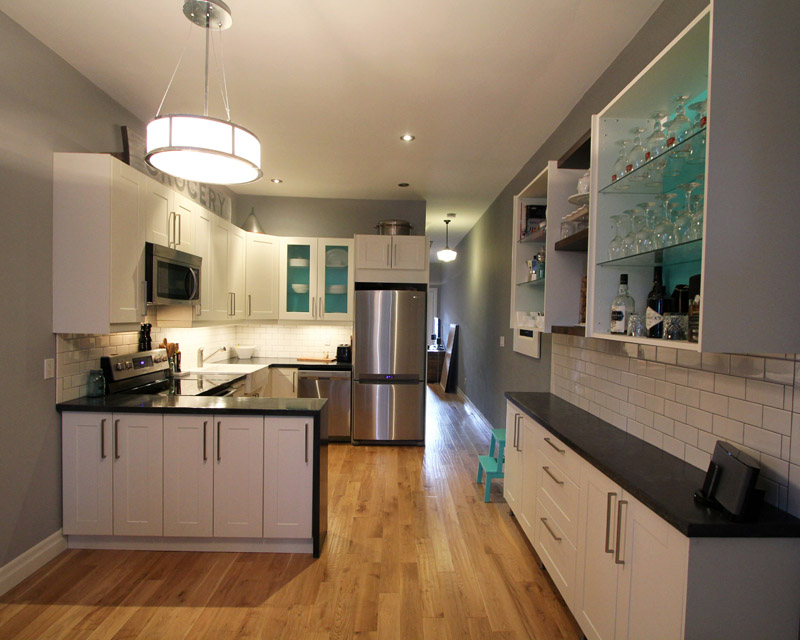
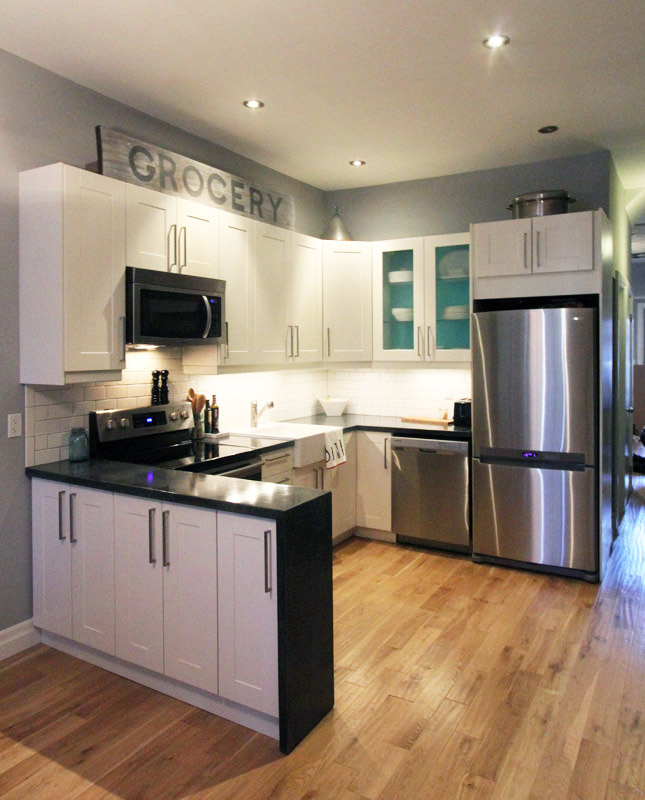
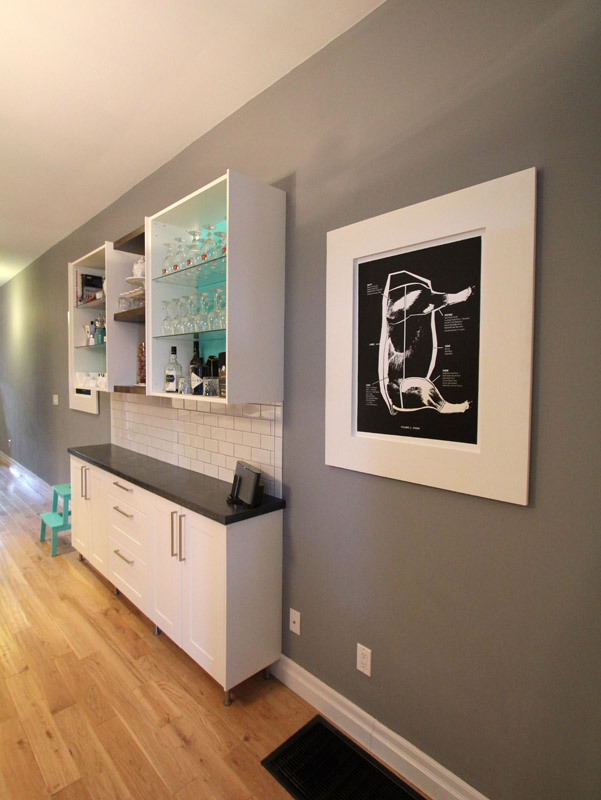
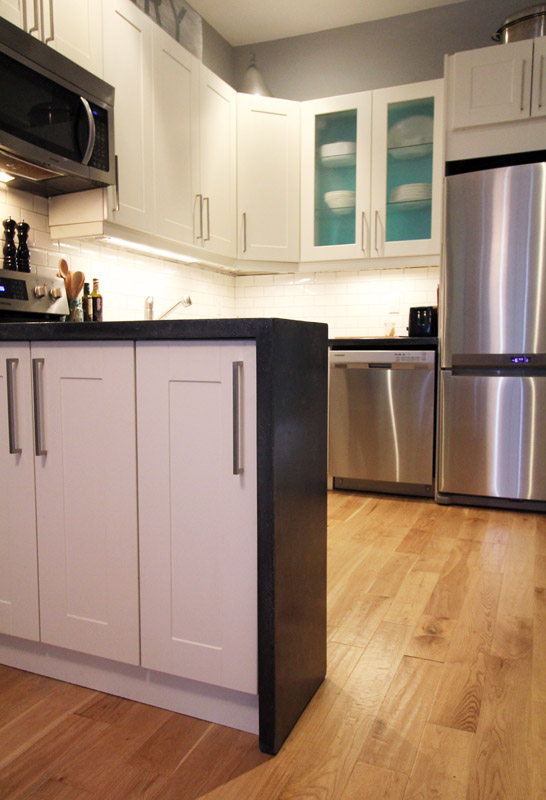
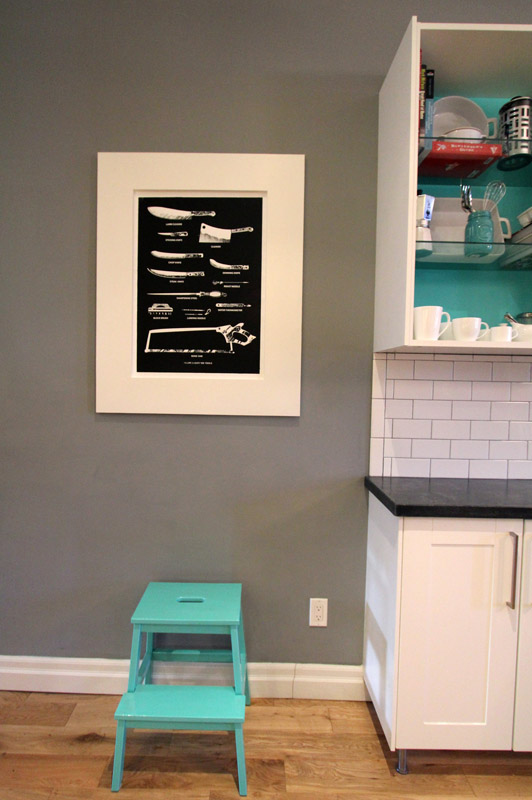
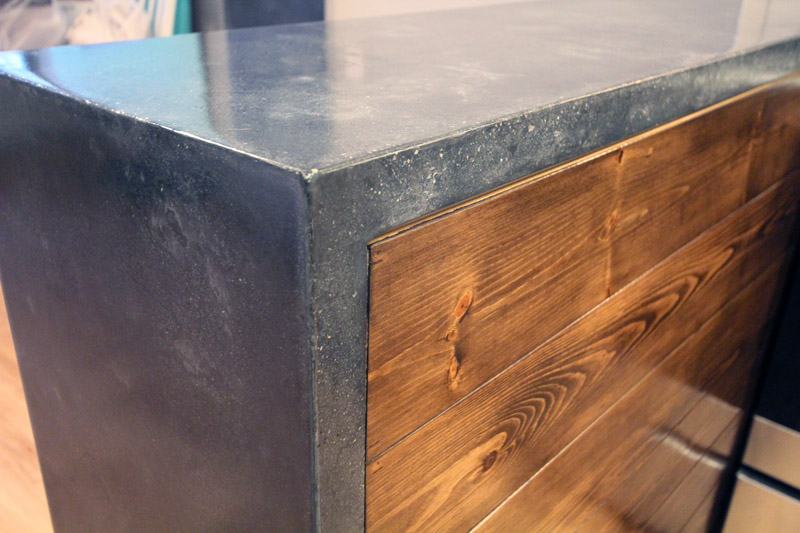
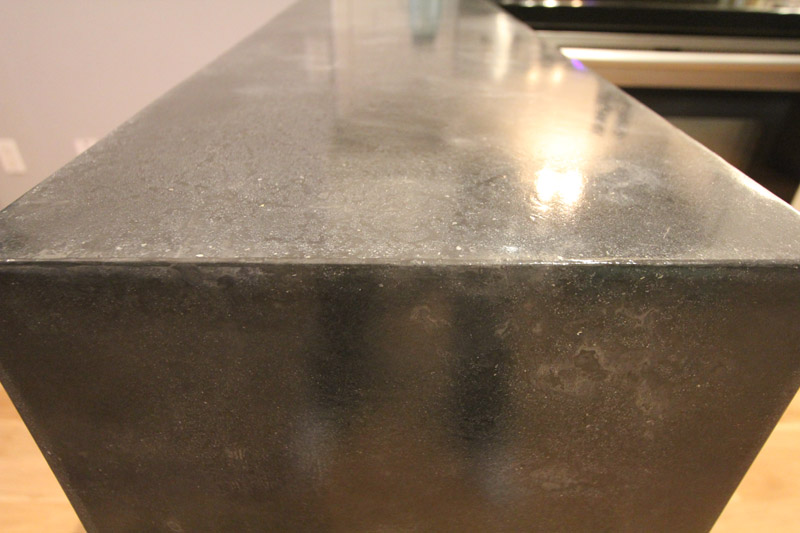
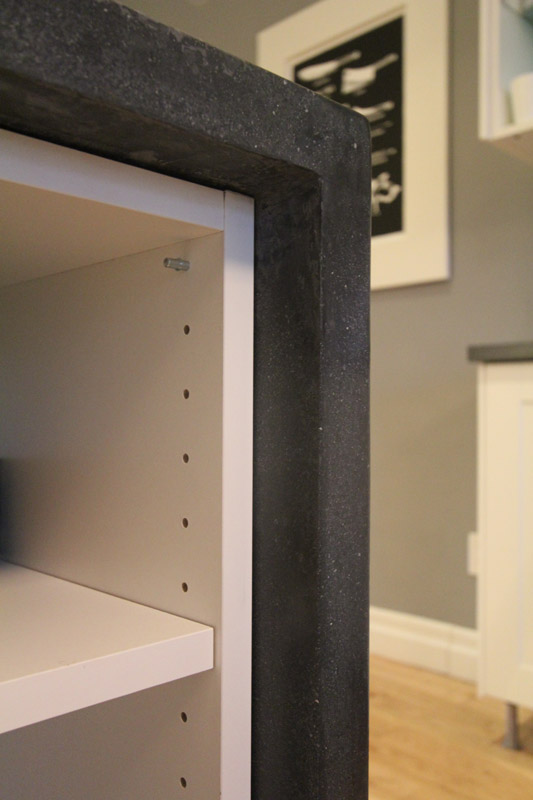
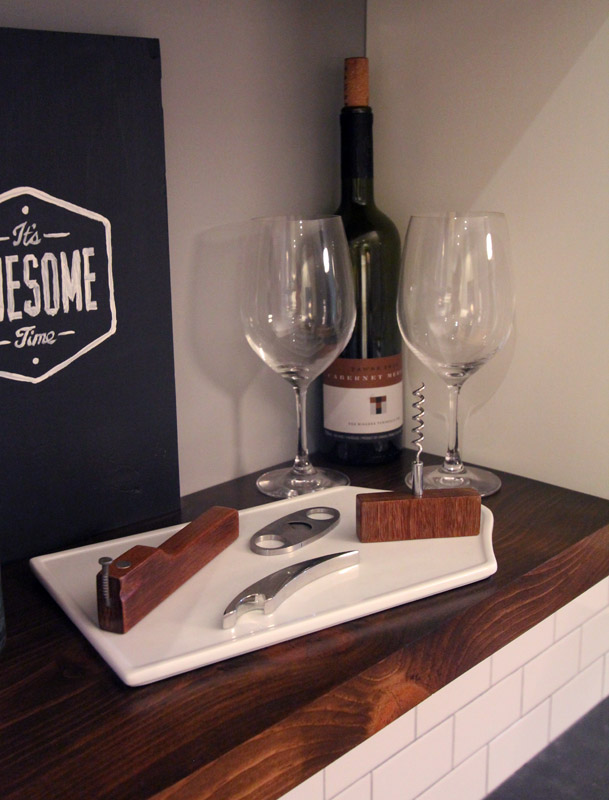
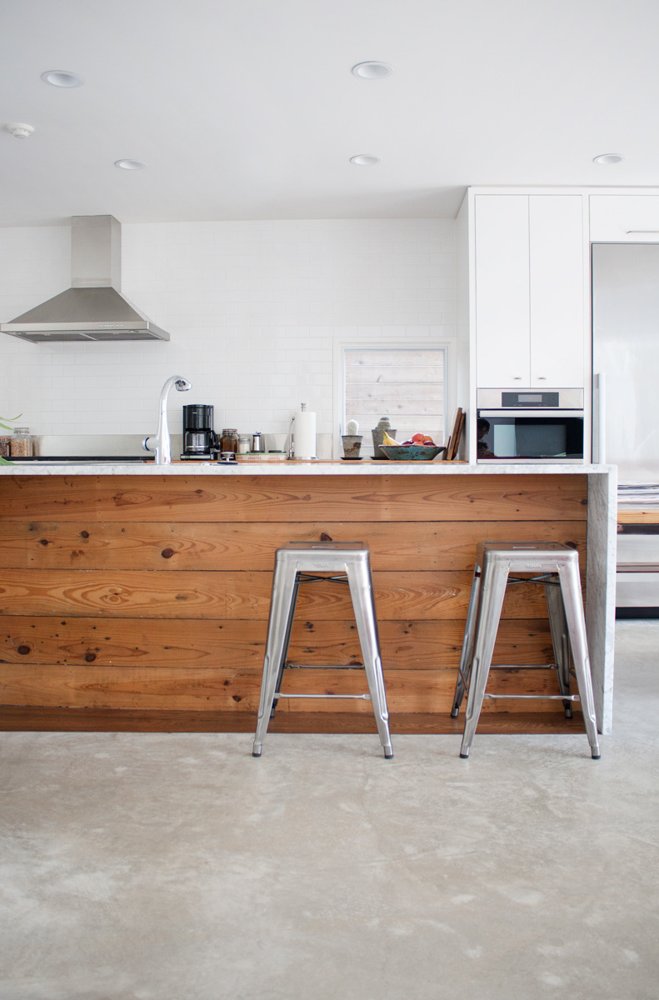
The counters were done in four pieces, including the single piece waterfall, which is by far my favorite piece! The color we used is “coal” but the color of the concrete can look very different at different times of the day. From a medium gray when the light is hitting it to a deep charcoal in the shadows. The color has so much texture and movement. I just love it! We paired the white cabinets with a pop of bright teal, and black and white accents.
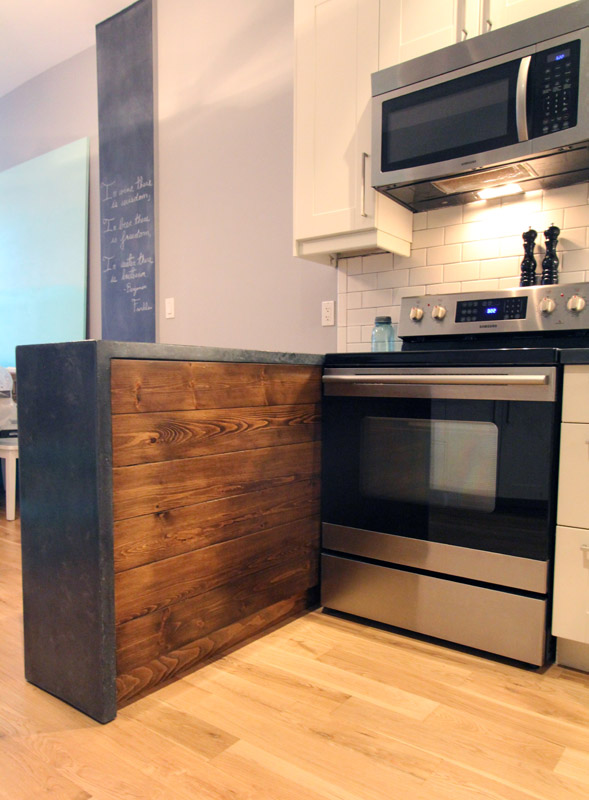
For the back of the peninsula we opted to add a pop of wood. The kitchen already had a lot of white, so adding wood really ties it into the dining room with its wood table & bench. It also matches the floating shelves on the coffee bar.
The waterfall is just sexy! I love how seamless it is. I would never have dreamed that we could do it in one piece. It is simply a work of art.
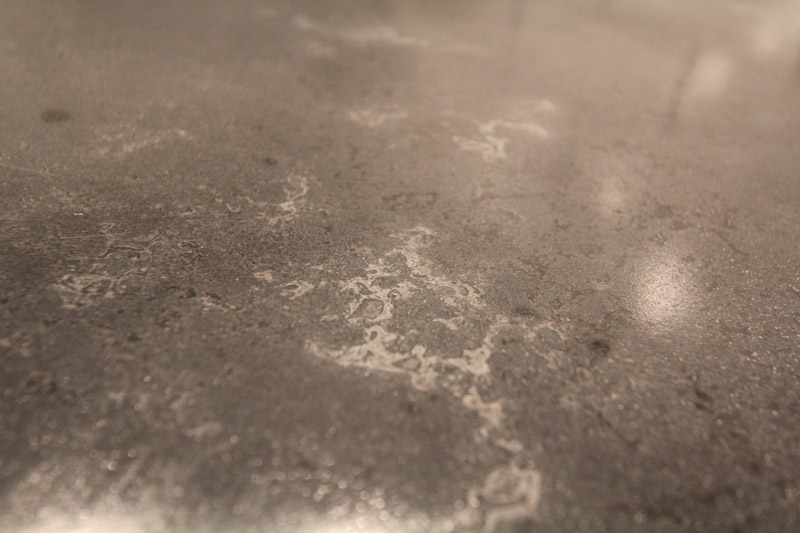
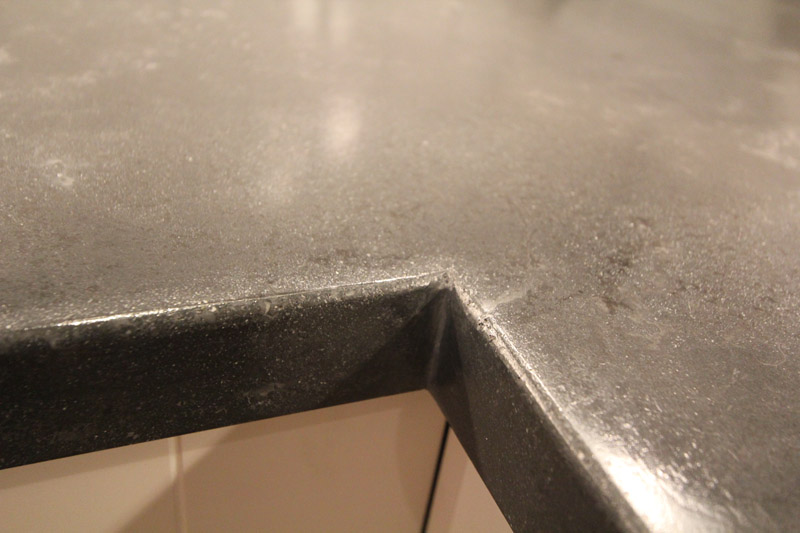
Speaking of the color varying. Here is one of my favorite spots with a lot of texture. This was produced by adding a slightly lighter color slurry for the middle slurry coat. I heart.
The front of the peninsula has cupboards, and when you open them you can see more of the exposed waterfall.
Sorry, had to throw one of Odin in. I can’t have my camera out and not take a photo (or ten) of him.
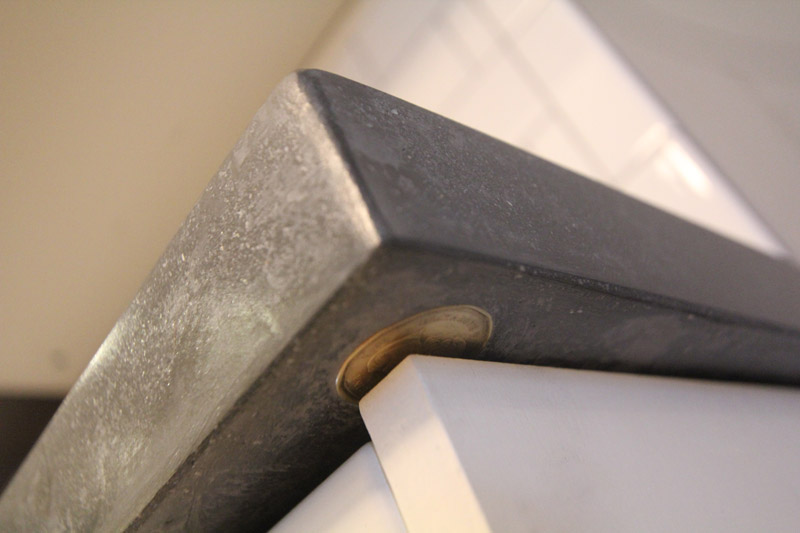
Do you remember when we hid a 2013 Loonie? Here’s the Queen peeking out from under the coffee bar counter.
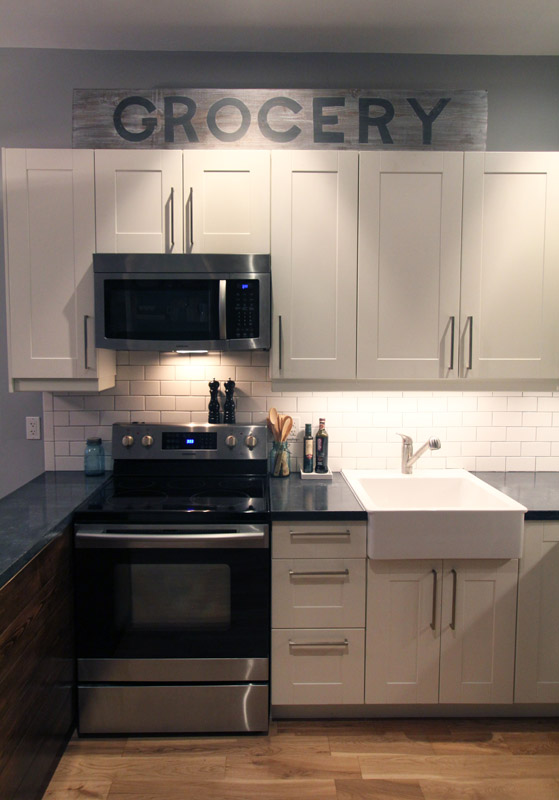
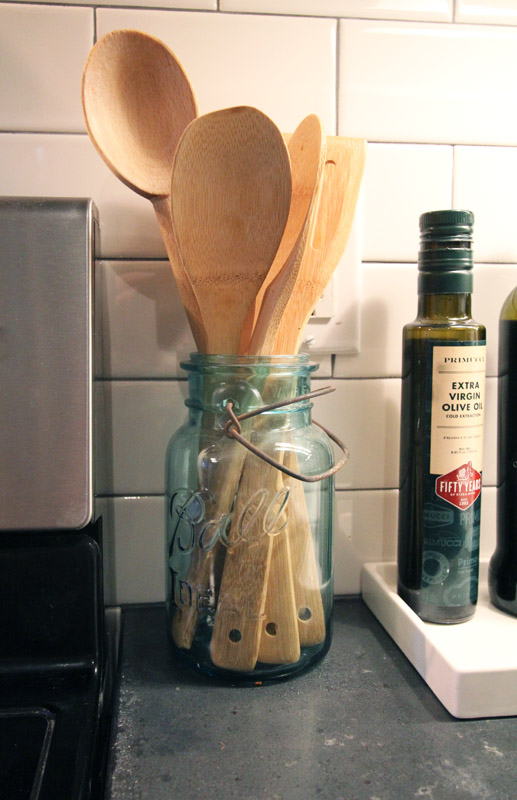
Now for a few of the other kitchen details. El Granto picked me up a couple vintage Bell jars one day at The Junction Flea. I love this one which holds my wooden spoons beside the stove. We also use a small ceramic tray to keep oil and vinegar off the counter (it would stain the tops).
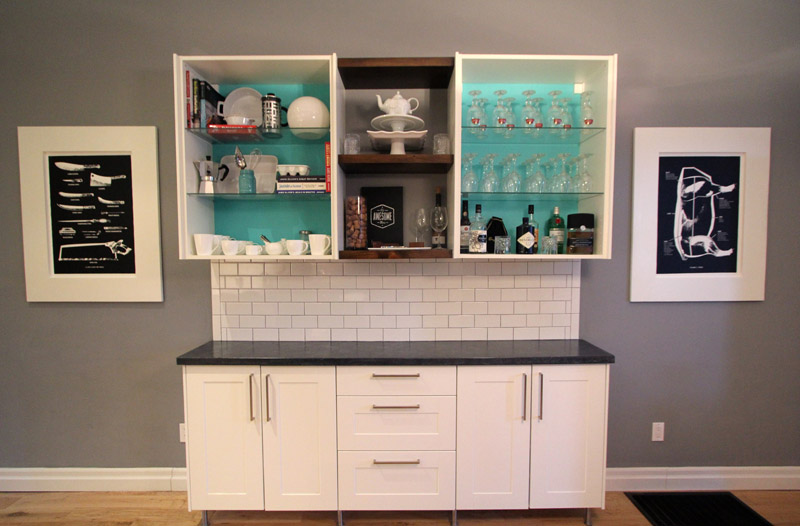
I am still very happy with the wood shelves we added to the coffee bar. Now with the wood clad peninsula, it really pulls the coffee bar into the kitchen.
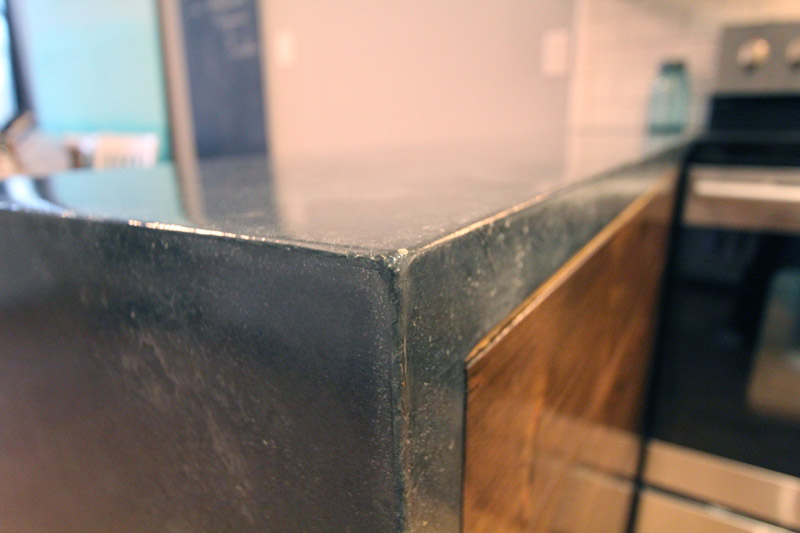
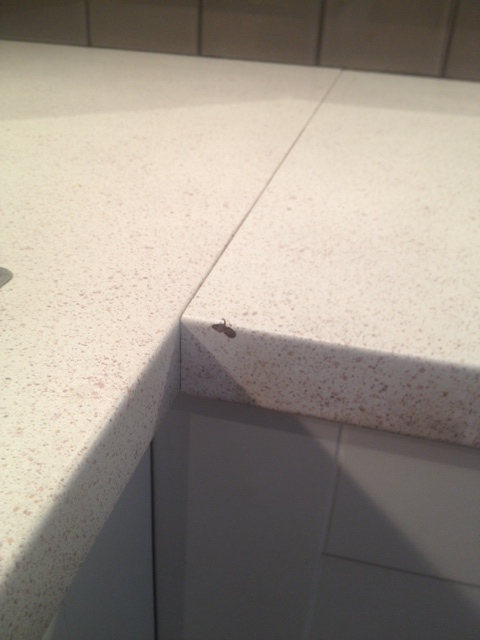
The inside counter was one piece I worried about a lot, but in the end its imperfectly perfect.
Okay, one more pic of the waterfall! We slightly rounded the counter edges. Littles and dogs wont poke their eyes out, and it makes me swear less when I bump into the counters.
So what do you think?! We’re super happy with them. They turned out better than we ever could have imagined!
I will be back later in the week with a few more kitchen items. Such as the source list, a few more project how to’s, as well as how we installed and sealed the counters. But for now, I am going to go and makeout with my counters. Wha? Uh. I mean stare at them lovingly, and maybe touch them a little. So smooth… and sexy…
If you’re making DIY concrete countertops, one of the most important parts of the process is the forms. Your forms are your molds, and if they’re not done right, your end product won’t look professional and you’ll constantly be bothered by those little bits that are “off” (or just straight up wrong).
Before taking on this project, I researched a LOT about the forms, and got a bit freaked out. Most of the things I’d read about the forms involved making a completely level work surface for the forms, (which would be a problem in our tiny unlevel garage) and a whole lot of pre-drilling, countersinking and screws screws screws. Then comes the stressful part about making your perfect edges with caulking.
Then Jeremy from Buddy Rhodes Concrete Products entered our life, and told me to chill out about the forms. They really weren’t that hard. We should build them with tape instead of screws, and not to worry cause if we mess something up it doesn’t matter, as we can just pull the tape up and do it again. They also don’t have to be level, just flat. Because OUR Buddy Rhodes concrete wouldn’t be poured, and therefore didn’t have to fill the forms completely, and thus no need for level.
As for the edges, Jeremy told us to pick up some Vaseline and Popsicle sticks, and he’d show us how to do the edges the easy way.
So Jeremy took a stressful, detail orientated task and made it a whole lot simpler.
So here’s what you need to make your forms:
Concrete Form Materials (motorcycle optional)
3/4″ 4×8 melamine sheets (we used 2) $38/each
Strips of melamine cut to the desired depth of your countertop. In our case we were building a 1 1/2″ thick countertop, and therefore got our strips cut to 1 1/2″. You CAN do this yourself on a table saw, however it is a hard task to push 4×8 sheets onto a table saw getting perfectly straight strips. It is much easier to have Home Depot or Lowes cut them down with their panel saw. Get more strips cut than you think you’ll need. We got 4. Not enough.
Double Sided Duct Tape (*This can be hard to find. In the US check Walmart or Lowes. In Canada we did not find it anywhere, and resorted to double sided Scotch carpet tape (which did work). We ended up using 5 rolls of carpet tape, so make sure you have a bunch on hand. We started with 3 and had to make a trip back to HD.)
Off cuts of your 3/4″ thick melamine to use as spacers for your countertop overhang
100% white silicone caulking. The white dries harder than the clear, so go for white. Again get more than you think you need.
Caulking gun
Disposable rubber gloves
Shop Towel (or heavy duty paper towel)
Vaseline
Popsicle Sticks
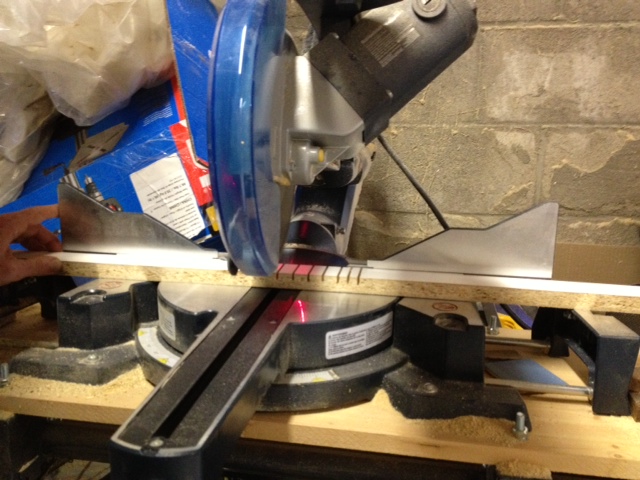
Miter saw
Flat work surface (we used saw horses with 2×4 vertical stretchers between to stop sagging for one work surface, and a bunch of 5 gallon paint buckets for the other.)
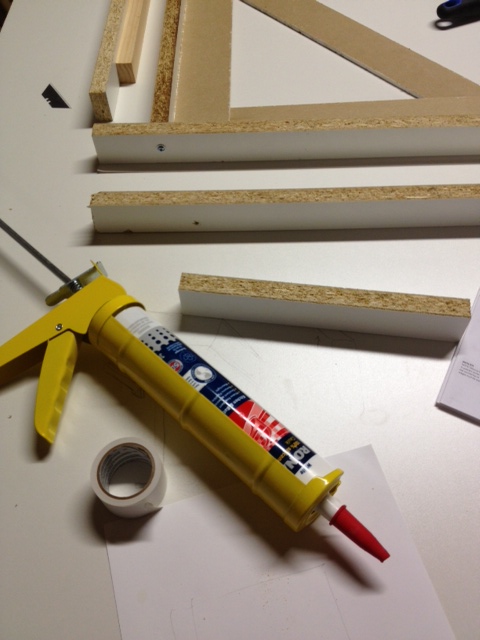
Form Supplies: 1 1/2″ strips of melamine, double sided tape, silicone caulkDouble Sided Tape
HOW TO MAKE CONCRETE COUNTERTOP FORMS
Step One:
Make your flat work surface, ensuring you can get to all sides of the work surface, and you’re not going to trip over anything. Place a 4×8 sheet of melamine on your work surface, ensuring the melamine is in good condition. The surface has to be flat because you’re making your countertops upside-down. If there’s sag your countertops won’t be flat!
Step Two:
FLIP YOUR TEMPLATES UPSIDE DOWN, and transfer any imperative markings such as overlaps and sink holes to the bottom. The flipping your templates upside down is CRITICAL! (Yes, we did learn this one from making a BIG mistake. We got so excited to start building the forms that we forgot to flip them and had to start all over again.)
Place your (upside down) templates onto your melamine and lay them out to maximize your space. (a.k.a. don’t put one big template smack dab in the middle, fit them around like a puzzle so that you’re not wasting space)
Step Three:
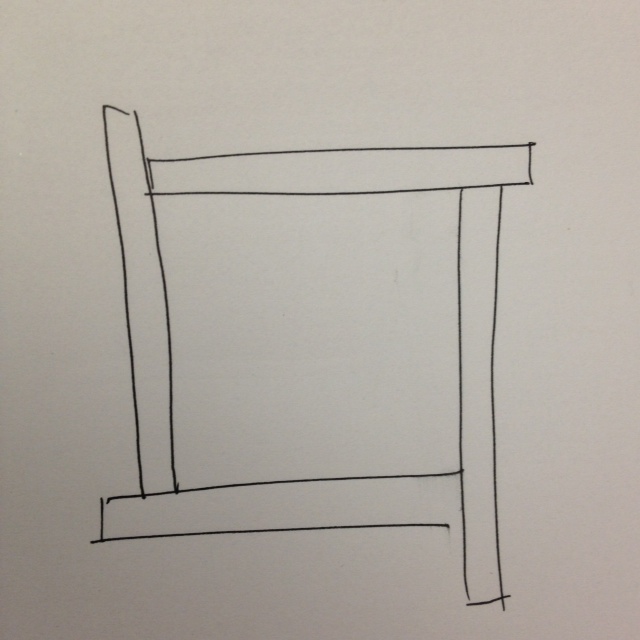
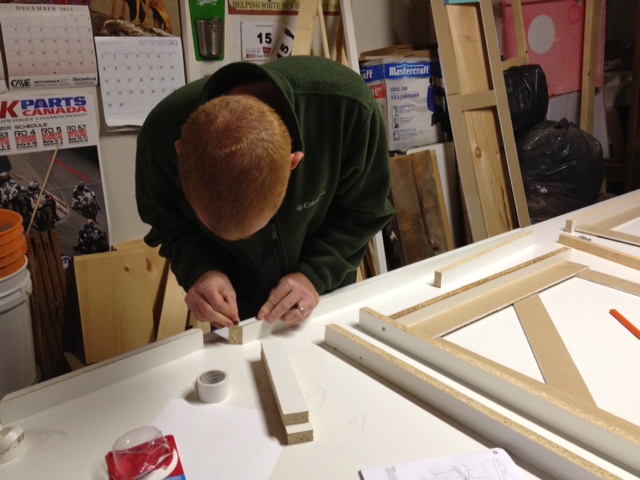
Start building the edges of your forms using your template as a guide. Now you don’t have to measure each piece exactly to build your frame, its actually easier if you cut your sides a bit long, and build the sides of your form like this:
Cut your pieces longer then they need to be and have one end overhanging the next. (sorry for my terrible drawing, I really did go art school…)
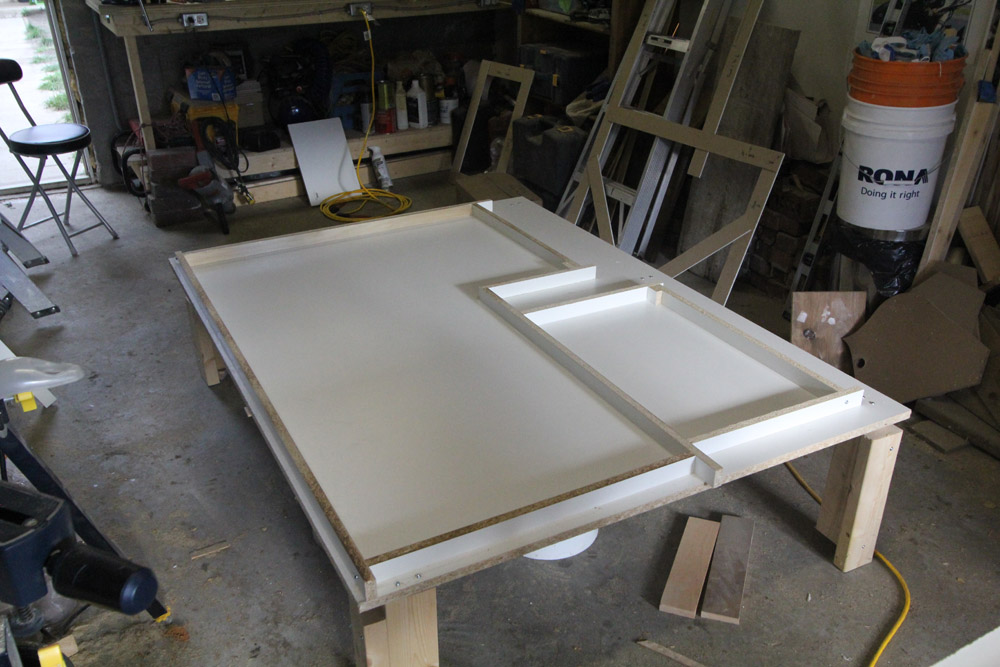
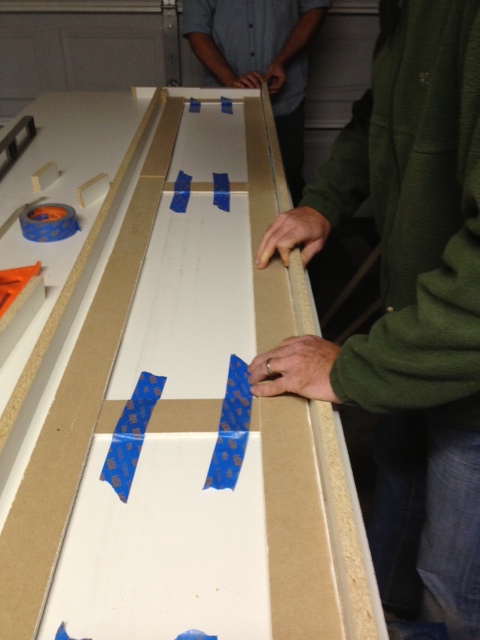
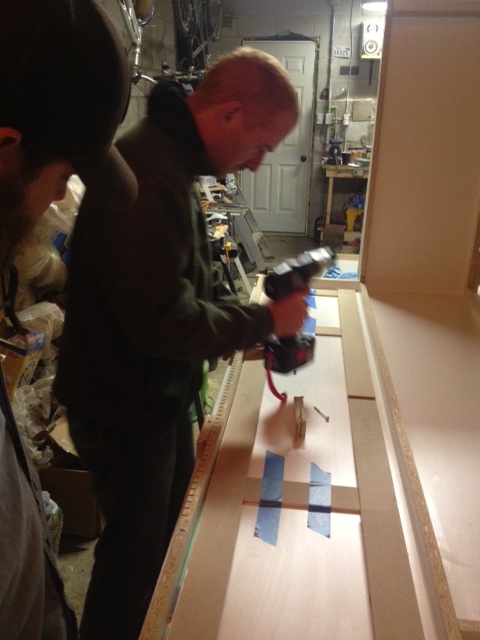
Follow your templates, and where its indicated to add an overhang of 3/4″ inch, place a few offcuts of your melamine between the template edge and your melamine side to create the perfect spacing. Once you have everything laid out, attach the form sides to the melamine sheet base using the double sided tape. For added strength, use a self tapping screw (such as a pocket hole screw) to screw through the corners of your form, attaching the side pieces together. No need to screw into your 4×8 melamine sheet base though, the double sided tape will hold everything good enough. Also if you don’t screw in to your base sheet you can reuse it later on for another project!
Jeremy applying double sided tape to one of the form sides.
Step Four:
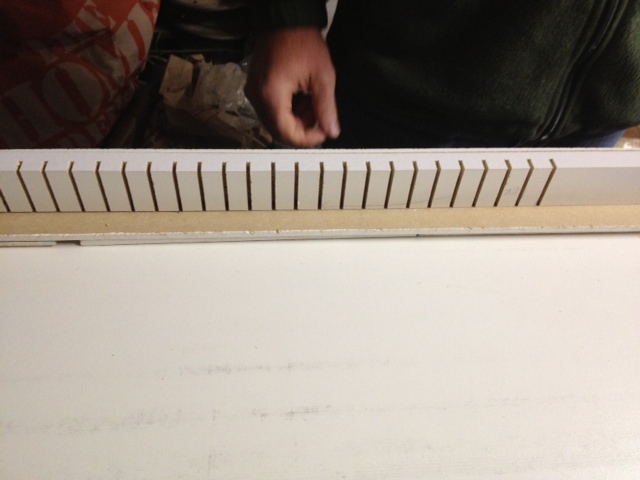
If you have any really wavy/crooked walls, and you needed to make a curved template (like we did for the coffee bar). Now it is time to make your curved form. To make the curve, we made kerf cuts on the back of one of our melamine strips. We first applied the double sided tape to the bottom of the piece, then set our miter saw to only cut through half the material, then kerfed all along where the curve needed to be.
Making the kerf cutsTesting the kerf cut piece to see if it would curve to our template
Once it was kerfed, we checked to see if it would curve to the form, then stuck it down, and added a few screws to keep it in place. A pretty big feat of engineering.
Curving the back piece of the coffee bar mold in place to form to our template (the coffee bar wall is very crooked, and has a hump right in the middle)Jeremy adding a few screws to the coffee bar form, and a sneak peek of our special form for the peninsula.
Step Five:
Make any special forms. This will include sink cutouts, and in our case a WATERFALL. Yep that’s right, my dream of a waterfall countertop was happening! Whats a waterfall counter you ask? It’s when the countertop appears to drop off the side of a counter to the floor. Like this:
Waterfall Countertop – Apartment Therapy
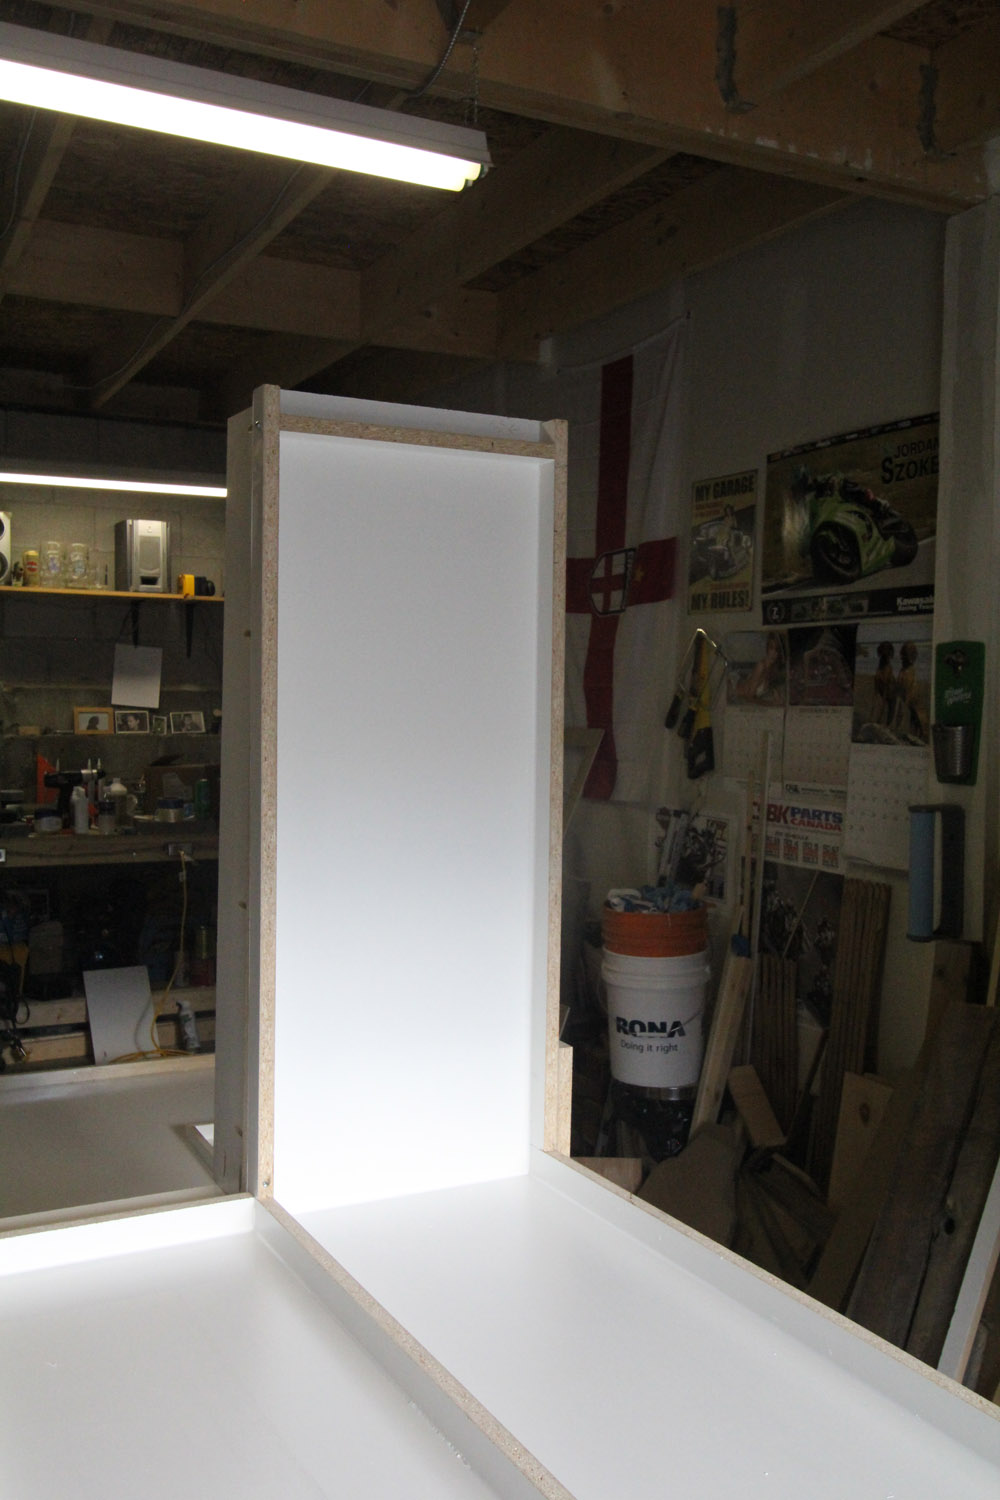
I really wanted the countertop on the peninsula to have a waterfall, and Jeremy said it was not only possible, but that we could do it in ONE PIECE. Yeah. Mind blown, right? As we are using the Buddy Rhodes Craftsman Mix in his traditional hand formed technique, we could literally make the concrete go VERTICAL! PSHEEEEEWWW! (That’s the sound of your mind blowing.)
So it was time to make our waterfall mold, and that meant making our upside down form go vertical. We created the form the same way we did the other forms, but instead of a short side we ran another piece of melamine vertical, and then gave it sides. We supported the back with extra pieces of melamine attached with pocket holes (so that it would support the weight of the wet vertical concrete).
Waterfall Countertop FormSupport pieces on the back of the waterfall countertop form
Step Six:
Once all your forms are built, its time to caulk the edges of your form to make it all purdy for your exposed corners. *Note that this step isn’t super essential when making hand pressed countertops using the Buddy Rhodes Craftsman Mix. Edges can easily be rounded and smoothed in the finishing steps, but it doesn’t hurt to have a nice finished edge right off the bat.
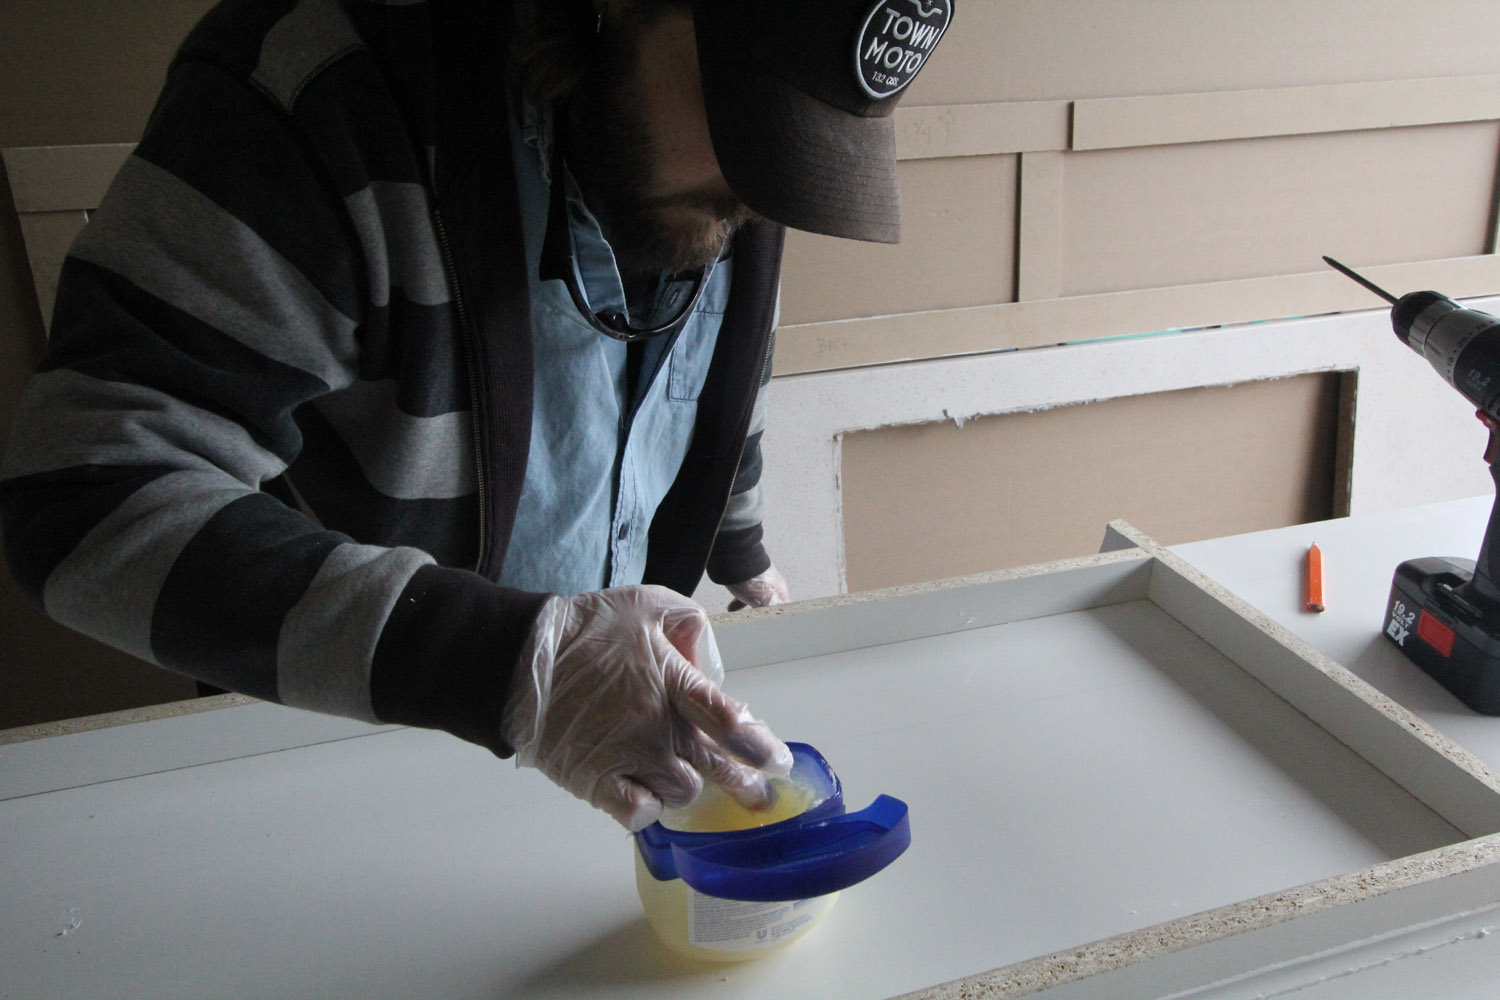
If you have ever used silicone caulking, you will know that its a sticky mess, and doesn’t clean up half as nice as latex caulk. I happen to not like silicone caulk much at all. Its unforgiving and finikity. So when Jeremy told us he had a fool proof way to caulk the edges I was in 100%.
Jeremy’s fool proof way to get a perfect round edge:
Lay down a very thin layer of Vaseline close to (but not in) your corners and seams. If you have mineral spirits (which we don’t have in Canada) thin your Vaseline down a bit to make it even easier to apply. Cover from right near the seams up the sides and on the base of your form about 1″ away from the seams. You only need a thin film, and ensure you wipe off any excess.
El Granto Applying the Vaseline
Lay down a bead of white silicone caulking into the seams.
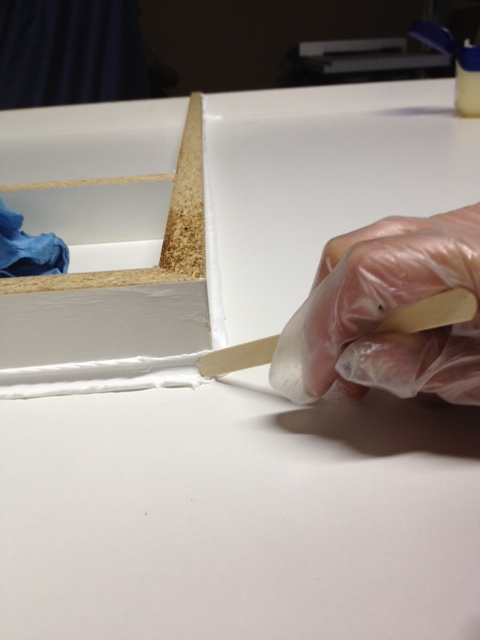
Take a Popsicle stick and push it into the seam and draw it along the seam to make a nice rounded corner. Ignore the excess caulking that is being pushed out to the sides. (no really, don’t even look at it, just let it be.)
Using a Popsicle stick to make a nice rounded corner
Wipe off your Popsicle stick frequently and don’t let excess caulk build up. It is important to push your Popsicle stick against both sides of the form and get a nice clean rounded corner. Now walk away and let it dry. Really. Leave all that gooped over the sides caulking and go get a coffee. Let it dry (ideally overnight) but a couple hours will do.
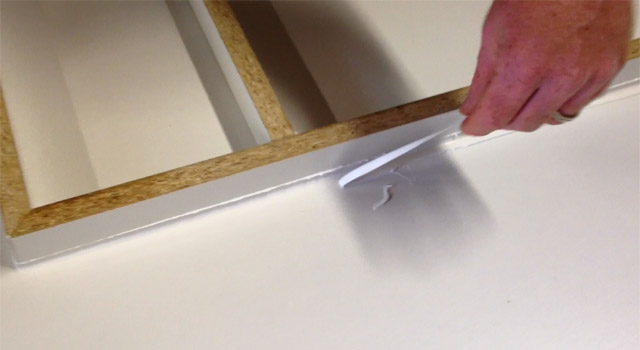
Then just pull off the excess caulking to reveal a perfect edge. (it comes off so easily because of the Vaseline!)
Pull off excess (dried) caulking to reveal the perfect edge
Awesome, right?!
Step Seven:
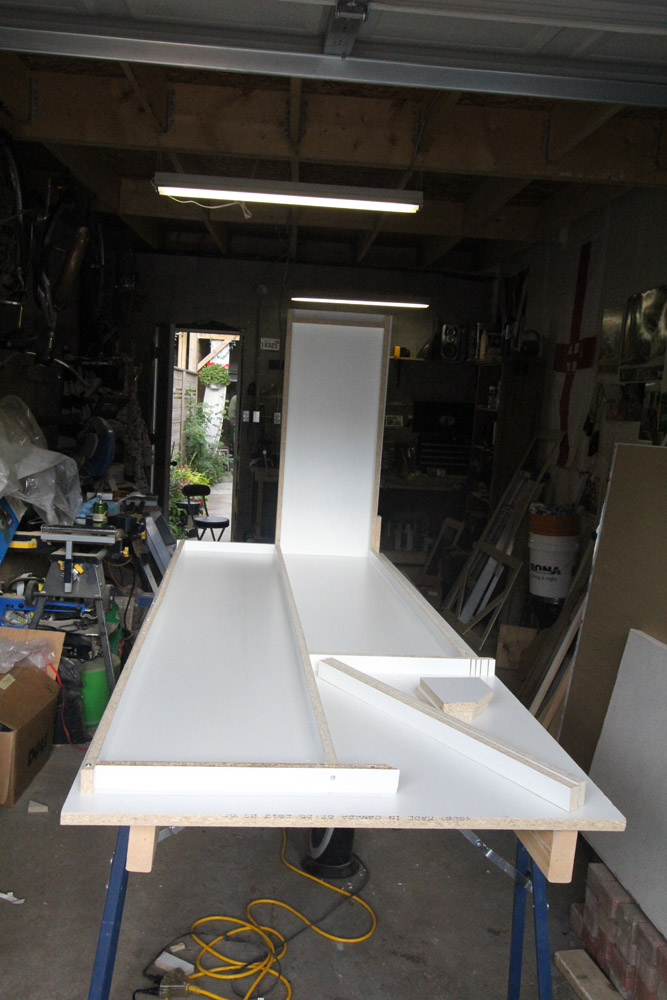
Pat yourself on the back, cause now you have some awesome Concrete Countertop Forms!
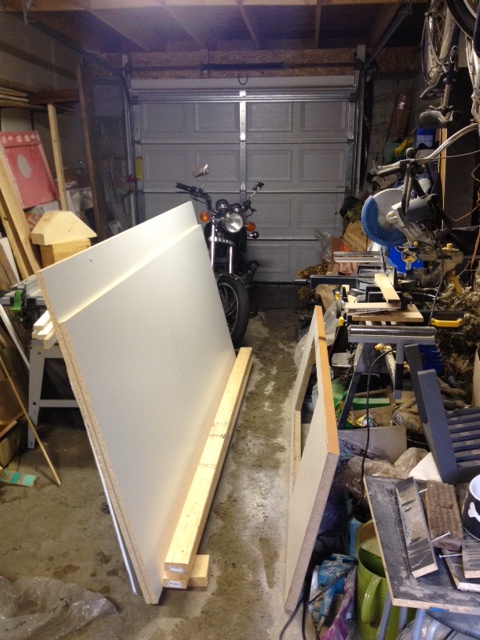
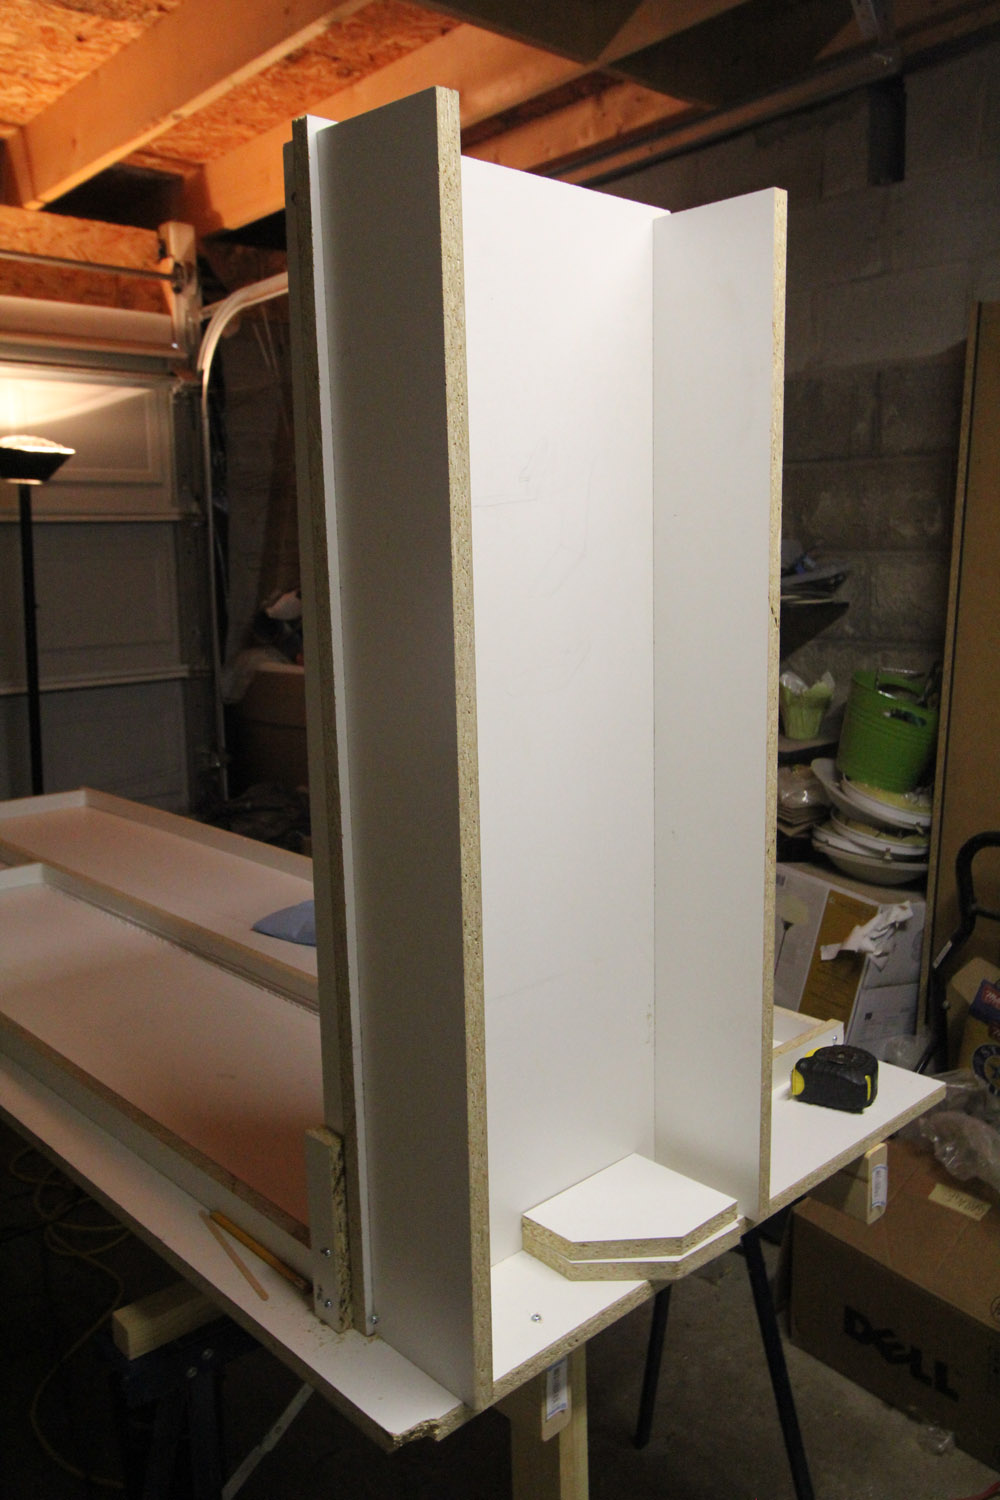
Finished forms (coffee bar form on right, and peninsula form on left)Finished forms (L shaped form for main kitchen, and smaller form for between sink and stove)
The forms are built, everything is ready to go! Next up we POUR!
I had epic plans for a kitchen makeover this year. You can see my wish list here, and my “timeline” here. HA HA! Why do I make lists?
Well we have been getting some things done in the kitchen/dining room. The coffee bar got drawers, we made a new dining table and bench, bought a sink, and I have finally made some progress in my plans for a DIY concrete countertops.
Kitchen Pre-Move In
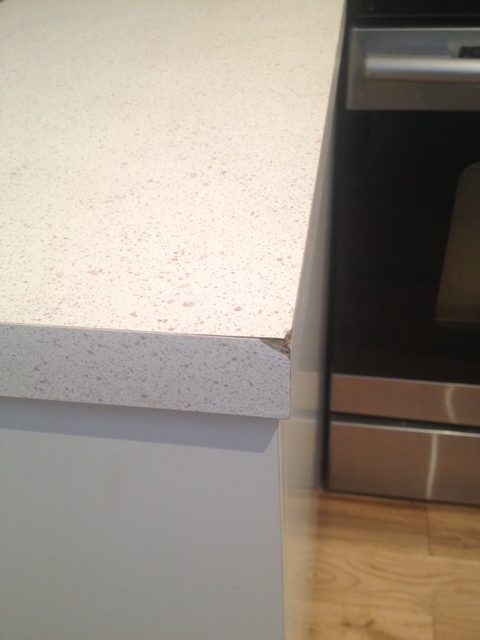
As you can see from the photo above we have laminate counters. They look okay in the pic right? White-ish and nondescript? Yeah except they’re this flecked beige design (bleh), and during the move & renos they got two bashes in them, as well as the laminate started to peel up after I ran the self cleaning cycle on my oven. There’s also a seam that I’m not the biggest fan of.
Bashed corner of our peninsula countertopDent in corner of counter as well as the seam
Awesome, right?
So DIY concrete countertops are high on my want list. Now you may also know that I am a planner. I’m not just gonna head to the hardware store, fill up a rental van with bags of concrete and start making things. I have to research, and plan. Cause if you don’t, projects go astray, money gets wasted, things take way longer than they should, and you may end up with some really heavy junk.
So it was time to research, plan and make some lists.
Project Concrete Countertops TO DO LIST:
Research concrete countertop mixes, techniques, colors and sealers
We have started to prep and calculate, and get our proverbial sh$t together, and THIS WEEKEND is the big pour. I am excited and scared all at the same time. My kitchen is about to get a whole lot less cracked and busted, and a whole lot more grown up!
Don’t worry, we will do the whole process from start to finish with you including a planning guide, all the prep and template making, the mold fabrication, mixing and “pouring”, finishing, installing and sealing. I know its a complex project, so I think we’ll break out some video to help you re-create your own project at home.
In the meantime, make sure to check in on our progress on our Facebook and my Instagram, we will be posting some status update shots and outtakes until we have enough time to post everything here in detail.