One of the most important parts of making a new concrete kitchen countertop is the templates. When starting to tackle our DIY Concrete Countertop project, we thought we would just measure our space, and make the forms from our measurements. Our kitchen looked square and true, but once the old counters were out we realized pretty quick that there was nothing square about our kitchen. Thats where templates come in. They are quick and easy to make, and will ensure your counters fit perfectly.
Your templates will recreate your cabinets and wall shape exactly, and ensure your countertops fit your space. It also makes sure your sink, faucet cut outs and anything else special is done in exactly the right spots. How terrible would it be to completely make your counters and realize your faucet hole is 2″ off. Ouch.
So here’s what you need to make your countertop templates:
- 1/8″ luan or other easily cuttable material cut into straight strips about 2″ wide. Get your hardware store to cut the strips for you on their panel saw. (We had some 1/4″ mdf strips left over from the guest room board & batten, so we used that. Although it wasn’t ideal, as we had to make a trip to the garage for all our cuts.)
- Glue gun & glue sticks
- Sharpie
- Measuring tape
- Bare cabinets free of counters and any imperfections. Ensure your cabinets are secured to the wall and level. Once you make the templates, you cant change your cabinets at all, or your countertops may not fit right.
- Sink & any integral items to the counters
We removed our old countertops & sink, and ensured everything was ready for the templates. We had purchased our new sink, and had it as well as its installation instructions ready.
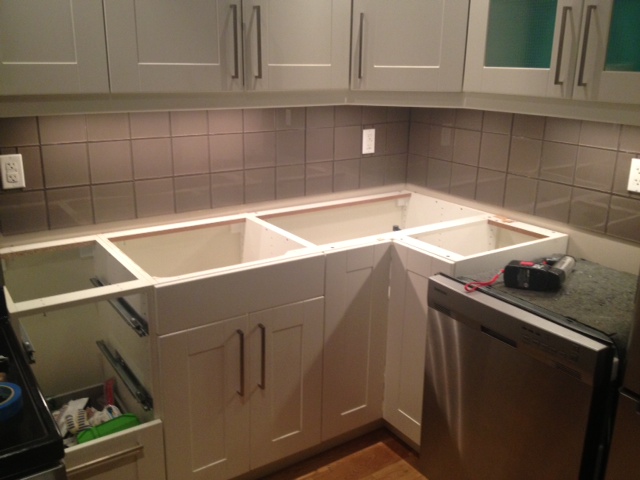
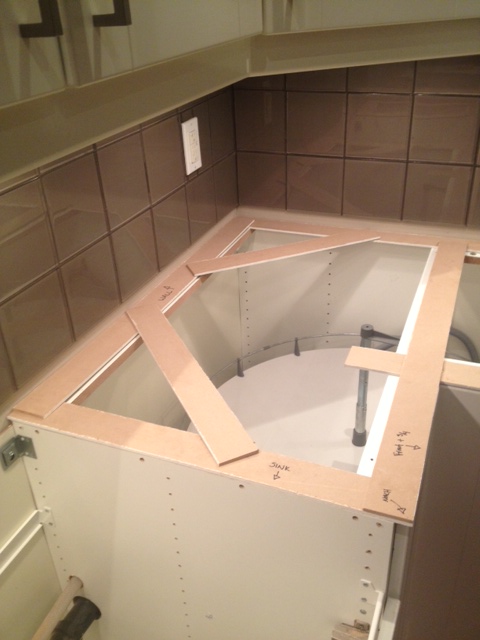
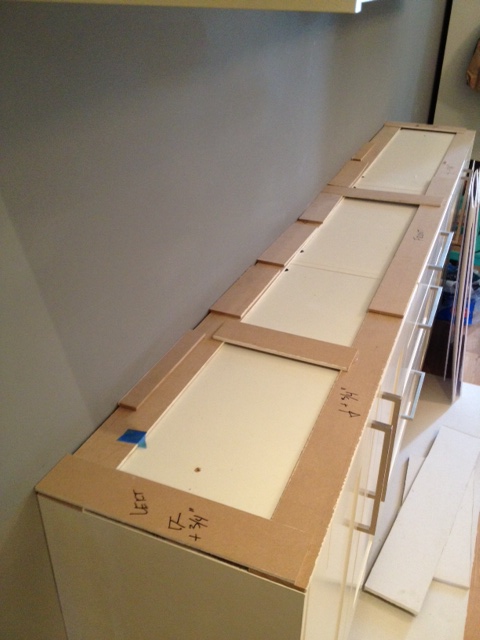
To start the templates lay a long piece of your template material along the backs of the cabinets. Then lay strips along the front of the cabinets cutting them to exactly the same length as your cabinet.
Join the front and the back strips with shorter strips cut to the depth of your cabinet. Make your way around your counters outlining them with your template strips. Once you have everything laid out, go back and hot glue it all together.
Label all pieces with “front”, “back” and descriptions such where all your appliances are. Mark any areas that will require an overhang. The standard overhang is 3/4″ from the front of your cabinet doors. The back of your counters and areas where it hits walls or appliances will not need an overhang.
Read the installation instructions for your faucet & sink, and mark any special requirements on the template. Your sink may come with a template of its own, if so attach that to your template in the proper place.
Dry fit your sink & faucet in place around the templates (and make sure everything is going to fit!)
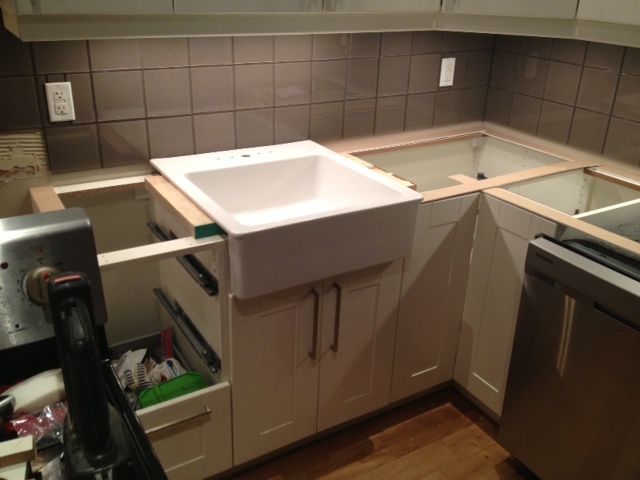
Our Ikea Domsjo sink required two notches on the front of our counters to fit the apron front sink. We marked the areas for the notch.
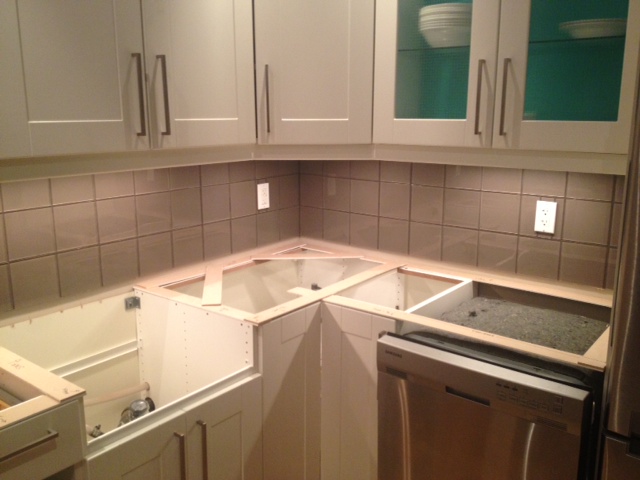
For the coffee bar our counter is 7 feet long and the wall has quite a bow right in the middle. This caused problems for us when installing the coffee bar (it’s actually spaced out from the wall about 1/2″) and we knew a straight countertop wouldn’t be perfect.
To template for the bow in the wall, we cut a bunch of short pieces and laid them against the wall where the curve was. This outlined the curve for us perfectly, and we were able to recreate the bow within the form.
The entire template process only took us about a half hour, and produced perfect templates to make our forms with. A simple step, but definitely worth the effort for a professional result! You can also use this form of template making for your laminate or butcherblock countertops.
Next up we will be building the forms, and getting one step closer to pouring our concrete!
This project is part of Project Concrete Countertops. Make sure you check out the rest of the series starting with Concrete Countertops – The Mix, The Templates, The Forms, The Pour, Fill & Sand,The Reveal and Finishing Touches.
*We were gifted some (awesome) Buddy Rhodes Concrete Products, but all opinions are our own!
Hi, Kristen! I have bought all of my Buddy Rhodes supplies and am getting ready to make my templates. I’m stuck on the waterfall edge. Did you template the waterfall edge flat to the cabinet, then, when building the forms, add in the depth of the counter top? I’m having a hard time working it out in 3D. I know this was over a year ago, thought I would ask in case you remember.
Thanks for all of the detailed instructions!
Hi Sandra,
We didnt template the waterfall, just templated the top, then measured for the waterfall. Cant wait to see how yours comes out!