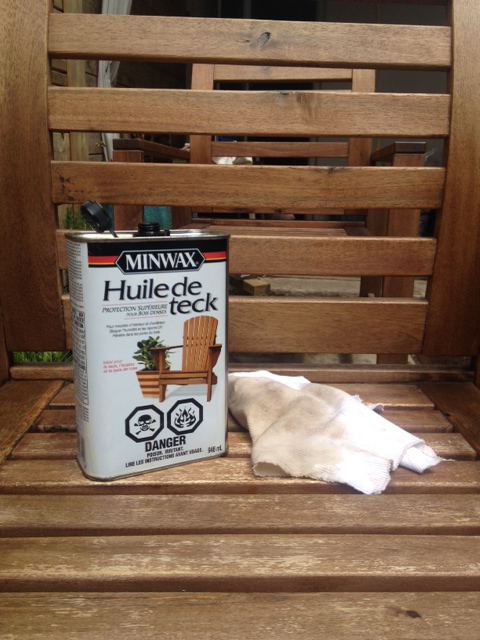
I received a sample in the mail the other day from Minwax. It included a couple packages of their wood finishing cloths, and a small piece of wood. At first glance the wood looked like an artists palette.
Tag: wood
DIY Housewarming Candle Holder
Nothing says housewarming like lighting things on fire… right? It is called houseWARMING after all.
No no, this post isn’t about burning your friends house down, but I will show you how to warm it with a small (controlled) flame.
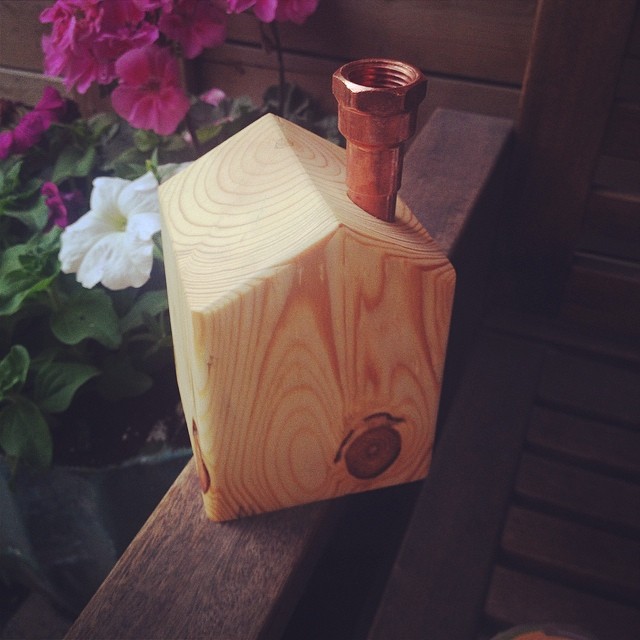
Meet my adorable housewarming gift idea; the DIY Housewarming Candle Holder.
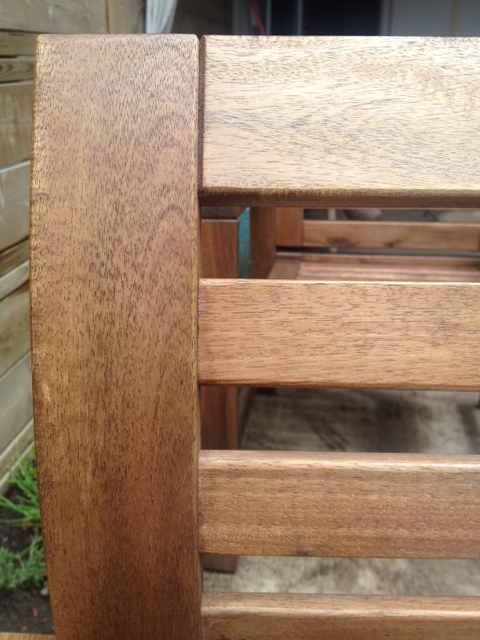
Acacia Wood Furniture Maintenance
Remember how I talked about maintaining our acacia outdoor chairs last year? Well guess who forgot to bring them in the garage over winter (hint it was us) and they were looking pretty shabby.
This year we decided to try out a different type of wood oil, in hopes that it would bring back some luster.
We gave the chairs a wash, and placed them out in the yard to dry, and get oiled.
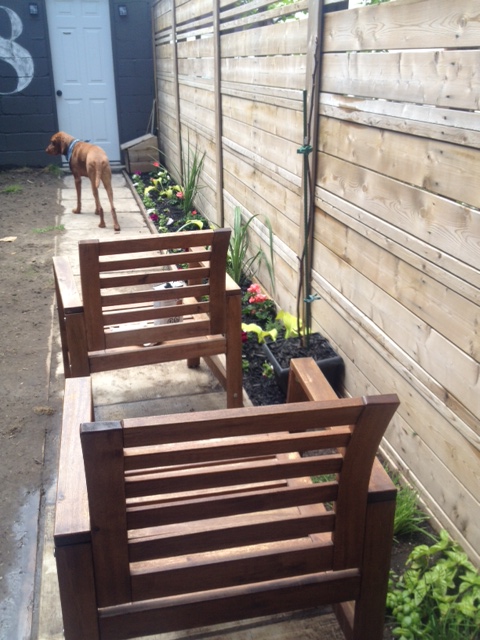
We used applied the Minwax Teak Oil with a foam brush, and after a few minutes work, our chairs were looking so much better! We plan on potentially giving them a little sand and a few more coats of oil because they guzzled it down. Poor thirsty chairs.
We’ve got a lot more to do in the backyard, but at least the chairs are looking a bit better!
What do you use for your wood furniture maintenance? Have you used Minwax Teak Oil before?
Danish Soaped Floors
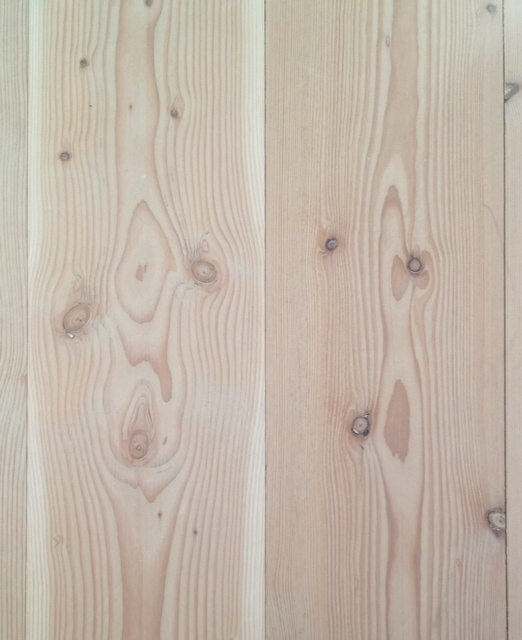
One of the first photos I Instagrammed while in Denmark was this photo of pine flooring:
Wood Paneled Peninsula
My least favourite part of the kitchen used to be the peninsula. It was short and stubby, too small to use as a prep space and looked awkward.
I had originally hoped to build the peninsula deeper to house a beverage fridge and get full counter depth cupboards & drawers. However it became apparent that to do that we would loose valuable dining room space, and be unable to have a 6 person dining table.
We were not willing to compromise on the dining table (we love to entertain!) so the peninsula needed to stay skinny. If we couldnt make it wider we could at least make it longer. We added only one more cabinet, which not only made the kitchen symetrical, but made so much more work space. Its amazing what a foot can do. Now you can stand comfortably at the peninsula and chop veggies or converse with someone in the diningroom.
Such a small change, but a world of difference. Now the peninsula is my favourite part of the kitchen. The concrete waterfall is the icing on the cake, but you may have noticed we added a bit of a special touch on the back of the peninsula as well.
The peninsula used to be backed in an Ikea cover panel that matched the Ikea Adel kitchen cabinets. It worked just fine, but after we added the extra cabinet, the old cover panel wasn’t big enough.
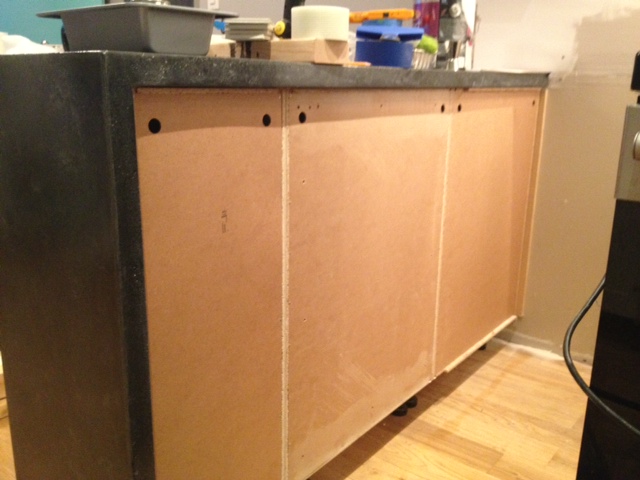
We could have went out and bought a larger one, but thought it might be a fun area to add something special, and make our kitchen look a bit more custom. Enter a trip to the hardware store.
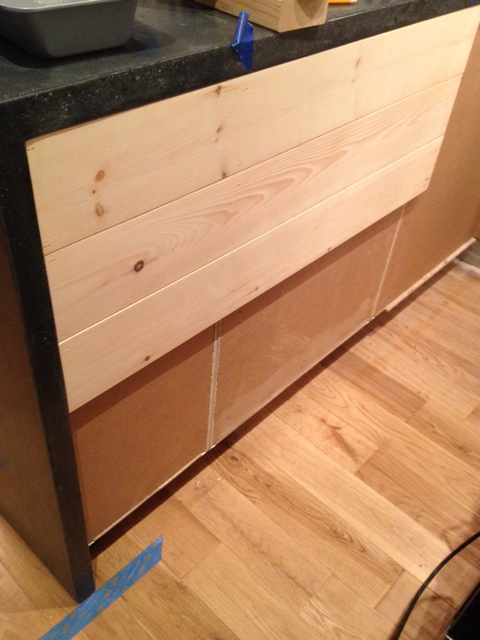
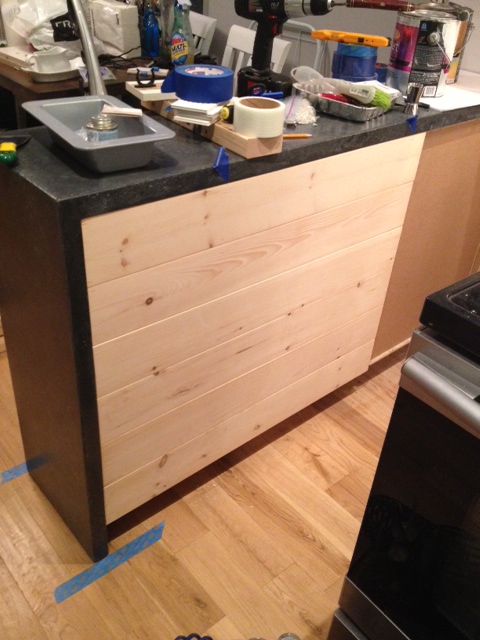
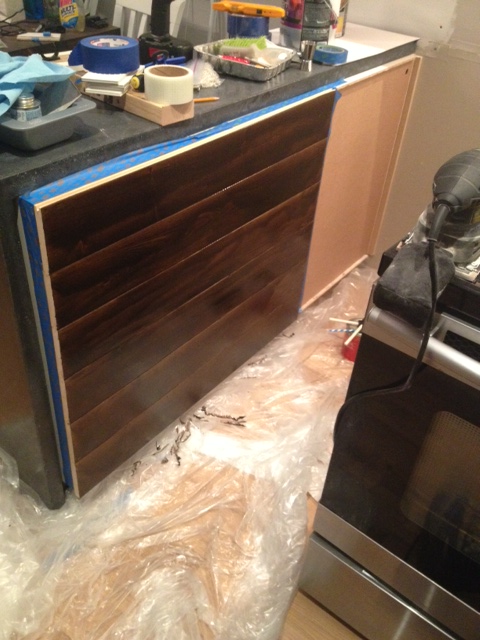
We picked up three 6 foot long pieces of tongue and groove 1×6 unfinished pine flooring from Home Depot along with a 1×4 piece of kiln dried pine. Back in the garage we cut down our lumber to three feet long on the miter saw, and headed into the house armed with some wood glue and a brad nailer.
We started at the top of the peninsula with a board facing groove up. We brad nailed it into the cabinets making sure we nailed through the sides of the cabinet frames, not just the backer. When attaching the second board we added a bit of glue to the groove, slid it tightly against the other board, and continued nailing. You will notice that we didn’t run the wood all the way to the wall. The stove is tucked into that corner, and to give the stove a bit more breathing room, we opted to only panel to just past the oven door. It saves on wood, and I will worry less that I will light my house on fire when I run the self cleaning oven.
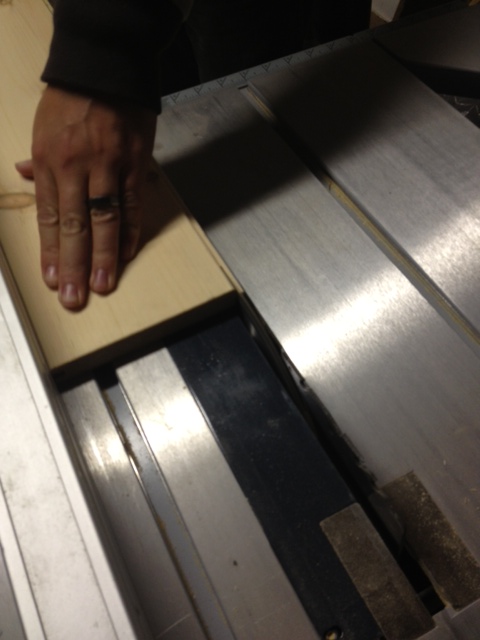
Once we reached the bottom, we went to the garage and cut the groove off the past piece with the table saw so we would end with a nice smooth board.
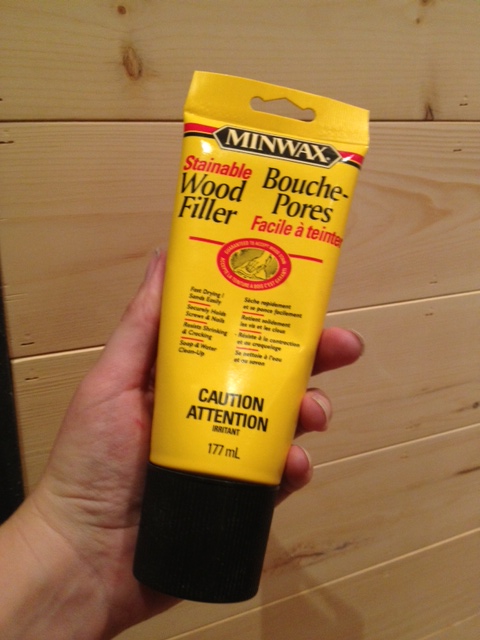
After the boards were installed we got out the wood filler and filled in the brad nail holes.
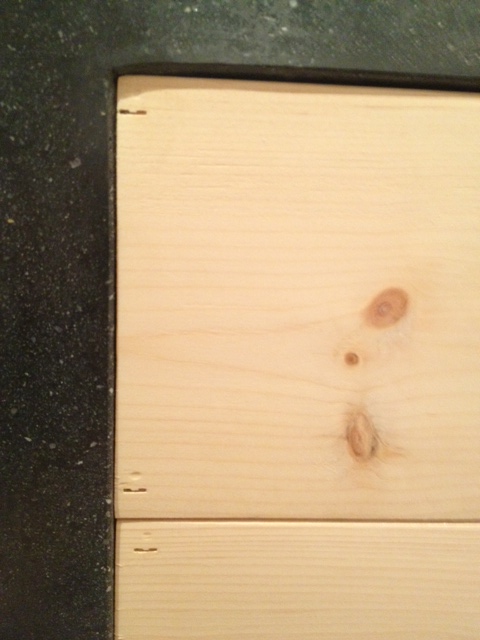
After letting the filler dry, we took the sander to the boards and gave it a quick finish sand.
Now we were ready to finish it. We pushed back the countertop (we hadn’t yet adhered it to the cabinets at this point) taped off the area, and added a coat of wood conditioner then two coats of stain (same color as our dining table & coffee bar shelves).
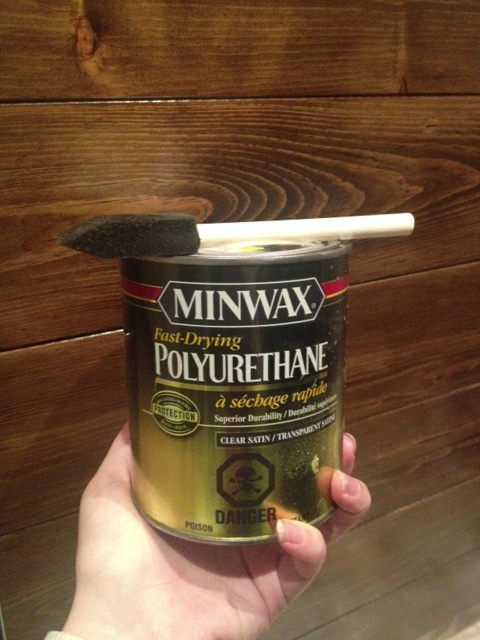
After staining we finished it up with 5 coats of Satin Poly. Five coats may have been a bit of overkill, but its beside the stove and oven, and will get its fair share of abuse.
Next up we needed to address the toe kick. For the rest of the kitchen we have plain white toe kicks, but it just seemed weird to carry on the white for the back of the peninsula, so we opted to use a piece of 1×4 pine stained & polyed to match.
We then moved the countertop back in place, making sure the wood was flush with the countertop edge, attached the countertop to the cabinet, and slid the stove back in place.

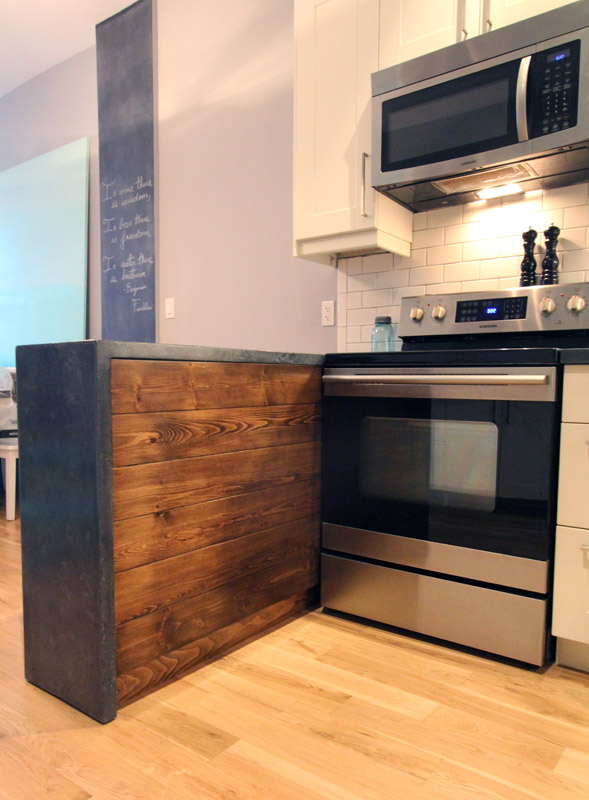
Total Cost: About $15!
Chevron Cheese Board
As the Holidays are fast approaching, I am rapidly trying to knock a few items off the big old To-Do list, including making a few handmade gifts. This year has been a tough one to produce a lot of homemade gifts. Both El Granto and I have been working long hours at our day jobs, and by the time we get home we’d rather snuggle up on the sofa together than go back out to the garage and get to work.
This past weekend with nothing planned on the calendar, we decided to take a trip to the lumber yard, and start making some cutting boards for holiday host/hostess gifts.
After we had cut up all our wood, I noticed a few spare pieces too small to make into another cutting board, but rather than just toss them into the scrap bin pile, I opted to make a little side project.
Here’s what I did:
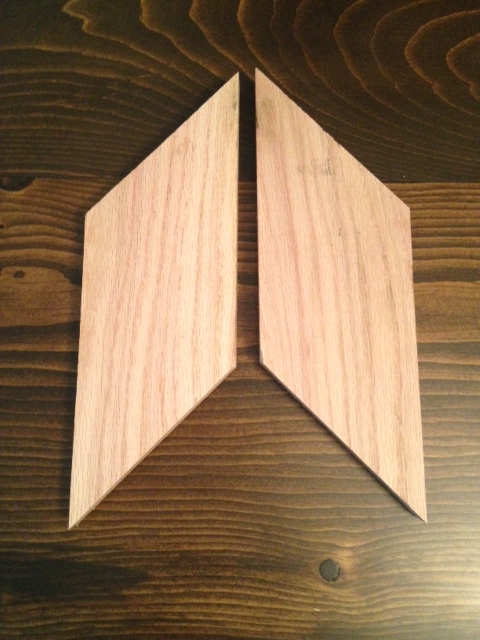
Set the miter saw to a 45. Took two scrap pieces of oak, stacked them on top of each other and cut a 45 through both of them at the same time. I then cut the same 45 at the other end of the pieces, again cutting through both boards at the same time.
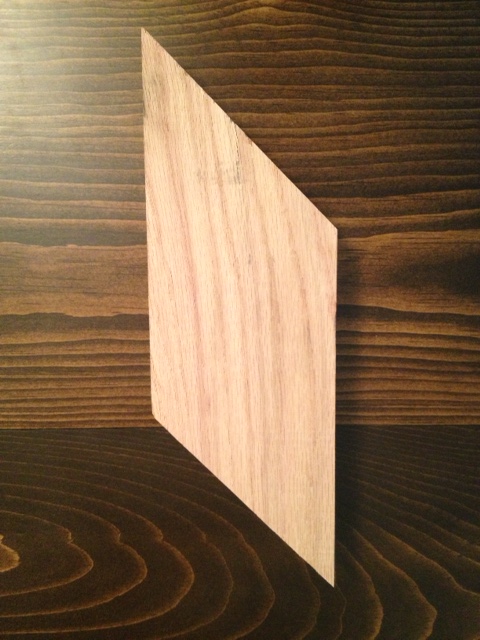
This made two pieces of wood about 9″ long that were EXACTLY the same. (the exactly the same is important.)
I then took those two boards, added glue, and clamped them together.
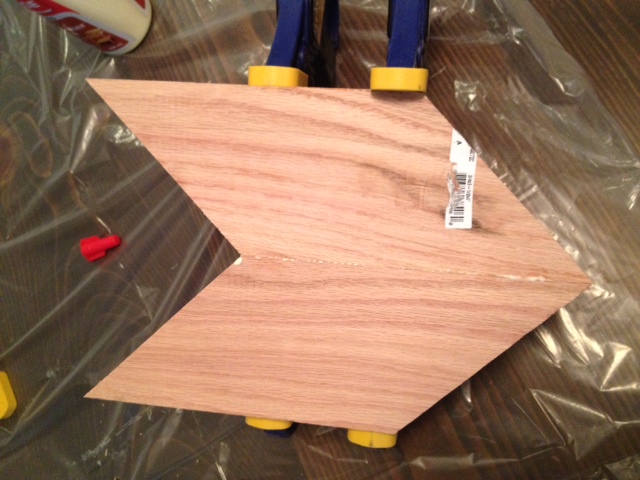
Once they were dry, I sanded, got the wood wet, let it dry, then sanded again. Why get the wood wet? It raises the grain, so you can sand it down again. If you don’t do this, then the first time the board is washed, the grain will raise and the wood will become rough again. It still may raise in the future, but at least you’ve sanded off the worst of it.
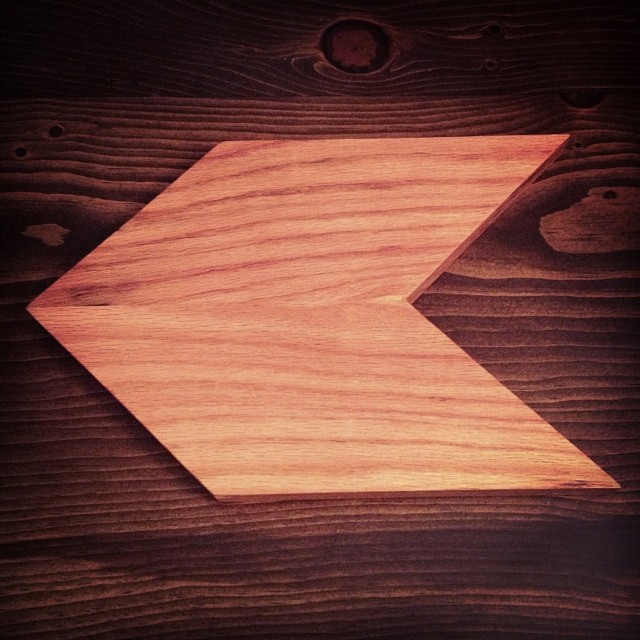
After everything is nice and sanded, I gave it a few coats of mineral oil, then followed up with some cutting board oil/wax.
Ta da: Hipster Chevron Cheese Board
El Granto had the brilliant idea that we should make a few of these, then we can slide them together at parties to make larger boards. I see another trip to the lumber yard, and more parallelograms in my future.
DIY West Elm Copper Light
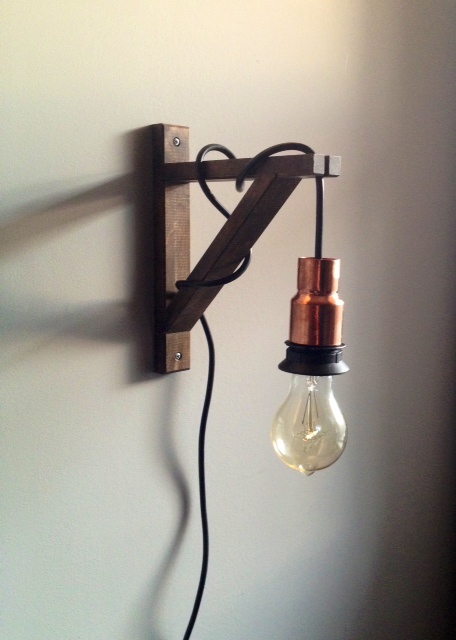
I find things on the internet, fall in love, cant afford them, then get sad. I will drool over things for weeks, then finally I will snap, have to do something about it, and get my ass in gear. Continue reading “DIY West Elm Copper Light”
Farmhouse Table Reveal + Plans
Aaaaand were done! Daniel and Adelle moved into their new place and took their newly finished modern farmhouse table and benches with them. Mind you as much as we will enjoy our garage space back, we will miss working with Daniel and Adelle on this project! It’s different working with friends than a spouse, it’s laid back and there (usually) isn’t any swearing involved. Throw in a piña colada or two, and it’s a party with work involved.
If you missed the beginning of the project, check out part one, two, three, and four.)
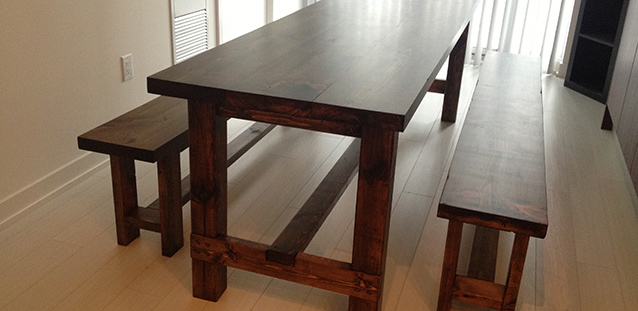
So without further adieu, here is the table!
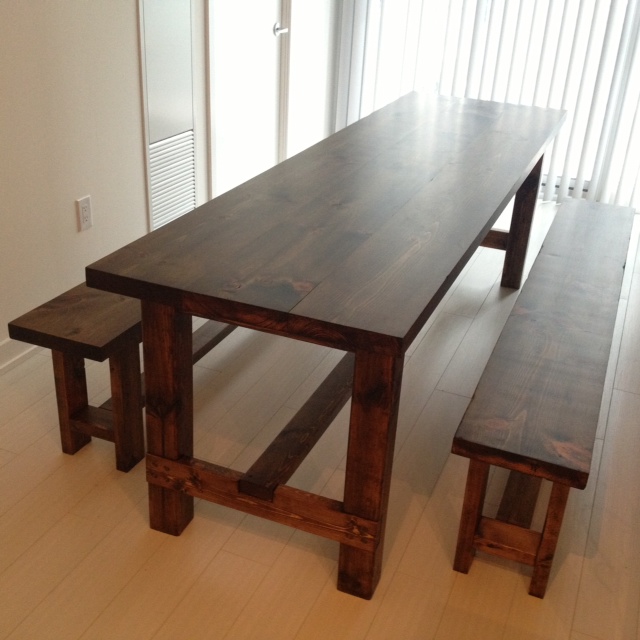
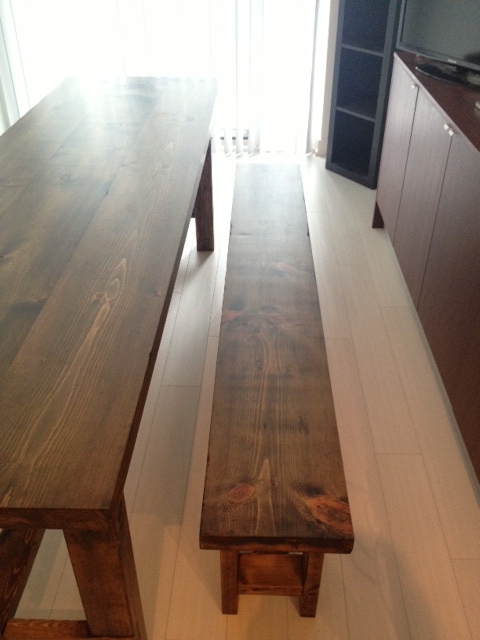
It fits perfectly in their narrow condo, and the benches hide away completely when not in use, making this table able to function as stand in kitchen prep surface.
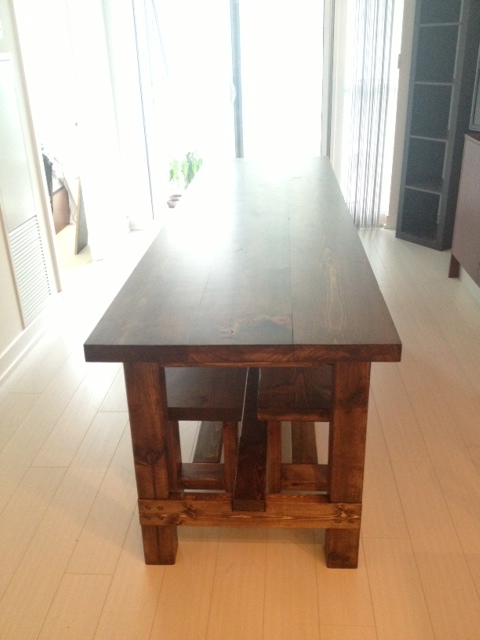
The deep stain color works great with their white walls and light floors.
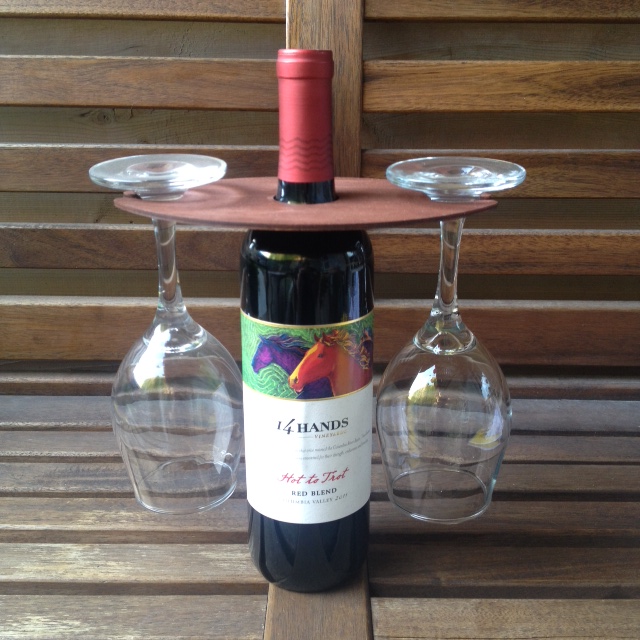
The table also does a mean job of holding a glass of wine or two (we had to test the table out…come on!)

SPECS & PLANS:
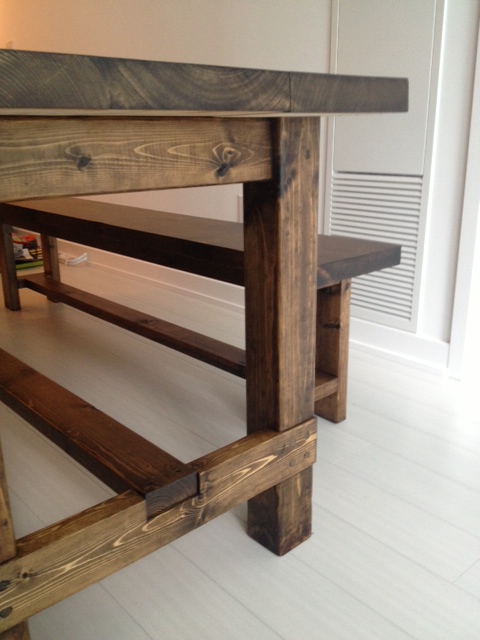
The table is loosely based on the Ana White farmhouse table plans. (We changed size, removed the breadboard ends, and used dowels instead of screws for the table legs. ) For in depth instructions on how to assemble the table check out her plans here.
Farmhouse Table
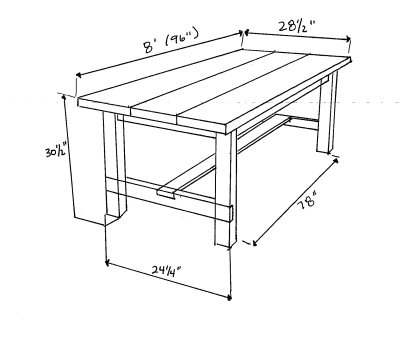
Lumber Buy List:
5 – 2×4 @ 8′
3 – 2×10 @ 8′ (we used kiln dried pine from Downtown Lumber for the table top, it was worth the extra expense! If you cant find kiln dried pine, purchase spruce 2×12’s from your local hardware store, and rip down to 9 1/2″ wide removing the beveled edges while you’re at it (they will be huge crumb catchers if you leave them)
1 – 4×4 @ 10′ (if you cant find 4×4’s in untreated spruce or pine, use cedar)
Cut list:
4 – 4×4 @ 29″ (legs)
2 – 2×4 @ 78″ (long aprons)
2 – 2×4 @ 17 1/4″ (short aprons)
1 – 2×4 @ 85″ (stretcher)
2 – 2×4 @ 24 1/4″ (stretcher supports)
3 – 2×10 @ 96″ (table top pieces)
Instructions:
Cut all lumber to length.
With Kreg Jig set to 1 1/2″ material, drill one pocket hole every 8″ or so on one side of two of the table top pieces (the outside tabletop boards). Then attach the outside table top pieces to the center table top board with wood glue and 2 1/2″ pocket hole screws. (see our post on building the table top here.)
Drill Kreg Pocket holes on top and sides of all apron pieces. Make 2 holes on the ends, and a hole about every 8″ on the tops.
Notch out legs for the stretcher supports. Make notches 3 1/2″ high by 1 1/2″ deep positioned 6″ up from the bottom of the leg, and 19 1/2″ down from the top of the leg.
Notch out stretcher supports. Make one notch in the center of each stretcher support. Make notch 3 1/2″ wide by 1 1/2″ deep.
Assemble legs by attaching short aprons to legs (inset by 3/4″) then set stretcher support into leg notches, and attach with screws or dowels (see how we did the dowels here).
Attach long aprons to legs, with pocket screws.
Flip tabletop upside down, center legs upside down on the table bottom, and attach legs to table top with pocket hole screws.
Attach stretcher to stretcher supports with screws or dowel.
Sand, stain & finish as desired.
Farmhouse Bench
(for TWO benches, halve the amounts if you’re only making one)
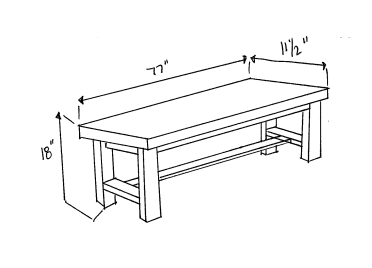
Lumber Buy List:
7 – 2×4 @ 8′
2 – 2×12 @ 8′ (7′ if possible)
Cut List:
8 – 2×4 @ 16 3/4″ (legs)
2 – 2×4* @ 61″ (aprons) *= we ripped a 2×4 down to 2″ wide. You can also buy 2×3’s instead of 2×4’s
2 – 2×4* @ 6″ (short aprons) **= we ripped a 2×4 down to 2″ wide. You can also buy 2×3’s instead of 2×4’s
2 – 2×4 @ 61″ (stretchers)
4 – 2×4 @ 6″ (stretcher supports)
2 – 2×12 @ 77″ (bench tops)
Instructions:
Cut all lumber to size.
Drill pocket holes on apron pieces (Kreg set for 1 1/2″ thick material). Two holes on each end, and about every 8″ on the top. Drill two pocket holes on top of small aprons. Drill two pocket holes on each end of stretcher supports. Drill two pocket holes on each end of stretchers.
Attach stretcher supports to legs 3 1/2″ up from the bottom with 2 1/2″ pocket hole screws. Attach long aprons to legs with pocket hole screws.
Flip bench top upside down, and attach legs (also upside down) to bench using the apron pocket holes and pocket screws. Attach side aprons to bench top. Attach stretcher to stretcher supports.
Repeat for second bench.
Sand, stain and finish as desired.
SOURCE LIST: (one table + two benches)
Materials:
Lumber (see above)
Minwax oil based stain in Jacobean
Minwax wood conditioner
Polyurethane – Minwax Oil Modified in Satin
200 2 1/2″ Kreg pocket hole screws (Lee Valley)
Wood Glue
Foam brushes (Dollarama)
Rags
Sandpaper (150, 220 and 320)
Kreg Screws – Lee Valley & Home Depot
Tools Used:
Miter saw
Table saw *not necessary, you can get material ripped to size at the lumber yard
Circular saw
Square
Kreg jig
Drill
Palm & orbital sanders
Measuring Tape
Difficulty Level (on a scale of 1-5):
three out of five
Total Cost: $400 (Lumber $320, Screws $20, Finishing materials $60)
Time frame: Two weekends (one to build, one to finish)
Burnin Down the House
In my quest for a stain for the media cabinet, I have about driven myself nuts with options. I have tried a stack of stain cans, jars full of “custom stain mixes” and even shoe polish. I am desperate, and indecisive. I don’t know why I am having such an issue with making my mind up, I guess we’ve just put a TON of work into the cabinet, and I don’t want to screw it up. I want it to be PERFECT. (Not that I am anal retentive or anything…) I think I have come up with a stain that I am happy with (more on that next week) but I wanted to show you one of the unorthodox options I was working with that turned out pretty cool.
Meet burnt wood

Yep, I torched that wood with a propane torch. Turned out kinda neat, right? Thats not stain at all, just raw pine that’s been torched. The theory on it is that you lightly flame the wood, and bring out the remaining sap. The sap, which is all sugary (maple syrup anyone?) burns when the flame hits it much like the top of a crème brûlée. You have to be very gentle with it, or else you’ll be left with firewood. The trick is to use even strokes and to not stop and start on the wood. Pretty much exactly like spray painting.
Its a cool finish, and something we may use around the house, but I think its a bit too much for the whole media cabinet. I thought it might end up looking like a country & western bar up in here. As much as I like cowboys, it was a bit much for our living room.
Ever used any nontraditional wood finishing methods? Ever torched any wood?
DIY Pipe & Wood Table Pt 1
****UPDATE**** Check out our revised version of the Pipe & Wood Table
We are hosting my family’s Christmas at our house this year. We currently have a 4 person dining table. No way could we all perch around that table no matter how many chairs we pushed against it. We needed to scrap the kids table, and nut up and get a grown up table.
INSPIRATION:

We put pen to paper and designed a simple tabletop with industrial black pipe legs. I had taken inspiration from this Restoration Hardware Flatiron table. Except we went with a basic “H” leg construction with a cross beam near the bottom of the legs.
We had originally wanted a nice thick reclaimed wood top, and had sourced a supplier, however that fell through and everything else we could lay our hands on was “city priced” (you know when you go to an antique store in the city and a simple item is priced 10 times higher that you ‘d find it at a flea market in the country? That’s “City Priced”.) So the cheap ass me wasn’t gonna pay city price for wood, so I nixed that idea and instead we decided to use 2×12″ construction lumber. We don’t have much invested in the tabletop, so if we get our hands on some nice reclaimed wood in the future, it won’t hurt our pocketbooks to swap it out. The legs are hardware store “black pipe” gas line pipe and fittings. These can be sourced at any large hardware store (orange & blue) and as they can cut and thread the pipe for you at the store, its super easy to work with.
We made a 72″ x 34.5″ table that is 30″ high. This is a standard 6 person table, but 8 can easily be squeezed around it.
Shopping List
1 – 3/4″x10′ black pipe $18.99
1 – 3/4″x6′ black pipe $13.80
4 – 3/4″x6″ nipple (heehee) $1.64/each
8 – 3/4″ Floor Flange $3.99/each
6 – 3/4″ Tee $1.64/each
1pkg 3″ felt furniture pads $4
2 – 2x12x12 spruce $17.50/each
Wood finishing materials (to be discussed in pt. 2)
Wood Cut list
3 – 2x12x6′
(Cut 2x12x12’s in half to make 4 – 6′ long pieces, and you can use the left over piece to make a bench.)
Pipe Cut list
The hardware store will cut and thread your pipe for you. There is a (substantial) fee for this. At our home depot it was $1 per cut and $2 per thread. We ended up having about $40 in cutting fees, which was actually more expensive that the pipe itself, but a necessary evil.)
1 – 3/4″ pipe 51″ long
4 – 3/4″ pipe 20″ long
4 – 3/4″ pipe 10″ long
")
We got our pipe and wood cut, gathered all the rest of our supplies and like a strange hardware store parade, headed to the checkout. A word to the wise, the pipe is greasy and dirty and yucky. Make sure you put your nice wood on a separate cart, and bring a tarp to protect your car. Also have some dish soap and goo gone ready at home to thoroughly clean and de-sticker your pipe when you get it back. Be prepared to get little metal splinters that will hurt. A lot.
")
We decided to use the Kreg Jig for attaching our boards together to make the tabletop. This is quick and oh so very easy, and all the screws are under the table where no one other than the dog or a crawling child will ever see them. We laid out our three best boards on saw horses in the garage.
")
We decided on placement making sure to alternate the crown of the wood (the crown is the way the grain curves, look at the end of a piece of lumber and you’ll see the grain pattern). Once we were happy with how our board would be arranged, we flipped them over and aligned them, making sure they were square. Our saw guy at the local hardware store didn’t fare so well with making all the boards the same length, so we lined up one end, and let the other end overhang knowing we’d trim it down later. Then we marked our kreg jig screw placements.
We put two screws in 8″ from the edge of the boards, and about every foot for the rest of the table. We alternated which side the screws came from so that we would get a more stable and solid tabletop.
The Kreg Jig is super easy to use. We set the jig and drill bit to 1.5″ thick wood, clamped out the jig (with protection on the “good side” so the clamp wouldn’t mar the table top) and drilled. Easy-peasy lemon-squeezey.
")
After all the holes were drilled, we re-aligned everything, and got to screwin!
")
After the tabletop was screwed together we trimmed off the scraggily cut edges using a circular saw. Then we gave the table a good sand with the palm sander. We wanted to leave a few of the rough wood’s imperfections, but ensure everything was nice and smooth.
After it had been sanded, we took it inside and got working on the legs. We thoroughly cleaned the pipes using a combination of citrus grease cutting cleaner, dish soap and goo gone. There was a lot of errant stickers and tape on the pipes along with the grease, so all these tools were needed. Be careful for any sharp metal or burrs, definitely wear protective gloves and eye protection.
To start out, attach each the 6″ pieces of pipe to flange. Next up attach a T to each of the 6″ pipes.
")
Screw a 10″ pipe into the side of each T. Attach another T to 2 of the 10″ pipes. Attach two legs together by the middle T, then do the same to the other set.
")
Now attach the 20″ pipe to the top of the T’s and another flange while the dog enjoys a peanut butter filled bone.
")
Make sure all your legs are exactly the same height. You may need to tighten or loosen a few joints to get everything equal.
Here’s the tricky part. Grab a friend and attach the long 51″ piece to the two open T’s. One of you will have to spin a set of legs around to get this done. You will look like an absolute fool doing this, but its the only way to get it done. Once everything is screwed together, you’re ready to attach your legs to the table.
")
")
Flip your tabletop over, and set the legs on top. Make sure everything is square, straight and level, and screw in your flanges using 1″ screws.
Apply your felt furniture pads to the bottom of the feet flanges, and flip your table back over. Now you’re ready for finishing! (we will be finishing the table inside due to the cold cold cold temperatures of our unheated garage.)
So here it with its legs attached and waiting for its finish work. Whatcha think?
")
")
One great thing we quickly found about this table is that if you have an uneven floor like we do you can unscrew certain parts to even the table out so it won’t wobble!
Promise, we’ll be back soon with how we finished the table, and a cost breakdown.
**UPDATE** Check out how we finished the table.
****SUPER UPDATE**** Check out our revised version of the Pipe & Wood Table