Daniel and Adelle move into their new place this weekend so we’ve been hustling to try to get their farmhouse table finished in time. When we left off, we had fabricated and stained the table top and one bench.
This past weekend we powered up and knocked out a second bench and got to making the farmhouse table legs. We lucked out and our local lumber yard carries untreated spruce 4×4’s. This will undoubtedly be the toughest material to track down if you’re building this project. The big box stores usually only carry 4×4’s in pressure treated and cedar. Neither of those is ideal for an indoor table, but if push comes to shove and you can’t find untreated spruce, go for the cedar.
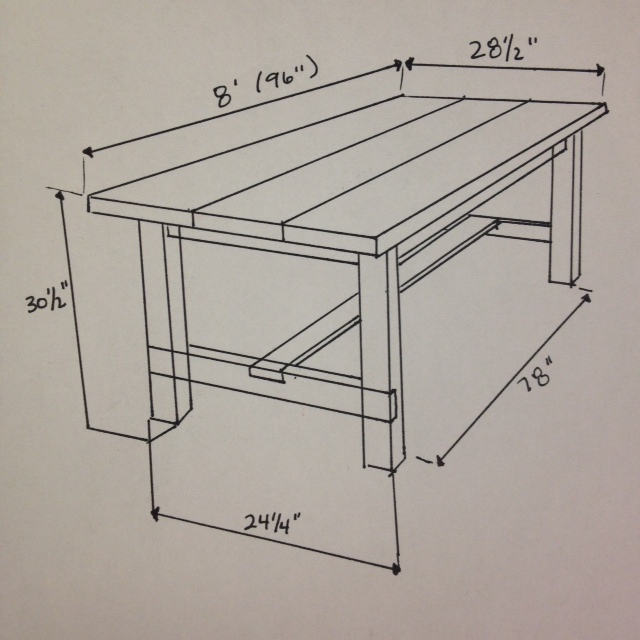
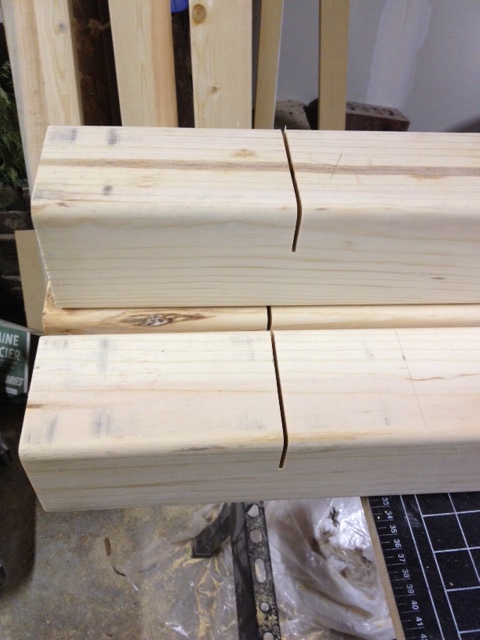
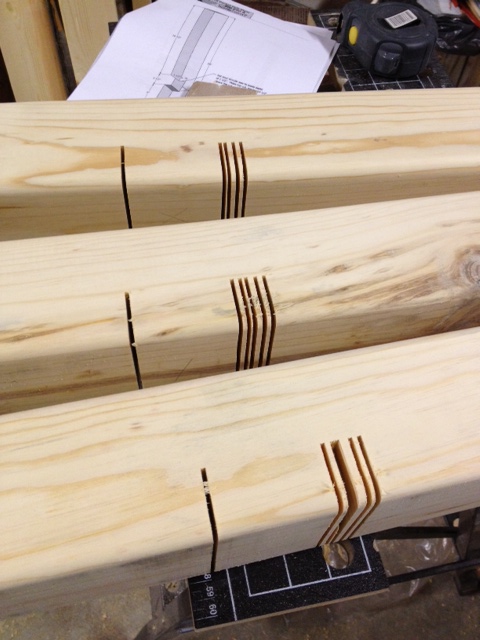
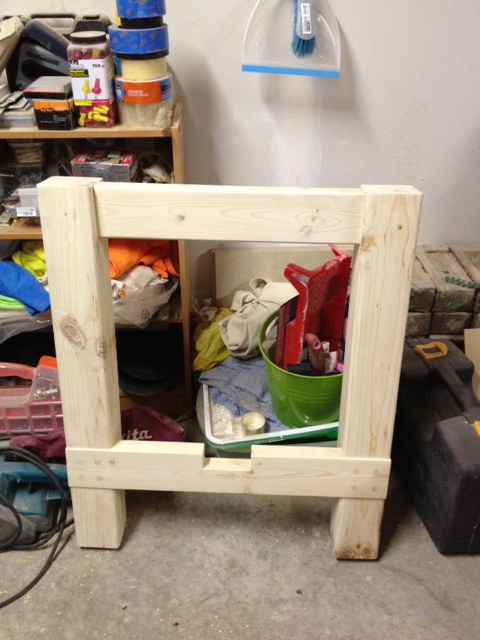
The legs consist of 4 4×4’s, two stretcher supports, a stretcher and four apron pieces (two short, and two long). The leg uprights need to be notched out for the cross pieces, and the cross pieces need to be notched for the stretcher. Good thing we got a new table saw right?! Right! The easiest way to notch is to make a bunch of kerf cuts. A kerf cut is a cut the width of the blade that usually doesn’t go all the way through the wood. (Kerf is actually the term for the width of the material removed by the blade.) For the notches we made a ton of kerf cuts close together and then banged out the little slices of wood. (you can also do this with a circular saw if you don’t have a table saw!)
We set the table saw fence for the first cut and the blade to 1 3/8″ high (we want the cross pieces to stick out 1/8″ from the leg posts to show off the notches, it will make more sense when its assembled.) We made the first cut on each post then the last cut. We then progressively made close cuts all the way in between.
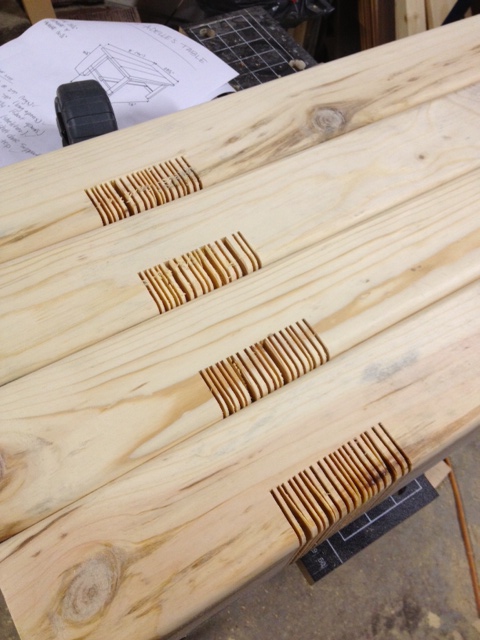
When we were done (and this does take a while!) we knocked out all the little slices of wood. We were left with a few nubs and errant wood slices, so we broke out the oscillating multi-tool and or made short work of them.
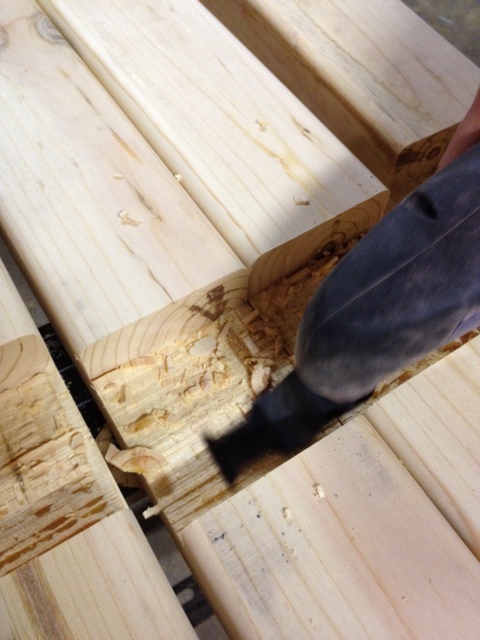
Now, if you EVER see someone cleaning up their kerf cuts like this. DON’T take their advice! That is the most dangerous thing I’ve ever seen! Use an oscilating multi tool, or a chisel, or heck even a jig saw, but do NOT use a table saw like that. My fingers hurt just thinking about it. Eeeep.
Now lets build some legs. We need to attach the aprons to the legs with pocket holes, then the stretcher support into our notches.
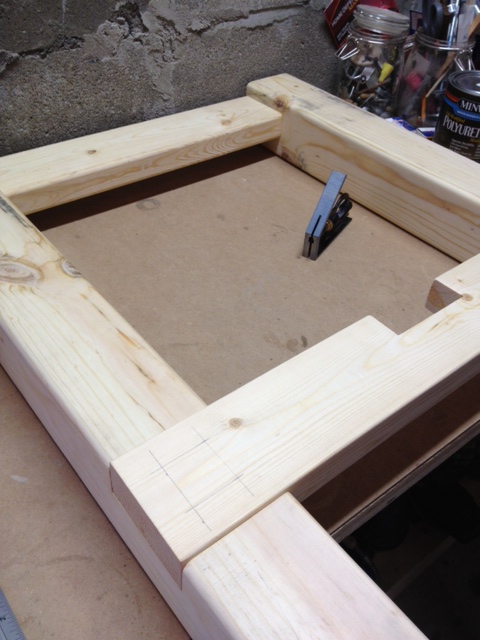
The easiest way to secure the stretcher support the legs would have been with screws. BUT if we used screws they would be visible on the front of the legs where the supports notched in. No way to use pocket holes there. I don’t like screws visible unless there is no other way.
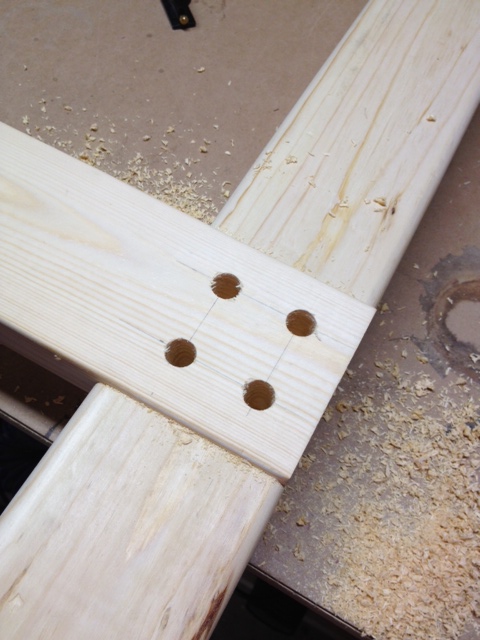
So out went the screws and in came 1/2″ dowels. We purchased a 6′ length of 1/2″ dowel from the hardware store and cut them down to about 3″ lengths. Then we took a 1/2″ spade bit and drilled four holes in a square pattern. We used a piece of tape to mark the bit depth, so that we didn’t drill too deep or too shallow.
We inserted the dowels with wood glue and let them dry. Once they were dry, we cut them down with a coping saw.

Now they were ready to be sanded flush. A few minutes with a power sander and they were looking faaaaantastic.
While we were at it, we also sanded the long aprons, and the stretcher for the table. The table will remain in 6 pieces until its assembled in the new place.
Now it’s time for staining and polying all the pieces, and they will be ready to be assembled this weekend!