In the modern and Scandinavian home scene you notice a lot of similar trends. Monochromatic palettes, clean uncluttered design, negative space, candles, wood, black and white etc. One other motif you will note is Swiss crosses. They’re on blankets, pillows, art and accessories. Find a scandi home pic on Pinterest, and play the find the Swiss cross game. Why is this motif so popular? It’s simple, bold and classic. Not a design fad, but a timeless design element.
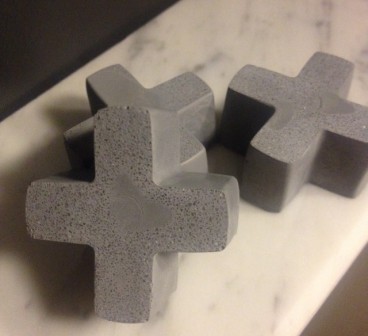
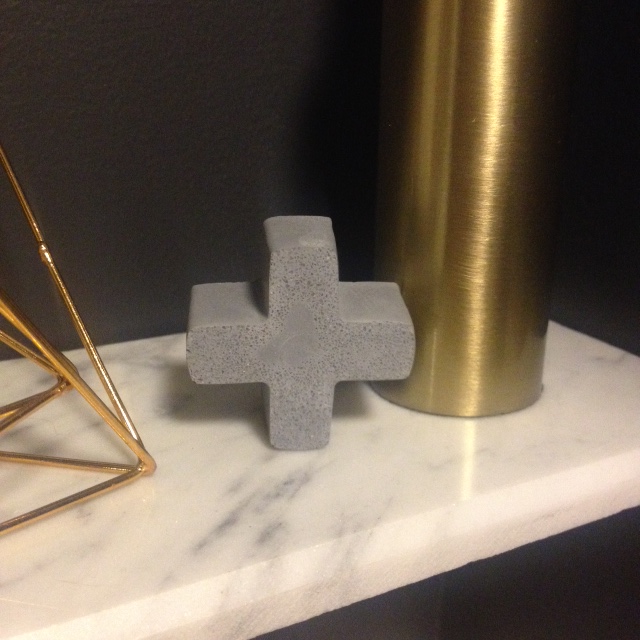
I’ve been Scandinspired as of late, so when I spotted X silicone ice cube trays at Ikea, I saw them not as X’s but as +’s. With silicone + tray in hand, I used some leftover concrete from my concrete clock project to make concrete Swiss crosses.
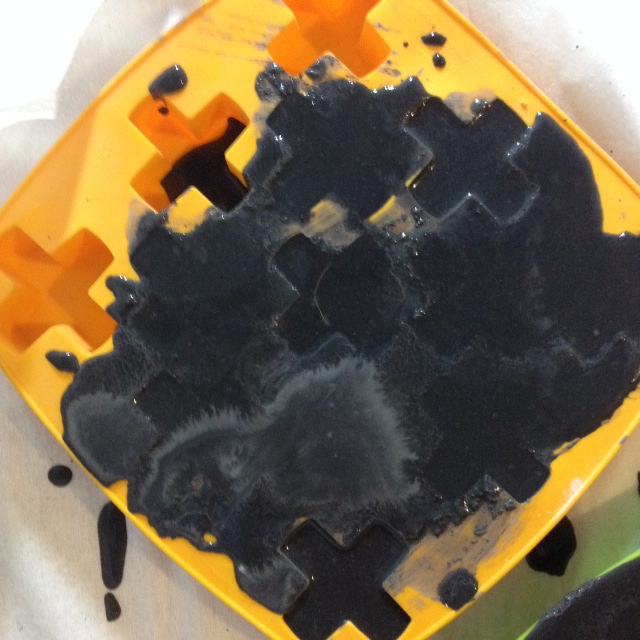
I poured excess grey concrete into my silicone ice cube trays, and covered with plastic. I left them to cure overnight, then easily popped them out of the silicone mold. [see how to mix & pour the concrete here.]
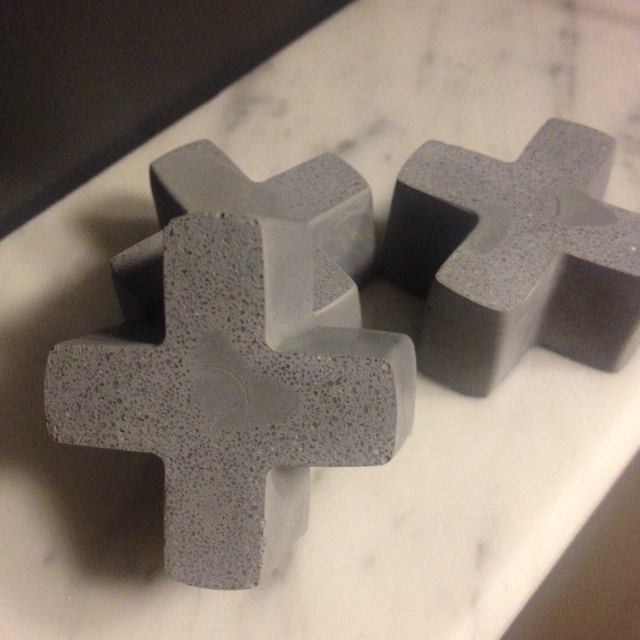
Any excess concrete was lightly sanded off, and the crosses were lightly sanded the edges of the +’s so they would stand up easily.
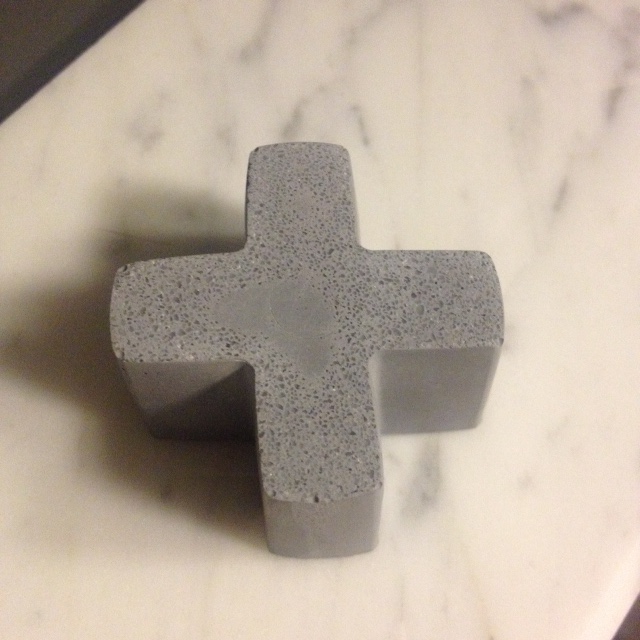
Not only did I use up my excess mixed concrete, I also made a cute decor item. The little Swiss crosses look sweet in my black and white powder room.
Working with concrete and silicone molds was incredibly easy. I am now on the hunt for other cool silicone molds. One of those sphere ice cube trays perhaps?
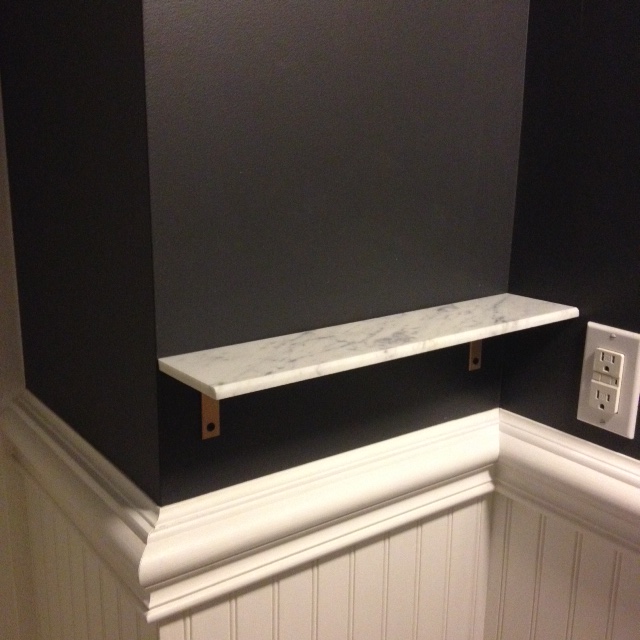
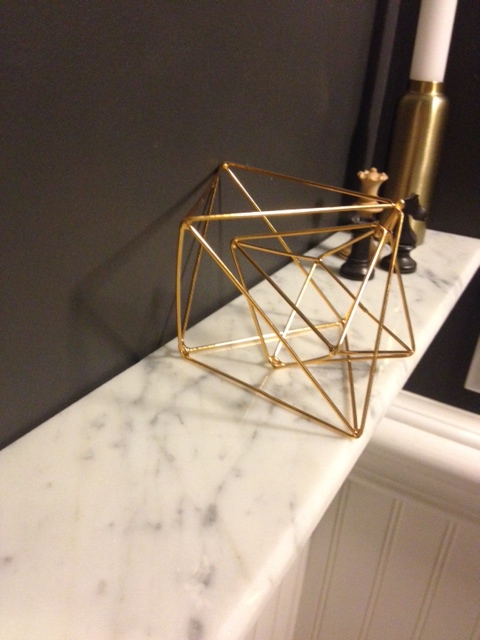
The powder room is small. At only about 4′ wide and 8′ long, with a closet jutting into it, it’s practically miniscule. To even be able to fit into the room, a vanity was vetoed for a pedestal sink. It’s great for the flow of the room, but offers no storage, and barely a surface to sit a bottle of soap. If you want to set your phone down, or touch up your makeup, you end up having to use the toilet tank as a shelf for your things. Not ideal (or very sanitary for that matter). To gain a much needed horizontal surface in our Powder Room Makeover, we opted to install a small shelf. Take a look at what we made.
Custom Marble Shelf
Materials:
1 4″ wide x 3′ marble shower sill
1 pkg corner brackets
Spray primer
Krylon gold spray paint
1 tube PL Premium construction adhesive
Tools:
Wet tile saw
Measuring Tape
Drill
Level
Caulking gun
How To:
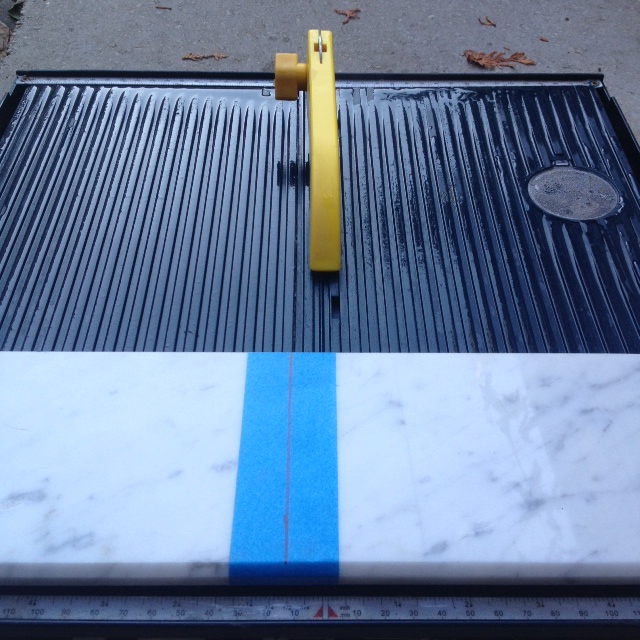
Measure available space (ours was 18″). Mark and cut marble to length with wet tile saw and diamond blade.
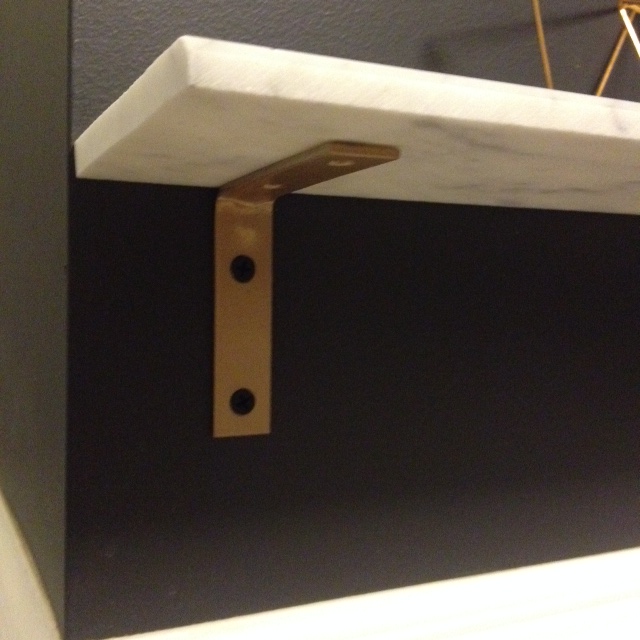
Install your corner brackets as shelf brackets screwing into studs, or using hollow wall anchors. We used black screws as we liked the contrast with the gold, and we have black accents in the room.
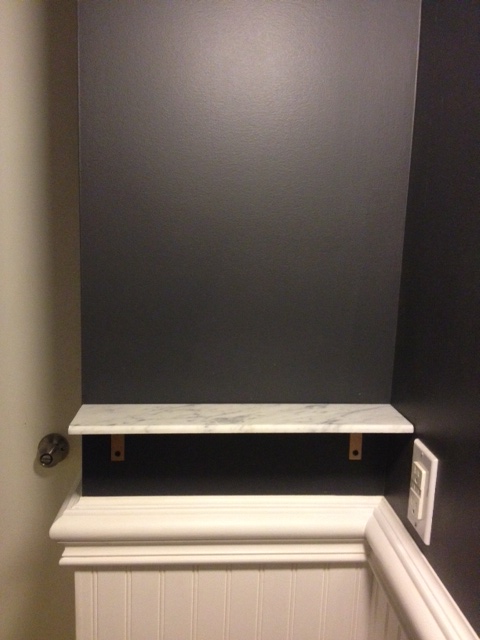
Attach marble to the brackets with a small amount of PL Premium construction adhesive, and let dry for 24 hours.
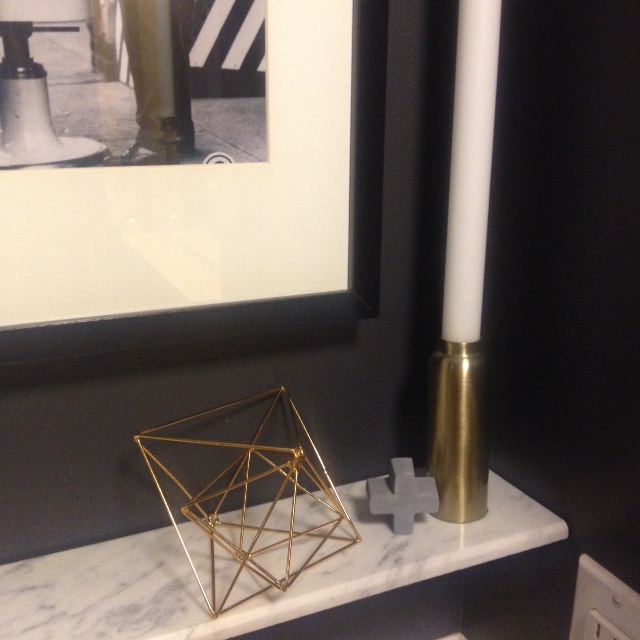
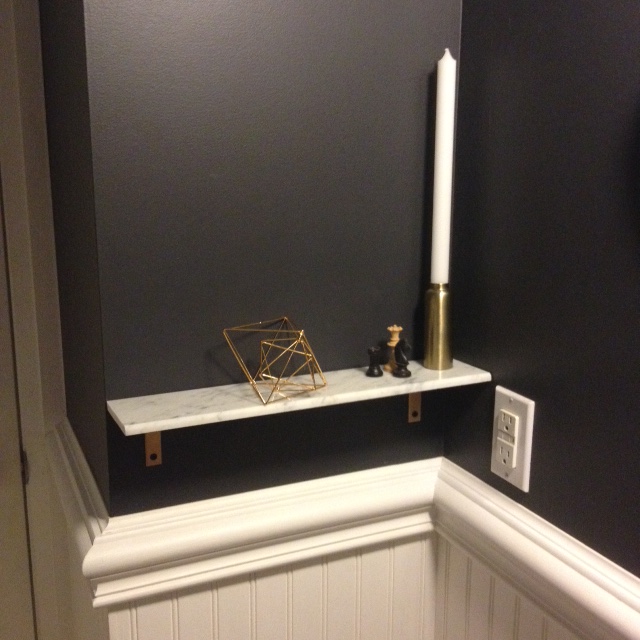
The shelf is perfect for holding a few decor items, and a place to set down your phone and lipstick. Now to style it!
I tried out a few accessories, and decided I really need a piece of art to balance everything. A small print set off to the left side will be perfect .
The bathroom is really coming along now. I will be back with another DIY project later on in the week.
SOURCE LIST:
Materialst:
Marble – Home Depot
Primer – Zinnser – Home Depot
Paint – Krylon Gold Metallic
Brackets – Brass corner brackets – Home Depot
PL Premium Adhesive – Home Depot
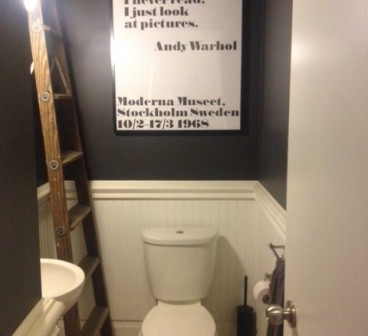
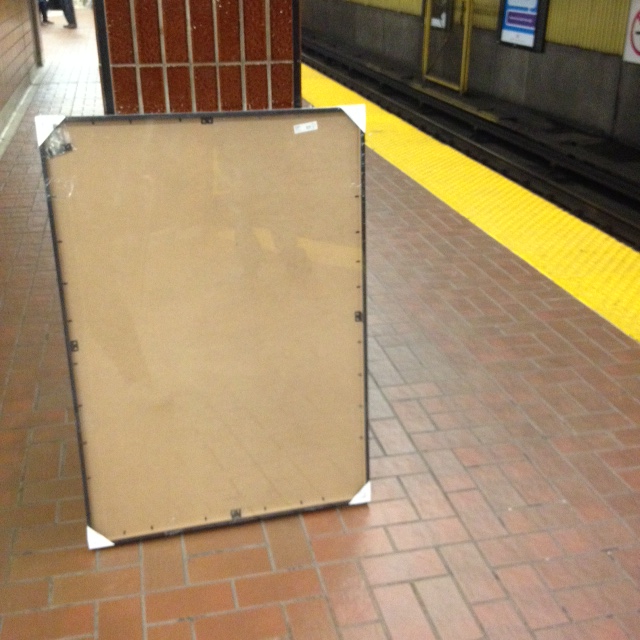
What a difference a little bit of art can make. After lugging home the big frames last week, and flattening the stored-too-long-in-a-tube art prints, I finally got a print framed and up on the wall. Continue reading “Powder Room Art”
Work on the powder room mini makeover has begun, even with a 3 day trip to the cottage for Thanksgiving thrown in. Here’s a quick update on what I’ve been up to:
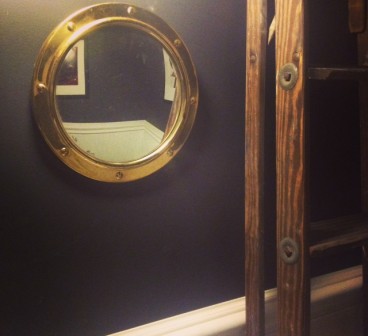
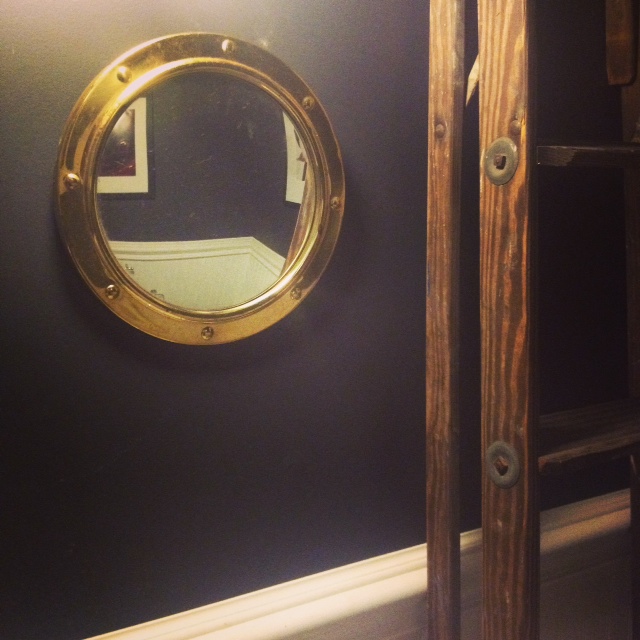
Removed the ornate mirror, and tried hanging the great portal mirror I grabbed at Value Village during the blogger thrift store tour. The mirror is AMAZING, and looks so good with the black wall color.
However… it is just too small for the space. Even with the convex shape of the mirror, it is just not big enough. Sad face.
You may also notice another item in that photo. While out on the motorcycle one day, El Granto and I spied a couple of wooden ladders and some old signs on the side of the road. I jumped off and scooped up all the signs we liked, then we sped home, dropped off the moto, and El Granto walked back and lugged one of the large 8′ tall wooded ladders home. It’s in absolutely fantastic shape, and can double as a decor piece and a functional ladder. (It’s a tool hiding in plain sight!) We propped it up in the empty corner of the powder room. I really like the height it gives to the small room. Maybe it will stay there, maybe not, but for now I am loving the wood tones against the black and white.
When I was in Denmark and Sweden this spring, I went on a bit of an art print binge, and during that time I picked up the full set of Warhol quote posters from Moderna Museet in Malmo, Sweden. They are nice big prints (70cm x 100cm or close to 27 1/2″ x 40″) and I thought one or two from the series would look great in the bathroom. We have 12′ ceilings in there, so they should be able to hold the big art prints without feeling claustrophobic. Now all I needed were frames. Of course, there is really only one place to get good quality frames that large (we’re talking three and a half feet tall!) for a good price. Like the prints themselves, my frame source was also Swedish. Can you guess where that is?
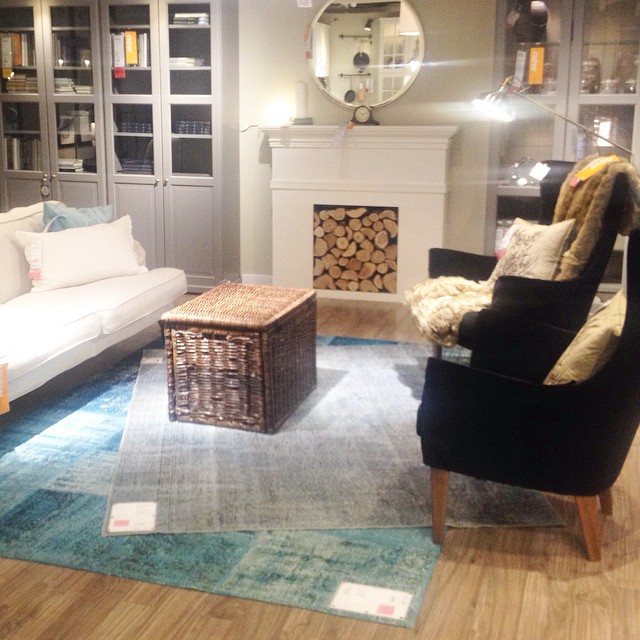
While at Ikea, I did a good amount of perusing. They have upped their game with their new store displays. It was looking good! There were also a few new great items in store, that are not listed online yet. I could do a whole post on it, but here is one of my instagrams from last night:
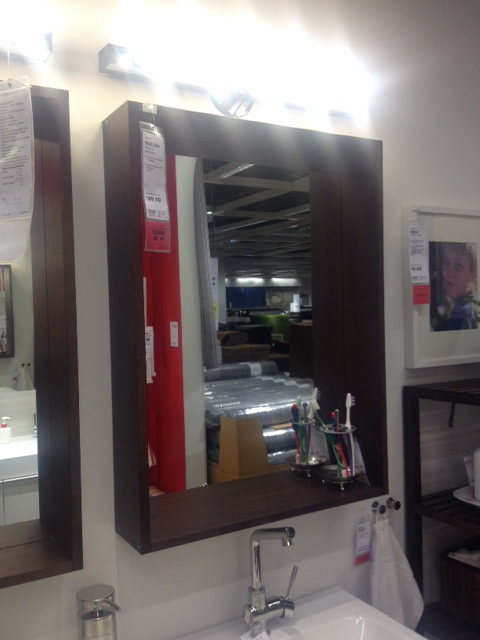
Alas I was not shopping for new armchairs or rugs (but hey, that faux fireplace would look great in my house!) I needed to source some bathroom items. I was hoping to pickup this Molger mirror (in birch):
But after seeing it in store the frame was much too deep for my space. It would get in the way of the faucet and and light fixture. Boo.
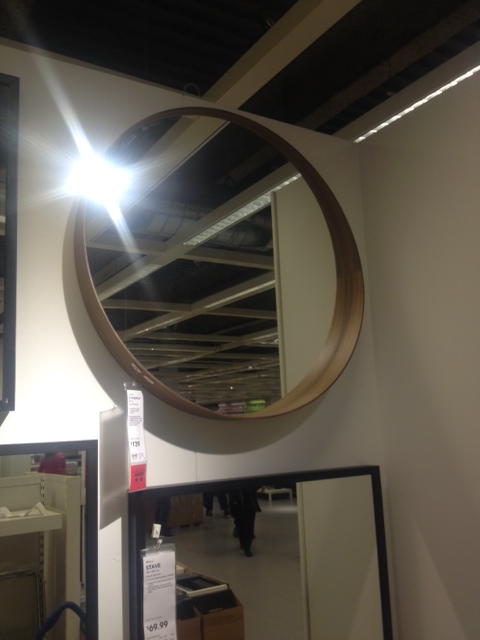
I saw this fab beauty, but it was like $120 (sorry no exact price as its not on Ikea’s site.) and thats more than I wanted to spend for the mirror for this project. Although I think two of them would be fab for my upstairs bathroom reno!
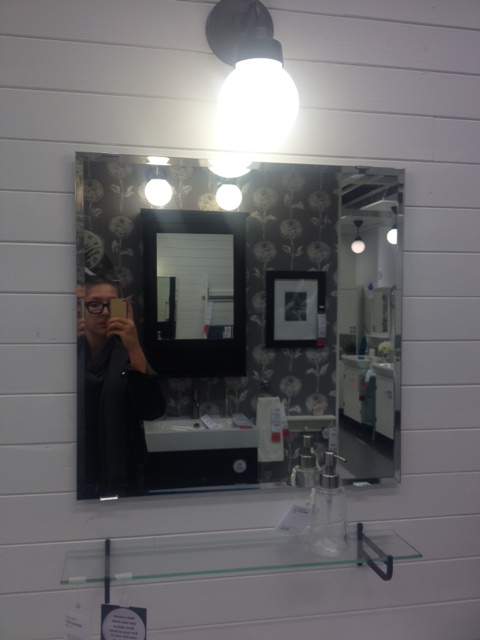
I ended up going with this simple square beveled mirror, and I may try my hand this weekend at a simple shadowbox frame for it. We’ll see.
I also left the store with a great toilet brush (no really!) This black svartsjon one for $8. Also, the 10 year old trapped in me, thinks svartsjon is a funny name for a toilet brush. Cause its got “jon” and “svarts” which I’m sure is how they must say farts in Swedish. Right? 😉
Then I went and carried everything home on the shuttle bus and the subway.
And no, that was not the most awkward nor heavy item I’ve carried home from Ikea on the Subway.
I can’t wait to get home from work tonight and start framing the posters. I want to see them on the wall!
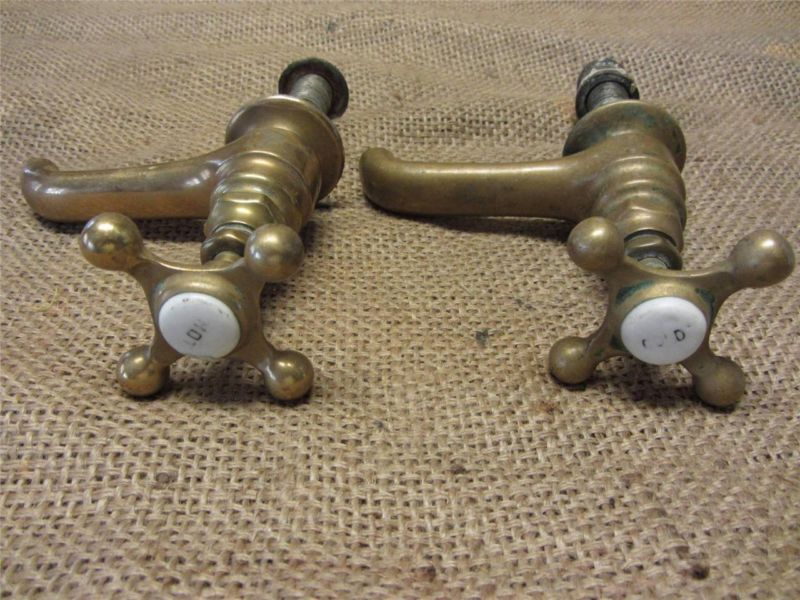
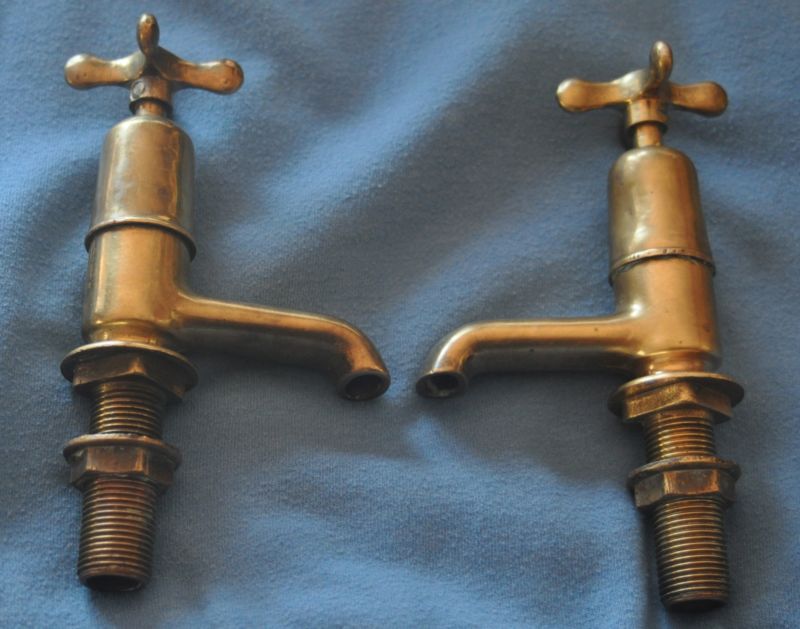
I am still however on the hunt for a light, a small shelf, towel & tp holders, trash can, and accessories. I also added to my wish list a set of antique taps, which I have my eye out for (aka stalking craigslist and eBay).
If you guys see any taps like these (for cheap) let me know!
There is one big consequence of blogging, that I never would in my wildest dreams have imagined. Something that caught me so off guard.
As a grown up, out of college/university, working a steady 9-5 in an office, meeting new people is hard. Really hard. If its hard to meet ANYONE its damn near impossible to meet people with common interests. As a grown woman, I don’t walk up to strangers and ask if they like decorating, thrifting, or woodworking. I certainly don’t ask them if they’d like to be my friend.
Then blogging happened, and I started to chat with readers, and other bloggers. People my age, who were into the same stuff as me. Discussing fabric, power tools and paint colors! Making connections with real people.
Then this happened:
Lucy, Dani, Virginia, Myself & Melissa. Photo Credit: Virginia @ Fynes DesignsPhoto Credit: Virginia @ Fynes Designs
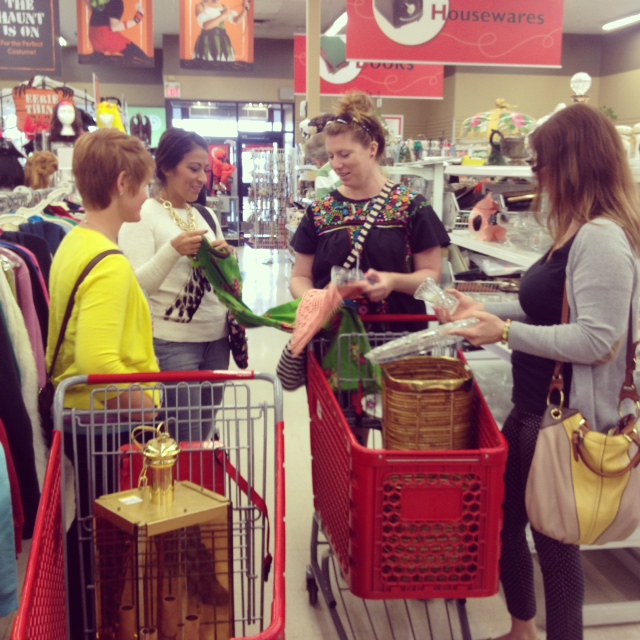
Myself and four other bloggers, traveling around Toronto in Ford Escapes on a whirlwind thrift store tour. We traveled throughout the city hunting for great home decor finds at Value Villages. Not just one store, we’re talking every single store in about a 30km radius.
Photo Credit: Melissa @ The Sweet Escape
It was SO.MUCH.FUN. Virginia from Fynes Designs, Dani from Lifeovereasy, Lucy from Craftberry Bush and Melissa from The Sweet Escape were a blast. We all had completely unique styles and tastes, and wandered the stores grabbing finds for ourselves, and ones we knew the other gals would like.
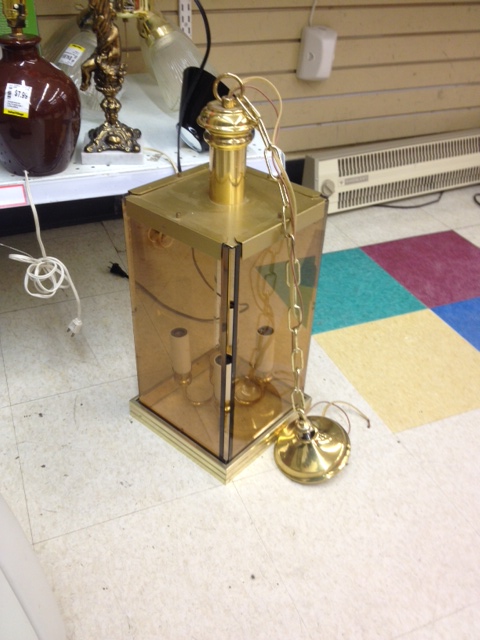
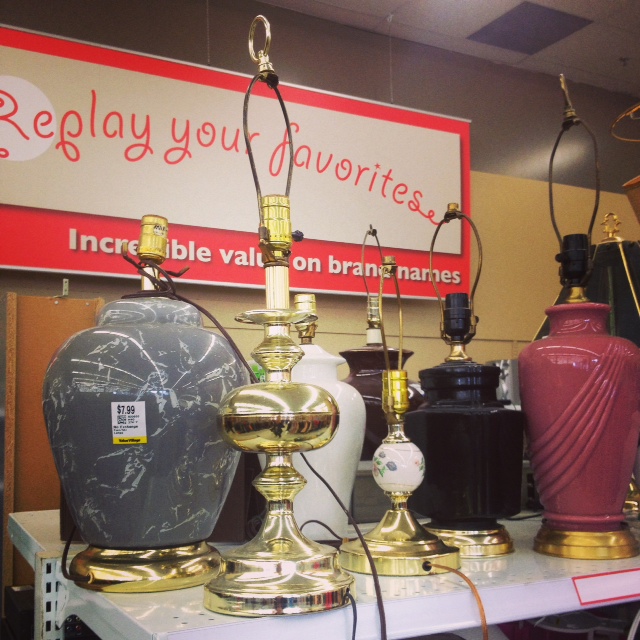
I feel bad for the other shoppers. We scoured those Value Villages high and low searching for the best scores in store. I got some amazing stuff. My (unintentional) theme was lighting. I found some fab items! My first nab was this brass lantern with smoked glass. I needed a new light for the guestroom, and knew this could be turned into something cool.
Brass & Smoked Glass Lantern
Next I spotted a couple of brass lamps. These were also picked for the guestroom. I have visions of wood and metal, with some badass shades.
I love lamp
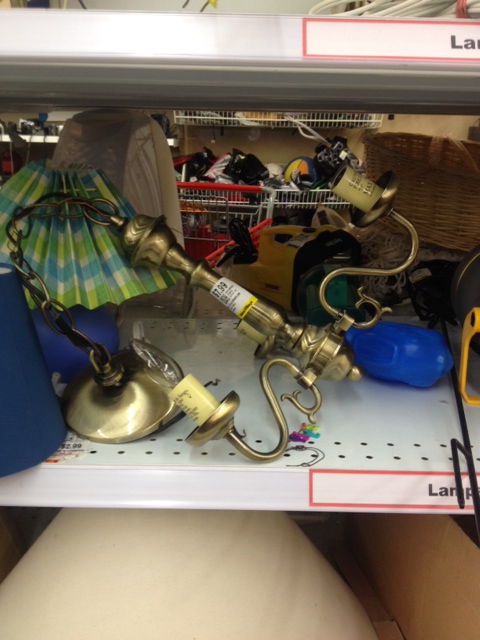
Next I spotted a small chandelier. I have been on the hunt for some candle lighting for the back deck, and knew this would be perfect converted into a candelabra.
Chandelier hidden on a shelf
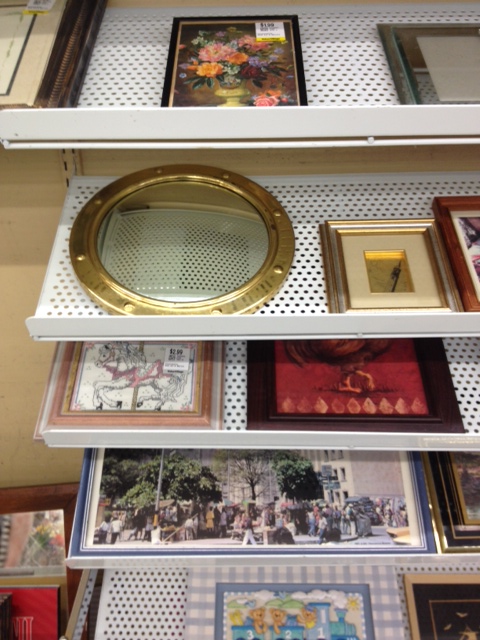
This mirror jumped out at me from the shelf screaming “take me home!” I loved its shape, only wished it was a bit bigger. Will still make a great accessory in our office or powder room.
The Mirror! Swoon!
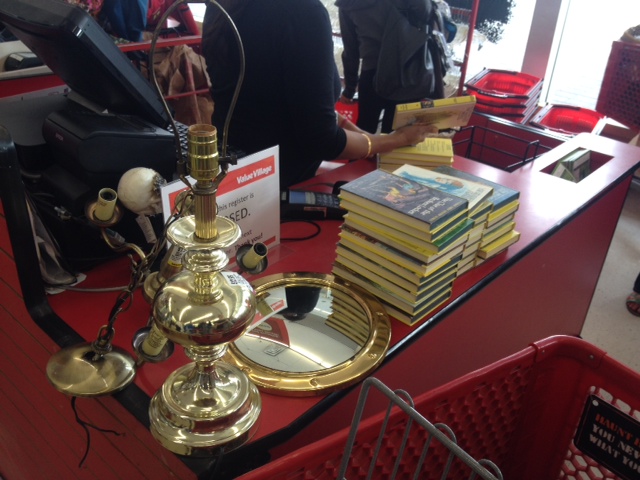
Last but not least, I spied a whole collection of Nancy Drew books. I used to read my Mom’s collection when I was a kid and adored them. I nabbed every single book and can’t wait to pour over them.
Checking out with my finds
The other bloggers got some amazing finds as well. It was really cool to see their process, and how they picked things. You would have thought we’d be fighting for the items, but we really went in different directions. I can happily say that there were no cat flights or any arm wrestling for items.
Virginia, Lucy, Melissa & Dani discussing their finds
With bags and bags filled with finds, we piled into our Ford Escapes. I got to drive the red one the whole day.
Who let me drive?
I have to say, I went in with little expectations. The last Ford I was in was a “vintage” bare bones clunker. For small SUV’s I really enjoy driving my mother in laws Honda CRV, but I have to say the Escape impressed me. The model I was driving had a bunch of fancy pants features including a backup camera, this cool blind spot warning, and one heck of a nav/console touch screen. The only problem I had was trying to operate the rear door. I learned afterwards that it was one of those fancy hands-free foot operated ones, but I just kept trying to lift it manually and it was giving me attitude. Guess I should have read the manual eh?
Our rides. I may have named the red one Suzy.
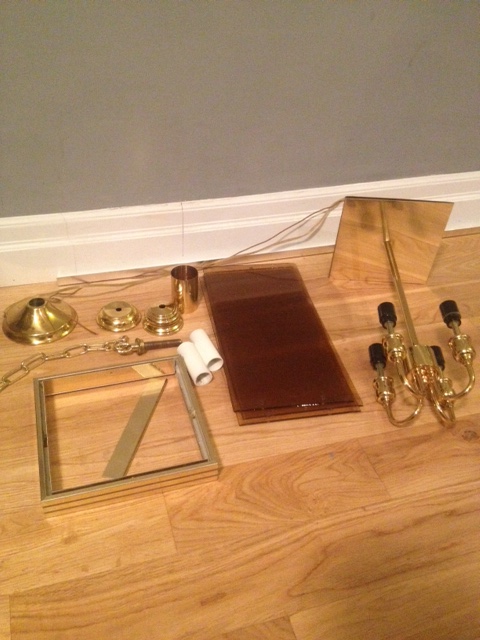
With all my finds at home, I set to transforming one item from my haul. I will be working the rest of the items into upcoming projects I promise, but I have to start somewhere! I took my brass lantern apart, and set to giving it a refresh for our guest room.
Lantern Disassembled
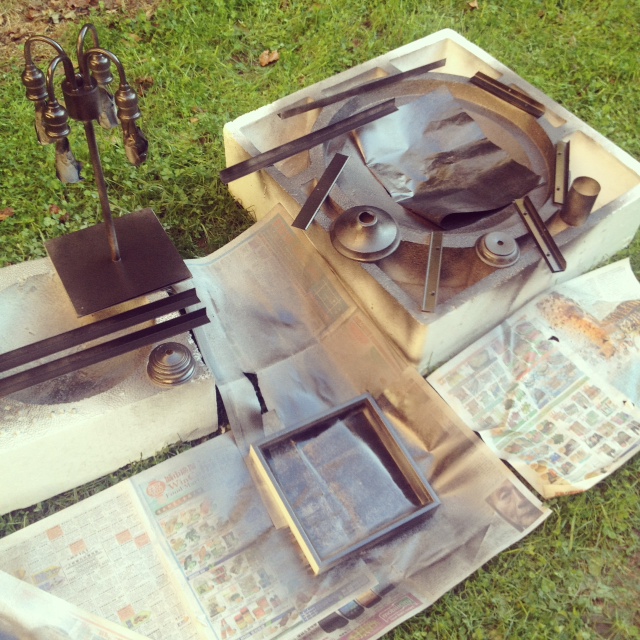
I picked up some angle iron and got El Granto to cut me a few pieces to make new sides for the lantern. The smokey glass needed to go (and good thing, as we broke a panel. oops!). El Granto and the dremel made quick work of the angle iron, and I got to priming all the pieces.
El Granto cutting the new sides for the lanternPriming the lantern parts
We have oil rubbed bronze accent pieces I the guest room, and thought that would be a nice bold color for the lantern. After the primer had dried I used Rustoleum Universal spray paint to give some nice even coverage to the pieces.
Spray painting the light
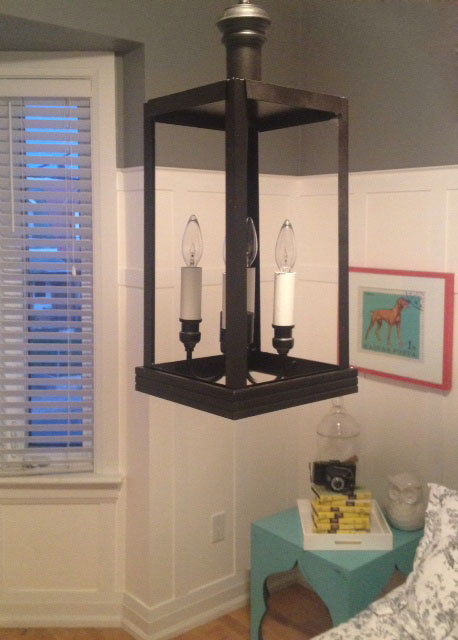
After everything was painted, I assembled it all together, and this is what I ended up with.
Finished Lantern
What do you think?
Can you also spy a few of my Nancy Drew books on the nightstand?
Make sure you check out all the other bloggers finds! Thank you so much Virginia for organizing this, and the event sponsors Value Village and Ford. It was amazing to spend a day doing what home bloggers do best, with some badass blogging ladies. Make sure you check out their posts:
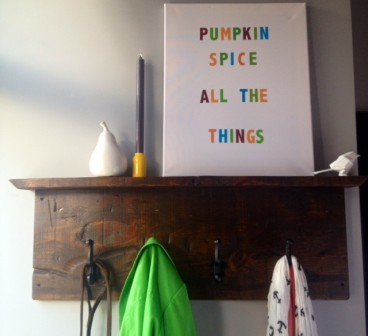
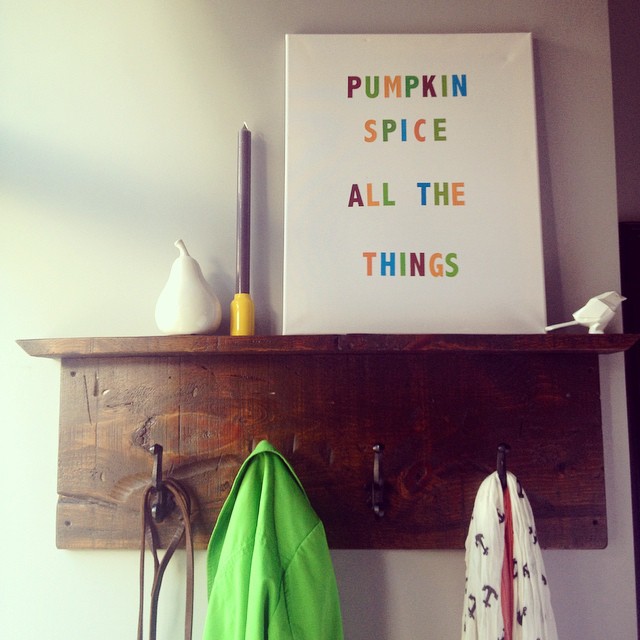
We at the Storefront are mantel-less home owners. As such, come fall or winter, we are the only blog on the entire internets to not have a decorated mantel. No really, find me another home/decor blog without a mantle post this week. Never to be left out, we tend to decorate the front porch (with heavy, and/or bolted down items of course.) One extension of our seasonal decorating, is the front entryway coat rack. With it’s small shelf, it is about the closest thing we have to a mantel.
We have a variety of canvases and prints that get trotted out seasonally to grace our front entryway. Feeling a little bored with our fall decor this year, I opted to add a new canvas to the repertoire. Enter my latest “masterpiece”.
We have a good assortment of tools in the Storefront Garage, but one tool we were missing was a tile saw. I mean a tile saw of any kind. We didn’t own a wet saw, or even a simple tile break.
I know I know, you’re shaking your head at me. We have a drill press, a table saw, TWO miter saws, a scroll saw, and a plethora of other tools but we don’t have a simple tile saw? You see we haven’t had to do any tiling in the Storefront. When we moved in, everything was freshly tiled, and thus, no need.
Well kids, that was until we tore off the kitchen backsplash. We drywalled, taped, mudded, primed & painted the backsplash so that it was usable, but it really needs some tile (both for aesthetics & durability).
As you know, I am a very budget conscious lady, and to run out and buy a bunch of new tile, mastic, grout, spacers, float, trowel AND a new saw, it was quite a bit of coin to drop when we had a lot of other things on our kitchen wish list.
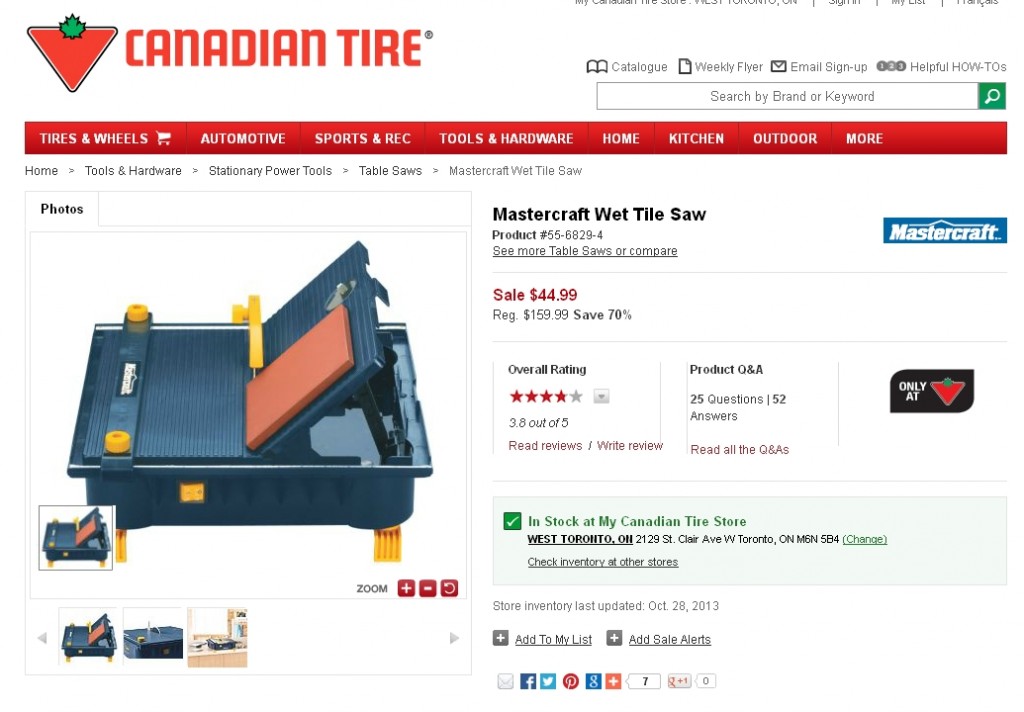
So I waited…for a sale…and THIS came on sale this week at Canadian Tire.
Mastercraft Wet Tile Saw
$159 wet saw on sale for $44? 70% off??
HELLS YEAH. I love you Canadian Tire.
(For my American friends, Canadian Tire is this crazy store that carries automotive parts, has an auto repair shop, a gas station, sells their own brand of tools, lighting, plumbing, kitchen wares, work boots and dog food to name a few things. It’s a Canadian staple, and El Granto even has a coffee mug that says I (heart) Canadian Tire. )
So a new wet tile saw will be making its way to our home this week, which consequently makes me want to get off my butt and start tiling.
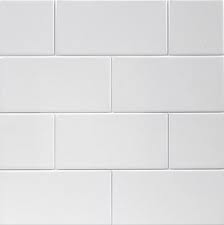
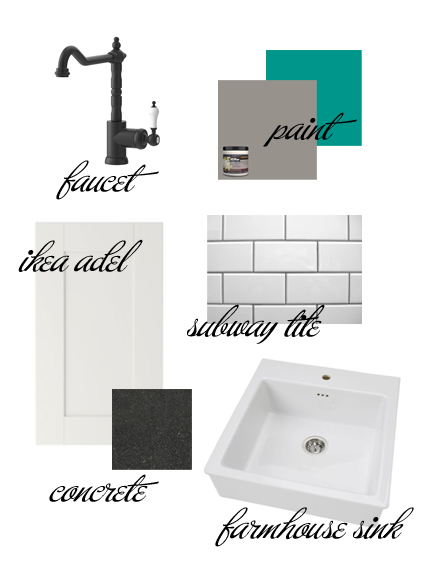
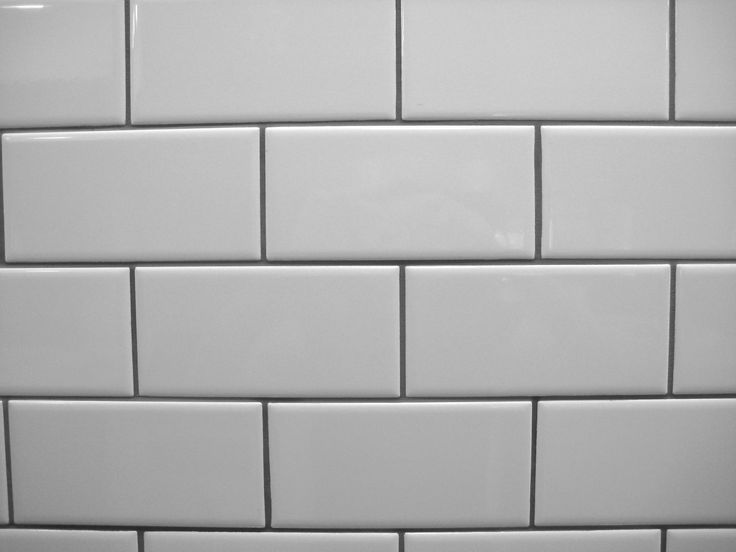
In my kitchen mood board you will notice that I have subway tile listed.
We decided early on to do a basic white subway tile for a couple of reasons. It was timeless (which worked well in our Edwardian home) as well as it was a nice neutral backdrop for other things in our kitchen (like the concrete counters), and would brighten up the kitchen.
We have lived with a showy (albeit ugly) backsplash for the last two years, and want something a bit more classic.
Lucky for us, white subway tile is also one of the cheapest options.
Now we will soon have a saw, have decided on a tile, there are only two decisions left.
Tile Pattern & Grout Color
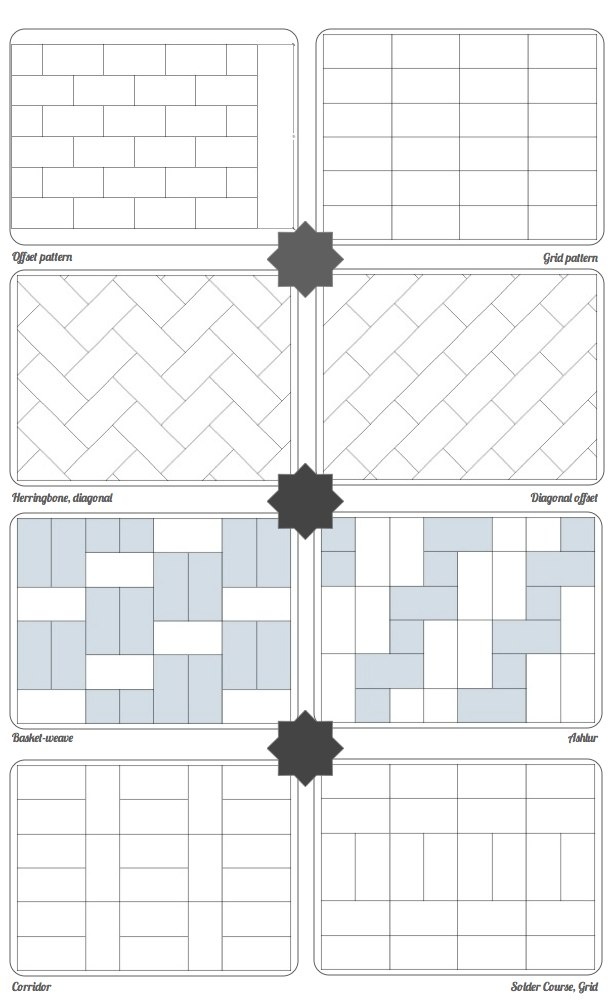
Traditionally a subway tile would have been laid in a brick pattern. Which I love. It’s classic and would have been what the Storefront had when it was built (although probably in a colored glazed finish of green, orange or brown.)
I love the brick pattern, and that’s what I’m leaning towards, but what do you think? Should we break out of our box and try something new?
Which pattern is your favorite?
Subway tile patterns (Source unknown)
Then the next big decision is grout color. Do we go white, or something a bit more fun like a gray or black?
White will make the backsplash all one tone and visually it will fall to the back a bit. Gray or black will make the tile stand out, and really make a statement.
White GroutGray Grout
Do I want a statement? Or do I want the tile to play a supporting role to the concrete counters and the farmhouse sink? What are your thoughts?
I took a quick business trip to New York last week. It was a busy three day trip, with not much time to take in the city. However, I did manage to pop into a few home decor shops, and did some walking, eating and enjoying New York in the fall.
My hotel was in a fantastic location, West 23rd between 5th & 6th avenue. When I walked east from my hotel I walked right onto 5th Avenue. With Eataly on one corner, the Flatiron building in the background, and tons of shopping and restaurants.
Flatiron BuildingEataly
The night I arrived in town I was able to pop out to a few shops before they closed.
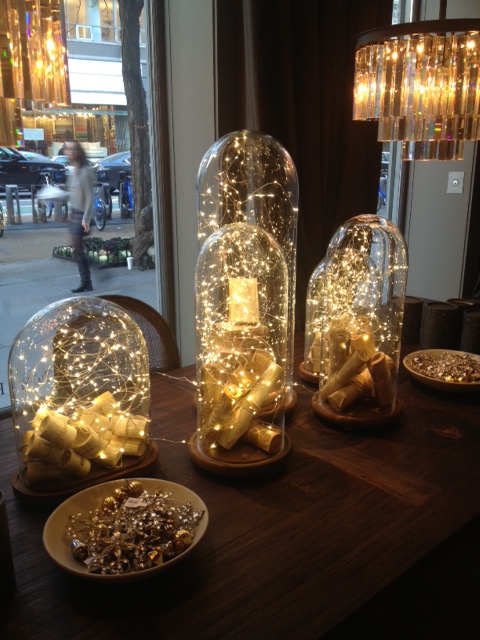
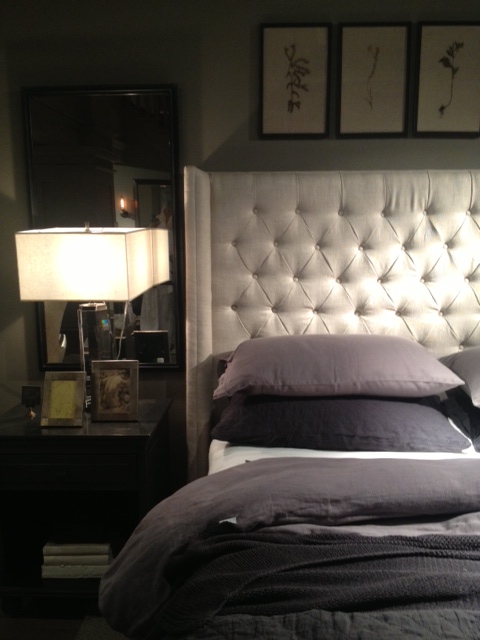
Restoration Hardware had some holiday decor up, and some generally lavish and fantastic decor pieces (but nothing that I fell head over heels for.)
Restoration Hardware – Lights under glass – great for a Holiday tableRestoration Hardware – Great Headboard
West Elm was surprisingly small, and I felt it had less to offer than my Toronto location.
Fishs Eddy’s was my favorite stop, and I brought home two pieces from there (in my small carry on luggage!) Thanks to a twitter friend Abby @crabigail for the Fishs Eddy & ABC Carpet tip! (no pics of Fishs Eddy, as they asked me not to take photos, but imagine a kitchen supply heaven.)
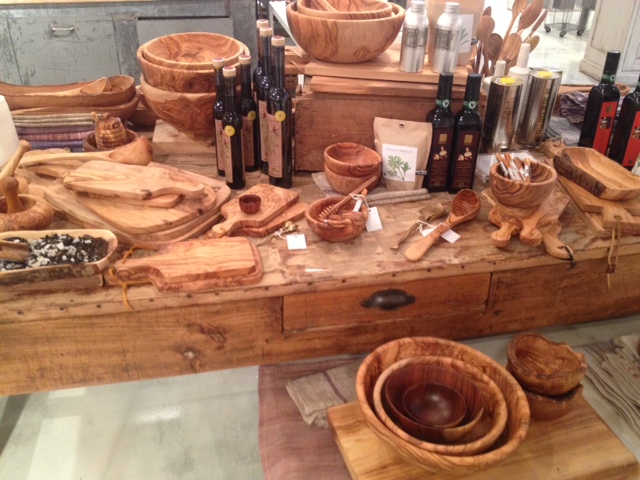
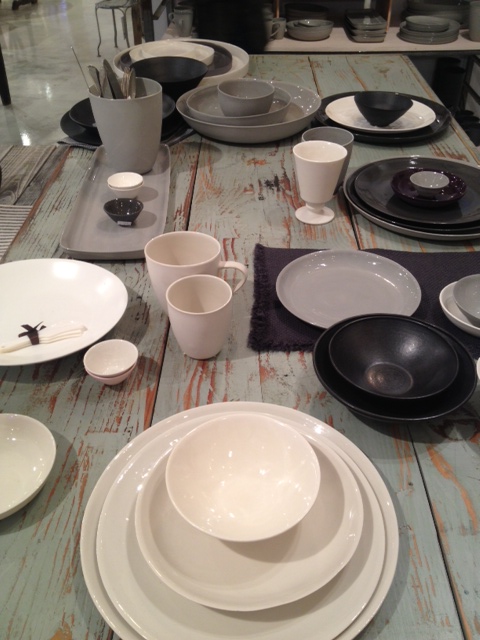
ABC Carpet & Home. Although the carpets & lighting were gorgeous, I sadly could not fit anything that large in my suitcase, however ABC just opened ABC Kitchen with tons of fab kitchen serving pieces. I loved their wood cutting & serving pieces (umm olive wood anyone?!). They also had some great matte ceramic pieces in whites and grays that were gorgeous.
ABC – Olive WoodABC Ceramic DinnerwareABC
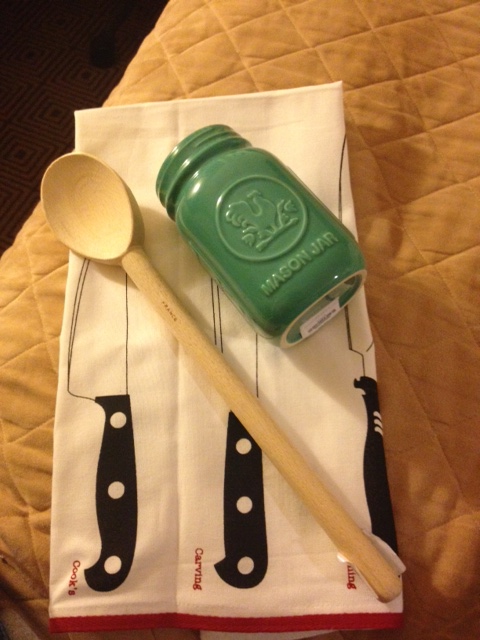
I tore myself from ABC Kitchen and only left with a large wooden spoon from France.
My New York Purchases – Ceramic Mason Jar & Tea Towel from Fishs Eddy & a wooden spoon from ABC Kitchen
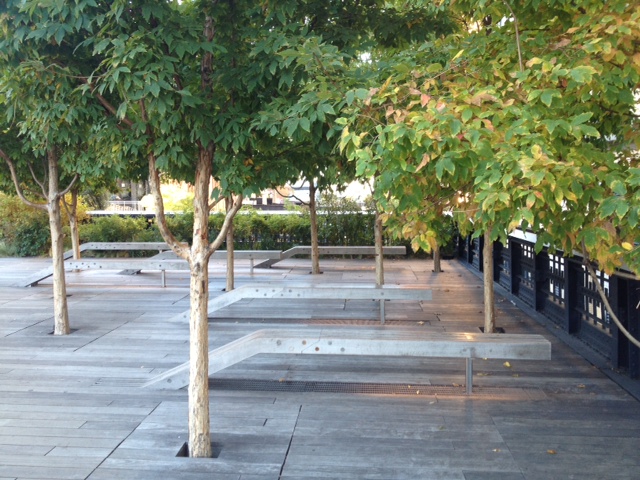
On my last morning in New York, I got up bright and early to walk down to the High Line. I love what New York has done with the space, and its a great urban walkway. I wish the West Toronto Railpath was half as nice (and integrated) as the High Line! They even have elevators for accessible access. Awesome! If you are visiting New York I highly recommend taking a nice walk on the High Line.
The High LineView from a bridge on The High Line
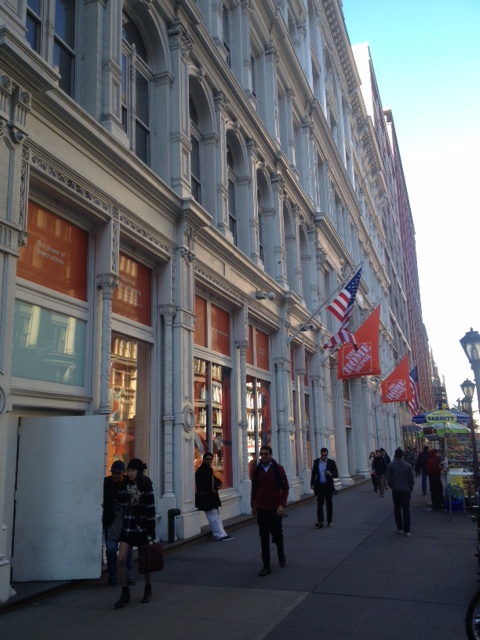
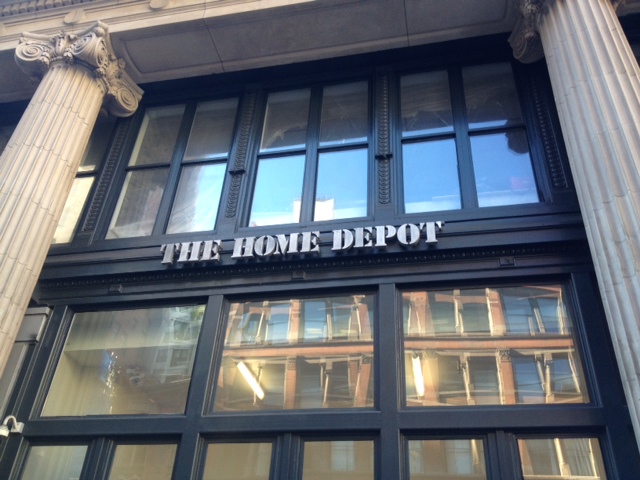
As I was heading back to my hotel, I noticed a Home Depot on 6h Avenue. I thought at first it was a head office but when I got a little closer I realized it was an actual retail store! A Home Depot on 6th Ave? New York, I love you!
The Home Depot – 6th Ave NYCThe Home Depot – 6th Ave NYC
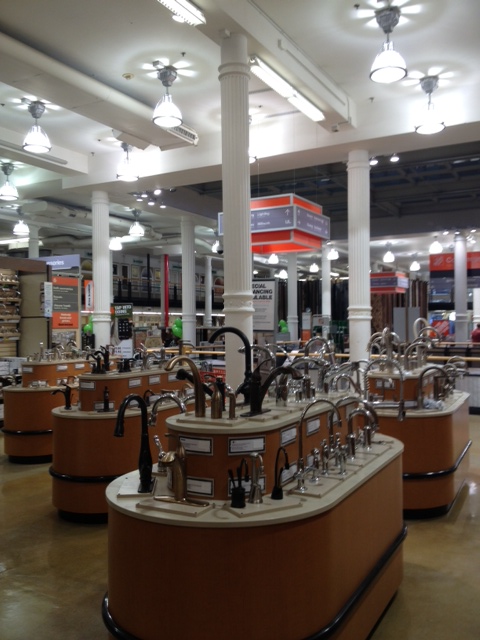
Of course I had to pop in (I couldn’t resist) and they surprising had a very good selection.
Home Depot 6th Ave – Faucet Department
While wandering around Chelsea I also noticed a large lumber yard near the Chelsea Market. I could certainly DIY in New York!
I love the city, but next time I visit I need to stay a little bit longer. It was too much a whirlwind visit (but business travel is always that way!) Whats your favorite stop in New York City?