Shopping for Kitchen Accessories

I know I know, my kitchen isn’t even close to being finished yet, but I am already on the hunt for some fun accessories to brighten the place up.

I want to add some new art, some textiles, some useful accessories like cutting boards (which I hope to make) as well as a few new serving pieces and decor. I always like to give a room a few new touches even when its not getting a complete new makeover.

Here are some of the things I’m loving right now:

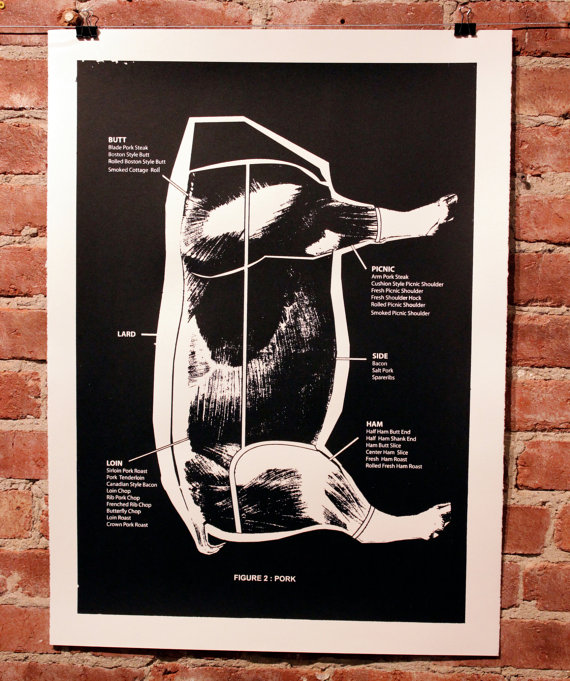
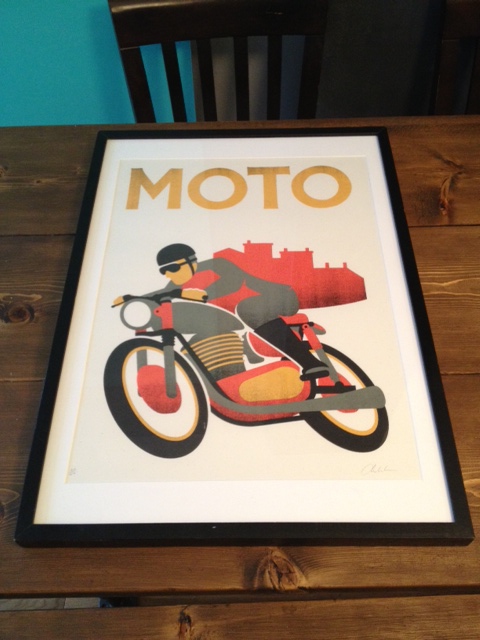
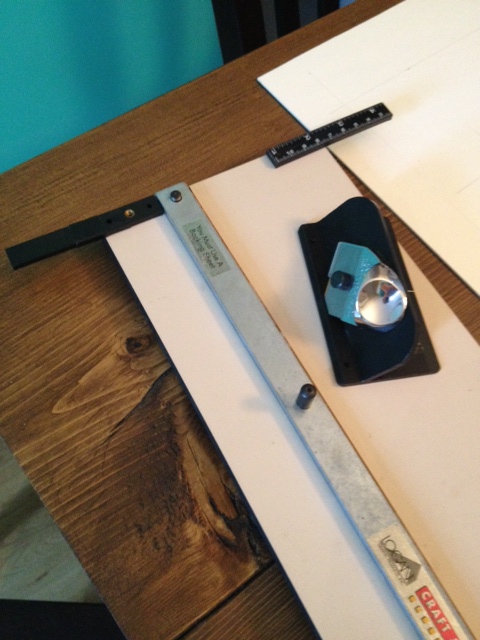
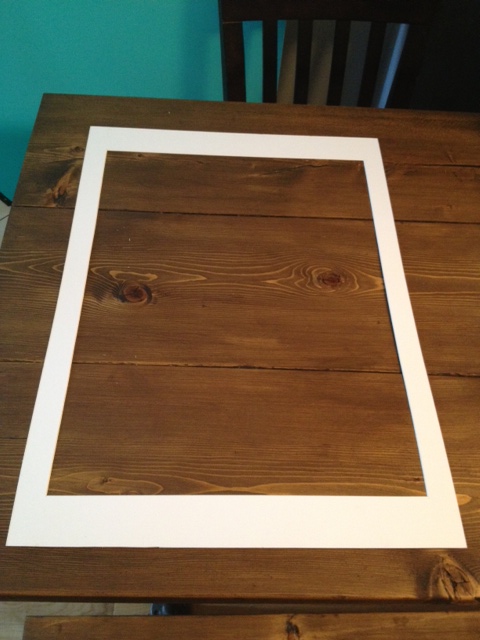
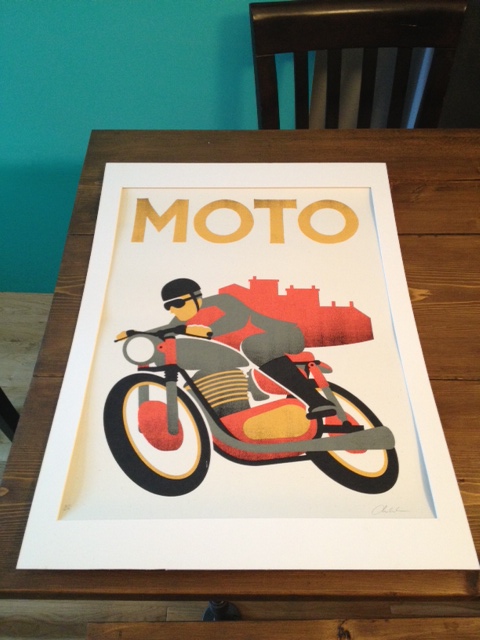
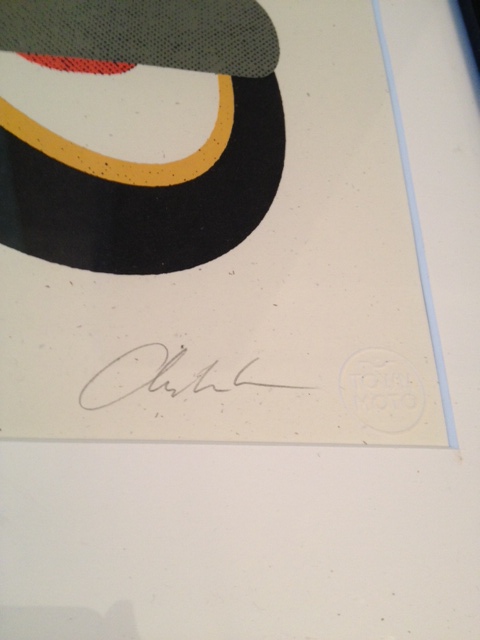
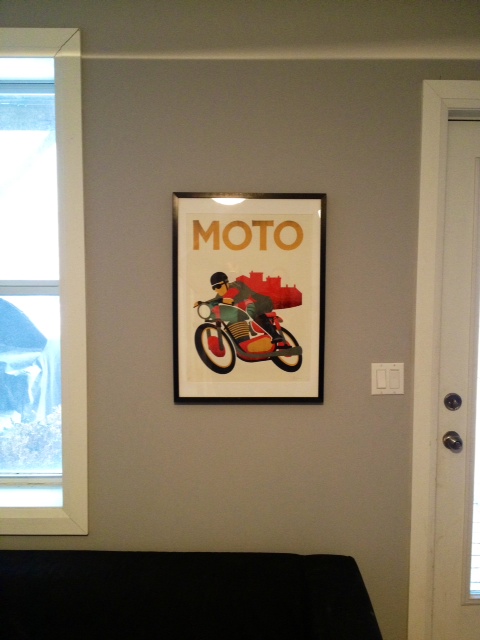
Butchery Prints from Smash Gallery.  I am leaning towards two of these for beside the coffee bar. I want to build some cool wood frames for them.

il_570xN.376116702_5lx7

il_570xN.376130575_cj5h


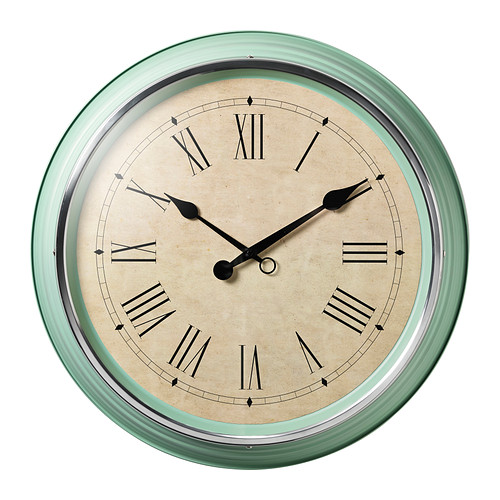
Ikea Skovel teal clock for the chalkboard wall in the dining room. We already have one of Ikea’s large clocks in our staircase and love the scale in our house. Ordinary sized clocks seemed tiny with our tall ceilings. The large scale and color is great. Although I am thinking of removing the clock face entirely and replacing it with something simpler.

skovel-wall-clock__0190681_PE344205_S4

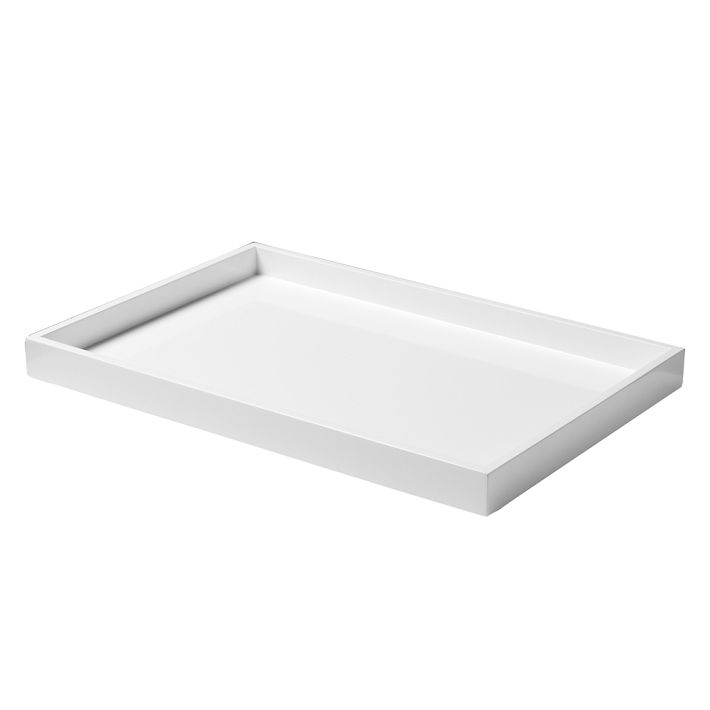
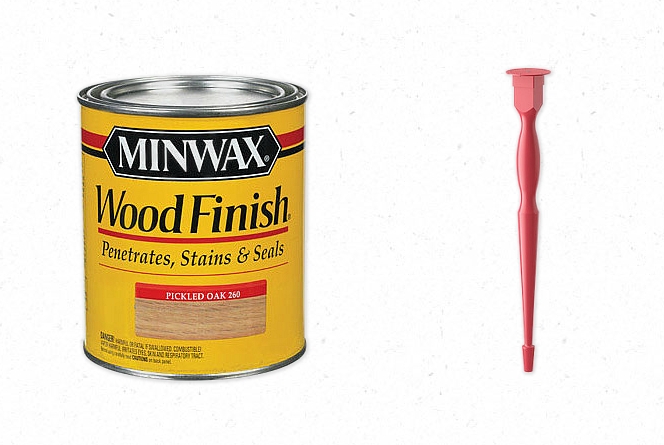
A small tray for holding my olive oil and balsamic beside the stove. I like having oil & vinegar close at hand (as I pretty much use it everyday!) but I don’t want to risk staining my new counters, so a nice little  tray to set the bottles on is perfect.

img21o

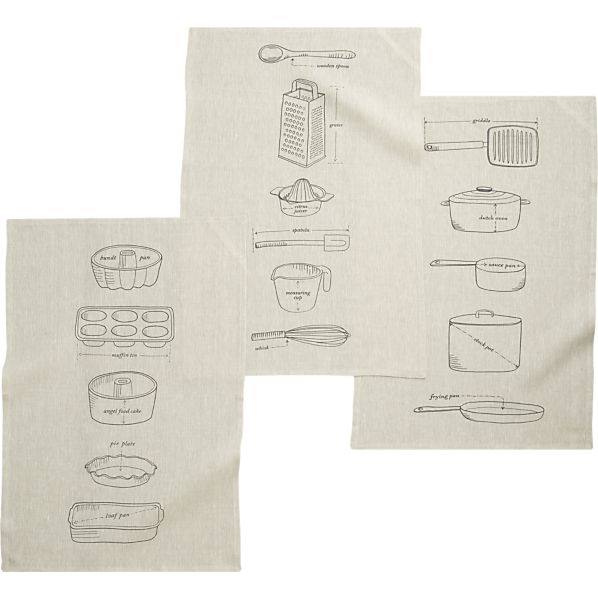
Linen & Flour Sack tea towels. These linen guys from Crate & Barrel are cute.

gourmet-blueprints-dishtowels-set-of-three

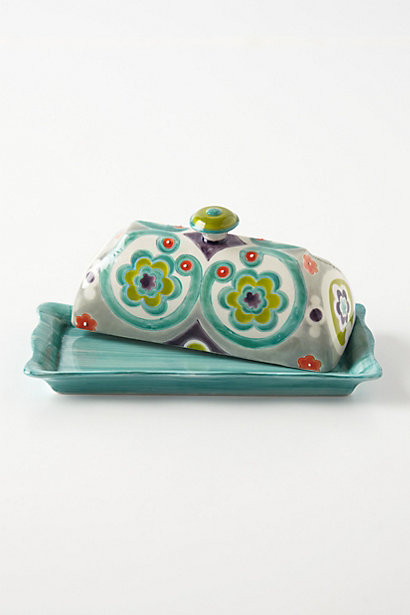
A cute butter dish. I like this guy from Anthropologie. It lends itself well to the teal in the cabinets and the step stool.

27724319_095_b

Other things we need (that I haven’t found yet) are a new dog food mat for Odin (poor guy is getting relocated, and his food mat is a bit worse for wear!). As well as kitchen utensil holder & compost bin. I actually have a cool DIY project in mind for these. Hopefully I will give it a shot this weekend, and have something to report back next week!

Anything you’re lusting after for your kitchen right now?

Paintin Signs

When we bought the Storefront, it had essentially been eliminated of all its character. It had been in bad shape, and the owners before us had brought it back, and modernized it, but in doing so had removed everything of the past. Don’t get me wrong, I love our spray foam insulation and skylights, but I’m not the biggest fan of the white vinyl windows and the lack of original trim & doors.

So in our quest to add some character back to the Storefront, I want to add in a bit of it’s past. When the Storefront was originally built it housed a Grocer. Later it did a stint as a Barber Shop, and until the 60’s it was a Tailor & Cleaner.

I have been scouring flea markets and antique shops for anything Grocery, Barber or Tailor related and have yet to find ANYTHING awesome for the house. Barber pole? Nope. Grocery Store sign? Not a hope.

Resigned to my failure, I decided to make things related to the past for the house. I started with a Grocery sign for the kitchen. (Cause a grocery sign was a shade easier than a barber pole…)

I headed into the garage and found a couple spare pieces of 2×12’s that were 6 feet long. I distressed one with some stain & a blow torch, and the other I whitewashed with some watered down chalk paint.

I then laid out my type. I made each letter about the size of an 8.5 x 11 sheet of paper, and just freehanded the letters with a pencil until they looked OK.

freehand sign paintin

I grabbed some paint, and filled in the lettering with a small foam brush, and let it dry.

Then I sanded everything to give it a worn look, and I had two (yes TWO) grocery signs ready to go.

Two (yes TWO) grocery signs

I then made El Granto put each one up on the kitchen cabinets so I could decide which one I liked best.

This one won out.

Grocery Sign
Grocery Sign
The Kitchen
The Kitchen

And now the other one is still hanging out in the kitchen leaning against a wall cause I have NO IDEA WHAT TO DO WITH IT. I’m really knocking it out of the park lately.

Anyone want a Grocery sign?

Make Your Own Custom Table

I know you’re probably all “tabled-out” with my table talk last week, but I just wanted to give you all some ideas for creating your own dining table.

As you know, we made a new top for our pipe leg table. It was easy peasy. Three boards, some supports, sanding, staining and protecting and its as easy as pie. (Well maybe not pie. Pie is pretty hard to make.) So now I’ve convinced you to make your own table top, but what if pipe legs aren’t your thing… It’s too hipster for you, or too industrial, or not glam enough. So don’t worry, I got your back. I’m your girl.

This is what you need to do. Make the table top. Then pick your stain color and pick your legs. It’s like a choose your own adventure novel, but with FURNITURE!

I know, your mind is blow! (right? maybe? a little bit blown? a spark?)

PICK A STAIN:

MinwaxColors
Minwax Stain Colors

PICK A LEG:

nicelegs
Ikea Legs
Wall 0f Ikea Legs
Wall-o-legs at Ikea

OPTIONAL: Pick a spray paint color to paint the legs:

Valspar Spray Paint Colors


Here’s some of my ideas:

Dark Walnut top + Ikea Vika Moliden Underframe legs spray painted  Exotic Sea.

Option 1

Classic Gray top + Ikea black Lalle legs

Option 2

Ebony top + Oddvald legs spray painted Troical Folliage

Option 3

Minwax Pickled Oak + Red Nipen legs (which are more pink than red)

Option 4

DIY TIP! If your idea of DIY & woodworking is watching HGTV in your PJ’s.  Consider using a piece of prefab Ikea butcher block countertop as a table top. It comes in a 6’x3′ size (for $269) that would be perfect for a dining table!

Ikea Numerar Countertop. Perfect as an easy table top!

What options would you choose?!

Window Shopping – Post & Beam Reclamation

I love nothing more than strolling around our neighborhood with El Granto & Odin. Coffee in hand, walking wherever our feet will take us. We like to stroll and visit new areas, window shop, and often come home with some new purchases.

One of my favorite places to window shop is the Junction. There are some great shops, and two of my absolute fave shops; Smash and Post & Beam Reclamation.

Storefront of Post & Beam Reclamation

This past weekend I was wandering through Post & Beam and thought I’d share some of the awesome things I spied there. I would have loved to have brought home every last one of these pieces, but alas our budget is being directed at the coffee bar & backyard this spring.

So here are some of my picks.

The front window display showcasing some awesome lights and iron orbs
Heres a closer detail of one of the iron orbs. Wouldnt this be great with a hanging fixture and edison bulb? (or take a cue from Restoration Hardware and hang a small chandelier inside)
Here’s a closer detail of one of the iron orbs. Wouldn’t this be great with a hanging fixture and Edison bulb? (or take a cue from Restoration Hardware and hang a small chandelier inside)
Wouldnt this lantern be gorgeous hanging from the ceiling of a lovely gazebo? Or as the entryway light for a coach house.
Wouldn’t this lantern be gorgeous hanging from the ceiling of a lovely gazebo? Or as the entryway light for a coach house.
Lovinf this simple but classic mantle. Made we want to bring it home even though the storefront doesnt have a fireplace! Would be cute with stacked logs in the hearth
Loving this classic mantle. Made we want to bring it home even though the storefront doesn’t have a fireplace! Would be cute with stacked logs in the hearth. Oh and check out those warehouse lights! Fab over an island or dining table
Arnt these lovely? Would be great feature in a stately kitchen
Aren’t these lovely? Would be great feature in a stately kitchen
These lights would be great in a powder room or boys bedroom or office (although those bulbs are all wrong)
Love their outdoor pieces including this. Would be perfect for an english style garden
Love their outdoor pieces including this fella. Would be perfect for an English style garden
Made from reclaimed materials, these modern looking industrial stools would be great at a dining table or as end tables
Made from reclaimed materials, these industrial stools would be great at a dining table or as end tables

Did you fall in love with any of these finds? Whats your favorite place to window shop?


Custom Framing Mats

Have you purchased any Ikea (or similar) frames only to have the provided mat be completely the wrong size for your art? You could go to an art or framing store and pay (heavily) for custom cut mats, or if you’ve got a few dollars and some time and patience you can do it yourself.

Back in my art school days, sick of trying (and failing) to cut mats with a straight edge, I broke down spent $50 of my poor ass college budget on a mat cutting kit. I then proceeded to cut all my art school project mats, as well as did a pretty handsome black market trade in cutting mats for my fellow students.

Mat Cutting Kit
Mat Cutting Kit

That (old battered) mat cutting kit still gets used several times a year, and has paid for itself many times over. If you are in need of several mats cut (doing a gallery wall any time soon?) If so, this may be the tool for you. Let me show you how it works.

A few weeks ago we purchased a beautiful print from a great local shop Town Moto. This vintage inspired motorcycle gear shop is one of El Granto’s favorite places. They have great gear & accessories as well as an in house design & print shop. They produce some beautiful motorcycle themed prints, and we brought a purdy new Moto print home. The print is gorgeous. Its printed on a lovely heavy paper, and its signed, stamped and numbered. A print like this needs to be presented in a way that equals its awesomeness. So I went frame hunting in the basement and found a great big Ikea Ribba frame previously used for an old highschool drawing. I ousted the drawing from its frame and stole the mat to use with the Moto print.

Reclaimed Mat
Reclaimed Mat

Problem is, the mat hole is MUCH too small for my print. The easiest thing to do here is flat mount the print, but that doesn’t look as nice.

Print much too big for the old mat

So I got out my mat cutting kit and set to work.

You need to figure out how big you want the new mat hole to be, and you need to draw the location of the new hole on the back of the mat so you can cut it. There are several different ways to do this. We wanted our print centered, so we did a bit of math (minusing the size of the new cut hole from the overall size of the mat to figure out how far from each side the cut hole needed to be.) Measure twice, if not three times before you cut, its easy to go astray especially if you’re dealing with 16ths of an inch etc. If you’re having problems with this step, feel free to ask questions and I will try (as best I can!) to explain in greater detail.

New cut lines drawn on mat

Place the mat (still upside down) into the mat cutter, and align one of your lines to the straight edge of the cutter.

See how theres a line on the cutter? Match that up to your cut line. It will ensure that you start & stop the cut right where you need to
Your vertical cut line is aligned with the straight edge and see how there’s a line on the cutter? Match that up to your horizontal cut line. It will ensure that you start & stop the cut right where you need to

Now starting at the bottom of the mat, place your cutter onto the mat, matching up the starting line on the cutter with the corner of the intersecting cut line. Push the blade into the mat, while holding the straight edge steady, and push the cutter along the straight edge, stopping at the top line of your cut hole. The key to this step is using a steady hand and pressure. Proceed to do all four sides of the mat, and ta da! Beautifully cut mat.

Newly cut mat with larger hole for our print
Testing to see how our new mat fits. Its perfect!
We framed the print so you could still see the signature and the embossed stamp on the print

Now insert your print, attach the back and hang your professional framed print on your wall.

Print framed
Print framed
The new print is hanging out on our back livingroom wall

*If my instructions are confusing, let me know. This may be a situation where its easier explained by a video tutorial*

SOURCE LIST:

Materials:

Print – Town Moto
Frame – Ikea
Mat – Art Store

Tools Used:

Mat Cutting Kit (we have the Logan one, you can pick up a basic mat cutting kit for about $50 at art stores)
Measuring tape or ruler
Hammer & Nail (to hang)
Old Butter Knife (my secret for prying up the tabs on the back of the frame)

Difficulty Level (on a scale of 1-5):

one out of five

Total Cost: $30

Tin Tile Inspiration

Three years ago, before we owned the house, heck before we were even really house hunting, we were at the Aberfoyle Antique Market with my parents when I spotted some antique tin ceiling tiles, and fell in LOVE. They were reclaimed from an old storefront in London Ontario. My parents bought me 20 of the 2×2′ tiles for Christmas that year, and I have been waiting to put them up somewhere in the Storefront since we moved in.

One of the Tin Tiles
The Tiles
The Tiles

The tiles have their original white paint still on them, and are in varying states of disrepair. Some are almost perfectly painted, while others are missing half their paint, or are rusted.

We could do all sorts of cool stuff with the tiles.  The ideas are so endless that I in fact could not decide on one… No really. Its been 2 years and these tiles are still sitting in my basement. Its not that I dont want to use them, I just cant make my mind up.

Do they get painted, stripped, left as is?

Do we put them on a ceiling, or use them as a wall covering, or as a backsplash in the kitchen?

Do I procure matching cove moldings and filler panels to do a ceiling the proper way?

See, its a bit overwhelming right? I don’t want to screw it up. So here is some of my inspiration.

Source: decorpad.com via Kristen on Pinterest

Source: mobfin.com via Kristen on Pinterest

Source: houzz.com via Kristen on Pinterest

Source: hgtv.ca via Kristen on Pinterest

Source: google.com via Kristen on Pinterest


What would you do with the tiles?!


Painting the Hallway

The hallway is one of those slow & steady projects. It has never gotten our focus, but we keep slowly chipping away at it. I first showed you the hallway and my inspiration, then we knocked a few things off the list when we changed up the lighting and added a transom window.

Here is what the hallway originally looked like

Hallway Before
Hallway Before

This was what the hallway was looking like after it’s lighting & transom updates.

photo(26)
The Hallway after new lighting and a transom
Hallway Nook (Outside Master Bedroom)

We knew we needed some new paint (the flat beige walls had seen much better days.) I decided they needed to change NOW, and one dreery Sunday afternoon I waded through our paint cans in the basement, and pulled out a can of white paint. I proceeded to march upstairs and paint one of the walls in the hallway white, then I ran out of paint.  Oops. Apparently a 30 foot hallway takes a lot of paint…So I headed out to Home Depot and picked up another can of white, and this past weekend I painted the rest of the hallway.

The Hallway with its fresh coat of white paint

After painting the 30 foot hallway bright white…it was starting to feel a bit stark, so when I got to the nook outside our Master Bedroom, I again raided the basement paint can supply and found some nice grey paint. I painted the little nook and the wall in front of our master this medium grey.

The nook with its grey walls (both walls are the same colour grey, the skylight just hits the one wall more and makes it seem lighter)
The view of the accent wall when looking down the wallway
The view of the accent wall when looking down the hallway

With $35 in paint (the grey was left over from the main floor) we had an updated hall. Now all it needs is a runner and some art. I am thinking gallery wall!


Window Coverings – The Result

A few months ago, I discussed our options for super tall window coverings.

Wanna know what we went with?

Curtains.

I know. You’re underwhelmed. So are we. Truthfully we were hoping to do privacy film of some sort, and then curtains as well.  I contacted 3M trying to get some information on their Night Vision film, if it would work for us, and where to get it in Canada. No one ever responded. Why do companies have contact forms if no one gets back to you?! I WANT to buy your product, just tell me where to get it!

So window film didn’t happen. Truthfully, curtains didn’t even happen until a couple days ago. We were at Ikea getting the shelves we forgot for the coffee bar when El Granto insisted we get new curtains. He had driven past our house the other day and was embarrassed by our stupid ass patterned curtains that were not double sided, and looked like butt from the street.

The Ugly Curtains...
The Ugly Old Curtains
A view of the curtains from inside
A view of the curtains from inside (yes that’s how tall our ceilings are!)

Its an area we have severely lollygagged in, and we really needed to get some different curtains up pronto. So we looked through our options of Ikea 118″ length curtains, and picked the simple medium gray Ritva curtains. (White would have been my first choice, but Odin loves looking out the front window. I do not relish having to wash the curtains every month, so grey it is.)

New Curtains
New Curtains + the sad state of our planter after a wind storm and 13 degree temperatures
New Curtains
New Curtains

Are they revolutionary? No. Do they BLOW YOUR MIND? Not a chance. Do they look put together, grown up and not ridiculous from the street? Yep.  They actually disappear from the street. It almost looks like there’s no curtains in the window, yet you cant see into the house. So its a win in our books.

See how the curtains disappear?

(and yes I know I still have only completed one side of our leaded glass windows… I ran out of lead. I have more now, I just need a warm sunny day to put it up…)

Anyone used 3M Night Vision film? Any luck finding it in Canada?

XL Art Project

The main floor of the Storefront has almost 11 foot ceilings and is open concept, and to be honest its been very hard to decide on art for the space. Everything I own and try to hang is way to small for the large walls. I have been hunting for some large art in my budget, but have struck out. I decided to take matters into my own hands, and set out to make some extra large art.

My Mom was coming to visit and was bringing my Dad’s truck. A truck meant that I could get some big building materials that I cant normally buy and take on the bus. We got materials for a few projects, and also picked up a 4×8 sheet of 1/4″ masonite hardboard. A lot of artists actually use masonite as artist canvas. It is a nice smooth surface to paint on, and is acid free.

I took my 4×8 sheet and built a frame for it out of 1×3 lumber (I wanted a shallow frame/support as I dont have a lot of space for a thick frame, in hindsight however 2×3’s would have made a beefier support). The frame consisted of an outer stretcher bar with mitered corners, and two cross supports.

Laying out the frame
Frame pieces cut and ready to be attached

I used pocket holes to secure my frame, then brad nailed my masonite to the frame using 5/8″ brad nails.

Using Pocket Screws to attach the frame together

After that was completed, I sanded the masonite to rough up the surface for painting.

The masonite sanded to scratch up the surface for primer

The hardest part is maneuvering the super sized canvas. I advise having a friend to help you carry and flip this lightweight but awkward art project.

I primed the whole shebang with some left over primer/sealer I had laying around, then I set to painting my art.

Masonite Primed
Masonite Primed

I wanted something with some colour, but that wasn’t super in your face (the painting is 4×8 after all, its already gonna have a ton of impact!) Heeding the ombre trend, I decided to do a turquoise ombre painting. I hit up my Home Depot, and got 5 sample pots of paint in varying shades of turquoise (from light to dark).

After my primer had dried, I got to painting. I painted a stripe at the top about 20″ high of the lightest colour.

Lightest Color Painted

Then proceeded to do stripes 19″ high of all the other colours. I painted the lightest and darkest colours first and let them dry, then worked my way fading the colours. The lightest colours were fairly easy to fade, but the darkest colours were harder.

Painting The Different Shades

I ended up mixing up a “pallet” (paper plate) of paint where I faded the colours together, having dark on one side of a large paint brush and light on the other.

Mixing the two shades

I then painted one stripe between the two colours with the fade in the middle. It only took me one afternoon to complete, and it makes quite an impact.

Painting Complete
Painting Complete

It currently is leaning against the wall in my dining room, but I think it will end up in my kitchen or even sideways over my sofa. So many options!

SOURCE LIST:

Materials:

4×8 sheet of masonite – Rona
4 – 1x3x8 spruce – Rona
CIL Primer – Home Depot
Behr Paint + Primer Sample pots – Home Depot

Tools Used:

Mitre Saw, Kreg Jig, Brad nailer, Paint brush

Difficulty Level (on a scale of 1-5):

Two out of five

Total Cost: $45

DIY Custom Door Mat

We needed a new door mat for the front door. We started hunting around for something useful but nice. What I found was a lot of ugly door mats, or ones that were hugely expensive. ARG. The problem is, when I get frustrated with not being able to find what I want for the price I want, I take matters into my own hands. So I refuse your overpriced or ugly door mats, and I will make my own thank you very much. So I stubbornly lugged my ass on the bus to Ikea and picked up some large coir rubber backed mats.

Ikea Trampa Door Mat

Coir is a natural coconut fiber and is very durable. If your mat gets dirty, shake it out, and you can even sweep it. Note to self, large coir mats are pretty heavy. After lugging them back on the bus I sure had sore arms the next day!

Okay, so now I had a plain mat. It would be fine as is, however I am never one to leave well enough alone. I decided to add some simple painted type or a design to the mat. I made a few layouts, but ended up loving a simple design of a small lowercase “hello” on the bottom right corner of the mat. I could have easily embellished the mat further with a border etc, but I liked the negative space the “hello” left on the mat. To save time, I broke out my Silhouette SD (yes I do use it for everything!) and cut out the hello from some cardstock. I popped out the letters, and used the cardstock as a stencil. I taped it onto my mat, and then used some sewing pins to get the paper to stay put.

Stencil taped & pinned to mat

The rough surface of the coir mat made it hard for spray adhesive or tape to adhere, so I found the pins the best course of action to get my stencil stay in place. I covered the other areas of the mat to make sure I didn’t get any overspray on the mat.

Close-Up Of Pins

Using a can of spray paint, I carefully painted my letters trying to spray completely parallel with the mat, to try to limit how much paint sneaks under the stencil. You will have some, but this careful paint technique should limit the paint’s sneaky sneak under the stencil. Give the stencil a few passes with the spray can, then let it dry for 5 minutes or so. When you go back you will notice that its lighted up quite a bit as the paint soaked in, so give it another couple passes with the spray paint, then let it dry. I got a bit impatient and removed the stencil about 10 minutes after I painted. Just make sure that you’re careful and don’t get paint on anything (including your hands, spray paint is hard to get off your cuticles!)

Detail shot of mat after spray painting

We let the paint dry for at a day or two, and the placed it at our front door.

The Mat

What do you think?

SOURCE LIST:

Materials:

Ikea Trampa Door Mat – Ikea
Spray Paint – Left Over Rust-oleum Universal in Black

Tools Used:

Silhouette SD
Sewing Pins

Difficulty Level (on a scale of 1-5):

Two out of five

Total Cost: $16