Chalkboard Wall

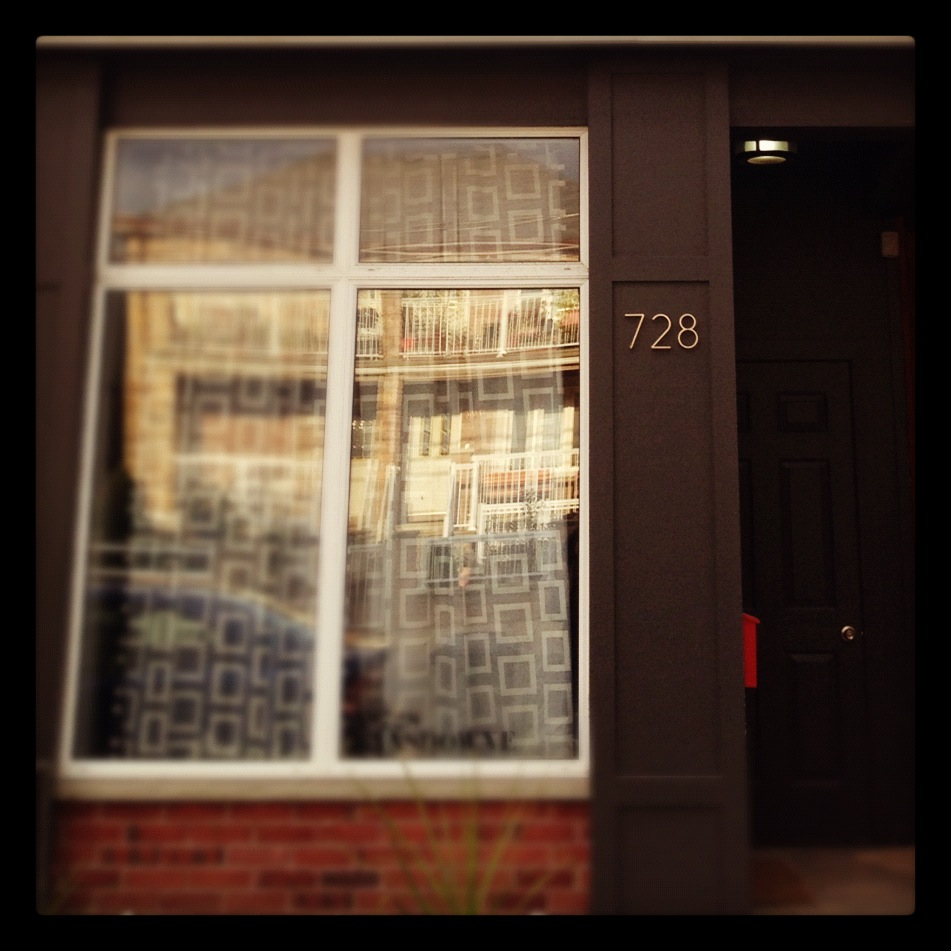
Our entryway, dining room and kitchen are all one great big open concept room. As soon as you walk in the front door you can see straight to the back of my kitchen. Its nice because the storefront window allows in a lot of natural light, and the open concept high ceiling space makes everything look a lot bigger than it actually is. Since moving into the house we have done very little to the main floor. The main reason being that anything we did would either cost a lot, or impact the whole main floor (i.e. we have one 60 foot long wall that runs from the front door to the back door, going through every room on the main floor except the powder room. So you cant just paint the kitchen or the dining room, you literally are painting the whole first floor.)

We have big plans for the space, we want to create a coffee bar in the dining room, replace the sink, faucet and countertop in the kitchen (and backsplash if I get my way). We just made a new dining table and bench. I have some art projects in the design stage, and a lot of projects for the livingroom.

In the interim I wanted to get the dining room ready for my holiday guests and for Christmas dinner. There is a chimney wall that juts out in the kitchen (see it behind the table in this shot).

See the small wall that juts out right behind the middle of the table?

I decided to give it a bit of a focal point, and paint it with black chalkboard paint. That way I can feature a menu board for dinner parties etc.

To start out I sanded down the wall to remove any imperfections and to make it as smooth as possible. Then I coated in one coat of primer.

Priming
Wall Primed

I sanded the primer than applied one coat of chalkboard paint. I started to get a bit worried at this point as it didn’t cover well at all…

One coat of Paint
Detail shot of one coat of the chalkboard paint

After a second coat it was started to look much better, but it still needed at least one more coat. I sanded at this point to try to make it as smooth as possible (chalkboards work best when they super smooth!)

So after sanding and a third coat of chalkboard paint I was starting to get the result I was looking for.

Several coats of chalkboard paint

After this I gave it one more sand and what I thought would be the final (4th) coat. However after it dried it was even rougher than before. Eep!  So once again I sanded and sanded and sanded some more then I painted a coat sideways instead of up and down. After that, I sanded and painted two more coats. Yes that’s right, if you’ve been counting you’ll know that we’re up to seven coats of paint. At this point I still wasn’t convinced it was smooth enough, but gave up because I had had enough of this project…and i deemed it “good enough”. Having never worked with chalkboard paint before I am not sure if I was just being anal retentive, or if you can actually get a perfectly smooth effect on a wall.

Once it had dried for three days, we covered the whole wall in a coat of chalk (rub the side of a piece of chalk over the whole wall.) Consider this like seasoning a cast iron pan. Then rub off with a dry cloth, and you can use your chalkboard wall. Just don’t wipe it with a wet cloth for at least a week.

Chalk Rubbed on Wall
Detail of Chalk
Chalkboard Done!

Check back tomorrow to see how I designed my Holiday Chalkboard Menu!

***UPDATE*** Here’s the Menu

Chalkboard Menu Done

SOURCE LIST:

Materials:

Rust-oleum Chalkboard Paint in Black – Canadian Tire
CIL Primer – Home Depot

Tools Used:

Paint brush, tray & roller

Difficulty Level (on a scale of 1-5):

Two out of five

Total Cost: $20

Outdoor Planters

We made a large planter box for our cement front yard a few years ago. It served two purposes, it gave some greenery to an otherwise paved front yard and secondly it made people aware that it was our property not just a very large sidewalk, and thus in turn got them to stop walking right by my front window. It has worked quite well. We still get the odd person who will take the route up by our window, but generally it gives us much more privacy.

In the spring I have bulbs planted and get lovely spring flowers. In the summer I plant bright annuals which last mostly into the fall.

For the holidays (and the rest of the winter) I like to have some fresh greenery and a little bit of rustic winter charm. So this year I hit up a local grocer who sells Christmas trees and greenery. I purchased about 5 bunches of assorted greenery, and my Mom and I set to decorating the planter. We also had some left over garland from another project. We’re not florists, and our only mission was to give it a bit of height and fullness. I also purchased a package of pine cones at my local dollar store, hot glued them to coffee stir sticks, and tucked them in here and there.

We also did a small urn under our mailbox by our front door.

So even though we don’t have Christmas lights up (we don’t have any outdoor electrical boxes!) it still looks festive. That combined with a wreath on the front door has our storefront in the holiday spirit.

DIY Holiday – Chrismas Carol Art

I have taken to decorating the little shelf over our front hall coat rack as a would-be mantle. It got decorated for Halloween, Thanksgiving and now its getting a little Christmas cheer. My local dollar store sells 12×16 stretched artist canvases for the low price of $2. They also sell $1 acrylic paint. I figured this was an excellent excuse to make some inexpensive holiday art.

The Coat Rack Mantle without any decoration

While singing Christmas carols at my desk one day (yep I’m one of those holiday spirit kinda people)  I decided that my art project should revolve around Christmas carols. I promptly went home and laid down some type in Illustrator of  the lyrics “Faithful friends who are dear to us, gather near to us once more”.  Hopefully our visiting friends and family will feel welcome this holiday season!

Type laid out in Adobe Illustrator

After I was happy with my type layout and font selection, I cut out the type using my Silhouette SD onto adhesive vinyl. If you don’t have a silhouette, you can pick up alphabet stickers from craft stores, or you can cut your own out of adhesive material. After my stickers were cut, I removed the excess vinyl (called weeding) and transferred my stickers using transfer paper (it’s sticky paper which pulls off the vinyl from their backing, then you place it where you want your stickers and apply using a credit card.)

Half the words adhered to the canvas

After my stickers were adhered I took a look and loved it just the way it was! I know, lazy me! If you want to do it right,  paint around the edges of the stickers with some white acrylic paint. You do this so that if any of the paint bleeds under the stickers, its white like the canvas so it wont be visible. After it dries,  coat the whole canvas in 2 coats of black, red or green paint.

After the paint dries, remove your stickers, and reveal the white canvas below. Or be lazy like me and just put stickers on canvas, then go drink some rum laced eggnog instead.

Where was I? Eggnog? Oops. Right. Project…

Then I placed it up on my mini mantle with a small artificial tree, candles, fresh greenery and a ceramic pear.


SOURCE LIST:

Materials:
12×16 Art Canvas
Adhesive Vinyl
White & Black Acrylic Paint
Eggnog for extra holiday cheer

Tools Used:
Silhouette SD
Paint Brush

Difficulty Level (on a scale of 1-5):

One out of five

Total Cost: $2 ($4 if you paint it)

Hallway Update

I posted a little while ago about my hallway hopes & dreams. I have not yet convinced anyone that I should paint the doors black (I still think its an excellent idea, but thank you everyone for not having any faith in me.) 😉

While we havnt made tons of progress, there have been a few improvements. We completed the transom window from the guest room, and it adds a ton more light to the hall, especially in the mornings.

Transom!

We also replaced the ugly cheapo hallway lights with new school house lights that match the downstairs hall.

I got the best deal ever on these schoolhouse lights. The one for the downstairs hall was on clearance for $36 (which was amazeballs all on its own.) I went back to get another two for the upstairs hall but they were sold out. Sad face. Instead of giving up, I set the Mom’s on the task to check their local Home Depots. My Mom struck out, but my Mother in Law struck it rich when she landed on a stach of the at a HD in Brampton. She picked up two and guess what, they were reduced further to TWENTY FOUR BUCKS. Yep, you heard me $24. Holy effing awesomesauce.

So heres what it looked like before:

Hallway Before
Hallway with new transom but old lights

And heres what we’ve got now.

After
After
After

The one big thing is how much more neutral colour the new lights put off. The old ones were soooo warm, they made the whole hall feel crowded and tight. The new ones are much cooler (in every sense!) There is one small thing that is driving me a bit nuts, the ceiling isnt level, but the lights are made to sit level. This makes them look a smidge crooked. Which drives my eyes nuts. Until I figure out a fix however, I will have to live with it.

We still have a long way to go. Need some paint, art, a runner and a plant & mirror for the nook, but its a good start!

Guest Room Art Project

We needed some art to flank the bed in the guest room. I wanted something fun and lighthearted, and to bring a bit of colour to our now grey and white guest room. I rummaged through my box-o-frames and found a couple black gallery frames that had seen better days. They were a bit bashed and mangled and were not looking their best. I decided to give them a bit of a facelift. I painted them a shade of pinky coral (although in hindsight I wish they were a bit more red). Then I set out to find some prints. As you may know we have a crazy Vizsla named Odin who I love to bits and have tons of photos of, but I didn’t want the guestroom to be a creepy shrine to my dog. Instead I set to look for Vizsla themed prints, that were not shots of  Odin. I found a great print of a vintage stamp from Hungary (where Vizsla’s are from) as well as a fun “Obey the Vizsla” propaganda style poster. I cut new mats for the frames with my mat cutter (a handy tool if you frame a lot!)

Here they are in the space. I like how they add a bit of colour to the space.

The guest room still needs a few more things. Accent pillows, some sort of art above the bed, a chair for reading or putting on your shoes, bedside lamps, a new light fixture, and some closet organization.

Knobs as Hooks

Girls come with a lot of accessories. We have purses, shoes, scarves, jewelry and a plethora of other crap things. This is often why we require so much closet space to store it all. Most of my rarely used handbags and shoes are packed away, but my often used purses, scarves and shoes need to be close at hand, and thus can be kind of a mess.

To get them out of the way, yet keep them accessible I decided to hang some knobs inside our new master closet to hang my favorite accessories.

The problem with knobs is that they are meant to be screwed into a cabinet. This means that they have what you call machine screws (screws without a pointy bit) to attach them to the cabinet. They screw through the back of the cabinet into the knob. This makes them impossible to attach to a wall without some DIY’ing.

Here’s what you need to do. Take your knob screws out to the garage and cut off the heads of the screws using a  saw with a metal blade. This now makes them headless screws (which means they can be screwed into things on both ends. )

Knobs

Head back inside wielding drywall anchors and a drill. Attach your wall anchors into the wall where you want your knobs.

Drywall Anchors in Wall

Then simply thread your now double sided screws into your knobs and your wall anchors. Ta Da! Knobs on a wall.

Knobs Screwed into Wall

Now hang your accessories, and get your nagging husband off your back.

Wheres my white Coach Purse? Hung up of course!
Knobs Holding Accessories

You can easily do this with all sorts of knobs, for holding towels in the bathroom, coats at the front door, or even the dog’s leash handy but out of the way.

SOURCE LIST:

Materials:
Saata Knobs (6 pack $1.49) – Ikea
EZ Ancors – Home Depot

Tools Used:
Hack Saw
Drill

Difficulty Level (on a scale of 1-5):

One out of five

Total Cost: $1.50

Upholstering a Custom Headboard

When we moved into our house, we bought our first big kid bed. By that, I mean one that had a boxspring, had an actual frame, and that was big enough that hubby & I didn’t need to sleep like sardines. The problem with owning a big kid bed is that we didn’t own a headboard. Our bed looked giant and sad sitting in the middle of our master bedroom.

We needed to do something about it, but we didn’t have tons of coin to drop on it, and I wanted something specific. At this point in time, I called the only person I knew who could help me; Mom. Mom you see is an expert at all things Home Ec related. Cooking? Shes a pro. Sewing? She could sew a life sized stuffed moose in her sleep. Crafting? She is the Danish Martha Stewart. So you can see why I called in the big guns.

Mom rolled into town, accompanied with upholstery foam, tacks, and a shopping list. The only thing I brought to the table was the purple ultrasuede I had purchased the week before. Mom scrutinized my choice of fabrics, and although it wouldn’t be her first choice, she conceded to give it a try. We quickly measured up how tall we thought the headboard should be, and headed to HD to get some supplies. We had ¾” plywood cut to the width and height of our headboard by the nice fellow in the wood department.

We also picked up some 2×4’s to brace the headboard, and to connect it to the frame. Some staples, spray glue and a new jig saw later, and we were off to the races.

Back at home, we got out some large pieces of newsprint and taped them together to make a big piece of paper the same size as half the headboard (it’s always easier to draw half of your design, then when its time to trace your pattern, just trace one side of the pattern, flip it over and do the other side. It will be a perfectly symmetrical design). We then drew out the design we wanted. We futzed a bit with it, used a pencil and some string to make the curves, and when we were happy with it, we cut out the design to use as a pattern.

The Headboard Pattern

We then traced the pattern onto the plywood, and cut it out with a jig saw. We attached 2×4’s to the back of the wood as legs and braces. * Note if you are going to attach it directly to the wall, at this point in time instead of adding legs, you would need to purchase a flush mount bracket set from a hardware store, and follow the instructions on how to install (or check out this tutorial on eHow)

After the wood was cut, we took the pattern and cut it down one inch smaller on the outsides. We then traced this new smaller pattern onto our 1” foam, and cut out the foam with a sharp knife. We sprayed the back of the foam with spray glue, and placed it centered on the plywood.

The Foam Cut to Size/Shape
Foam Attached to Headboard Wood

Then came covering the headboard with cotton batting, folding it over the back of the plywood and stapling using a staple gun. I have this  great backwards staple gun, that allows you to push the trigger forward instead of backwards, it’s much easier on your hand muscles.

Wrapping the Headboard in Cotton Batting
Headboard Wrapped in Batting

Next up, we laid our fabric face down on a clean surface (we used our kitchen floor covered in a sheet.)

Headboard Laid on Fabric Ready for Upholstering

We then wrapped the fabric around the back of the headboard. This is where it gets tricky, and requires as many hands as you can recruit. Starting with the bottom of the headboard, fold the fabric around to the back, make taut (but don’t over pull and stretch it) and staple to the back of the board. Do this all along the bottom every 4” or so. Then move to the top of the headboard, and starting at the center do the same thing, making sure that the fabric is nice and smooth and flat on the front of the headboard. If your headboard is square, this will all be pretty easy. We of course made a fancy-dancy curved headboard, so it’s a bit trickier.  With a curved design, you will have to make relief cuts to get the curves nice and smooth. You will be using a LOT more staples on the curves, making sure you get all the fabric pulled taut and smooth. You may find that cutting some of the excess fabric off helps, but make sure you leave yourself enough fabric to get a good grip.

Stapling Fabric to Headboard

Work your way around the whole top of the headboard, one side at a time then move to the sides of the headboard.

You will probably want to go over and add a few more staples in places that you may have missed, and cut off some of the flaps of fabric to tidy everything up. Now flip it over, and admire your handy work!

Headboard Upholstered

You still probably want to know why we cut the foam one inch smaller that the wood? We did this as we wanted to add a decorative nail head trim, and we didn’t want it to get buried in the foam. By cutting the foam short, it left us a nice space to lay the trim. We used nail head strips from Lee Valley Tools. They were much quicker and easier to lay straight than using individual nails. You only actually have a nail once every 6 nail heads or so. This was great for the straight parts, but around the curves I wished for more nails. The trim just isn’t as smooth as I would like it. Make your way around the headboard nailing in as you go, and curving the strips to meet the curve of your headboard. We used a small hammer and it didn’t damage the nail heads, but a rubber mallet is recommended.

Headboard With Nailhead Trim
Nailhead Trim Detail

Now quickly rush your headboard up to your bedroom and place it behind your bed and pat yourself on the back. The get out the drill and some bolts, and bolt it to your bed frame, or attach it to the wall.

Headboard Complete & Installed

SOURCE LIST:

Materials:
Plywood- 3/4″ 4×8 sheet cut to size at the store – Home Depot
1″ Foam – Len’s Mill Store
Cotton Batting – Len’s Mill Store
Purple Ultrasuede Fabric – Designer Fabrics
Nailhead Trim – Lee Valley Tools
Spray Glue – Home Depot
Staples – Home Depot

Tools Used:
Jig Saw
Staple Gun
Knife & Scissors
String
Pencil & Paper
Mom

Difficulty Level (on a scale of 1-5):

Three out of five

Total Cost: $70

Pinterest Challenge – Painted Wallpaper

I love Pinterest. I have used it for organizing my wedding ideas, dreaming and planning our home renos, and even a recipe or two.

Most of all it inspires me. It’s like looking through magazine after magazine of gorgeous ideas. A few minutes of Pinteresting and my head is full of great ideas and projects, much to the chagrin of my husband!

So when Sherry @ Young House Love was discussing this years fall edition of their Pinterest Challenge, I decided to jump in with both feet.

I have been obsessed as of late with paintable wallpaper. I just love the texture and depth of it. Take for instance my inspiration shot from Emma @ The Marion House Book. Her use of the paintable wallpaper with a dark dramatic colour in her office is just stunning!

Check out her whole office here.

I already have a wallpapered wall in my Master Bedroom, but I have been thinking about adding some drama to my master closet. It’s not a walk-in closet, nor does it have room for a chandelier or an ottoman or any sort of art. Its just a standard double closet, but why should that stop it from being awesome?!

So I set out to add some drama to my closet by wallpapering & painting the insides of my closet doors! Yeah that’s right, the insides of my closet doors, so that when you open the doors they will scream TA-DA! It will be like having your own sexy magicians assistant hidden inside your closet.

Closet Before

So to put inspiration to fruition. We picked up a roll of (0n sale!) Martha Stewart paintable wallpaper in a pressed tin design, as well as a tester jar of dark purple paint.

We removed the doors from their hinges, then set them up on some saw horses in the guest room. The doors were a bit wider than the roll of wallpaper, and I could have taken the easy way out and just done a paneled insert for the door, but I decided to do it right and cover the entire door. So I laid out my first sheet of paper, wet & booked it, then applied it to the straight edge of the door. We smoothed out the bubbles and ensured the edges were well pressed down.

One Sheet of Wallpaper Applied to Door

We then lined up a second 1/2 sheet of paper (split lengthwise, so I could use the other half for the second door). Matched the pattern, wet & booked and applied the wallpaper. We then did the same thing on the other door.

Wallpaper Applied to Doors

I left the wallpaper overhanging the edges until it all dried. At that point I flipped the doors over. Placed a piece of scrap wood underneath to use as a cutting board. I then cut along the edges of the door with a sharp blade, cutting off the excess wallpaper and leaving a smooth edge.

We then gave the wallpaper two coats of purple paint with a brush. It was a pain to get the paint into all the little crevices! The second coat went much faster than the first.

Painting the Wallpaper
Doors Wallpapered & Painted

While the doors were drying, we gave a coat of dark grey paint to the closet, and prepped for new rods & organizers. We re-hung the doors, and this is what we have now! (sorry about the pic quality, we haven’t had an ounce of decent natural light in days with this storm!) I will take better pics once some sunshine decides to come out and play.


SOURCE LIST:

Materials:
Martha Stewart Paintable Wallpaper in Pressed Tin – Canadian Tire
Behr Sample paint – Home Depot

Tools Used:
Wallpapering kit (wetting container, smoother, sponge, edge roller etc.)
Sharp Blade
Hammer & flat head screwdriver (for removing doors)
Paint Brushes & Trays

Difficulty Level (on a scale of 1-5):

Two out of five

Total Cost: $20

Project Master Bedroom

Our Master Bedroom was actually one of the first rooms we started work on. (in the sense that it got a mini makeover before we started filming our episode of Holmes Inspection.)

Here’s a run down of what we started with: Our 2nd floor Master bedroom is on the small side at 10×12 feet, but we decided to make it our Master rather than the guest room because it had a large double closet, was quiet and away from the busy street, and it had an amazing private second floor deck. The room has one window, a glass door heading out to the deck, and decent height ceilings.

We purchased a new mattress, box spring and standard bed frame when we moved into the house, and brought along with us two tall dressers that my Mom & I had refinished glossy black a few years ago. That’s it. No bedside tables, lamps,  curtains or anything. For the first few months we used unpacked moving boxes as our bedside tables, and those temporary drapes that are made of folded paper. Then the ceiling started leaking in our bedroom, and we cut a giant hole and found ice in our ceiling. Thankfully the Holmes Group came in to help us, but that meant that our house was going to be on tv…with millions of people seeing it, and we had MOVING BOXES FOR BEDSIDE TABLES. Enter Kristen panic attack.

We needed to quickly get the room into a presentable shape before the Holmes Inspection crew came in to film our house, but without painting or doing anything to the actual room. So we did a few projects to get it up to a liveable state before construction. We built a headboard, got a few dressers as bedside tables, hung a mirror, got a couple lamps, curtains and threw in a vase of flowers…I know, its not much but at least we didn’t look like we were living in a shanty town when the camera crew came in.

Here are a few before (and in between) shots:

Master Bedroom Before We Moved In
Master Bedroom after mini makeover before Holmes Inspection Reno
Another View pre-reno

It still however had a long way to being complete!

Here’s some of our Inspiration:

Master Bedroom Pinterest Board

And here’s the Master Bedroom To Do List:

So check back for us (hopefully) knocking all those to-do’s off our list!