I got a Pinterest account two years ago, mostly for pinning my wedding ideas, and then when we bought the house it extended into home decor. I am by no means popular on Pinterest, I just do my thing and at time of publishing this I only have 1576 followers and just over 2000 pins.
I do however have one popular Pin.
Yep that’s right, one. I am not even sure how or when it got popular. I posted it almost two years ago. One day it just had tons of repins.
I love Pinterest. I have used it for organizing my wedding ideas, dreaming and planning our home renos, and even a recipe or two.
Most of all it inspires me. It’s like looking through magazine after magazine of gorgeous ideas. A few minutes of Pinteresting and my head is full of great ideas and projects, much to the chagrin of my husband!
So when Sherry @ Young House Love was discussing this years fall edition of their Pinterest Challenge, I decided to jump in with both feet.
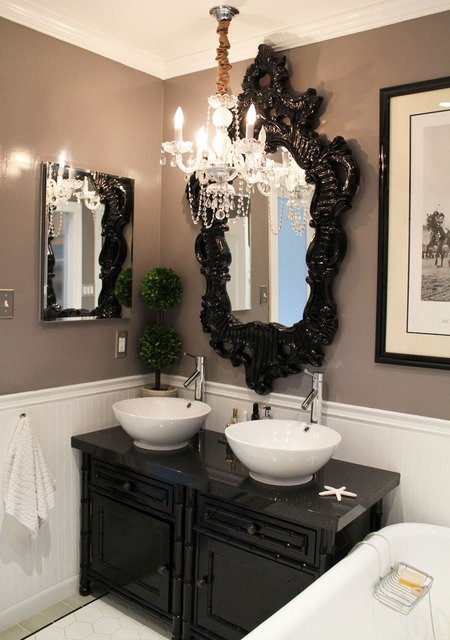
I have been obsessed as of late with paintable wallpaper. I just love the texture and depth of it. Take for instance my inspiration shot from Emma @ The Marion House Book. Her use of the paintable wallpaper with a dark dramatic colour in her office is just stunning!
I already have a wallpapered wall in my Master Bedroom, but I have been thinking about adding some drama to my master closet. It’s not a walk-in closet, nor does it have room for a chandelier or an ottoman or any sort of art. Its just a standard double closet, but why should that stop it from being awesome?!
So I set out to add some drama to my closet by wallpapering & painting the insides of my closet doors! Yeah that’s right, the insides of my closet doors, so that when you open the doors they will scream TA-DA! It will be like having your own sexy magicians assistant hidden inside your closet.
Closet Before
So to put inspiration to fruition. We picked up a roll of (0n sale!) Martha Stewart paintable wallpaper in a pressed tin design, as well as a tester jar of dark purple paint.
We removed the doors from their hinges, then set them up on some saw horses in the guest room. The doors were a bit wider than the roll of wallpaper, and I could have taken the easy way out and just done a paneled insert for the door, but I decided to do it right and cover the entire door. So I laid out my first sheet of paper, wet & booked it, then applied it to the straight edge of the door. We smoothed out the bubbles and ensured the edges were well pressed down.
One Sheet of Wallpaper Applied to Door
We then lined up a second 1/2 sheet of paper (split lengthwise, so I could use the other half for the second door). Matched the pattern, wet & booked and applied the wallpaper. We then did the same thing on the other door.
Wallpaper Applied to Doors
I left the wallpaper overhanging the edges until it all dried. At that point I flipped the doors over. Placed a piece of scrap wood underneath to use as a cutting board. I then cut along the edges of the door with a sharp blade, cutting off the excess wallpaper and leaving a smooth edge.
We then gave the wallpaper two coats of purple paint with a brush. It was a pain to get the paint into all the little crevices! The second coat went much faster than the first.
Painting the WallpaperDoors Wallpapered & Painted
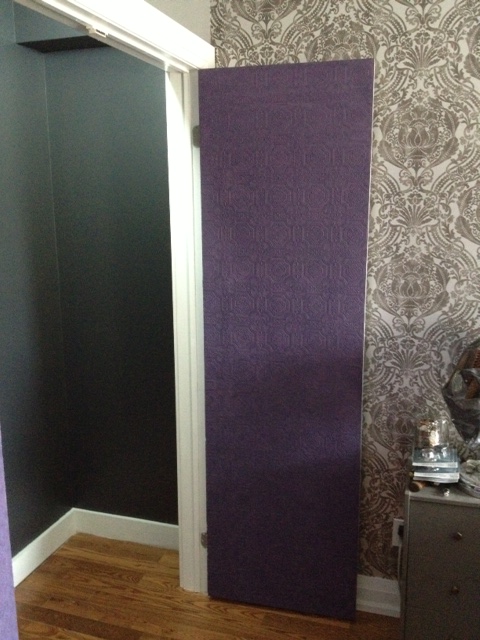
While the doors were drying, we gave a coat of dark grey paint to the closet, and prepped for new rods & organizers. We re-hung the doors, and this is what we have now! (sorry about the pic quality, we haven’t had an ounce of decent natural light in days with this storm!) I will take better pics once some sunshine decides to come out and play.
SOURCE LIST:
Materials:
Martha Stewart Paintable Wallpaper in Pressed Tin – Canadian Tire
Behr Sample paint – Home Depot
Our main floor powder room needed some sprucing up, and you guessed it, de-beige-ing. We wanted something dramatic, yet still functional. I will be posting the results of our powder room facelift in the next week, but wanted to give you a sneak peak of our inspiration, and our to do list. Even though it was a small room, there are still a lot of things on that to do list! (and they are still not all finished…)
I have been working on our office for SIX MONTHS now. That’s right, half a year! Having a clingy spazzy puppy around doesn’t help. The moment you try to get some work done, he wants to play, or is hungry, or wants to go for a walk, or chew on the baseboard, or just wants so sit there and whine until you stop doing work and pay attention to him.
If having a puppy is this bad, I have no idea how people with babies eat, go pee or bathe. If I ever have kids, I just know I am going to be one of those mothers who puts the baby in the crib screaming and goes downstairs and has a glass of wine.
Where was I? Oh yes the office.
Wrangling the puppy was especially difficult when we were painting, or doing things that he could in no way be near. We would take turns working while the other watched the dog, or built a dog play area in the hallway. Needless to say the simplest task ended up taking days or weeks. I am still finishing a few things up, and a few projects are still incomplete, but it’s finally gotten to a point where I may actually let someone see it.
As for furniture; in our last office we built in a custom desk so when we moved to the storefront the desk stayed behind. We also owned a crappy old office chair, that I happily pushed to the curb before we carried away our last moving box.
So coming into the office in the new house, we owned:
A filing cabinet covered in El Granto’s music and snowboarding stickers, which is missing the rails to actually hang files on
A cheap Ikea drawer unit
LOTS AND LOTS of books, antique cameras and crap.
That is not a lot to work from…Try as hard as I did, you just cant make a desk out of crap. It topples over…
So for the first six months of living in the house we used my Grandmother’s 50 year old Ikea card table as a desk, and a folding chair. More often than not we ended up working with the laptop on the sofa downstairs.
Before I post pictures of all our office projects, here is some insight on what we had planned
This board is giving away a ton of hints of what we were up to, so stay tuned for the results!
And here is our great big office plan/project to do list.