Our powder-room was newly renovated before we purchased the house, but was very very bland. The fixtures were in brand new condition, but the space was beige and boring.
We wanted to add some detail to the powder-room reminiscent of our century old home. The night before we closed on our house, my parents came down with truck and trailer to help with the move, and graciously took us to Ikea, Home Depot and Central Fairbank Lumber to stock up on all the supplies we knew we needed for our first weeks (and projects) in our new home.
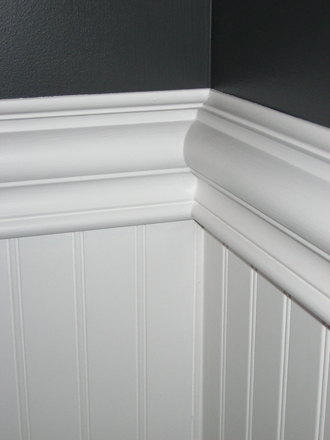
This was our first time visiting Central Fairbank Lumber and I was in LOVE. Their trim selection is to die for. They are also incredibly helpfull, and sorted us out with tons of samples, pricing etc. We finally decided on a style and purchases some chair rail and some beadboard for our powderroom. We went with a solid wood chair rail, and a mdf beadboard for wainscotting. The solid wood beadboard came out much higher in price, and we actually liked the look of the mdf better, the grooves were more well defined.
After we had settled into the new house, I had a week or so off for the Christmas Holidays and I set myself the task of getting started on the powder room. We cut down the 4×8 sheets of beadboard in thirds, leaving us 32″ high sections. We took these down to our basement and put on two coats of primer. HOLY COW. Did the MDF suck up a lot of primer. We had purchased one quart thinking that was plenty, not so, we had to go out and buy more. Priming was a bit tedious with all the nooks and crannies. We used a brush to get into the grooves, and a small foam roller to go over the rest. It took us a good solid afternoon to get it primed. We also primed the chair rail while we were at it.
We also took this opportunity to paint the top half of the wall before installing the wainscoting. We choose a dark dark grey that is almost black. Two coats and it covered beautifully. The hardest part was working with a tall ladder in such a small space.
Next we shut off the water, and set to taking down our pedestal sink. No problem you’d think, right? It was newly installed, didn’t even have caulking on it, only two screws holding it into the wall..it should come out easy as pie, right? WRONG. Whoever installed it didn’t use the installation template nor did they brace the wall with studs. Instead they put two Ez Ancors in the wall, then used two random (too long) screws which when we tried to remove, refused to budge out of the Ez Ancors. We ended up having to pull the Ez Ancors entirely out of the wall to get the sink off. (I now have confidence in the staying power of Ez Ancors that’s for sure!) This left us with gaping holes, and nothing to support the sink when it went back on. So we cut out more of the drywall, reinforced the wall with 2×4’s and re-drywalled. A task that should have taken 2 minutes ended up taking 2 days. This was not a good start to the project…
Finally we got to cladding the bottom of the walls with the breadboard. We started with the largest wall and placed the beadboard directly on top of the baseboard. We used PL premium adhesive to glue it to the walls and then used some brad nails to hold it in place. We moved around the room cutting the boards to size as we went, and cutting out around obstacles. We deliberately made one board finish right beside the sink plumbing so that it would be nice and easy to notch out around the pipes. The walls were not completely square, so we did have a few gaps at the corners but nothing that some caulking couldn’t fill. We then measured and cut our chair rail. We opted to place the chair rail over top of the bead board which meant that there was a small gap between the wall and the chair rail. We purchased some quarter round to fill it and top it off nicely. We used more PL premium and brad nails to secure all the trim.
We filled all the nail holes and gaps with DAP paintable caulking and did some more touch ups with the primer. Then the wainscoting got two coats of bright white paint.
We were now ready to re-install the sink. We thought we has figured out all our sink woes, but we were wrong. The 3/8″ thickness of the beadboard now made the p-trap not fit. Instead of using an adjustable p-trap, the installer had hard plumbed it. So we headed to Home Depot to buy an adjustable p-trap. We tried to install it and noticed that the end that hooked up to the sink fit great, but going into the wall the p-trap pipe was too skinny. What the what?! They plumbed the wrong size pipe in the wall, and had hard plumbed it because they had to use a reducer to get the pipe size down, and it being such a compact space, an adjustable p-trap wouldn’t fit.
Now what?! We bought every p-trap the store sold and nothing would work. Were we going to have to buy a new sink? Rip out our new wainscoting and re-do the plumbing in the wall?! Before calling in a plumber we headed to Rona to see if they had any answers. The incredibly awesome plumbing guy knew exactly what we needed. A self contained p-trap. What’s that? It looks like this:
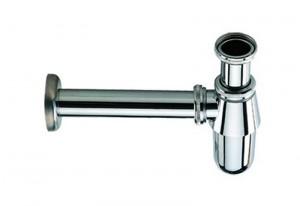
It takes up much less space (and is prettier!) than a normal pea trap. However they are expensive and special order. But wait! Awesome Rona plumbing guy thinks they had one that was special ordered and returned. He went to look and came back with a badly battered box with an intact p-trap. He sold it to us at a large discount and we skipped out of the store! It took us 5 attempts at installing until it didn’t leak, but finally we got the sink back on and secured to the wall, and water turned on. Phew! Plumbing blows.
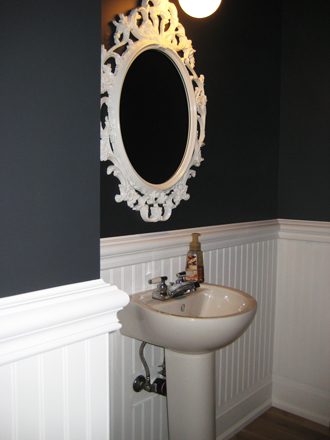
We could finally get back to finishing the bathroom, we hung our bathroom project mirror.
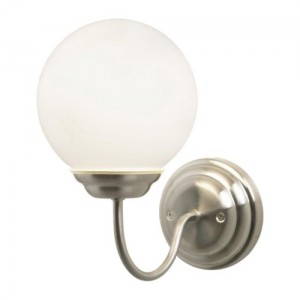
A new light.
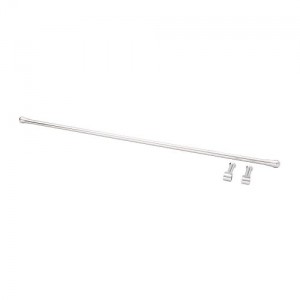
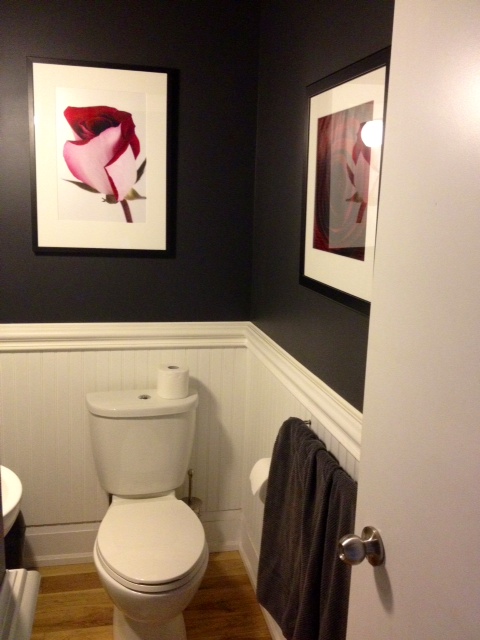
A new towel rack.
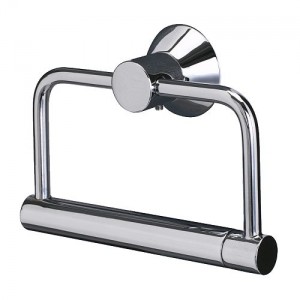
And a new toilet roll holder.
We then hung some photos and TA DA! A pretty place to poop fix your makeup.
SOURCE LIST:
Materials:
Chair Rail: Central Fairbank Lumber #48
MFD Bradboard: Central Fairbank Lumber
Quarter Round: Home Depot
Ikea Ung Drill Frame: Ikea
Ikea Lillholmen Light: Ikea
Custom Cut Mirror: Cascade Crystal
Wall Paint: Behr Premium Plus Ultra Eggshell in Cracked Pepper
Primer: Behr Premium Plus Interior Enamel Undercoater, Primer & Sealer
Wainscotting & Trim Paint: Behr Premium Plus Pure White
Mirror Paint: Rustoleum Universal All Surface in Gloss White
Dap Caulking: Home Depot
Towel Rack: Ikea Baren
Toilet Roll Holder: Ikea Savern
Tools Used:
Mitre saw, circular saw, tape measure, level, brad nailer & compressor, paint brushes & rollers, ladder,
Difficulty Level (on a scale of 1-5):
Total Cost: $250



Looks great! Can you please provide the specific color of the gray? Thanks!
It’s Behr Cracked Pepper. I love it! We also (coincidentally) used it on the exterior of the storefront as well!