
Our powder-room was newly renovated before we purchased the house, but was very very bland. The fixtures were in brand new condition, but the space was beige and boring. Continue reading “Powder Room Facelift”
Tag: chair rail
Painting The Office
I love Amy Butler fabrics. When I stumbled upon the fact that Graham & Brown had an Amy Butler wallpaper line, I was in love. I drooled over the designs, ordered samples, and set my heart on the Fountain Pattern in Stone. Continue reading “Painting The Office”
Installing Office Chair Rail
I like trim & moulding. Scratch that. I am kind of obsessed with it. Especially in an Edwardian home, I feel like we should have trim everywhere. Baseboard, Wainscoting, Board & Batten, Chair Rail, Plate Rail, Crown Moulding. I love and want it all.
So every room we reno, I tend to try to sneak in some trim. The office was no different. It was crying out for a chair rail. The one problem with the office was well, the walls were about as straight as Elton John. My favourite chair rail, which is a solid oak, ¾” thick beauty from Central Fairbank Lumber would be amazing, but would not fair so well with my squiggily walls. I needed something a bit more pliable. So El Granto, Odin & I walked to Downtown Lumber and picked out a lovely simple mdf pre-primed chair rail, and carried it home. Yes, I said carried it home. We do not own a car. So when we need building materials, we either rent the home depot bring it home van, or we buy from Downtown Lumber and walk the 2.8km along the West Toronto Railpath to and from Downtown Lumber. If you ever spy two crazy looking people and their red dog carrying home a 2×4’s on the walking path, that would be us. It’s actually not that bad. One person can easily carry a few 8 foot boards, it’s when it comes to 10 or 12 foot boards, that it’s helpful to have a friend. The biggest thing we brought home were 2x8x12’s for the deck. Those suckers were heavy! The folks at Downtown Lumber are even so kind to tape together multiple boards for me, so it’s easier for me to carry home.
Back to the task at hand… We walked home with our chair rail, and I quickly measured up my walls, and made a cut list. As our miter saw is in the garage, I prefer to do a cut list with all my angles, and head to the garage to cut everything at once. I am anal retentive when it comes to measuring and my trim cuts, so they are usually bang on. I quickly cut all the pieces. It was really simple as the whole room was only 5 pieces, so 10 cuts. My chair rail was a shallower depth then my door molding, so we decided to do flush cuts at the door frames. This means out of my 10 cuts I actually only had to miter the two corners (hint hint, this means that the other two corners in the room house my built in bookcases.) I then marked where the studs were on the wall and brad nailed the trim in place.
Now here is some edumacation for you. This is what a 2” brad nail looks like when you hit a drywall screw in the wall. He’s not a happy nail, neither was El Granto when he had to pull that angry nail back out.


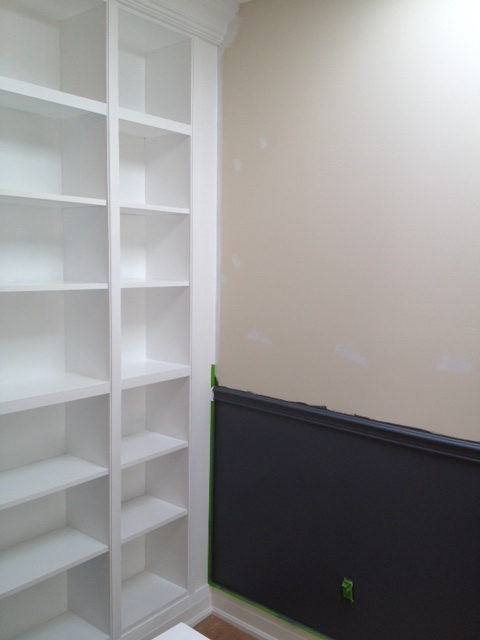
When setting the chair rail position, I originally laid it out level. As the floor is not the least bit level, it looked really off. Instead I decided to make it parallel to the floor, which meant to the eye it would look all nice and straight. In cases like this, doing it right will make it look all wrong. So there is my advice, DO IT WRONG. Brilliant eh? Using the flexible MDF chair rail worked so well. It curved to our wacky walls perfectly. Now, had we painted out the chair rail white it would have accented how crooked the walls are, but as we were painting the chair rail the bottom wall colour, it would (hopefully) blend in.
We then filled all the nail holes with paintable caulk, and ran a tiny bit along the top of the chair rail, which made it look seamless to the wall.

Then it was time to PAINT!
HAHA aren’t I a tease? Painting post tomorrow I promise.
SOURCE LIST:
Materials:
MDF Chair Rail: Downtown Lumber
Brad Nails: My Garage
DAP Paintable Caulking: Home Depot
Tools Used:
Miter Saw, Measuring Tape, Compressor & Brad Nailer, Level
Difficulty Level (on a scale of 1-5):
Total Cost: $40