DIY Tips – Fill Them Holes

***UPDATE! THESE DO NOT WORK WITH BILLY BOOKCASES***

So you know how Ikea (or any prefab) cabinets & bookcases have all those shelf holes for allowing you to move your shelves around willy nilly? They’re super useful, but they leave unsightly dark holes that clearly give your shelving unit away as not being custom built. I happen to hate these holes. So much so, that I painstakingly filled them all with paintable caulking in my Custom Ikea Billy Built-In Bookcase project. This took me 6 hours to do, but well worth it. At the time I thought there could be no easier way…

This past weekend, the clouds opened, angels sang, and I found the answer to all your shelf hole problems.

While waiting in the Ikea Kitchen infodesk line last Saturday night, I spied a basket full of strange little objects. I picked one package up and regarded it curiously, then a light bulb went off in my head!

Do you know what these are?

Yes, brilliant brillant Ikea has made SHELF HOLE FILLERS! They’re little plastic pieces that you pop into your unused shelf holes. AWESOMESAUCE! These little guys come in packages of 100 for a whopping $1, and in either black or white.

I swiftly grabbed 4 packages, and then insisted on telling the helpfull (but probably slightly scared) Ikea sales rep about how amazing this invention was.

As soon as I got home I set to filling all the holes in my upper cabinets in the coffee bar & the rest of the glass door fronted cabinets in my kitchen.

Shelf Holes Before
Shelf Holes Before
Shelf Holes After
Shelf Holes After

YOUR MIND IS BLOWN, RIGHT?! (or am I the only person in the world who gets this excited about filled shelf holes…)

Total Cost: $3 ($1 per cabinet) my fingers did get a bit sore after pushing in 300 of these puppies, but a small price to pay for sexy looking cabinets.

Go pick some of these up at your local Ikea, then send me tearful letters about how  they changed your life.

best.invention.ever
best.invention.ever

*UPDATE!* Variera Cover Cap’s are now available online at Ikea.ca
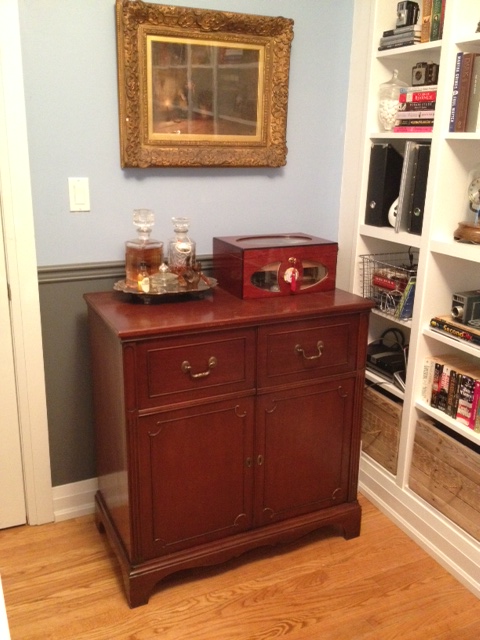
Vintage Hi-Fi Unit to Bar

El Granto always wanted a bar. Not just any bar, but a man’s bar. One to hold bourbon and cigars, mustaches and testosterone. One that smelled like rich mahogany and leather bound books.

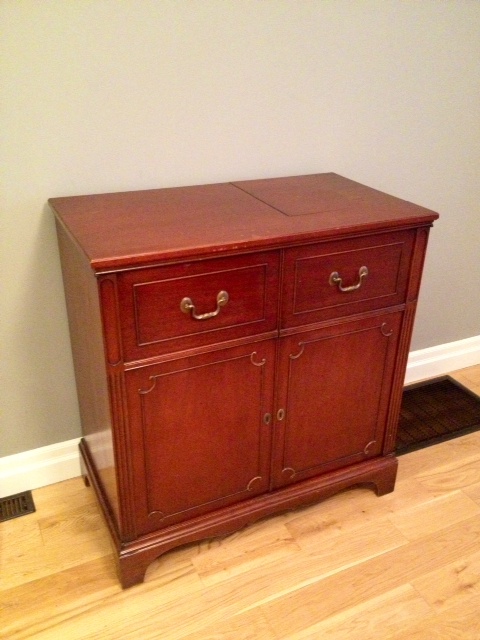
We were at Aberfoyle Antique Market one Sunday when El Granto spied a vintage Hi-Fi cabinet. It was solid wood, had two doors on the front, and a pop up panel in the top where the record player used to go. It had long been stripped of the electronics, but still had all the charm. El Granto saw the potential for this to be an amazing bar. He could already picture himself drinking a Tom Collins while smoking a Cuban. So we haggled, packed it into the (in-law’s) car, and brought it home.

The Hi-Fi Unit
The Hi-Fi Unit
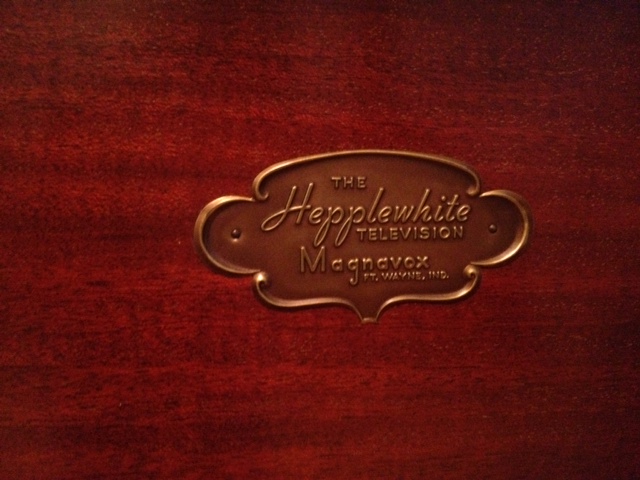
It was a "Hepplewhite Television" by Magnavox
It was a “Hepplewhite Television” by Magnavox

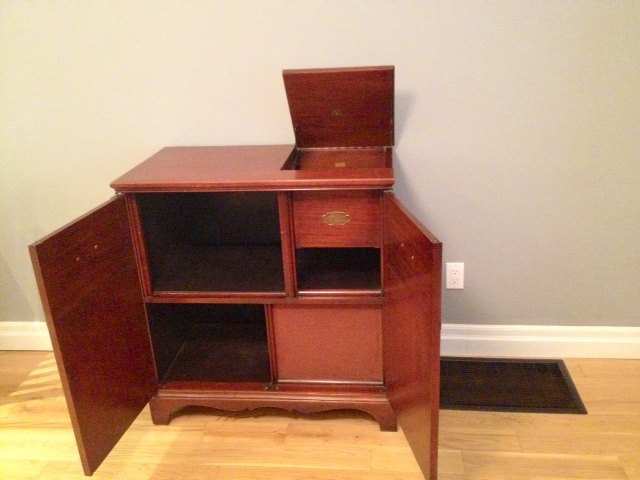
Problem was, the unit had no shelves (it needed 2), nor did it have a back. There were shelf cleats in the main cabinet where the TV had been held in place and a gaping hole where the record player used to be (it had a really cool mounting system where the record player just sat on four cleats that had springs on them so you wouldn’t skip your record while walking by or dancing around). So we just measured shelves to fit where electronics were previously. We knew we were not going to be able to match the wood and finish.  So really the slate was blank for whatever kind of shelves we wanted. We purchased some 3/8” hardboard, had it cut to size at the hardware store and got to work. We bought some black faux ostrich leather fabric and wrapped and glued it on to the hardboard and dropped them in place. Easy Peazy Lemon Squeezy. We then gave another piece of hardboard a coat of black paint and nailed it to the back of the bar.

The Bar with shelves and a back installed

El Granto uses the pop up drawer to hold misc cigar items, his humidor sits on top, the inside is full of bottles and bar wear.

The Pop-Up where the record player used to sit
The Pop-Up where the record player used to sit (those tubes are empty)

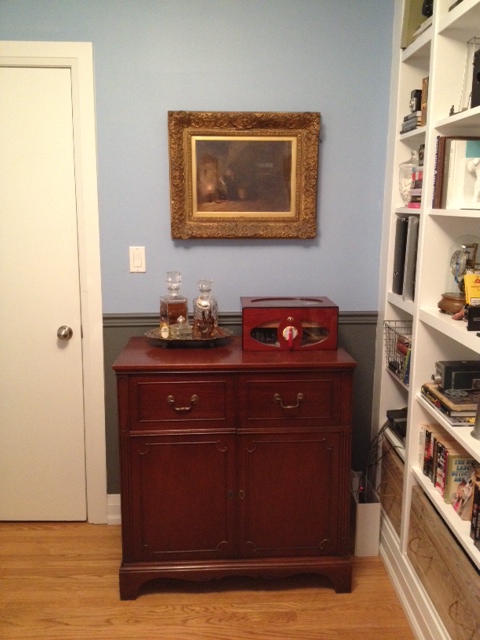
The top also has an antique silver tray, decanters and decorative items.

The bar used to live in our dining room, but after we added the big new table and the coffee bar, the poor bar had no home. Sad face.

So we emptied it out, and carried the HEAVY bar upstairs into the office. Now it resides under an antique painting, and beside the bookcase.

The bar's new home
The bar’s new home
He looks dapper here don't you think?
He looks dapper here don’t you think?

The office is becoming more manly. I am expecting it to grow chest hair any day now.

Hide Your Ugly Office Tech

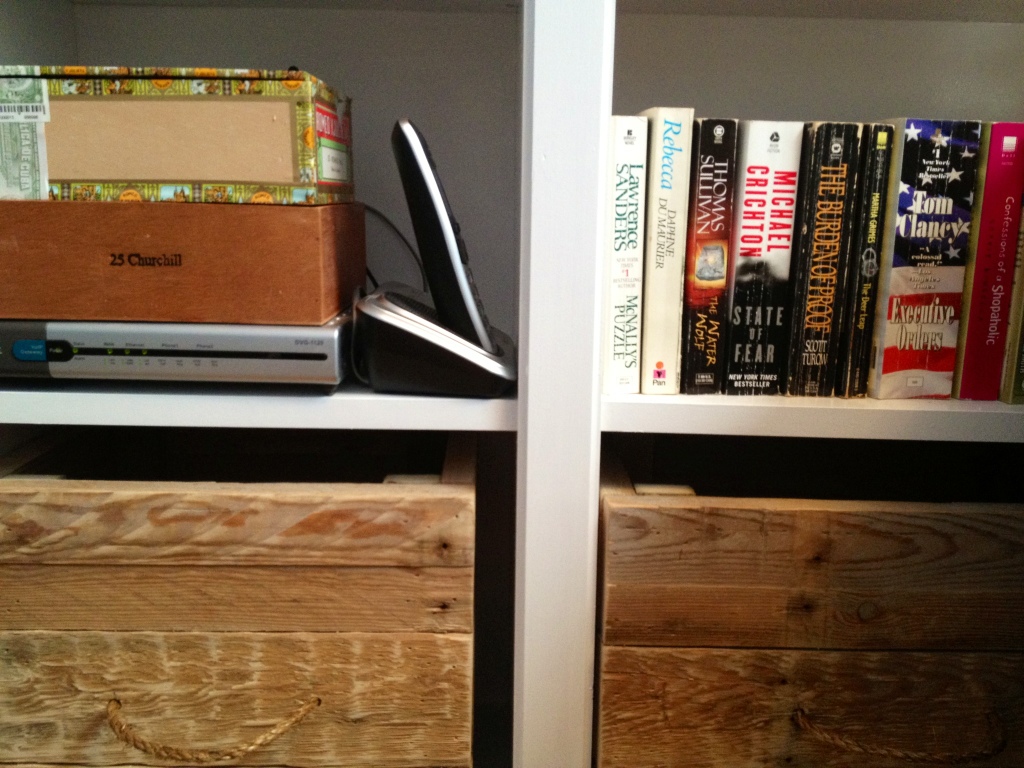
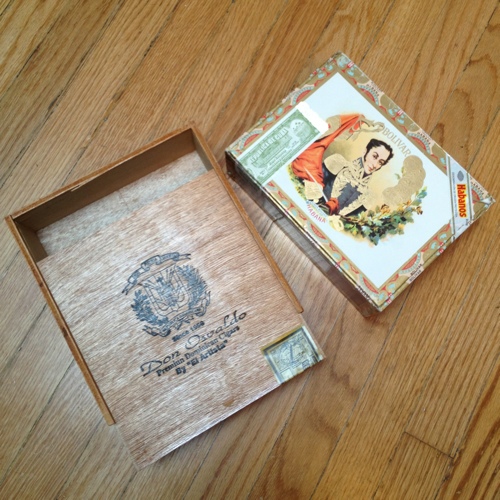
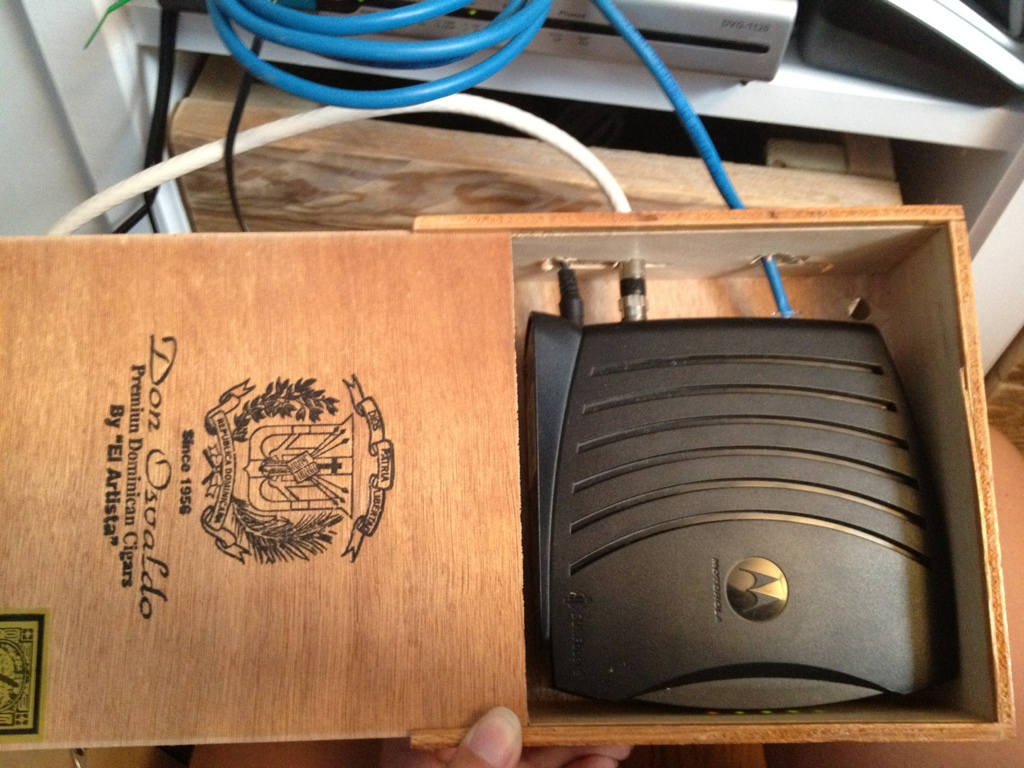
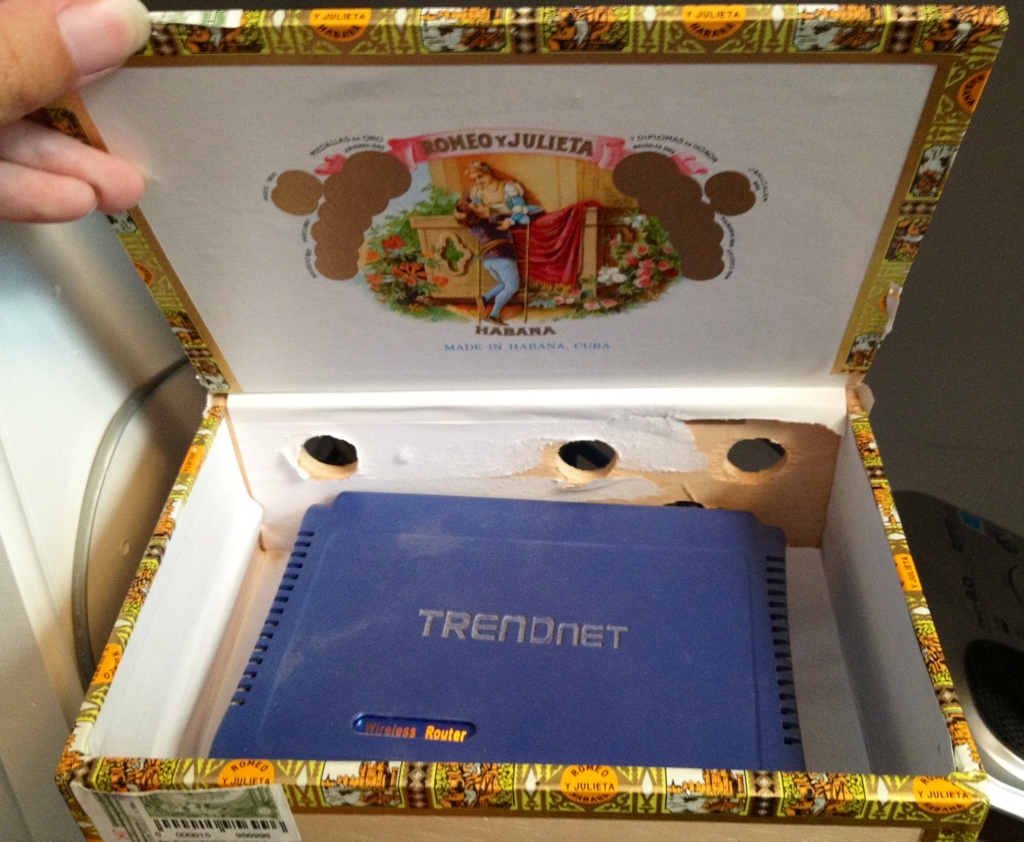
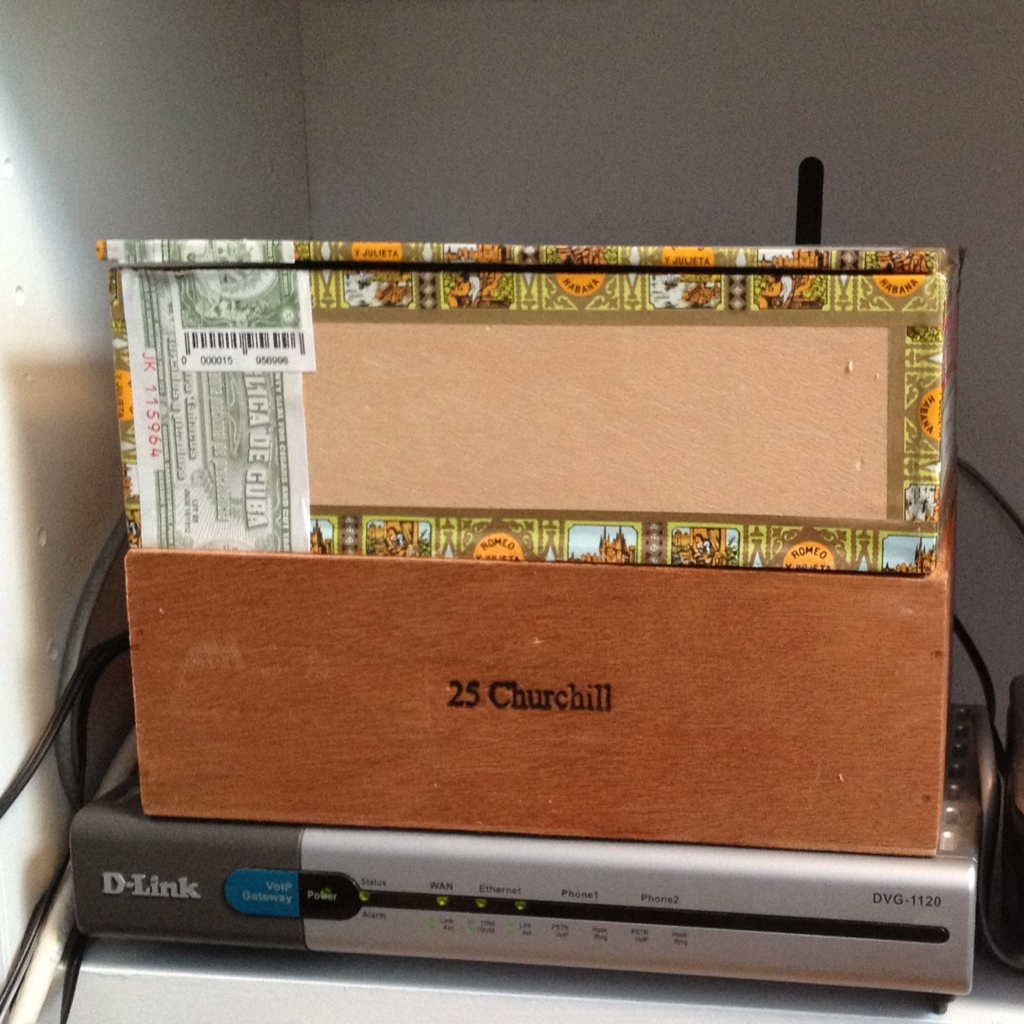
I enjoy having internet, hell without it I wouldn’t be posting this. However I hate all the technology required for it. Wifi cable modem, router, cables, wires…yuck. They are always a tangled mess of blinking lights and ugly plastic. So what do you do about it? Make friends with some cigar smokers (thanks El Granto & Father in-law) & steal some of their pretty cigar boxes.

Drill some holes for cables, antennas and air flow in your cigar boxes. Plunk your tech junk in them and stack em up.

20120903-191824.jpg

20120903-192041.jpg

All our tech fit into two boxes other than my stupid VOIP gateway which is giant and stupid, and wouldn’t fit in anything. There… I told it. (until I find a box or old book for the gateway to fit in, he will just sit below the boxes.)

No one would know these unsuspecting boxes on my bookshelf hold all that ugly crap. There may be dirty dishes in the sink and laundry piling up but it makes me sleep a little better at night knowing that my tech junk is neatly tucked away.


So now you have no excuse. Go hide your tech!

SOURCE LIST:

Materials:
Cigar Boxes: Unsuspecting Family

Tools Used:
Pencil, Drill,

Difficulty Level (on a scale of 1-5):

One out of five

Total Cost: $0

Office Closet Storage

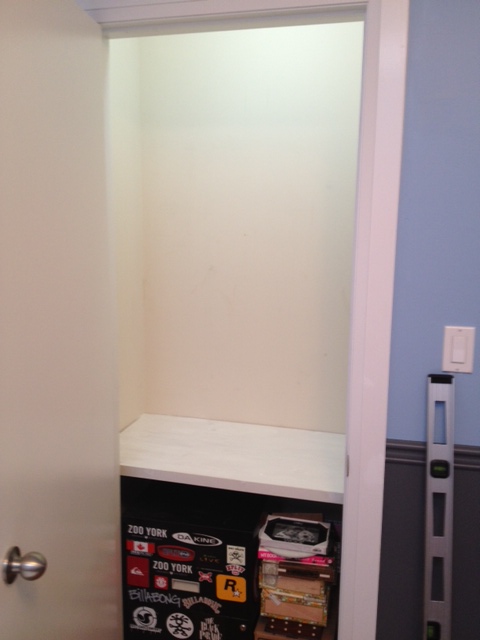
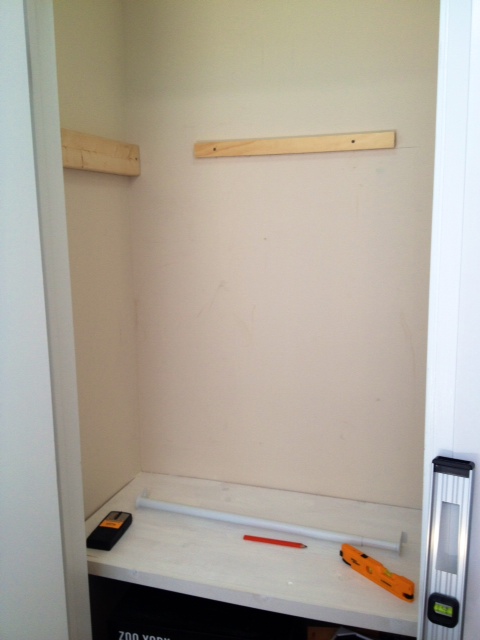
As our office is actually our third bedroom, it conveniently had a closet. A closet was the perfect place to store all the not so pretty office essentials. i.e. paper, cd’s, printer, El Granto’s ugly utilitarian college filing cabinet, as well as some oversize items that take up a lot of space in our own closet (I’m looking at you luggage…) To get the best usage out of our closet, we decided to place the filing cabinet on the floor of the closet and to build a shelf over top of it to house the printer and misc supplies. I mentioned to El Granto that I would like to work on this mini project after work one night and I came home it was magically built! I quickly put a coat of primer on it.

Closet Shelf Primed

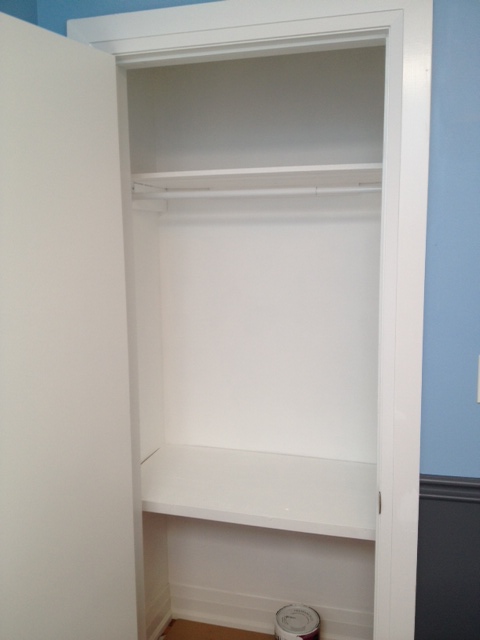
Then stood back and said, well now that works so well we need MORE shelves. We decided to put in a shelf and a closet rod so we could hang extra clothes or for if the office is ever turned into a nursery. So we got to work, hung a rod and another shelf.


I then primed it all and gave the whole closet two coats of white paint. It’s not like anyone will be inspecting my office closet, but it just neatened everything up. Now all our crap unattractive items can be safely shut behind doors (and I have a place to quickly shove rogue office items when company is coming over.)

Office Closet Painted

The office is really starting to shape up now!
SOURCE LIST:

Materials:
5/8″ Plywood for shelves: Home Depot
2×2’s and 2×4’s for shelf supports: Home Depot
Behr Sealer and Undercoater: Home Depot
Behr Premium Plus Interior Eggshell paint in Pure White: Home Depot
Frog Tape: Canadian Tire
Closet Rod: Home Depot

Tools Used:
Circular saw, measuring tape, level, stud finder, drill, small foam paint roller & brush

Difficulty Level (on a scale of 1-5):

Two out of five

Total Cost: $10 (most materials were left overs from other projects)

Ikea Goliat Drawer Unit ReHab

A long long time ago, when El Granto & I moved in together, El Granto was still in school, I had just graduated and was working my first big kid job. We had no money, ate copious amounts of pasta and potatoes, and spent what was left on (cheap) beer.

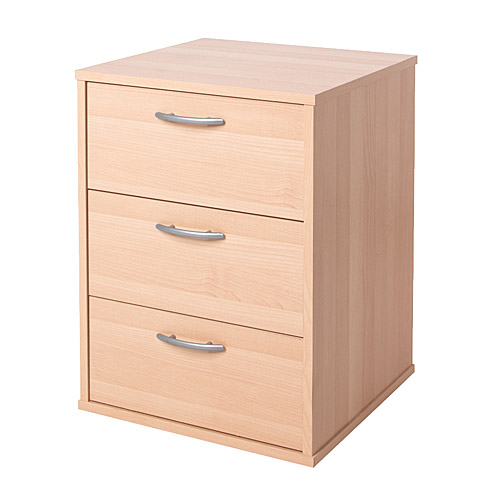
Needless to say our furniture consisted of things we’d stolen from our parent’s houses. We did manage to purchase a few new things; some drapes, a few Ikea Lack side tables, and a Ikea Goliat drawer unit that we used as a night stand/little dresser in our bedroom.

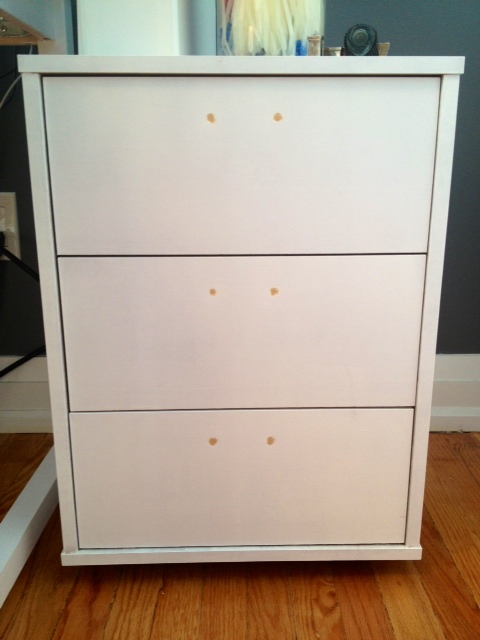
Ikea Goliat

That unit later graduated to living in our office when we purchased real bedside tables, and has now lived through 8 years of our abuse. It holds all the strange things one accumulates. Also known as the junk drawer. It houses batteries, calculators, phone & camera chargers, memory cards, travel voltage adapters, a screw driver, camera batteries, luggage tags, a sling shot etc. “Important” stuff don’t you know where else to put.

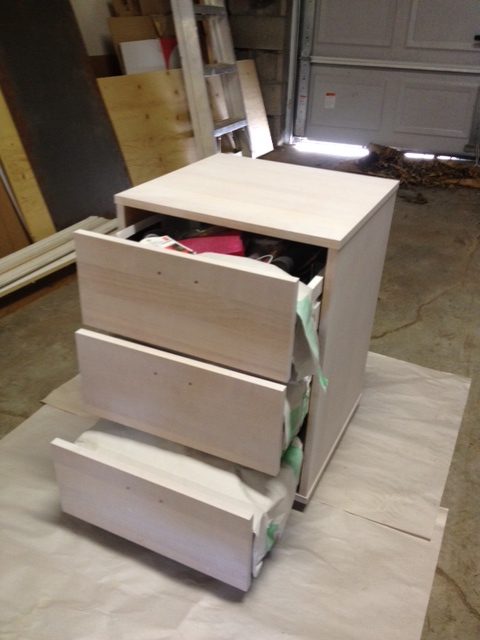
When faced with the office reno, we wanted to keep our useful friend Goliat, but he needed some cosmetic help. His laminate “birch effect” finish looked like plastic, and the handles were not even trying to disguise the fact that they were plastic. He needed help! So we carried him out to the garage, took off the handles, scuffed him up with some sandpaper, and gave him a coat of Zinnsser B-I-N primer. In hindsight I should have given it two coats, it would have probably eliminated one of my coats of paint later.

Goliat Drawer Unit with One Coat of Primer

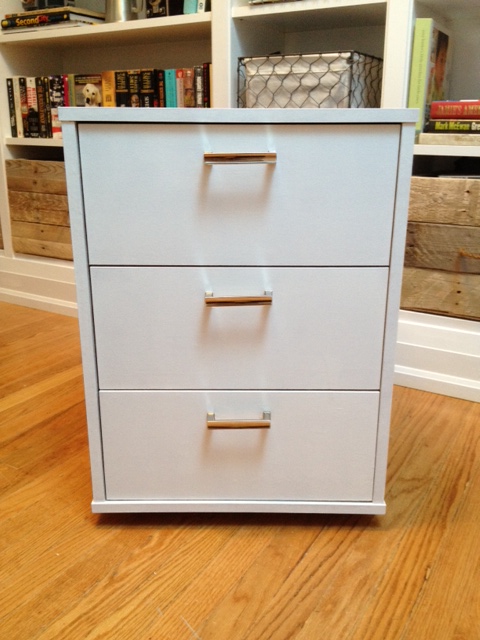
After priming I gave it a quick sand, and added 3 coats of white gloss interior/exterior paint. We let it dry, and added three new Martha Stewart 3 in. Channel Cabinet Hardware pulls from the Home Depot.

The hardware was a bit of a pain to be honest. I sourced from their website. The handle I chose said “in store only” so I walked the 3km to Home Depot to find the crappiest selection of in stock hardware ever! I was astonished at how dated and bad it was. After spending 20 minutes to finally track down the kitchen designer, I found my hardware on a sample board in a drawer. The Martha Stewart hardware was all spectacular and well priced, but SPECIAL ORDER! UGH. I hate the words special order. It means waiting, delays, incorrect shipments and anger. I had fallen in love with the handles, so I sucked it up and ordered.

I ordered on a Monday, and the kitchen designer said it should be in store in about a week. They arrived in store the following Monday (yay!) I brought them home and realized I had measured incorrectly. BLARG. Stupid Kristen. They’re too big. They’re not even the right size for other projects around the house that need new handles.

So… I had two options. Return them and order some new ones, or fill the holes in the drawer unit, touch up paint, and re-drill them. The problem with ordering new ones, is that the smallest any of the pretty Martha Stewart ones came in was 3″ and the Ikea drawer unit was SMALLER than that. Leave it to Ikea to not use standard sizes!

So I filled the holes… (AFTER I HAD ALREADY PAINTED IT) and then PAINTED IT AGAIN. Do my capitals express some of my angst?

Wood Filling Holes
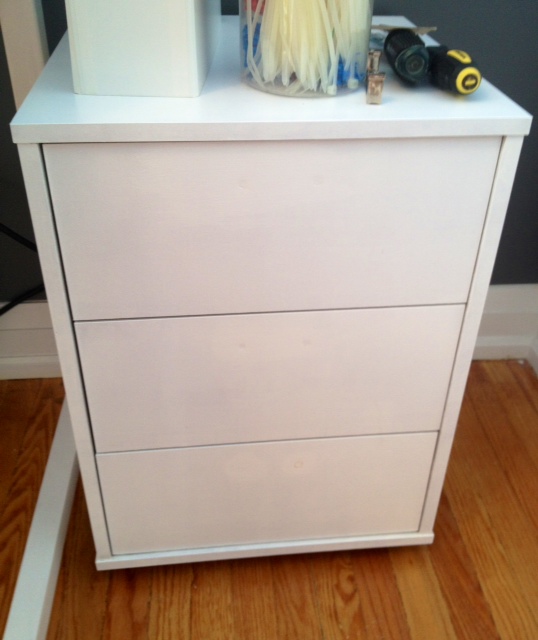
Drawer Pull Holes Filled and Painted

I then marked and drilled new holes for the new hardware, and FINALLY it was done!

Finally Finished!
Handle Close-Up

SOURCE LIST:

Materials:
Previously owned Ikea Goliat Drawer Unit
Zinnser B.I.N. Primer (spray can): Canadian Tire
Behr Premium Plus Interior/Exterior Glossy paint in Bright White:  Home Depot
Frog Tape: Canadian Tire
Martha Stewart 3 inch Channel Pulls: Home Depot

Tools Used:
Paint Brush, Small Foam Roller & Tray, Sand paper, Screw Driver

Difficulty Level (on a scale of 1-5):

Total Cost: $25 (we already owned the Goliat unit)

Ikea Dining Table to Desk

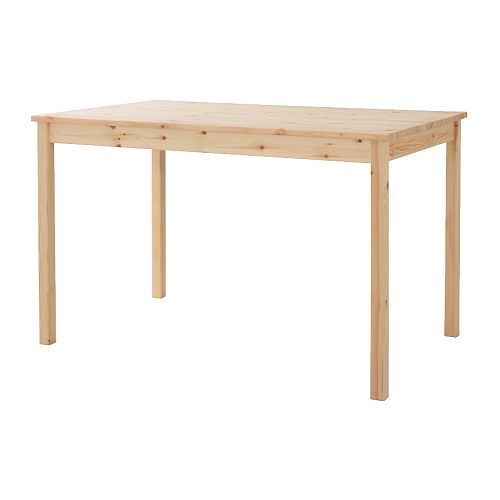
We needed a desk for the office. We loved old bankers desks, and lovely chunky vintage desks, but we had one problem. Whatever desk we wanted in the office needed to be able to fit up our tiny staircase, or be hefted up and over our second floor deck. Otherwise it needed to be assembled on site. After lugging our mattress and other large furniture up and over the deck, I was in no way, shape, or form, about to do that again. So it looks like we were building something on site. We didn’t need anything fancy, just a desk to use the computer on and store unpaid bills. I cost out the materials to build a simple table ourselves, then I thought to myself: self just suck it up, be the cheap ass that you are and buy something from Ikea! It will be less expensive, less work, and you get to spend time with the happy little Ikea man assembling it.  So we reviewed the cheapest Ikea desk solutions, and discovered that the Ingo Dining Table was exactly the size we needed, and was made of solid unfinished wood, and was SIXTY NINE dollars.

Ikea Ingo Dining Table

Yes that’s right, a solid wood desk for less a hundo. Sign me up. So we got our dining table, assembled, and then decide what to do with it. I loved Katie’s Ingo desk hack so I thought I would give that a try. Then my brad nailer and I got in a fight, he decided he would shoot nails sideways out of my project and after many a screaming match, we decided to divorce.  So decorative trim on the desk just wasn’t going to happen. Instead, I installed a bottom cross piece, primed, sanded and painted it with two coats of white paint, wiped my hands, signed the alimony agreement, and called it a day.

SOURCE LIST:

Materials:
Ingo Dining Table: Ikea
Zinnser B.I.N. Primer: Home Depot
Behr Premium Plus Interior/Exterior Glossy paint in Bright White:  Home Depot

Tools Used:
Paint Brush, Small Foam Roller & Tray, Sand paper

Difficulty Level (on a scale of 1-5):

Two hammers out of five

Total Cost: $80

Office Lighting

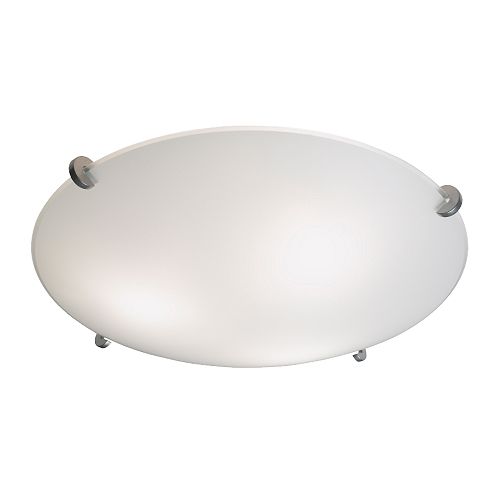
The office light was originally a Ikea Erbium ceiling light that the moment a truck drove by would shake and rattle so hard you thought it was going to explode and rain glass down on your head.

Ikea Erbium Light

Not only was the light noisy, it was also b.o.r.i.n.g. So we needed to change things up.

We needed a fancy, pretty, shiny new light.

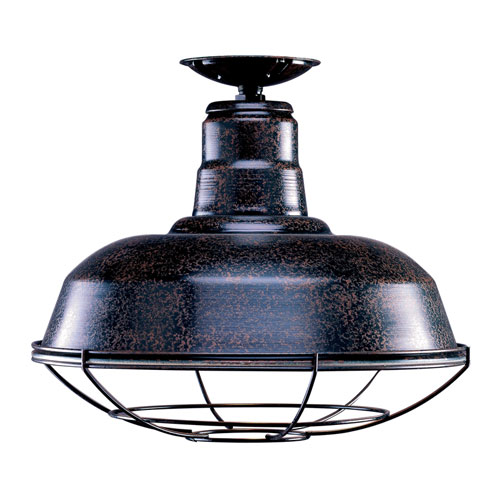
I started looking at Barn Light Electric‘s offerings and lusted after their Flush Mount Warehouse Pendant

Barn Light Electric’s Flush Mount Warehouse Pendant

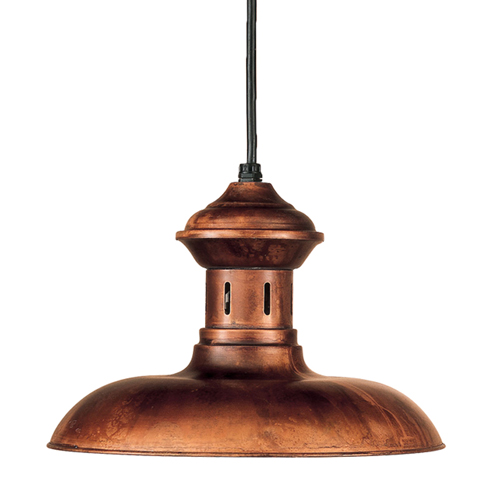
I dreamed about  the Cimarron Pendant

Barn Light Electric’s Cimarron Pendant

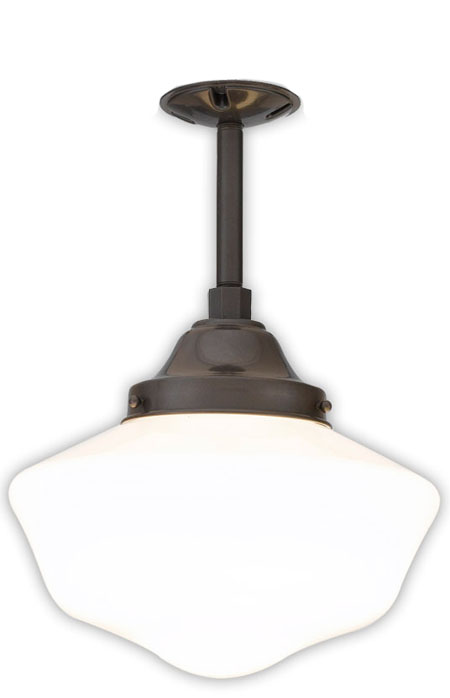
And I swooned over School House Pendant “The Volusia”.

Barn Light Electric’s School House Pendant “The Volusia”

Then I realized I had already long ago spent the whole budget for the room on the makings of the bookcase and the desk, and I had NO budget left for lights. That meant that buying from Barn Light Electric, shipping to Canada, and then paying brokerage & duty fees was not going to be a feasible endeavor. Enter sad sad Kristen face.

So ‘pretty’, ‘new’, and/or their friends ‘shiny’ and ‘fancy’ were out of the question. We needed something cheap.

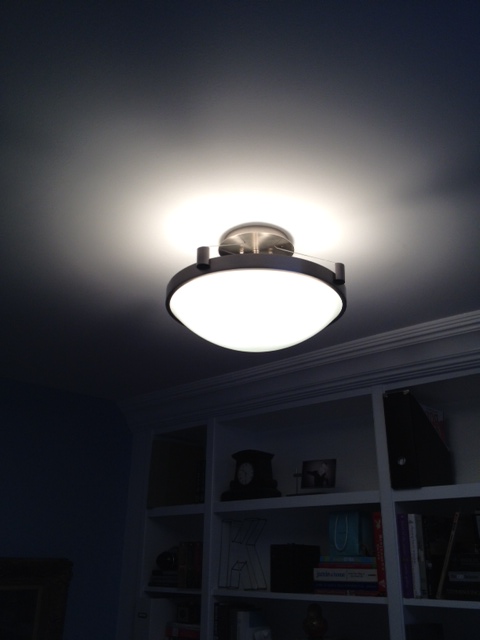
We just so happened to have a random light we took down from our bedroom sitting around taking up space and we swiftly swapped it out. It’s better, its not great, but will make do for now. The room has so much natural light from the giant skylight, that the light wouldn’t be on much anyways. So here it is, the new old light.

Moving forward I will be daydreaming about changing it out for one of the lusty Barn Light Electric lights.

Yeah…I’m a lighting loving weirdo, I know…

From Billy to Built-Ins

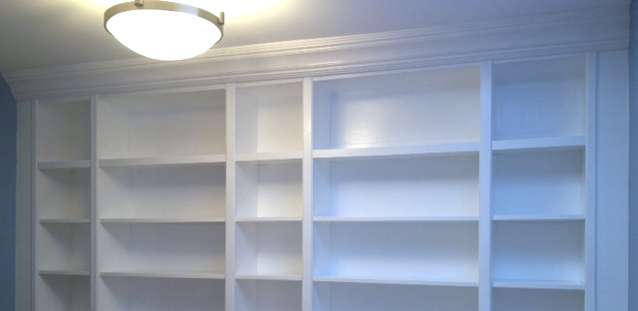
Our house is a three bedroom, two large bedrooms and one smaller. The smaller is of course the best choice for either an office or nursery. We wanted to plan for an office now, and if we ever needed it down the road, an easy transition to a nursery. Continue reading “From Billy to Built-Ins”

When it Rains it Pours (The Chair Hunt Part II)

I posted about my chair hunt less than a week ago.

By that point I had been scourging Craigslist & Kijiji for an antique bankers chair for weeks. I had dragged El Granto into many an antique store, and even shook my fist at the TV when I saw Sarah Richardson had found one at an antique store on queen street. I wasn’t mad at Sarah, I was mad that I hadn’t been there first!

So I wrote the post, and sent my Mom an email asking her to keep an eye out for a bankers chair (she’s even more resourceful than I am) I then forgot about putting my chair request out into the world, and got back to work.

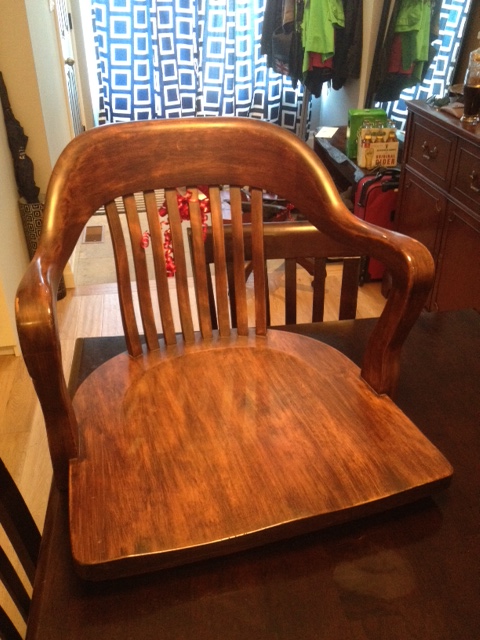
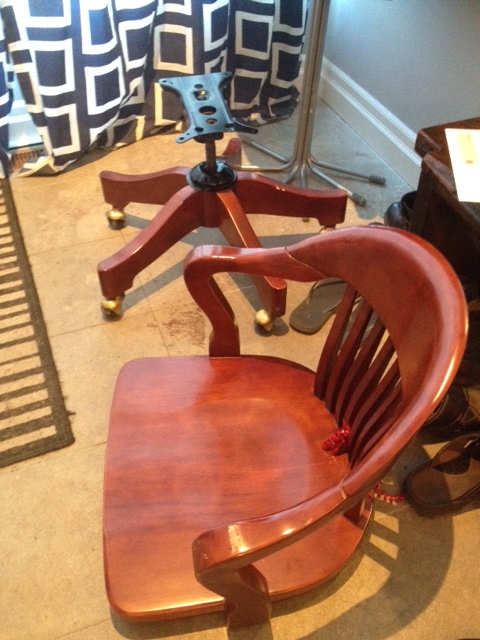
Fast forward to Friday. My Mom comes for a visit, and shows up with not one but TWO bankers chairs. One antique that was in brilliant shape, and had the original chair mechanism and everything, and a second one that was a more modern version. I was flabbergasted. My Mom had found the vintage one on Craigslist for a steal, and the second one was found on the side of the road by my Mom & Dad’s friends.

Antique Bankers Chair that my Mom Sourced from Kijiji (unassembled)
Modern Bankers Chair that my Mom’s Friends FOUND on the road! (Mom had to take it apart to fit it in the car)

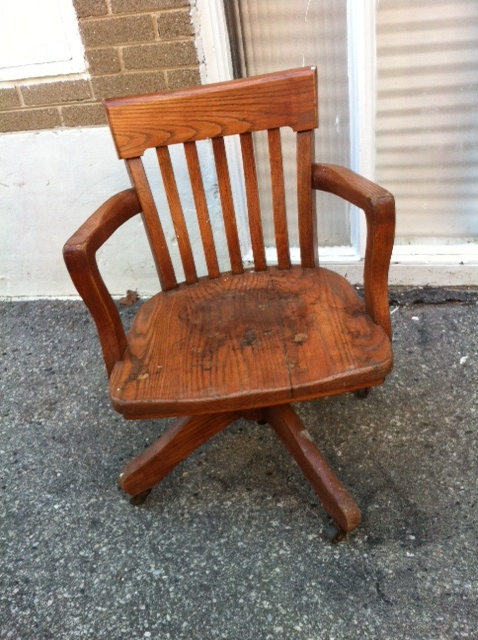
Then I go into work on Monday morning and get an email from a co-worker that says “Look what we found on the curb!”

The Chair my Awesome Co-Worker found at the Curb

SERIOUSLY?! I couldn’t find one if my life depended on it, and two people managed to find ones thrown out for garbage on the side of the road?! Hell, I should just give up my searching for things, and make a list for everyone else to find. Thank you all so much.

I am also looking for old reclaimed red bricks for a new patio, and some old picture frames…just saying.

Here’s the antique chair assembled in the office

Antique Bankers Chair