DIY Tips – Fill Them Holes

***UPDATE! THESE DO NOT WORK WITH BILLY BOOKCASES***

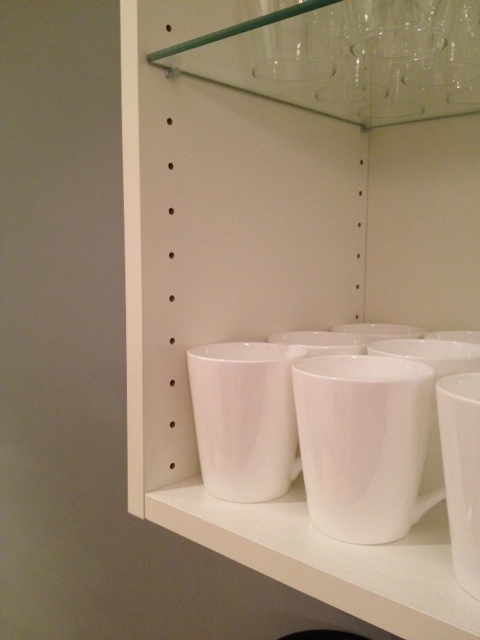
So you know how Ikea (or any prefab) cabinets & bookcases have all those shelf holes for allowing you to move your shelves around willy nilly? They’re super useful, but they leave unsightly dark holes that clearly give your shelving unit away as not being custom built. I happen to hate these holes. So much so, that I painstakingly filled them all with paintable caulking in my Custom Ikea Billy Built-In Bookcase project. This took me 6 hours to do, but well worth it. At the time I thought there could be no easier way…

This past weekend, the clouds opened, angels sang, and I found the answer to all your shelf hole problems.

While waiting in the Ikea Kitchen infodesk line last Saturday night, I spied a basket full of strange little objects. I picked one package up and regarded it curiously, then a light bulb went off in my head!

Do you know what these are?

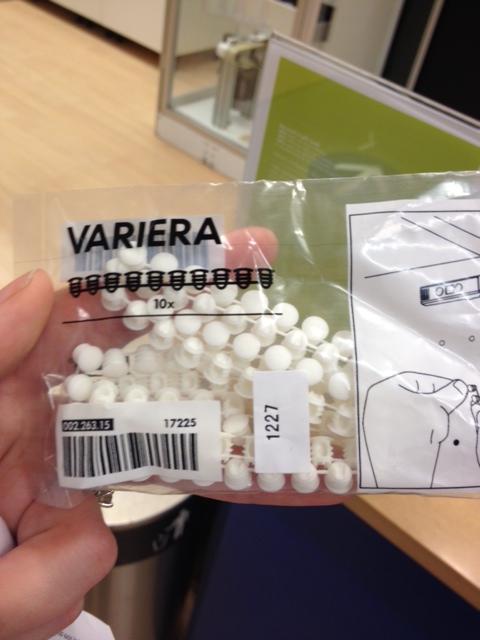
Yes, brilliant brillant Ikea has made SHELF HOLE FILLERS! They’re little plastic pieces that you pop into your unused shelf holes. AWESOMESAUCE! These little guys come in packages of 100 for a whopping $1, and in either black or white.

I swiftly grabbed 4 packages, and then insisted on telling the helpfull (but probably slightly scared) Ikea sales rep about how amazing this invention was.

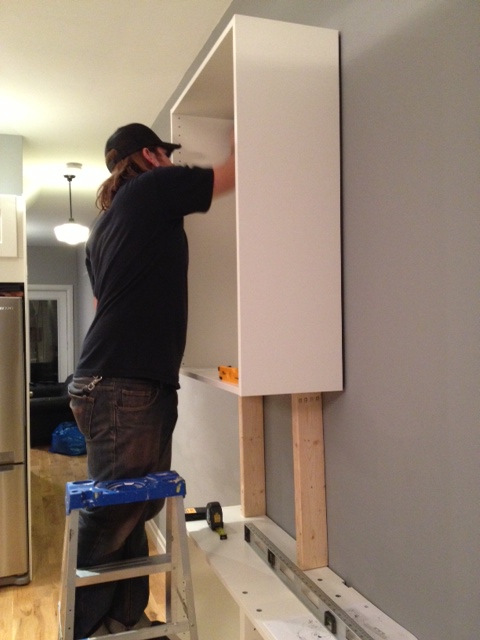
As soon as I got home I set to filling all the holes in my upper cabinets in the coffee bar & the rest of the glass door fronted cabinets in my kitchen.

Shelf Holes Before
Shelf Holes Before
Shelf Holes After
Shelf Holes After

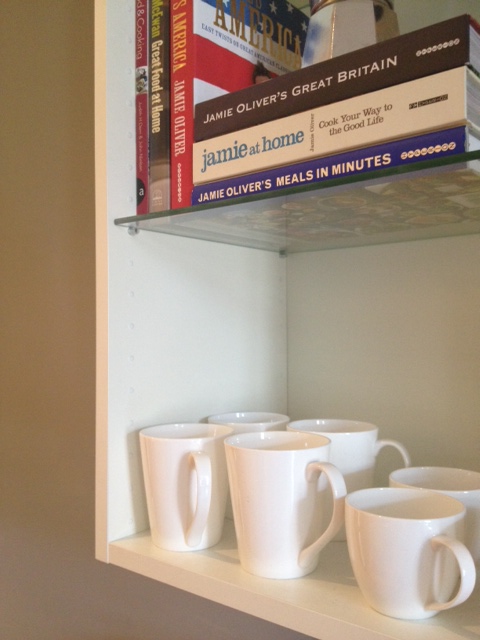
YOUR MIND IS BLOWN, RIGHT?! (or am I the only person in the world who gets this excited about filled shelf holes…)

Total Cost: $3 ($1 per cabinet) my fingers did get a bit sore after pushing in 300 of these puppies, but a small price to pay for sexy looking cabinets.

Go pick some of these up at your local Ikea, then send me tearful letters about how  they changed your life.

best.invention.ever
best.invention.ever

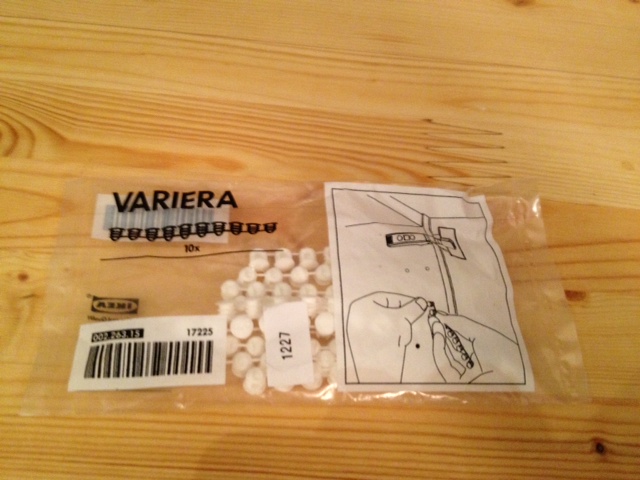
*UPDATE!* Variera Cover Cap’s are now available online at Ikea.ca

Ikea Kitchen Installation Tip

So last week we taught you how to open an Ikea box without ruining your marriage.

Now we’ll teach you how to install an Ikea upper cabinet without swearing at your spouse, or dropping a 30lbs cabinet on their head. You’re getting marriage counseling and DIY all in one. You should thank me.

So when installing an Ikea upper cabinet, you need to hold the cabinet up to the wall where you want it, then mark for where the rail is going to go. This can be a bit of an awkward process with two people. One person has to hold the cabinet over their head steady and level while the other person marks. This is the point where one of you is on a ladder wielding a level and a pencil, directing the other one who is trying to brace the cabinet on their shoulders and keep it steady while you tell them to move it “a little to the left, no your other left dumbass”. This is the point in time when things are about to go oh so wrong. So here’s what you need to do.

You installed your lower cabinets already, correct? They’re nice and level and secure and wonderful? (Level is the key here!)

Measure the distance between the top of your lower cabinet, and where the bottom of the upper cabinet should be. Now go to the garage and cut two 2×4’s to exactly that length (I am gonna call them stilts). Come back inside, and place them standing up straight on your lower cabinets.

Cabinet Stilts
Cabinet Stilts (although we ended up turning them sideways, see next picture)

Now lift your upper cabinet up and rest it on the stilts. You still have to hold on to the cabinet, but now the entire weight isn’t fully resting on your shoulders, and your cabinet is prolly pretty damn close to level. Mark your holes, then take the cabinet down and install your rail. Once you are ready to install the cabinet, use your stilts again to give the cabinet some support while you screw in all the bolts.

Bolting in the cabinet

Yep, those two scrap pieces of wood just saved you from a black eye, dented cabinet and sleeping on the sofa.

You’re welcome.

And yes El Granto’s work pants are pink. He’s secure that way.

How to Open an Ikea Box

Ever tried to open an Ikea box and got so frustrated you just started ripping the cardboard hoping to somehow get that damn box open? Dont worry, we have all been there. Ikea boxes are strong and sturdy but glued shut encased in a little Swedish tomb that you think you’ll never be able to open. Well my friends, we have figured out how to open most Ikea boxes simply and easily (I say most cause some boxes are so well glued nothing will open them. In those cases I resort to tearing and swearing.)

So what you ask is our trick?

Take screwdriver of your choice, and weedle it into one end of the box.

Pull up on the screwdriver.

Then slide the screwdriver along the box, opening the end in its wake.

*one word of caution, watch where your screw driver is going, and don’t let it come flying off the box and make a divot in the hardwood in the dining room, or else your wife will screech at you “watch the floors dumbass!”

I know. Its so simple you’re surprised you never thought of it. Instead you broke countless fingernails and scratched your new cabinet when you tried to open the package with a box cutter. Now you love me and will forever be grateful for saving your marriage. I wonder what the divorce rate as a direct result of Ikea arguments is? Oh come on, you know you’ve had an Ikea argument. “If you like the Kivik sofa with the Dansbro red slip cover so much you can sleep on it indefinitely!” Shopping at Ikea is a domestic situation in the making. Don’t believe me? Check out this post from Apartment Therapy.

Now go forward and open your ikea boxes!