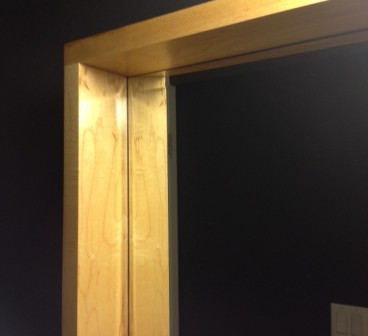
Here is how we created a maple shadow box mirror for the powder room. Originally we sourced the Ikea Molger mirror, but in real life the shadowbox was much too deep, and would not only block the faucet, but also jut into the room too far.
Saturday evening we were sitting in the dining room painting things and chit chatting when El Granto decided to go upstairs and grab something. He found the light “burnt out” to our master bedroom then proceeded to find the upstairs hall, bathroom, staircase and livingroom lights out as well. Our cable and tv were out, as were our office electronics and wifi. Strangely the dining room and fridge and stove were not affected, but our kitchen lights were toast as well.
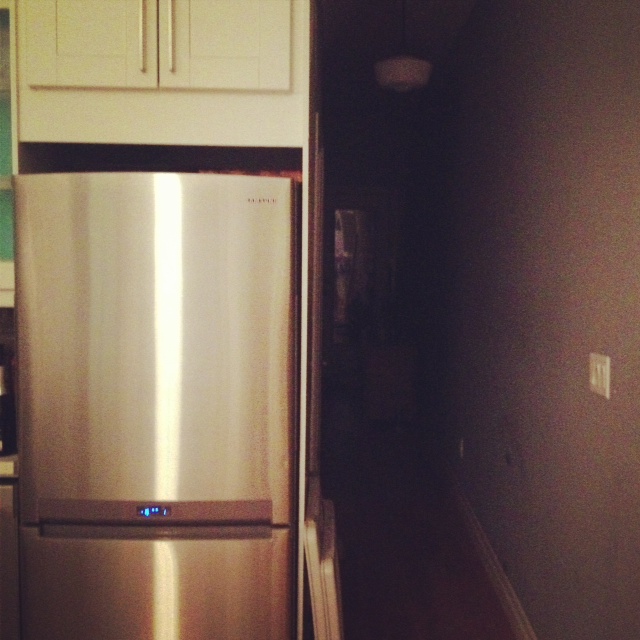
Front half of the house had power, back half: not so much
Our first thought was to check the electrical panel, so down we headed to the basement. No breakers were tripped, but we still turned each one off and on again, as well as turning the main supply off and on again. Still nothing. There didn’t seem to be any issues with the panel, it wasn’t sparking, arcing or on fire, so we were a bit perplexed. We feared a major electrical problem and a costly repair bill. Not to mention this was 8pm on a Saturday night. While El Granto went to check with our neighbors (to see if they had any power problems, and where he kindly got an invite to join them watching Despicable Me.) I called our power authority in hopes that there was a crazy power outage that would somehow only affect half our house.
Surprisingly someone picked up the phone at Toronto Hydro and didn’t think I was a complete nutter. He asked me a few questions, the classic IT question of “have you tried turning it off and then on again” and we went through the steps we had taken. I was expecting him to tell me to call an electrician, but instead he said they’d send someone out in a few hours.
Gearing up for a large bill from the laughing hydro guys, I agreed and El Granto set to procuring extension cords and making us a cozy movie night.
At around 11pm a knock came to the door and we opened it to find two men in big orange reflective jumpsuits and hard hats. They were kind and polite (although poor Odon was freaked right out by these reflective guests and had to spend the remainder of their visit in his crate). They asked to come in and check the panel, where they found no problems.
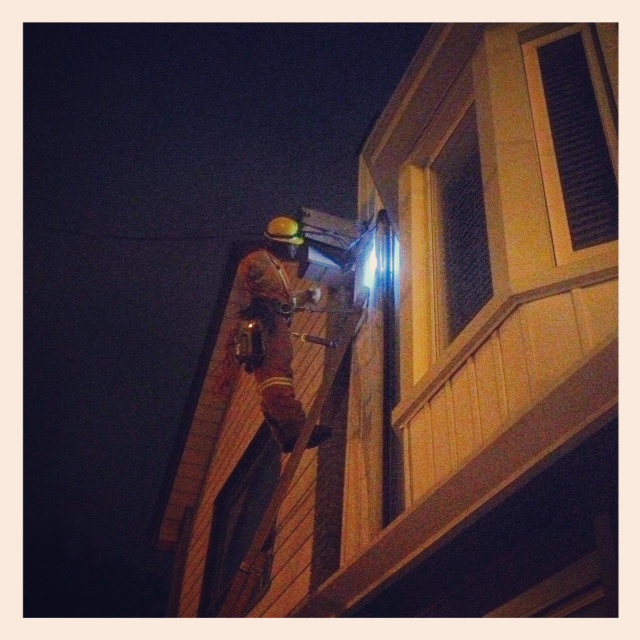
They then headed outside where parked in front of our house was a giant hydro truck complete with ladders and booms and tons of flashing lights blocking traffic. They got out their big ladders and started scaling our house. Within minutes they had found the culprit. The line coming in from the street is aluminum and our house is wired with copper. Over time these foes can decide they don’t want to play nice anymore and create a short. What we didn’t know is that we have three separate lines going into our house, and one of them shorted, thus leaving only half the house in the dark. They quickly chopped off the angry wire, replaced it, and we had power again! We knew this as all our fire alarms started going off in unison. Our saviors in orange jumpsuits packed up their ladders and tools and left with hearty waves off to save the next house stranded in the dark.
Super Amazing Hydro Guy fixing the power
Exhausted after our exciting evening, we proceeded to go inside, shut off all the lights and go to bed. But at least I didn’t have to navigate the 3am bathroom break in the dark.
So if your house (strangely) loses half it’s power. After checking the possible causes, call in your power company, cause it might be a problem with your power line! Who knew?!
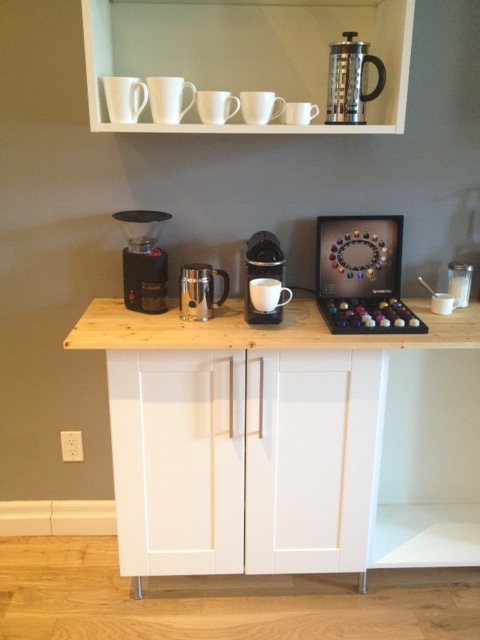
I really want to build concrete countertops for my kitchen. My laminate counters suck, and the coffee bar is curremtly covered in a $20 wood shelf from Home Depot.
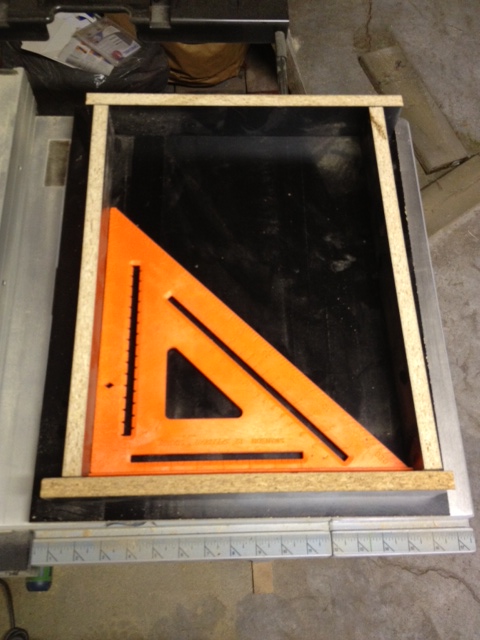
I had a bag of concrete hanging around the garage (don’t you?!) and decided it was high time to put all my researching to the test and pour some concrete. I decided to make a “cutting board” as my test run, and grabbed some spare melamine (I’m not a hoarder, I just have stuff in the garage…collecting dust…that might some day get used.) SO the melamine… I had El Granto rip down a few pieces into 2″ strips and then built a little form with some spare screws.
Building the mold (and making sure it’s square)
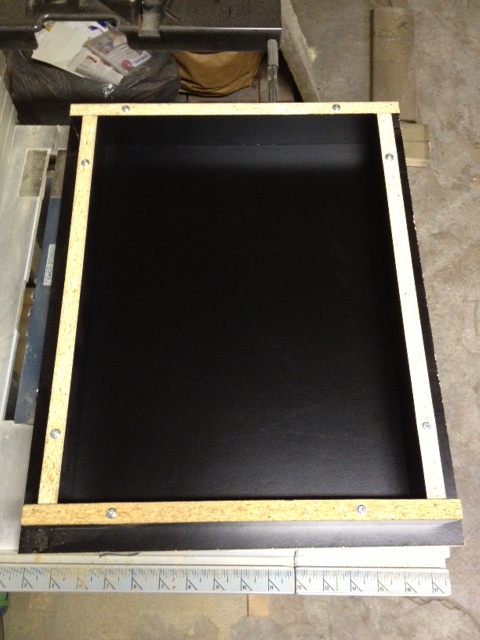
Next up, sealing the cracks in the form with silicone caulking. I conveniently had a new tube of silicone caulking. I inconveniently could not find my caulk gun. Cause it’s an easy thing to lose. You know, giant red tube thingy that looks like a weapon. Yep, missing. Hardware store? Closed. Dollar store? I may be able to find paint brushes, and tie downs, but a caulk gun was not to be had at Dollarama. My neighbours had been outside working on project as well, and we had passed an air compressor over the fence earlier in the day (true story) so I figured I’d ask if maybe they had one. BINGO! Caulk gun. Except theirs was contractor grade and made for big tubes of caulking, and my wee bitty tube of silicone was too small. So now what? I shoved a piece of wood into the bottom of the caulking tube and hoped for the best.
I started caulking, and I got silicone EVERYWHERE. All over me and the mold.
DIY TIP. Tape your mold or you’ll get silicone everywhere. After about 10 minutes I was covered and sticky and I had done the WORST job of caulking anything in my life. I threw in the towel (this was a test after all!) and left it to dry.
Mold Made (before crappy silicone job)
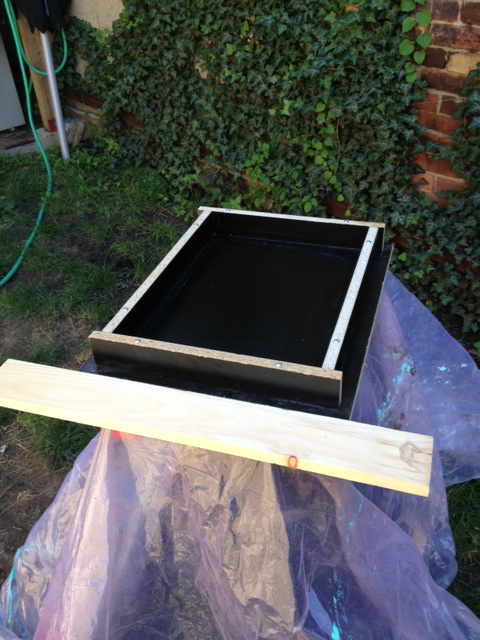
Next day we moved the mold outside on worktable covered in a plastic drop cloth, and I (with my girly muscles, a shovel and a piece of wood) mixed up a half bag of concrete. In hindsight, it could have used a bit more water, and I could have used a trowel (rather than a piece of wood) to get it well into the mold.
Pour area prepped. Drop cloth & screeding board readyFilling the mold. Don’t you just love my work outfit? Paint covered work shirt and track pants. I really should buy an attractive set of work clothes.
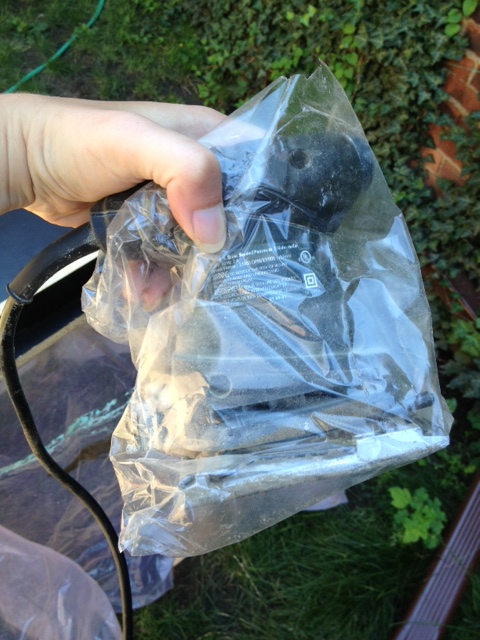
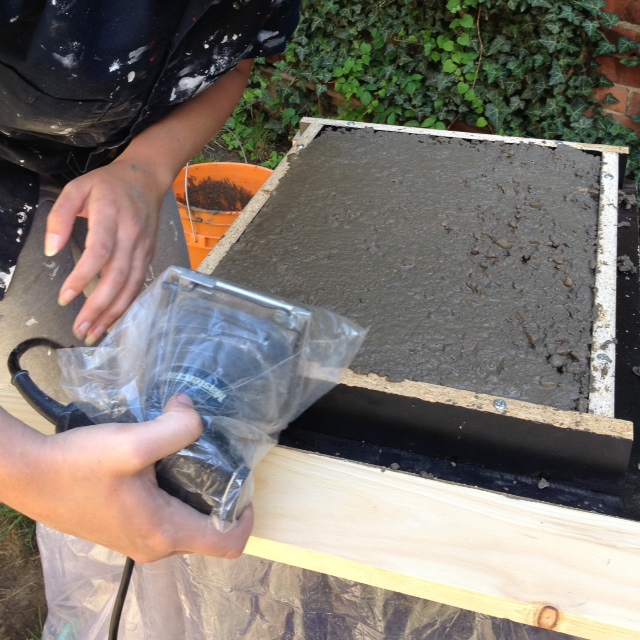
I then (smartly) took the sandpaper off my palm sander, and covered it in a bag, and vibrated the crap out of the mold.
Sander covered in a bagVibrating the mold
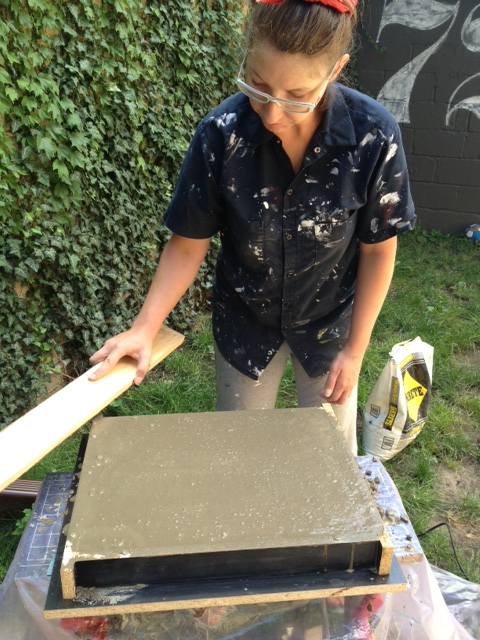
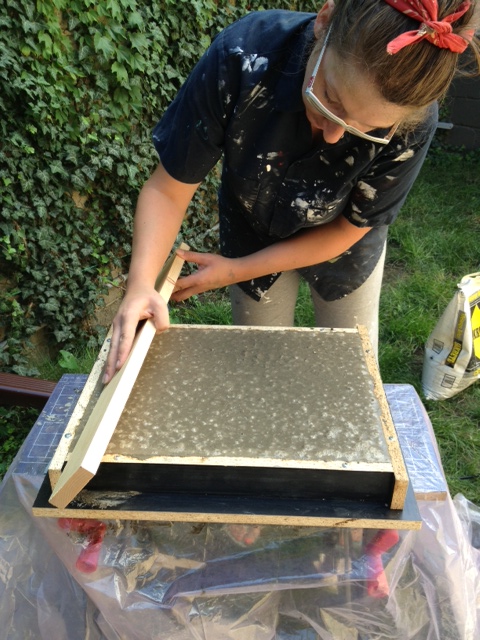
Then we screeded the top (which also didn’t go so well, as it started pulling gravel out of the mold, but again I think my mix was too thick.)
Screeding the mold
Then I let it dry, covered with plastic for a day. I didn’t put a wire mesh in it, cause A.) it was a test and B.) I didn’t have any in my garage…
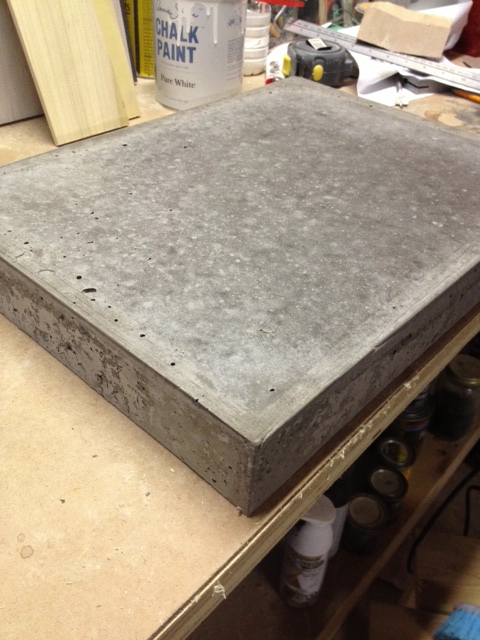
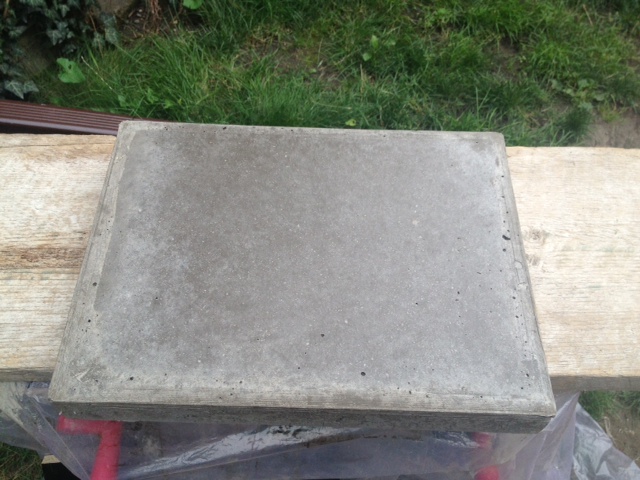
I un-molded, and voila.
Concrete just after de-moldingIt worked!
Things I learned:
Concrete is heavy.
2″ is too thick for our countertop. It just looked too big (that’s what she said). In all seriousness, 1 1/2″ is a much more reasonable size, 2″ was just overkill. Like a Hummer H2.
My mix needed a bit more water.
Counter sink the screws! Or else you can screed it very well.
I will not mix up all the countertops in a bucket. Concrete mixer rental is imperative.
I needed a better concrete mix than the $4 bag of all purpose. It was too rocky and rough. The top of my cutting board was great, but the sides showed too much aggregate.
Next up, I will be filling the holes, adding some feet to my “cutting board” test driving some concrete sealers and waxes, and then putting it to the test in my kitchen. Wish me luck!
Have you ever played with concrete? Any tips to pass on?
I know you’re probably all “tabled-out” with my table talk last week, but I just wanted to give you all some ideas for creating your own dining table.
As you know, we made a new top for our pipe leg table. It was easy peasy. Three boards, some supports, sanding, staining and protecting and its as easy as pie. (Well maybe not pie. Pie is pretty hard to make.) So now I’ve convinced you to make your own table top, but what if pipe legs aren’t your thing… It’s too hipster for you, or too industrial, or not glam enough. So don’t worry, I got your back. I’m your girl.
This is what you need to do. Make the table top. Then pick your stain color and pick your legs. It’s like a choose your own adventure novel, but with FURNITURE!
I know, your mind is blow! (right? maybe? a little bit blown? a spark?)
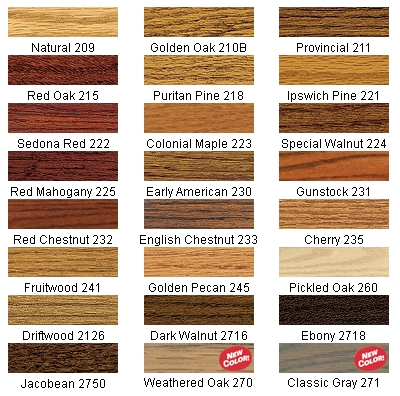
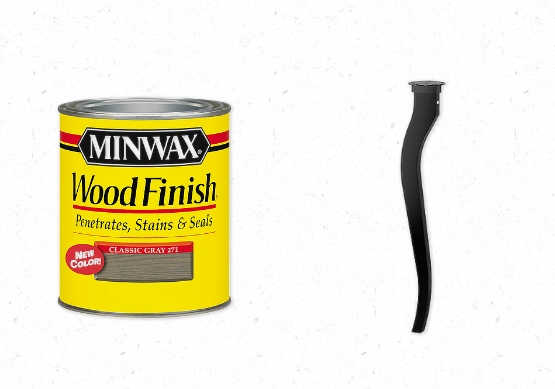
PICK A STAIN:
Minwax Stain Colors
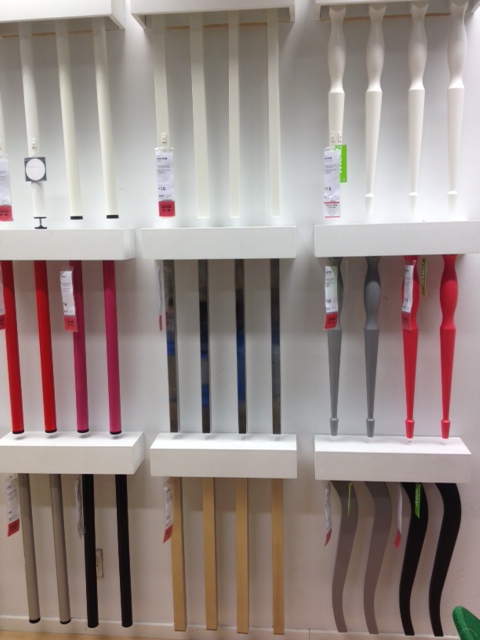
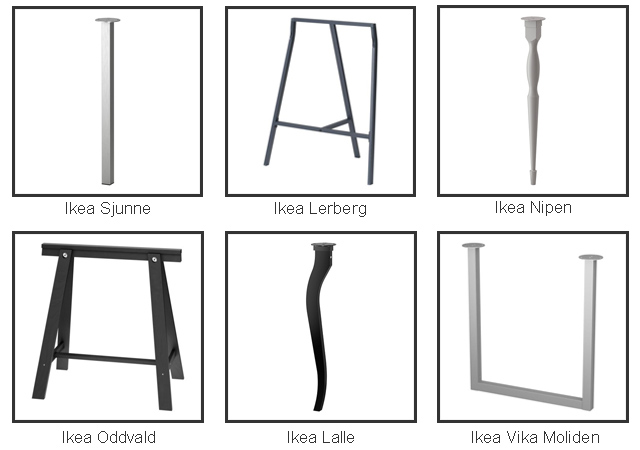
PICK A LEG:
Ikea LegsWall-o-legs at Ikea
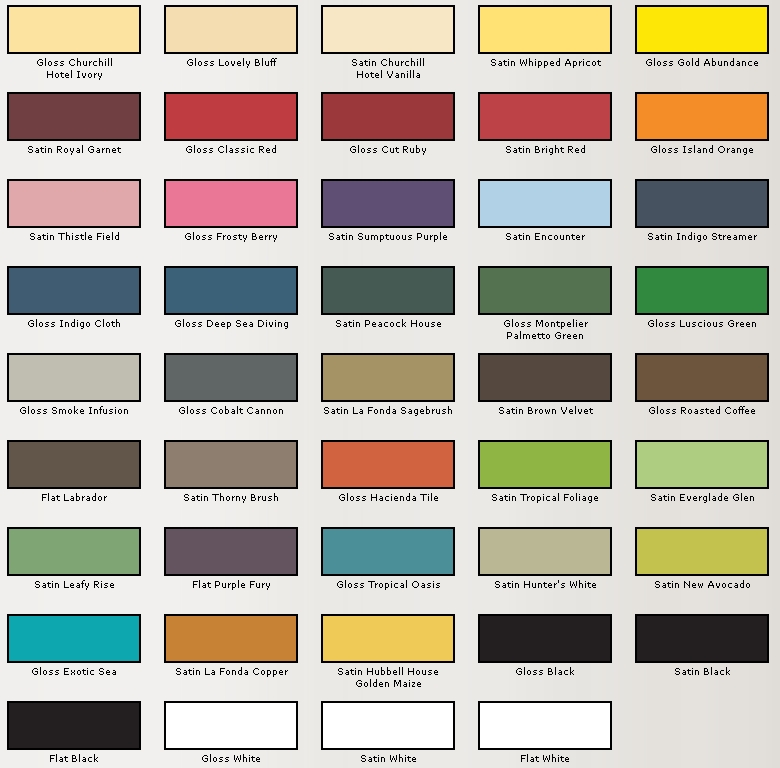
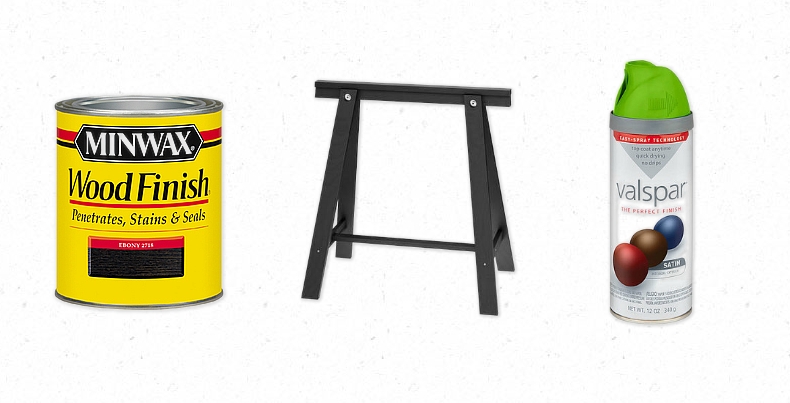
OPTIONAL: Pick a spray paint color to paint the legs:
Ebony top + Oddvald legs spray painted Troical Folliage
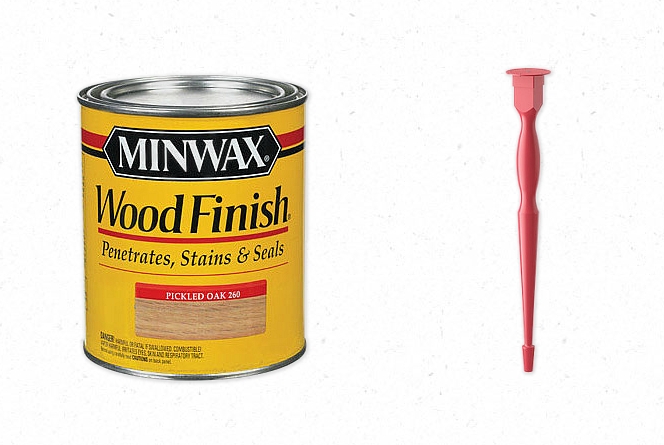
Minwax Pickled Oak + Red Nipen legs (which are more pink than red)
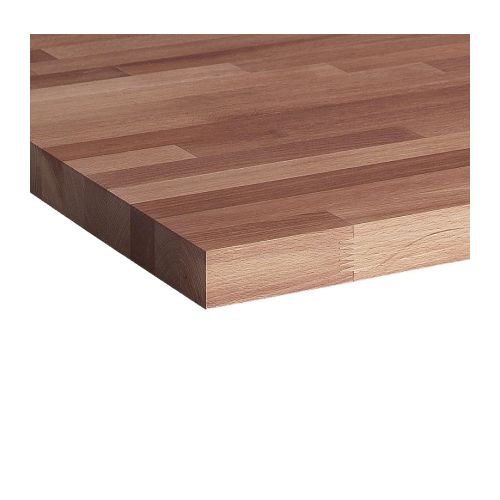
DIY TIP! If your idea of DIY & woodworking is watching HGTV in your PJ’s. Consider using a piece of prefab Ikea butcher block countertop as a table top. It comes in a 6’x3′ size (for $269) that would be perfect for a dining table!
Ikea Numerar Countertop. Perfect as an easy table top!
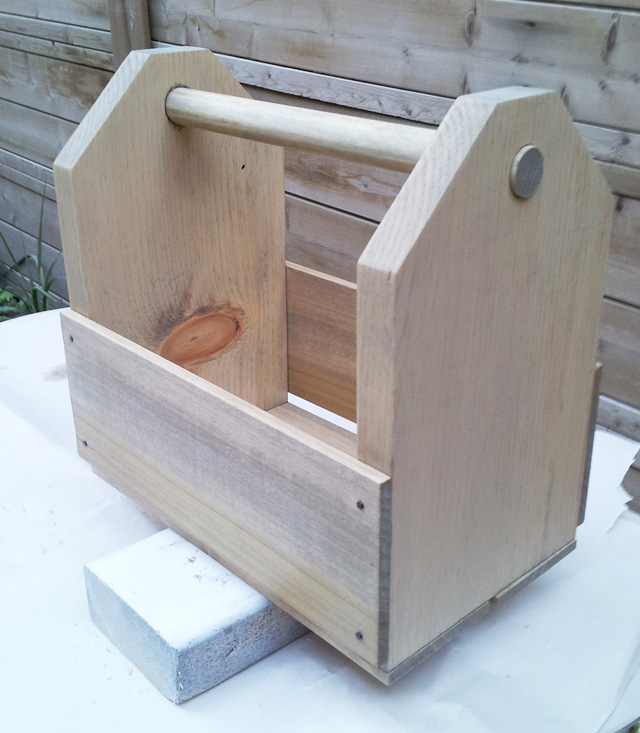
Last weekend while Kristen was sanding a new project and I had little to do. Sure I could have helped. But why not whip together a quick project while she did all the boring work?
I have seen many beer/can carriers on the internet and decided to give it a try myself.
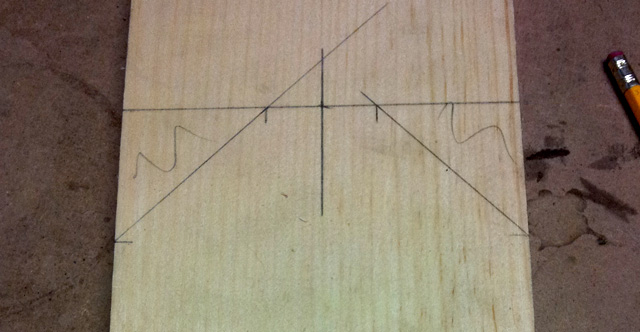
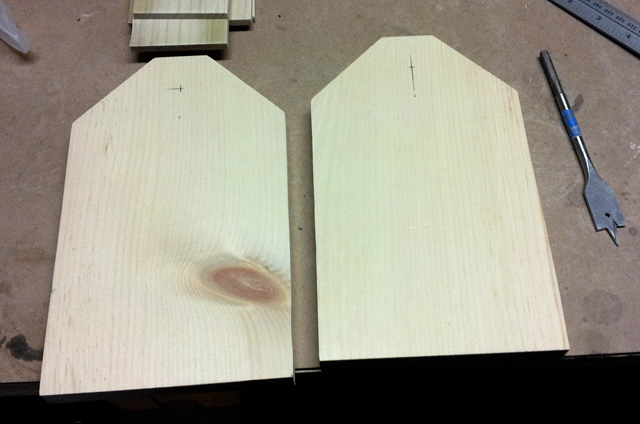
I started by measuring a can and adding some inches to the height to give some room for a handle (9 inches tall) and measured two cans beside each other for the width (giving a little breathing room for easy removal of frosty brews it came to 5 1/2 inches). Then I used a combination square to add 45 degree corners to the template (the flat top section is 1 3/8 inches).
Scribble on pieces you know will be scrap as a reminder.
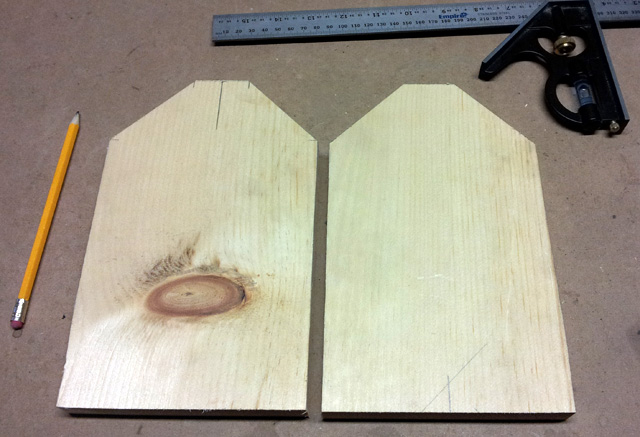
After cutting out the first side of the carrier with the miter saw I decided I was happy with the size and traced the outline to the 2nd side.
Using the first side as a template for the second sideBoth sides cut and ready to go
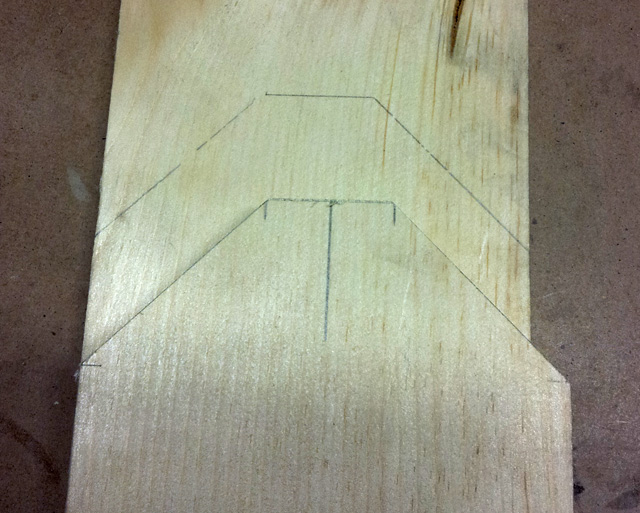
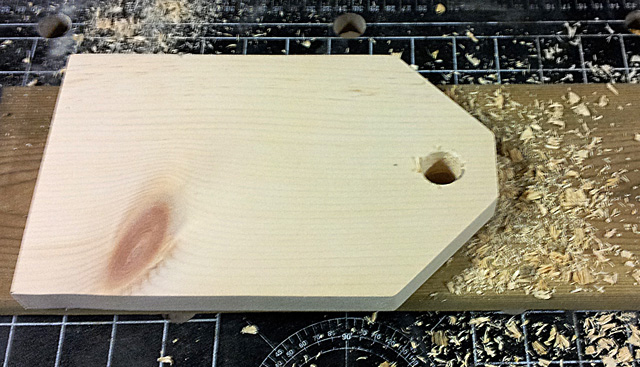
I measured and drilled a 3/4 inch hole in each side for the handle to pass though.
Tiny markings to show me where to drill.
DIY Tip: place a scrap board beneath your piece to stop tearout when drilling holes that will be seen or are large
I then lined up three cans and and measured their width and found that with a little breathing room 9 1/2 inches suited three cans quite well.
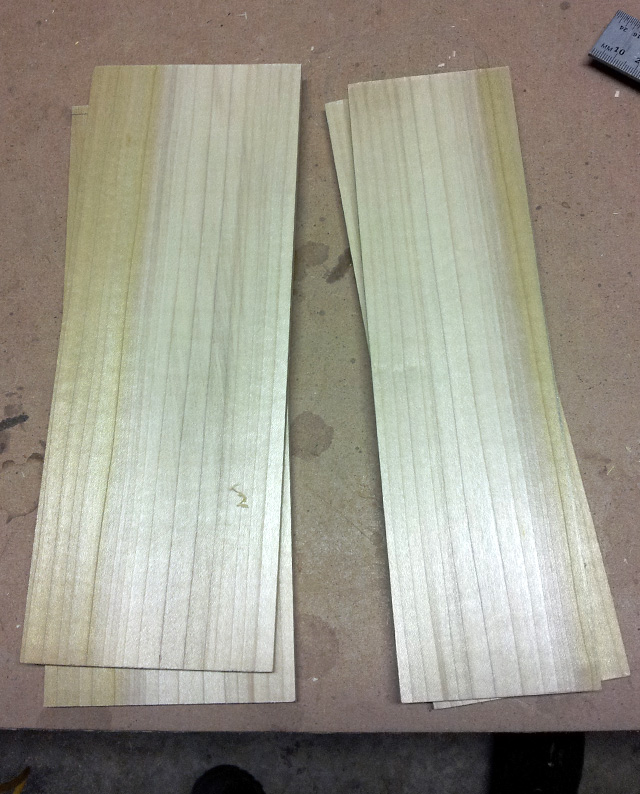
I found some poplar that was laying around the garage and cut 4 strips to 9 1/2 inches long and ripped two of them down to 2 5/8 inches to make the bottom of the carrier with a little gap on either side for the escape of any condensation that may build up and drip down the sides of my nectar vessels during transport.
Side pieces (left) and bottom pieces (right)
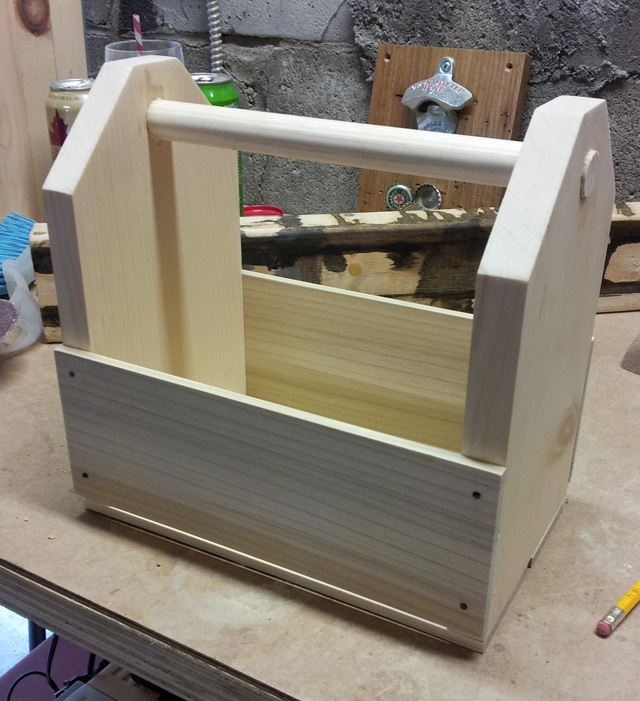
After all the pieces were cut they were sanded down to 220 grit and I attached them all together using some black finishing nails that were left over from ages ago when we made the Liquor Cabinet. Leaving a gap between the sides and the bottom (more condensation relief).
I then cut the handle (some 3/4 inch dowel left over from a project you’ll see in the future) to size leaving a little room for it to poke out just for looks and inserted it in to one side of the carrier. I then coated the inside end and the outside end of the handle with glue and slid the entire thing in to place so that no glue got where it shouldn’t be. (Wiping up any excess that squidged out.)
Can Carrier Assembled
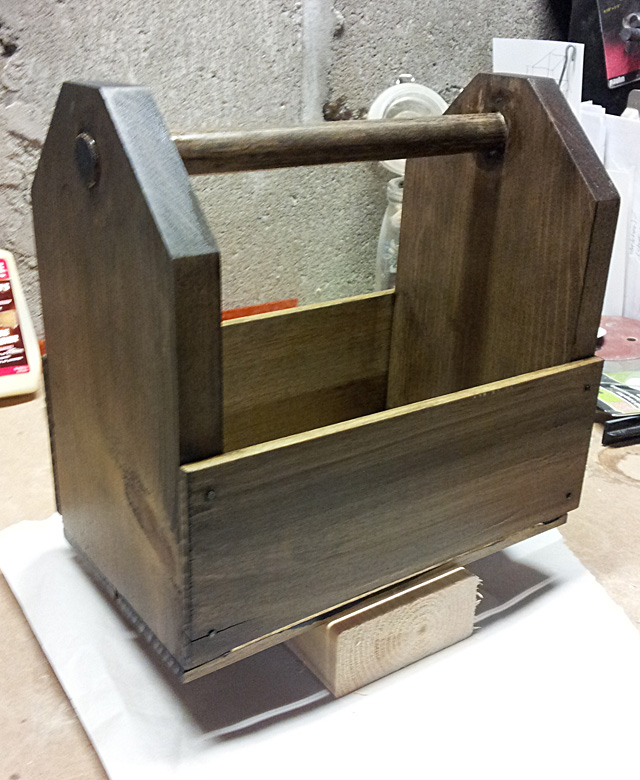
I picked a random jar of stain (Minwax Weathered Oak) and set to staining. Then I hated the stain.
YUCKY!
So I restained it darker using Minwax Jacobean.
Niiiiiiiiiiiiiice!
Happy with the stain I set to four coats of Varathane Oil Modified Polyurethane in Satin finish. Using the process outlined in the finishing post.
Ta Da!
In all I think this probably took about an hour and a half including stain and finishing. The entire build only took about 45 minutes and was a great way to get me out of sanding other projects. AND now we have a great way to carry our Friday Libations out to the patio (or the park shhhhh).
SOURCE LIST:
Materials: Scrap Pine (1×6 x 2′)
Scrap Poplar (1/4″)
Scrap Dowel (3/4″)
Scrap Finishing Nails
We re-used our old dining chairs when we made our DIY iron & wood dining table. As you can see below, it’s not ideal. The chairs don’t “match” the table, yet they’re not different enough to pair well with the table. Why didn’t we get new chairs? Chairs are expensive! I wanted pretty metal Navy chairs, or metal Tolix chairs. Then I remembered one of those chairs is more than our grocery budget for a whole month…eeep
Dining Room & Kitchen
Chair vs. Food. I choose food.
However those chairs were still driving me nuts. They have lived with us since we moved to Toronto 7 years ago. They’re well built, but they lived through our late 20’s, a lot of fun and a few exuberant parties. They are scratched, and are finished with that really dark espresso stain color that might as well be painted on. You cant even tell that there is real wood hiding under it. Combined with the dark dining table in our otherwise bright kitchen/dining room, it was making a bit of black hole.
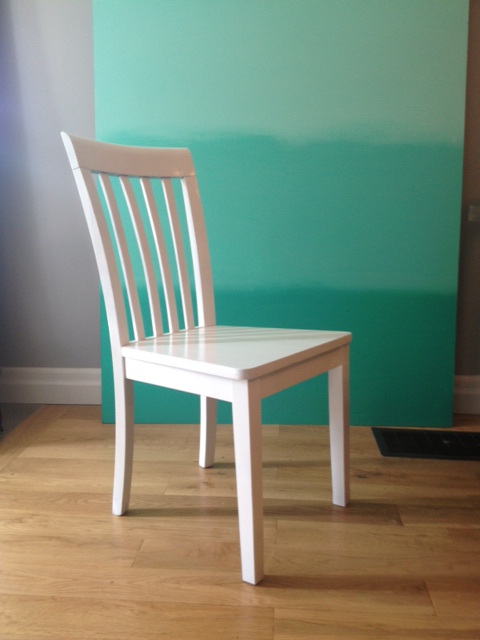
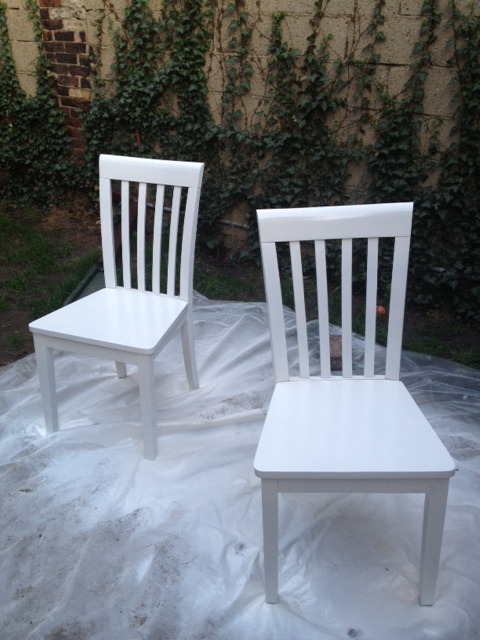
I set up my DIY spray booth in the garage. Gave a light sand, and a good cleaning to the chairs, then gave them several coats of RustOleum Universal in gloss white.
DIY TIPS! When spray painting, the prep is the most important step! Ensure your surface is very clean. Use a degreasing cleaner such as TSP to remove any oil or wax from the surface. If your surface is very shiny and slippery, always rough it up a bit with some sandpaper, to ensure good adhesion. Spray painting is all about light coats. Give your piece several light coats using a sweeping motion about an arms length away from your surface. To avoid drips and runs, don’t spray too close. For surfaces that are going to see a lot of wear, put on an extra coat. Make sure you re-coat within an hour, or after 48 hours to avoid the paint cracking or not adhering properly. Go out and paint something!
Chairs BeforeChair in the paint boothNewly painted chairs dryingChair After
That’s just a sneak peek of the changes to the dining room. We have another couple projects in the works, so a full reveal in a few weeks!
Now for my super special awesome paint news!
I had the chance to meet the folks from RustOleum last week at the Home Depot DIY 101 day, and they let a super big secret drop. RustOleum is coming out with SEVEN new colors of Universal paints in Home Depot stores this week. Yep, 7! They look amazing, and I cant wait to try them all out. Check your local Home Depot Canada store in the coming weeks for these new colors:
RustOleum Universal Flat Metallic:
Chestnut
Burnished Amber
Soft Iron
Antique Nickel
RustOleum Universal Hammered Metallic:
Chestnut
Burnished Amber
Antique Pewter.
These paint finishes look amazing! Very Restoration Hardware-ish. Perfect for refinishing dated hardware, light fixtures, furniture and anything else you can think of. I cant wait to try them out!
Have you spray painted anything lately? Ever used RustOleum Universal paint?
Recently I was fortunate enough to receive an invite to a DIY 101 seminar put on in conjunction with Rambling Renovators and Home Depot. It was a super fun event where we got to learn about gardening, tools and spray painting with the Home Depot pros. I learned a ton of new things (especially in the gardening area, as I totally have a black thumb!) Check out this excellent recap by Jen at Rambling Renovators (and you can even spy my mug trying out the cordless brad nailer!)
Sylvan teaching us how to not murder our plans (we ended up making our own herb gardens to take home!)Rick the tool guy giving us the down low on the coolest new tools
The seminar on tools got me thinking. El Granto and I have been very lucky and have received a lot of our DIY tools as presents from family. Some hand me downs, and some Christmas and birthday gifts. I still have the hammer my dad gave me when he dropped me off at my first apartment in college. He left me with a small array of tools; hammer, screw drivers, and a little tin full of misc screws and nails. He didn’t want me to be the girl hanging pictures and assembling Ikea furniture with a butter knife. Thanks Dad!
We now have quite the tool arsenal, but if you’re just starting out on the path to DIY getting your needed tools can be an expensive and overwhelming experience. So to help you out, I have devised a list of the best items to purchase to get you started on most tasks.
Essential Tools for the DIY Beginner
Miter saw. This workhouse will have you making precise, clean cuts for everything from trim and moldings, to framing and furniture. To start out, all you need is a basic 10″ single bevel compound miter. If you outgrow this down the line, corded tools hold their value well, and you’ll be able to resell on Kijiji or Craigslist.
Ryobi 10 In. Compound Mitre Saw With Laser $99.00
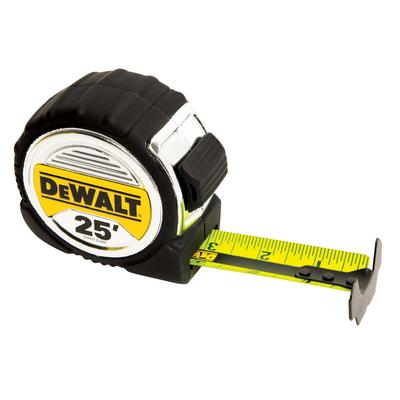
Good quality tape measure (or two!) You will literally use this non stop. Measure twice really is a motto to live by. Purchase a good quality tape. One that is sturdy, accurate and has a good extension. We currently have FIVE!
DeWALT 25′ tape with 13 foot stand out (great for measuring things by yourself) $25.99
Level. Not only is a level great for well, making things level, but I often use mine as a straight edge and saw guide. Invest in a level, as this is a tool that you will have for years to come.
DeWALT 28″ box level. This fella has rubber shock resistant end caps so if you drop it accidentally (like I am oft to do) you wont be running to the store for a replacement. $69.99
Cordless drill. This is the tool that will probably get the most use in your workshop. From assembling furniture to making short work of little projects, a good drill is essential. Make sure to choose a cordless drill wisely. Choose one that has a good battery life, quick charging time, is lightweight but powerful. This is a tool to invest in. Purchase one with a 1/2″ chuck (3/8 is just too small). Also consider your other battery powered tools, and purchasing a line of products that you can interchange the batteries. It means less chargers, and having backup batteries ready when you need them. I am scoping out a new drill (El Granto’s is a bit too big and heavy for me). This Ryobi drill + impact set I have my eyes on.
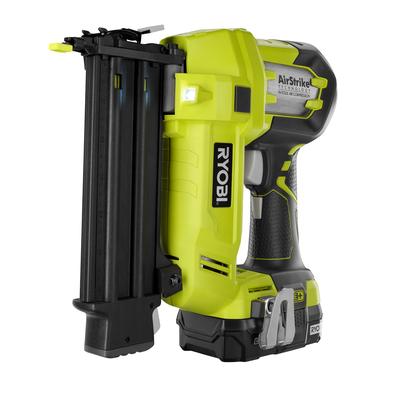
Ryobi One+ 18V Lithium Drill and Impact Driver Kit $149
Hammer. A well balanced comfortable hammer will make short work of your task. Choose one that is lightweight but powerful to reduce fatigue.
DeWALT 15oz high velocity hammer $79.97
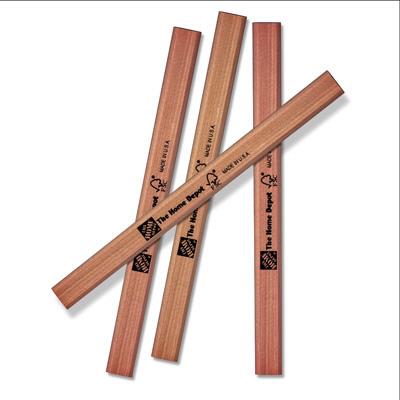
Pencils. This may sound like a “DUH” item, but when you need one, you can never seem to find one. Buy a few good quality ones and keep them sharp and handy. (Don’t forget a sharpener too!)
Carpenters pencil $0.49
It also doesn’t hurt to splurge on a fancy tool or two. After trying out this puppy at the Home Depot DIY 101 seminar I am in LOVE. This cordless brad nailer has me wanting to tackle another trim project like our guest room board & batten. Heart <3 …
Home Depot will rip down large lumber for you such as plywood (for a small fee). For big projects, bring your cut list with you and have them cut it for you. A table saw is a big purchase, and unless you’ll be using it a ton, you really don’t need one!
You don’t need a truck to get big lumber home! We don’t have a car, and (as you know) build a lot of stuff. We walk home with what we can, but for larger purchases we rent the Home Depot take it home van. For $25 you get 90 minutes rental time, which is plenty of time to get everything home and unloaded.
Don’t be afraid to ask for help. If you’re unsure on a project, do research and ask for help before getting started. It’s much better to plan and research and get it right the first time than to do a poor job and waste expensive materials. Don’t forget to read the instructions! Packages can often tell you exactly how to get things done. Use resources like sales people at the hardware store, and free in store workshops to help you get the knowledge you need.
*I was not paid in any way for this post. All opinions are my own!
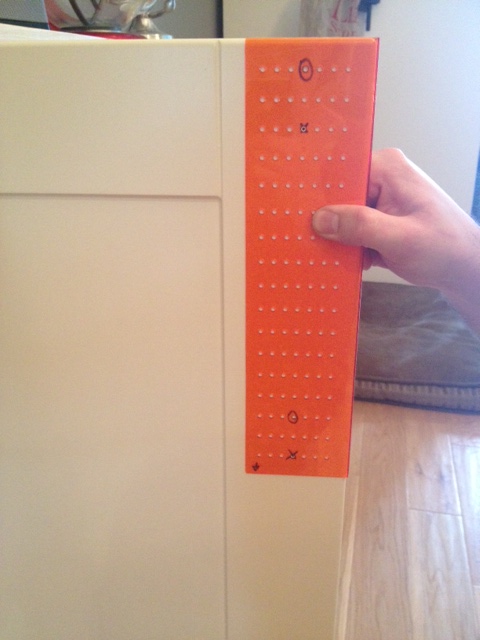
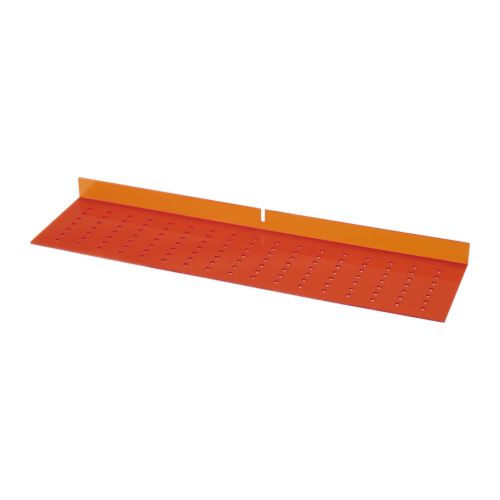
We needed to add hardware to the coffee bar that matches the rest of the kitchen. We found the hardware easily enough. The previous owners bought everything for the kitchen at Ikea, so its been super easy to add new cabinets etc. When we picked up the new hardware, we also purchased the Ikea Fixa Drill template. The template is supposed to make the placement and hole drilling of your cabinet hardware super simple. (I am all for making tasks simpler!) For the $3 price tag, we decided to give it a try.
Fixa Drill Template
We brought it home and checked the template against the current hardware in our kitchen to find that the old owners used the same template. Score! We marked on the template where the current hardware is hung, then transferred the template over to our new cabinets.
Template on Cabinet Door
Using a small sharpie, El Granto marked the holes.
Holes marked with a Sharpie
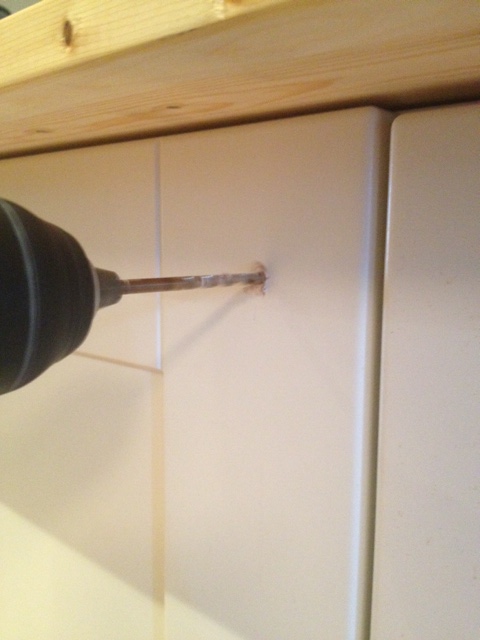
Then drilled them with a bit just slightly larger than the screws.
Drilling Holes
After El Granto drilled all the holes, he attached the handles in record time. For $3 Fixa Drill Template was well worth it, and we will definitely be using it next time we need to install hardware!
***UPDATE! THESE DO NOT WORK WITH BILLY BOOKCASES***
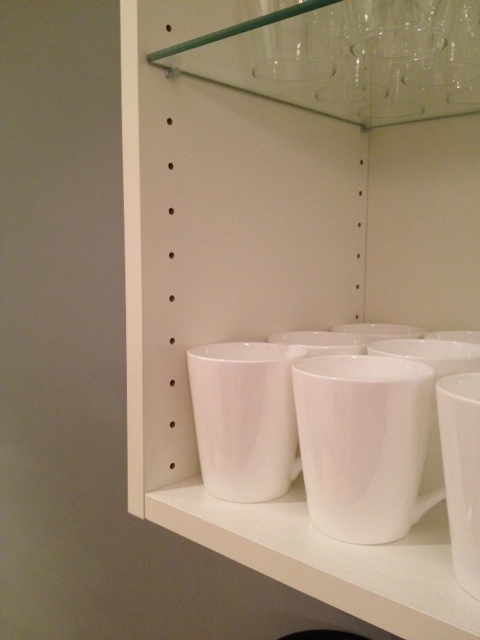
So you know how Ikea (or any prefab) cabinets & bookcases have all those shelf holes for allowing you to move your shelves around willy nilly? They’re super useful, but they leave unsightly dark holes that clearly give your shelving unit away as not being custom built. I happen to hate these holes. So much so, that I painstakingly filled them all with paintable caulking in my Custom Ikea Billy Built-In Bookcase project. This took me 6 hours to do, but well worth it. At the time I thought there could be no easier way…
This past weekend, the clouds opened, angels sang, and I found the answer to all your shelf hole problems.
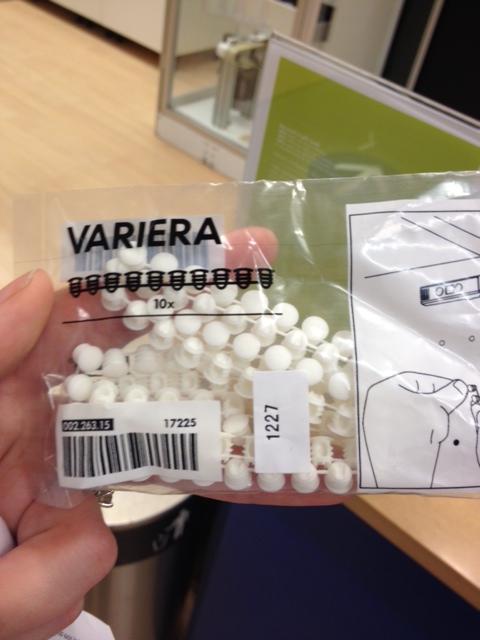
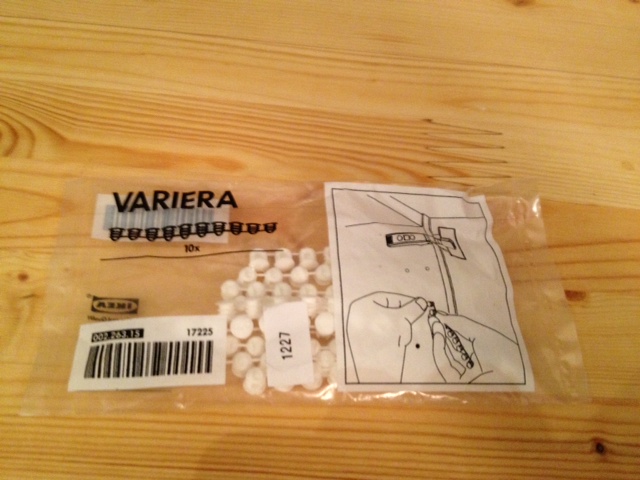
While waiting in the Ikea Kitchen infodesk line last Saturday night, I spied a basket full of strange little objects. I picked one package up and regarded it curiously, then a light bulb went off in my head!
Do you know what these are?
Yes, brilliant brillant Ikea has made SHELF HOLE FILLERS! They’re little plastic pieces that you pop into your unused shelf holes. AWESOMESAUCE! These little guys come in packages of 100 for a whopping $1, and in either black or white.
I swiftly grabbed 4 packages, and then insisted on telling the helpfull (but probably slightly scared) Ikea sales rep about how amazing this invention was.
As soon as I got home I set to filling all the holes in my upper cabinets in the coffee bar & the rest of the glass door fronted cabinets in my kitchen.
Shelf Holes BeforeShelf Holes After
YOUR MIND IS BLOWN, RIGHT?! (or am I the only person in the world who gets this excited about filled shelf holes…)
Total Cost: $3 ($1 per cabinet) my fingers did get a bit sore after pushing in 300 of these puppies, but a small price to pay for sexy looking cabinets.
Go pick some of these up at your local Ikea, then send me tearful letters about how they changed your life.
best.invention.ever
*UPDATE!* Variera Cover Cap’s are now available online at Ikea.ca