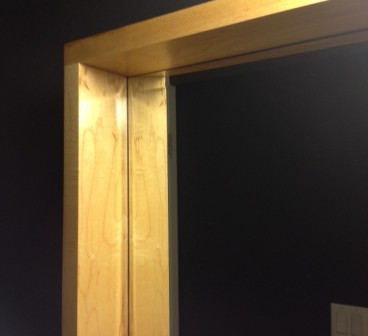
Here is how we created a maple shadow box mirror for the powder room. Originally we sourced the Ikea Molger mirror, but in real life the shadowbox was much too deep, and would not only block the faucet, but also jut into the room too far.
This is what we made instead:
DIY Shadowbox Mirror
Materials:
- 1×3 @ 10′ Maple
- Wood glue
- 1/4″ plywood
- Mirror
- Small finish nails
- PL Premium construction adhesive
- Finishing supplies
- Hanging kit
Tools:
- Miter Saw (optional, can have lumber cut at hardware store)
- Clamps
- Circular saw (optional, can have lumber cut at hardware store)
- Sandpaper
How To:
Measure the width of your mirror and add 1/16″ to that measurement (that’s for a bit if wiggle room). Measure the thickness of your lumber. If it’s from the big box store, it’s probably 3/4″. Add that measurement to your mirror width measurement. For instance, my mirror was 23 1/2″ wide. With that + my wiggle room (1 1/16″) + wood thickness (3/4″) = 24 5/16″
Cut 4 pieces of maple to length (in my case 24 5/16″).
DIY tip. When you need to cut multiple pieces to the exact same length, try using a stop block.
Here is a quick and easy way to set up a stop block when using a miter saw on a stand. On your stand, you will notice your rollers have one side that has a flat little shelf below the roller. Flip your roller so that the shelf is facing towards your saw. Cut a scrap piece of wood to the correct length. Unplug your saw (safety first!) and lock it in the down position. Place your scrap wood up against the side of your saw blade. Move your roller up and to the side until your piece of wood is sitting flat and flush with the little shelf.
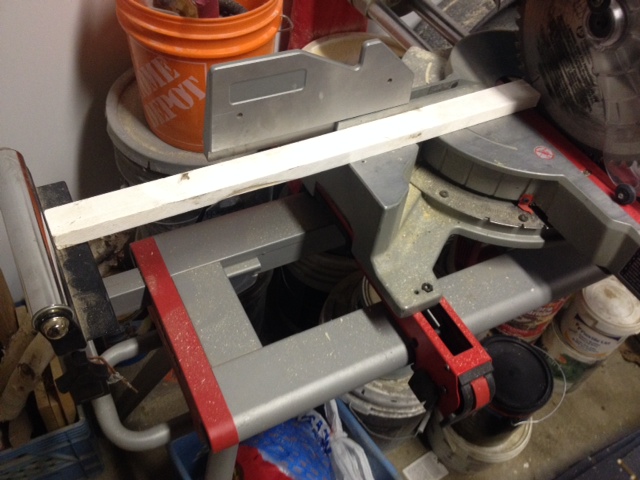

Lock it in place (tighten the knobs). Now you have a stop block set up. Remove your scrap wood, unlock the saw and plug it back in. Take another piece of wood and do a test cut using your stop block. Measure and make sure it’s the correct length.
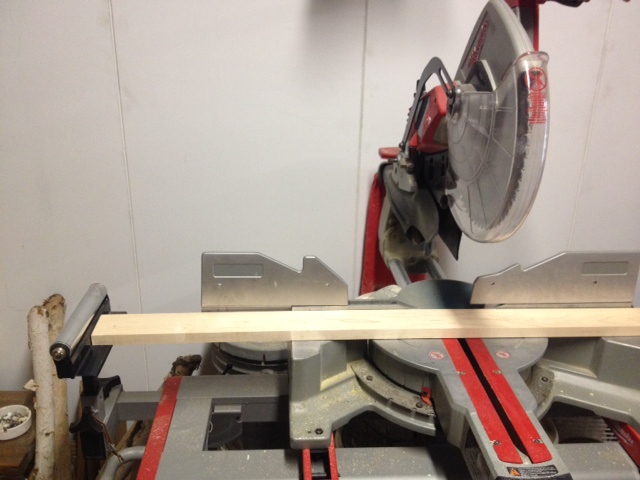
Using your stop block setup, cut 4 pieces of wood to length. Remember, you don’t have to measure and mark, your stop block will do all that for you!
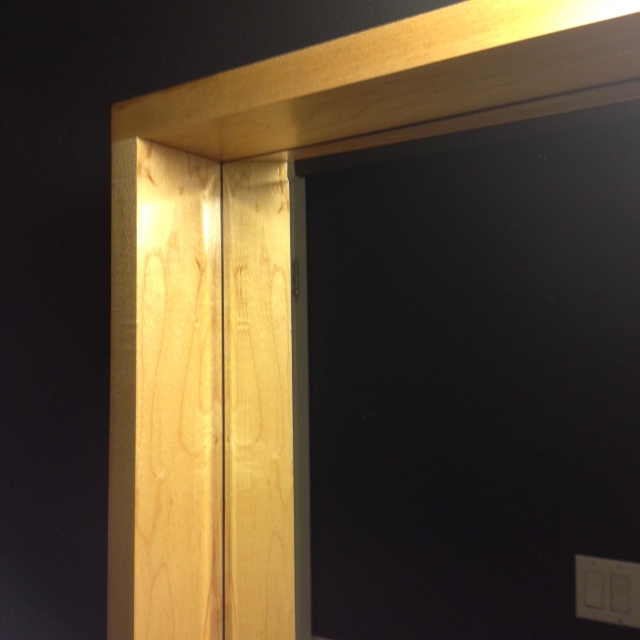
Assemble your frame around your mirror. Why do it around the mirror? It will make sure your frame is square, and that you will be able to fit the mirror inside when you’re done. [variation note: if you have a table saw or a router, you can instead cut a channel in your frame to make the mirror slide into. We did not do this, as we are using a beveled mirror, and the bevel would be obscured by inserting the mirror into the frame.]
Using wood glue and clamps if you’ve got them (corner clamps or long bar clamps). Assemble the frame by aligning one piece of maple along one side of the mirror, making one end flush with the side of the mirror, and the other end overhanging. Place the second piece along the next side of the mirror butting it up against the overhang of the previous piece. Continue on the same way with the rest of the pieces, until your frame is completely laid out. Apply glue, clamps and insert a few nails into the corners to hold everything in place while the glue dries. If you do not have clamps you can use screws in the corners.
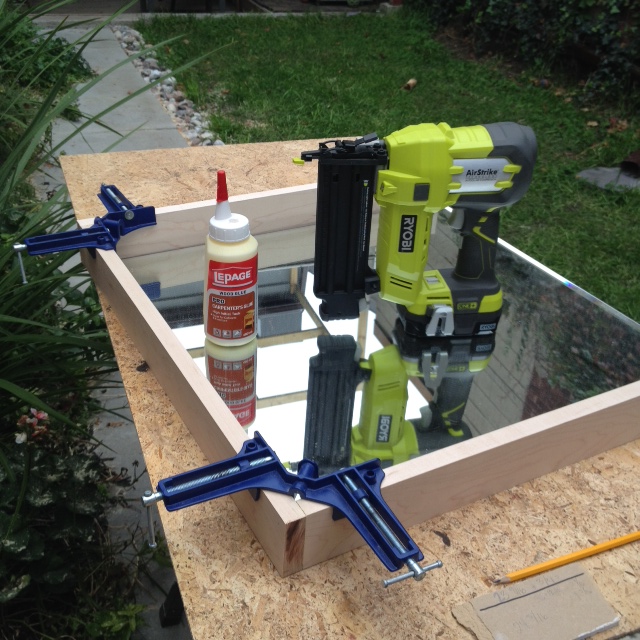
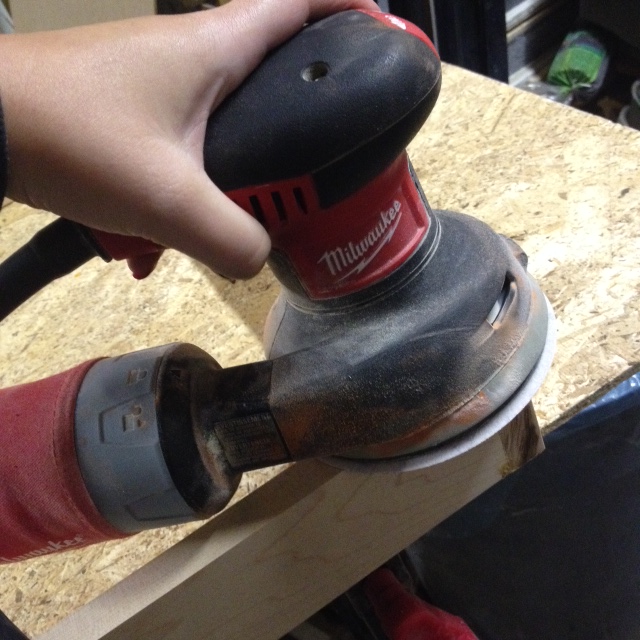
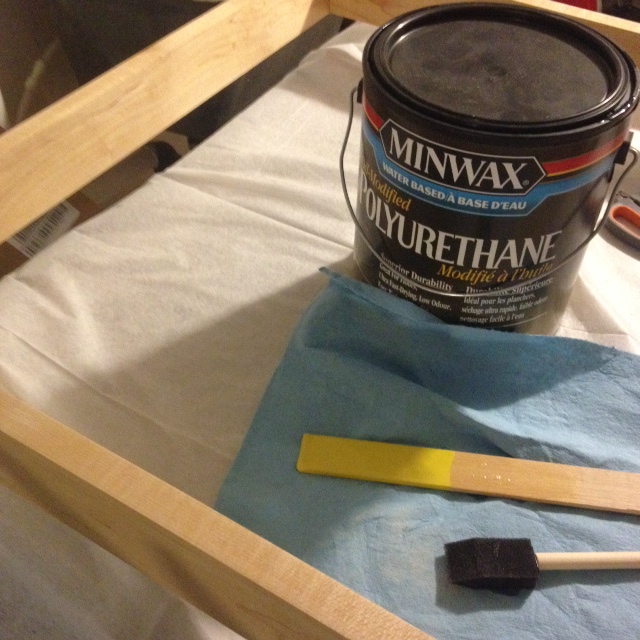
After glue is dry, unclamp, sand and finish [read my guide to wood finishing here.]
Trace your frame on a piece of 1/4 plywood and cut it to size. Using small finish nails, or a brad nail gun and a few small dabs of PL Premium adhesive attach plywood to the back of your frame. Apply PL Premium to the inside of your frame backing and glue down your mirror. Leave overnight to dry.
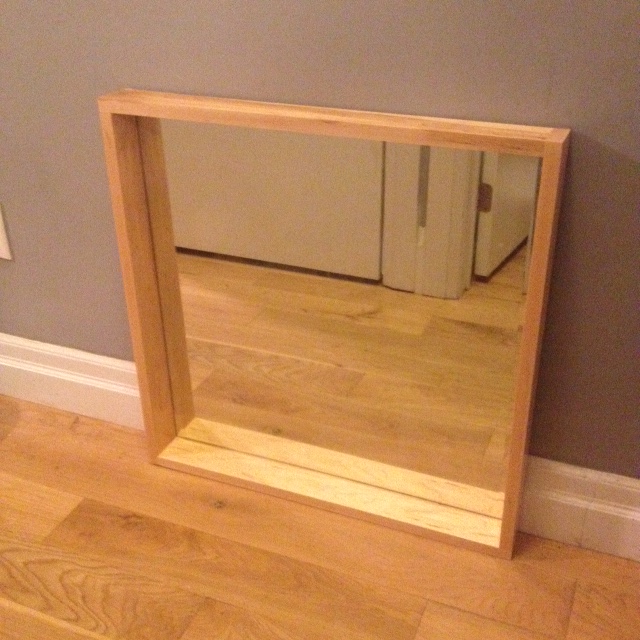
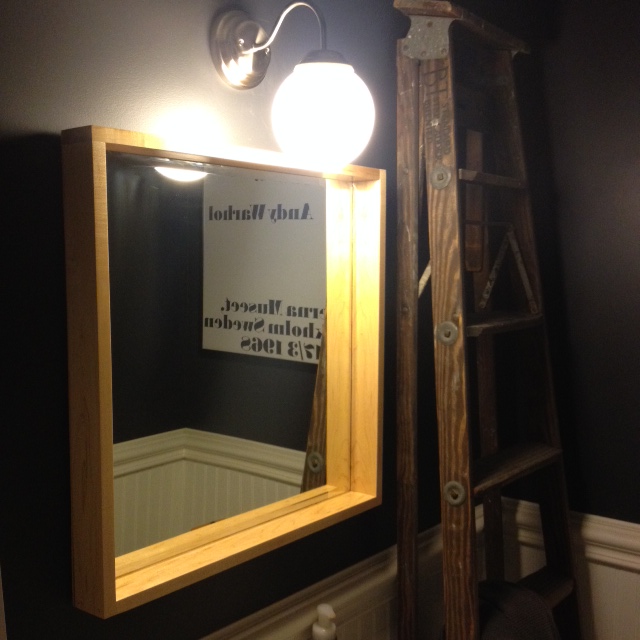
There you have it, custom framed shadowbox mirror. A weekend project for under $50.
Materials & Tools:
Maple – 1×3 – Downtown Lumber
Adhesive- PL Premium – Home Depot
Polyurethane – Minwax Oil Modified in Satin – Downtown Lumber
Hanging kit – Wallbuddies – Creartive Custom Framing
Mirror – Molger – Ikea
Miter Saw – Milwaukee
Orbital Sanger – Milwaukee
Nail Gun – Ryobi
Clamps – Irwin
Difficulty Level (on a scale of 1-5):
Total Cost $50
If the mirror is mounted to the wall with those little clips can a shadow box mirror still be made, DIY style?
Thanks so much, and really nice work!
Great tut!
Any idea what the ratio of adhesive to mirror should be? I’d like to hang a large (think 8′ by 6′) mirror using this method but the last thing we need is a big-ass mirror crashing down in the middle of the night.
Thanks!
Looks awesome Kristen! Glad the hardware worked 🙂