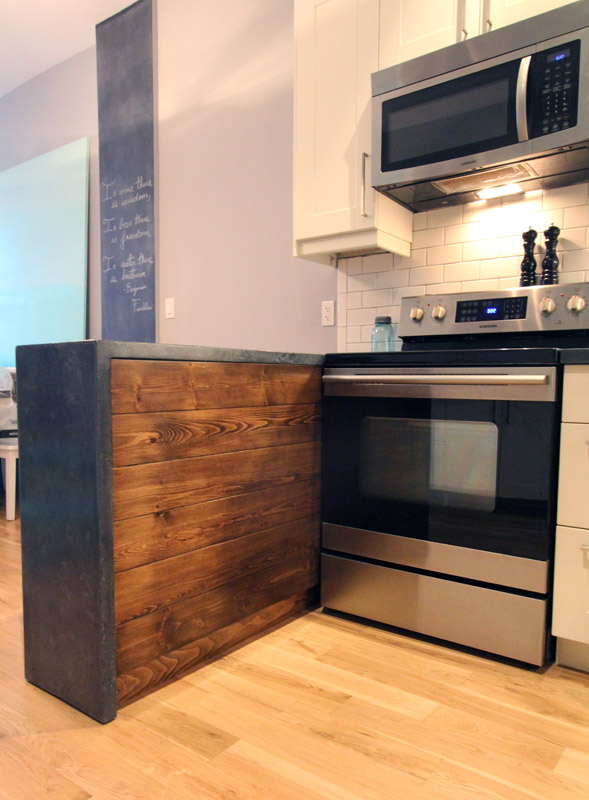
My least favourite part of the kitchen used to be the peninsula. It was short and stubby, too small to use as a prep space and looked awkward.
I had originally hoped to build the peninsula deeper to house a beverage fridge and get full counter depth cupboards & drawers. However it became apparent that to do that we would loose valuable dining room space, and be unable to have a 6 person dining table.
We were not willing to compromise on the dining table (we love to entertain!) so the peninsula needed to stay skinny. If we couldnt make it wider we could at least make it longer. We added only one more cabinet, which not only made the kitchen symetrical, but made so much more work space. Its amazing what a foot can do. Now you can stand comfortably at the peninsula and chop veggies or converse with someone in the diningroom.
Such a small change, but a world of difference. Now the peninsula is my favourite part of the kitchen. The concrete waterfall is the icing on the cake, but you may have noticed we added a bit of a special touch on the back of the peninsula as well.
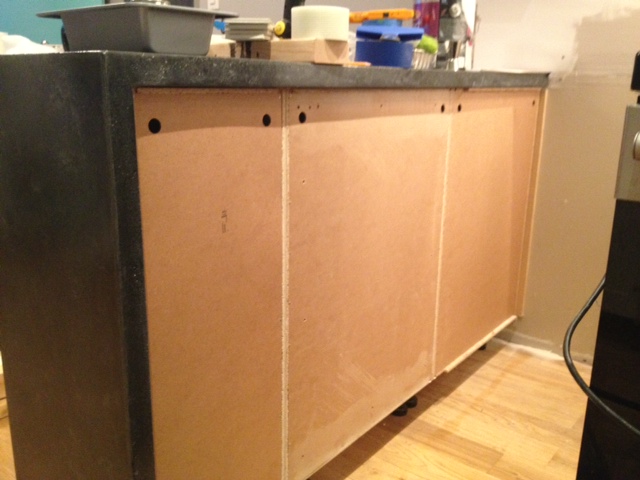
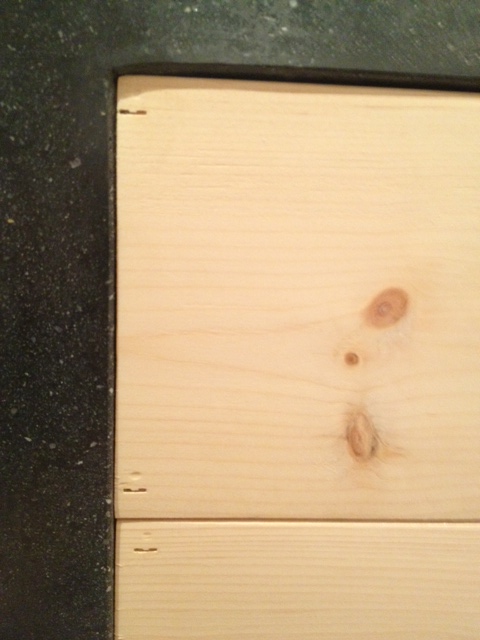
The peninsula used to be backed in an Ikea cover panel that matched the Ikea Adel kitchen cabinets. It worked just fine, but after we added the extra cabinet, the old cover panel wasn’t big enough.
Naked Peninsula Back
We could have went out and bought a larger one, but thought it might be a fun area to add something special, and make our kitchen look a bit more custom. Enter a trip to the hardware store.
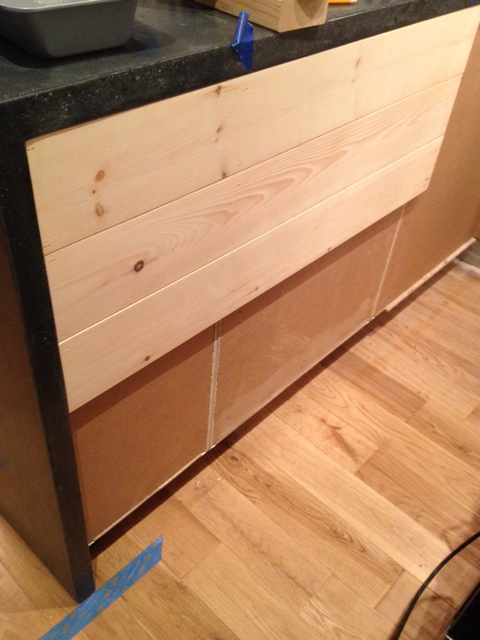
We picked up three 6 foot long pieces of tongue and groove 1×6 unfinished pine flooring from Home Depot along with a 1×4 piece of kiln dried pine. Back in the garage we cut down our lumber to three feet long on the miter saw, and headed into the house armed with some wood glue and a brad nailer.
We started at the top of the peninsula with a board facing groove up. We brad nailed it into the cabinets making sure we nailed through the sides of the cabinet frames, not just the backer. When attaching the second board we added a bit of glue to the groove, slid it tightly against the other board, and continued nailing. You will notice that we didn’t run the wood all the way to the wall. The stove is tucked into that corner, and to give the stove a bit more breathing room, we opted to only panel to just past the oven door. It saves on wood, and I will worry less that I will light my house on fire when I run the self cleaning oven.
Nailing up boards
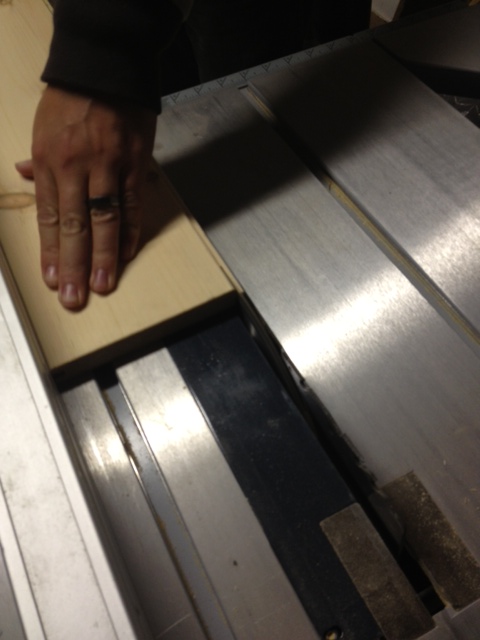
Once we reached the bottom, we went to the garage and cut the groove off the past piece with the table saw so we would end with a nice smooth board.
Cutting off the last tongue with the table sawLast board installed (note the absolute chaos of the kitchen in the background!)
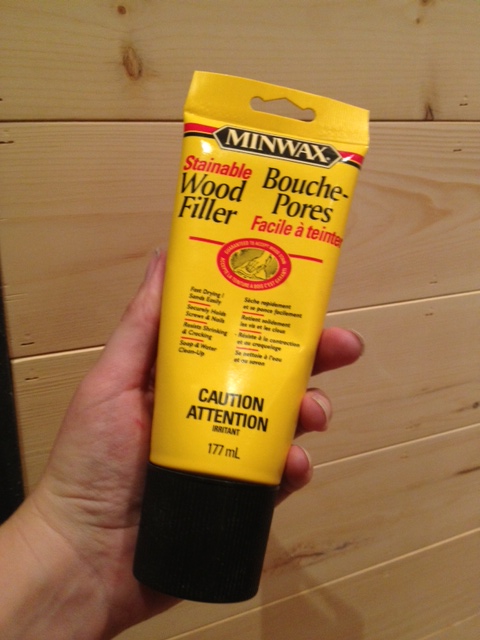
After the boards were installed we got out the wood filler and filled in the brad nail holes.
Wood FillerNail holes (and the stupid little divot my brad nailer leaves)
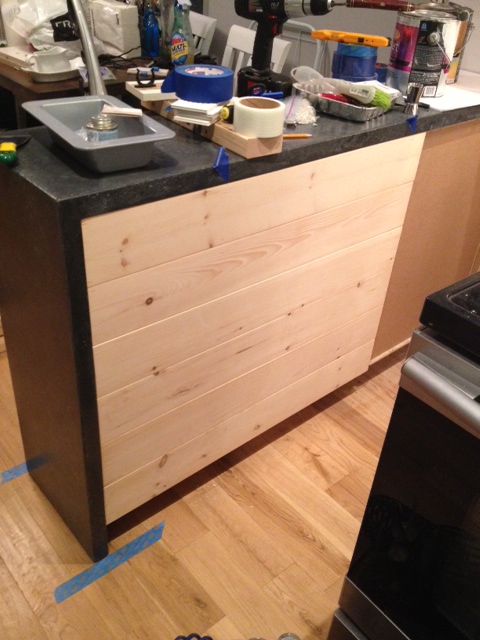
After letting the filler dry, we took the sander to the boards and gave it a quick finish sand.
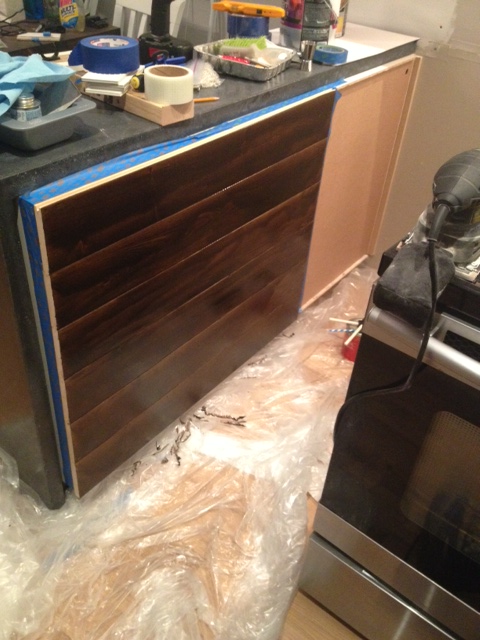
Now we were ready to finish it. We pushed back the countertop (we hadn’t yet adhered it to the cabinets at this point) taped off the area, and added a coat of wood conditioner then two coats of stain (same color as our dining table & coffee bar shelves).
Staining the paneling
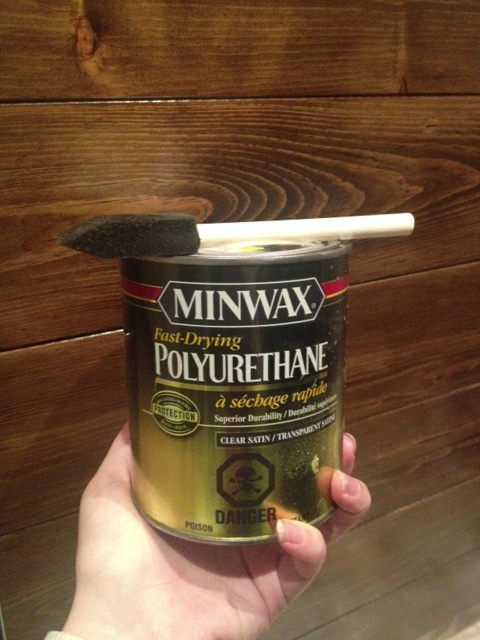
After staining we finished it up with 5 coats of Satin Poly. Five coats may have been a bit of overkill, but its beside the stove and oven, and will get its fair share of abuse.
Poly & foam brush
Next up we needed to address the toe kick. For the rest of the kitchen we have plain white toe kicks, but it just seemed weird to carry on the white for the back of the peninsula, so we opted to use a piece of 1×4 pine stained & polyed to match.
We then moved the countertop back in place, making sure the wood was flush with the countertop edge, attached the countertop to the cabinet, and slid the stove back in place.
Making sure the countertop was flush with the panelingPeninsula Back & Toe Kick
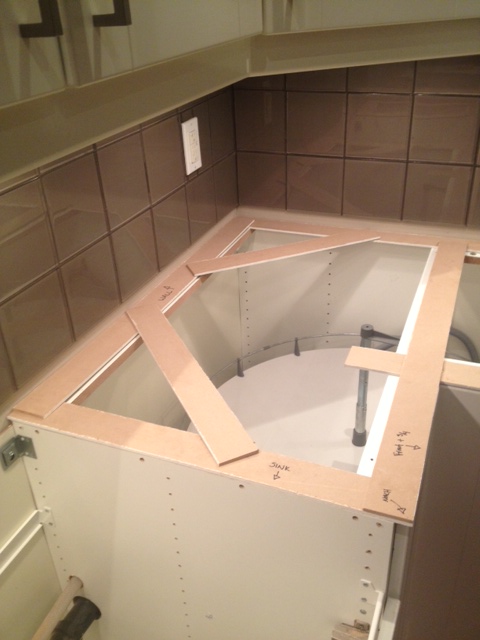
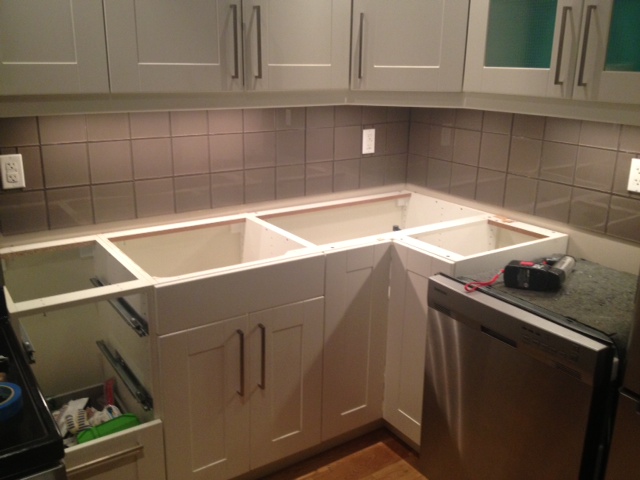
One of the most important parts of making a new concrete kitchen countertop is the templates. When starting to tackle our DIY Concrete Countertop project, we thought we would just measure our space, and make the forms from our measurements. Our kitchen looked square and true, but once the old counters were out we realized pretty quick that there was nothing square about our kitchen. Thats where templates come in. They are quick and easy to make, and will ensure your counters fit perfectly.
Your templates will recreate your cabinets and wall shape exactly, and ensure your countertops fit your space. It also makes sure your sink, faucet cut outs and anything else special is done in exactly the right spots. How terrible would it be to completely make your counters and realize your faucet hole is 2″ off. Ouch.
So here’s what you need to make your countertop templates:
1/8″ luan or other easily cuttable material cut into straight strips about 2″ wide. Get your hardware store to cut the strips for you on their panel saw. (We had some 1/4″ mdf strips left over from the guest room board & batten, so we used that. Although it wasn’t ideal, as we had to make a trip to the garage for all our cuts.)
Glue gun & glue sticks
Sharpie
Measuring tape
Bare cabinets free of counters and any imperfections. Ensure your cabinets are secured to the wall and level. Once you make the templates, you cant change your cabinets at all, or your countertops may not fit right.
Sink & any integral items to the counters
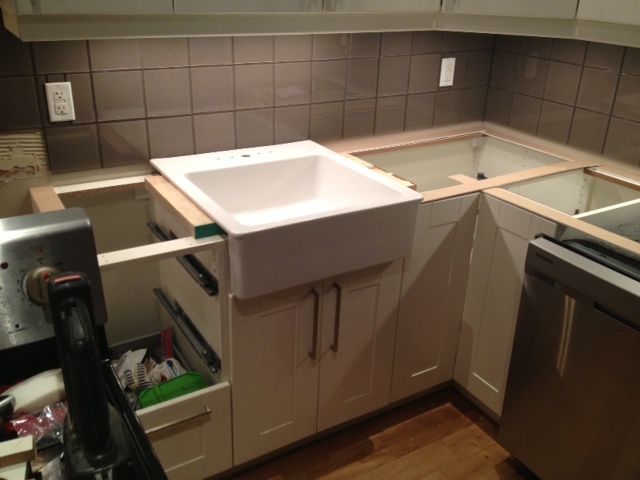
We removed our old countertops & sink, and ensured everything was ready for the templates. We had purchased our new sink, and had it as well as its installation instructions ready.
Cabinets ready for templating
To start the templates lay a long piece of your template material along the backs of the cabinets. Then lay strips along the front of the cabinets cutting them to exactly the same length as your cabinet.
Laying out the first pieces of the template and marking how long they need to be
Join the front and the back strips with shorter strips cut to the depth of your cabinet. Make your way around your counters outlining them with your template strips. Once you have everything laid out, go back and hot glue it all together.
Label all pieces with “front”, “back” and descriptions such where all your appliances are. Mark any areas that will require an overhang. The standard overhang is 3/4″ from the front of your cabinet doors. The back of your counters and areas where it hits walls or appliances will not need an overhang.
Template for small portion of the counter between the sink and stove
Read the installation instructions for your faucet & sink, and mark any special requirements on the template. Your sink may come with a template of its own, if so attach that to your template in the proper place.
Dry fit your sink & faucet in place around the templates (and make sure everything is going to fit!)
Dry Fitting our sink in place to build the templates around it
Our Ikea Domsjo sink required two notches on the front of our counters to fit the apron front sink. We marked the areas for the notch.
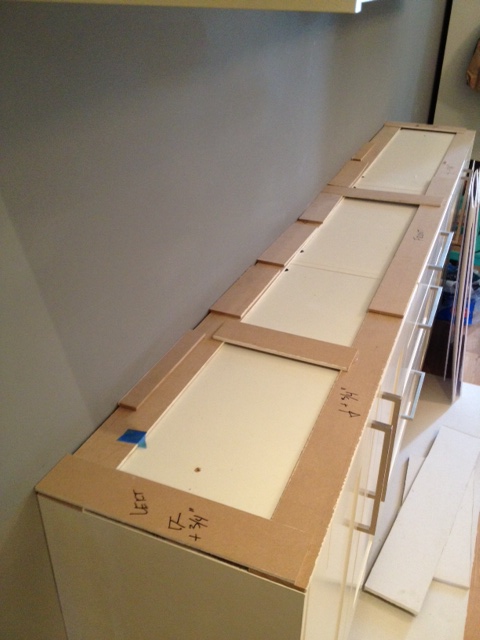
Note the markings for the sink edge and where the notch needs to goMain kitchen templates
For the coffee bar our counter is 7 feet long and the wall has quite a bow right in the middle. This caused problems for us when installing the coffee bar (it’s actually spaced out from the wall about 1/2″) and we knew a straight countertop wouldn’t be perfect.
To template for the bow in the wall, we cut a bunch of short pieces and laid them against the wall where the curve was. This outlined the curve for us perfectly, and we were able to recreate the bow within the form.
Coffee Bar template. Note all the small pieces forming to the curve in the wall
The entire template process only took us about a half hour, and produced perfect templates to make our forms with. A simple step, but definitely worth the effort for a professional result! You can also use this form of template making for your laminate or butcherblock countertops.
Next up we will be building the forms, and getting one step closer to pouring our concrete!
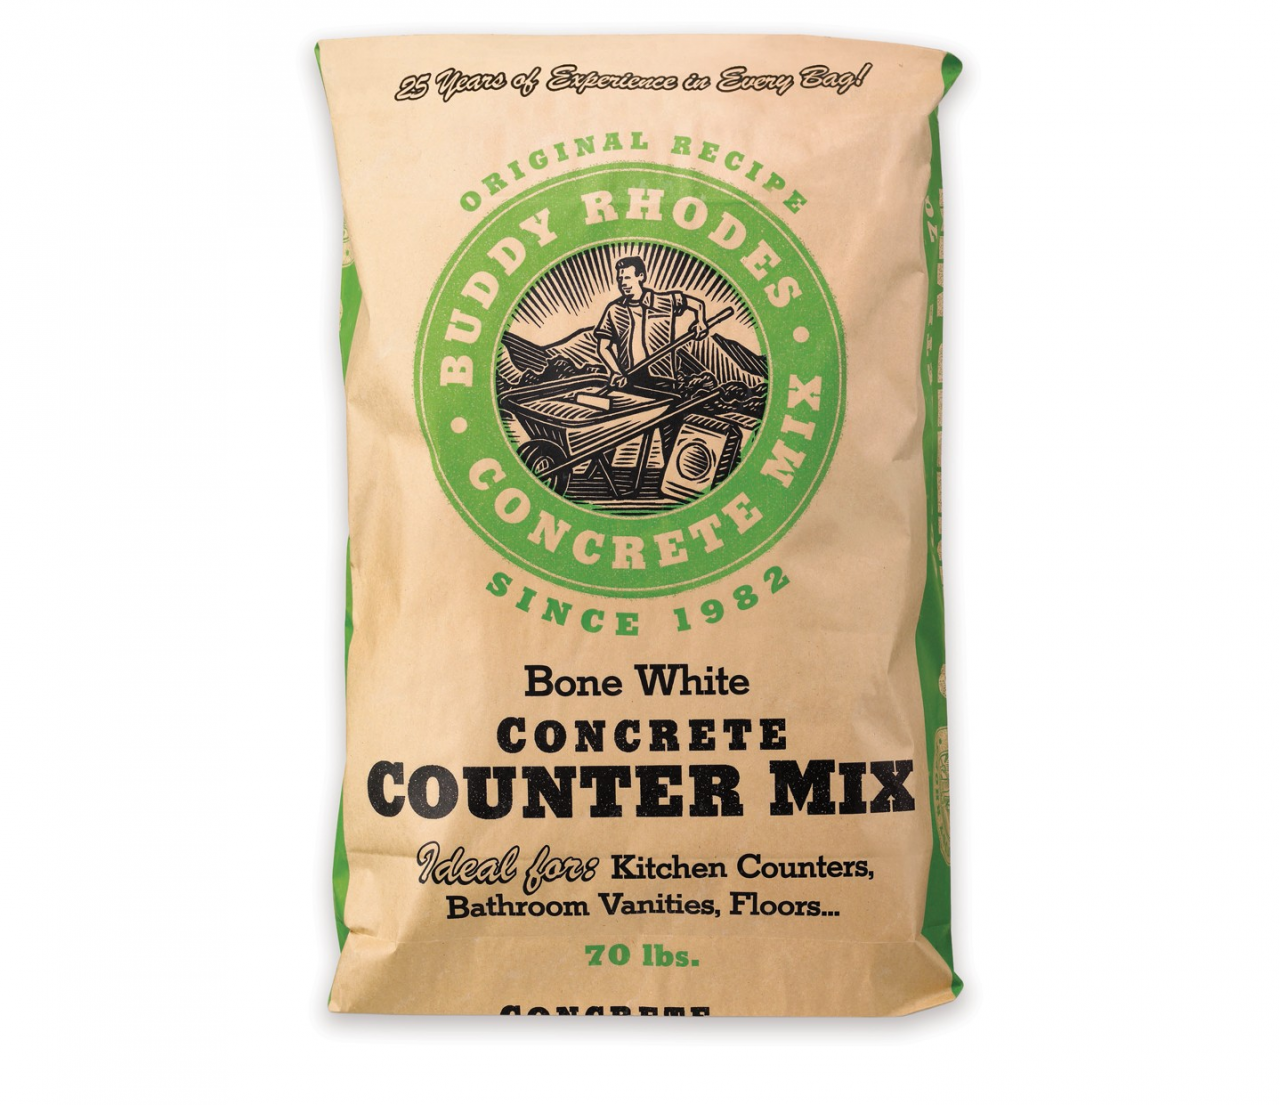
When planning for concrete countertops, the biggest thing we needed to decide on was the concrete mix.
Not all mixes are created equal, and for a countertop you need a high strength mix. Why? So your countertop doesn’t crack and fall to pieces. Simple enough.
Will the big box store mixes work? Maybe. But it’s a crap shoot. There are a LOT of variables that could send you into a tough place. First up, the big box store mixes aren’t meant for countertops (well except for the Quikrete countertop mix but more on that later).
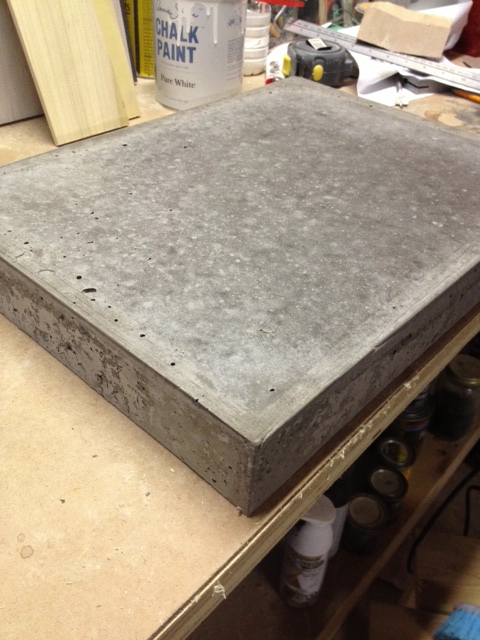
A few weeks ago I made a test piece knowing that I wasn’t using the right mix, but I just wanted to TRY, see if my mold would work, see if the whole scenario was even plausible. Turns out it is, but I had a lot of room to improve.
Concrete Test
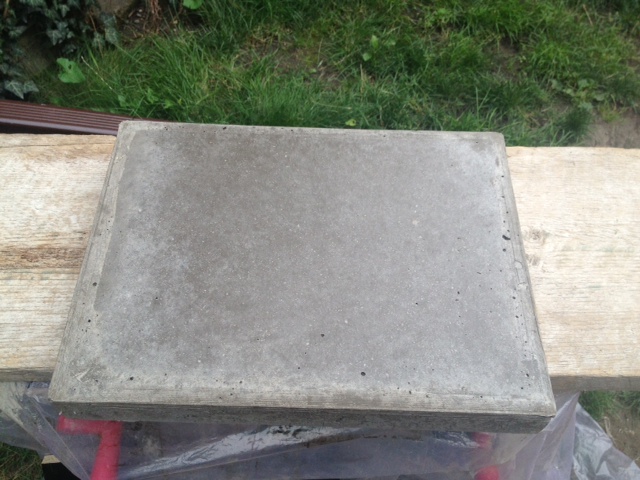
So my test piece came out full of holes, and with a lot of aggregate visible on the sides, a blotchy colour, gouges from my caulking job it and it was HEAVY. It turns out that little test piece was a behemoth. Not only did it change my mind about doing 2″ thick surfaces (gonna stick with 1 1/2″) but it also had me looking at alternatives to traditional concrete mixes.
So I started calling concrete countertop mix manufacturers, and checking my local hardware stores. Not only was there only one mix option at the big box stores, but there were no sealing and finishing products to complete the project, nor where there any direction on how best to build the molds, pour, sand & finish. I am not really one for experimenting on 2000 lbs of concrete. I want a product that I can do myself, have confidence in, and get professional results.
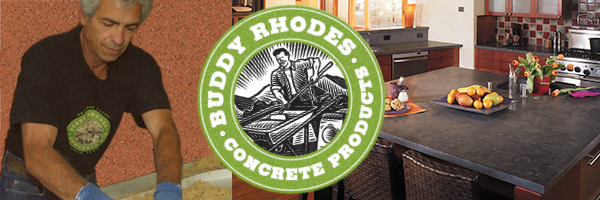
That’s when fate interjected, and I received a comment on my countertop test project from Buddy Rhodes Concrete Products suggesting I check out their product line. After a quick look around their site, and a few YouTube videos later, I had to know more.
Buddy Rhodes has flipped concrete on it’s head. It’s hard to explain, but his product & hand pressed technique isn’t poured like traditional concrete. It’s a thicker product that’s more the consistency of clay, that you don’t pour into a mold, you pick up handfuls of it, and pack it into the mold. Really. Then you don’t vibrate it, or worry about bubbles, and screeding, or even filling the entire mold to the brim.
It’s reinforced not with clunky (and heavy) re-bar or chicken wire, but with glass fibers. It doesn’t require a concrete mixer or 45 of your closest friends to pour, in fact you could do it in a couple weekends with a friend or two. But get this, its JUST as strong (if not stronger) and it’s way easier (and lighter). You can replicate finishes, and get professional results, every single time. Its incredibly DIY friendly and versatile.
They made concrete doable, and replicable, and almost idiot proof. Not only that, but their process makes concrete able to go vertical! Their product can be worked up a vertical surface. So my dream for a waterfall counter wasn’t going to be a feat of engineering and a two piece project. I could build a waterfall countertop in ONE PIECE. Mind blown.
I emailed the person at Buddy Rhodes who had commented on my post, and said I needed to know more! Where can I get this, will it work for my project?! They may have been shocked at my exuberance, or just too nice to say no to a crazy lady, but one of their artisan concrete experts Jeremy emailed me back in a few short hours asking about my project. A few emails later, and we were having a video conference call where Jeremy was convincing me we could pour my whole kitchen in four pieces when I had planned on doing it in 6, and not only that, but anything else I could dream up was essentially plausible.
Jeremy talked us through how their product differs from the big box bagged mix which was my only other option at this point. He pointed out the analogy of baking. You want to bake some bread. Do you just start out throwing things into a bowl and hope for the best, or do you use a tried and true recipe and high quality ingredients?
First off let’s get to know concrete a little more. There’s essentially two parts. Aggregate and cement. Think of a slab of concrete as a slice of raisin bread (gluten free of course). The cement is the bread and the aggregate is the raisins. Together they make toasted buttery goodness… Wait. I think I might be hungry… The bag mixes are short on cement. So they’re like a fruitcake. Lots of aggregate and not a lot holding it together. They are short on cement because it is the most expensive component it is also the reason for the strengths that concrete exhibits. But, it is also the glue that holds everything together, our mix is like proper raisin bread. Lots of cement and not too much aggregate.
The prebagged concrete countertop mix available at your local hardware store is essentially the same mix used in your backyard to set a post, mixed with more cement and less aggregate. Will it make you a concrete countertop? Probably. Will it be the perfect counter you were dreaming of? Umm..maybe. There are a lot of variables that could set things in a tail spin. It may be concrete, but it may not be the best option, especially for a DIY’er. Other possible pitfalls are that you can only make solid surfaces, its a very heavy and unwieldy product, and it has a long cure time. If poured or cured improperly it can crack, be brittle, has a limited color range, and is a mess to pour. It will also require some heavy duty forms, a lot of heavy mixing, some favors called into your buddies, and a lot of headache and hoping and you still haven’t figured out how to seal or protect it either.
I was a bit freaked out, as I’m sure you might be too right about now. Why would I risk a bunch of cash in materials, truck rentals, concrete mixer rentals and forms to possibly have a very large heap of junk that I would actually need to pay someone to take away if this didn’t go right?
So big box mix was out of the running, and Buddy Rhodes mix was the clear best choice.
Jeremy worked with us suggesting the best technique for us to use, how to build our molds, and make it as simple as possible to get a kick ass product. We were over the moon excited, and a lot more confident. I think some of my excitement rubbed off on Jeremy, as he surprised us with saying he might come to Canada to see us do our project. (That and for the maple syrup and poutine of course.)
Now, I assure you I warned this Southerner that fall in Canada isn’t quite the paradise he’s used to. But he booked a ticket, and gave us three weeks to get all our prep done, so he could see us “pour” when he got here. Talk about a deadline. But we did not want to fail our new concrete hero!
So we started measuring, and prepping, and calculating everything we needed and started checking things off our to-do list.
Next up, I will give you a detailed list of absolutely everything you need to buy, rent, procure, beg or borrow to make your project go (relatively) smoothly, and get a great result!
I really want to build concrete countertops for my kitchen. My laminate counters suck, and the coffee bar is curremtly covered in a $20 wood shelf from Home Depot.
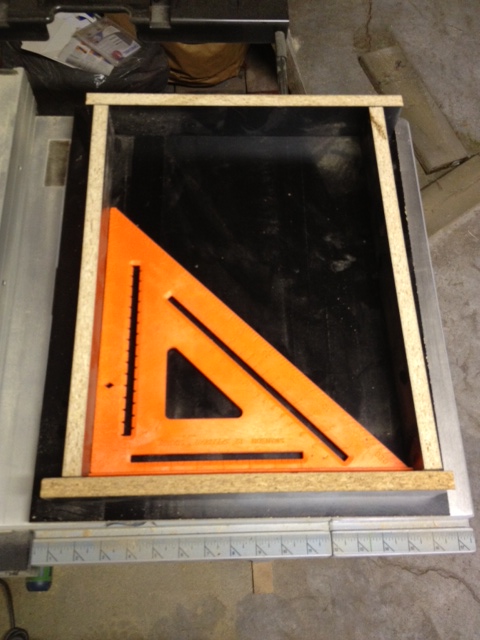
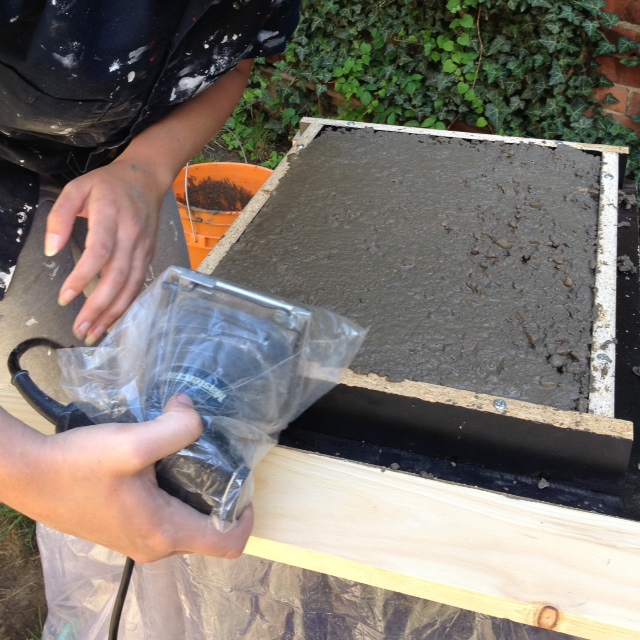
I had a bag of concrete hanging around the garage (don’t you?!) and decided it was high time to put all my researching to the test and pour some concrete. I decided to make a “cutting board” as my test run, and grabbed some spare melamine (I’m not a hoarder, I just have stuff in the garage…collecting dust…that might some day get used.) SO the melamine… I had El Granto rip down a few pieces into 2″ strips and then built a little form with some spare screws.
Building the mold (and making sure it’s square)
Next up, sealing the cracks in the form with silicone caulking. I conveniently had a new tube of silicone caulking. I inconveniently could not find my caulk gun. Cause it’s an easy thing to lose. You know, giant red tube thingy that looks like a weapon. Yep, missing. Hardware store? Closed. Dollar store? I may be able to find paint brushes, and tie downs, but a caulk gun was not to be had at Dollarama. My neighbours had been outside working on project as well, and we had passed an air compressor over the fence earlier in the day (true story) so I figured I’d ask if maybe they had one. BINGO! Caulk gun. Except theirs was contractor grade and made for big tubes of caulking, and my wee bitty tube of silicone was too small. So now what? I shoved a piece of wood into the bottom of the caulking tube and hoped for the best.
I started caulking, and I got silicone EVERYWHERE. All over me and the mold.
DIY TIP. Tape your mold or you’ll get silicone everywhere. After about 10 minutes I was covered and sticky and I had done the WORST job of caulking anything in my life. I threw in the towel (this was a test after all!) and left it to dry.
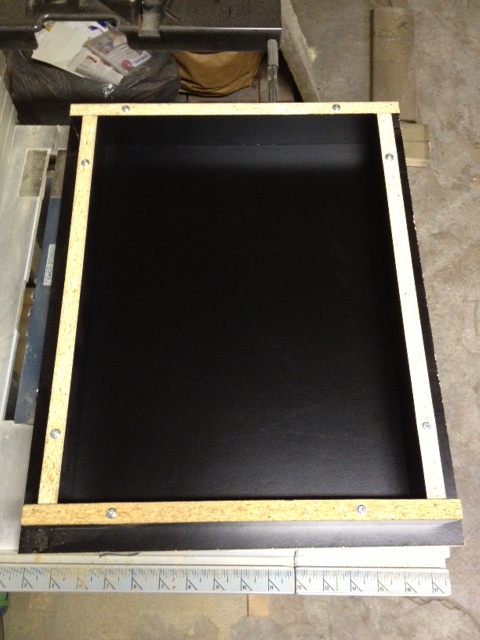
Mold Made (before crappy silicone job)
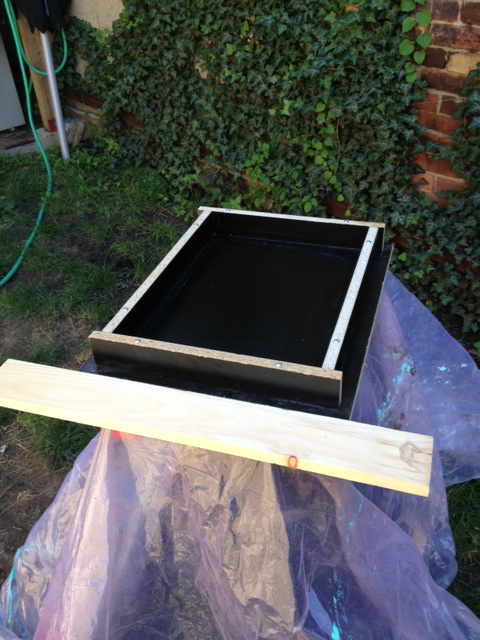
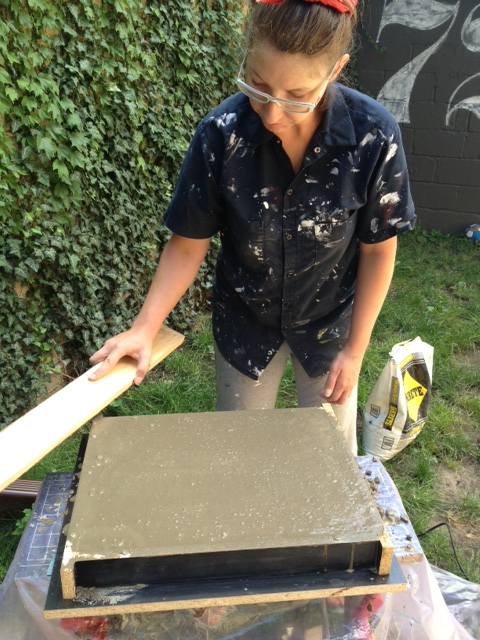
Next day we moved the mold outside on worktable covered in a plastic drop cloth, and I (with my girly muscles, a shovel and a piece of wood) mixed up a half bag of concrete. In hindsight, it could have used a bit more water, and I could have used a trowel (rather than a piece of wood) to get it well into the mold.
Pour area prepped. Drop cloth & screeding board readyFilling the mold. Don’t you just love my work outfit? Paint covered work shirt and track pants. I really should buy an attractive set of work clothes.
I then (smartly) took the sandpaper off my palm sander, and covered it in a bag, and vibrated the crap out of the mold.
Sander covered in a bagVibrating the mold
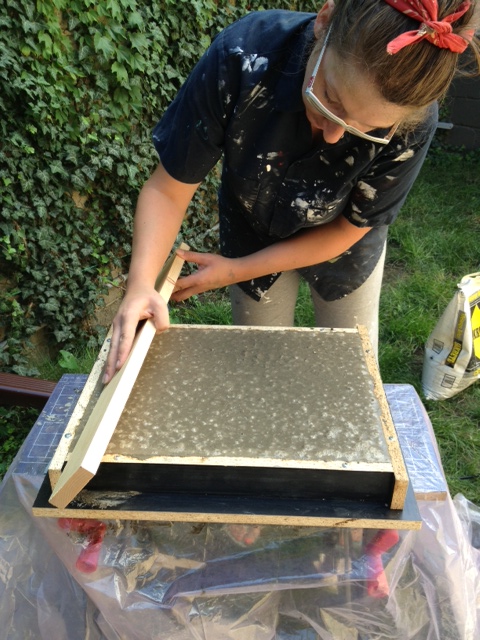
Then we screeded the top (which also didn’t go so well, as it started pulling gravel out of the mold, but again I think my mix was too thick.)
Screeding the mold
Then I let it dry, covered with plastic for a day. I didn’t put a wire mesh in it, cause A.) it was a test and B.) I didn’t have any in my garage…
I un-molded, and voila.
Concrete just after de-moldingIt worked!
Things I learned:
Concrete is heavy.
2″ is too thick for our countertop. It just looked too big (that’s what she said). In all seriousness, 1 1/2″ is a much more reasonable size, 2″ was just overkill. Like a Hummer H2.
My mix needed a bit more water.
Counter sink the screws! Or else you can screed it very well.
I will not mix up all the countertops in a bucket. Concrete mixer rental is imperative.
I needed a better concrete mix than the $4 bag of all purpose. It was too rocky and rough. The top of my cutting board was great, but the sides showed too much aggregate.
Next up, I will be filling the holes, adding some feet to my “cutting board” test driving some concrete sealers and waxes, and then putting it to the test in my kitchen. Wish me luck!
Have you ever played with concrete? Any tips to pass on?
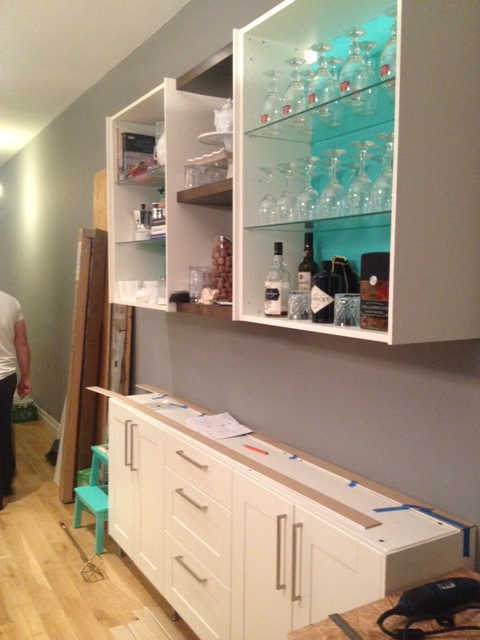
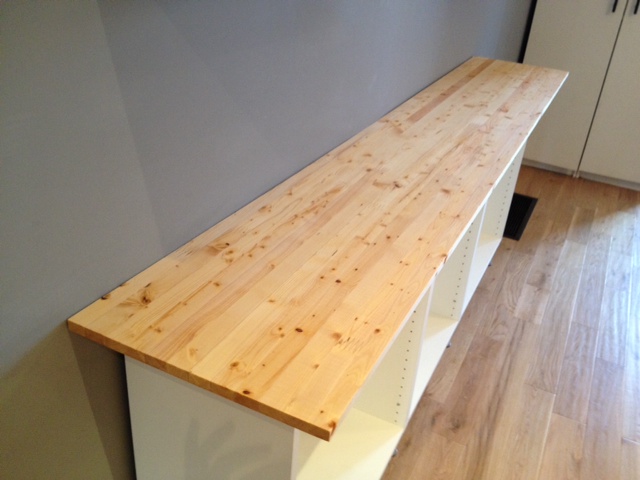
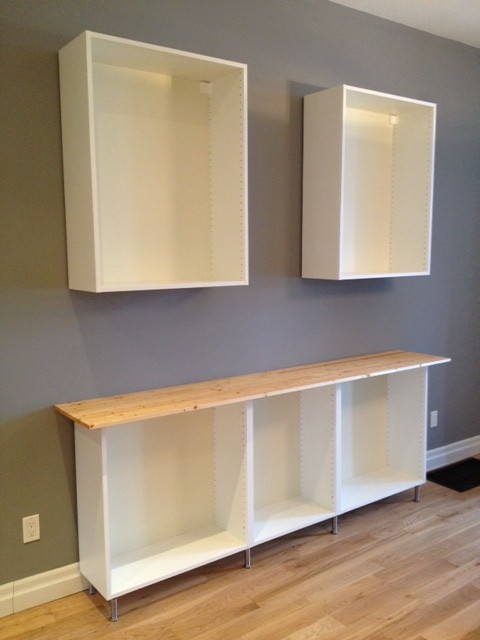
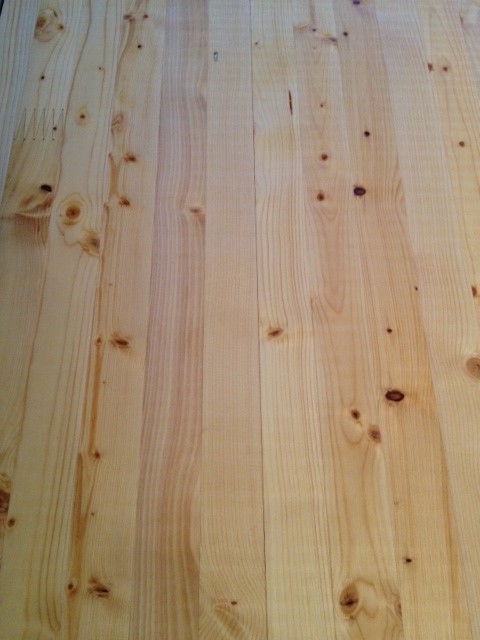
We will be living with the coffee bar without doors for a few months untill the budget will allow us to pruchase all the door and drawer fittings. The DIY concrete countertop will have to wait until spring (when its warm enough to pour in our unheated garage) but in the interim we still wanted to get some use out of our new cabinets. So we decided to make a temporary countertop using some inexpensive $20 shelving we found at Home Depot. It is finger jointed pine which looks a lot like butcher block. It’s 3/4″ thick and came in a 8′ length and 16″ wide. It was wide and long enough to fit the bill, and we figured we could finish it up to be a passable temporary butcher block countertop for our coffee bar untill project Concrete Countertops can happen.
We cut to length, sanded, and got to finishing it. We decided to give it a couple of coats of tung oil (same as our dining table) and call it a day.
Not bad for a $20 counter top eh?
SOURCE LIST:
Materials:
Pine Shelf – Home Depot (note we used the #2 grade, you can also get a #1 grade version for $46)
Tung Oil – Lee Valley Tools