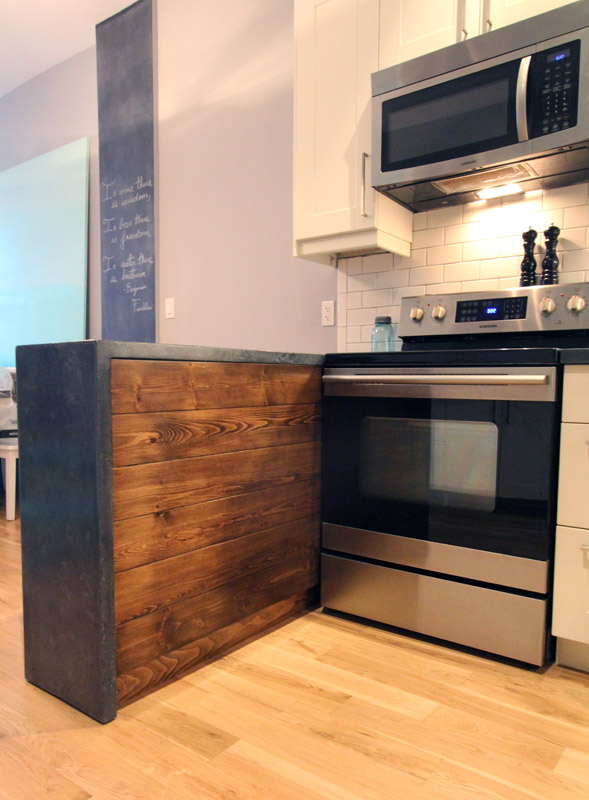
My least favourite part of the kitchen used to be the peninsula. It was short and stubby, too small to use as a prep space and looked awkward.
I had originally hoped to build the peninsula deeper to house a beverage fridge and get full counter depth cupboards & drawers. However it became apparent that to do that we would loose valuable dining room space, and be unable to have a 6 person dining table.
We were not willing to compromise on the dining table (we love to entertain!) so the peninsula needed to stay skinny. If we couldnt make it wider we could at least make it longer. We added only one more cabinet, which not only made the kitchen symetrical, but made so much more work space. Its amazing what a foot can do. Now you can stand comfortably at the peninsula and chop veggies or converse with someone in the diningroom.
Such a small change, but a world of difference. Now the peninsula is my favourite part of the kitchen. The concrete waterfall is the icing on the cake, but you may have noticed we added a bit of a special touch on the back of the peninsula as well.
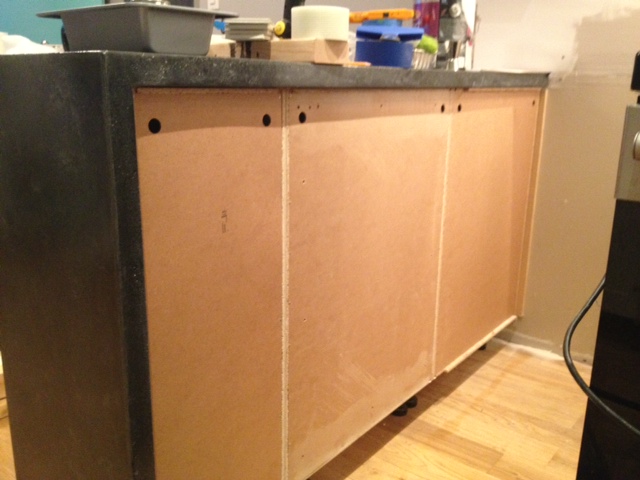
The peninsula used to be backed in an Ikea cover panel that matched the Ikea Adel kitchen cabinets. It worked just fine, but after we added the extra cabinet, the old cover panel wasn’t big enough.
Naked Peninsula Back
We could have went out and bought a larger one, but thought it might be a fun area to add something special, and make our kitchen look a bit more custom. Enter a trip to the hardware store.
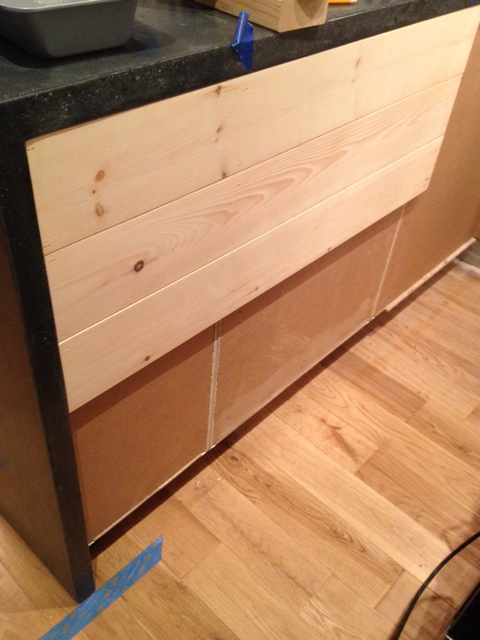
We picked up three 6 foot long pieces of tongue and groove 1×6 unfinished pine flooring from Home Depot along with a 1×4 piece of kiln dried pine. Back in the garage we cut down our lumber to three feet long on the miter saw, and headed into the house armed with some wood glue and a brad nailer.
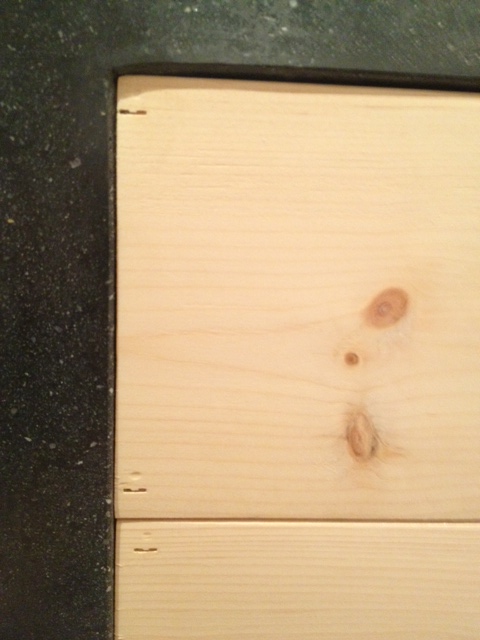
We started at the top of the peninsula with a board facing groove up. We brad nailed it into the cabinets making sure we nailed through the sides of the cabinet frames, not just the backer. When attaching the second board we added a bit of glue to the groove, slid it tightly against the other board, and continued nailing. You will notice that we didn’t run the wood all the way to the wall. The stove is tucked into that corner, and to give the stove a bit more breathing room, we opted to only panel to just past the oven door. It saves on wood, and I will worry less that I will light my house on fire when I run the self cleaning oven.
Nailing up boards
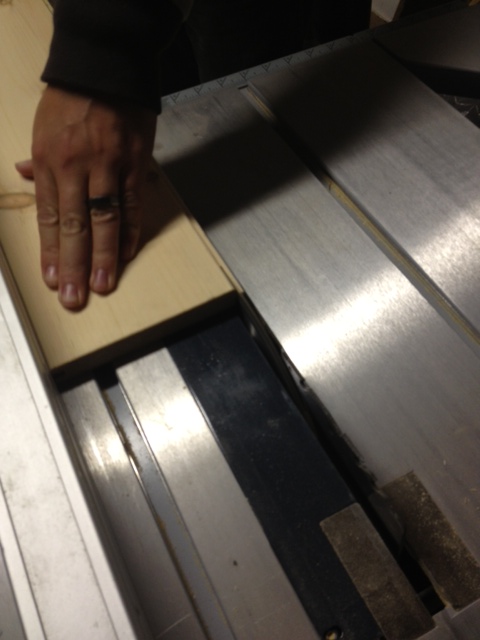
Once we reached the bottom, we went to the garage and cut the groove off the past piece with the table saw so we would end with a nice smooth board.
Cutting off the last tongue with the table sawLast board installed (note the absolute chaos of the kitchen in the background!)
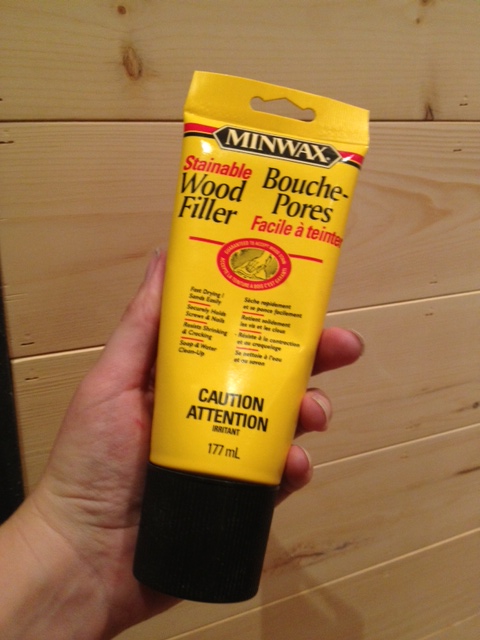
After the boards were installed we got out the wood filler and filled in the brad nail holes.
Wood FillerNail holes (and the stupid little divot my brad nailer leaves)
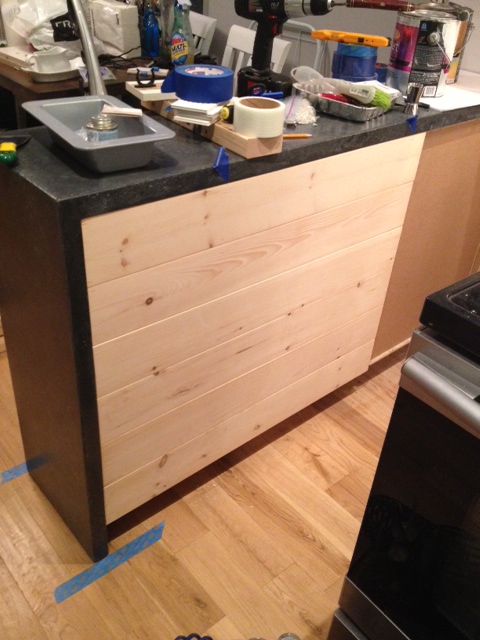
After letting the filler dry, we took the sander to the boards and gave it a quick finish sand.
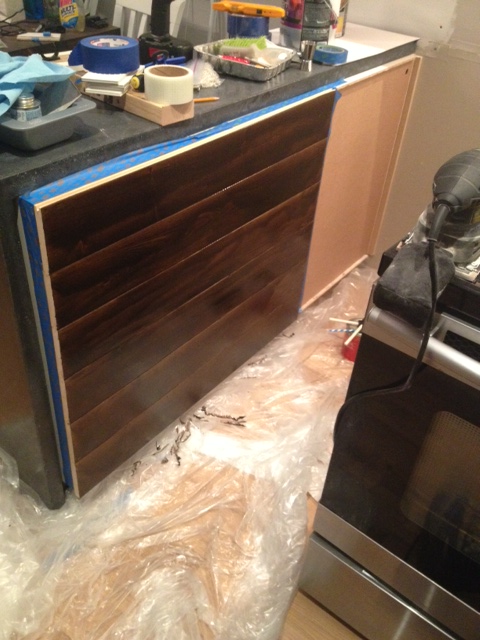
Now we were ready to finish it. We pushed back the countertop (we hadn’t yet adhered it to the cabinets at this point) taped off the area, and added a coat of wood conditioner then two coats of stain (same color as our dining table & coffee bar shelves).
Staining the paneling
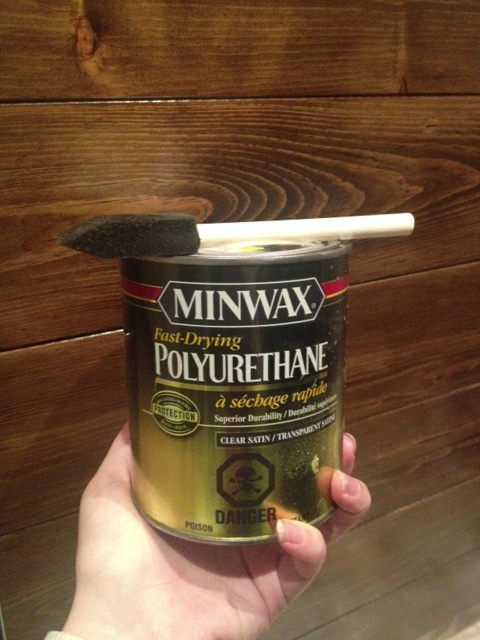
After staining we finished it up with 5 coats of Satin Poly. Five coats may have been a bit of overkill, but its beside the stove and oven, and will get its fair share of abuse.
Poly & foam brush
Next up we needed to address the toe kick. For the rest of the kitchen we have plain white toe kicks, but it just seemed weird to carry on the white for the back of the peninsula, so we opted to use a piece of 1×4 pine stained & polyed to match.
We then moved the countertop back in place, making sure the wood was flush with the countertop edge, attached the countertop to the cabinet, and slid the stove back in place.
Making sure the countertop was flush with the panelingPeninsula Back & Toe Kick
The title of this post lies. Such a dirty little liar.
The concrete product we are using; Buddy RhodesCraftsman Mix and the way were mixing it: “Buddy’s hand pressed technique” is not poured at all. However “DIY Concrete Countertops – The Day We Made Mud Pies” doesn’t have the same ring to it, or credibility.
All joking aside, I want you guys to take me seriously now, because things are about to go down. It’s getting hot in here, and someone may have let the dogs out (oops!).
It’s time to make the countertops!
Like really truly put stuff in molds!
If you’re new (hi!), and haven’t yet read my previous posts on this project, well then get to it! You’ve got a lot to catch up on before this sh%t goes down!
Jeremy from Buddy Rhodes flew into Toronto, all the way from the Southern US to help us Canucks “pour”. You will note a continuing theme throughout our time with Jeremy. He was convinced all Canadians said nothing but “aboot” and “eh”. While El Granto & I had a good laugh every time he said “y’all”. While I tried very very hard not to let an “Eh!” drop. They regrettably slipped out, and I will never ever live it down.
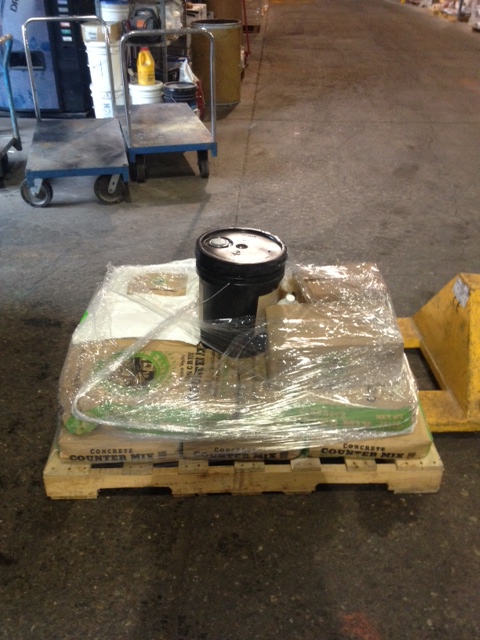
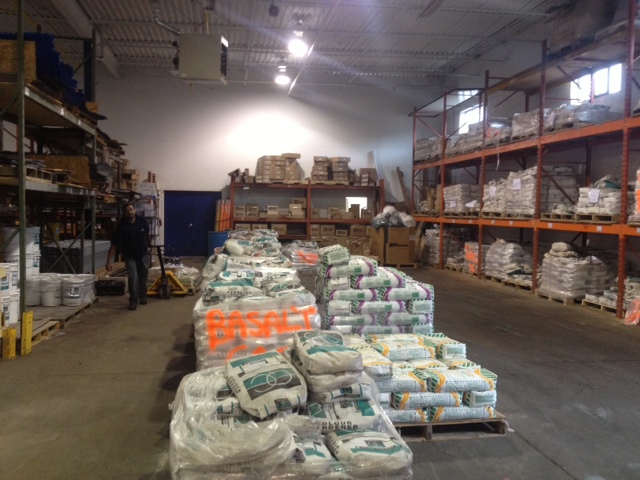
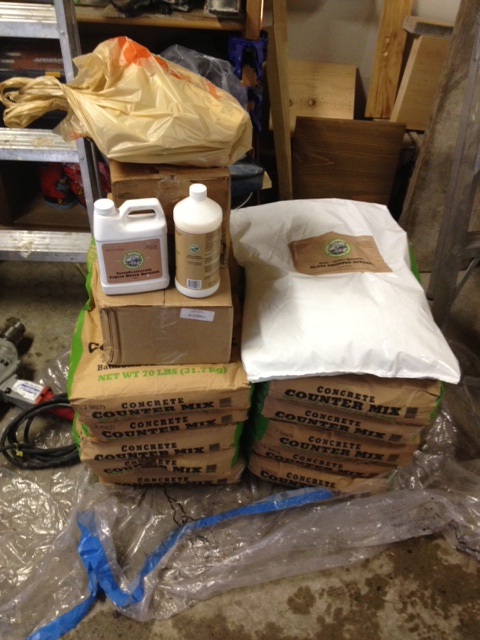
While Jeremy was making his way to Canada, EL Granto’s Mum and I headed to Form & Build in Mississauga to pick up our supplies. After much humorous banter with the Form & Build guys (including them playing a trick on the new kids, telling us the SUV wouldn’t hold the weight of everything!) we had all our supplies loaded and ready to go. (Thanks Form & Build warehouse guys, that stuff is HEAVY!)
The pallet full of our supplies at Form & BuildForm & Build Warehouse – it’s like a concrete candy storeWhat do you think, is it all gonna fit? It did (and the CRV was fine!)All the Buddy Rhodes supplies safe and sound back at the Storefront Garage
Back at the Storefront we laid out our previously built forms on perfectly flat sturdy surfaces (you CAN put them on the ground, but it’s much much easier if you’re working at waist height and our garage floor is anything but flat). We used saw horses for one of the forms, and we made a work surface out of 5 gallon buckets and some 2×4’s for the other.
Jeremy building a work platform for our forms
This was all happening in our 240 square foot garage. (Which is full of tools eh!) This is urban DIYing at its finest! You gotta make do with what you’ve got.
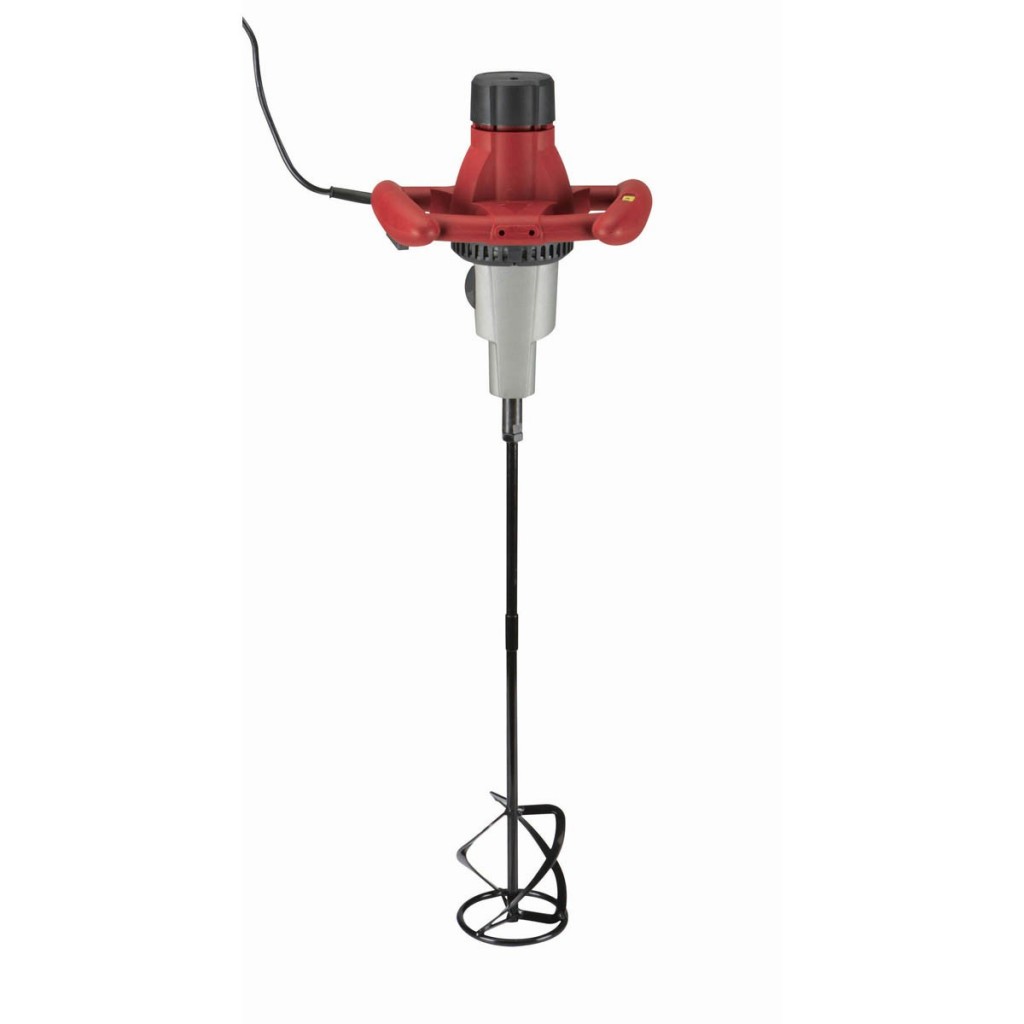
Once we had everything ready to go, we started mixing. Jeremy had previously suggested we get a mortar mixer like this:
Harbor Freight Tools Mortar Mixer
They are readily available in the US but apparently in Canada they are hard to find. Home Depot carries one for sale online only, but unfortunately we didn’t have enough time for the shipping before Jeremy got into town. I called every tool rental place in the city, and alas no one rented them.
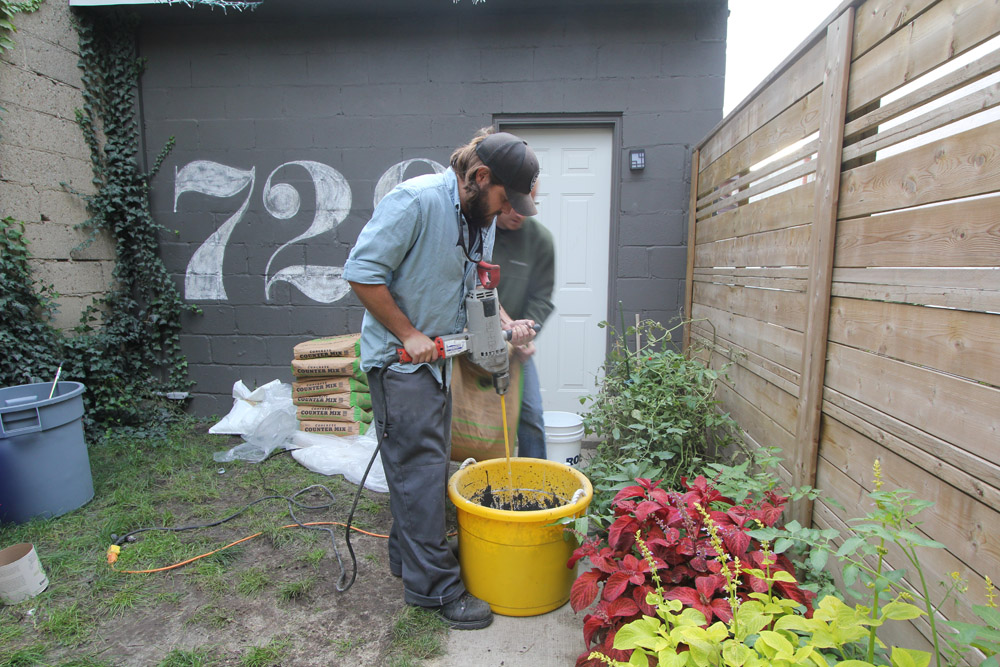
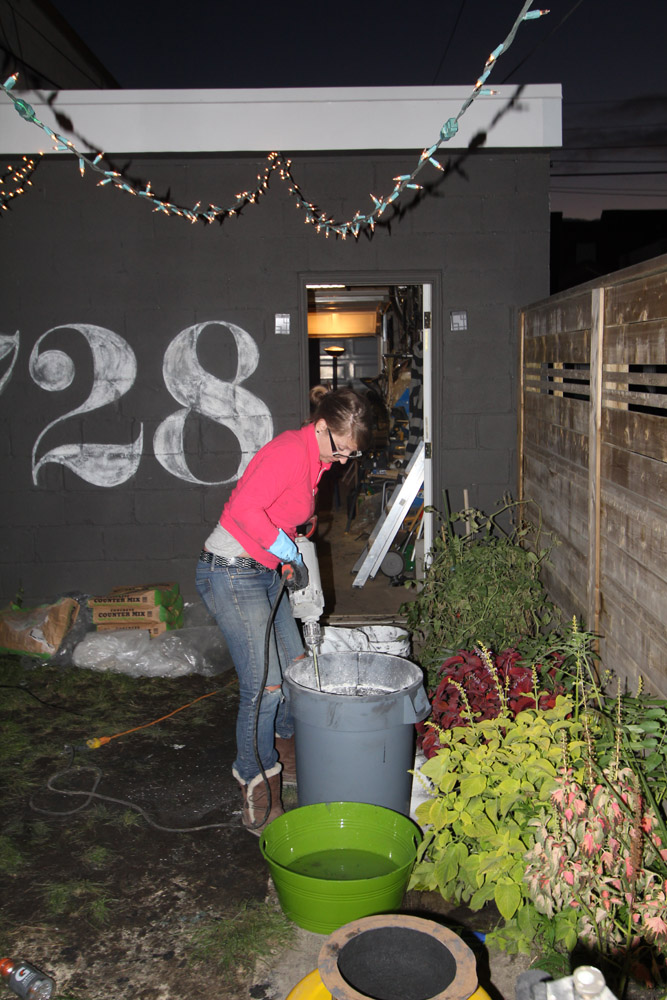
We settled for a rental mixing drill, and this thing was a beast. It was HEAVY, unwieldy, mixed too much air into the mix, and took forever to mix. Not ideal, but in the end it did get the job done. We all struggled with it, ended up cutting our mixing paddle shorter, and took turns. Next time, I am buying the right tool for the job! If you are thinking of doing this project, get a mortar mixer!!
We were mixing the Buddy Rhodes Craftsman Mix according to Buddy’s hand pressed recipe. This mix is not your normal concrete. It’s more the consistency of cookie dough, and truthfully mixing it is just like making cookie dough!
“Pouring” this mixture is a two stage process, you put a first coat of hand pressed craftsman mix in to your forms about a half inch thick, then you fill in the form with a backer coat of fiber reinforced craftsman mix. Use the Buddy Rhodes project calculator to determine how much of each product you will need.
Here are the quantities we used for Stage One:
2 bags Buddy Rhodes Craftsman Mix
8 quarts water
2 quarts polymer
1 can pigment (coal in our case)
Water reducer to get the consistency we are after (only a little, about a cap full)
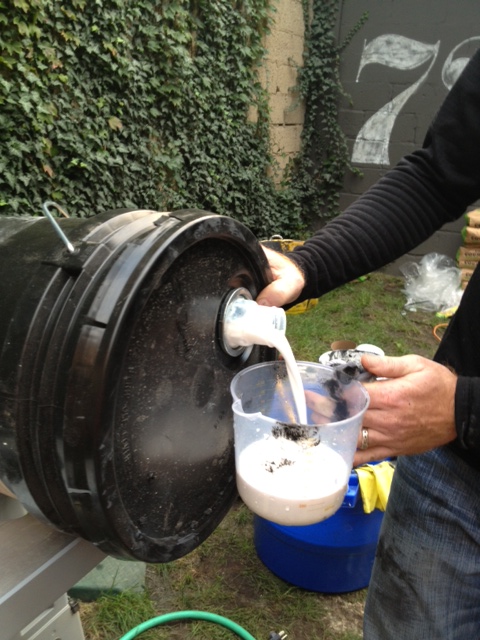
DIY TIP: Ever poured something out of a 5 gallon pail? Sucks right? It’s heavy and hard to control and slops all over the place! Here’s a tip, place the pail on its side on a work surface. Start with the spout facing up, and remove lid. Place your container below the spout, and slowly roll the pail. It will start gently pouring out of the spout into your container, and you wont spill anything! When you’re done, roll the pail back and put the lid back on. No heavy lifting and spilling required!
Easy Peasy Lemon Squeezy
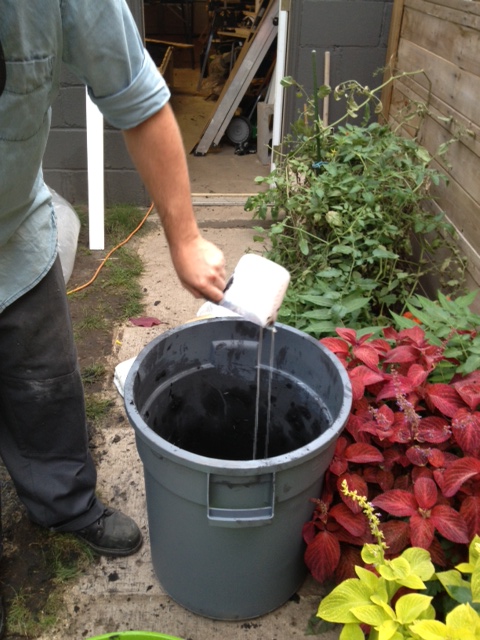
Just like baking, we mixed all the liquids together first, and added in the pigment to get it evenly dispersed.
Add liquids first, then mix
Then we slowly added one bag of craftsman mix. If you’re doing this project, wear a dust mask, you do not wanna breathe in that dust!
Mixing everything together
Lifting the mixer up and down, and round and round helped everything mix more evenly.
Everyone pulled together to mix. This was hard work! Especially me with my girly muscles.
Everything is ready once the mixture reaches cookie dough consistency. It’s like play-dough for big kids who want new kitchens!
Now it’s time for the fun!
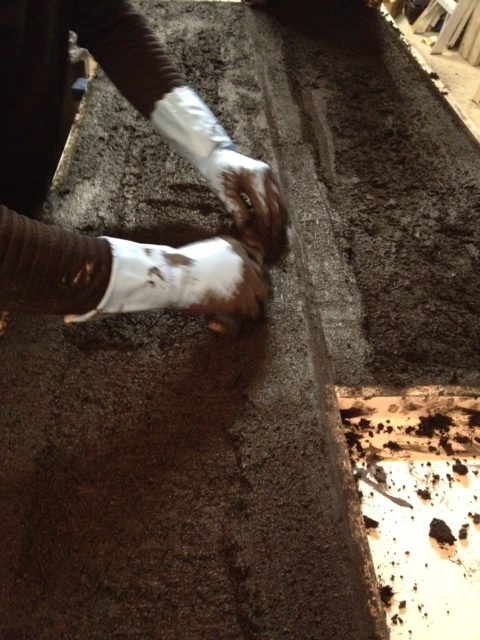
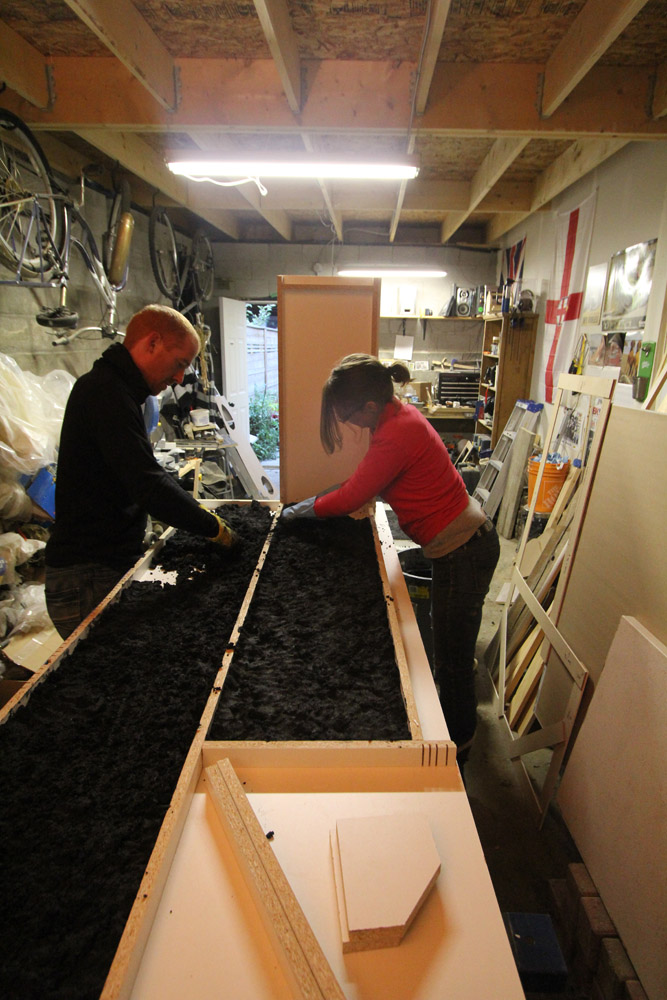
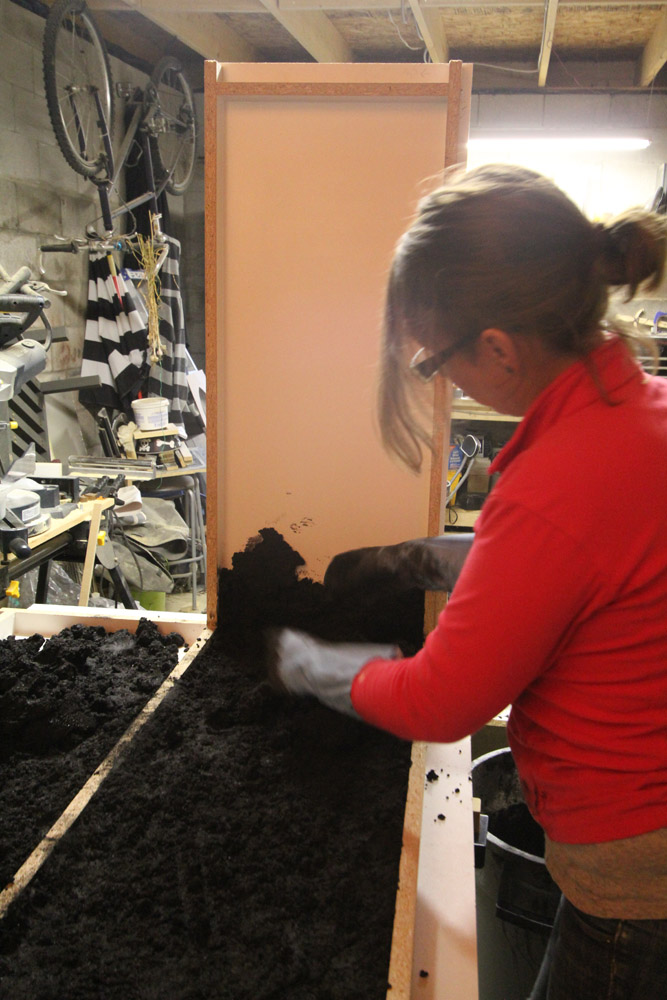
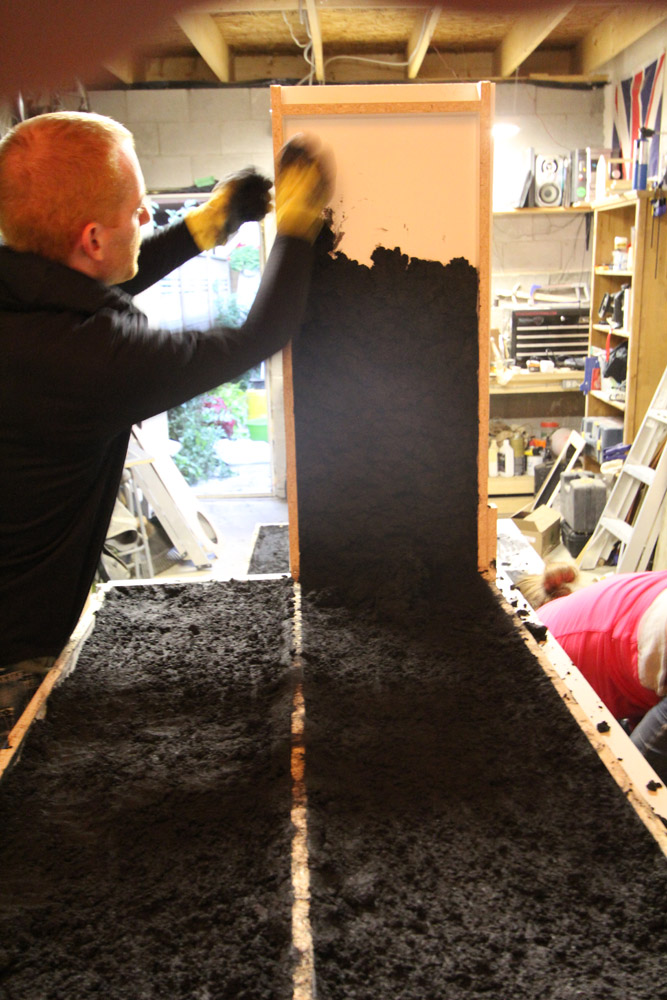
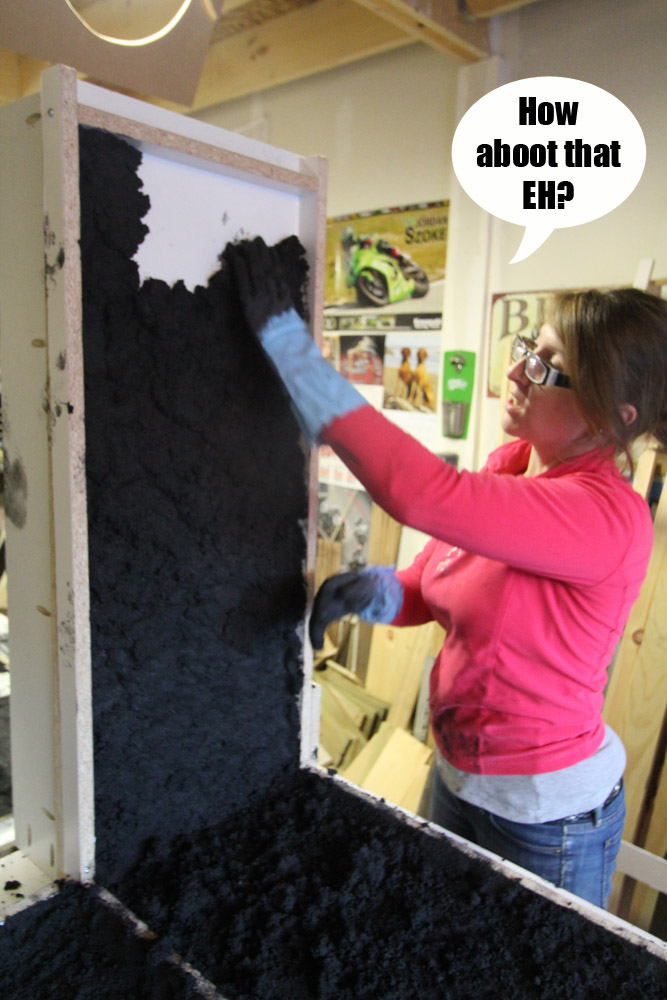
We donned gloves, and took handfuls of the mix and packed it (gently) into the forms. With this technique we actually want to leave some voids, so that the concrete will have a more organic look to it. If you pack it too hard you’ll squish out all the air and have no voids to fill later. We want voids because we will fill the voids with a bone paste colored slurry, which will give some character and depth to the finish. So this task meant that we were to do a bit of a crappy job in order to make it awesome.
We made handfulls of what I lovingly called mud pies, and placed them in the forms, making sure we got up the sides and all along the flat parts about 1/2″ thick.
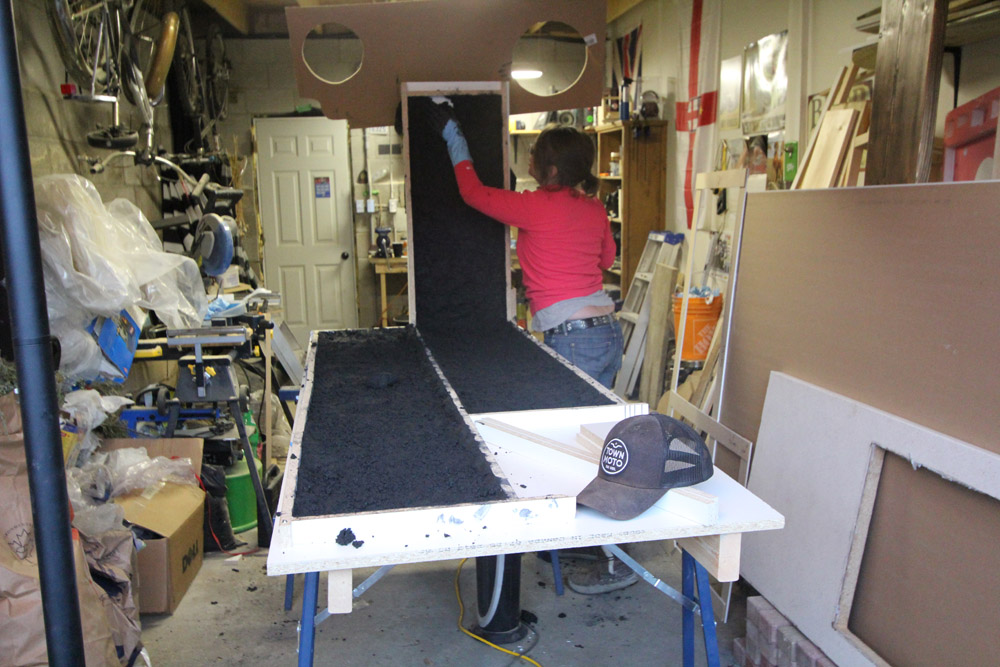
When we got to the waterfall countertop form, we did the flat part first, then started up the vertical. As the mix is nice and thick, it stuck to the form no problem.
Packing the bottom of the formsBuilding the mix up the vertical form
Up and up the form we went.
Build that wall y’all!Am I doing it right?Almost there!
After the forms had their 1/2″ of Stage One mix, we gently raked everything with our fingers making sure things were pretty well evenly dispersed and there weren’t any huge voids. Next up is Stage Two, the reinforced backer.
Here are the quantities for Stage Two – The Backer:
2 bags Buddy Rhodes Craftsman Mix
8 quarts water
2 quarts polymer
1 can pigment (coal in our case)
Water reducer to get the consistency we are after (a little bit more than Stage One)
2 1/2 lbs of glass fibers
Stage Two gets mixed exactly the same way as stage one, except the glass fibers are added (and mixed in gently) right at the very end. It’s important not to break all the fibers or they wont do their job. You don’t want lazy slacking fibers.
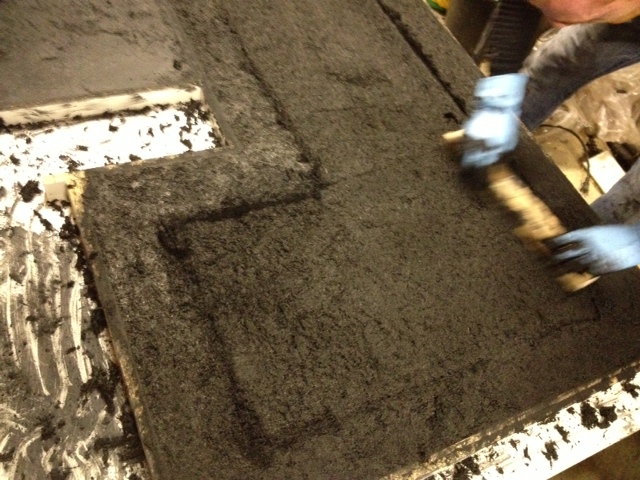
After the backer was all mixed up, we added it to the molds, filling it up entirely near the edges, and leaving it a bit less full in the middle of the forms (you don’t need to fill them all the way up in the middle, its just wasting concrete!). You want the forms completely full where they are going to touch the front and the back of your cabinets (so that everything lies nice and flat). You also want it to ensure your overhang is completely full.
We then used a small piece of wood to screed the parts of the countertop that will touch the cabinets & the overhangs making everything nice and flat.
Jeremy using a piece of wood to screed and make flat the bottom of the countertopJeremy hollowing out the center of the large countertop piece. You dont need the form to be full in the middle. This way you can cut down on material and weight
On our waterfall, we made some smaller pieces to act as the backs of the mold where our toe kicks and overhangs were. This will ensure we get a nice pretty back side of our counter (as it will be visible.)
Check out the small pieces of melamine on the vertical of the waterfall mold. Also note the exhausted look on El Granto’s face and the sheer amount of mess everywhere.
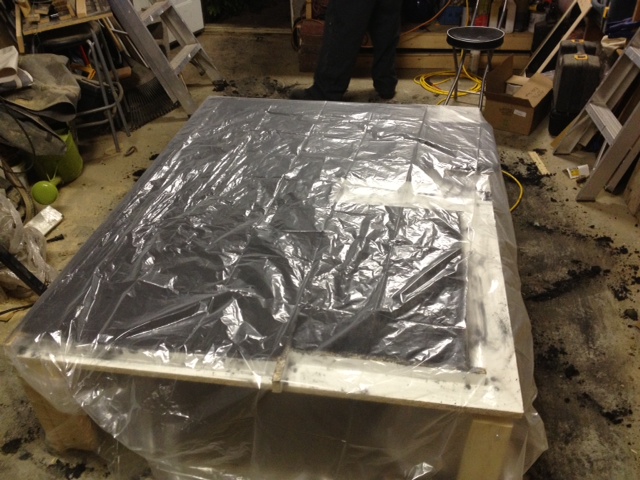
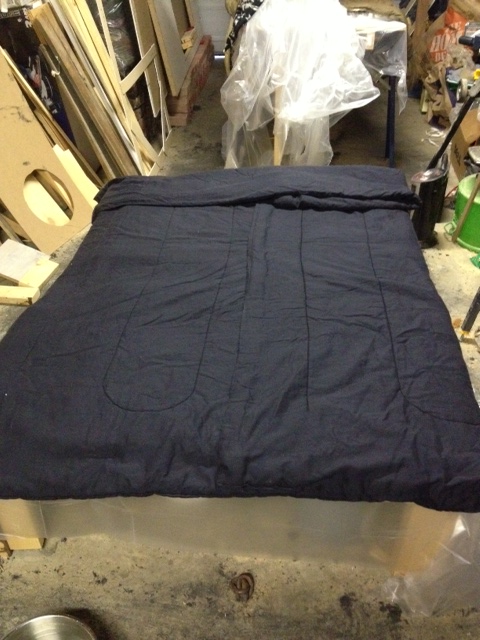
Once we were done, we covered our counters with plastic sheeting, then blankets to keep them warm. Heat is important to the curing process (in his shop Jeremy puts industrial heating blankets on his forms while they cure to keep them as hot as possible), and as it was fall in Canada, it was even more important to keep everything warm. We put all the concrete to bed with blankets and left the heat on high in the garage overnight.
Covering forms with plastic to keep in moistureWe covered the concrete with blankets and tucked it in for the night.
We occasionally went out and wet down the concrete with warm water and a cloth, then recovered. If you are doing this yourself, I would recommend doing your pour one weekend, then keep your concrete damp and warm for a week (this will ensure the strongest concrete possible), and unmold the next weekend. We were on a tighter timeline, and unmolded the next day.
It was a hard days work, but we actually made countertops! Next step is to unmold everything, make a bone paste colored slurry to fill any voids, and then sand. We’re getting closer!!
***UPDATE – Check out the next stage in the project here ***