So last week we taught you how to open an Ikea box without ruining your marriage.
Now we’ll teach you how to install an Ikea upper cabinet without swearing at your spouse, or dropping a 30lbs cabinet on their head. You’re getting marriage counseling and DIY all in one. You should thank me.
So when installing an Ikea upper cabinet, you need to hold the cabinet up to the wall where you want it, then mark for where the rail is going to go. This can be a bit of an awkward process with two people. One person has to hold the cabinet over their head steady and level while the other person marks. This is the point where one of you is on a ladder wielding a level and a pencil, directing the other one who is trying to brace the cabinet on their shoulders and keep it steady while you tell them to move it “a little to the left, no your other left dumbass”. This is the point in time when things are about to go oh so wrong. So here’s what you need to do.
You installed your lower cabinets already, correct? They’re nice and level and secure and wonderful? (Level is the key here!)
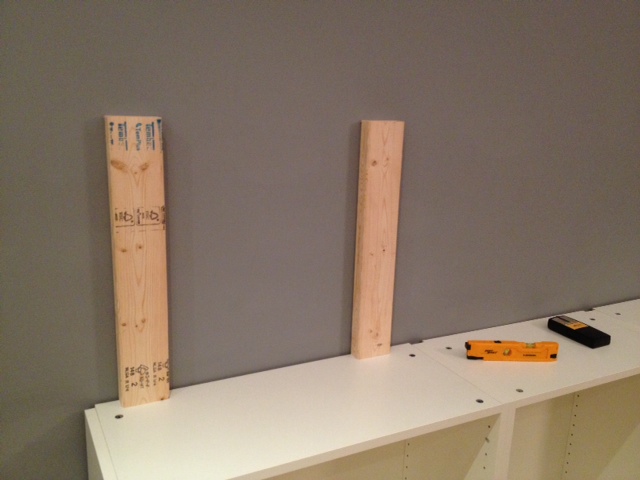
Measure the distance between the top of your lower cabinet, and where the bottom of the upper cabinet should be. Now go to the garage and cut two 2×4’s to exactly that length (I am gonna call them stilts). Come back inside, and place them standing up straight on your lower cabinets.

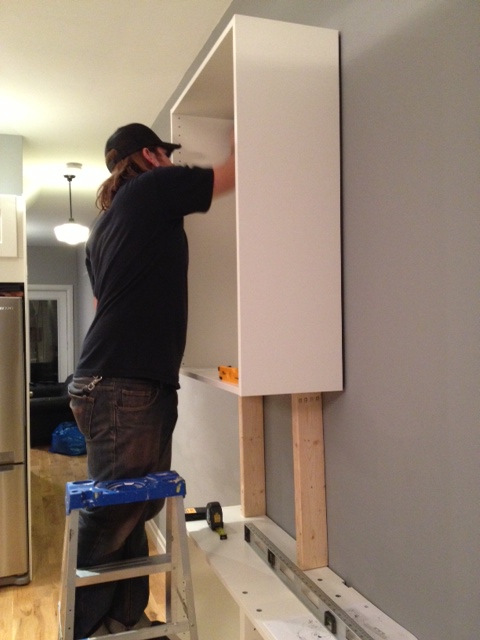
Now lift your upper cabinet up and rest it on the stilts. You still have to hold on to the cabinet, but now the entire weight isn’t fully resting on your shoulders, and your cabinet is prolly pretty damn close to level. Mark your holes, then take the cabinet down and install your rail. Once you are ready to install the cabinet, use your stilts again to give the cabinet some support while you screw in all the bolts.

Yep, those two scrap pieces of wood just saved you from a black eye, dented cabinet and sleeping on the sofa.
You’re welcome.
And yes El Granto’s work pants are pink. He’s secure that way.