Project Nelson

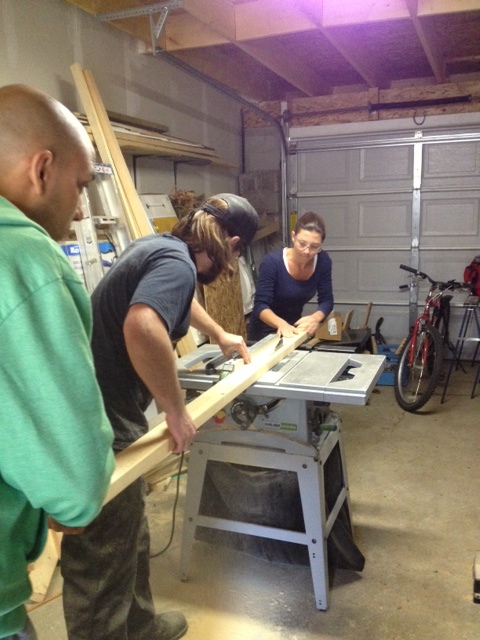
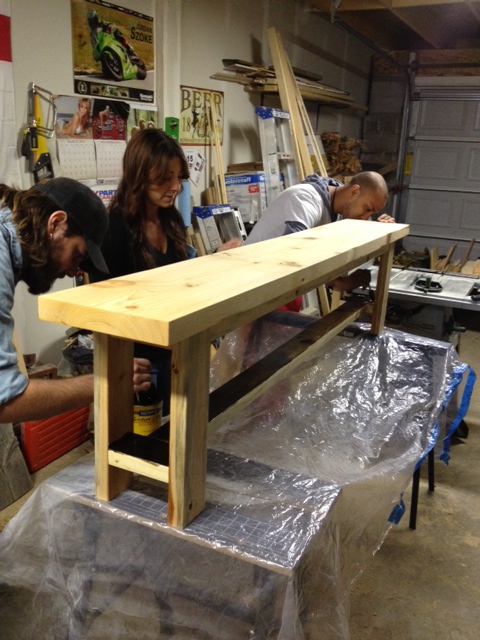
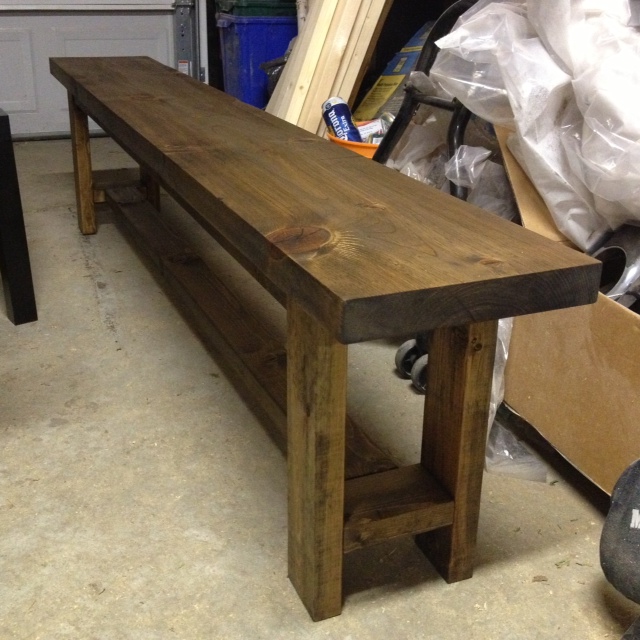
We have started a new project in the Storefront garage; Project Nelson. We are making a Modern Farmhouse table and matching benches for a gentleman named Nelson. The table will be pretty much exactly the same as Dan’s table. As such, I won’t be boring you all with another build how-to from start to finish. I will however be popping in to share a few tips and tricks with you guys along the way, and keeping you up to date on the progress.

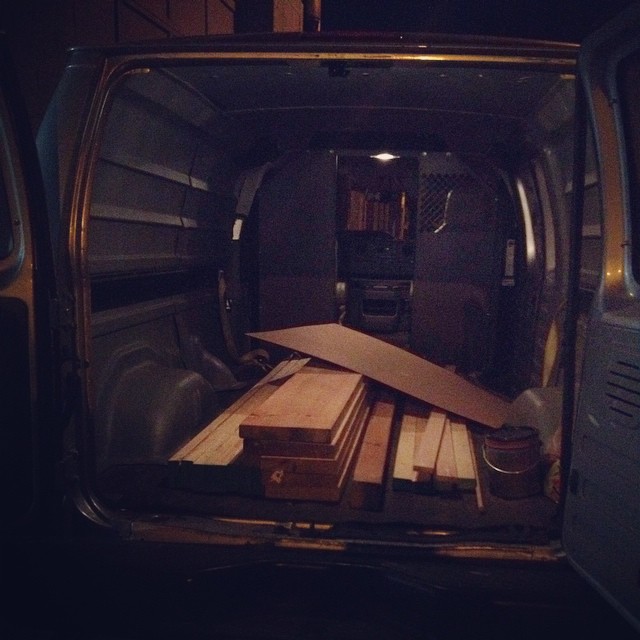
Progress got started this past weekend. A Zipvan was rented. Can I mention again how fantastic this concept is? We can have access to a large fully loaded cargo van without having to well… store or pay for a large cargo van. Instead we can get one once a month when we absolutely need it, and pay $30 or so for an hour and a half. With said Zipvan, we headed to Downtown Lumber and picked up lumber. We are using Canadian kiln dried 2″ thick pine for this project. (Although for the record, Downtown Lumber also sells 2×12 oak at about $18/board foot.)

Zipvan Rental

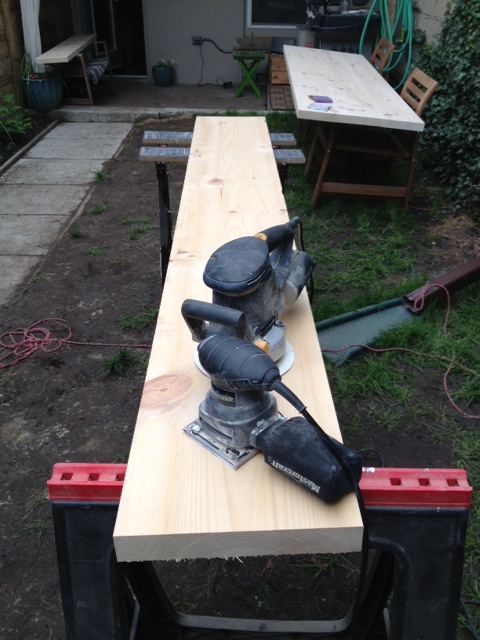
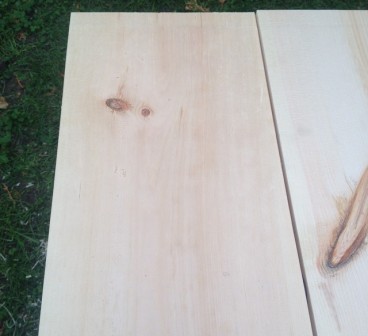
With lumber in the garage and a fine fall day, we planed all the lumber. My goodness, its amazing when you have the right tool for the job.

Turning this:

Pine Before Planing

Into this:

Pine After Planing

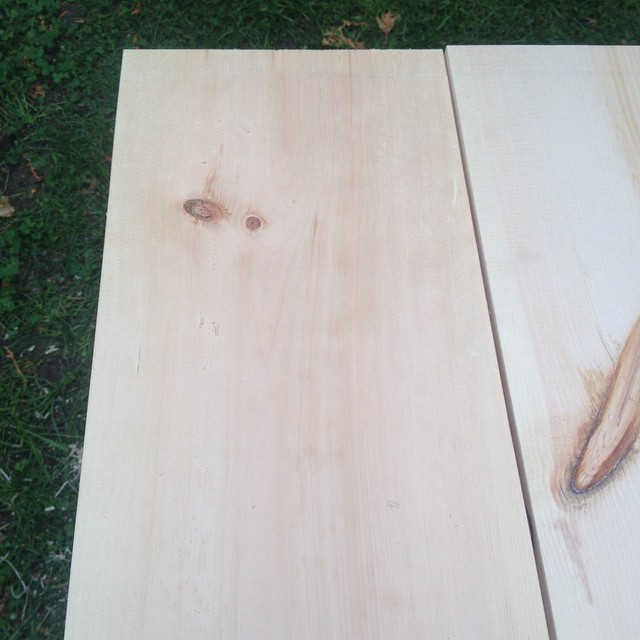
Will save me hours sanding!

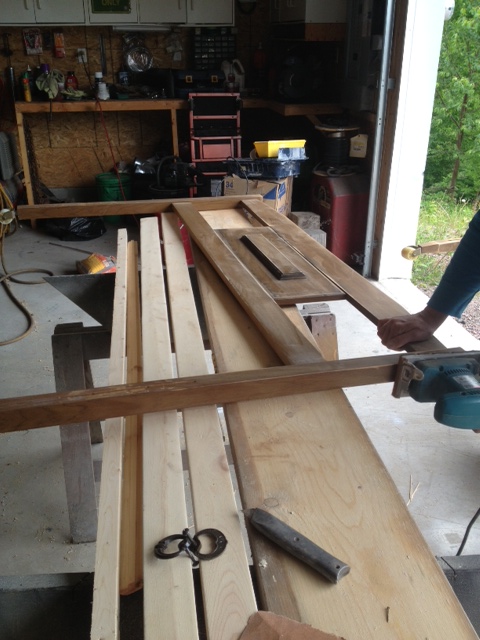
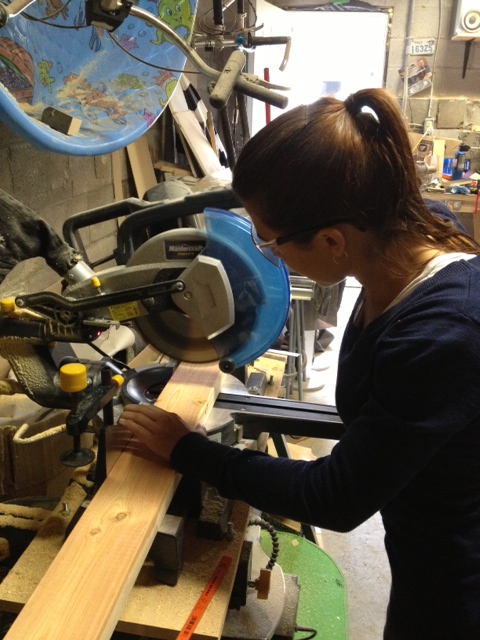
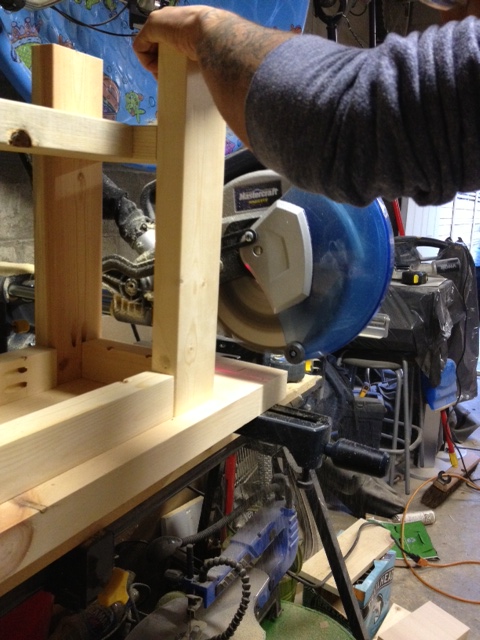
With all that lovely smooth pine, we cut everything to length, giving our new Milwaukee 12″ sliding compound miter saw a workout.

Milwaukee Miter Saw

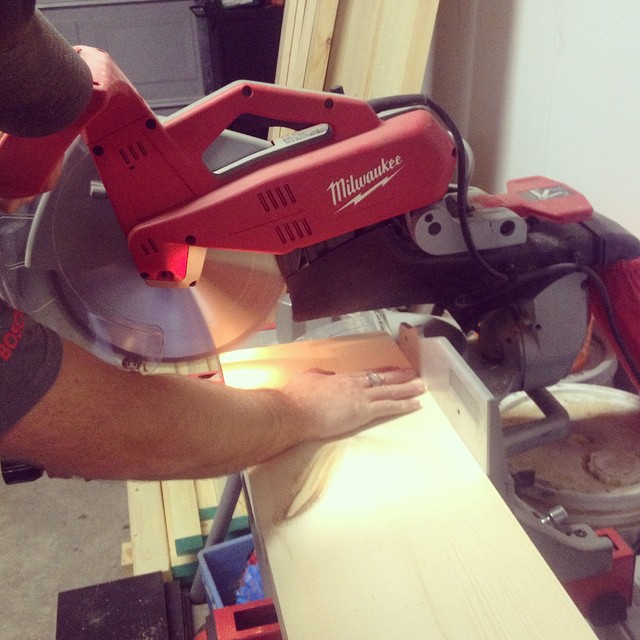
Maaaaan, the last table we built with our old Mastercraft saw. Comparing that saw to the Milwaukee is night and day. The beast Milwaukee cut through that pine like butter, not burning, sticking or generally seeming like it had to try very hard at all. AND it is accurate. Our old saw liked to waiver. Slowly creeping out of true and making us perpetually need to square it up, and never being happy with the results. We did a test cut with the Milwaukee, checked it with a square, and BAM it was perfect. That makes my life ever so much easier.

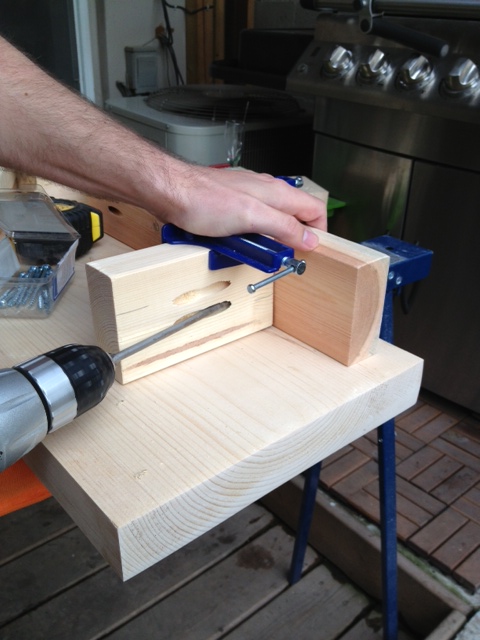
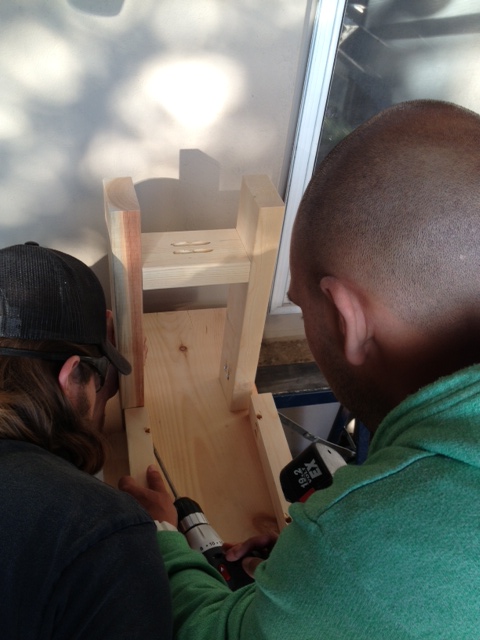
With everything cut to length. We glued up the table top, added some back supports, and filled a few knots with epoxy. Is anyone interested in how to epoxy knot holes? If so, let me know, and I will give a how to. While the epoxy & glue were drying, we cut down the legs, and got started on stain samples for Nelson. A good days progress. We hope to have Nelsons table finished and ready for delivery in a month.

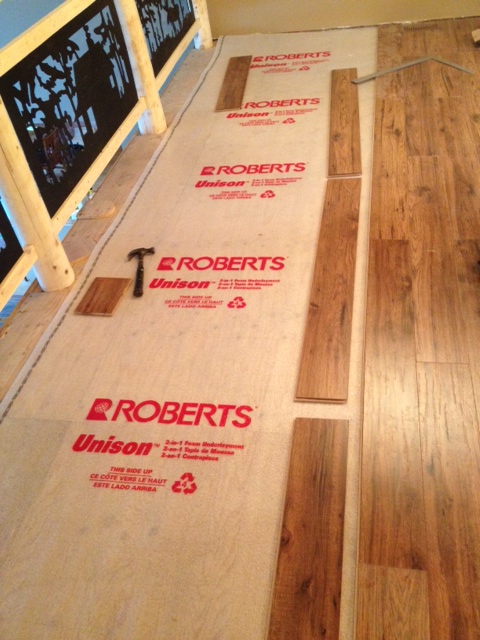
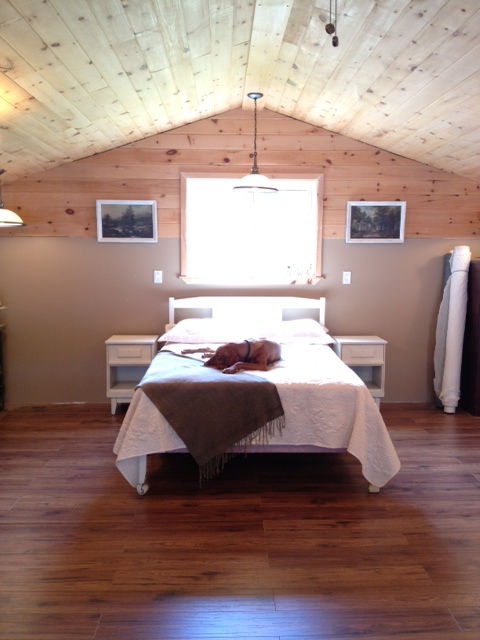
We also got a bit of work done on the powder room, and will have a progress update for you later in the week.

Acacia Wood Furniture Maintenance

Remember how I talked about maintaining our acacia outdoor chairs last year? Well guess who forgot to bring them in the garage over winter (hint it was us) and they were looking pretty shabby.

This year we decided to try out a different type of wood oil, in hopes that it would bring back some luster.

photo 2(9)
Mixwax Teak Oil (or “Huile de teck” when you wanna be fancy and say it in French/forget to turn the bottle around when taking pictures for your blog)

We gave the chairs a wash, and placed them out in the yard to dry, and get oiled.

photo 4(8)
Prepping the chairs for oiling

We used applied the Minwax Teak Oil with a foam brush, and after a few minutes work, our chairs were looking so much better! We plan on potentially giving them a little sand and a few more coats of oil because they guzzled it down. Poor thirsty chairs.

They look so much better!

We’ve got a lot more to do in the backyard, but at least the chairs are looking a bit better!

What do you use for your wood furniture maintenance? Have you used Minwax Teak Oil before?

Everybody’s Workin on the Weekend

Last weekend I had big plans of finishing a couple projects in the dining room. I was going to accomplish sooooo much. It was totally gonna happen.

Then I got an email from my Mom asking if I wanted to head up to the cottage and give her a hand with a few things. I could DIY at home OR I could DIY at the cottage? Needless to say, the dog & I were packed and ready to go that evening. El Granto & I had some prior commitments in the city, and we both couldn’t bail on them, so El Granto stayed in the city while Odin and I headed north.

73e04706d11711e2873222000a1f9e77_7

A few years ago, my parents purchased what was literally a shack, on a beautiful waterside property in Northern Ontario.  Since then, they have built a huge addition, turning it from a 400 square foot room to an over 1500 square foot cottage with a huge loft, a bunkie, and a great big garage. The work is almost finished, but there’s still a few things on the To Do List. One of those things is furniture. The house is going from a 1 bedroom to a 2 bed + loft, so more furniture was needed!

Mom and I headed up with a truck and trailer full of two sofas, a mattress & box spring, a headboard & foot board, two night stands and a dresser. We managed to not only get it up north, but down the ravine into their property, get the truck and trailer turned around, disconnected the trailer, and unloaded all the furniture. Yay girly muscles!

My Mom was gifted the bedroom set, which was awesome, but it needed some TLC. It was 50’s laminate in all its glory (they put laminate OVER solid wood!)

50's dresser!
50’s dresser!

Mom & spent an afternoon sanding, cleaning, and spray painting away.

drawers
Sanding & Painting drawers
Sanding & cleaning headboard
odin & furniture
Odin didn’t understand that the drop cloths were for the furniture to be painted on, not for him to lay on…

We then headed up to the loft and worked on laying some laminate flooring. Turns out, laminate is super easy to lay! Once you have a solid flat surface, you lay down some underlayment, and the flooring just clicks together! The hardest part is carrying the boxes of flooring up to the loft, and working on your knees clicking it together.  You can also see a sneek peek of the super cool railings my parents made. My Mom drew cottagey silhouettes onto sheet metal, they then cut it out using a plasma cutter. (Aren’t they creative!)

laminate flooring
Installing laminate flooring

All our hard work paid off though, as this is what the loft was looking like when we were done.

The Cottage Loft Bedroom

Odin

The room still needs some trim work, and the furniture needs hardware. Some lamps, drapery and  accessories and this will the perfect cottage space. (Oh and that’s bolts of fabric on the right, my mom has an industrial sewing machine in the loft and likes to knock out upholstery projects in her spare time!)

I think Odin likes it.

Benched

Daniel & Adelle’s Farmhouse Table project is coming along. The tabletop is built, stained and ready for polyurethane. We still need to make the legs & aprons, but its getting there! We also managed to knock off some progress on the matching benches.

The benches are 77″ long, which means they will just fit underneath the table. The reason they went with this design was so that the benches could completely fit under the table when not in use. This will work well in Daniel & Adelle’s long but narrow dining space. Being able to get rid of the benches also means the dining room can quickly be turned into an impromptu dance floor when a dance party just happens to break out. What, you don’t have surprise dance parties in your dining room? Psssht, you’re not living until you dance like Elaine, or break out a Tom Cruise pantsless dance routine in your dining room. Impromptu dance sessions happen all the time with our friends.

The benches are simple, but needed a bit of cutting, sanding and a load of pocket holes. We got started by sanding the bench top, and cutting the legs, aprons, stretcher and stretcher support.

Sanding the Bench Top
Adelle cutting the legs & support pieces
Adelle cutting the legs & support pieces.

All the support pieces are made from spruce and the bench top is from 2×12 pine. For the aprons, straight up 2×4’s would have been a bit bulky and heavy, so we ripped down 2×4’s to 1 1/2″ x 2″ on the table saw for the side & end aprons.

ripping boards
Ripping the apron boards.

The assembly of the bench was a bit tricky due to the limited space for the pocket holes. The pocket holes for the apron supports actually intersected each other. Good thing all of this will be hidden! We also broke out the corner clamps again (they are getting a lot of use!)

Stretcher & legs
Attaching the stretcher support to the legs

We used a ratchet and driver bit to manually drive all the screws for the bench legs. At this point in time I believe I felt it necessary to check on the dog, or tie a shoe, or any task that got me out of screwing in all those difficult screws.

Once the legs were assembled we attached the aprons (insetting them by 1/8″ for a little flair) and the bench was made.

Attaching Aprons
Attaching Aprons


Bench Complete
Bench Complete

Awesome, complete, woot!

Wait…why does the bench top look so long??? Oh CRAP! I got so carried away at the start, I forgot we needed to cut the bench tops down to size! Woopsies! This bench was 7 feet long, when it was only supposed to be 77″. Now what? We do disassemble the whole thing and cut down the top?(Remembering all those screws put in by hand….) That doesn’t sound like fun…

OR we could lift the whole bench upside down and cut the top on the miter saw. Seriously?!

cuttingdownbench
Cutting the bench top

YEP. It happened. The miter saw table rollers & two people held up the bench, while Daniel cut the bench top down to size. Phew, crisis averted. At least I didn’t screw up the whole project. With a few minutes work, we were back on track. I am very thankful I realized before staining!

Speaking of staining, after all that sanding was done we applied wood conditioner and then stained away. Talk about a staining party. The four of us were staining away in our tiny garage on a Tuesday night. (Even El Granto picked up a brush and he doesn’t do that often!)

Aint no party like a staining party
Aint no party like a staining club party

One bench built & stained, one more bench to go!

bench stained
Bench Stained

When it Rains it Pours (The Chair Hunt Part II)

I posted about my chair hunt less than a week ago.

By that point I had been scourging Craigslist & Kijiji for an antique bankers chair for weeks. I had dragged El Granto into many an antique store, and even shook my fist at the TV when I saw Sarah Richardson had found one at an antique store on queen street. I wasn’t mad at Sarah, I was mad that I hadn’t been there first!

So I wrote the post, and sent my Mom an email asking her to keep an eye out for a bankers chair (she’s even more resourceful than I am) I then forgot about putting my chair request out into the world, and got back to work.

Fast forward to Friday. My Mom comes for a visit, and shows up with not one but TWO bankers chairs. One antique that was in brilliant shape, and had the original chair mechanism and everything, and a second one that was a more modern version. I was flabbergasted. My Mom had found the vintage one on Craigslist for a steal, and the second one was found on the side of the road by my Mom & Dad’s friends.

Antique Bankers Chair that my Mom Sourced from Kijiji (unassembled)
Modern Bankers Chair that my Mom’s Friends FOUND on the road! (Mom had to take it apart to fit it in the car)

Then I go into work on Monday morning and get an email from a co-worker that says “Look what we found on the curb!”

The Chair my Awesome Co-Worker found at the Curb

SERIOUSLY?! I couldn’t find one if my life depended on it, and two people managed to find ones thrown out for garbage on the side of the road?! Hell, I should just give up my searching for things, and make a list for everyone else to find. Thank you all so much.

I am also looking for old reclaimed red bricks for a new patio, and some old picture frames…just saying.

Here’s the antique chair assembled in the office

Antique Bankers Chair