Yet Another Bench

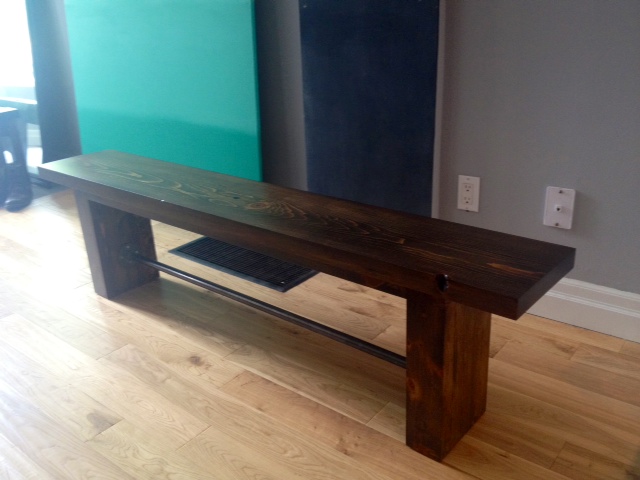
I know, I know, ANOTHER BENCH?! REALLY? Here’s the deal. We replaced the top of our pipe leg dining table, and our old bench was looking sad in comparison. It’s unfair to give one kid a present, and then stiff the other one. So Mr. Bench got an upgrade.

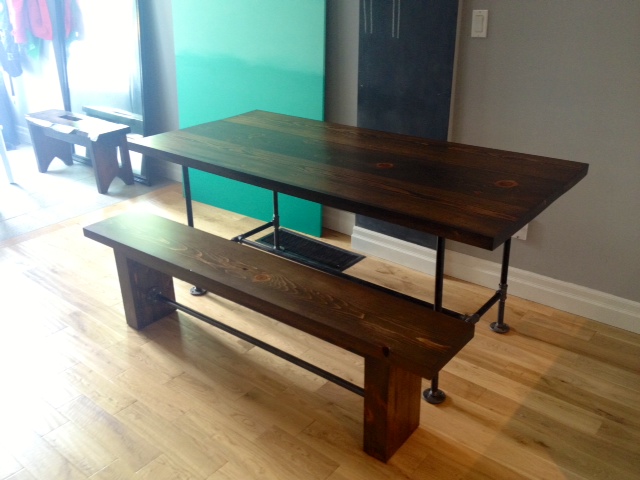
If you remember correctly, this is what the old bench (& table) looked like:

The Table & Bench
The Table & Bench

We salvaged the pipe stretcher from the old bench, and got to work making new legs & a top. We wanted something a bit more industrial looking. The old bench was fine, but a bit traditional. So we searched for inspiration and found this on Pinterest:

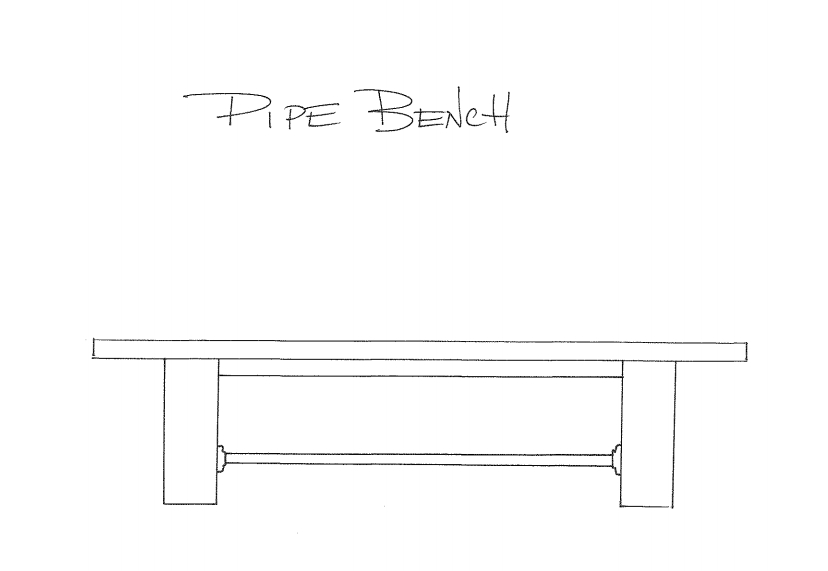
I loved the chunky legs and thought it had the perfect shape. So we set to building our own version with a pipe stretcher.

pipebench

Buy List:

1 – 2×12 x 6′ piece of kiln dried pine (same as our table)
2 – pine 2×2’s @ 8′ for aprons
2 – pine 2×4’s @ 8′ for the legs (make sure these are square edged 2×4’s, not rounded ones like you use for framing)
3/4″ dowel
Wood Glue
4′ pre-cut piece of 3/4″ gas line pipe (threaded on both ends)
2 – 3/4″ pipe floor flanges
2 1/2″ pocket screws

Cut List:

1 – 2×12 at 68″ (bench top)
2 – 2×2 at 48 5/8″ (aprons)
10 – 2×4 at 16 1/2″ (legs) if you can, set yourself a jig on your saw to make sure all the pieces are cut exactly the same size

First up, glue 5 2×4’s together with wood glue and clamps making one great big 4×10, repeat with the other 5 2×4’s (if you don’t have enough clamps, do one leg, then let it dry for a day, unclamp and do the other leg.)

Five 2x4's
Five 2×4’s glued together

To make sure those legs aren’t gonna move, we also strengthened them with dowels (and a few screws). We liked the way the exposed dowels looked on Daniel & Adelle’s table, so we opted for that route. After the legs have dried, mark 3″ up from the bottom of the leg on one end and mark the center of the board. Then drill a 3/4″ hole with a spade bit about half way through your leg. Ideally it would go all the way through, but to do that nicely (without any tear out) and straight you really need a drill press (which we dont have!). So we opted to do a dowel from each end.

Dowel Hole Drilled
Dowel Hole Drilled

After your hole is drilled, cut a piece of dowel a bit longer than your hole, glue & tap in place. Repeat for all the other sides of both legs and let dry.

Dowel Insterted
Dowel Inserted

To strengthen the top of the legs we used a 3″ counter sunk screw from either end. We pre-drilled the holes with a 3/8″ drill bit, inserted the screws, then filled the hole with a wood plug & some glue. If you must use screws on a project, using wood plugs will make them a lot less glaringly obvious.

Wood Plug
Wood Plug

Once all the glue has dried (another day) you can cut the dowels close to flush using a coping saw, chisel, hand saw, Dremel, or oscillating multi-tool.

Now it is time to make a few pocket holes for attaching the legs to the top. We put three holes in each leg (kreg pocket hole jig set to 1 1/2″ thick material).

Time to sand. I always find that it is MUCH easier to sand pieces like legs before installing them. As we needed to sand down the exposed dowels, we started sanding with 80 grit until the dowels were flush, then switched to 100, then 150 and finally 220 grit.

The apron pieces got 2 pocket holes drilled in each end (to attach to the legs) and a good sand as well.

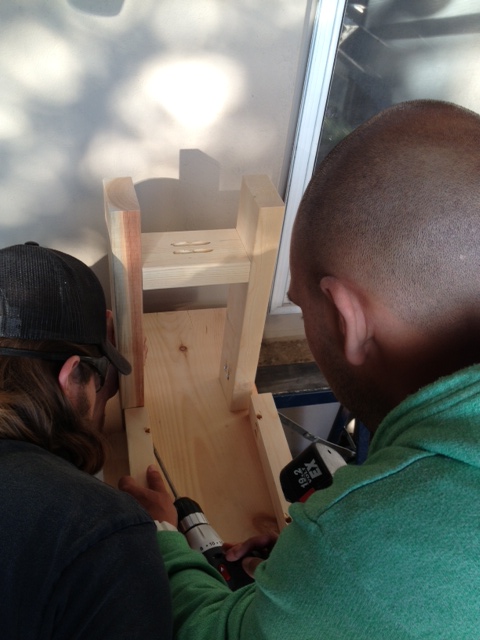
Next up, attach the flanges to either end of the pipe and attach the pipe stretcher to the legs with screws. We used a scrap 2×4 to set the flanges up from the bottom of the legs.

Attaching Pipe
Attaching Pipe Stretcher

Next up, attaching the legs to the table and the aprons. Flip the bench top upside down and use it as a work table to attach the aprons. The aprons will give the bench even more strength, and stop it from wanting to shift sideways.  Once the aprons are attached to the legs, center the legs on the bench top, and attach the legs with the pocket holes you drilled earlier.

Assembly
Attaching the aprons to the legs, and the legs to the bench top

Put in a few 2 1/2″ screws through the aprons into the top, and fill the Kreg holes with pocket hole wood plugs and glue.

Time to head back outside, give the top a sand, and an overall finish sand to the rest of the bench.

Bench ready for stain (there's painters tape over the pipe)
Bench ready for stain (there’s blue painters tape over the pipe)
Bench legs
Bench legs sanded and ready for stain

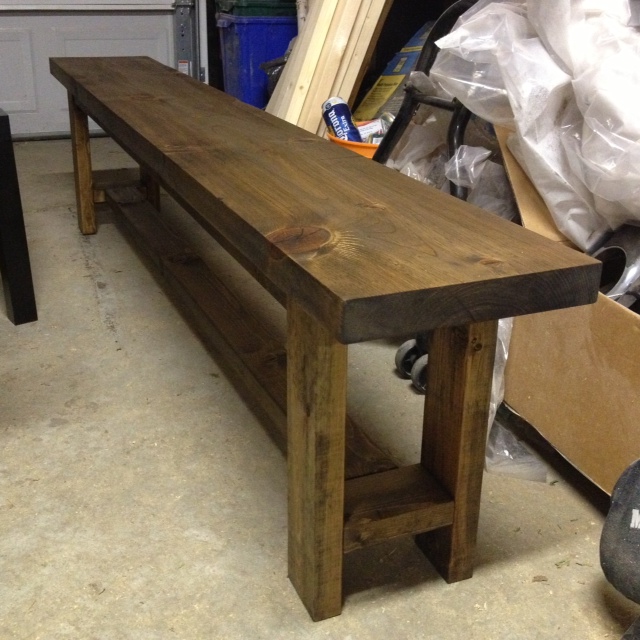
A coat of wood conditioner, two coats of Varathane Chocolate stain, and three coats of polyurethane later and this is what we’ve got. (check out my post on finishing wood here.)
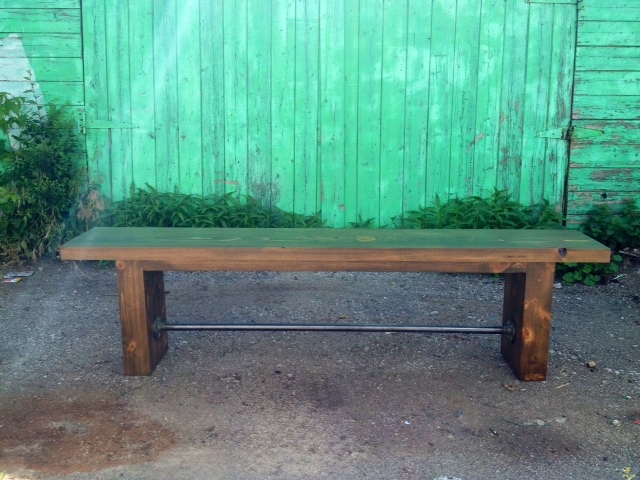
Bench
Yep, I moved my nice new bench out into the dirty alley to take this photo.
bench
Big legs are sexy. Men take note.
Benchy Bench Bench
Benchy Bench Bench
Bench & Table
Completed Bench & Table

SOURCE LIST:

Materials & Cut List:
(see above) – Wood from Downtown Lumber
Stain – Varathane Chocolate
Polyurethane – Minwax Oil Modified in Satin

Tools Used:
Miter saw
Drill
Kreg Jig
Orbital sander
Measuring Tape
Finishing Supplies

Difficulty Level (on a scale of 1-5):

two out of five

Total Cost: $60 (for the new wood, we already owned the pipe, stain & poly)
Farmhouse Table Reveal + Plans

Aaaaand were done! Daniel and Adelle moved into their new place and took their newly finished modern farmhouse table and benches with them. Mind you as much as we will enjoy our garage space back, we will miss working with Daniel and Adelle on this project! It’s different working with friends than a spouse, it’s laid back and there (usually) isn’t any swearing involved. Throw in a piña colada or two, and it’s a party with work involved.

If you missed the beginning of the project, check out part one, two, three, and four.)

So without further adieu, here is the table!

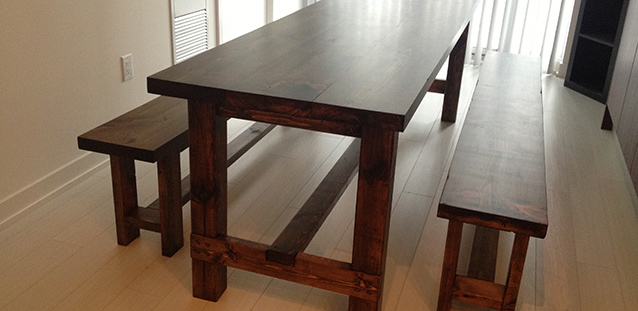
Farmhouse Table

Farmhouse Table

Farmhouse Bench

It fits perfectly in their narrow condo, and the benches hide away completely when not in use, making this table able to function as stand in kitchen prep surface.

Farmhous Table

The deep stain color works great with their white walls and light floors.

The table also does a mean job of holding a glass of wine or two (we had to test the table out…come on!)

wineinsta

SPECS & PLANS:
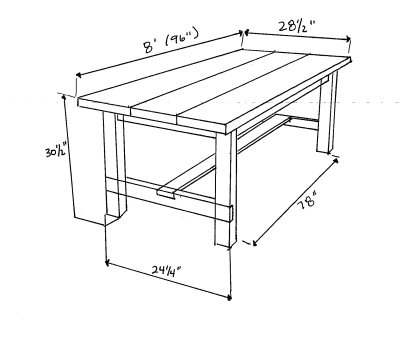
The table is loosely based on the Ana White farmhouse table plans. (We changed size, removed the breadboard ends, and used dowels instead of screws for the table legs. ) For in depth instructions on how to assemble the table check out her plans here.

Farmhouse Table

tableplan


Lumber Buy List:

5 – 2×4 @ 8′
3 – 2×10 @ 8′ (we used kiln dried pine from Downtown Lumber for the table top, it was worth the extra expense! If you cant find kiln dried pine, purchase spruce 2×12’s from your local hardware store, and rip down to 9 1/2″ wide removing the beveled edges while you’re at it (they will be huge crumb catchers if you leave them)
1 – 4×4 @ 10′ (if you cant find 4×4’s in untreated spruce or pine, use cedar)

Cut list:

4 – 4×4 @ 29″ (legs)
2 – 2×4 @ 78″ (long aprons)
2 – 2×4 @ 17 1/4″ (short aprons)
1 – 2×4 @ 85″ (stretcher)
2 – 2×4 @ 24 1/4″ (stretcher supports)
3 – 2×10 @ 96″ (table top pieces)

Instructions:

Cut all lumber to length.

With Kreg Jig set to 1 1/2″ material, drill one pocket hole every 8″ or so on one side of two of the table top pieces (the outside tabletop boards). Then attach the outside table top pieces to the center table top board with wood glue and 2 1/2″ pocket hole screws. (see our post on building the table top here.)

Drill Kreg Pocket holes on top and sides of all apron pieces. Make 2 holes on the ends, and a hole about every 8″ on the tops.

Notch out legs for the stretcher supports. Make notches 3 1/2″ high by 1 1/2″ deep positioned 6″ up from the bottom of the leg, and 19 1/2″ down from the top of the leg.

Notch out stretcher supports. Make one notch in the center of each stretcher support. Make notch 3 1/2″ wide by 1 1/2″ deep.

Assemble legs by attaching short aprons to legs (inset by 3/4″) then set stretcher support into leg notches, and attach with screws or dowels (see how we did the dowels here).

Attach long aprons to legs, with pocket screws.

Flip tabletop upside down, center legs upside down on the table bottom, and attach legs to table top with pocket hole screws.

Attach stretcher to stretcher supports with screws or dowel.

Sand, stain & finish as desired.

Farmhouse Bench

(for TWO benches, halve the amounts if you’re only making one)

benchplan


Lumber Buy List:

7 – 2×4 @ 8′
2 – 2×12 @ 8′ (7′ if possible)

Cut List:

8 – 2×4 @ 16 3/4″ (legs)
2 – 2×4* @ 61″ (aprons) *= we ripped a 2×4 down to 2″ wide. You can also buy 2×3’s instead of 2×4’s
2 – 2×4* @ 6″ (short aprons) **= we ripped a 2×4 down to 2″ wide. You can also buy 2×3’s instead of 2×4’s
2 – 2×4 @ 61″ (stretchers)
4 – 2×4 @ 6″ (stretcher supports)
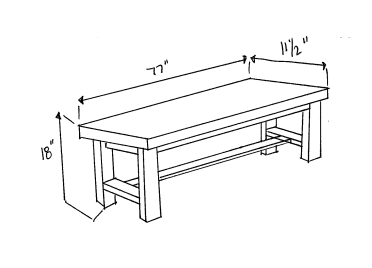
2 – 2×12 @ 77″ (bench tops)

Instructions:

Cut all lumber to size.

Drill pocket holes on apron pieces (Kreg set for 1 1/2″ thick material). Two holes on each end, and about every 8″ on the top. Drill two pocket holes on top of small aprons. Drill two pocket holes on each end of stretcher supports. Drill two pocket holes on each end of stretchers.

Attach stretcher supports to legs 3 1/2″ up from the bottom with 2 1/2″ pocket hole screws. Attach long aprons to legs with pocket hole screws.

Flip bench top upside down, and attach legs (also upside down) to bench using the apron pocket holes and pocket screws. Attach side aprons to bench top. Attach stretcher to stretcher supports.

Repeat for second bench.

Sand, stain and finish as desired.


SOURCE LIST: (one table + two benches)

Materials:

Lumber (see above)
Minwax oil based stain in Jacobean
Minwax wood conditioner
Polyurethane – Minwax Oil Modified in Satin
200 2 1/2″ Kreg pocket hole screws (Lee Valley)
Wood Glue
Foam brushes (Dollarama)
Rags
Sandpaper (150, 220 and 320)
Kreg Screws – Lee Valley & Home Depot

Tools Used:
Miter saw
Table saw *not necessary, you can get material ripped to size at the lumber yard
Circular saw
Square
Kreg jig
Drill
Palm & orbital sanders
Measuring Tape

Difficulty Level (on a scale of 1-5):

three out of five

Total Cost: $400 (Lumber $320, Screws $20, Finishing materials $60)
Time frame: Two weekends (one to build, one to finish)

Benched

Daniel & Adelle’s Farmhouse Table project is coming along. The tabletop is built, stained and ready for polyurethane. We still need to make the legs & aprons, but its getting there! We also managed to knock off some progress on the matching benches.

The benches are 77″ long, which means they will just fit underneath the table. The reason they went with this design was so that the benches could completely fit under the table when not in use. This will work well in Daniel & Adelle’s long but narrow dining space. Being able to get rid of the benches also means the dining room can quickly be turned into an impromptu dance floor when a dance party just happens to break out. What, you don’t have surprise dance parties in your dining room? Psssht, you’re not living until you dance like Elaine, or break out a Tom Cruise pantsless dance routine in your dining room. Impromptu dance sessions happen all the time with our friends.

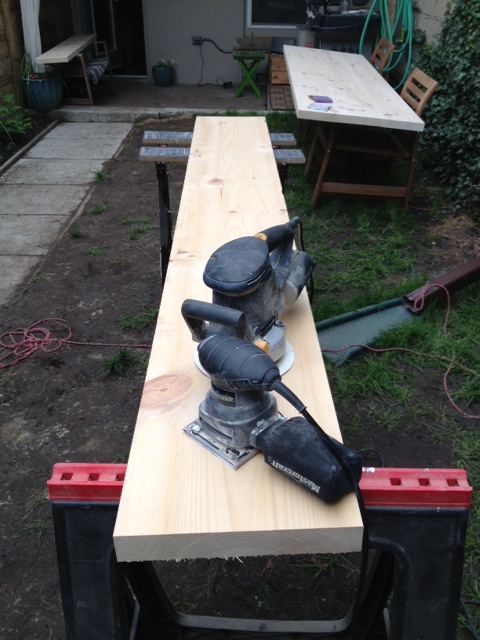
The benches are simple, but needed a bit of cutting, sanding and a load of pocket holes. We got started by sanding the bench top, and cutting the legs, aprons, stretcher and stretcher support.

Sanding the Bench Top
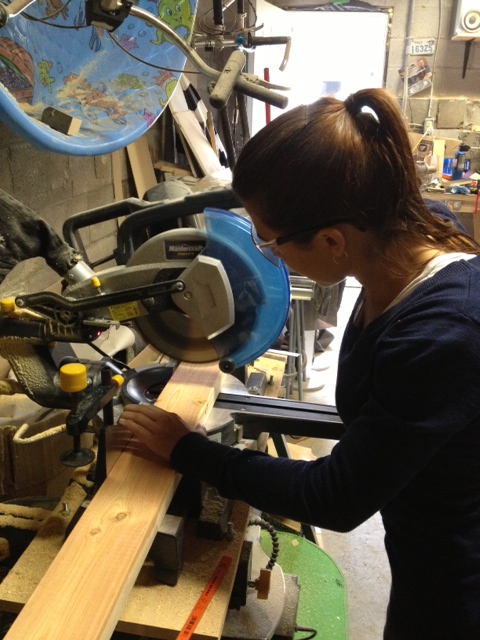
Adelle cutting the legs & support pieces
Adelle cutting the legs & support pieces.

All the support pieces are made from spruce and the bench top is from 2×12 pine. For the aprons, straight up 2×4’s would have been a bit bulky and heavy, so we ripped down 2×4’s to 1 1/2″ x 2″ on the table saw for the side & end aprons.

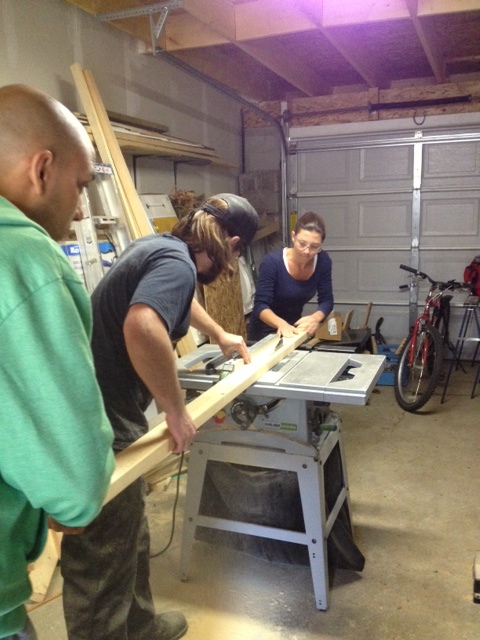
ripping boards
Ripping the apron boards.

The assembly of the bench was a bit tricky due to the limited space for the pocket holes. The pocket holes for the apron supports actually intersected each other. Good thing all of this will be hidden! We also broke out the corner clamps again (they are getting a lot of use!)

Stretcher & legs
Attaching the stretcher support to the legs

We used a ratchet and driver bit to manually drive all the screws for the bench legs. At this point in time I believe I felt it necessary to check on the dog, or tie a shoe, or any task that got me out of screwing in all those difficult screws.

Once the legs were assembled we attached the aprons (insetting them by 1/8″ for a little flair) and the bench was made.

Attaching Aprons
Attaching Aprons


Bench Complete
Bench Complete

Awesome, complete, woot!

Wait…why does the bench top look so long??? Oh CRAP! I got so carried away at the start, I forgot we needed to cut the bench tops down to size! Woopsies! This bench was 7 feet long, when it was only supposed to be 77″. Now what? We do disassemble the whole thing and cut down the top?(Remembering all those screws put in by hand….) That doesn’t sound like fun…

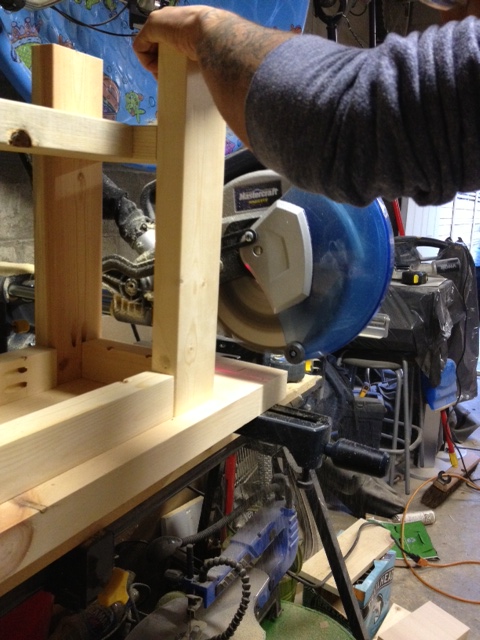
OR we could lift the whole bench upside down and cut the top on the miter saw. Seriously?!

cuttingdownbench
Cutting the bench top

YEP. It happened. The miter saw table rollers & two people held up the bench, while Daniel cut the bench top down to size. Phew, crisis averted. At least I didn’t screw up the whole project. With a few minutes work, we were back on track. I am very thankful I realized before staining!

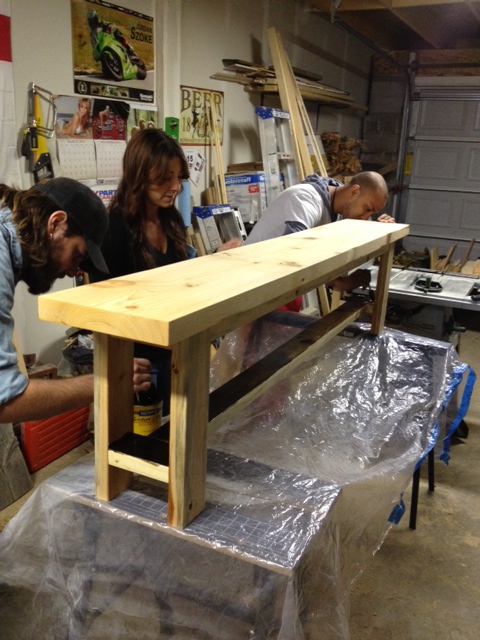
Speaking of staining, after all that sanding was done we applied wood conditioner and then stained away. Talk about a staining party. The four of us were staining away in our tiny garage on a Tuesday night. (Even El Granto picked up a brush and he doesn’t do that often!)

Aint no party like a staining party
Aint no party like a staining club party

One bench built & stained, one more bench to go!

bench stained
Bench Stained

DIY Pipe & Wood Bench

BIG Milestone today kids! This is our 100th post!

So we made the dining table, then we finished the table, and now we’re making a quick and easy (and cheap) bench to go along with it.

Left over from our table offcuts, was a 2×12 piece of wood just about 6′ long. El Granto decided to surprise me and make a matching bench to go along with our table. The bench will add a lot more seating (you can squeeze a truck load of people around a bench when necessary.) It also reduces the amount of chairs we have to have, and a bench can be tucked close into the table and not take up a ton of room.

Here’s the shopping and cut list for what you need to make a 68″ long, 11 1/2″ wide and 18″ high wood & pipe bench.

Shopping List
(leftover 2x12x6′ from the table project)
2 – Premium 2×4’s
2 – 3/4″ Flanges
1 – 48″ precut piece of 3/4″ black pipe
8 – 1″ wood screws
Cast Iron Square Nails (Optional)

Wood Cut List
1 – 2x12x68″‘ spruce
4 – 2x4x16 1/2″
4 – 2x4x6 1/2″

Pipe Cut List
You don’t need any custom cut pipe. Use your 48″ precut piece as is. Woot!

Assembly
Pre-sand your pieces of 2×4 (these will be the bench legs, and once assembled are a bit more of a pain in the ass to sand.)  While you’re at it, sand the bench top as well. Start at a 60 grit or so, then work your way up to 220.

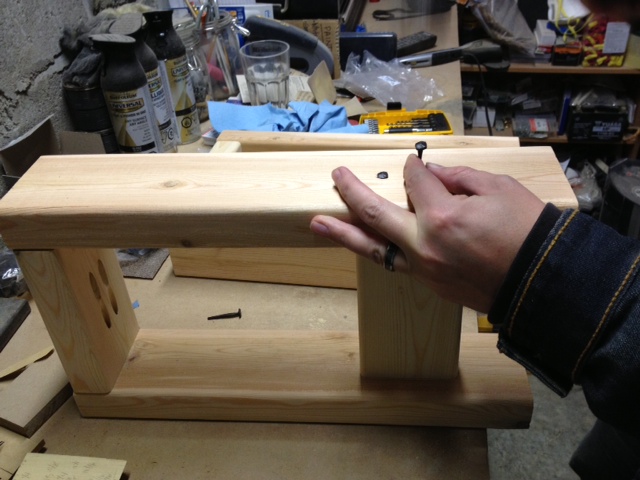
Assemble bench legs using your attachment method of choice. We decided to go with the Kreg Jig pocket hole system, but you can easily use dowels & glue. El Granto got a bit carried away in the assembly process, and forgot to take any pics until it was all done (oops!).

Here’s a shot of one set of legs, where El Granto is adding some decorative square nails. You can see how we used the pocket holes to attach the top support piece, we also used pocket holes below the bottom vertical support piece. The bottom support piece is vertical because we are going to attach our pipe cross beam there.

El Granto adding some decorative square nails to one set of bench legs
Square nails are awesome!

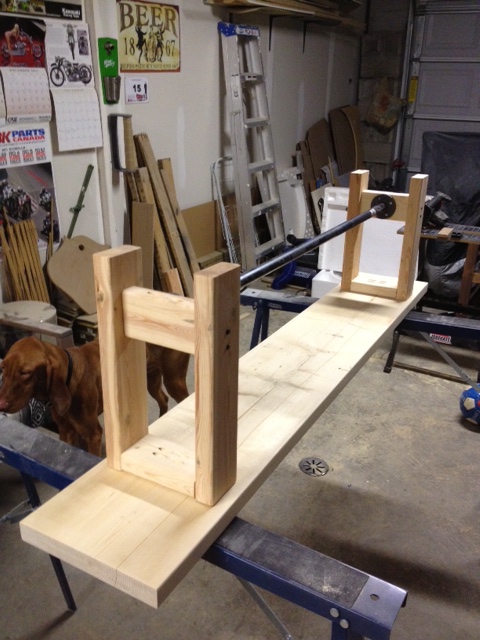
After the legs are assembled, attach the flange to one set of the legs, then attach the pipe and the second flange and screw the other flange to the other set of legs.

Attaching the legs to the pipe (excuse the constant garage clutter/sawdust)

Flip the bench top upside down, and place your upside down legs on top, and screw legs into bench top using 2 1/2″ screws.

Attaching bench legs (and yes that is a half naked woman posing with a motorcycle on the wall. The garage is El Granto’s domain, and wouldn’t be complete without a calendar full of bikini clad women posing with motorcycles.) And of course another photo bomb by the dog.
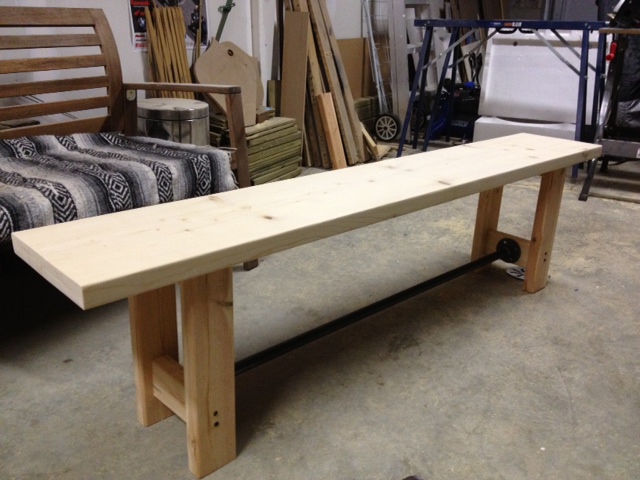
Bench Assembled

After the legs were attached, we took the bench inside to start the finishing process. We stained and oiled it to match the table.

The Bench
Bench leg detail
legs legs legs
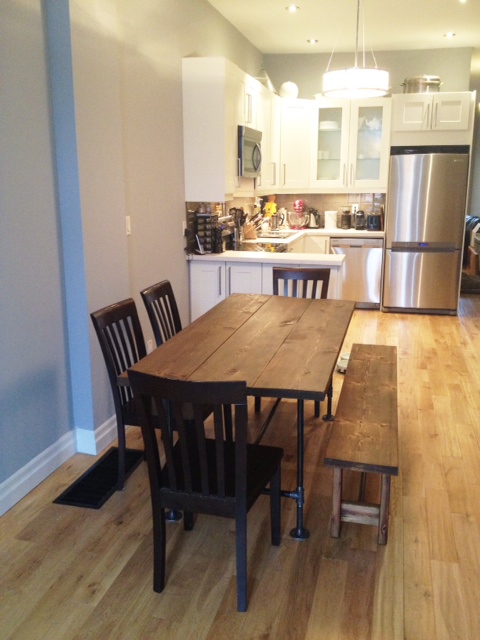
Table & bench
Table & Bench

We now really need some new chairs. In the interim, I think I will give the ones I have a coat of paint. I am leaning towards turquoise or red. Eventually I would really love some Tolix chairs or some Emeco navy chairs. The dining room also desperately needs some high impact art, as does the area over my kitchen cupboards.

SOURCE LIST:

Materials:

2 – Premium 2×4’s – Home Depot
1 – 3/4″x4′ black pipe – Home Depot
2 – 3/4″ Floor Flange – Home Depot
2×12 spruce – Rona
1″ wood screws – Home Depot
Varathane stain in Chocolate – Home Depot
Varathane wood conditioner – Home Depot
Pure Tung Oil – Lee Valley
Square Nails – Lee Valley

Tools Used:

Miter Saw
Kreg Jig
Measuring Tape
Hammer (for decorative nails)
Drill

Difficulty Level (on a scale of 1-5):

Three out of five

Total Cost: $16 (bench top wood, and finishing materials were left overs from the table project)