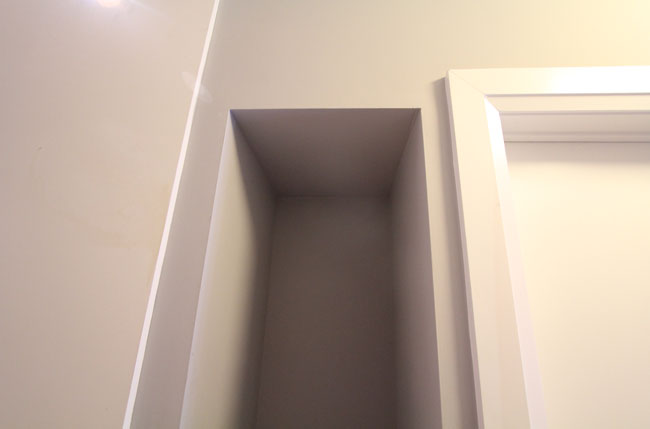
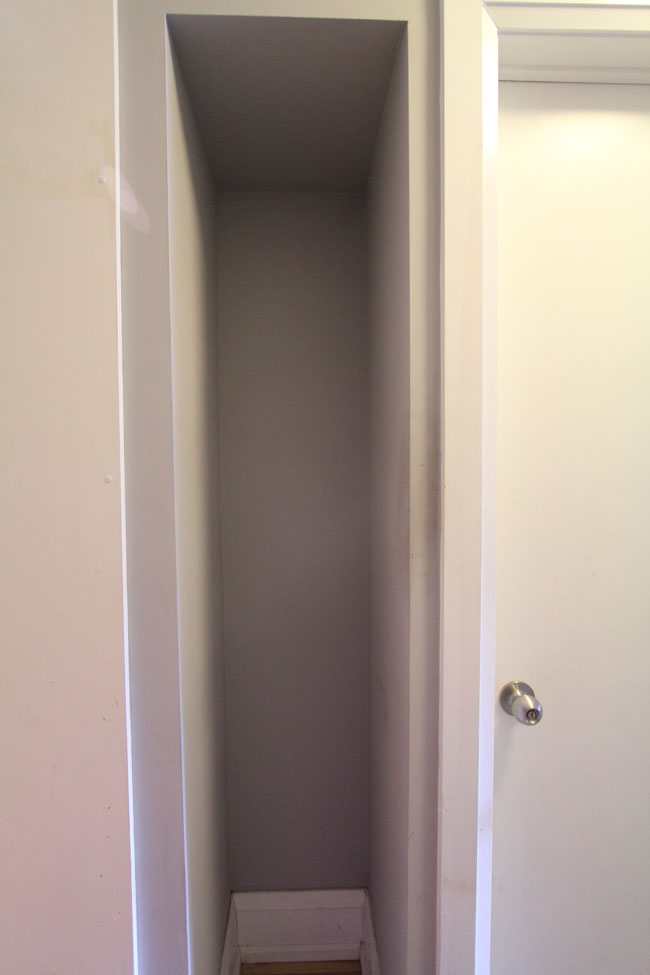
In our main floor hallway lives a strange small nook. He resides between the side of the refrigerator, and the powder room. He’s tall and skinny at 81″ high, 15″ wide and 18″ deep.
We have lived with this weird nook for four years, and during that time Mr. Nook has held the broom, dustbin, dog food, soda bottles, and a plethora of other things you had no idea where to put. At parties, I have come across one or more people just hanging out in the nook, having a jolly good time.
But seriously though, what the heck is Mr. Nooks purpose?! We live in a small 12′ wide house, and real estate is prime. Mr. Nook was taking up valuable space, and not being very helpful.
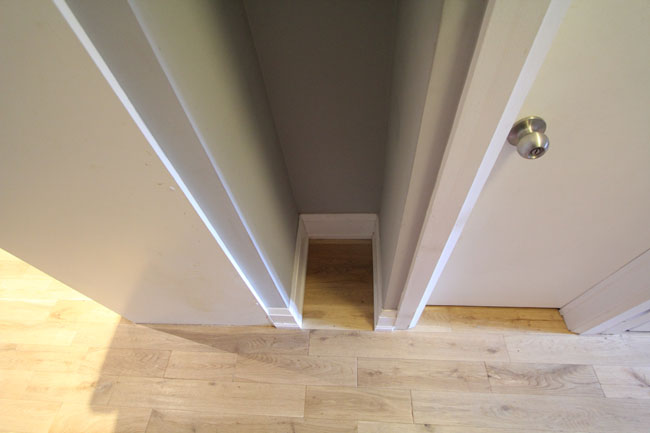
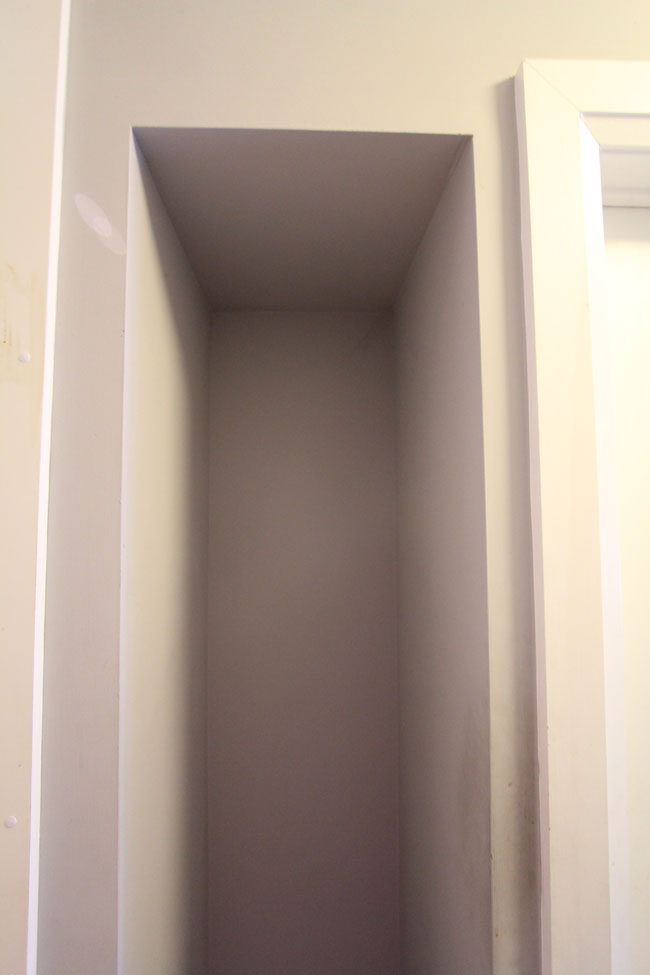
Here is a look at the nook in all its glory. Sorry for the closeups. Even with a wide angle lens, this nook is hard to photograph.
To the left of the nook is the cover panel covering the side of our refrigerator. To the right is the door to the powder room.
The nook is even trimmed out with baseboard! It’s like a tiny little room.
Here you can see that it is framed up to be the same height as a regular door (but only for really skinny people).
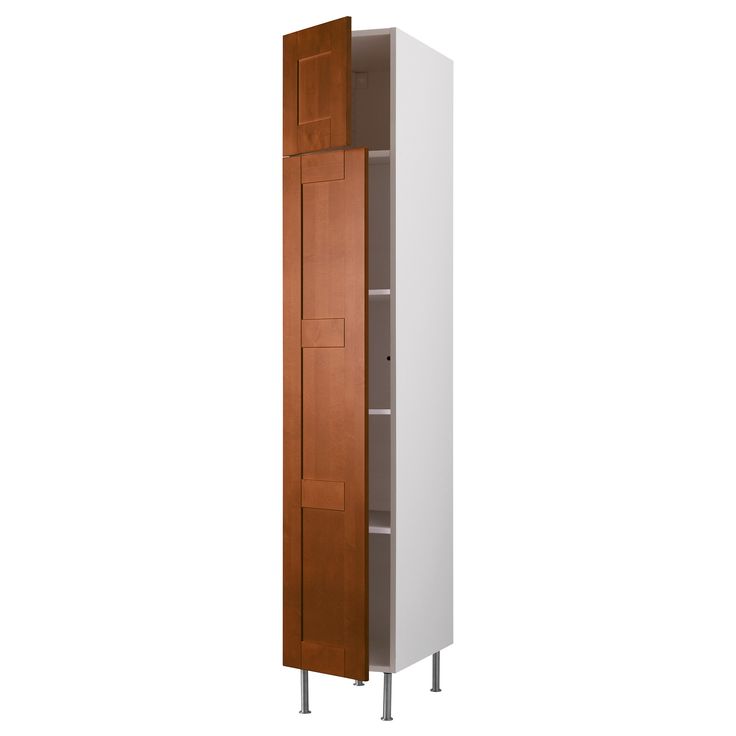
We were at Ikea the other day picking up the last of our glass doors for the coffee bar, as Ikea went and discontinued ALL their current kitchens. We were still missing a few glass doors, so we hustled there to grab them before they sold them off. As you know, I cannot go to Ikea without perusing the AS IS section for possible project supplies. I was sorting through loose cabinet doors when I struck upon these doors.
They are Adel brown high cabinet doors meant for Ikea’s pantry system. The door style is Adel (same as our Kitchen) but in brown. Armed with an Ikea paper measuring tape, I noticed that the doors were almost the same size as my nook. The total height of the two doors was 79″ (my opening is 81″) and the width is bang on at 15″.
The doors were the wrong color for my kitchen, but they were…wait for it…$23 total.
The doors promptly got tossed onto the cart, and brought home with us, while I was giving fist bumps to random strangers and congratulating myself on a badass score.
I know what you’re thinking:
A.) The doors don’t even match my kitchen
B.) The nook isn’t even IN my kitchen
C.) I didn’t buy a cabinet to go along with the doors
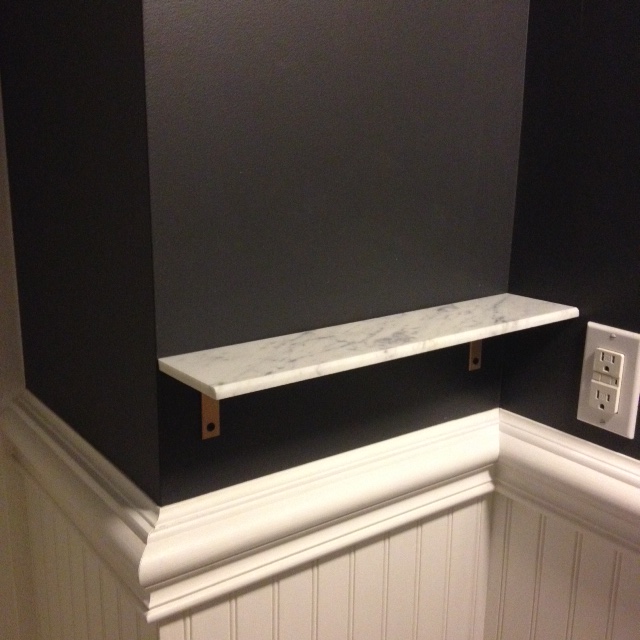
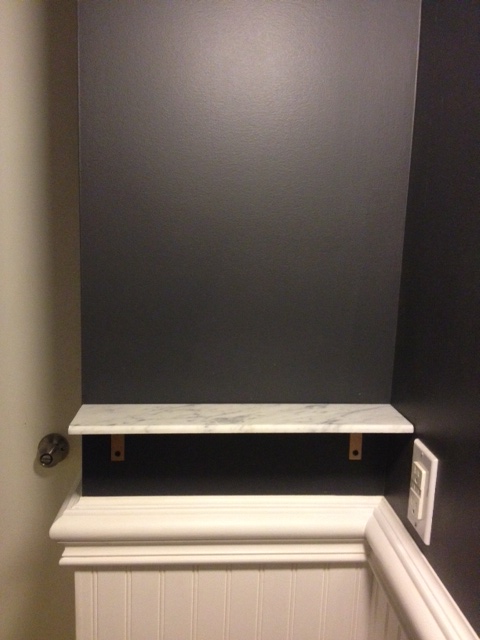
The powder room is small. At only about 4′ wide and 8′ long, with a closet jutting into it, it’s practically miniscule. To even be able to fit into the room, a vanity was vetoed for a pedestal sink. It’s great for the flow of the room, but offers no storage, and barely a surface to sit a bottle of soap. If you want to set your phone down, or touch up your makeup, you end up having to use the toilet tank as a shelf for your things. Not ideal (or very sanitary for that matter). To gain a much needed horizontal surface in our Powder Room Makeover, we opted to install a small shelf. Take a look at what we made.
Custom Marble Shelf
Materials:
1 4″ wide x 3′ marble shower sill
1 pkg corner brackets
Spray primer
Krylon gold spray paint
1 tube PL Premium construction adhesive
Tools:
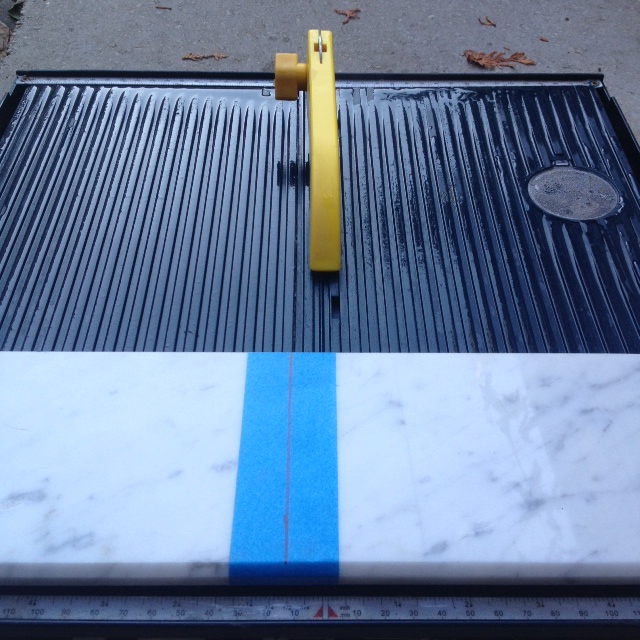
Wet tile saw
Measuring Tape
Drill
Level
Caulking gun
How To:
Measure available space (ours was 18″). Mark and cut marble to length with wet tile saw and diamond blade.
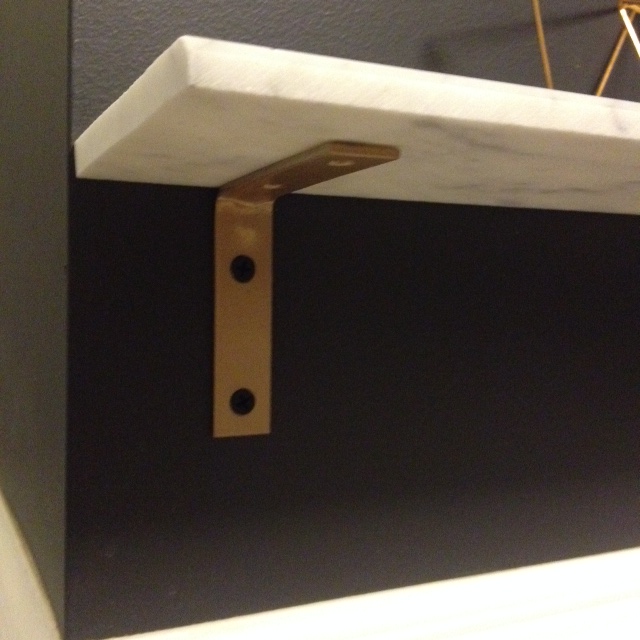
Install your corner brackets as shelf brackets screwing into studs, or using hollow wall anchors. We used black screws as we liked the contrast with the gold, and we have black accents in the room.
Attach marble to the brackets with a small amount of PL Premium construction adhesive, and let dry for 24 hours.
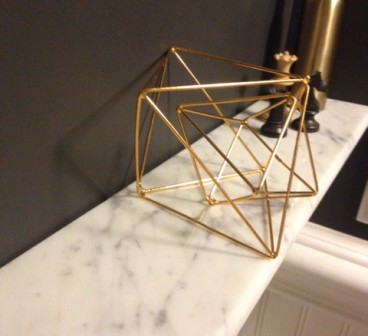
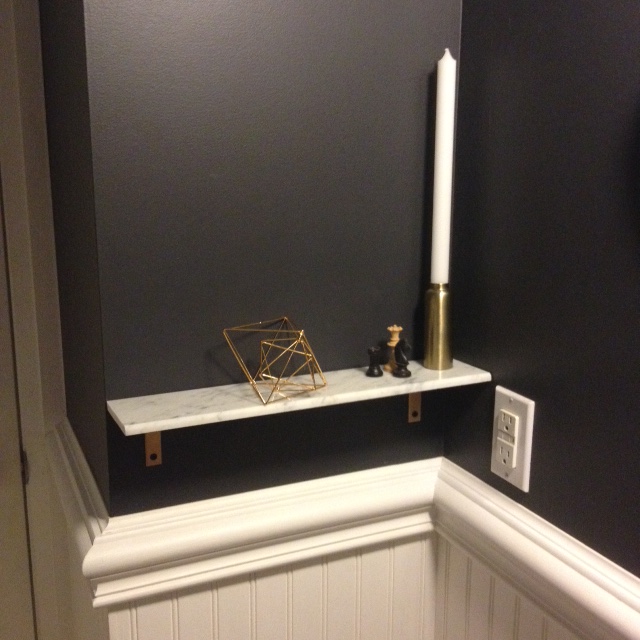
The shelf is perfect for holding a few decor items, and a place to set down your phone and lipstick. Now to style it!
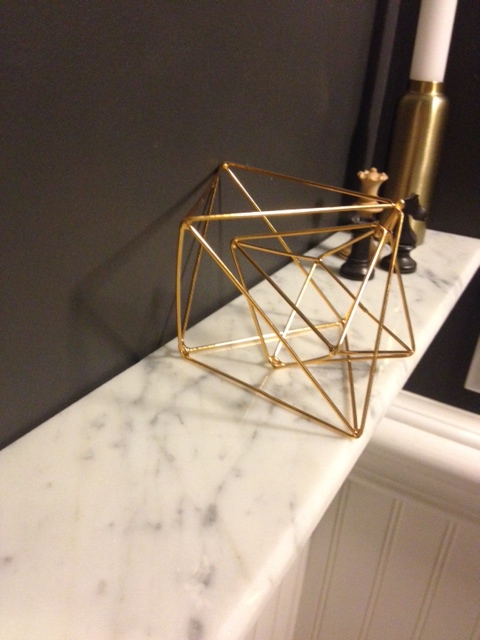
I tried out a few accessories, and decided I really need a piece of art to balance everything. A small print set off to the left side will be perfect .
The bathroom is really coming along now. I will be back with another DIY project later on in the week.
SOURCE LIST:
Materialst:
Marble – Home Depot
Primer – Zinnser – Home Depot
Paint – Krylon Gold Metallic
Brackets – Brass corner brackets – Home Depot
PL Premium Adhesive – Home Depot
Girls come with a lot of accessories. We have purses, shoes, scarves, jewelry and a plethora of other crap things. This is often why we require so much closet space to store it all. Most of my rarely used handbags and shoes are packed away, but my often used purses, scarves and shoes need to be close at hand, and thus can be kind of a mess.
To get them out of the way, yet keep them accessible I decided to hang some knobs inside our new master closet to hang my favorite accessories.
The problem with knobs is that they are meant to be screwed into a cabinet. This means that they have what you call machine screws (screws without a pointy bit) to attach them to the cabinet. They screw through the back of the cabinet into the knob. This makes them impossible to attach to a wall without some DIY’ing.
Here’s what you need to do. Take your knob screws out to the garage and cut off the heads of the screws using a saw with a metal blade. This now makes them headless screws (which means they can be screwed into things on both ends. )
Knobs
Head back inside wielding drywall anchors and a drill. Attach your wall anchors into the wall where you want your knobs.
Drywall Anchors in Wall
Then simply thread your now double sided screws into your knobs and your wall anchors. Ta Da! Knobs on a wall.
Knobs Screwed into Wall
Now hang your accessories, and get your nagging husband off your back.
Wheres my white Coach Purse? Hung up of course!Knobs Holding Accessories
You can easily do this with all sorts of knobs, for holding towels in the bathroom, coats at the front door, or even the dog’s leash handy but out of the way.
SOURCE LIST:
Materials: Saata Knobs (6 pack $1.49) – Ikea
EZ Ancors – Home Depot
For those who follow me on Pinterest, you may have noticed a lot of front hall coat storage solutions being pinned to my “Organization” board lately.
Our front entryway is well…a mess. Our front door opens to a square tiled area with no closet and a blank wall. No place to put your keys, coat, shoes or, well… anything.
Slowly we have introduced a few good things to the front entryway. A Ikea Pax wardrobe for storage, a handcrafted bench from a local artisan and a giant mirror that came with our last apartment. The black sheep of the entryway however is an ugly, broken $15 Ikea RIGG coat rack that we’ve had since college.
Ikea RIGG Coat Rack
In fact, I believe its been broken since college. Held together by duct tape and zip ties (really!) The thing fell down every time you put a winter coat on it, and generally looked like a giant blob of coats taking up a massive amount of space in our entryway. We wanted to change it for a long time…we just never actually did.
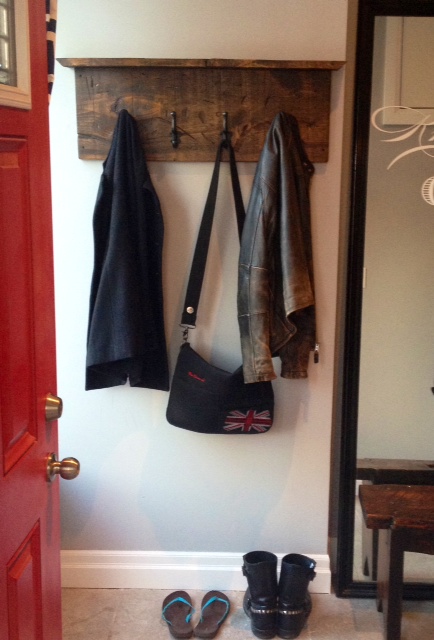
So finally we got off our butts and decided to make a wall mounted coat rack to streamline the entryway some. Our lovely reclaimed wood bench was our inspiration. We wanted something that looked like it belonged with our bench. Like a brother from another mother. We picked up a piece of 1x12x10 rough pine (also used in the bath table DIY) from Home Depot. We measured our space, and decided for a 12×33″ wide rack with a 4×36″ mini shelf on top (to hold some art etc.)
Cutting the boards to size
We cut down the pieces of wood, sanded the roughest bits out and got to distressing.
Sanding
We hammered, nailed, sawed, chiseled, and generally beat the crap out of our wood. My favourite part is some rusty nails (that I salvaged from my pallets) that we bashed into the wood, leaving nail heads and in one case the whole nail showing. It really does make it look like its been around 100 years.
Distressed Wood
As we wanted to match the bench, I headed out to pick up the darkest brown stain I could find. I came back with Varathane “Chocolate” and put on a coat. It looked great at first, but as it dried, it was still too light. So I put on a second coat of stain, then followed it up with a coat of Minwax Water Based Oil-Modified Polyurethane.
After 2 coats of Chocolate stain
After it dried, I sanded lightly with a fine sandpaper, then gave it a second coat. Once it was completely dry we attached some nice cast iron coat hooks, and attached it to the wall (into the studs) with some nice 2 1/2″ long black screws.
So here is the before and after:
Before: Coat MonsterAfter: YAY!
SOURCE LIST:
Materials:
1×12 wood: Home Depot
Varathane Chocolate Stain: Home Depot
Minwax Water Based Oil-Modified Polyurethane: Home Hardware
Cast Iron Coat Hooks: Home Depot
If you have been being a good boy or girl, you will have read my Project Office post and you will know I have a lot to do! One of the items on the To Do list was crates for built in bookshelves. Bookscase DIY tutorial will come soon (I promise) but until then here is a sneak peak on how we made the crates to go ON the bookcase.
I was planning on sourcing some framing grade lumber and roughing it up a bit to get a worn look for my crates. Odin & I happened to be walking through an industrial area in our neighbourhood on Friday when we spied a pile of shipping pallets on the side of the road.
Stack of Pallets
I thought to myself, “self, there some rough wood, and its CHEAP rough wood”. You see, cheap is one of my favorite words. I like it so much that people often use it to describe me. So Saturday morning Odin and I took off to steal grab ourselves one of these pallets. I picked one that looked good, didn’t appear to have hobo pee or bugs on it, so I carried it home. By carried it home, I mean I walked 100 feet, rested, walked 100 more feet and had another rest all the way home. It was also a Saturday morning, and I had to walk past a hipster brunch spot in the neighbourhood looking like a crazy person. The dog happily trotted behind me wondering what on earth I was up to.
Stopping to take a break and admiring my “found” pallet
After lugging this darn thing home, swearing a few times, wishing I owned a car, and wondering what I was so damn crazy, I finally got down to work. I thought bringing it home was hard, I hadn’t yet met hard. Hard is not owning a crow bar, and trying to take out massive nails with a hammer and Mjölnir to pry and bash them apart.
Taking Apart Pallet While Trying not to Hit My Foot with a Hammer
Break time yet? GAH! This is hard work. You are probably asking right now, where on earth is El Granto? He was having a lovely day learning to drive NASCAR’s with his Dad and Brother. At about this point in time I was cursing him in every language that I know a curse word in. These include, English, French, Spanish and German. My mother would be disappointed that I don’t know any Danish curse words. The worst thing I know is how to say underwear in Danish. This was a hit when I was six…
So… I finally managed to pry apart some boards, and then bashed out the nails.
Striped Apart Pallet
As you can see the wood before sanding is…well kinda gross. It will get better, I promise. Now I put some super rough sandpaper in my palm sander, and set to work.
Getting Ready to Sand
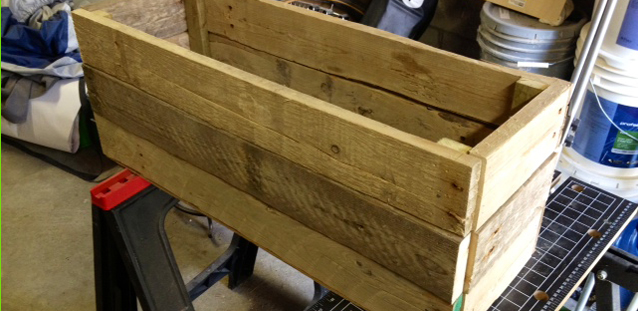
Once I sanded everything, using the dimensions of my bookshelves, I decided on a size for the crates. I wanted them to fit in the bookcase nicely, but have a little room to slide in and out. I drew up a quick diagram on a piece of wood, and started cutting! The finished size for the crates are 29″x10″x11″ and 13″x10″x11″. I cut my front pieces 29″ long for the big ones and 13″ for the small. The sides were 8 1/4″ and each crate was 3 boards high. I cut the boards to length on the miter saw, and used scrap pieces of 1×2’s as corner braces. I attached the front panels to the corner supports using brad nails. I spaced the corner supports 5/8″ in from the edge to allow space for the sides to fit flush.
One Front of Crate Assembled
I assembled both the fronts, then attached them to the sides with more brad nails. I then traced a bottom for the crate onto some extra hardboard we had laying around the garage. I cut out the hardboard with the circular saw, and nailed it to the bottom of the crate.
Voila! Crate!
The wood is all different thickness, and I didn’t worry about having everything match perfectly. It just adds to the distressed look. After I had assembled it, I took the palm sander to it again making sure there were no sharp corners or splinters. There, I was done! It only took me 3 hours to make one crate. Wait, what, I need four more of these? DAMMIT! I better get back to work. I sanded and cut the wood to length for one more crate, but I ran out of brad nails. Uck. So I waited for El Granto to get home from his NASCAR adventure and then headed to Canadian Tire to pick up more nails, and some felt furniture sliders for the bottoms of the crates. We also stopped and pilfered one more crate on our way home, which I made El Granto carry, and he cursed me in the same fashion that I had cursed him earlier. Once I got home, a soft couch and a cold drink sounded better than doing more work, so I gave up, and left it for Sunday.
Sunday morning, we got all ready to start work (this time with El Granto in tow). When we went outside our neighbours were putting up a big glass panel on their amazing deck, and asked for some muscle. El Granto went to help, and I got back to work making more crates. El Granto’s work conveniently consisted of standing holding a piece of glass for an hour, then being rewarded with a plethora of yummy beverages. Of course he preferred doing this to helping me make crates…so once again I was bustin my ass alone. El Granto did stop in to help me take apart the second pallet (it’s much easier to watch him then to do it myself.) I proceeded to make one more big crate, and three little ones.
Small Crate
The little ones are cute. Like a puppy version of a crate. I finally finished all five of my crates, and stood back to appreciate my giant stack-o-crates.
Stack-o-crates!
Some of the wood turned out really cool. The ones that look all spotted were really really rough boards, that I sanded and sanded and sanded and they came out all spotty! I also really like the boards with the rough saw marks. I thought I may have to distress the crates more, but I think they look fairly worn. They look like driftwood almost. I was on the fence with staining them, but we like them just the way they are, so we’ll leave them as is for now. They do need some hardware, I am waffling between shiny fancy nickle handles (that I am using elsewhere in the room) or sticking with rustic and using some rope, either as a handle, or making small monkey’s fists and using them as pulls. What do you think?
Sneak Peek of a Crate in the Office
So what do you think? Free crates, were they a pass or a fail?
UPDATE!
My idea to use pretty polished handles on my crate was overruled by El Granto, my Mom, our neighbours, my co-workers and the garbage man. So rope handles it is!
We checked Rona, and their rope was too big, Home Depot had even bigger rope and some smaller rope. We went with the small one. In hindsight, I wish it was a bit chunkier. Will be keeping an eye out for some bigger rope. Also, check out the completed bookcase here.
SOURCE LIST:
Materials:
Wood Shipping Pallets : side of the road
1×2’s: Pile-o-wood in my garage
1/8″ hardboard: My garage
Brad Nails: Canadian Tire
Sandpaper: Canadian Tire
Felt Furniture Pads: Canadian Tire
Rope: Home Depot