The main floor of the Storefront has almost 11 foot ceilings and is open concept, and to be honest its been very hard to decide on art for the space. Everything I own and try to hang is way to small for the large walls. I have been hunting for some large art in my budget, but have struck out. I decided to take matters into my own hands, and set out to make some extra large art.
My Mom was coming to visit and was bringing my Dad’s truck. A truck meant that I could get some big building materials that I cant normally buy and take on the bus. We got materials for a few projects, and also picked up a 4×8 sheet of 1/4″ masonite hardboard. A lot of artists actually use masonite as artist canvas. It is a nice smooth surface to paint on, and is acid free.
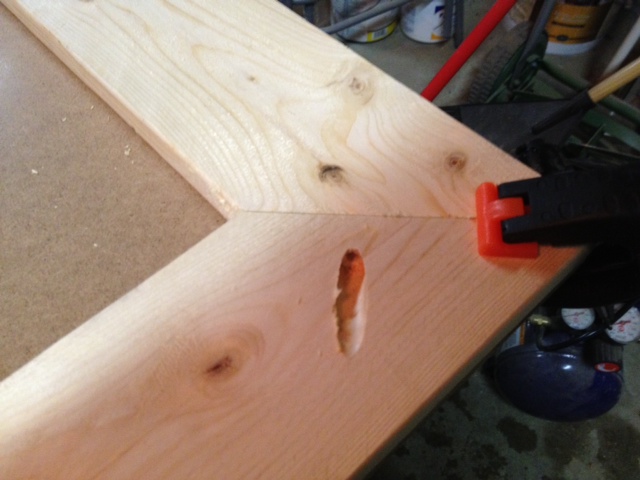
I took my 4×8 sheet and built a frame for it out of 1×3 lumber (I wanted a shallow frame/support as I dont have a lot of space for a thick frame, in hindsight however 2×3’s would have made a beefier support). The frame consisted of an outer stretcher bar with mitered corners, and two cross supports.

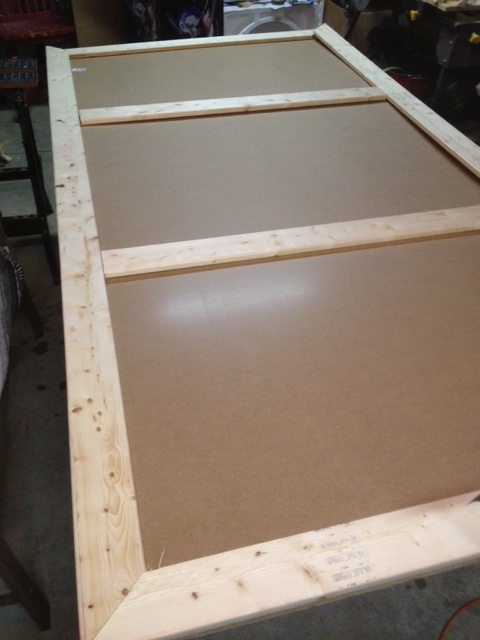
I used pocket holes to secure my frame, then brad nailed my masonite to the frame using 5/8″ brad nails.
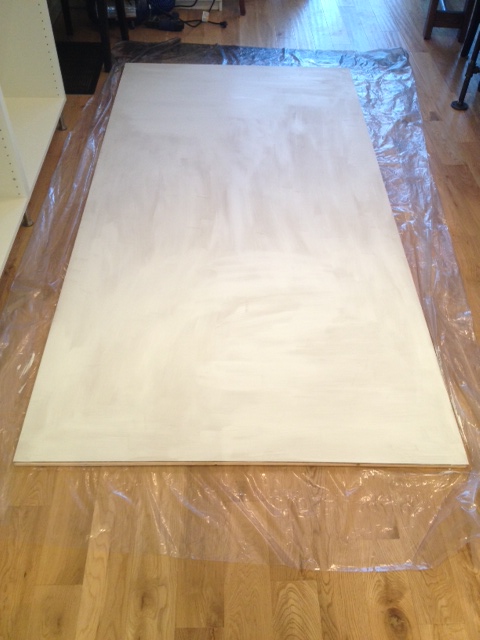
After that was completed, I sanded the masonite to rough up the surface for painting.

The hardest part is maneuvering the super sized canvas. I advise having a friend to help you carry and flip this lightweight but awkward art project.
I primed the whole shebang with some left over primer/sealer I had laying around, then I set to painting my art.
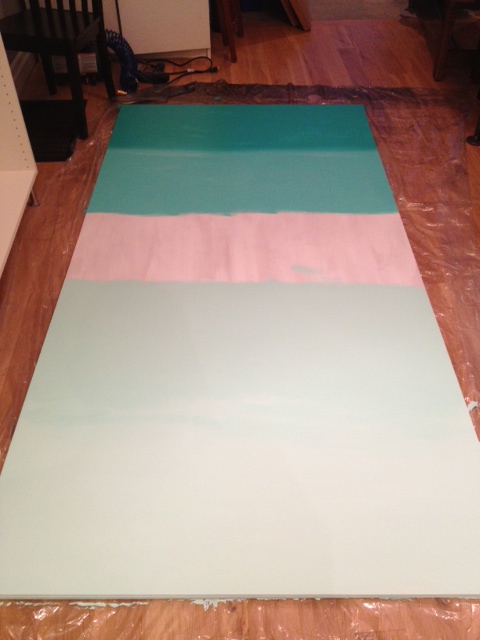
I wanted something with some colour, but that wasn’t super in your face (the painting is 4×8 after all, its already gonna have a ton of impact!) Heeding the ombre trend, I decided to do a turquoise ombre painting. I hit up my Home Depot, and got 5 sample pots of paint in varying shades of turquoise (from light to dark).
After my primer had dried, I got to painting. I painted a stripe at the top about 20″ high of the lightest colour.
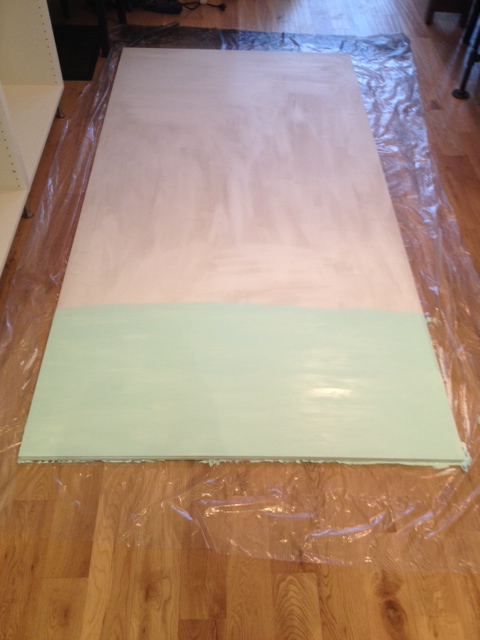
Then proceeded to do stripes 19″ high of all the other colours. I painted the lightest and darkest colours first and let them dry, then worked my way fading the colours. The lightest colours were fairly easy to fade, but the darkest colours were harder.
I ended up mixing up a “pallet” (paper plate) of paint where I faded the colours together, having dark on one side of a large paint brush and light on the other.
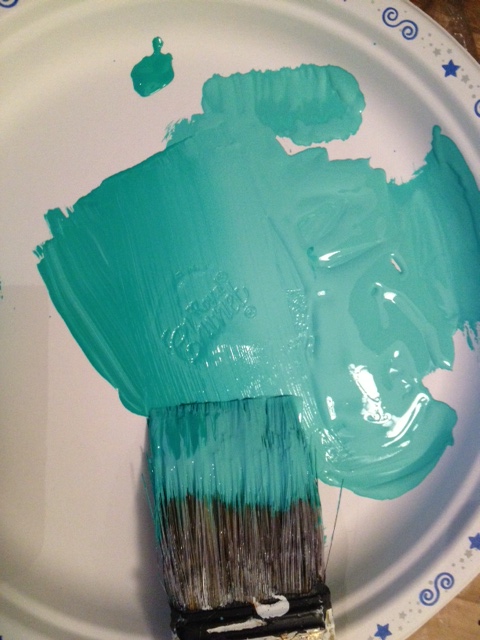
I then painted one stripe between the two colours with the fade in the middle. It only took me one afternoon to complete, and it makes quite an impact.
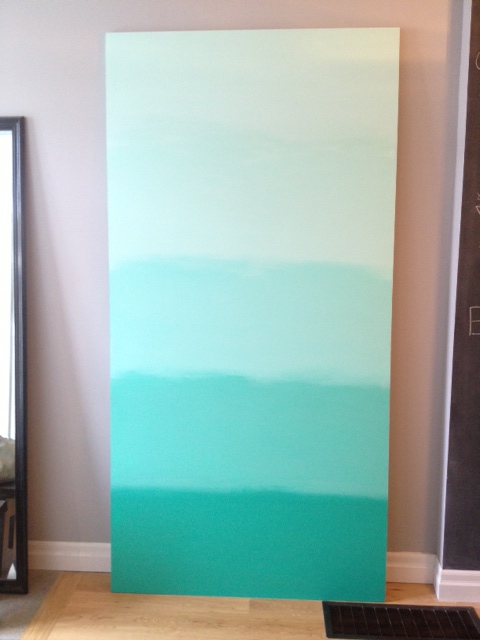
It currently is leaning against the wall in my dining room, but I think it will end up in my kitchen or even sideways over my sofa. So many options!
SOURCE LIST:
Materials:
4×8 sheet of masonite – Rona
4 – 1x3x8 spruce – Rona
CIL Primer – Home Depot
Behr Paint + Primer Sample pots – Home Depot
Tools Used:
Mitre Saw, Kreg Jig, Brad nailer, Paint brush
Difficulty Level (on a scale of 1-5):
Total Cost: $45
Nice job, like the organic feel of the stripes!