We loved our DIY Pipe & Wood table and bench. However, we started to fall out of love with it after living with it for a few months. In order to get the table done on a budget & quick timeline we used framing grade spruce lumber from the big box store. Over time the wet wood warped, and our table was looking a bit topsy-turvy. Oops. The framing grade spruce also had rounded edges, which made for serious crumb catchers between the joints. Thirdly, we used Tung Oil to finish the table, and after a while, the tung oil started to smell, well, like spoiled oil. Nowhere in all my research did I find anyone saying tung oil would smell like butt after a few months. Lesson learned. (Although as a finish the tung oil was doing otherwise great, not a single water spot or mark on the table, if you can get past the butt smell.)
If you know me (and my neuroses) at all, you will know that I couldn’t just leave the table. I can live with dust bunnies rolling around the house becoming dust monsters, and I can live with dirty dishes in the sink, but a wonky smelly table? Not a hope.
So here it is kids:
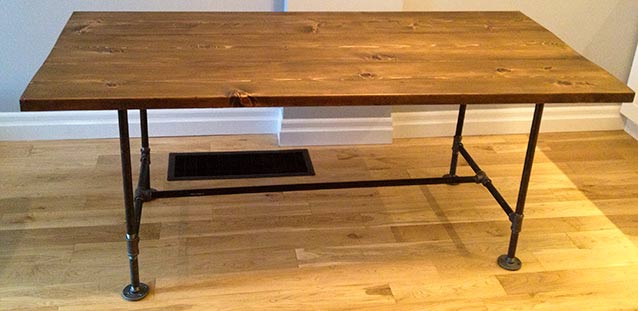
DIY Pipe & Wood Table Version 2 (6’x 34 1/2″)
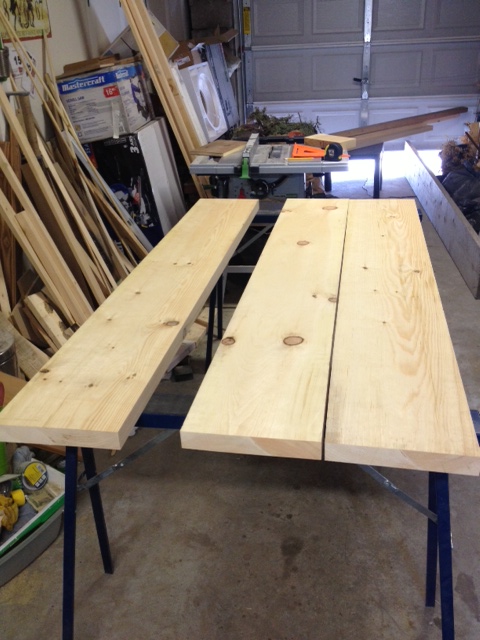
Lumber Buy List: (purchased from a local Home Hardware Building Center. Check your neighborhood to see if you have a Home Hardware Building Center or another lumber yard . They will carry a larger amount of lumber than the big box stores, at about the same prices.) If you’re in Toronto, try Downtown Lumber (a Home Hardware) or Central Fairbank Lumber.
3 – Kiln dried pine 2×12’s @ 6′ (square cut edges, not rounded ones)
1 – Kiln dried pine 2×2 @ 8′ (support pieces)
Cut List:
3 – 2×12’s @ 6′ (our lumber yard rough cut them to just over 6′, then we did nicer cuts with our sliding miter saw at home. If you do not have a sliding miter saw, or a circular saw that can cut through that thickness of wood, have your lumber yard cut it for you with their good saw, not their rough cut one.)
3 – 2×2’s @ 26″, cut to a 45 degree miter on either end.
Instructions:
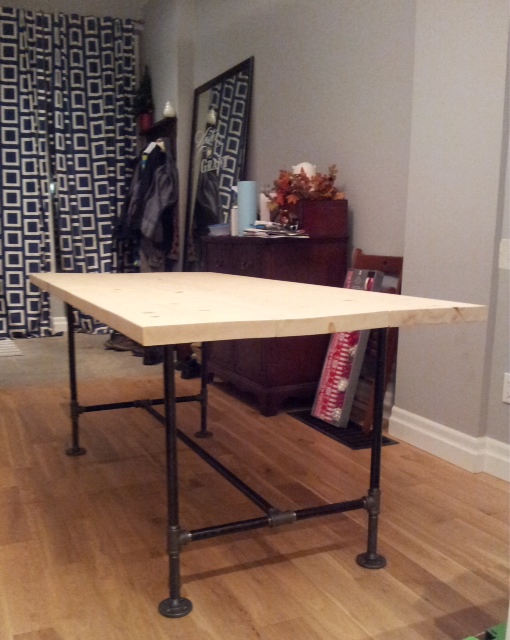
Lay out your table top boards and decide which sides you want up. Make sure to flip the grain so that one board’s grain is up, and the next is down. When you have everything laid out (and square!) mark for Kreg pocket holes every 8″ or so on the bottom of 2 of your tabletop boards. Using the 1 1/2″ thick wood setting, drill your pocket holes. (see how to drill a Kreg pocket hole here.)
Attach your tabletop boards together with wood glue and 2 1/2″ Kreg Pocket Hole screws. Make sure your table is square before attaching the boards together. (You can check it with a square and by measuring corner to corner diagonally. If both sides are the same, your table is square.) Wipe off any excess glue that may have squeezed up between boards with a wet rag before it dries.
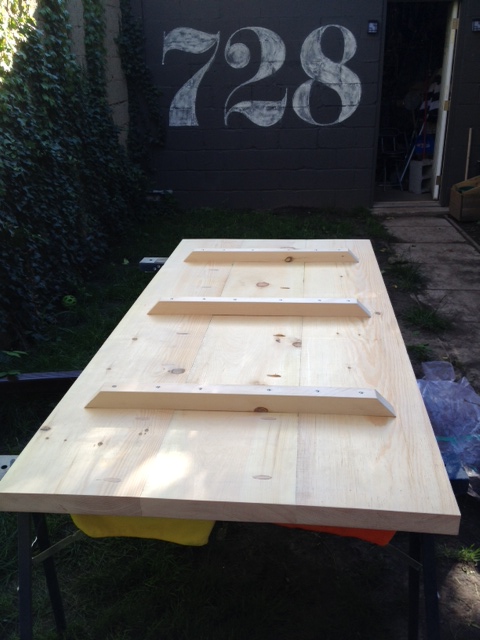
Once glued and screwed, attach the support pieces. We put one in the middle, and two right behind where our pipe legs would go. The ends are cut to a 45 so that its looks nicer, and you’ll be less likely to whack your knee off it later. We used some 2 1/2″ screws to attach the supports, making sure we got at least 2 screws into each board. These support pieces will try to keep your table from warping. Remember wood is a living organism, and changes during high & low humidity and heat. So you can never guarantee your wood will stay exactly the same. (That’s why you leave an expansion joint on your hardwood floors, or else they might buckle.)
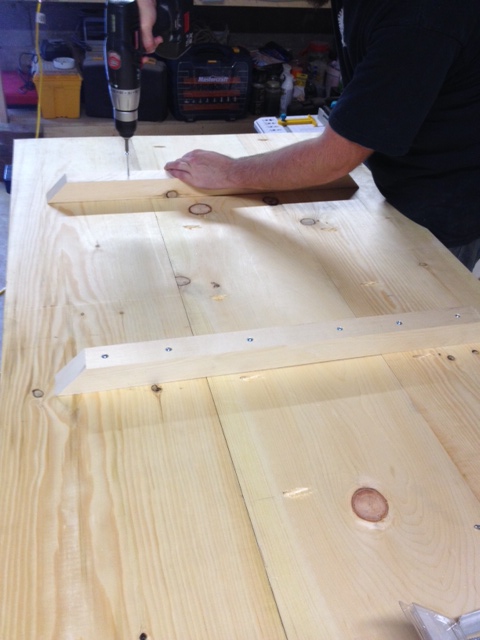
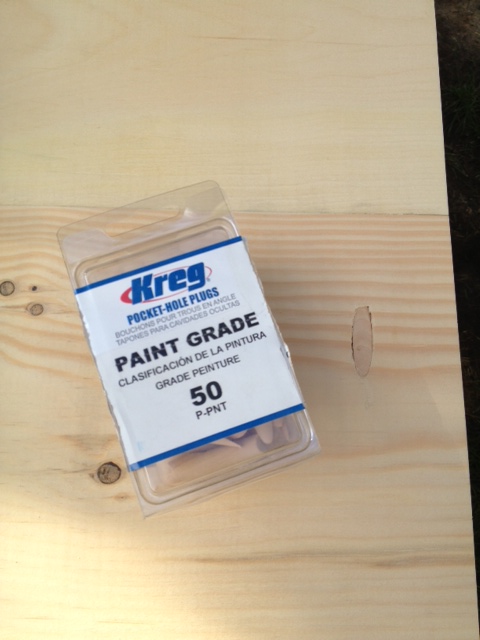
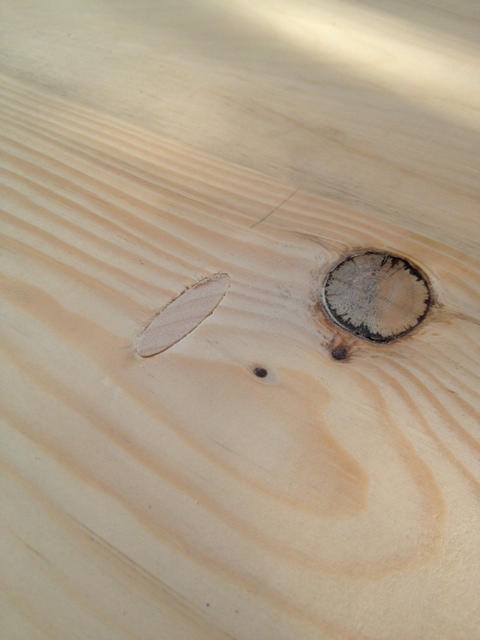
We also filled the pocket holes with Kreg wood plugs. You wouldn’t see the holes, but if you ran your hand along the underside of the table you would feel them. They also might catch on pants or stockings. The Kreg plugs are easy to use. A bit of wood glue and careful placement and they were done. After the glue dried we gave them a sand to ensure everything was nice and smooth.
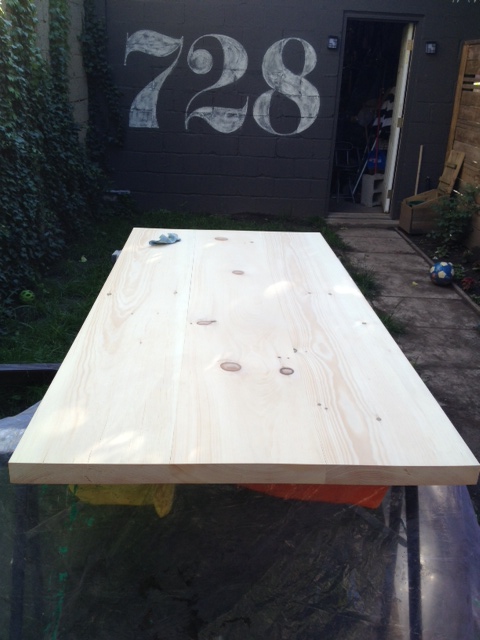
Now its time to sand. I like to sand outside in the summer, so out the table went. We sanded away, then I stained the table and royally screwed it up. OOPS. Time to fix my mistake, and try again.
After the sanding came two coats of Varathane Chocolate Stain (check out my finishing post to see all my steps in sanding, wood conditioning & staining.)
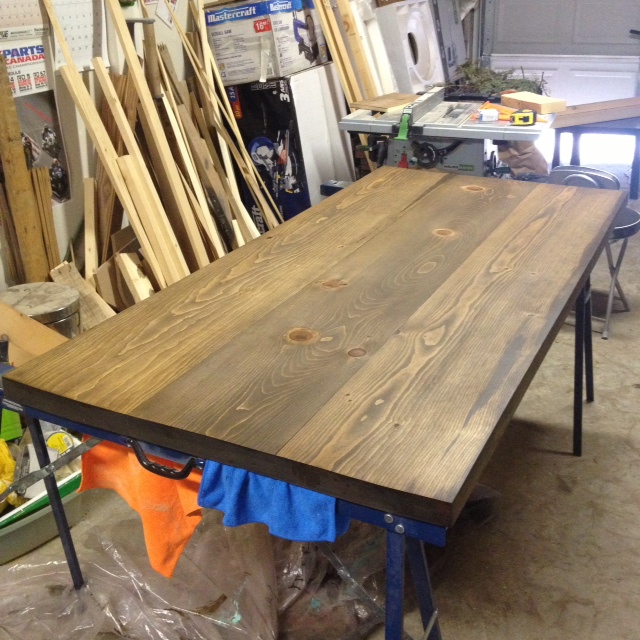
I can tend to get a wee bit anal retentive, so when it came to polyurethaning the table, I had to stop myself at 6 coats. Any more would be a bit cray cray. Realistically as long as you have at least three coats, you should be good.
Now to re-attach the legs from the old table. A bit of measuring to make sure its centered, and a few screws and we’ve got legs people.

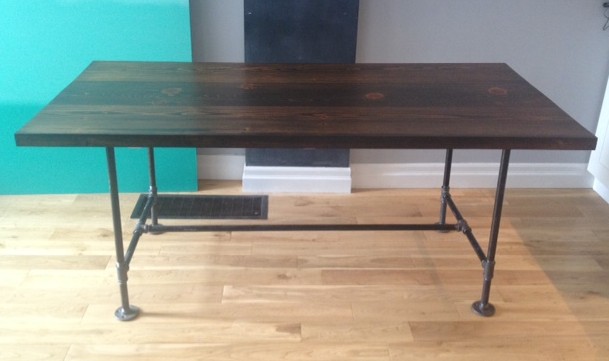
Want to see what it looks like all finished?! (ignore my terrible lighting, the dining room is impossible to shoot in.)
Dum da da daaaaaa

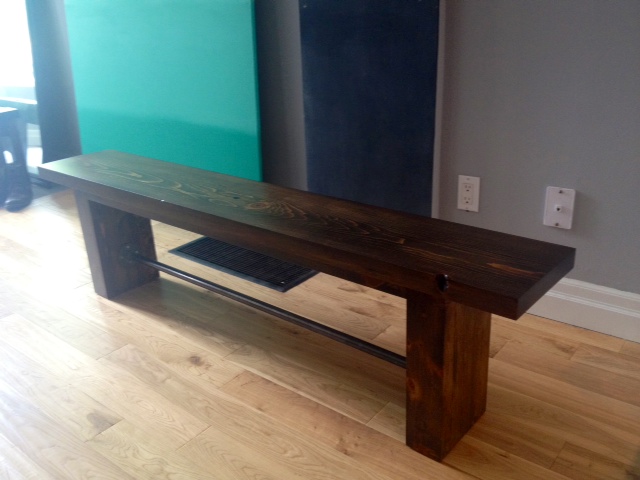
***UPDATE*** We also made a new bench to go along with the table. Check it out here.
SOURCE LIST:
Materials & Cut List:
(see above)
Tools Used:
Miter saw
Drill
Kreg Jig
Orbital sander
Measuring Tape
Difficulty Level (on a scale of 1-5):
Total Cost: $100 (for the new wood, we already owned the pipe, stain & poly)

")
")
")
")
")
")
")
")
")
")
")