I received a sample in the mail the other day from Minwax. It included a couple packages of their wood finishing cloths, and a small piece of wood. At first glance the wood looked like an artists palette.
Tag: stain
Media Cabinet – Odds & Ends
The Printmakers media cabinet project is coming along (if you’ve missed it, check out part one, two and three)
We checked a few things off the list last weekend. First up, we headed down to Lee Valley Tools to pick up the hardware. I had pre-scouted online but wanted to go to the showroom to take a look at everything in person. Turns out, we walked out of the store with the exact things I had picked out online! (not that I minded wandering the isles full of awesome tools and hardware at Lee Valley…)
Here’s what we bought:

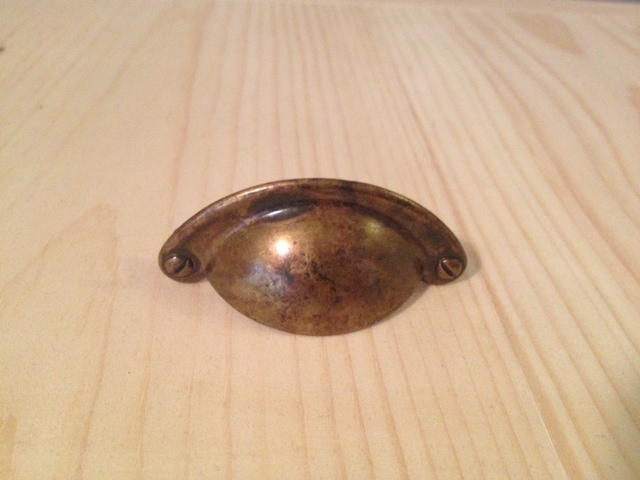

We also picked up standard drawer slides (350mm) and some door latches. The purchase set us back $135 but it was actually considerably less than I was expecting. I will give you a breakdown of all the fees once the cabinet is finished.
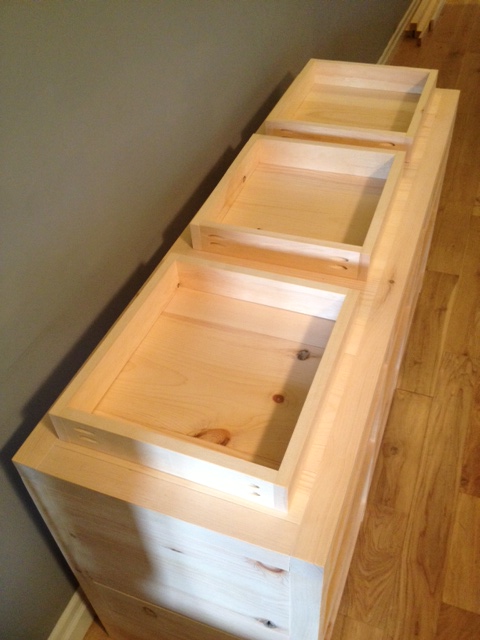
On the same day as our hardware adventure, we also trekked out to the lumber yard and picked up the wood for our interior shelves and drawer boxes.
We got to work installing the shelves. They are inset into the frame, so we were trusting our fabrication to have everything go in perfectly. I was expecting disaster, but it went smoother than expected. It was a tight fit, but with some persuasive hammering we were able to get everything in and screwed into the frame using pocket holes. It needs a good sand, but overall we are pleased with how its shaping up.

We also got started on the drawer boxes. We cut the sides and fronts of the boxes to length, pre-drilled pocket holes, then assembled using our corner clamps and a square to ensure the boxes were perfectly square. (Un-square boxes will cause us a ton of headache when we try to install them.)

The assembly of the drawer boxes went fairly swiftly and smoothly. Now they’re ready for the drawer bottoms and then we can install them (which I am super stoked about!)

We also spent a good chunk of time trying out more staining options. I am still not in love with anything, but am getting closer.
I think this is the most indecisive I have been about anything in the house. I have a wildcard option that I am going to try out this week, and I will let you know how it goes (that is if I don’t light the house on fire while trying it.)
Hopefully this weekend we can install some drawers and get some staining done!
The Quest for Stain
I know exactly what I want, but I cant find it. Isn’t that infuriating?
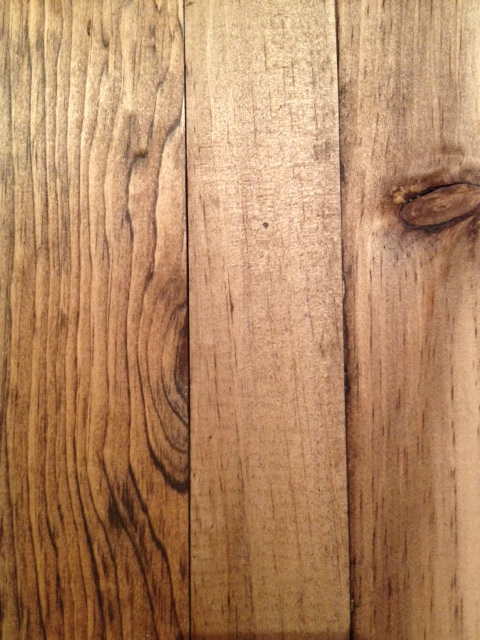
I heart the look of the reclaimed pine from Restoration Hardware. Its a grey undertoned warm finish that looks old, but not dirty. (I hate how some reclaimed wood looks so dirt ridden that you’d never want to have it in your house.)
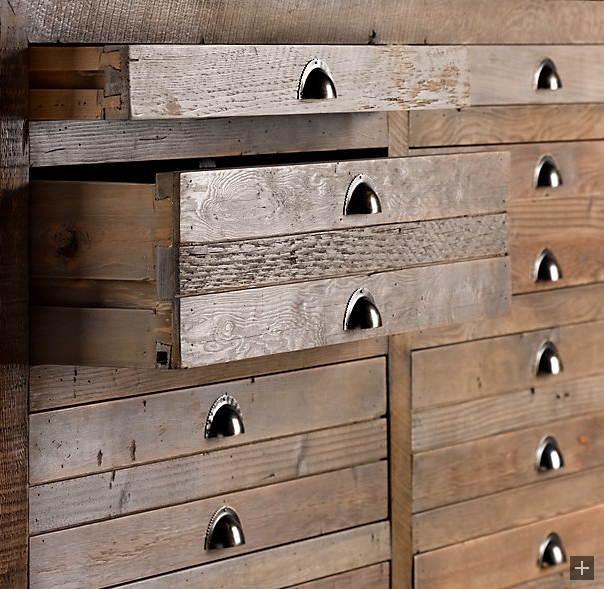
I want to find a stain that will turn my raw pine media cabinet into a fantastically aged awesomesauce masterpiece (yeah I know I got a bit carried away with my adjectives there). I went on a quest for stain. A quest for stain is not nearly as fun as you’d expect a quest to be. There was no ring and not even one Hobbit.
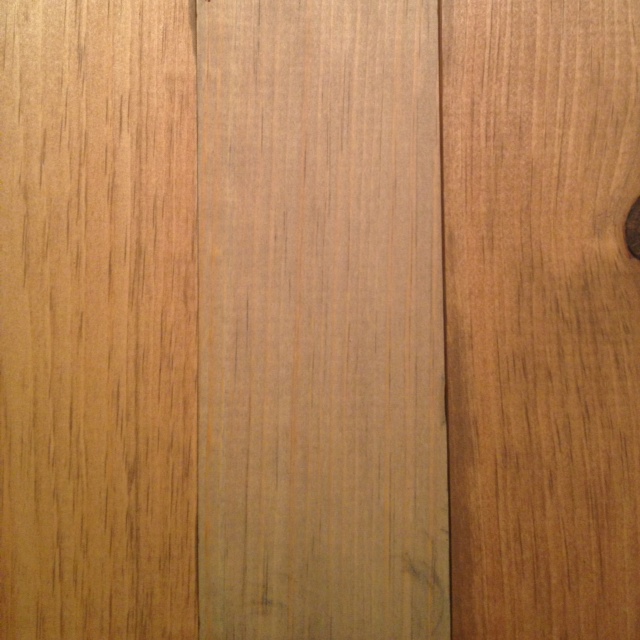
Here’s the list of contenders:
- First up, Minwax Classic Grey. Conclusion: Too flat and weirdly unnatural.
- Next stop, one coat of Classic Grey and one coat of Early American. Conclusion: Too dark, the grey got lost entirely, and it ended up much too red.
- Thirdly, Minwax Weathered Oak. Conclusion: I had high hopes for this fellow, as the swatch online looked just like the RH finish. Its a new stain, so none of my hardware stores carried it. I had to special order it, and waited with bated breath for my miracle finish. Conclusion: Looks exactly like Classic Grey… it is lacking the warmth I wanted.
- Fourth try, six parts of Classic Grey mixed with one part of Early American. aka “Kristen Mix” Conclusion: One coat equals the closest result yet, it’s still a bit warm/orangey, but at least has the grey tones I’m looking for. Two coats got muddy and grey again, and lost the bit of contrast one coat had.

I now need to decide if one coat of “Kristen Mix” is good enough, or if I should continue on my search. I would still like a bit deeper tone in the knots, cracks etc.
The other option I am considering is doing the one coat of my “Kristen Mix” then some Annie Sloan Dark Wax. I think it will give me the darker hue I am looking for, especially in the cracks and crevices. However, Toronto has yet to get a Annie Sloan retailer. Our closet stop is Bracebridge or St. Thomas Ontario. Both of which are a bit far away for a girl without a car.
Anyone used Annie Sloan’s Dark Wax? If so, is it the magical remedy to my stain woes? How about shoe polish? Yeah, I know it sounds a bit cray cray, but swear I remember Norm using it on an episode of This Old House.
DIY Bath Table
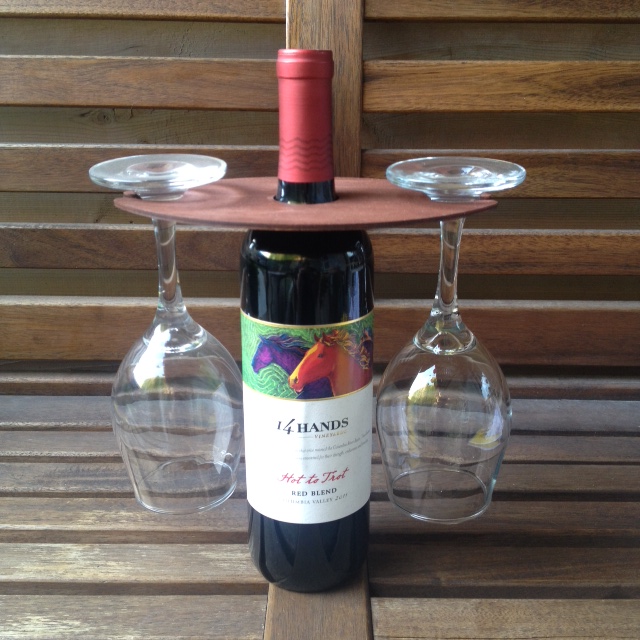
I loooove baths. Like unhealthy obsession love. Like you may have to call Intervention love. If we had money and space in our backyard I would have a hot tub for sure. A bath is like a hot relaxing hug. When I have had a shitty day, all I ever want to do is take a glass of wine and a book to the bath. When I have baths I drag all sorts of things into the tub with me. My Kobo (e-book reader), beverage, glasses, candles etc. Thats a lot of stuff. About 10 minutes into the bath I start to get all sweaty (cause I have the bath set to boil) and I am always afraid I am going to drop my Kobo in the bath. So about 6 months ago when I pinned this lovely pin to my Pinterest.

Source: designsponge.com via Kristen on Pinterest
I love the whole bathroom, but especially the live edge board acting as a table on the tub. I normally hate bath accessories. I don’t need a wire basket to hold my loofah. I need a wine glass cup holder, and manufacturers don’t seem to be making those… So finally after much procrastination I set out to make myself one.
I loved the thought of using reclaimed wood, or a nice live edge slab like the above photo, but alas I couldn’t source anything easily/locally. So instead I purchased a rough 12″ wide 1″ thick pine board from Home Depot. The rough boards are a good deal. We got a 10′ long one for about $10. We had the guys at HD cut it down to 2 five foot lengths for us, so it would fit in the car. I came home, measured up the width of my bath tub, and cut a board to length. We distressed it a bit, and I took the sander to it smoothing it a bit, but still leaving it fairly rough.

I finished it with a coat of Varathane Early American stain. Then a coat of Linseed Oil.

Bingo bango bath table.

Now excuse me while I go get naked and enjoy my bath. Trust me, no one needs to see a pic of that…
SOURCE LIST:
Materials:
1x12x29″ piece of rough pine: Home Depot
Varathane Early American Stain: Home Depot
Linseed Oil: Home Depot
Tools Used:
Palm sander, sand paper, random items for distressing
Difficulty Level (on a scale of 1-5):
Two out of five
Total Cost: $17