Slowly but surely our media cabinet is coming along. As El Granto and I have big kid 9-5’s we really only get to work on projects on the weekends.
When we left off, we had attached the front and back frame together and it was looking like this.
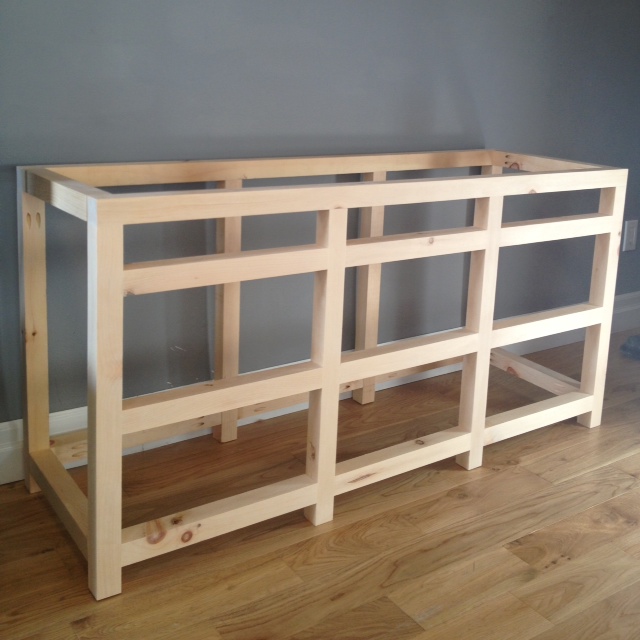
So this weekend we headed to the lumber yard (again) and picked up a few more supplies. After the frame was built we needed to add the top and sides to the frame. According to the plans we were also supposed to add a back, but we have a load of electronics going into the cabinet, including three gaming consoles, and those get HOT. So in order to best keep them cool, we opted to leave the back entirely off the cabinet. However if we change our minds on how we’re going to use the cabinet, a new back can always be added on at a later date.
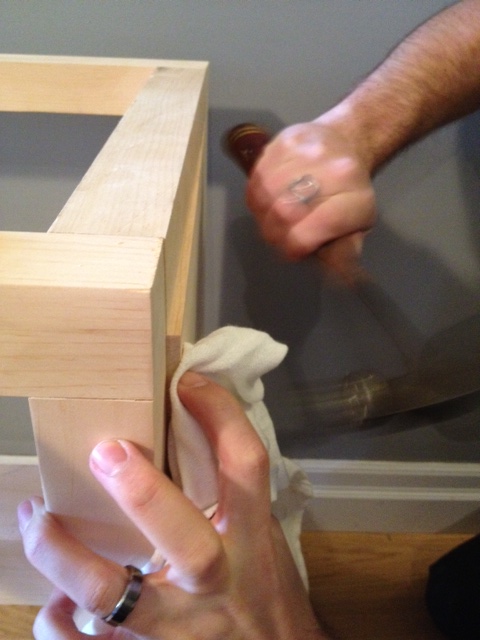
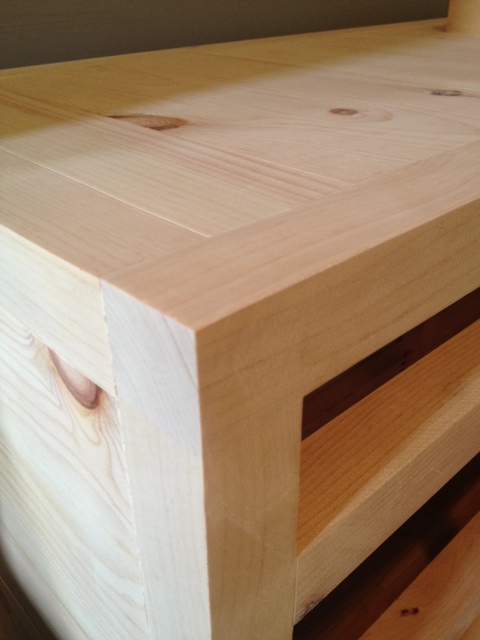
The plans called for using 3/4″ plywood for the sides, top and interior shelves. We opted to use 1×10 solid pine planks instead. It actually came in at less money than the plywood, is nice solid wood, and looks great. We attached the planks together with the kreg jig and then inserted them into the sides of the cabinet using a bit of mafia style gentle persuading (aka a hammer and a rag.)
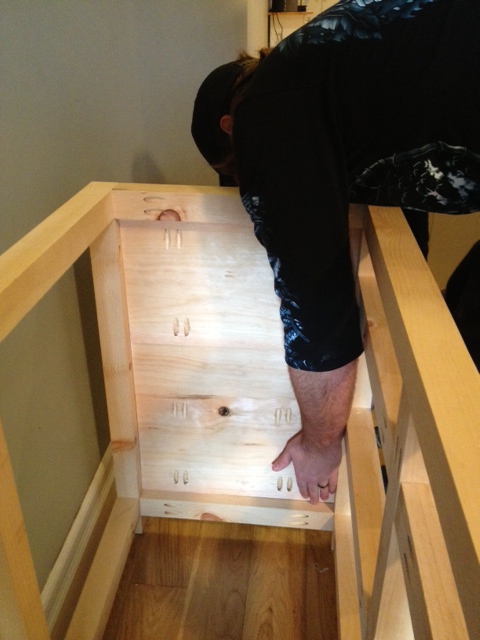
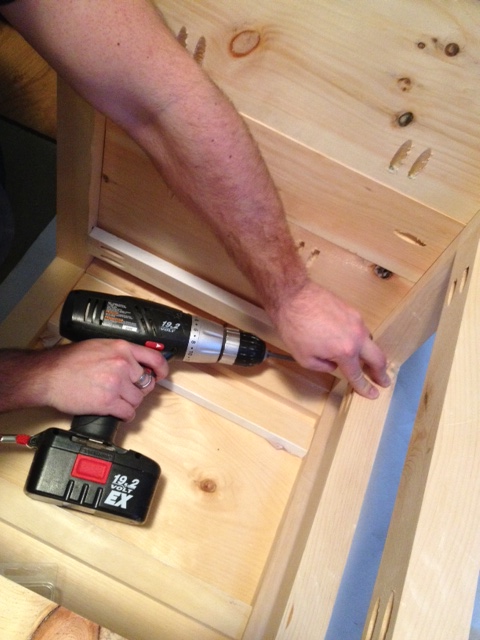
Once the sides were inserted in, we screwed them to the frame using kreg pocket holes that we had pre-drilled. This made the whole cabinet come together, and come back to being completely square (much to my chagrin it had gotten a bit off square during the frame assembly.)
After both sides were on, we moved on to the top. It got a bunch of 1×2 support pieces screwed into the frame to support the weight of the TV. We added in extra supports so that each individual plank had a support on either side of it.
Here’s what it looked like with our completed top and sides, and after a bit of a sand to make everything look all pretty like.
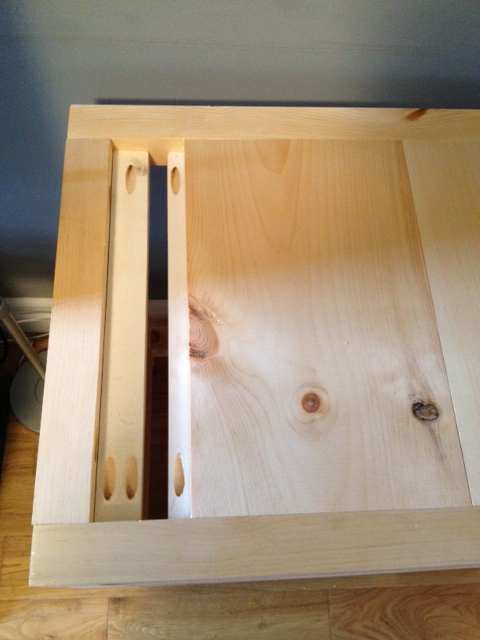
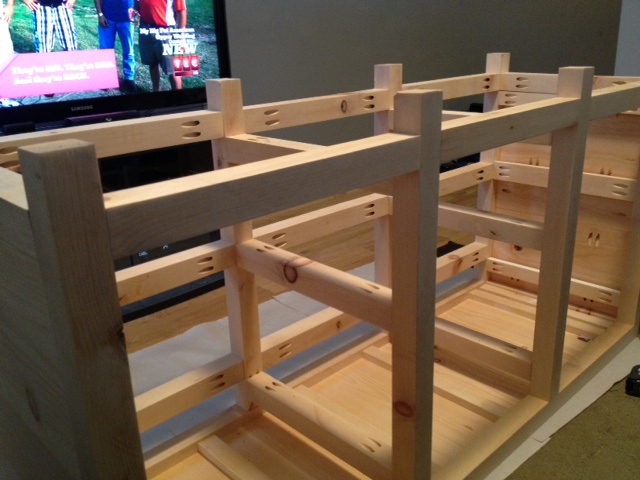
Next up we needed to add the internal supports for the drawer slides as well as the shelves. This was a whole lot of twisting and turning, and most of the assembly was done with the cabinet upside down in the middle of the living room.
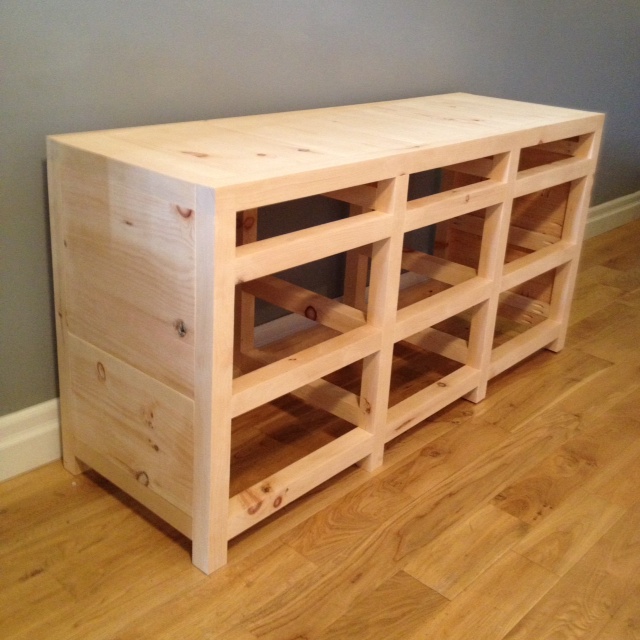
We have not installed the shelves yet, as we mis-cut some of the lumber and ran out (oops). So until we can make yet another trip to the lumber yard and get more supplies, we’re taking a bit of a break.
All told, we have almost 200 screws already into the cabinet. It’s so sturdy, I think it may be able to survive nuclear war. It and cockroaches will outlive the human race. (Perhaps the cockroaches will want to watch tv?)
A close up of the frame supports. The top and bottom ones will have drawer slides attached, and the middle will have an inset shelf to house all our electronics.
Our next steps are: Finishing and adding the shelves, doing another sand of the whole cabinet, especially the interior. Staining and polying the cabinet before we install the drawers. Then building the drawer boxes, making a trip to Lee Valley to buy all the hardware, another lumber yard visit, and some borrowing of our (awesome) neighbours table saw to rip down the drawer fronts. Phew, still a whole lot left to go, but we’re about halfway done now.
Thanks guys! We’re very happy at the progress we’ve made. It’s been (surprisingly) a lot easier than we expected. Now, lets hope we get through building the drawers without killing each other or using the cabinet as firewood…
Wow.. it’s really coming together! I can’t wait until it’s done. 🙂
Looks fantastic so far. Cant wait to see it finished.