I find things on the internet, fall in love, cant afford them, then get sad. I will drool over things for weeks, then finally I will snap, have to do something about it, and get my ass in gear.
You see I loved this light:

I wanted it beside the sofa in the livingroom, so I could read snuggled up on the sofa without having the overhead light on. However for $168 for a pair of them (cause I couldn’t very well get one for my end of the sofa, and leave El Granto in the dark…) it was a very silly purchase. $168 is the price of 4 cans of paint, a kitchen backsplash, or NEW SHOES.
So, no West Elm lights. Sad face.
As you know by my past projects, I never let my cheapness prevent me from getting what I want. It just means I have to make it myself. (Like our DIY Restoration Hardware Mirror, Shelves, Media Cabinet and Table.)
Where do you go when you want to make something cheap? Ikea & the Hardware Store.
I headed to Ikea and picked up two lamp cord sets ($5.99 each in black) and two wooden shelf brackets ($2 each).
At the hardware store I picked up two copper 1″ to 1 1/2″ bushings. ($6.39 each) and two Edison Bulbs ($8.97 each)
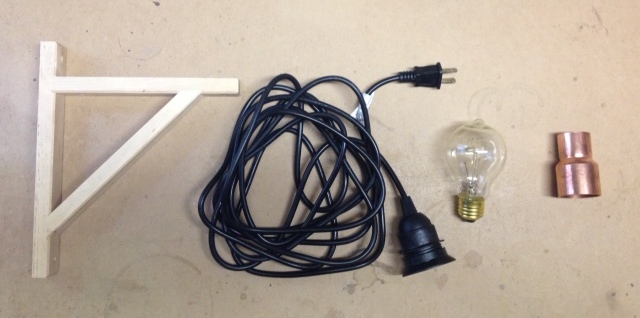
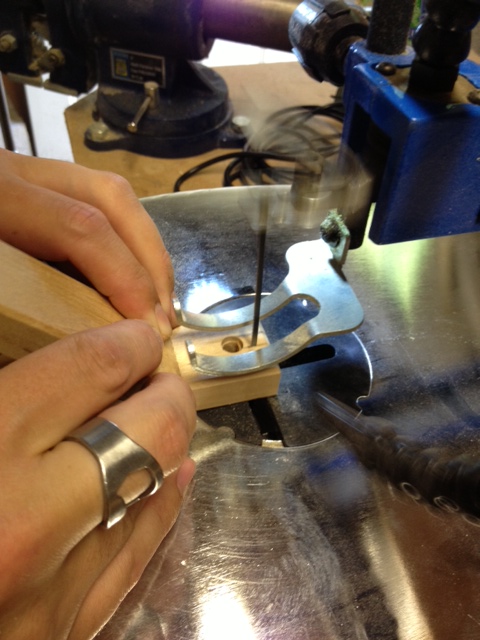
At home, El Granto notched out a slot at the top of the bracket for the cord, and I sanded, stained and waxed the brackets.

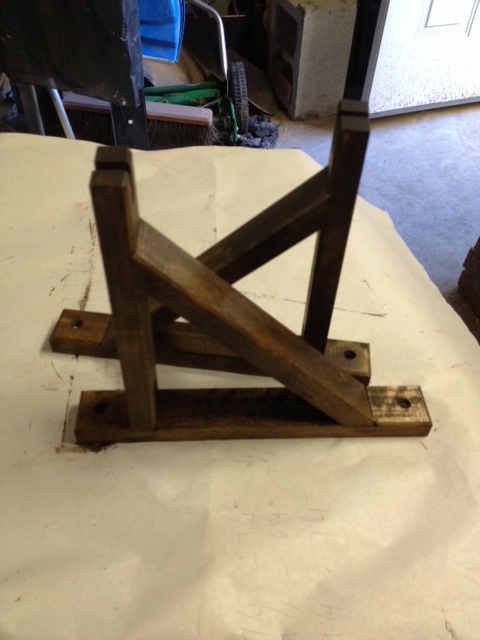
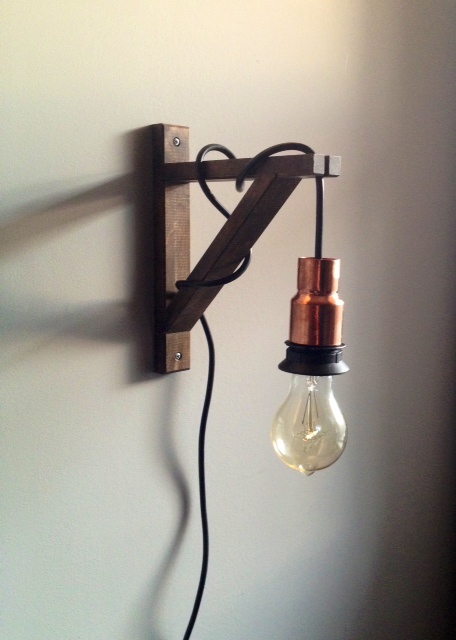
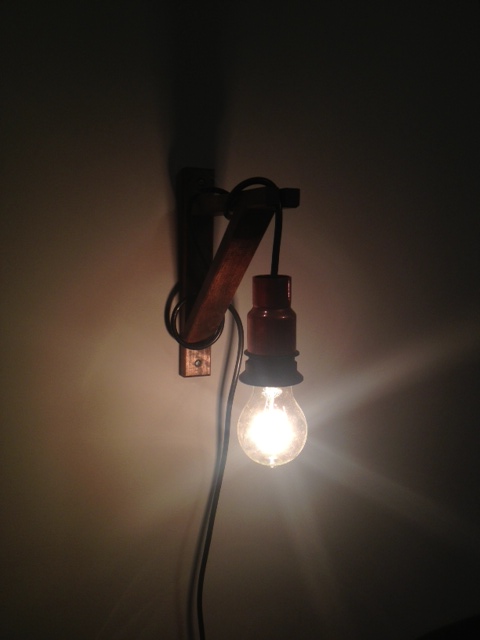
I placed the copper bushing overtop of the lamp set, placed the cord through the notch, and wove it around the bracket.

We installed with a few hollow wall anchors, and this was the results.
SOURCE LIST:
Materials & Cut List:
Cord Set – Ikea
Bracket – Ikea
Copper Bushing – Home Depot
Edison Bulb – Home Depot
Finishing Materials
Tools Used:
Drill
Scroll Saw (Jig Saw would work)
Difficulty Level (on a scale of 1-5):
Total Cost: $47 BOOYA! ($23.50 each)
Thank you so much for posting this! I have been trying to figure out how to attain the expensive copper cord set (So expensive!)… Thank you!
LOVE THIS!! Do you know of any other way to get the bracket notch in the wood? Do you think drilling a couple of holes in a row would work?
Hi Tracy,
I think drilling a few holes in a row would work, or you could take a small hand saw and notch it that way. I would love to see the results if you try this project!
Hey there DIY West Elm Copper Light!
Brilliant! I love what you did. Bravo!!!! (El Granto doesn’t show up here very often anymore. So I’m wondering if you’d be willing to ask a favor?)
How about building a couple of these for me? I’d be SO HAPPY to know where it came from and you’d be making this little lady smile while she reads in bed. What do you say? Will you at least consider it? (Please write me back so I’ll know whether I’ll be seeing the light of day or or not. e.g. waiting until March to let WestElm send me their version.)
Cheers!
Mambo
Yours is much nicer than the West Elm one!!!
Thanks Rishi!!! You’re too kind.