When we last left the basement, we had laid the DRIcore subfloor and installed the SMARTWALL wall finishing system. Then we ran into spring, and had to move our work outside. So what was left on our basement list? Get some paint on the walls, and some flooring on the floors. Then we could move to the pretty finishing touches!
So let’s talk basement flooring. I was inspired by white soaped floors while in Denmark. I even wrote a post on them.
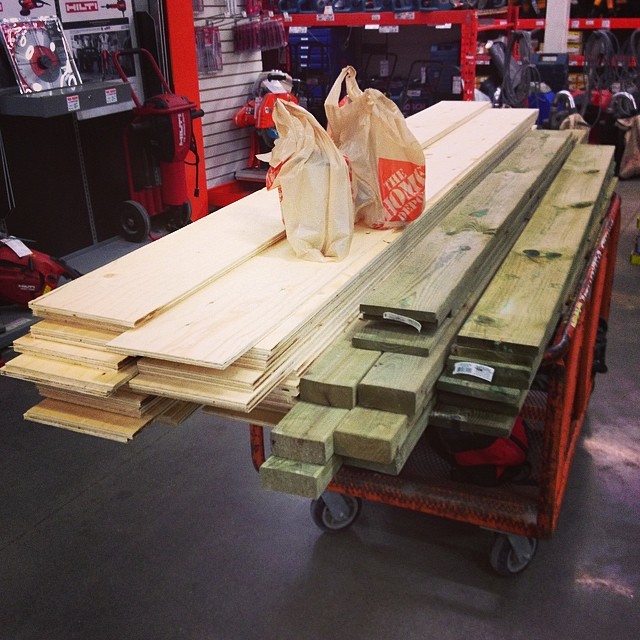
I had grandiose plans to do inexpensive soaped floors. We even purchased a whole bunch of 3/8″ thick standard spruce plywood and had them cut into 7 3/4″ x 8′ planks on Home Depot’s panel saw (much easier than ripping it at home on our table saw).
But the floor wood cleaner, lye and soap finishing supplies were mighty expensive, and it seemed like a waste of money and an absolute ton of work for a basement floor. The problem is I still liked (and wanted) the look…
So how do I plan on getting it?
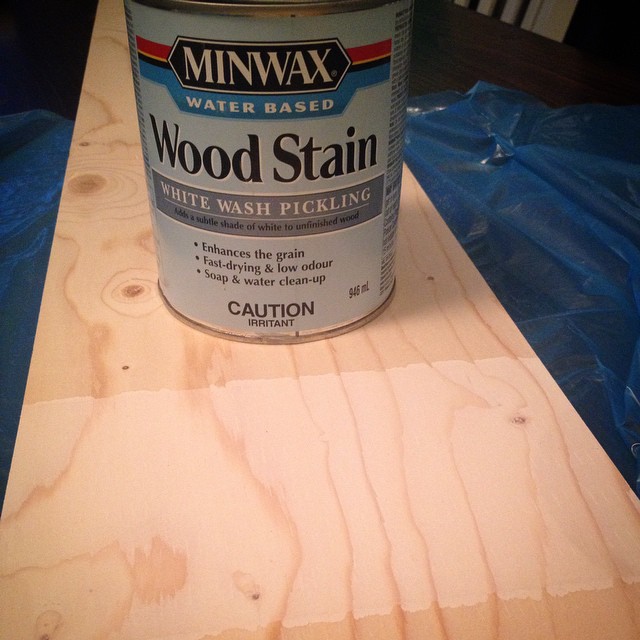
A few weeks ago I sanded and sanded and sanded a piece of the plywood, and applied some test stains. I tried Weathered Oak, Grey, and White Wash Pickling Stain. There was one clear winner. The Minwax White Wash Picking stain.
Along with the stain we plan on using Minwax water based pre-stain conditioner and Minwax Ultimate Floor finish in satin. That floor finish is a big one, as it has a non-yellowing formula. White washing floors only to have them amber when the poly is applied would be devastating. We have the finishing materials ordered, and they should arrive shortly.
Now to deal with the sanding issue. We could lay the whole floor, then rent a floor sander and go at the whole thing. Problem is, we could easily sand through the first layer of plywood with the big sander thus ruining the floor. Next idea… use a belt sander and orbital to sand each board before laying. Okay idea, but still very very time consuming. Third idea: rent, beg, borrow or steal a planer and gently shave off a tiny bit of the boards.
While a planer may be on my Christmas list (please Santa please!) Such an expensive tool could not be justified for this project. Enter the begging and borrowing. When we got our new Milwaukee sliding compound miter saw, we gave our old 10″ slider to my Dad. He was building a deck, and his saw wouldn’t handle 6″ wide boards. So I causally mentioned the gifted saw, smiled a sheepish good daughter smile, and asked to borrow his planer. He said yes! His beast of a planer (this thing is solid metal and must weigh 100lbs) came home with us at Thanksgiving. Thanks Dad!
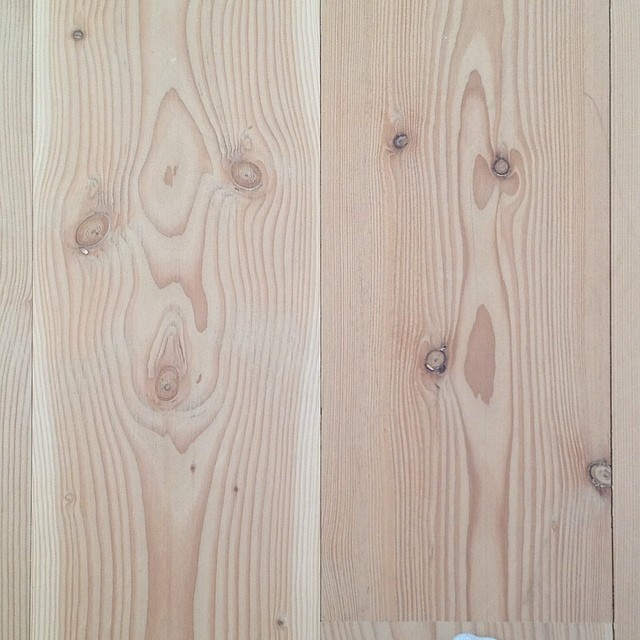
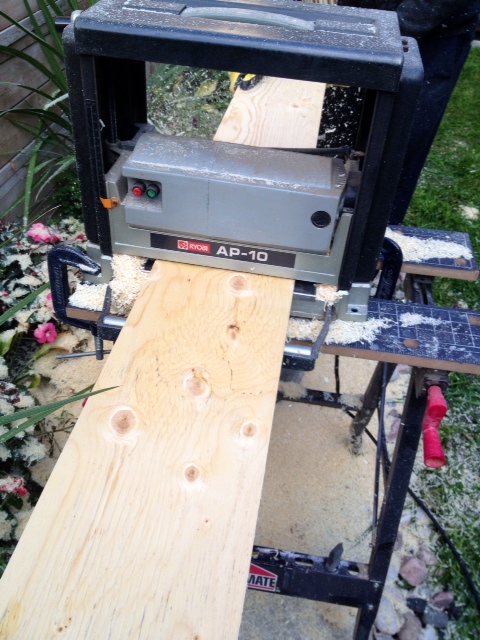
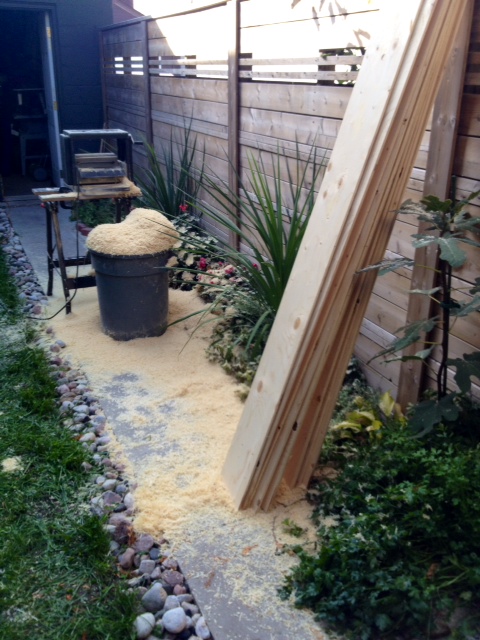
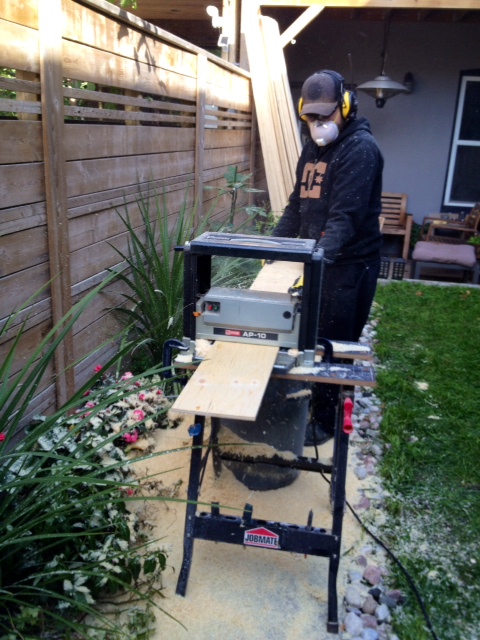
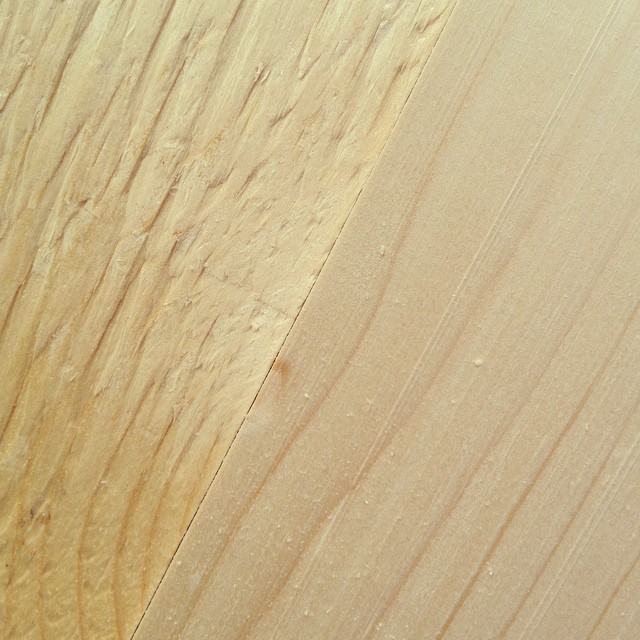
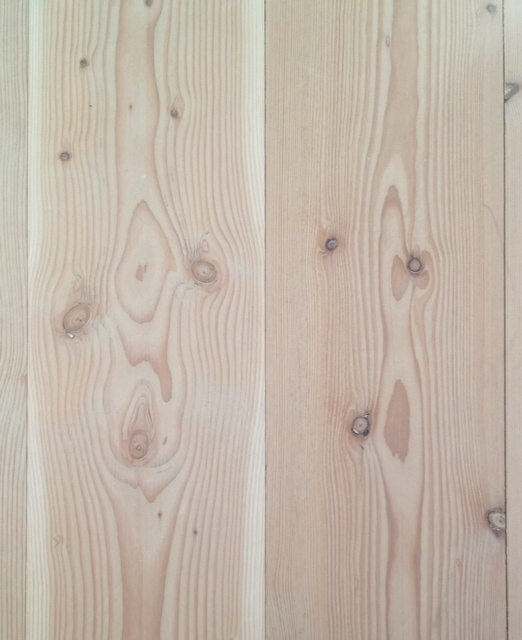
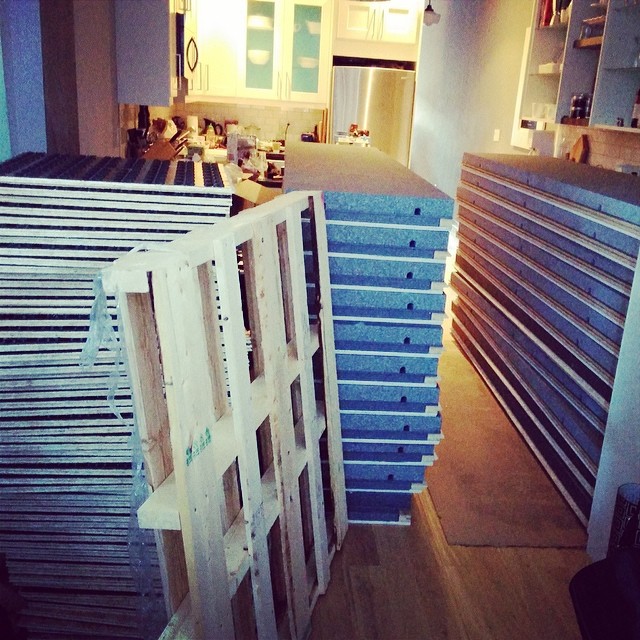
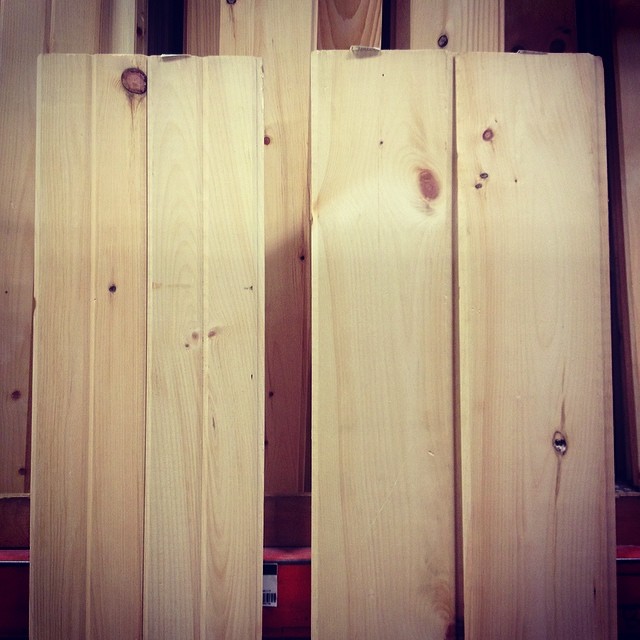
This weekend we spent an afternoon planing those boards into perfect planks. It was a noisy, sawdust filled endeavor, but with utterly fantastic results!
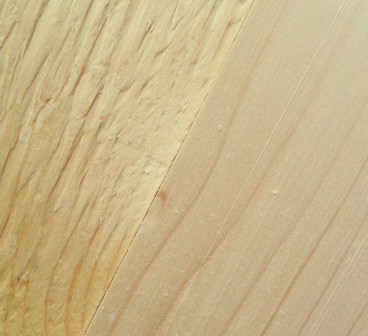
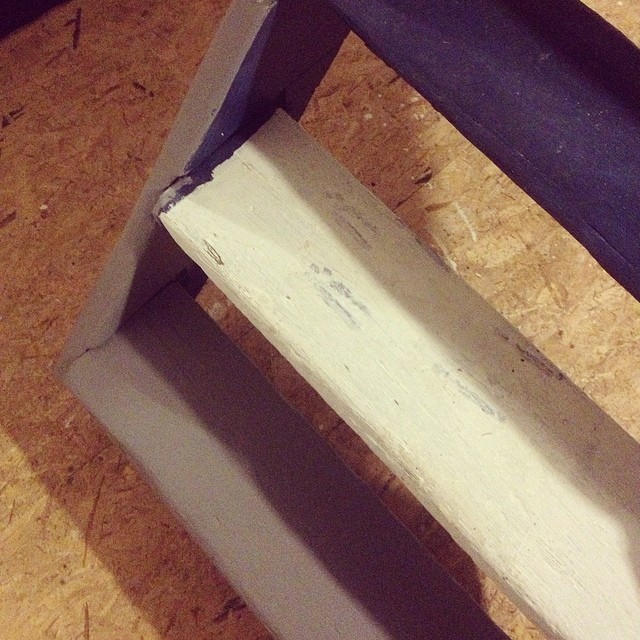
We took 1/8′ off all the boards, and they look amazing (for cheap plywood! $0.59 a square foot!)
Left: before planing Right: after planing
We did run into a few issues with the knots tearing out in the planer. We will strategically cut out the bad parts when we lay the floor, and then wood fill and sand the others before staining.
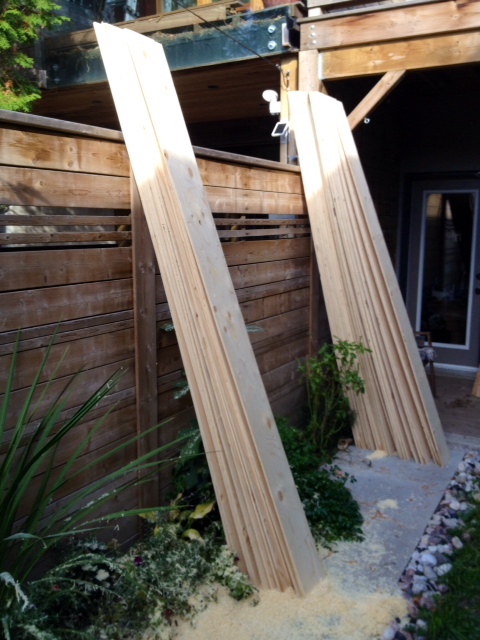
We got all the flooring planed, and it is stacked back in the basement ready to be laid. I would like to get the basement wall painted before laying the floor. Is it wishful thinking that I could paint it after work one day this week? Hahaha yeah.
I’m currently balancing two projects. Finishing the basement when the weather is terrible, and working outside on the daybed when the sun is shining. Oh and shopping when it’s just too miserable to do either.
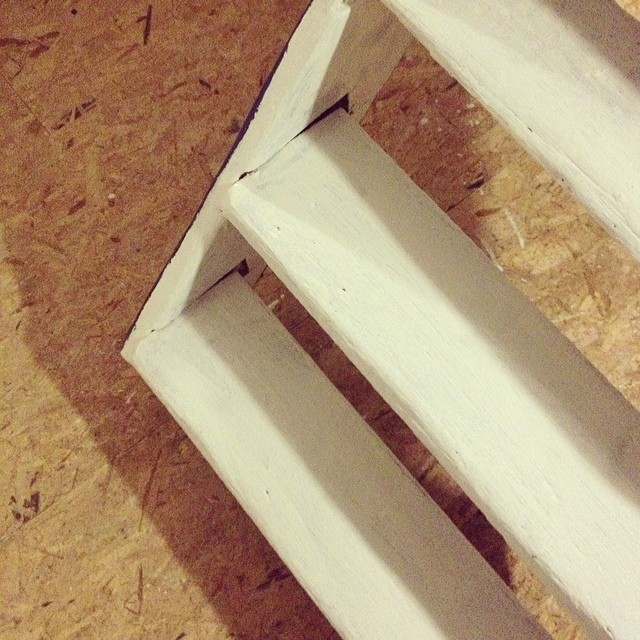
I made a stab at painting the stairs to the basement a few weeks ago.
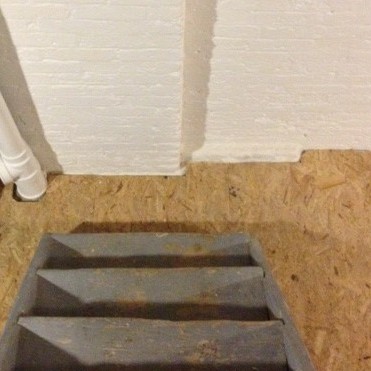
The staircase is slightly sketchy looking, held together by magic, physics and luck. The stairs were made with what appears to be the left over rough sawn douglas fir floor joists. They were old, dirty, full of charcter and needed a little tlc.
They would never be pristine, but hey, they could be a bit better. I scrubbed them down, gave them a sand, pulled out the errant nails on the stair treads (who puts nails on stair treads?!), and gave the whole staircase 2 coats of BIN primer.
As I put the primer on the last step I realized I had painted myself DOWN the stairs, and had effectively trapped myself in the basement until the primer dried. Have I mentioned lately how awesome I am?
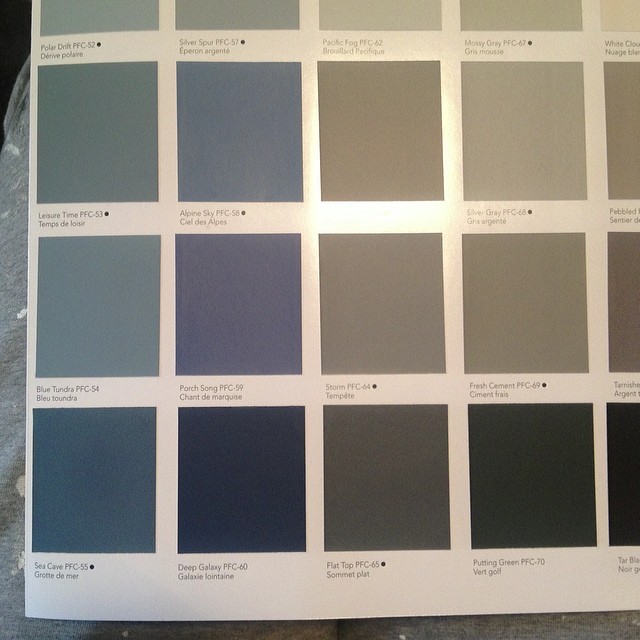
After I watched the paint dry (about as fun as it sounds), it was paint time. I picked up the color chart for Behr flooring paint, and said to myself: “Self, I know you want to pick grey, but maybe you should step outside of your comfort zone and pick something a little different”.
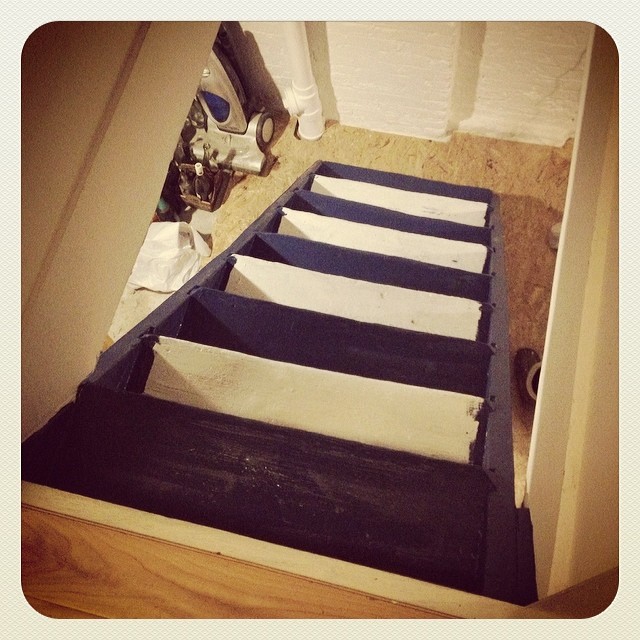
I jumped out of that comfort zone and went with the nice rich navy blue of Deep Galaxy.
With paint in hand, I started to paint the stairs, this time painting every other step so that I could escape and not have to live in the basement indefinitely.
What do you think of my color choice?
Cause I HATE it.
I looked at it for weeks contemplating finishing the blue paint job and seeing if it magically grew on me.
Weeks later…It still sucks. It’s too dark, it makes the steps hard to see, and the color matches nothing in the rest of my plan for the basement.
I bit the bullet, headed back to Home Depot, and picked a new color.
Any guesses?
Yep…grey.
My old friend. My standby. My tried and true companion. My Amy Pond*.
Now. Anyone want to come over and paint my stairs? Cause painting stairs kinda sucks.
* That’s a Dr. Who reference for any non-nerdy (aka non-awesome) people out there.
I was really hoping to have a completed DRIcore subfloor to show you guys today, but alas we ran out of leveling shims and left off about 80% done. We are pretty proud of how much we got done though! We got our DRIcore delivery on Friday and El Granto unloaded all the subfloor & SMARTWALL panels into our dining room. Thank goodness for big tough husband muscles. I would have broken down and cried just looking at all that stuff to unload!
DRIcore subfloor and SMARTWALL unloaded into our dining room.
We did knock a few other things off the list since we last spoke (pretend we’re old friends having a lovely chat over tea and scones).
I tried some more wiring scenarios with the basement hall light, and have still come up short. I can only manage to get either the staircase OR the rest of the basement lights to work, not both. Womp womp.
I can only manage to have either the staircase light work OR the basement lights. Not both.
Not to be deterred, I switched gears and set up some DIY scaffolding, which consisted of a leaning ladder and a 2×12.
Kristen’s DIY “Scaffolding”
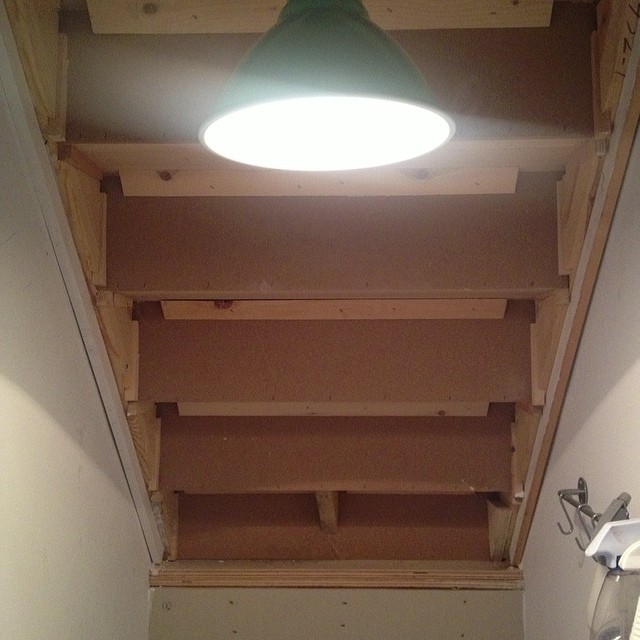
El Granto didn’t approve, but it actually felt quite sturdy to me! With the “scaffolding” in place I was able to reach most of the basement staircase ceiling (which happens to be the underside of the 2nd floor staircase). Now that we had access I could apply strapping to the staircase ceiling and prep for a new ceiling cladding.
After the strapping was up I could cut my V groove boards that I primed last week. A few cuts and out came the compressor and brad nailer. Most of the time my brad nailer and compressor do the job just fine, but when you’re standing 8 feet over the staircase putting up boards over your head and wrestling with the air cord, I really wish I’d splurged on a cordless brad nailer. This was especially so when my nailer kept misfiring and leaving nail-less holes in my board. Note to Santa, please bring Kristen a cordless brad nailer for Christmas, it will cut down on her volume of profanities exponentially. xox
Up went the first 8 boards and I was incredibly exited to see the transformation. The rest of the boards will have to hold off until I can fix the (insert string of expletives here) new staircase light. Then they need to be caulked, holes filled and painted.
Basement ceiling cladding going up
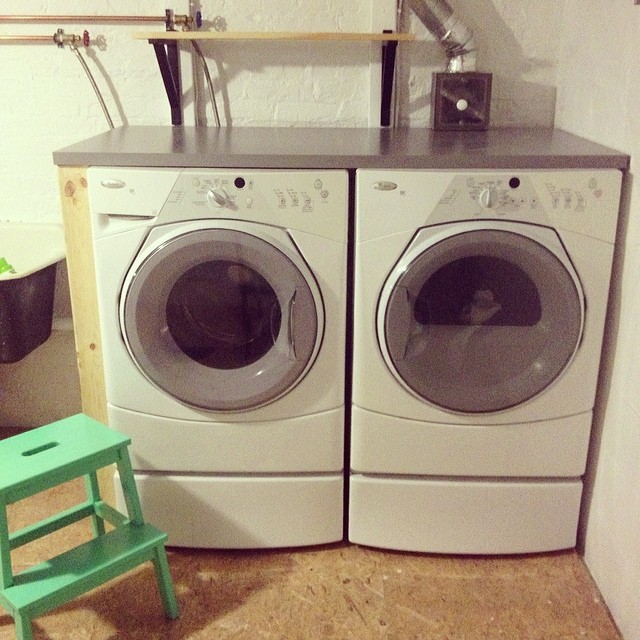
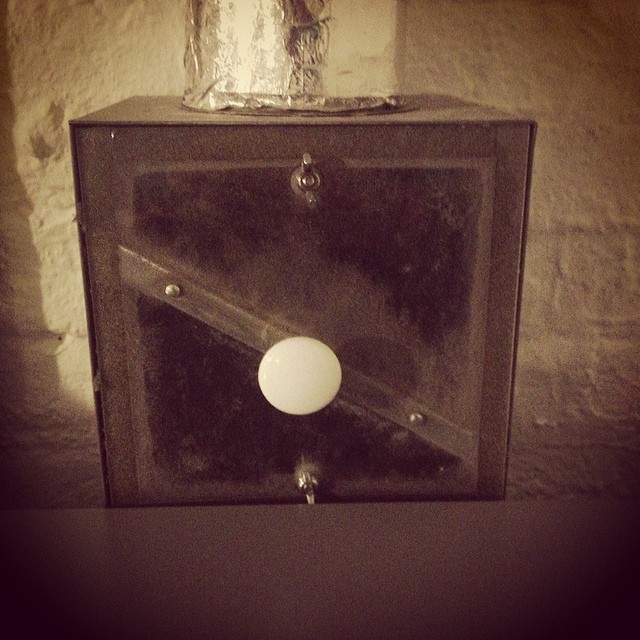
Next up was tackling another one of my problem areas from last weekend: the new washer & dryer countertop. It was too tall to fit under the wall mounted lint trap. So out came the washer & dryer (again!) and we lowered the leveling feet, re-leveled them and re-taped the dryer vent and voila! The counter now fits. To get the counter to slide all the way back to the wall we broke out the jig saw and cut a notch for the dryer vent. The counter slid in perfectly, and we will now have no lost socks behind the dryer! Can I get a woot woot?
Next up on the task list was installing a little shelf over the washer & dryer to hold laundry detergent etc. Two Ikea black shelf bracket and a scrap piece of pine later as we had ourselves a shelf.
Washer & Dryer countertop and new shelf installed
This week we would like to tackle painting the basement stairs, and this weekend finish off the DRIcore subfloor and start tackling the walls!
What project were you working on this weekend? How did it go?
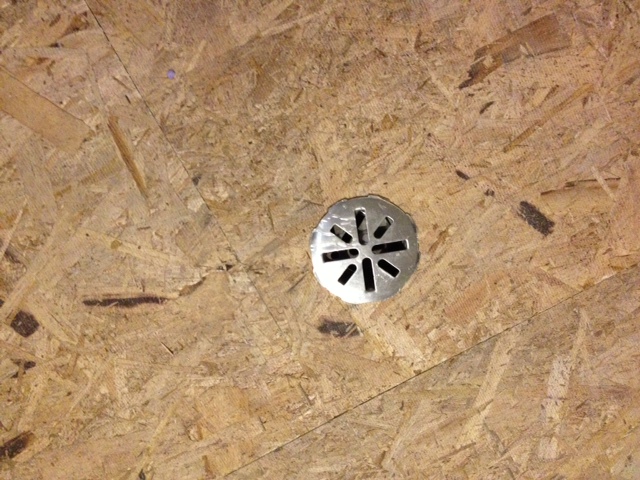
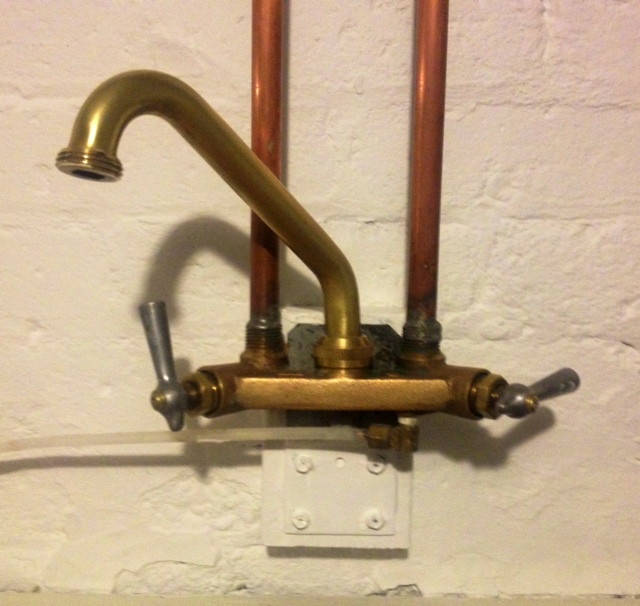
We have the most spectacular original farmhouse cast iron laundry sink in our basement. It’s one of the only original items left and as soon as we saw it we fell in love. I’m not gonna say it’s the only reason we bought the house, but damn… it helped sway us.
With the sink came an old brass faucet. It’s nowhere close to original, and it has seen better days. This sink and faucet went through two gut renos, countless paintbrush washings, and who knows what else. The faucet was tarnished and covered in dirt, grime and a myriad of old paint.
I was temped to replace it, hell even spray paint it, and put my thoughts out to the world on Instagram. Then Carrie and Lindsay stepped in and convinced me to give the poor brass faucet some TLC and see if I could save him.
Out came the scotch pad, a whole lot of elbow grease and some Brasso, and these are the results.
What do you think? Is brass back?
I still haven’t fixed the rotated handle, simply because I can’t find the shutoff valve for the sink! Really! I have six million shutoffs everywhere in the basement, including 4 right beside the faucet, but none of those shuts off my sink. Until I find the magic valve, poor little faucet will have a broken wing.
Next up, I’ve got to tackle the sink. Anyone have any magic products for cleaning cast iron sinks? I’ve got to clean the raw cast iron base and the enameled bowls. I see more elbow grease in my future.
Generally our projects tend to go fairly smoothly. We plan and prep a ton, and usually stay on budget and don’t have many delays. However, it’s not always sunshine and roses. We too can be plagued with reno stress and generally a whole lot of crap that doesn’t go right.
This weekend the basement project fell into the not going so well territory.
Saturday:
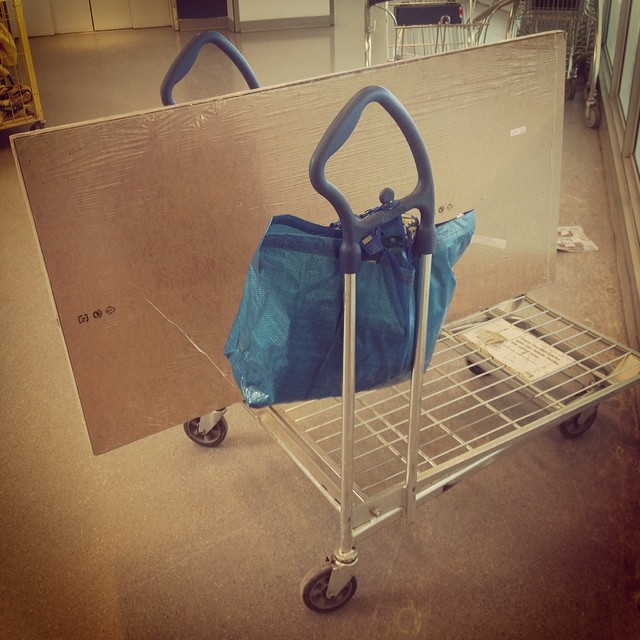
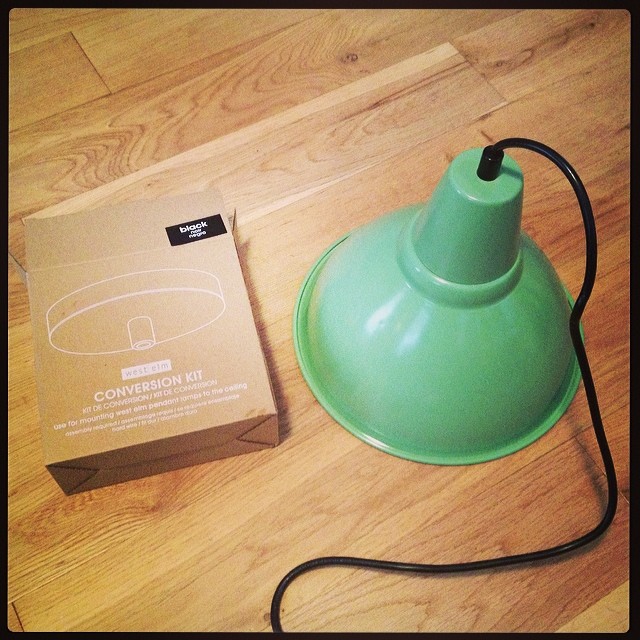
El Granto headed to the motorcycle show to see a man about a motorcycle (more on that later) . I saw the sunshine from my bedroom window and thought “oh what a nice day, I’ll go to Ikea”. What a mistake. It was sunny but frigidly cold and windy. I took the subway to Kipling, and waited 45 minutes in the middle of the parking lot for the Ikea shuttle. Bonus points for Ikea making their shuttle stop without any shelter, and not in viewing distance of the station. Good work Ikea. After arriving at Ikea I braved the Saturday crowd and the arguing couples and screaming parents to pick up a (very large) counter for the washer & dryer as well as a few other accessories. I also needed to make a stop at the lighting department, as I had purchased a purported “ceiling light” which was actually a plug in light. I hoped I purchased the wrong version, and that they magically had a hard wired option, but alas no. Nor does Ikea have conversion kits or any easy way to turn their plug in lights to hard wire.
Discouraged I left Ikea with my purchases and carried a 20lbs 5×2.5′ countertop home on the shuttle and subway. By this point I was cursing myself for not renting a car, or at least going to Ikea with a pal to help carry.
How am I going to get this home?
I finally got everything home and went to install the countertop and realized that my lint trap above the dryer was too low and the counter wouldn’t fit. Awesome. I left the counter and called it a day.
Really? That darn lint trap is line 1/2″ too low.
Sunday:
We headed out early to catch brunch at one of our neighbourhood spots only to find that the drunken hipster hockey fans had been up since 6am and were looking for some breakfast to sop up the booze, and all our fave brunch spots has lines out the door. (*Note to all the non-Canadians, our bars don’t usually open at 6am, but because of the early morning gold metal Canada vs. Sweeden hockey match, the government changed the rules for the day to allow bars to be open and serving for the big game. What can I say, Canadians love their hockey and beer.)
Sad and brunchless I gave up and headed out on some errands. I bused down to West Elm to pick up a light conversion kit. A $25 fix for my $15 Ikea lamp problem, but at least I knew it would work.
The cute (but evil!) $15 Ikea light and the $25 West Elm Conversion kit to fix it
I headed home, dropped off my shopping then headed back out to Home Depot to pick up the cladding for the basement staircase ceiling.
Ceiling cladding options: Beadboard or Barnboard
I decided on pine barnboard planking and proceeded to go through each and every board in stock to find only three acceptable boards. Well that’s not enough to plank a ceiling, so out went the barnboard and in came V groove tongue & groove. Another slog through the pile to find acceptable pieces and then a long hard trip home on public transit with the lumber and supplies.
After arriving home I set out to priming my planks and finish wiring and installing my Ikea light in the basement staircase (there is no light there and it’s pretty dark/sad.)
Priming the Ceiling Planks
After struggling with the wire I’ve discovered that the light switch isn’t wired with two hot wires and meretted neutrals, but alas is wired hot in, neutral out. Uhhhh… how am I going to add a light to this circuit? I tried a few wiring options and wired up the light to test, only to drop the two tiny black screws that hold the light to the ceiling down the stairs bouncing around and getting lost forever. Much swearing, yelling and a slam of a door ensued.
I unwired the light, reattached the existing wiring (so we would have some light in the basement) and left a ladder in the powder room, a compressor in the hall, beadboard covering every surface in the dining room, a nonworking light hanging from an unplanked ceiling and construction debris everywhere and went to bed.
Tonight I am going to try to muster up the courage to take another stab at it, or I may just sit on the sofa with a slice of pizza and hope that a DIY fairy comes to fix my problems.
About a week and a half ago we unhooked our washer and dryer and moved them to the middle of the room so we could waterproof paint behind them. We also wanted to attach the laundry pedestals we have had in the boxes for (cough cough) two years.
We accomplished that last week, but we couldn’t put the laundry pair back until we installed the DRIcore subfloor below it. However, our DRIcore delivery isn’t scheduled until later this week. Aaaand the dirty laundry was starting to pile up.
With the subfloor project at least a week away we decided we needed to remedy the laundry situation. We picked up 6 DRIcore subfloor panels and some foil tape, and set to reinstalling the laundry.
We measured our room and planned our DRIcore subfloor layout (more on this in another post), and installed 6 pieces under the laundry pair.
Installing the first piece of DRIcore Subfloor
This isn’t ideal (we should really lay the whole floor at once) but this gal wanted some clean clothes to wear to the office that weren’t track paints and paint covered high school basketball T-shirts.
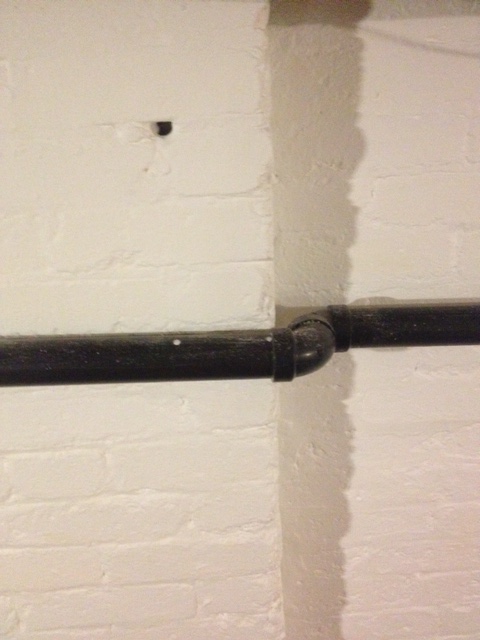
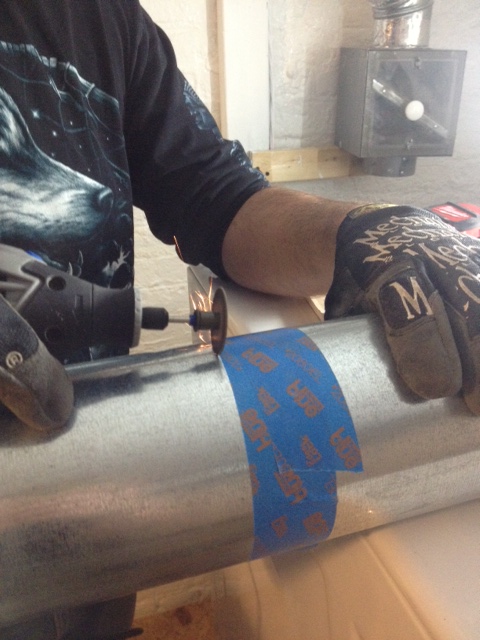
After the DRIcore was laid, we measured for our hard duct line for the dryer. As we had added laundry pedestals and the DRIcore subfloor, the vent line needed to be over a foot shorter. So out came the Dremel and a metal cutting wheel and El Granto cut down the dryer vent line.
El Granto cutting the dryer vent
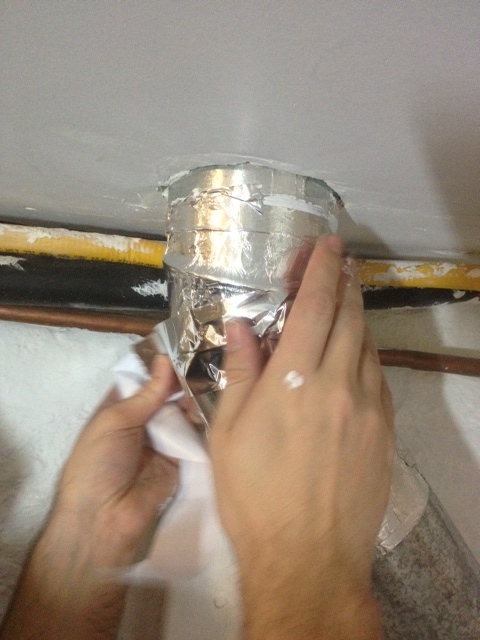
We reinstalled and taped the seams with new foil tape. (or should I say I cut El Granto some pieces of tape, and he reinstalled).
Taping seams in the dryer duct-work with foil tape.
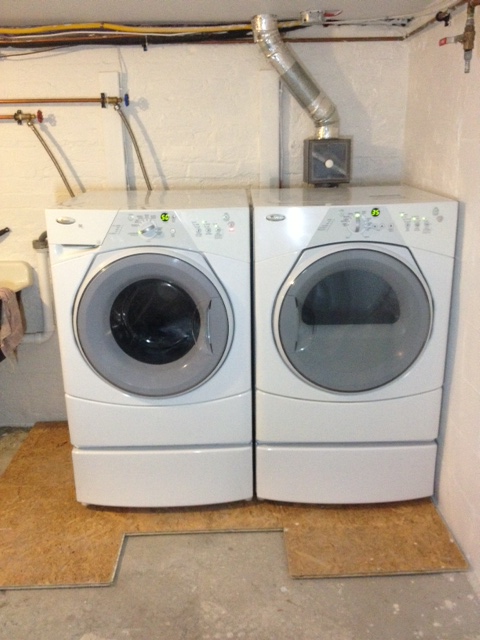
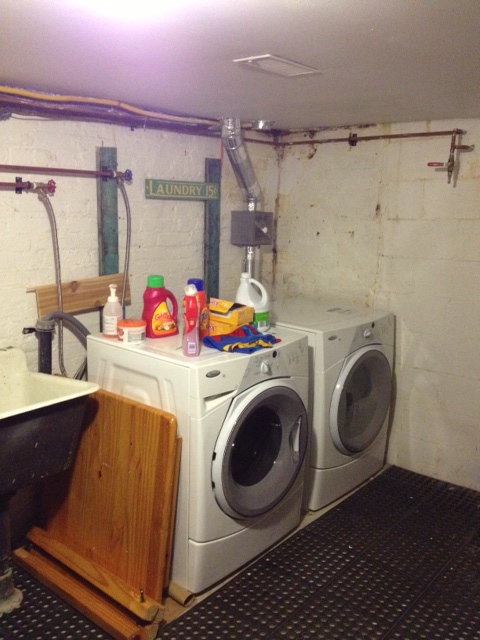
Now we could level the dryer using the adjustable feet in the laundry pedestals. A few turns of the wrench and everything was nice and level. Next we replaced the washer, hooked it up and leveled it as well. We then matched the heights of the washer an dryer and placed them side by side.
Washer & Dryer re-installed
I am kicking myself for not installing the laundry pedestals sooner. It is so much nicer not to bend over to switch the laundry!
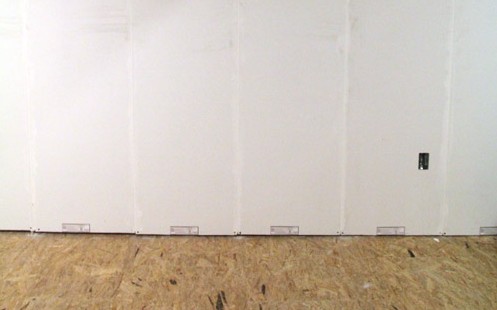
The room is also starting to come together. With the washer & dryer back in place, you can really start to see the contrast of what it used to look like.
Remember this?
Laundry room before
I cant wait to get the rest of the DRIcore subfloor in and get started on the walls!