Last weekend I had big plans of finishing a couple projects in the dining room. I was going to accomplish sooooo much. It was totally gonna happen.
Then I got an email from my Mom asking if I wanted to head up to the cottage and give her a hand with a few things. I could DIY at home OR I could DIY at the cottage? Needless to say, the dog & I were packed and ready to go that evening. El Granto & I had some prior commitments in the city, and we both couldn’t bail on them, so El Granto stayed in the city while Odin and I headed north.
A few years ago, my parents purchased what was literally a shack, on a beautiful waterside property in Northern Ontario. Since then, they have built a huge addition, turning it from a 400 square foot room to an over 1500 square foot cottage with a huge loft, a bunkie, and a great big garage. The work is almost finished, but there’s still a few things on the To Do List. One of those things is furniture. The house is going from a 1 bedroom to a 2 bed + loft, so more furniture was needed!
Mom and I headed up with a truck and trailer full of two sofas, a mattress & box spring, a headboard & foot board, two night stands and a dresser. We managed to not only get it up north, but down the ravine into their property, get the truck and trailer turned around, disconnected the trailer, and unloaded all the furniture. Yay girly muscles!
My Mom was gifted the bedroom set, which was awesome, but it needed some TLC. It was 50’s laminate in all its glory (they put laminate OVER solid wood!)
50’s dresser!
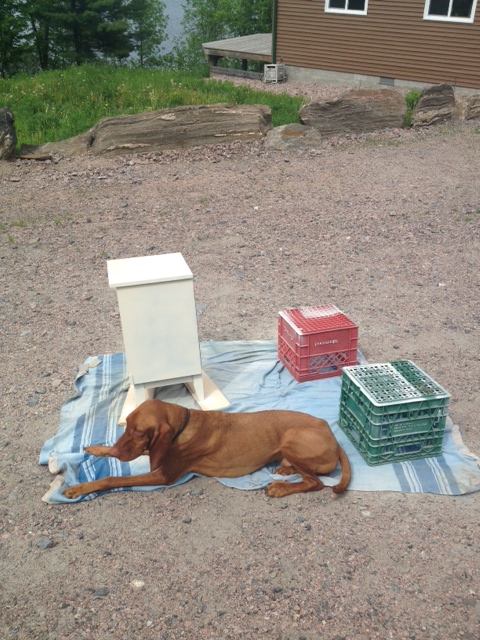
Mom & spent an afternoon sanding, cleaning, and spray painting away.
Sanding & Painting drawersSanding & cleaning headboardOdin didn’t understand that the drop cloths were for the furniture to be painted on, not for him to lay on…
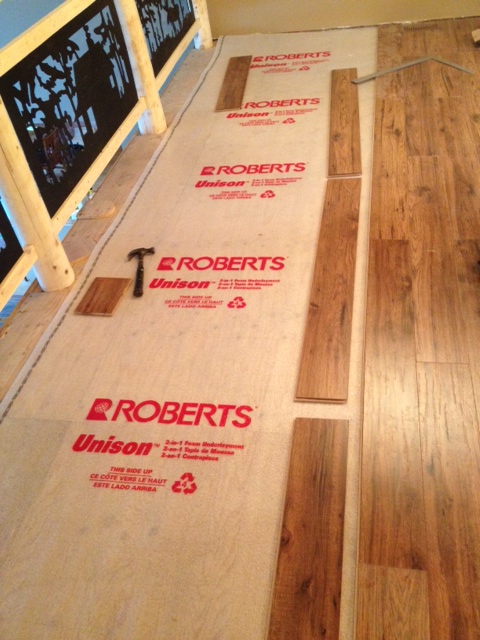
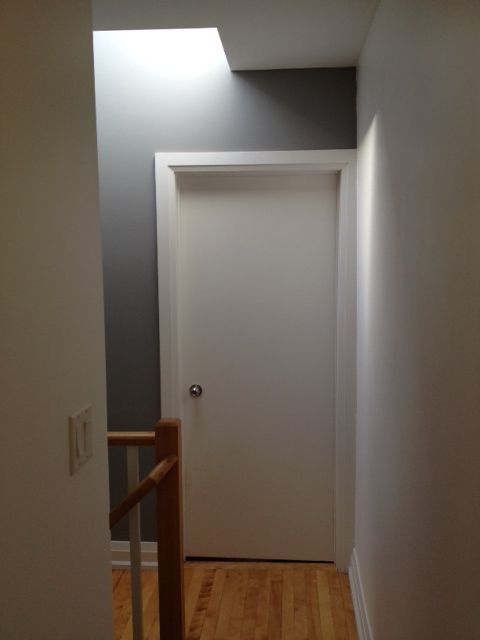
We then headed up to the loft and worked on laying some laminate flooring. Turns out, laminate is super easy to lay! Once you have a solid flat surface, you lay down some underlayment, and the flooring just clicks together! The hardest part is carrying the boxes of flooring up to the loft, and working on your knees clicking it together. You can also see a sneek peek of the super cool railings my parents made. My Mom drew cottagey silhouettes onto sheet metal, they then cut it out using a plasma cutter. (Aren’t they creative!)
Installing laminate flooring
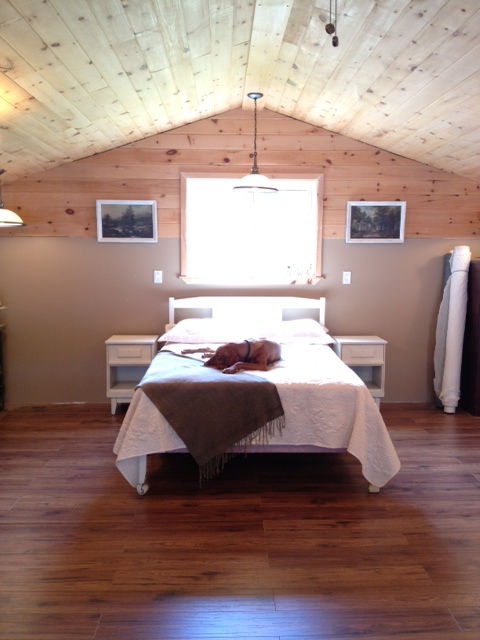
All our hard work paid off though, as this is what the loft was looking like when we were done.
The Cottage Loft Bedroom
The room still needs some trim work, and the furniture needs hardware. Some lamps, drapery and accessories and this will the perfect cottage space. (Oh and that’s bolts of fabric on the right, my mom has an industrial sewing machine in the loft and likes to knock out upholstery projects in her spare time!)
The hallway is one of those slow & steady projects. It has never gotten our focus, but we keep slowly chipping away at it. I first showed you the hallway and my inspiration, then we knocked a few things off the list when we changed up the lighting and added a transom window.
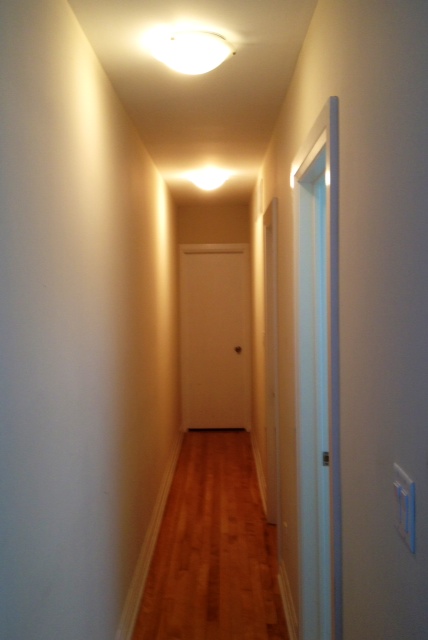
Here is what the hallway originally looked like
Hallway Before
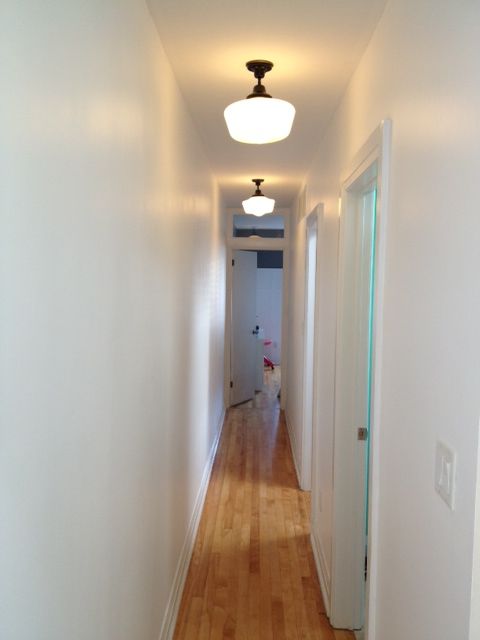
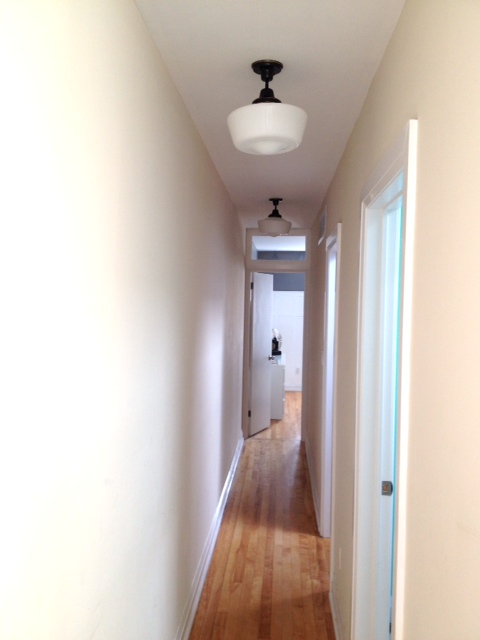
This was what the hallway was looking like after it’s lighting & transom updates.
The Hallway after new lighting and a transomHallway Nook (Outside Master Bedroom)
We knew we needed some new paint (the flat beige walls had seen much better days.) I decided they needed to change NOW, and one dreery Sunday afternoon I waded through our paint cans in the basement, and pulled out a can of white paint. I proceeded to march upstairs and paint one of the walls in the hallway white, then I ran out of paint. Oops. Apparently a 30 foot hallway takes a lot of paint…So I headed out to Home Depot and picked up another can of white, and this past weekend I painted the rest of the hallway.
The Hallway with its fresh coat of white paint
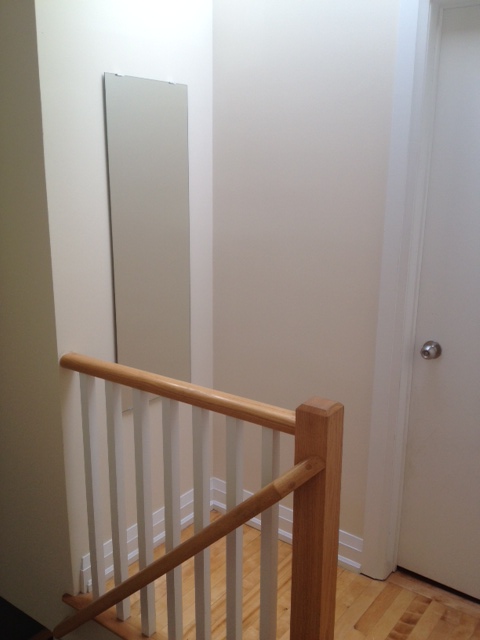
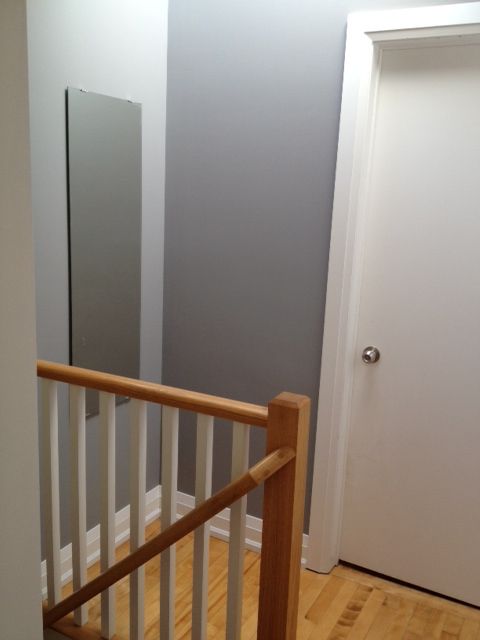
After painting the 30 foot hallway bright white…it was starting to feel a bit stark, so when I got to the nook outside our Master Bedroom, I again raided the basement paint can supply and found some nice grey paint. I painted the little nook and the wall in front of our master this medium grey.
The nook with its grey walls (both walls are the same colour grey, the skylight just hits the one wall more and makes it seem lighter)The view of the accent wall when looking down the hallway
With $35 in paint (the grey was left over from the main floor) we had an updated hall. Now all it needs is a runner and some art. I am thinking gallery wall!
Our entryway, dining room and kitchen are all one great big open concept room. As soon as you walk in the front door you can see straight to the back of my kitchen. Its nice because the storefront window allows in a lot of natural light, and the open concept high ceiling space makes everything look a lot bigger than it actually is. Since moving into the house we have done very little to the main floor. The main reason being that anything we did would either cost a lot, or impact the whole main floor (i.e. we have one 60 foot long wall that runs from the front door to the back door, going through every room on the main floor except the powder room. So you cant just paint the kitchen or the dining room, you literally are painting the whole first floor.)
We have big plans for the space, we want to create a coffee bar in the dining room, replace the sink, faucet and countertop in the kitchen (and backsplash if I get my way). We just made a new dining table and bench. I have some art projects in the design stage, and a lot of projects for the livingroom.
In the interim I wanted to get the dining room ready for my holiday guests and for Christmas dinner. There is a chimney wall that juts out in the kitchen (see it behind the table in this shot).
See the small wall that juts out right behind the middle of the table?
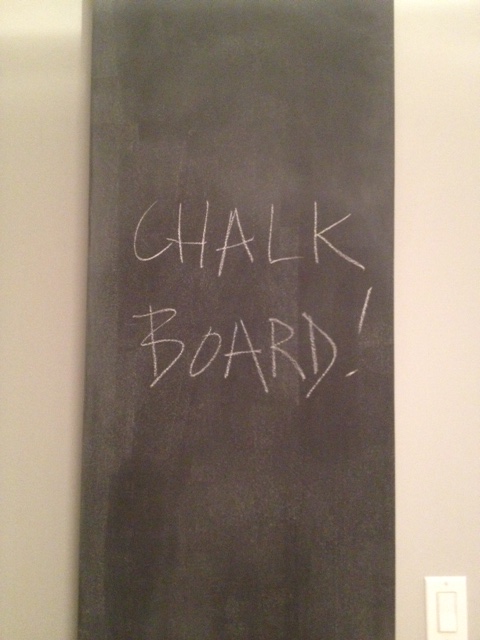
I decided to give it a bit of a focal point, and paint it with black chalkboard paint. That way I can feature a menu board for dinner parties etc.
To start out I sanded down the wall to remove any imperfections and to make it as smooth as possible. Then I coated in one coat of primer.
PrimingWall Primed
I sanded the primer than applied one coat of chalkboard paint. I started to get a bit worried at this point as it didn’t cover well at all…
One coat of PaintDetail shot of one coat of the chalkboard paint
After a second coat it was started to look much better, but it still needed at least one more coat. I sanded at this point to try to make it as smooth as possible (chalkboards work best when they super smooth!)
So after sanding and a third coat of chalkboard paint I was starting to get the result I was looking for.
Several coats of chalkboard paint
After this I gave it one more sand and what I thought would be the final (4th) coat. However after it dried it was even rougher than before. Eep! So once again I sanded and sanded and sanded some more then I painted a coat sideways instead of up and down. After that, I sanded and painted two more coats. Yes that’s right, if you’ve been counting you’ll know that we’re up to seven coats of paint. At this point I still wasn’t convinced it was smooth enough, but gave up because I had had enough of this project…and i deemed it “good enough”. Having never worked with chalkboard paint before I am not sure if I was just being anal retentive, or if you can actually get a perfectly smooth effect on a wall.
Once it had dried for three days, we covered the whole wall in a coat of chalk (rub the side of a piece of chalk over the whole wall.) Consider this like seasoning a cast iron pan. Then rub off with a dry cloth, and you can use your chalkboard wall. Just don’t wipe it with a wet cloth for at least a week.
Chalk Rubbed on WallDetail of ChalkChalkboard Done!
Check back tomorrow to see how I designed my Holiday Chalkboard Menu!
***UPDATE*** Here’s the Menu
Chalkboard Menu Done
SOURCE LIST:
Materials:
Rust-oleum Chalkboard Paint in Black – Canadian Tire
CIL Primer – Home Depot
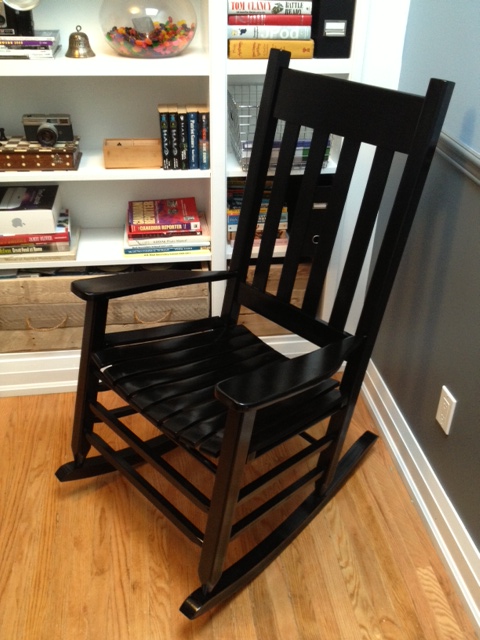
If you follow us over on the new fangled thing called facebook you may have noticed a photo El Granto uploaded the other day of a busted rocking chair that followed him home. Continue reading “Repairing a Broken Chair”
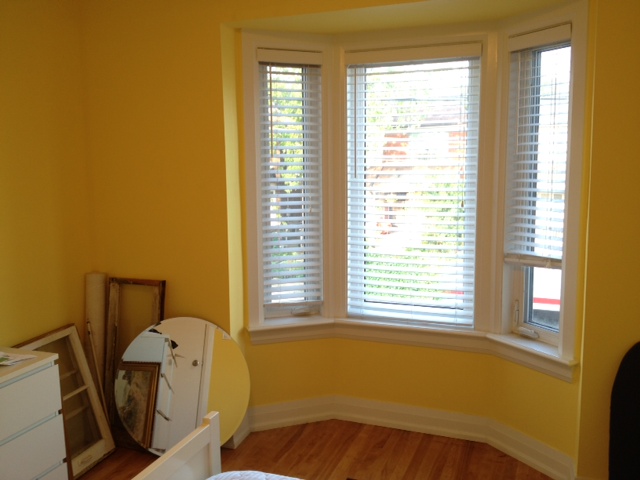
It was time to add some charm to our guest bedroom in the form of board & batten on the walls & some new (not yellow) paint. The room is big in the scope of our house at 12’x12′. It has a lovely bay window, double closet and original 100 year old ash floors. It also has amazing baseboards & trim (as does most of our house). When starting the board & batten the last thing I wanted to do was change, futz or in anyway do anything to the trim work. I wanted it to stay where it was, and do the board & batten up to it. Problem is, the baseboards are sloped and hit the wall with only 1/4″ space from the wall. This means that the material for my battens could only be 1/4″ thick, or else I’d have an unsightly overhang.Eeep…that doesn’t leave a lot of options.
BeforeBefore
These were the possibilities that I could find:
1/4″ x 4 foot long poplar lattice at almost $5 each…hurmph
1/4″ x 8 foot vynal trim pieces at almost $6 each…ack
1/4″ thick 4×8 sheet of hardboard for $17
The hardboard was looking to be the best option, but we don’t have a table saw yet (it’s still on my wish list). So we’d have to get the Home Depot guys to cut it down for us at $1 a cut, then somehow get it home. It could work, but it also wasn’t the best case scenario…I needed to think this one out.
I then called my local lumber yard Downtown Lumber. They’re always really helpful and I thought they may have some ideas. Turns out Downtown Lumber carries 1/4″ MDF in 4×8 sheets for $15, and they make custom cuts for 50 cents each. I like using mdf much better than hardboard (as it doesn’t have that glossy surface), and the lumber store is waaay closer to our house, and easier to walk home with big lumber.
So better + cheaper + less work = happy Kristen.
So I did my math, settled on 2.5″ battens, and placed the order to have 2 mdf sheets cut into 2.5″ strips. We headed over after work to pick it up and lugged it all home along with some trim. The getting it home was an epic fail (I’m talking all of it almost falling off a dolly, practically killing a cyclist and an epic argument) dammit we should just get a car already…
So after we got the wood home, and had a few drinks to forget the ordeal, I set out sanding the edges of the mdf for a nice smooth finish, and putting a coat of Behr Premium Plus Ultra in pure white on the edges. I didn’t paint the flat part of the battens for one main reason; I was going to have to fill & touch them up anyways, and to get a smooth finish I would really need to re-paint them entirely. Rather than make myself more work. I decided to paint them once they were on the wall with a small foam roller.
I did however paint the bottom of the wall so it would save me trying to paint in between the battens (yuck). Deciding where the paint would stop (where the top rail would go) was the hardest part. The storefront is not the least bit straight or level, and when I drew a level line on the wall it looked like I had done it drunk. So we fudged it, and made it kinda sorta parallel to the ceiling and floors. We used a chalk line to line it up, then used tape to mark the line, and to keep me from painting willy nilly everywhere.
Bottom of Wall Painted White
After the paint had dried (the next day) we installed the top rail out of the 2.5″ mdf battens on the nice line we’d made with the tape the day before.
Top Rail Installed
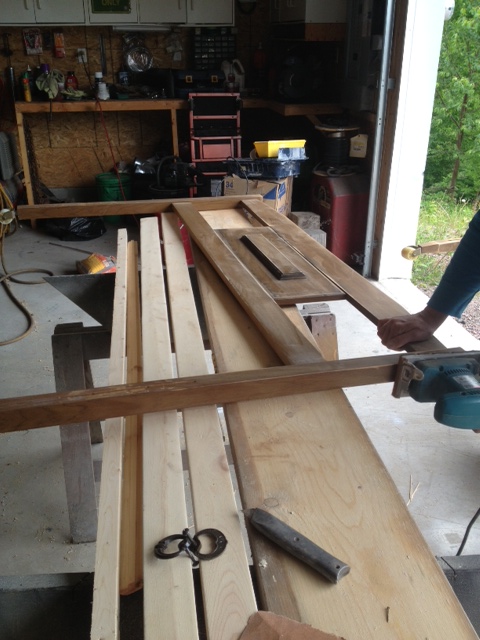
Then the vertical battens got added. We had to custom cut each and every one, as they were all different heights. I would measure a few, and head out to the garage to do the cutting, then lug them all back upstairs, over a baby gate (that was keeping the dog from free roaming and destroying the house) and then back into the guestroom. I made countless trips up and down those stairs.
Vertical Stiles Installed
We went with 12″ of space between battens, cause, well it looked good. The front wall under the bay window the spacing is fudged so that battens framed the windows (technically they should have not two battens touching eachother, but it looks correct once its all painted).
Under the Bay Window the Spacing is “Fudged”
We did have one instance where hitting an electrical outlet was unavoidable. It was on a small wall that had 2 switches, an outlet and an a/v outlet. The battens were almost the same size as the outlets, so we placed one batten directly centered on the outlet, so we could make flush cuts against it. We then measured out our 12″ on either side. The wall is not perfectly symmetrical, but you wouldn’t second guess it.
Where we couldn’t avoid hitting an electrical outlet, we changed the spacing so that a batten would hit it square so that our cuts would be easier
To make the spacing easier, we made a spacing jig out of some old lumber, and spaced & leveled then brad nailed each batten.
Our Spacing Guide (sorry for the out of focus shot, I was trying to shoot and hold)
It went very quick, the most time consuming part being the measuring and cutting (especially if I’d measured wrong, and had to go re-cut). We labeled each batten corresponding to what wall the were working on (Left, Right, Front, Back) and gave them a letter (i.e. Left-A was the first board on the left side, whereas Right-I was the last board on the right). This made it so much easier as you couldn’t loose track of what board went where.
After we fished installing all the vertical battens, we also decided to add some horizontal battens about a foot from the top to add a bit more visual appeal, and it matches the shaker paneling on the front of the storefront. We had lots of off cuts from the vertical battens, so we cut down a bunch of 12″ battens and brad nailed them in place. (and of course custom cut ones for the odd places.)
All the Rails & Stiles Installed
Next up was to fill all the damn holes from the brad nails. I filled the nail holes with spackle, and the cracks and seams with paintable caulking. I used the spackle this time so that we could easily sand to get a perfect finish on the flat battens.
Spacking
We then added some cove moulding on top of the top rail. I was going to add a small plate rail above that as well, but that proved to be too difficult with our wonky walls. Our walls just bowed and dipped so much that there were huge gaps at points. So we decided to call it done with the cove moulding.
After all that filling, sanding and caulking, I got to painting. I cut in the edges of the battens where they met the wall. I had given one coat of paint to the battens before I had installed them, but this second coat covered all the caulking and finished the sides beautiful. I painted the flat part of the battens using a small foam roller. I made sure not to use too much paint so that it didn’t overflow into the “board” part, and it went quite quickly. I was running extremely low on paint (had only bought one gallon) and decided to brush on my second coat. The foam roller gives a beautiful finish, but it was looking like it was going to take three coats (which I did not have enough paint for) So I switched it up and painted the entire second coat with a brush. The trick to painting a flat surface with a brush without leaving brush marks is a light touch. You want to evenly distribute the paint without pulling any back up. I paint the whole piece, and then go back over it quickly with a light brush. When the paint dries this should leave you with a nice smooth finish.
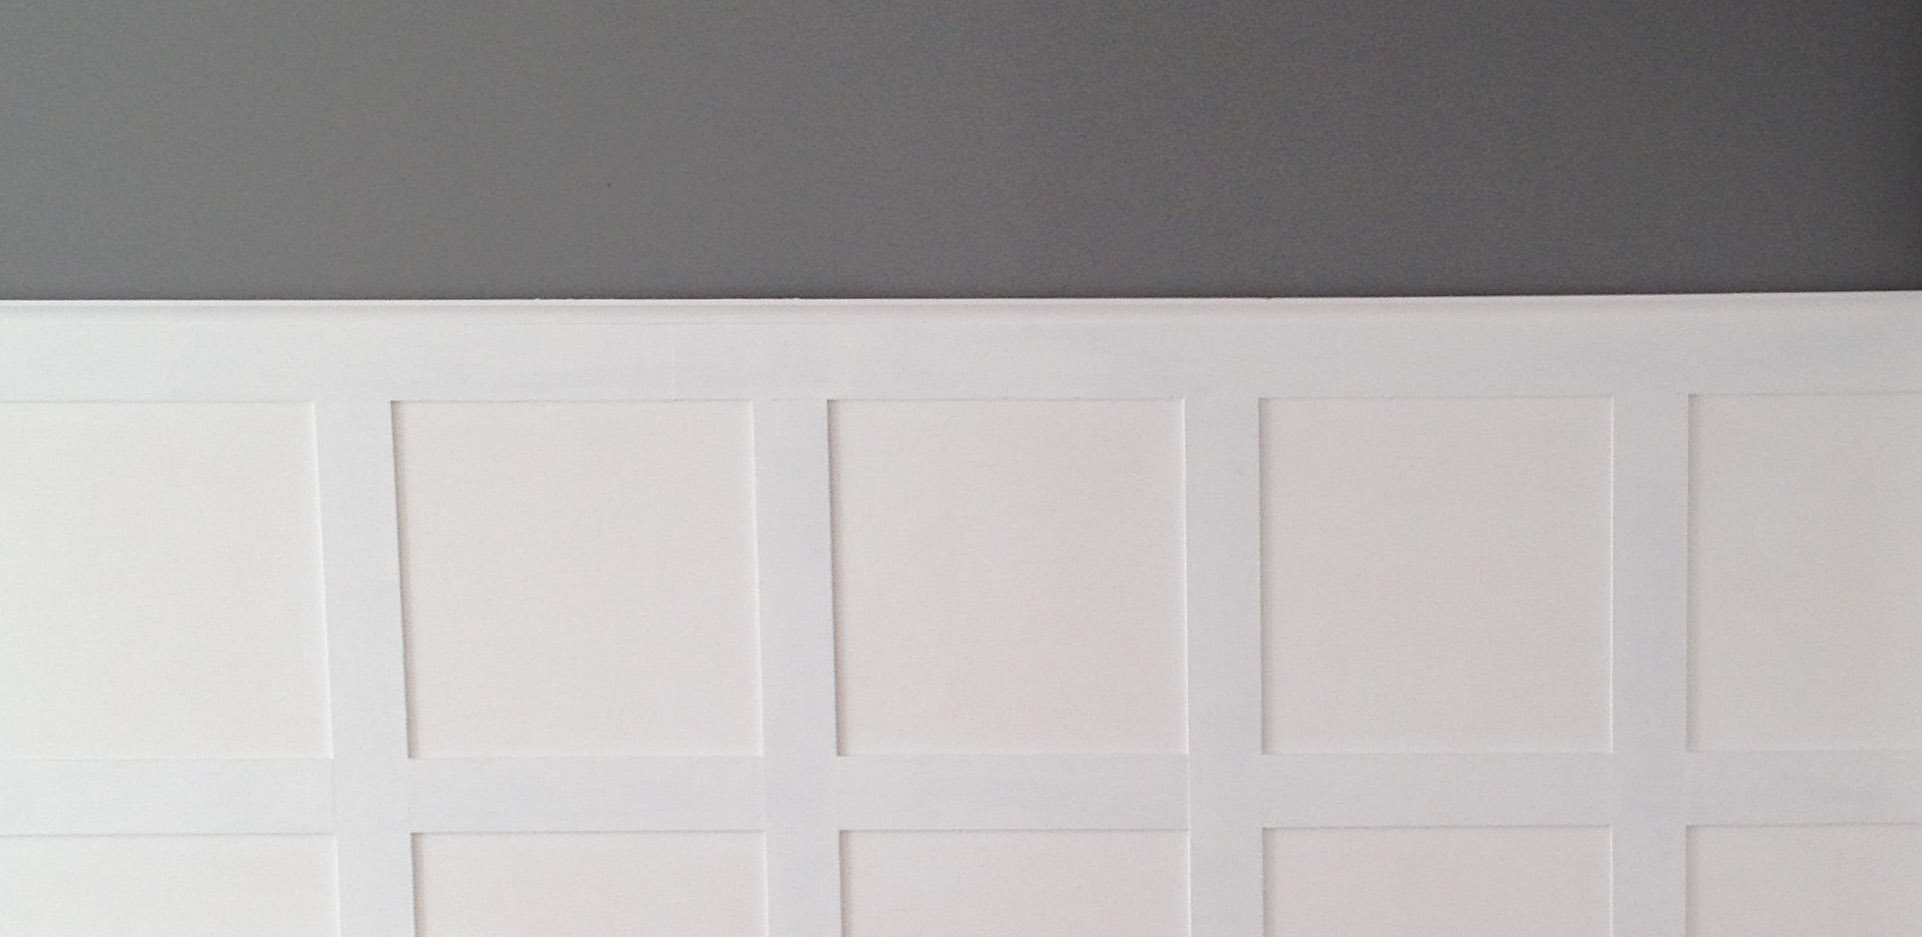
Board & Batten Painted (wall still yellow)
After it dried for a day, I went back and painted the rest of the wall with a nice medium grey, which really made the board & batten pop!
Materials:
2 – 1/4″ 4×8 sheets of mdf cut into 2.5″ strips: Downtown Lumber
1/2″ cove moulding: Downtown Lumber
DAP Spackle : Home Hardware
DAP Alex Plus Paintable Caulking: Home Depot
Paint (Board & Batten)- Behr Premium Plus Ultra Pure White in Satin: Home Depot
Paint (Wall) – Behr Premium Plus Ultra in Anonymous in Eggshell: Home Depot
I played around with Annie Sloan Chalk Paint for the Backyard Mural and loved it. It is like painting with artist paint.
I built a few bedside tables for our guest room and it struck me that I would love to use chalk paint on them. Problem is, that I am a very impatient person, and when I get an idea in my head, I need to do it NOW. My closest stocklist for Annie Sloan paint is 2 hours away, and I don’t own a car…harrumph.
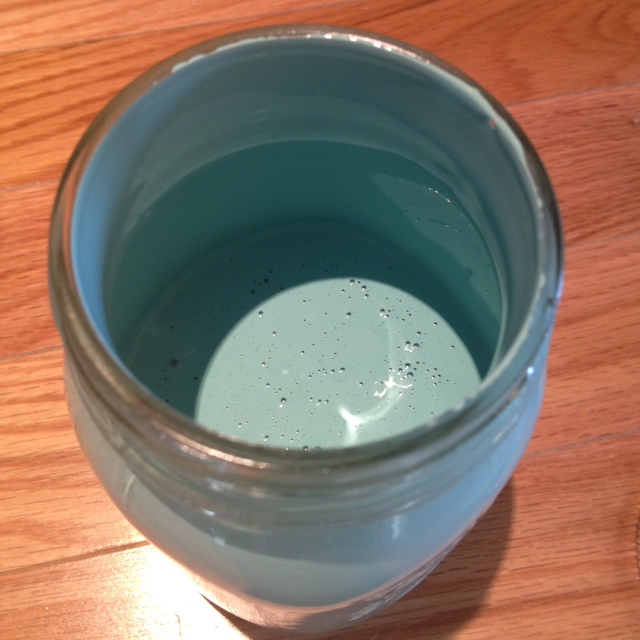
So I did the next best thing, and started googling. Hoping magically that in the last month a Toronto AS stocklist had opened up…no such luck. But then I found a bunch of recipes for DIY chalk paint. I am a bit of a disbeliever, but thought I had nothing to loose, so I set out to try to make some chalk paint of my own. I picked up a $3 container of plaster of paris from the hardware store, eyeballed some into an old jar, added the same amount of water as plaster, gave it a stir and then added about 1.5 times as much latex wall paint. I played with the color mixing some turquoise and some blue that I had laying around. I gave it all a stir, then paint it on some scrap wood. IT LOOKED JUST LIKE CHALK PAINT. No, seriously. It went on the same way, covered the same way, and cleaned up the same way. I let it dry overnight thinking I would come back to it spontaneously combusting in the morning, or that it would all peel off or do something terrible. But… It did. just. fine.
Still looking at it rather speculatively, I put on a coat on my newly fabricated bedside tables, and it looked just like chalk paint. Again I waited for the other shoe to drop, only to put on a second coat, and distress it, and wax it and have it behave exactly the same way as the Annie Sloan chalk paint…
So here’s the game changer folks:
DIY CHALK PAINT
1 part plaster of paris
1 part hot water
3 parts paint
Mix plaster & water together until all the plaster is incorporated. Add paint. Stir.
(I put my chalk paint in a mason jar and added a label.)
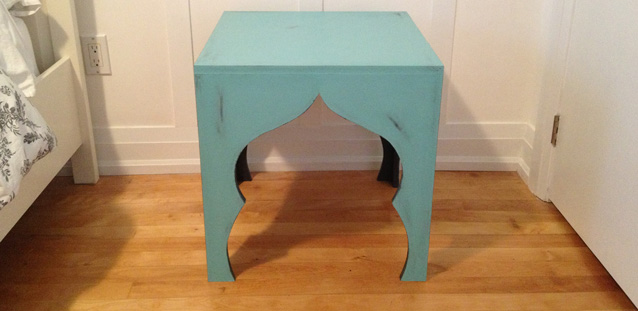
I have been scoping around Craigslist and local antique stores for the last couple weeks trying to find some tables to turn into bedside tables for the guest room. We were using two (well worn) Ikea $10 Lack tables that we’ve had since the dawn of time, but they really needed to go. I searched and searched, but couldn’t find anything I loved. I didn’t have the budget to spend a couple hundred on new bedside tables, so I decided to make some. I headed over to The Design Confidential to look at some of their furniture plans. (They have some amazing DIY furniture plans!). I took a look through their end table/bedside table collections and spotted this plan. I instantly saw it and thought I could do a more Moroccan version of it.
The plan calls for the tables to be 18″ high, but that was a bit short for my application. I wanted to make them as tall as possible using one 4×8 sheet of lumber to make two square tables. So I did some math and figured out that I could (just) get ten 19″ squares out of one sheet, so I headed to my local Home Depot and got a 5/8 sheet of MDF cut down to 19″ squares.
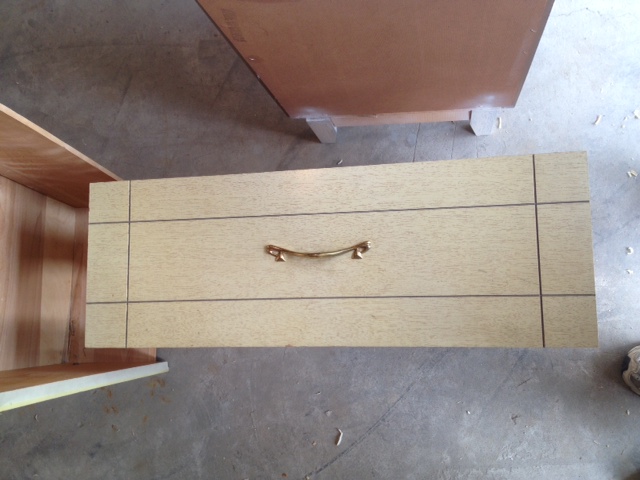
After getting my wood home I drew out a pattern for the table legs on a piece of scrap paper. I only did one side of the pattern (as its easier to just do one side, trace it onto your wood, and then flip it and trace the other side.)
Making the table patternTracing the pattern onto the wood
After I traced my pattern, I cut it out of the MDF using my jig saw, sanded any rough bits, and then used that one as a pattern for the rest of my pieces. (for two tables you need a total of 8 leg/side pieces, whatever you do, don’t cut all 10 of your pieces into the leg pattern, you need tabletops too! duh!)
One table leg cut
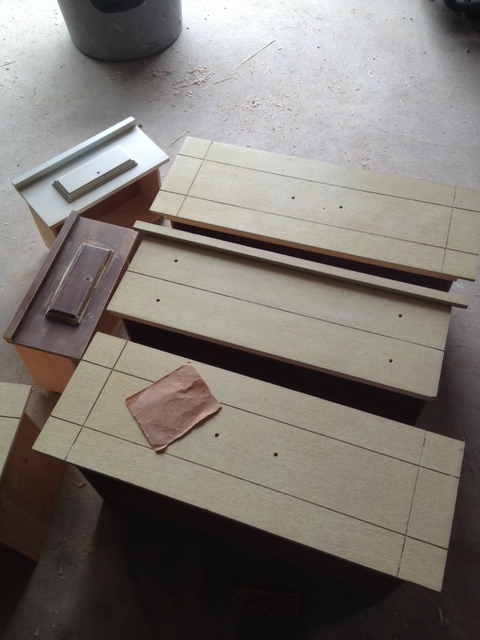
Now follow the rest of the Design Confidential’s instructions here. Essentially you have to cut down the width of two of your table legs so that they overlap nicely. Then you stand it all up, and nail it all together. I found that using some masking tape to hold the legs together temporarily helped a lot. I just dont have enough hands to hold everything and nail it all!
Attaching table legsThe Table Assembled
After you’ve assembled everything, if you’re using MDF as your wood, I HIGHLY advise going and getting yourself some spackle. Sand all your edges so everything is nice and pretty, and then take that spackle and rub in into the mdf edges. HUH? MDF edges are rough and not as nice as the flat parts, so if you want everything to look perfect, you need to spackle those edges. Once they’re dry, sand them to a nice smooth finish, then get ready to paint. (yes I know it looks like utter crap before you’ve sanded, but just trust me.)
The rough edges of mdf covered in a thin layer of spackle
I painted the tables (inside and out) with a coat of dark grey Behr Premium Plus Ultra Paint + Primer I had laying around. Now if I hadn’t been using paint+primer, I would have put a coat of stand alone primer on first.
Tables painted a base coat of charcoal gray
After my paint dried, I mixed up a batch of DIY Chalk Paint (come back tomorrow for my DIY on this). I painted 2 coats of chalk paint in robins egg blue on the front and top of the tables. I left the inside of the legs the base colour so you got a bit more contrast with the blue.
Tables painted with two coats of chalk paint (leaving the insides of the legs the base color)
Then I sanded and slightly distressed using sandpaper and a damp cloth (to see more on my distressing chalk paint using a wet cloth check out this post). After I was happy with the distressing and smoothness of the finish, I gave it a coat of furniture wax and polished it.
Materials:
1 – 4×8 sheet of 5/8″ MDF – Home Depot (cut into 19″ squares by HD’s cutting staff)
DAP Spackle: Home Hardware
Behr Premium Plus Ultra paint in Cracked Pepper – Home Depot
Chalk Paint – DIY
We currently have a white plastic mailbox. It came with the house, there’s no way we would have installed such a monstrosity. The only reason it’s lasted so long was that we were trying to find something great to replace it. Problem is, it’s been a year since we updated the exterior of the storefront and we haven’t found anything yet. We wanted a vertical mailbox, that would be tucked in nicely in our entryway nook. We have searched without avail, and decided to take matters in our own hands.
White plastic mailbox
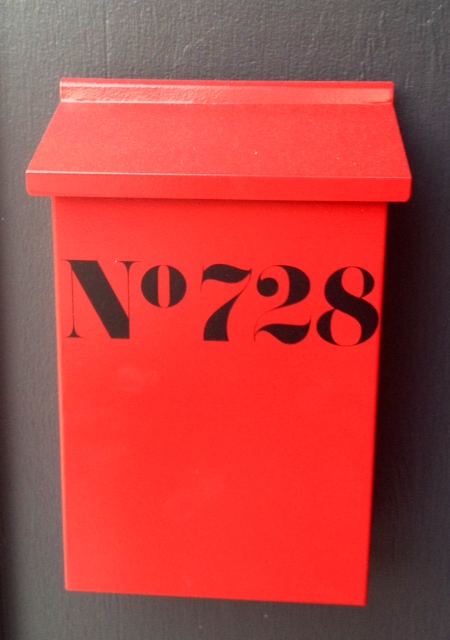
We purchased a basic black vertical mailbox from Rona for $14. We brought it home, and got to customizing it.
We took the mailbox out to the garage and gave it two coats of BIN primer (lightly sanding in between).
After the primer had dried overnight, we gave it two coats of the same paint as our front door.
You remember the “728” from the mural in the backyard? Well that 728 has become a sort of logo for the storefront if you will. We also have a vinyl sticker on the front window with our complete address. We also decided to bring our “logo” to our mailbox. So I broke out my Silhouette SD, and cut out a smaller version of the 728 onto some scrap vinyl.
I pulled away the excess pieces (called weeding), used adhesive transfer paper to pull away the stickers from the backing(you can also use masking tape), and then using a steady hand stuck it onto the mailbox. I then used a creditcard to smooth out any bubbles.
It’s day four of Project Guestroom and although lots of work has went on, there’s still a ton to do. Here’s an update in pictures:
The weekend got started by prepping for our big project; board & batten. Well truthfully its not really board and batten, its more like shaker style paneling.
We got 1/4″ mdf custom cut at our awesome local lumber yard Downtown Lumber and attempted to walk it all the way home on a dolly that didnt want to cooperate. But after an hour and a half of El Granto and I yelling at the lumber, each other, and strangers passing by, we got it all home.
We then laid out our paneling, which required math, engineering and thought. It took a long time and my head hurt. The end result was a line of tape on the wall…
Tape Line Up (Will Be the Top of the Paneling)
Then we painted and stuff, and then it looked like this:
Wall Painted White
Then we started paneling
Top Rail InstalledVertical Stiles InstalledAll the Rails & Stiles Installed
Then we sanded, spackled, spackled and more spackled and then cried some, cause spackling sucks
OMG look at all the stupid spackling
Next up, caulking, cause as if spackling didn’t suck enough…
(yes yes there will be a full board & batten post and a how-to after I complete it all, so hold your horses)
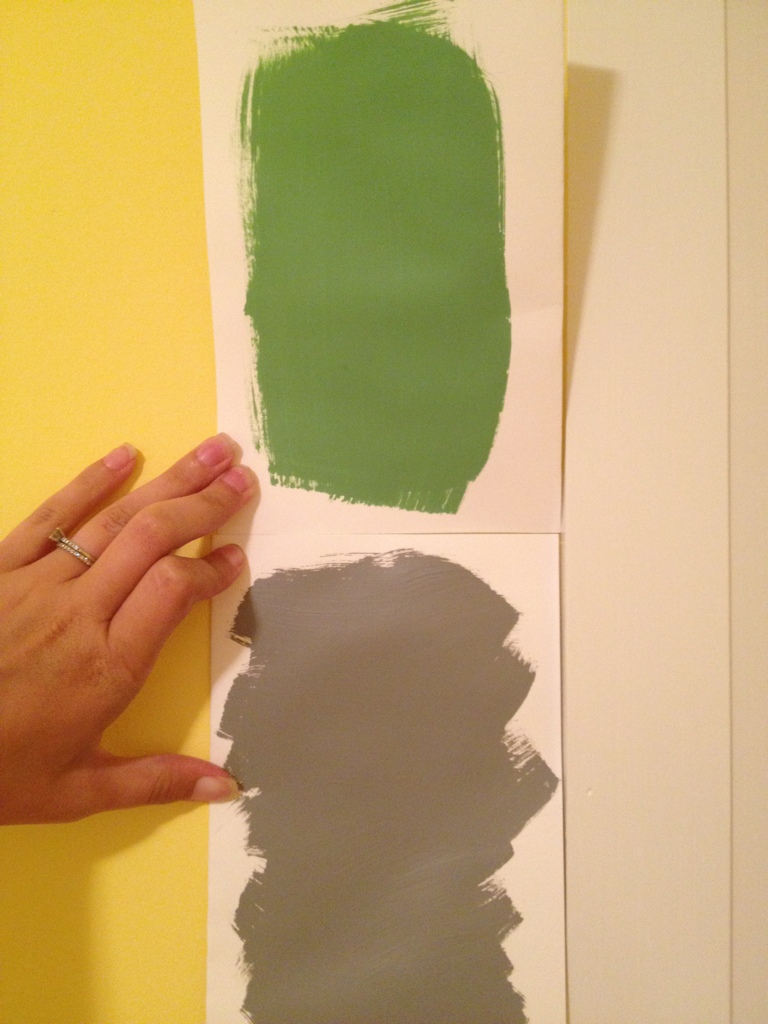
Help! I have three vastly different ideas on paint colour for our guest room. Here’s the down low:
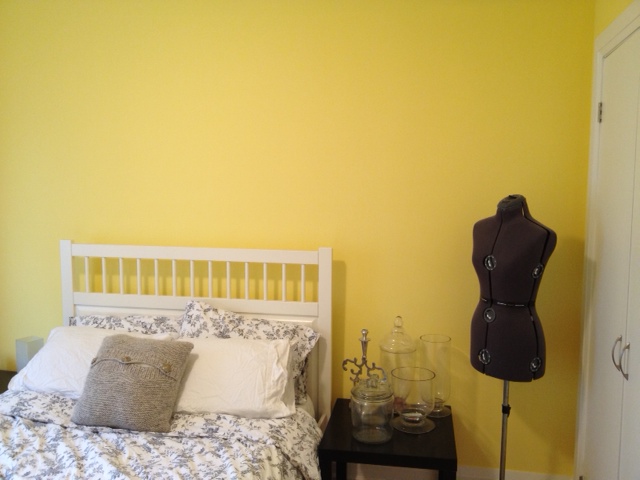
The guest room is getting a facelift with a new wall treatment & plate rail. The wall treatment will be white. Yes boring old white. Don’t worry, this room needs some boring. Currently it’s a whole-hella-lotta-yellow. A hangover’s worst nightmare yellow.
So here’s were I need your help. Above the wall treatment there’s like 2 feet of regular old wall. What colour do I paint it? I can leave my old friend yellow (who will probably look way less acid-trippish when hes confined to 2 feet of space). Or I could go all crazy on it and do green. Last but not least is my old standby; medium grey.


")
")
")
")
")


")
")


")
")
")