DIY “Cast Iron” Heat Registers

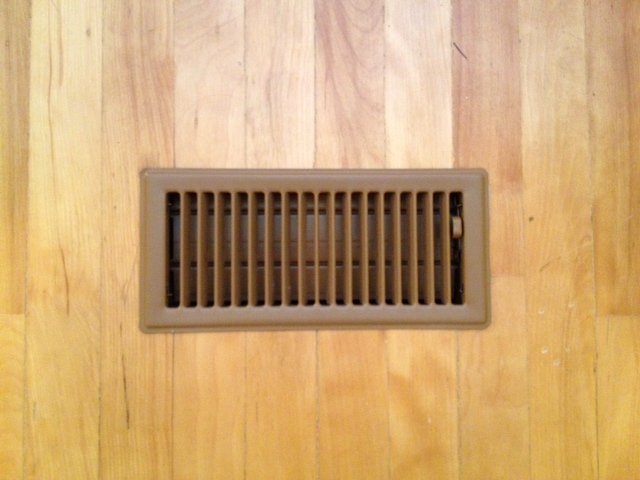
We live in a 100 year old home, and we have plastic heat registers. Hey, I am no historian, but I feel pretty confident in saying that that they aren’t original… Not only are they plastic, but they are different colours and patterns. We’ve got white slatted ones, plastic stainless steel look swirly ones, brown ones that are trying to blend in with the hardwood (but clearly don’t) and we have one pretty black metal one.

Fed up with our ghetto registers, I looked into replacing the whole house with reproduction Edwardian ones. As El Granto and I wanted to keep eating for the next year, that was not an option…

We were left with two viable options, live with them or paint em. Of course, I choose to paint. We headed to the hardware store and picked up some Rustoleum Universal All Surface in Oil Rubbed Bronze. Have you painted with this spray paint? It’s freakin awesome. You can spray any direction, on any surface (even plastic!), with no prep other than making sure the surface is clean. The cleaning is the most time consuming part. When our house was reno’d most outside walls and all the ceilings were torn down and re-drywalled. If any of you have ever drywalled anything you will know that drywall dust is the son of Satan. That shit gets everywhere. When we moved back into the house we spent two weeks cleaning up drywall dust and I still find it in strange hard to reach places (tops of kitchen cabinets, under bathroom vanity, caked onto light fixtures). Drywall dust really is my nemesis.

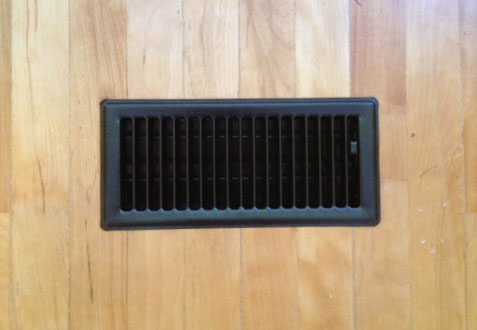
The heat registers were hiding a dark secret; a plethora of drywall dust stuck in all their nooks and crannies. I painstaking cleaned out every groove with my pinky fingers and a damp rag. After that was done and I had a few recuperating drinks, I headed out to the alleyway behind our house and gave 2-3 thin coats of the oil rubbed bronze spray paint. I let it dry overnight and the difference is incredible! They all match…and don’t look like cheap plastic! A $9 can of spray paint gave new life to 7 regular heat register covers and 4 cold air returns. Got mis-matched registers? Paint em!
Oh, and a bit of advice. I googled painting heat registers before starting out and someone suggested removing the flappy thingies. That is a shitty idea. They do NOT come out easily, and they all fall apart, and you have to bend things and it sucks. So don’t worry about it, just open them slightly and make sure you paint them good. I think my mantra should be “if it sucks, don’t do it”. There, words to live by. Now go paint your ugly heat registers.
basic heat register
Before (UGLY)
After (PRETTY)
Before – Ugly Mis-Matched Registers
After – All the same colour!

SOURCE LIST:

Materials:
RustOleum Universal in Oil Rubbed Bronze: Home Depot

Tools Used:
Hands, Scrap paper

Difficulty Level (on a scale of 1-5):

One out of five

Total Cost: $9

Ikea Goliat Drawer Unit ReHab

A long long time ago, when El Granto & I moved in together, El Granto was still in school, I had just graduated and was working my first big kid job. We had no money, ate copious amounts of pasta and potatoes, and spent what was left on (cheap) beer.

Needless to say our furniture consisted of things we’d stolen from our parent’s houses. We did manage to purchase a few new things; some drapes, a few Ikea Lack side tables, and a Ikea Goliat drawer unit that we used as a night stand/little dresser in our bedroom.

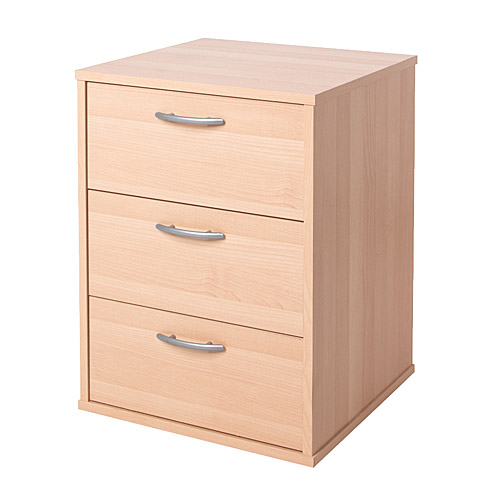
Ikea Goliat

That unit later graduated to living in our office when we purchased real bedside tables, and has now lived through 8 years of our abuse. It holds all the strange things one accumulates. Also known as the junk drawer. It houses batteries, calculators, phone & camera chargers, memory cards, travel voltage adapters, a screw driver, camera batteries, luggage tags, a sling shot etc. “Important” stuff don’t you know where else to put.

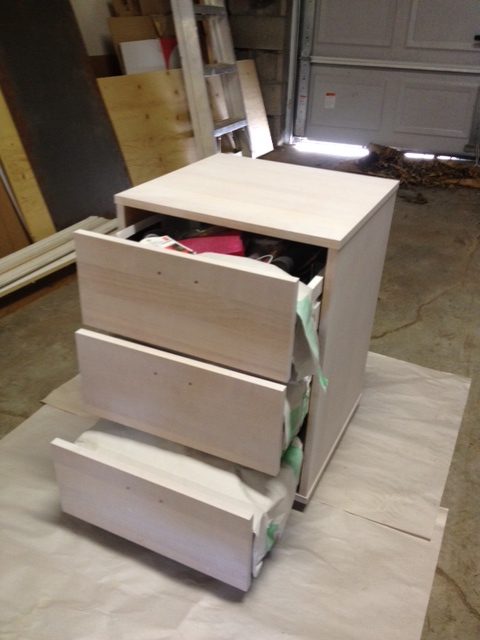
When faced with the office reno, we wanted to keep our useful friend Goliat, but he needed some cosmetic help. His laminate “birch effect” finish looked like plastic, and the handles were not even trying to disguise the fact that they were plastic. He needed help! So we carried him out to the garage, took off the handles, scuffed him up with some sandpaper, and gave him a coat of Zinnsser B-I-N primer. In hindsight I should have given it two coats, it would have probably eliminated one of my coats of paint later.

Goliat Drawer Unit with One Coat of Primer

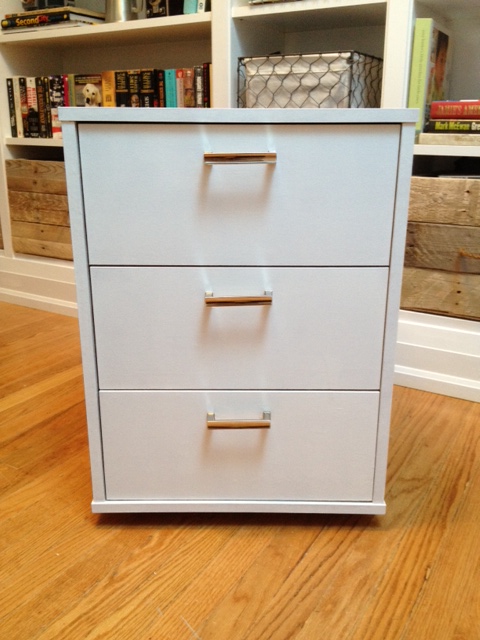
After priming I gave it a quick sand, and added 3 coats of white gloss interior/exterior paint. We let it dry, and added three new Martha Stewart 3 in. Channel Cabinet Hardware pulls from the Home Depot.

The hardware was a bit of a pain to be honest. I sourced from their website. The handle I chose said “in store only” so I walked the 3km to Home Depot to find the crappiest selection of in stock hardware ever! I was astonished at how dated and bad it was. After spending 20 minutes to finally track down the kitchen designer, I found my hardware on a sample board in a drawer. The Martha Stewart hardware was all spectacular and well priced, but SPECIAL ORDER! UGH. I hate the words special order. It means waiting, delays, incorrect shipments and anger. I had fallen in love with the handles, so I sucked it up and ordered.

I ordered on a Monday, and the kitchen designer said it should be in store in about a week. They arrived in store the following Monday (yay!) I brought them home and realized I had measured incorrectly. BLARG. Stupid Kristen. They’re too big. They’re not even the right size for other projects around the house that need new handles.

So… I had two options. Return them and order some new ones, or fill the holes in the drawer unit, touch up paint, and re-drill them. The problem with ordering new ones, is that the smallest any of the pretty Martha Stewart ones came in was 3″ and the Ikea drawer unit was SMALLER than that. Leave it to Ikea to not use standard sizes!

So I filled the holes… (AFTER I HAD ALREADY PAINTED IT) and then PAINTED IT AGAIN. Do my capitals express some of my angst?

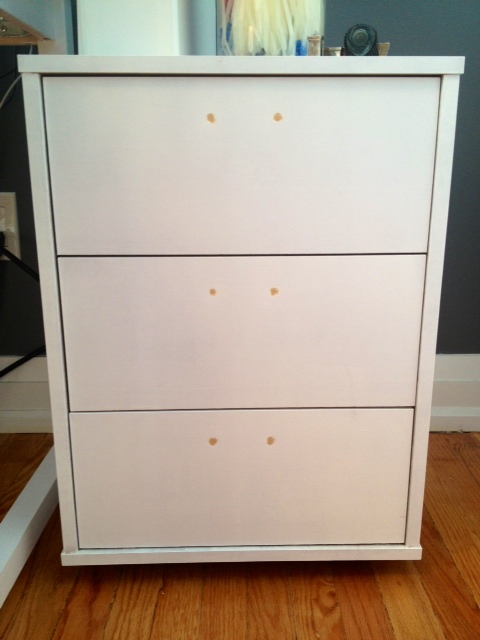
Wood Filling Holes
Drawer Pull Holes Filled and Painted

I then marked and drilled new holes for the new hardware, and FINALLY it was done!

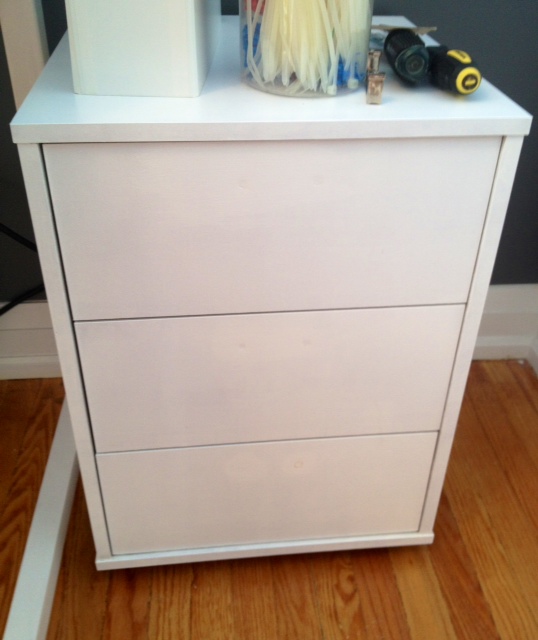
Finally Finished!
Handle Close-Up

SOURCE LIST:

Materials:
Previously owned Ikea Goliat Drawer Unit
Zinnser B.I.N. Primer (spray can): Canadian Tire
Behr Premium Plus Interior/Exterior Glossy paint in Bright White:  Home Depot
Frog Tape: Canadian Tire
Martha Stewart 3 inch Channel Pulls: Home Depot

Tools Used:
Paint Brush, Small Foam Roller & Tray, Sand paper, Screw Driver

Difficulty Level (on a scale of 1-5):

Total Cost: $25 (we already owned the Goliat unit)

Ikea Dining Table to Desk

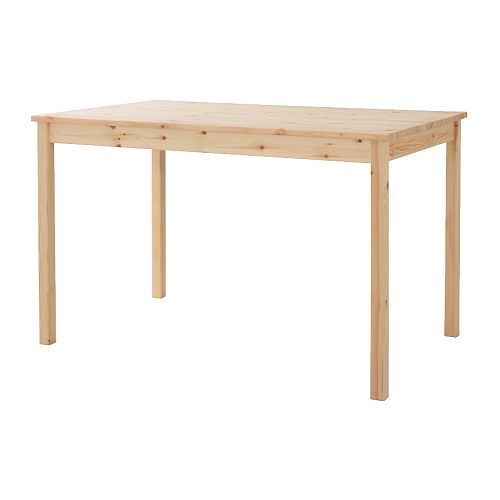
We needed a desk for the office. We loved old bankers desks, and lovely chunky vintage desks, but we had one problem. Whatever desk we wanted in the office needed to be able to fit up our tiny staircase, or be hefted up and over our second floor deck. Otherwise it needed to be assembled on site. After lugging our mattress and other large furniture up and over the deck, I was in no way, shape, or form, about to do that again. So it looks like we were building something on site. We didn’t need anything fancy, just a desk to use the computer on and store unpaid bills. I cost out the materials to build a simple table ourselves, then I thought to myself: self just suck it up, be the cheap ass that you are and buy something from Ikea! It will be less expensive, less work, and you get to spend time with the happy little Ikea man assembling it.  So we reviewed the cheapest Ikea desk solutions, and discovered that the Ingo Dining Table was exactly the size we needed, and was made of solid unfinished wood, and was SIXTY NINE dollars.

Ikea Ingo Dining Table

Yes that’s right, a solid wood desk for less a hundo. Sign me up. So we got our dining table, assembled, and then decide what to do with it. I loved Katie’s Ingo desk hack so I thought I would give that a try. Then my brad nailer and I got in a fight, he decided he would shoot nails sideways out of my project and after many a screaming match, we decided to divorce.  So decorative trim on the desk just wasn’t going to happen. Instead, I installed a bottom cross piece, primed, sanded and painted it with two coats of white paint, wiped my hands, signed the alimony agreement, and called it a day.

SOURCE LIST:

Materials:
Ingo Dining Table: Ikea
Zinnser B.I.N. Primer: Home Depot
Behr Premium Plus Interior/Exterior Glossy paint in Bright White:  Home Depot

Tools Used:
Paint Brush, Small Foam Roller & Tray, Sand paper

Difficulty Level (on a scale of 1-5):

Two hammers out of five

Total Cost: $80