Paintin Signs

When we bought the Storefront, it had essentially been eliminated of all its character. It had been in bad shape, and the owners before us had brought it back, and modernized it, but in doing so had removed everything of the past. Don’t get me wrong, I love our spray foam insulation and skylights, but I’m not the biggest fan of the white vinyl windows and the lack of original trim & doors.

So in our quest to add some character back to the Storefront, I want to add in a bit of it’s past. When the Storefront was originally built it housed a Grocer. Later it did a stint as a Barber Shop, and until the 60’s it was a Tailor & Cleaner.

I have been scouring flea markets and antique shops for anything Grocery, Barber or Tailor related and have yet to find ANYTHING awesome for the house. Barber pole? Nope. Grocery Store sign? Not a hope.

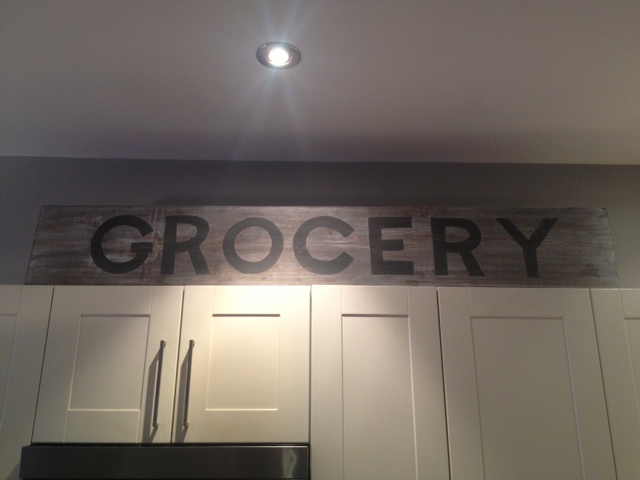
Resigned to my failure, I decided to make things related to the past for the house. I started with a Grocery sign for the kitchen. (Cause a grocery sign was a shade easier than a barber pole…)

I headed into the garage and found a couple spare pieces of 2×12’s that were 6 feet long. I distressed one with some stain & a blow torch, and the other I whitewashed with some watered down chalk paint.

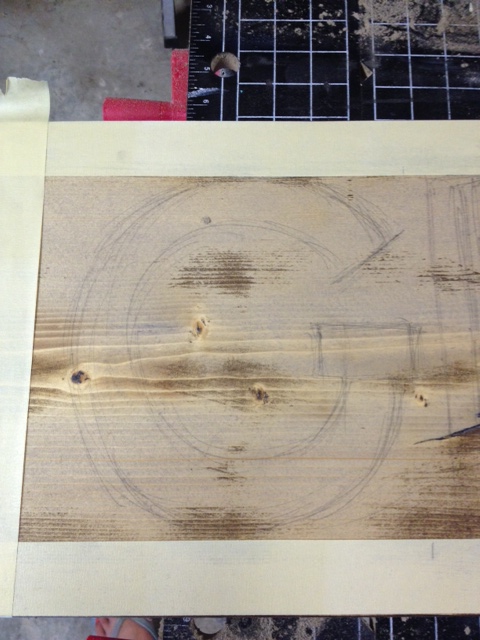
I then laid out my type. I made each letter about the size of an 8.5 x 11 sheet of paper, and just freehanded the letters with a pencil until they looked OK.

freehand sign paintin

I grabbed some paint, and filled in the lettering with a small foam brush, and let it dry.

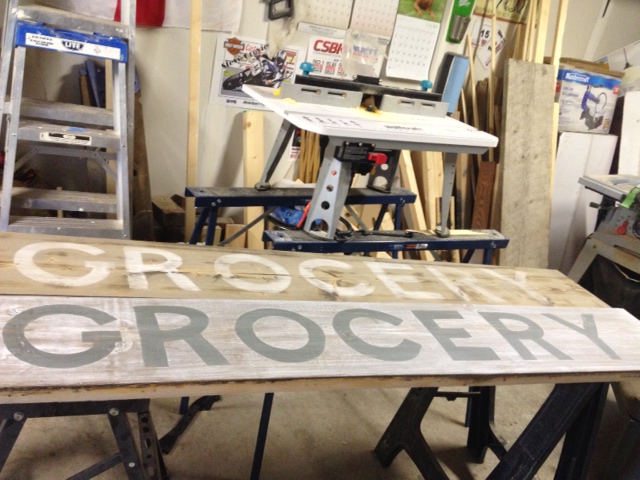
Then I sanded everything to give it a worn look, and I had two (yes TWO) grocery signs ready to go.

Two (yes TWO) grocery signs

I then made El Granto put each one up on the kitchen cabinets so I could decide which one I liked best.

This one won out.

Grocery Sign
Grocery Sign
The Kitchen
The Kitchen

And now the other one is still hanging out in the kitchen leaning against a wall cause I have NO IDEA WHAT TO DO WITH IT. I’m really knocking it out of the park lately.

Anyone want a Grocery sign?

Concrete Countertop Test Run

I really want to build concrete countertops for my kitchen. My laminate counters suck, and the coffee bar is curremtly covered in a $20 wood shelf from Home Depot.

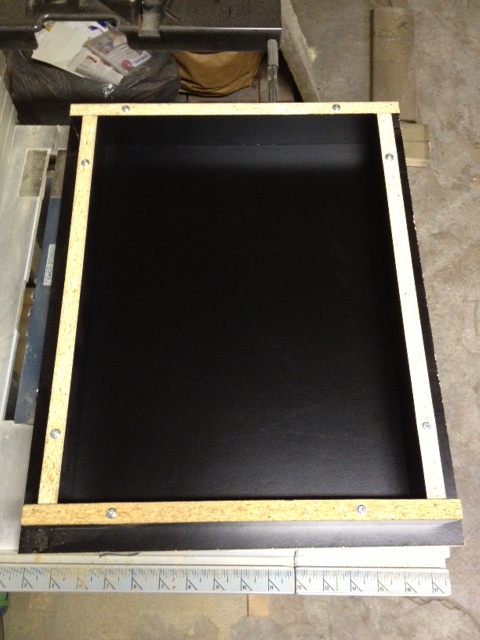
I had a bag of concrete hanging around the garage (don’t you?!) and decided it was high time to put all my researching to the test and pour some concrete. I decided to make a “cutting board” as my test run, and grabbed some spare melamine (I’m not a hoarder, I just have stuff in the garage…collecting dust…that might some day get used.) SO the melamine… I had El Granto rip down a few pieces into 2″ strips and then built a little form with some spare screws.

Building the mold (and making sure it's square
Building the mold (and making sure it’s square)

Next up, sealing the cracks in the form with silicone caulking. I conveniently had a new tube of silicone caulking. I inconveniently could not find my caulk gun. Cause it’s an easy thing to lose. You know, giant red tube thingy that looks like a weapon. Yep, missing. Hardware store? Closed. Dollar store? I may be able to find paint brushes, and tie downs, but a caulk gun was not to be had at Dollarama. My neighbours had been outside working on project as well, and we had passed an air compressor over the fence earlier in the day (true story) so I figured I’d ask if maybe they had one. BINGO! Caulk gun. Except theirs was contractor grade and made for big tubes of caulking, and my wee bitty tube of silicone was too small. So now what? I shoved a piece of wood into the bottom of the caulking tube and hoped for the best.

I started caulking, and I got silicone EVERYWHERE. All over me and the mold.

DIY TIP. Tape your mold or you’ll get silicone everywhere. After about 10 minutes I was covered and sticky and I had done the WORST job of caulking anything in my life. I threw in the towel (this was a test after all!) and left it to dry.

Mold Made (with crappy silicone job)
Mold Made (before crappy silicone job)

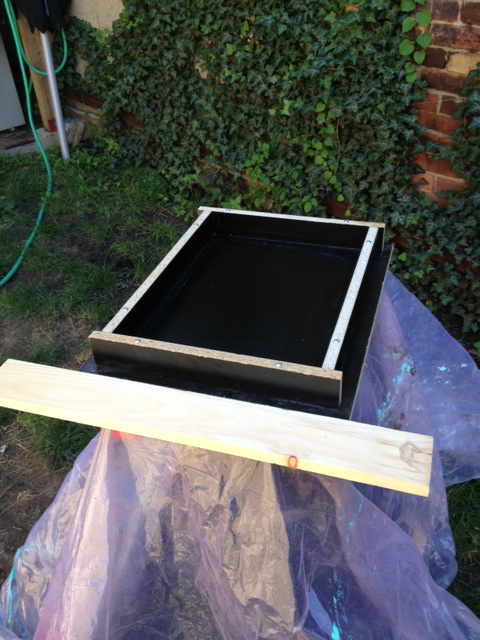
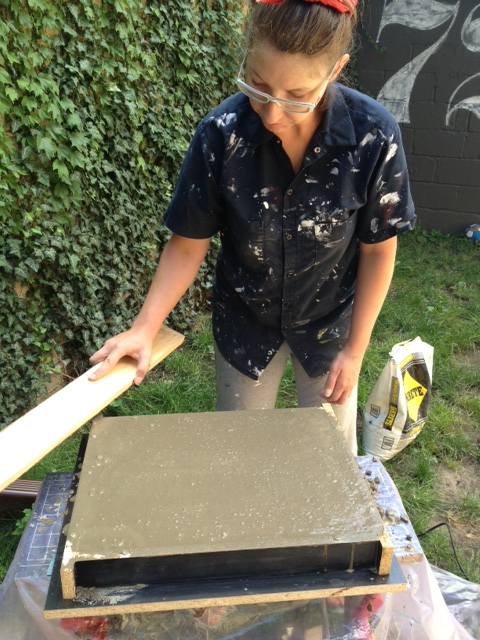
Next day we moved the mold outside on worktable covered in a plastic drop cloth, and I (with my girly muscles, a shovel and a piece of wood) mixed up a half bag of concrete. In hindsight, it could have used a bit more water, and I could have used a trowel (rather than a piece of wood) to get it well into the mold.

Pour area prepped. Drop cloth & screeding board ready
Filling the mold
Filling the mold. Don’t you just love my work outfit? Paint covered work shirt and track pants. I really should buy an attractive set of work clothes.

I then (smartly) took the sandpaper off my palm sander, and covered it in a bag, and vibrated the crap out of the mold.

sander
Sander covered in a bag
Vibrating the mold
Vibrating the mold

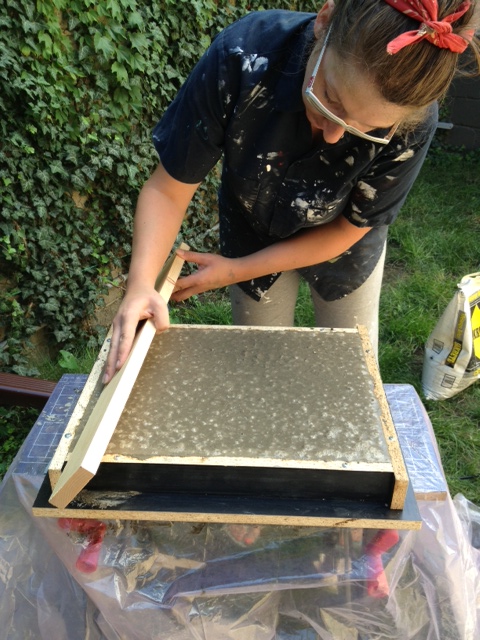
Then we screeded the top (which also didn’t go so well, as it started pulling gravel out of the mold, but again I think my mix was too thick.)

Screeding the mold
Screeding the mold

Then I let it dry, covered with plastic for a day. I didn’t put a wire mesh in it, cause A.) it was a test and B.) I didn’t have any in my garage…

I un-molded, and voila.

Concrete cuttingboard
Concrete just after de-molding
Concrete cuttingboard
It worked!

Things I learned:

  • Concrete is heavy.
  • 2″ is too thick for our countertop. It just looked too big (that’s what she said). In all seriousness, 1 1/2″ is a much more reasonable size, 2″ was just overkill. Like a Hummer H2.
  • My mix needed a bit more water.
  • Counter sink the screws! Or else you can screed it very well.
  • I will not mix up all the countertops in a bucket. Concrete mixer rental is imperative.
  • I needed a better concrete mix than the $4 bag of all purpose. It was too rocky and rough. The top of my cutting board was great, but the sides showed too much aggregate.

Next up, I will be filling the holes, adding some feet to my “cutting board” test driving some concrete sealers and waxes, and then putting it to the test in my kitchen. Wish me luck!

Have you ever played with concrete? Any tips to pass on?

Yet Another Bench

I know, I know, ANOTHER BENCH?! REALLY? Here’s the deal. We replaced the top of our pipe leg dining table, and our old bench was looking sad in comparison. It’s unfair to give one kid a present, and then stiff the other one. So Mr. Bench got an upgrade.

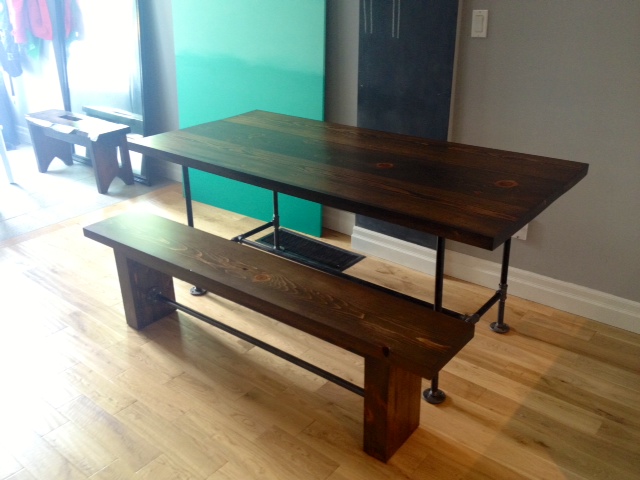
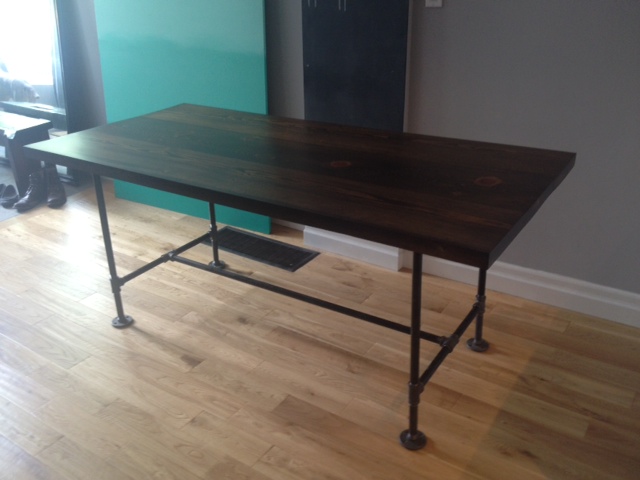
If you remember correctly, this is what the old bench (& table) looked like:

The Table & Bench
The Table & Bench

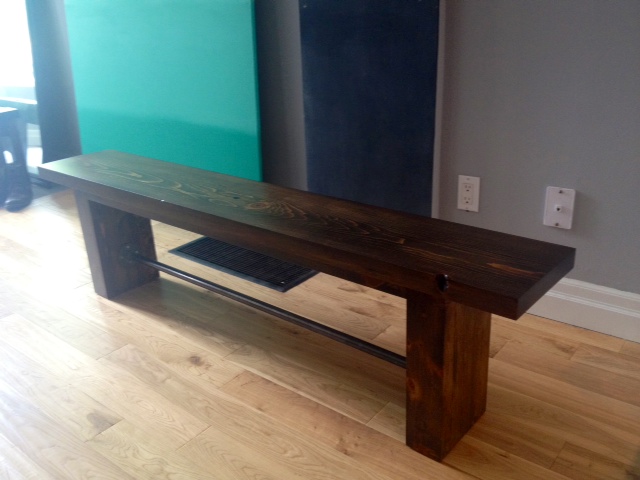
We salvaged the pipe stretcher from the old bench, and got to work making new legs & a top. We wanted something a bit more industrial looking. The old bench was fine, but a bit traditional. So we searched for inspiration and found this on Pinterest:

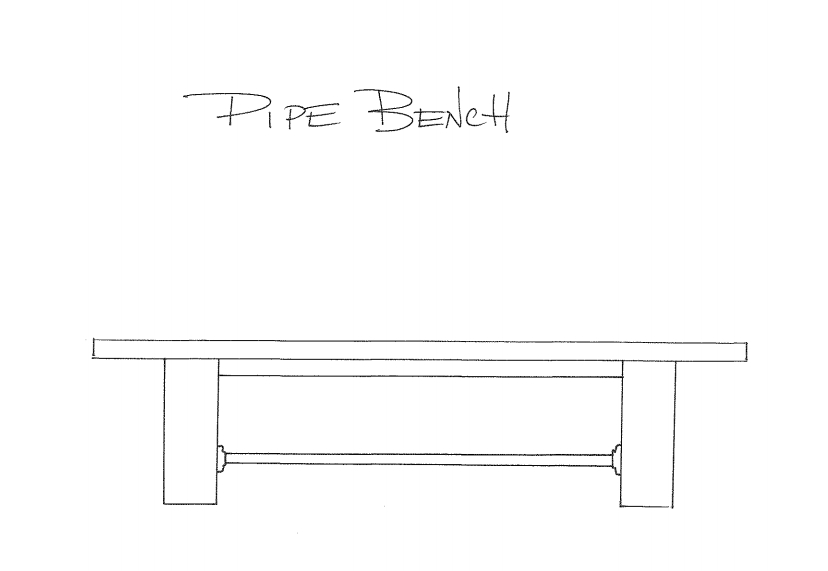
I loved the chunky legs and thought it had the perfect shape. So we set to building our own version with a pipe stretcher.

pipebench

Buy List:

1 – 2×12 x 6′ piece of kiln dried pine (same as our table)
2 – pine 2×2’s @ 8′ for aprons
2 – pine 2×4’s @ 8′ for the legs (make sure these are square edged 2×4’s, not rounded ones like you use for framing)
3/4″ dowel
Wood Glue
4′ pre-cut piece of 3/4″ gas line pipe (threaded on both ends)
2 – 3/4″ pipe floor flanges
2 1/2″ pocket screws

Cut List:

1 – 2×12 at 68″ (bench top)
2 – 2×2 at 48 5/8″ (aprons)
10 – 2×4 at 16 1/2″ (legs) if you can, set yourself a jig on your saw to make sure all the pieces are cut exactly the same size

First up, glue 5 2×4’s together with wood glue and clamps making one great big 4×10, repeat with the other 5 2×4’s (if you don’t have enough clamps, do one leg, then let it dry for a day, unclamp and do the other leg.)

Five 2x4's
Five 2×4’s glued together

To make sure those legs aren’t gonna move, we also strengthened them with dowels (and a few screws). We liked the way the exposed dowels looked on Daniel & Adelle’s table, so we opted for that route. After the legs have dried, mark 3″ up from the bottom of the leg on one end and mark the center of the board. Then drill a 3/4″ hole with a spade bit about half way through your leg. Ideally it would go all the way through, but to do that nicely (without any tear out) and straight you really need a drill press (which we dont have!). So we opted to do a dowel from each end.

Dowel Hole Drilled
Dowel Hole Drilled

After your hole is drilled, cut a piece of dowel a bit longer than your hole, glue & tap in place. Repeat for all the other sides of both legs and let dry.

Dowel Insterted
Dowel Inserted

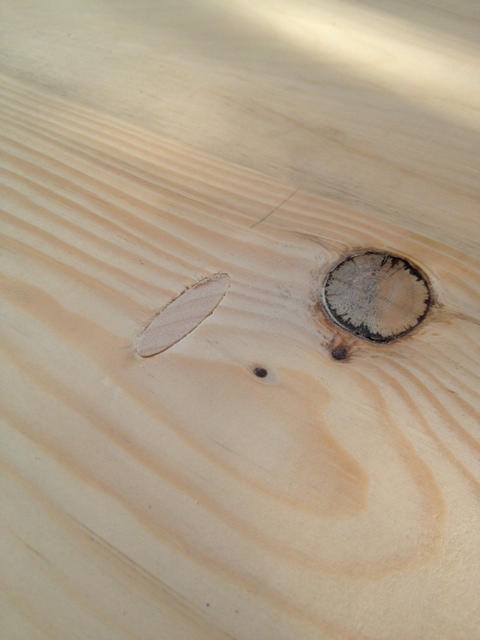
To strengthen the top of the legs we used a 3″ counter sunk screw from either end. We pre-drilled the holes with a 3/8″ drill bit, inserted the screws, then filled the hole with a wood plug & some glue. If you must use screws on a project, using wood plugs will make them a lot less glaringly obvious.

Wood Plug
Wood Plug

Once all the glue has dried (another day) you can cut the dowels close to flush using a coping saw, chisel, hand saw, Dremel, or oscillating multi-tool.

Now it is time to make a few pocket holes for attaching the legs to the top. We put three holes in each leg (kreg pocket hole jig set to 1 1/2″ thick material).

Time to sand. I always find that it is MUCH easier to sand pieces like legs before installing them. As we needed to sand down the exposed dowels, we started sanding with 80 grit until the dowels were flush, then switched to 100, then 150 and finally 220 grit.

The apron pieces got 2 pocket holes drilled in each end (to attach to the legs) and a good sand as well.

Next up, attach the flanges to either end of the pipe and attach the pipe stretcher to the legs with screws. We used a scrap 2×4 to set the flanges up from the bottom of the legs.

Attaching Pipe
Attaching Pipe Stretcher

Next up, attaching the legs to the table and the aprons. Flip the bench top upside down and use it as a work table to attach the aprons. The aprons will give the bench even more strength, and stop it from wanting to shift sideways.  Once the aprons are attached to the legs, center the legs on the bench top, and attach the legs with the pocket holes you drilled earlier.

Assembly
Attaching the aprons to the legs, and the legs to the bench top

Put in a few 2 1/2″ screws through the aprons into the top, and fill the Kreg holes with pocket hole wood plugs and glue.

Time to head back outside, give the top a sand, and an overall finish sand to the rest of the bench.

Bench ready for stain (there's painters tape over the pipe)
Bench ready for stain (there’s blue painters tape over the pipe)
Bench legs
Bench legs sanded and ready for stain

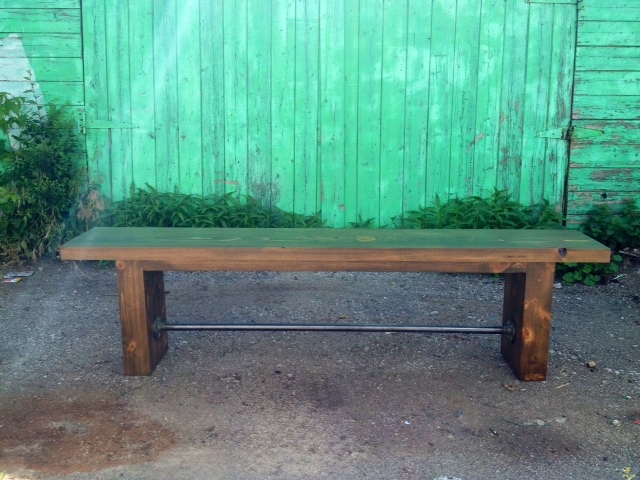
A coat of wood conditioner, two coats of Varathane Chocolate stain, and three coats of polyurethane later and this is what we’ve got. (check out my post on finishing wood here.)

Bench
Yep, I moved my nice new bench out into the dirty alley to take this photo.
bench
Big legs are sexy. Men take note.
Benchy Bench Bench
Benchy Bench Bench
Bench & Table
Completed Bench & Table

SOURCE LIST:

Materials & Cut List:
(see above) – Wood from Downtown Lumber
Stain – Varathane Chocolate
Polyurethane – Minwax Oil Modified in Satin

Tools Used:
Miter saw
Drill
Kreg Jig
Orbital sander
Measuring Tape
Finishing Supplies

Difficulty Level (on a scale of 1-5):

two out of five

Total Cost: $60 (for the new wood, we already owned the pipe, stain & poly)

Quick & Dirty Outdoor Table

We got home from a week vacation in Vegas to find that our house hadn’t floated away in the Toronto Floods, and that our garden had doubled in size because of said rain. Win win. We also came home to a heat wave. You’d think I would be prepared for the heat after staying a week in the desert. No siree. Vegas heat = dry and wonderful, Toronto heat = humid and sweaty. Needless to say on our first day back we didn’t do much. We played and cuddled with Odin (who we missed desperately) and had a few cocktails on the deck.

Our deck layout is small (big surprise), and features a bench and two chairs with a small folding table. This works well for the person sitting beside the table, but everyone else must hold on to their drinks, snacks, hats etc. Fed up with holding onto my wine glass, (yes yes I know, first world problems) I sprang into action and built a quick and dirty (literally) outdoor side table.

Last time I was up at the cottage, I stole borrowed an old battered 2×12 that was sitting under the bunkie. My Dad had used it for the concrete forms for the cottage foundation, and the old board was just hanging out under the bunkie left for a life of firewood/scrap. I saw the beauty in its weathered aged goodness and brought the board home with me. It has since sat littering the garage floor (much to El Granto’s chagrin) waiting for a project.

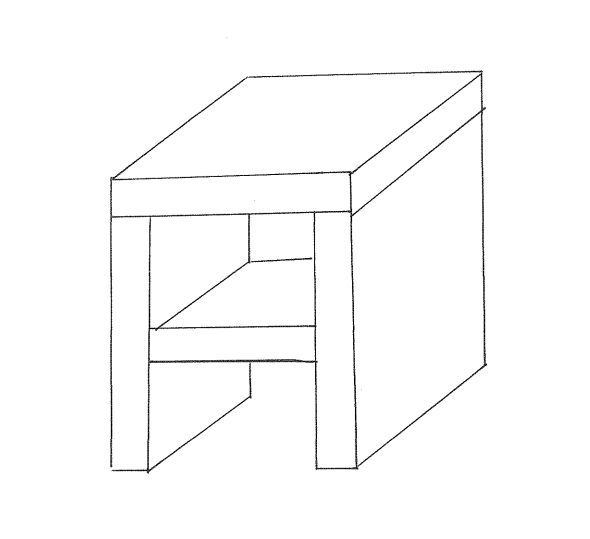
In my fit of DIY, I did up a quick drawing, decided on a design & size, and made a few cuts of the weathered wood (see cut list below.)

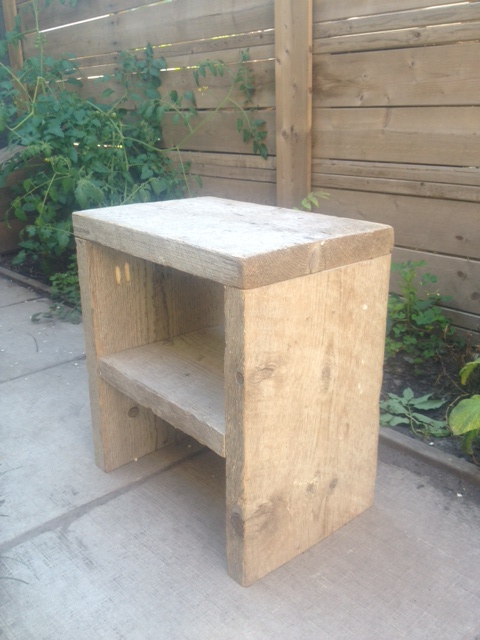
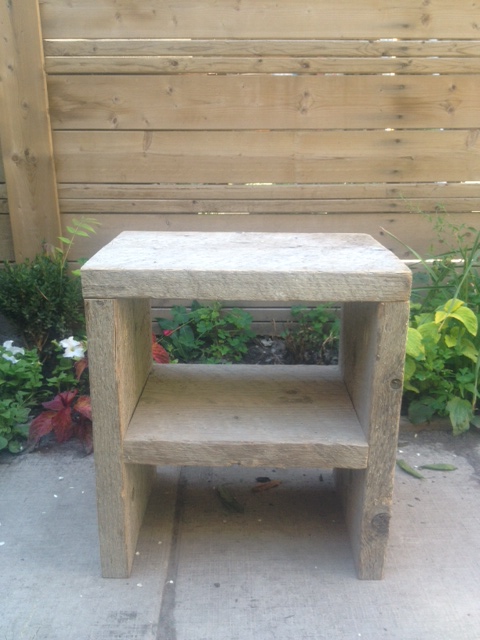
Outdoor Side Table

(19″ tall, 17″ wide and 11 5/8″ deep )
Note: My sketch is in no way to scale, or in correct proportions, or even straight. That’s just how awesome I am at drawing…

outdoortable

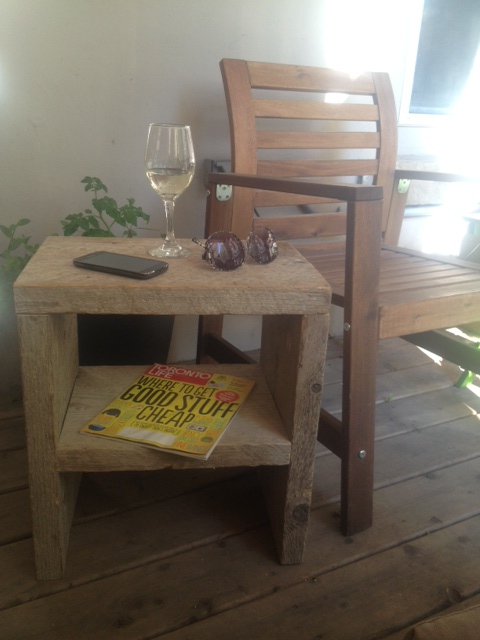
I drilled a few pocket holes (four in one end of each of the side boards, and two on each end of the shelf), and screwed in a few outdoor Kreg screws, and 15 minutes later we had a weathered side table. Perfect for holding a glass of wine, sunglasses & a magazine. I made the shelf big enough to hold our Bose sound dock. Cause no deck time is complete without some Robin Thicke.

DIY Outdoor side table
Side Table
No sanding, no staining, no finishing. Easy peasy lemon squeezy.
Side Table
Room to hold a few bevy’s, magazines and sunnies

SOURCE LIST:

Buy List:
1 – 2×12 @ 8′ (Under the Bunkie)
12 – 2 1/2″ outdoor pocket hole screws (Lee Valley)

Cut List:
1 – 2×12 @ 17″ (top)
1 – 2×12 @ 13 1/4″ (shelf)
2 – 2×12 @ 17 3/8″ (sides)

Tools Used:
Miter saw
Drill
Kreg Jig
Measuring Tape

Difficulty Level (on a scale of 1-5):

one out of five

Total Cost: $0 (booyakasha)

Pipe & Wood Table V2

We loved our DIY Pipe & Wood table and bench. However, we started to fall out of love with it after living with it for a few months. In order to get the table done on a budget & quick timeline we used framing grade spruce lumber from the big box store. Over time the wet wood warped, and our table was looking a bit topsy-turvy. Oops. The framing grade spruce also had rounded edges, which made for serious crumb catchers between the joints. Thirdly, we used Tung Oil to finish the table, and after a while, the tung oil started to smell, well, like spoiled oil. Nowhere in all my research did I find anyone saying tung oil would smell like butt after a few months. Lesson learned. (Although as a finish the tung oil was doing otherwise great, not a single water spot or mark on the table, if you can get past the butt smell.)

tablefeature
Pipe & Wood Table

If you know me (and my neuroses) at all, you will know that I couldn’t just leave the table. I can live with dust bunnies rolling around the house becoming dust monsters, and I can live with dirty dishes in the sink, but a wonky smelly table? Not a hope.

So here it is kids:

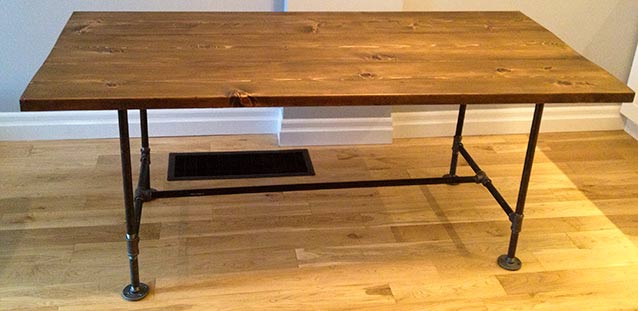
DIY Pipe & Wood Table Version 2 (6’x 34 1/2″)

Lumber Buy List: (purchased from a local Home Hardware Building Center. Check your neighborhood to see if you have a Home Hardware Building Center or another lumber yard . They will carry a larger amount of lumber than the big box stores, at about the same prices.) If you’re in Toronto, try Downtown Lumber (a Home Hardware) or Central Fairbank Lumber.

3 – Kiln dried pine 2×12’s @ 6′  (square cut edges, not rounded ones)
1 – Kiln dried pine 2×2 @ 8′ (support pieces)

Cut List:

3 – 2×12’s @ 6′ (our lumber yard rough cut them to just over 6′, then we did nicer cuts with our sliding miter saw at home. If you do not have a sliding miter saw, or a circular saw that can cut through that thickness of wood, have your lumber yard cut it for you with their good saw, not their rough cut one.)

3 – 2×2’s @ 26″, cut to a 45 degree miter on either end.

Instructions:

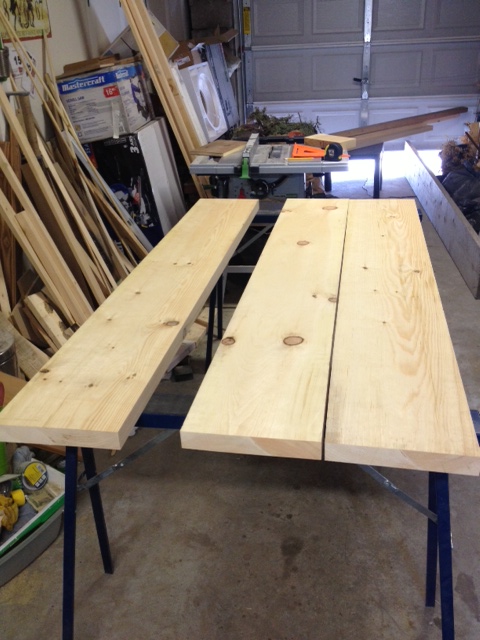
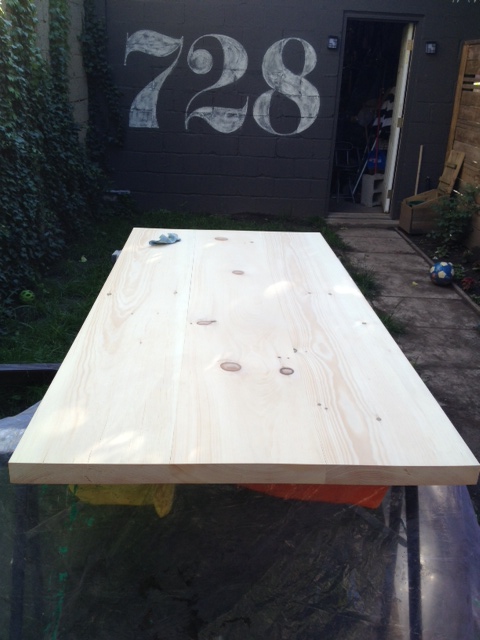
Lay out your table top boards and decide which sides you want up. Make sure to flip the grain so that one board’s grain is up, and the next is down. When you have everything laid out (and square!) mark for Kreg pocket holes every 8″ or so on the bottom of 2 of your tabletop boards.  Using the 1 1/2″ thick wood setting, drill your pocket holes. (see how to drill a Kreg pocket hole here.)

Deciding on board layout

Attach your tabletop boards together with wood glue and 2 1/2″ Kreg Pocket Hole screws. Make sure your table is square before attaching the boards together. (You can check it with a square and by measuring corner to corner diagonally. If both sides are the same, your table is square.) Wipe off any excess glue that may have squeezed up between boards with a wet rag before it dries.

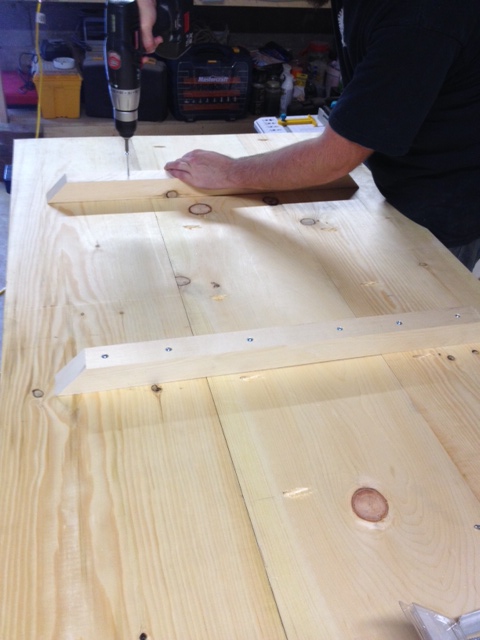
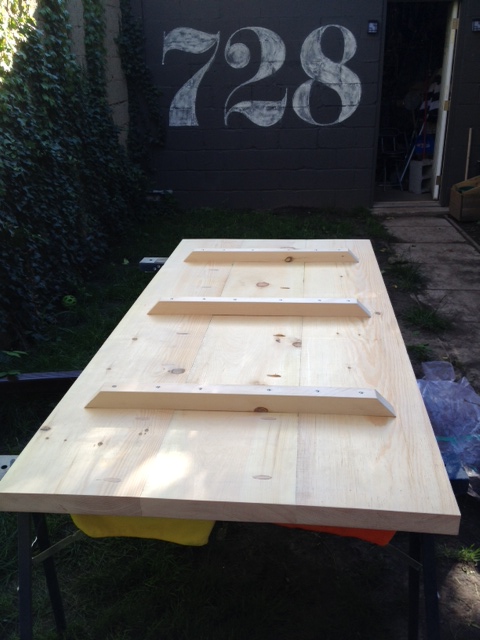
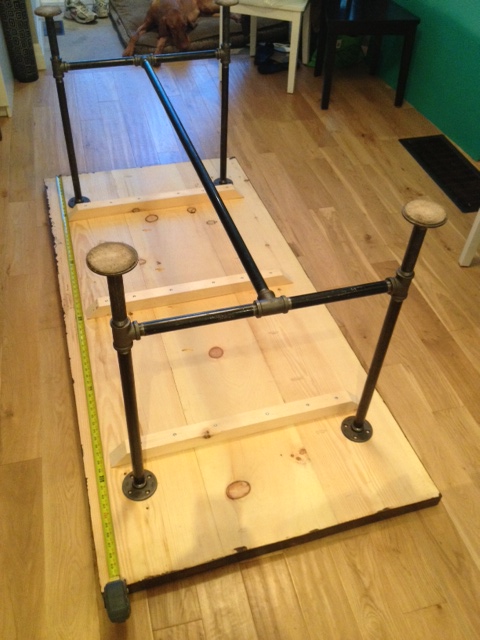
Once glued and screwed, attach the support pieces. We put one in the middle, and two right behind where our pipe legs would go. The ends are cut to a 45 so that its looks nicer, and you’ll be less likely to whack your knee off it later. We used some 2 1/2″ screws to attach the supports, making sure we got at least 2 screws into each board. These support pieces will try to keep your table from warping. Remember wood is a living organism, and changes during high & low humidity and heat. So you can never guarantee your wood will stay exactly the same. (That’s why you leave an expansion joint on your hardwood floors, or else they might buckle.)

Attaching the supports
Table Supports
Table Supports

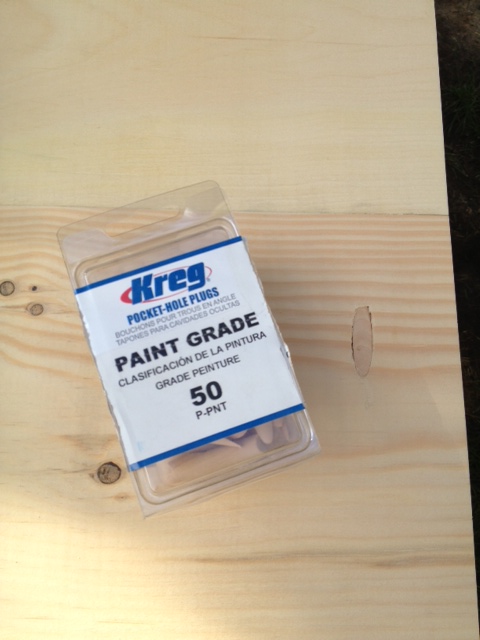
We also filled the pocket holes with Kreg wood plugs. You wouldn’t see the holes, but if you ran your hand along the underside of the table you would feel them. They also might catch on pants or stockings. The Kreg plugs are easy to use. A bit of wood glue and careful placement and they were done. After the glue dried we gave them a sand to ensure everything was nice and smooth.

Kreg Pocket Hole Plugs (we used paint grade as they would not be seen)
Here they are in action

Now its time to sand. I like to sand outside in the summer, so out the table went. We sanded away, then I stained the table and royally screwed it up. OOPS. Time to fix my mistake, and try again.

Table top sanded (for the second time) and ready for stain.

After the sanding came two coats of Varathane Chocolate Stain (check out my finishing post to see all my steps in sanding, wood conditioning & staining.)

Here it is after one coat. The second coat of stain (plus subsequent polyurethane) really bring out the depth of the wood.
Here it is after one coat of stain. The second coat of stain (plus subsequent polyurethane) really bring out the depth of the wood, which you will see in the finished product.

I can tend to get a wee bit anal retentive, so when it came to polyurethaning the table, I had to stop myself at 6 coats. Any more would be a bit cray cray. Realistically as long as you have at least three coats, you should be good.

Now to re-attach the legs from the old table. A bit of measuring to make sure its centered, and a few screws and we’ve got legs people.

Legs Legs Legs
Legs Legs Legs

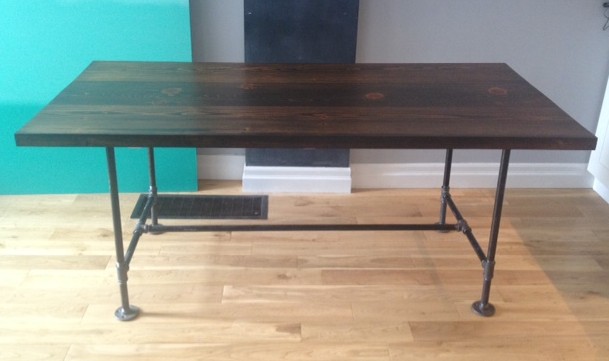
Want to see what it looks like all finished?! (ignore my terrible lighting, the dining room is impossible to shoot in.)

Dum da da daaaaaa

Pipe & Wood Table
Pipe & Wood Table V2
Pipe & Wood Table
Yay! Smelly & Wobbly Table No More!

***UPDATE*** We also made a new bench to go along with the table. Check it out here.

Benchy Bench Bench
Benchy Bench Bench


SOURCE LIST:

Materials & Cut List:
(see above)

Tools Used:
Miter saw
Drill
Kreg Jig
Orbital sander
Measuring Tape

Difficulty Level (on a scale of 1-5):

two out of five

Total Cost: $100 (for the new wood, we already owned the pipe, stain & poly)

Quick no Plan Project: Beer Can Carrier

Last weekend while Kristen was sanding a new project and I had little to do. Sure I could have helped. But why not whip together a quick project while she did all the boring work?

I have seen many beer/can carriers on the internet and decided to give it a try myself.

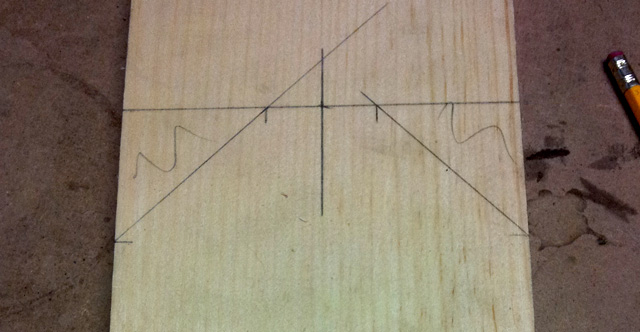
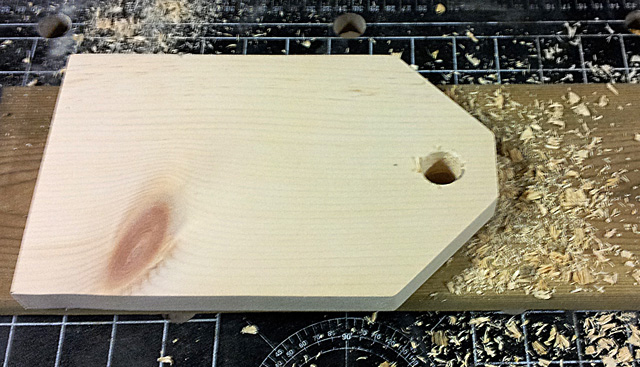
I started by measuring a can and adding some inches to the height to give some room for a handle (9 inches tall) and measured two cans beside each other for the width (giving a little breathing room for easy removal of frosty brews it came to 5 1/2 inches). Then I used a combination square to add 45 degree corners to the template (the flat top section is 1 3/8 inches).

IMG_20130629_161250
Scribble on pieces you know will be scrap as a reminder.

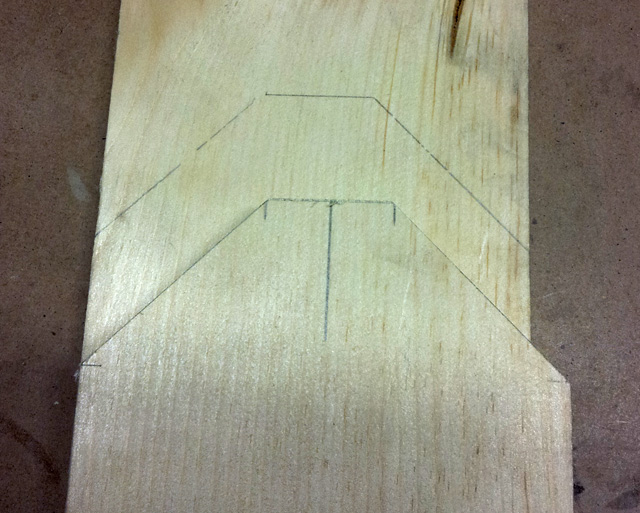
After cutting out the first side of the carrier with the miter saw I decided I was happy with the size and traced the outline to the 2nd side.

IMG_20130629_161706
Using the first side as a template for the second side
IMG_20130629_162045
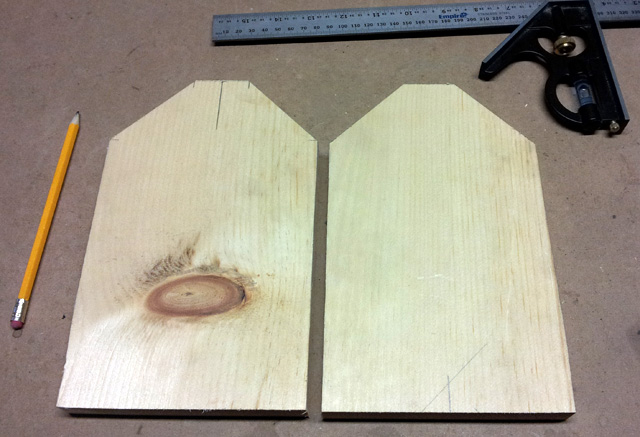
Both sides cut and ready to go

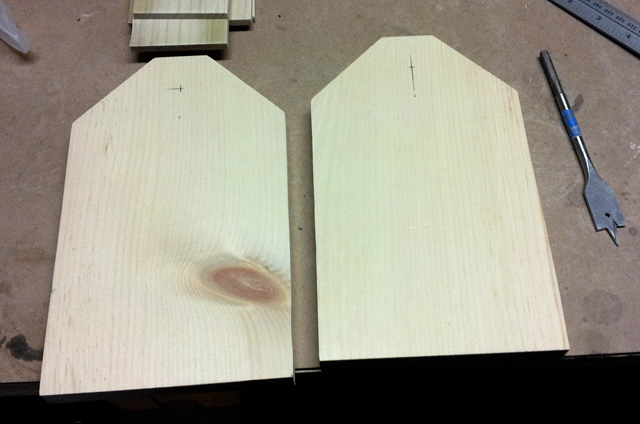
I measured and drilled a 3/4 inch hole in each side for the handle to pass though.

IMG_20130629_165941
Tiny markings to show me where to drill.

DIY Tip: place a scrap board beneath your piece to stop tearout when drilling holes that will be seen or are large

IMG_20130629_170311

I then lined up three cans and and measured their width and found that with a little breathing room 9 1/2 inches suited three cans quite well.

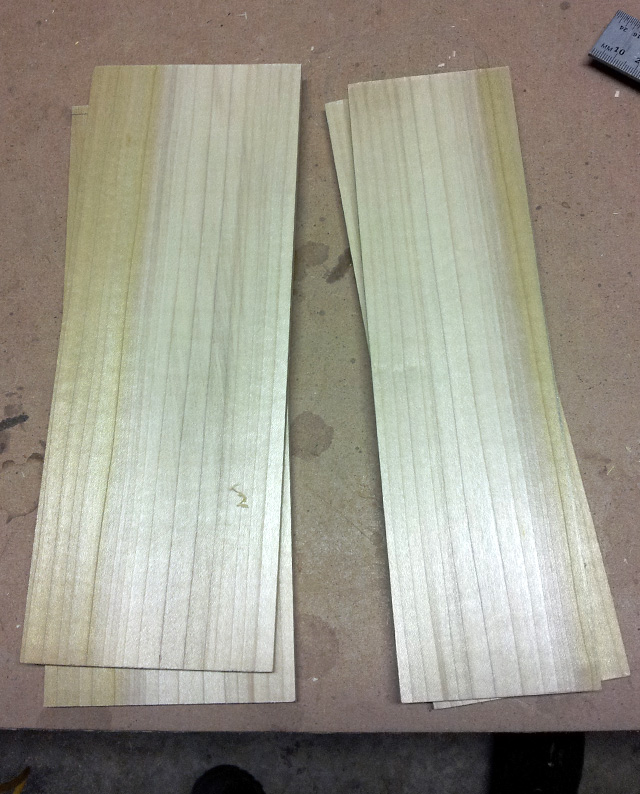
I found some poplar that was laying around the garage and cut 4 strips to 9 1/2 inches long and ripped two of them down to 2 5/8 inches to make the bottom of the carrier with a little gap on either side for the escape of any condensation that may build up and drip down the sides of my nectar vessels during transport.

IMG_20130629_164616
Side pieces (left) and bottom pieces (right)

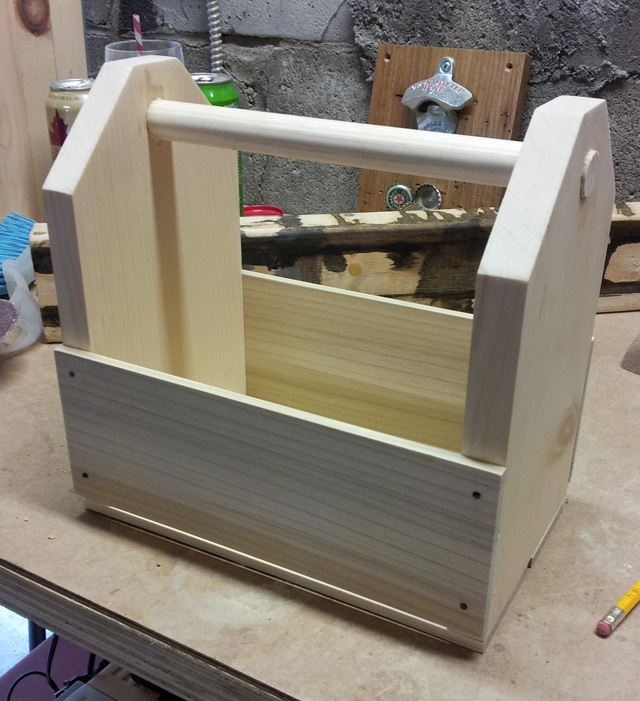
After all the pieces were cut they were sanded down to 220 grit and I attached them all together using some black finishing nails that were left over from ages ago when we made the Liquor Cabinet. Leaving a gap between the sides and the bottom (more condensation relief).

I then cut the handle (some 3/4 inch dowel left over from a project you’ll see in the future) to size leaving a little room for it to poke out just for looks and inserted it in to one side of the carrier. I then coated the inside end and the outside end of the handle with glue and slid the entire thing in to place so that no glue got where it shouldn’t be. (Wiping up any excess that squidged out.)

IMG_20130629_175251
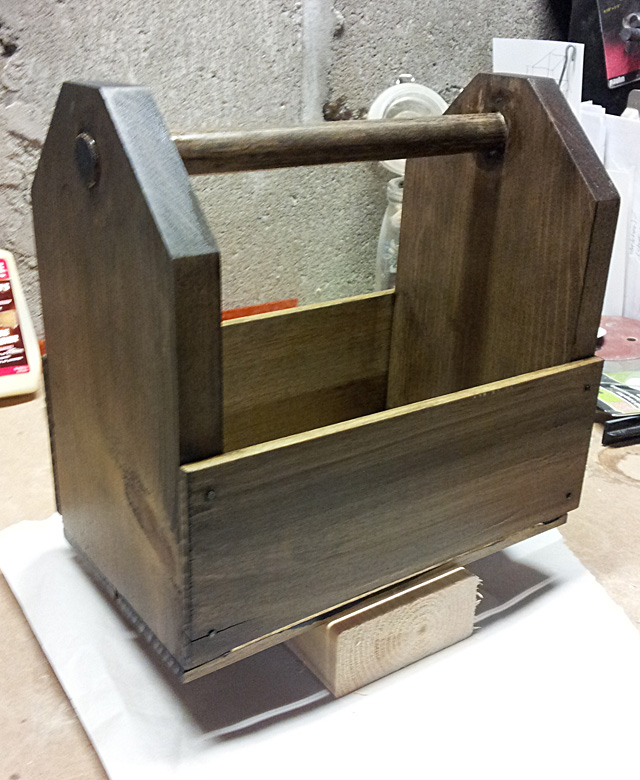
Can Carrier Assembled

I picked a random jar of stain (Minwax Weathered Oak) and set to staining. Then I hated the stain.

IMG_20130629_201024
YUCKY!

So I restained it darker using Minwax Jacobean.

IMG_20130630_182017
Niiiiiiiiiiiiiice!

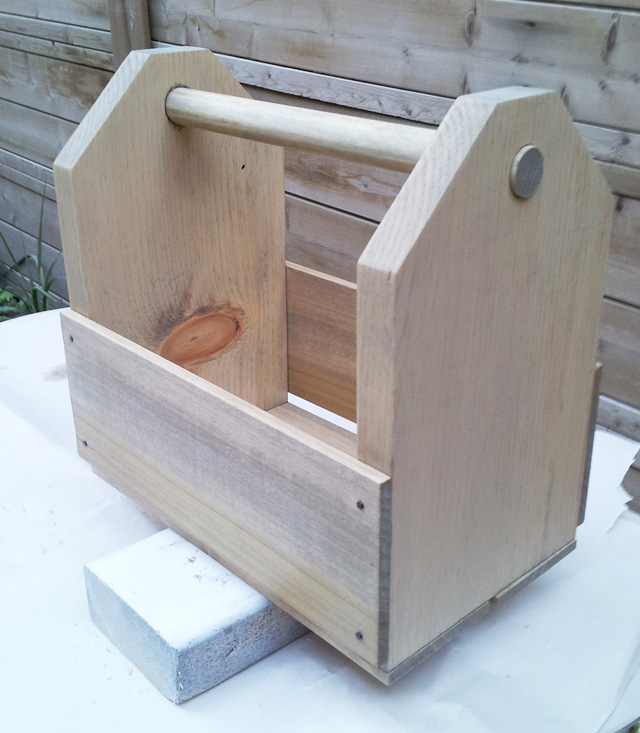
Happy with the stain I set to four coats of Varathane Oil Modified Polyurethane in Satin finish. Using the process outlined in the finishing post.

IMG_20130701_182813
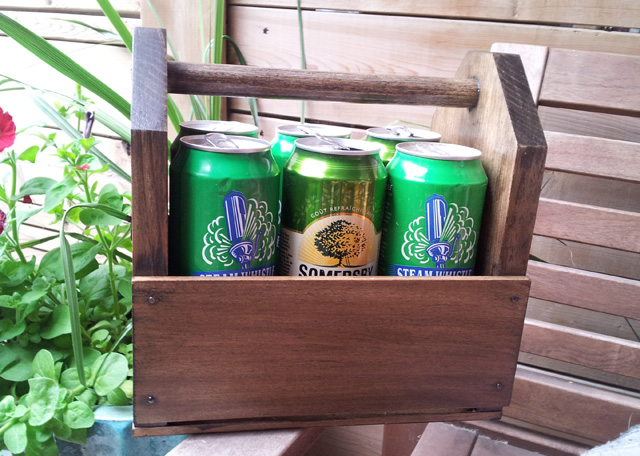
Ta Da!

In all I think this probably took about an hour and a half including stain and finishing. The entire build only took about 45 minutes and was a great way to get me out of sanding other projects. AND now we have a great way to carry our Friday Libations out to the patio (or the park shhhhh).


SOURCE LIST: 

Materials:
Scrap Pine (1×6 x 2′)
Scrap Poplar (1/4″)
Scrap Dowel (3/4″)
Scrap Finishing Nails

Cut List:
2 – 9″x5 3/4″  – 1″ thick Pine
2 – 4″x 9 1/2″ – 1/4″ thick poplar (sides)
2 – 2 5/8″ x 9 1/2″ – 1/4″ thick poplar (bottom)
1 – 9 1/2″ dowel (handle)

Tools Used:
Miter saw
Combination Square
Drill
3/4″ Spade Drill Bit
Orbital sander
Measuring Tape

Difficulty Level (on a scale of 1-5):

one out of five

Total Cost: $0!!!

Update Chairs w/ Spray Paint + The Best Paint News Ever!

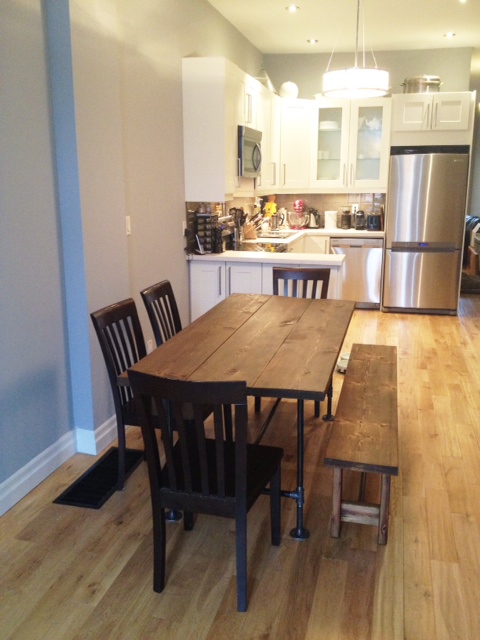
We re-used our old dining chairs when we made our DIY iron & wood dining table. As you can see below, it’s not ideal. The chairs don’t  “match” the table, yet they’re not different enough to pair well with the table.  Why didn’t we get new chairs? Chairs are expensive!  I wanted pretty metal Navy chairs, or metal Tolix chairs. Then I remembered one of those chairs is more than our grocery budget for a whole month…eeep

Dining Room
Dining Room & Kitchen

Chair vs. Food. I choose food.

However those chairs were still driving me nuts. They have lived with us since we moved to Toronto 7 years ago. They’re well built, but they lived through our late 20’s, a lot of fun and a few exuberant parties. They are scratched, and are finished with that really dark espresso stain color that might as well be painted on. You cant even tell that there is real wood hiding under it. Combined with the dark dining table in our otherwise bright kitchen/dining room, it was making a bit of  black hole.

It was time for a change.

Now. As you may have noticed, I heart spray paint, and in particular I have a soft spot for RustOleum Universal spray paint. Their oil rubbed bronze finish may be the best spray paint finish on the market. Really. In the past we’ve made a knock off Restoration Hardware mirror with RustOleum Universal, refinished a busted rocking chair, given new life to mismatched heat registers, brought a light fixture back from the 80’s, gave a bit of glam to a plastic frame, and even saved some shabby door handles.

The choice was obvious. Chairs; meet spray paint.

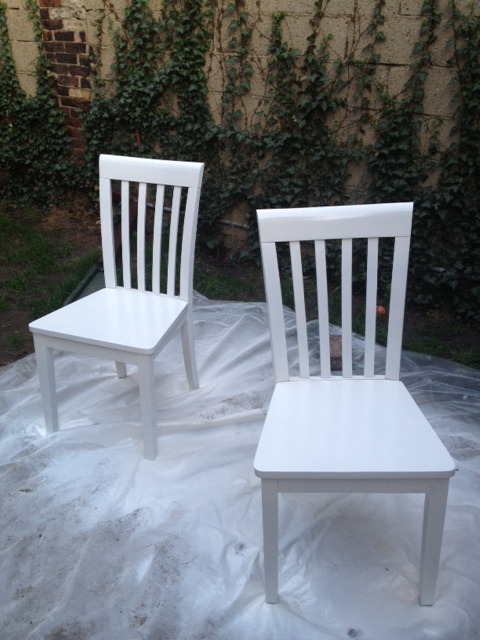
I set up my DIY spray booth in the garage. Gave a light sand, and a good cleaning to the chairs, then gave them several coats of RustOleum Universal in gloss white.

DIY TIPS! When spray painting, the prep is the most important step! Ensure your surface is very clean. Use a degreasing cleaner such as TSP to remove any oil or wax from the surface. If your surface is very shiny and slippery, always rough it up a bit with some sandpaper, to ensure good adhesion. Spray painting is all about light coats. Give your piece several light coats using a sweeping motion about an arms length away from your surface. To avoid drips and runs, don’t spray too close.  For surfaces that are going to see a lot of wear, put on an extra coat. Make sure you re-coat within an hour, or after 48 hours to avoid the paint cracking or not adhering properly. Go out and paint something!

Chairs Before
Chairs Before
Chair in the paint booth
Newly painted chairs drying
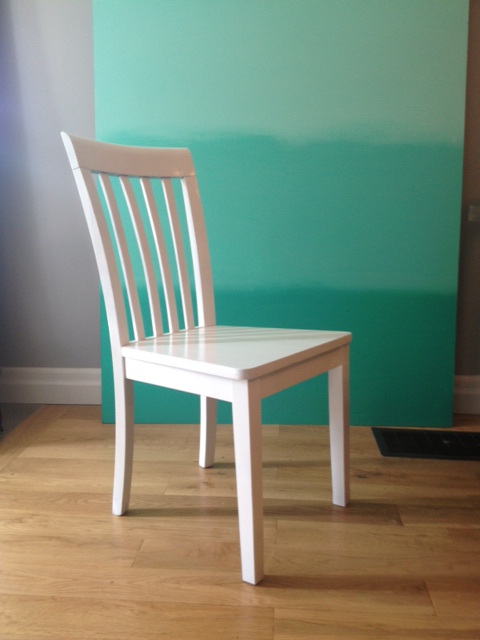
Chair After
Chair After

That’s just a sneak peek of the changes to the dining room. We have another couple projects in the works, so a full reveal in a few weeks!

Now for my super special awesome paint news!

I had the chance to meet the folks from RustOleum last week at the Home Depot DIY 101 day, and they let a super big secret drop. RustOleum is coming out with SEVEN new colors of Universal paints in Home Depot stores this week. Yep, 7! They look amazing, and I cant wait to try them all out. Check your local Home Depot Canada store in the coming weeks for these new colors:

RustOleum Universal Flat Metallic:

  • Chestnut
  • Burnished Amber
  • Soft Iron
  • Antique Nickel

RustOleum Universal Hammered Metallic:

  • Chestnut
  • Burnished Amber
  • Antique Pewter.

These paint finishes look amazing! Very Restoration Hardware-ish. Perfect for refinishing dated hardware, light fixtures, furniture and anything else you can think of.  I cant wait to try them out!

Have you spray painted anything lately? Ever used RustOleum Universal paint?

Farmhouse Table Reveal + Plans

Aaaaand were done! Daniel and Adelle moved into their new place and took their newly finished modern farmhouse table and benches with them. Mind you as much as we will enjoy our garage space back, we will miss working with Daniel and Adelle on this project! It’s different working with friends than a spouse, it’s laid back and there (usually) isn’t any swearing involved. Throw in a piña colada or two, and it’s a party with work involved.

If you missed the beginning of the project, check out part one, two, three, and four.)

So without further adieu, here is the table!

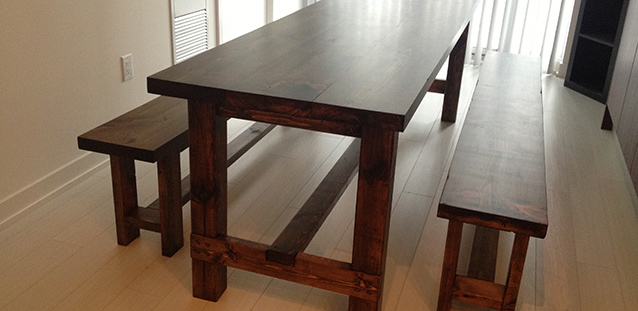
Farmhouse Table

Farmhouse Table

Farmhouse Bench

It fits perfectly in their narrow condo, and the benches hide away completely when not in use, making this table able to function as stand in kitchen prep surface.

Farmhous Table

The deep stain color works great with their white walls and light floors.

The table also does a mean job of holding a glass of wine or two (we had to test the table out…come on!)

wineinsta

SPECS & PLANS:
The table is loosely based on the Ana White farmhouse table plans. (We changed size, removed the breadboard ends, and used dowels instead of screws for the table legs. ) For in depth instructions on how to assemble the table check out her plans here.

Farmhouse Table
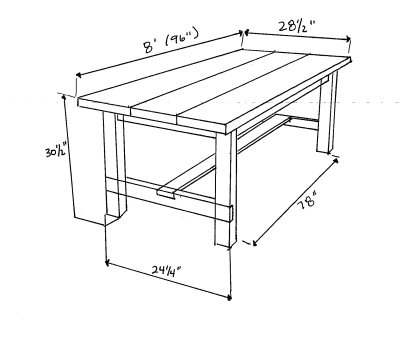
tableplan


Lumber Buy List:

5 – 2×4 @ 8′
3 – 2×10 @ 8′ (we used kiln dried pine from Downtown Lumber for the table top, it was worth the extra expense! If you cant find kiln dried pine, purchase spruce 2×12’s from your local hardware store, and rip down to 9 1/2″ wide removing the beveled edges while you’re at it (they will be huge crumb catchers if you leave them)
1 – 4×4 @ 10′ (if you cant find 4×4’s in untreated spruce or pine, use cedar)

Cut list:

4 – 4×4 @ 29″ (legs)
2 – 2×4 @ 78″ (long aprons)
2 – 2×4 @ 17 1/4″ (short aprons)
1 – 2×4 @ 85″ (stretcher)
2 – 2×4 @ 24 1/4″ (stretcher supports)
3 – 2×10 @ 96″ (table top pieces)

Instructions:

Cut all lumber to length.

With Kreg Jig set to 1 1/2″ material, drill one pocket hole every 8″ or so on one side of two of the table top pieces (the outside tabletop boards). Then attach the outside table top pieces to the center table top board with wood glue and 2 1/2″ pocket hole screws. (see our post on building the table top here.)

Drill Kreg Pocket holes on top and sides of all apron pieces. Make 2 holes on the ends, and a hole about every 8″ on the tops.

Notch out legs for the stretcher supports. Make notches 3 1/2″ high by 1 1/2″ deep positioned 6″ up from the bottom of the leg, and 19 1/2″ down from the top of the leg.

Notch out stretcher supports. Make one notch in the center of each stretcher support. Make notch 3 1/2″ wide by 1 1/2″ deep.

Assemble legs by attaching short aprons to legs (inset by 3/4″) then set stretcher support into leg notches, and attach with screws or dowels (see how we did the dowels here).

Attach long aprons to legs, with pocket screws.

Flip tabletop upside down, center legs upside down on the table bottom, and attach legs to table top with pocket hole screws.

Attach stretcher to stretcher supports with screws or dowel.

Sand, stain & finish as desired.

Farmhouse Bench

(for TWO benches, halve the amounts if you’re only making one)
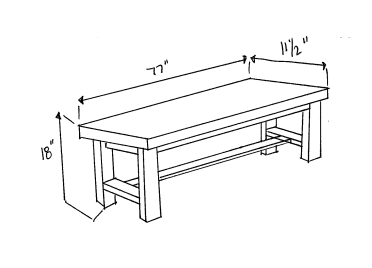
benchplan


Lumber Buy List:

7 – 2×4 @ 8′
2 – 2×12 @ 8′ (7′ if possible)

Cut List:

8 – 2×4 @ 16 3/4″ (legs)
2 – 2×4* @ 61″ (aprons) *= we ripped a 2×4 down to 2″ wide. You can also buy 2×3’s instead of 2×4’s
2 – 2×4* @ 6″ (short aprons) **= we ripped a 2×4 down to 2″ wide. You can also buy 2×3’s instead of 2×4’s
2 – 2×4 @ 61″ (stretchers)
4 – 2×4 @ 6″ (stretcher supports)
2 – 2×12 @ 77″ (bench tops)

Instructions:

Cut all lumber to size.

Drill pocket holes on apron pieces (Kreg set for 1 1/2″ thick material). Two holes on each end, and about every 8″ on the top. Drill two pocket holes on top of small aprons. Drill two pocket holes on each end of stretcher supports. Drill two pocket holes on each end of stretchers.

Attach stretcher supports to legs 3 1/2″ up from the bottom with 2 1/2″ pocket hole screws. Attach long aprons to legs with pocket hole screws.

Flip bench top upside down, and attach legs (also upside down) to bench using the apron pocket holes and pocket screws. Attach side aprons to bench top. Attach stretcher to stretcher supports.

Repeat for second bench.

Sand, stain and finish as desired.


SOURCE LIST: (one table + two benches)

Materials:

Lumber (see above)
Minwax oil based stain in Jacobean
Minwax wood conditioner
Polyurethane – Minwax Oil Modified in Satin
200 2 1/2″ Kreg pocket hole screws (Lee Valley)
Wood Glue
Foam brushes (Dollarama)
Rags
Sandpaper (150, 220 and 320)
Kreg Screws – Lee Valley & Home Depot

Tools Used:
Miter saw
Table saw *not necessary, you can get material ripped to size at the lumber yard
Circular saw
Square
Kreg jig
Drill
Palm & orbital sanders
Measuring Tape

Difficulty Level (on a scale of 1-5):

three out of five

Total Cost: $400 (Lumber $320, Screws $20, Finishing materials $60)
Time frame: Two weekends (one to build, one to finish)
Fancy Pants Drawer Liners

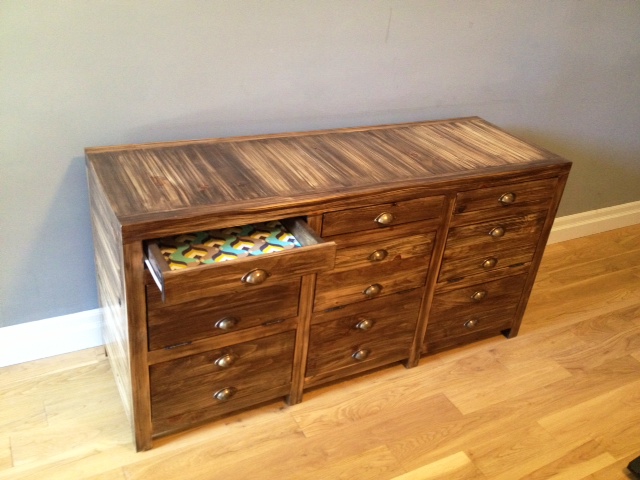
The bottoms of the drawers for our media cabinet were a bit, well…not living up to their potential. We used hardboard & chipboard as the drawer bottoms and compared to the stained wood on the rest of the piece, they look a bit shabby and out of place.

drawer bottom
The poor shabby little drawer bottom, covered in stain and looking sad.

I knew all along that my anal retentive personality wouldn’t let the drawer bottoms live in such a state. Not only were they not up to par, but they were an excuse to add a bit of fun to an unexpected place. I love adding colour/drama where you least expect it (like my purple wallpapered closet doors.)
For the drawer bottoms, I narrowed it down to either paint or paper. While paint could be fun in a nice bright colour, I decided on paper in the end to add a bit of a graphic punch.

There is a newly opened store in my neighbourhood called TOWN that I knew would have some lovely papers. (They also have the best selection in cute cards!). The selection at TOWN did not disappoint, and we spent several minutes trying to decide on just one pattern (would have bought them all!) We took our sheets of heavy weight wrapping paper home, cut out squares to fit the drawer bottoms, and got to gluing. I used Elmer’s extra strong spray adhesive (the same spray adhesive I use to attach foam for upholstery projects). A few quick sprays of adhesive, and careful application onto the drawer bottom, and we had a much nicer looking drawer.

drawer
Drawer bottom lined with paper
Media Cabinet Drawer
A little pop of sunshine every time you open one of the drawers
Drawer
Ahhh, isn’t that much nicer?

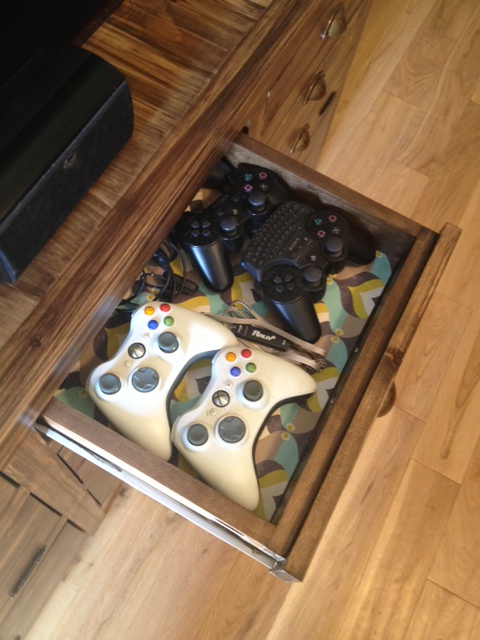
I bet you’re wondering how much use we get out of those skinny little drawers. LOTS, they hold remotes, video game controllers and all sorts of little things that you don’t want out all the time, but would get lost in the big drawers. I am LOVING not having the XBOX and PlayStation controllers hanging out on my end table!

Controllers
Yay! Controllers and USB keys are happily hidden away.

The drawers are lined, now I can sleep again. (Isn’t everyone kept up at night by the thought of an unsightly drawer bottom. Wait, that’s not normal?)

SOURCE LIST:

Materials:

Wrapping Paper (3 sheets) – TOWN the Store
Elmer’s Spray Adhesive

Tools Used:

Ruler
Pencil
Scissors

Difficulty Level (on a scale of 1-5):

one out of five

Total Cost: $16