Almost two years ago, I started adding lead strips to the storefront transom windows, to create a faux leaded glass effect. I ran out of lead when I was halfway through, leaving one window unfinished. El Granto even purchased me a new roll of lead last summer, but I had yet to get around to finishing the project. I often have trouble finishing projects. Once the project goes from fun to mundane, pulling the trigger on the last 10% is tough. I often find myself running onto the next project with full steam, and forgetting the last finishing bits.
Well this past weekend was finishing up projects & home maintenance weekend. From weed pulling and grass cutting to touch up painting, and yes that’s right, finishing the lead windows.
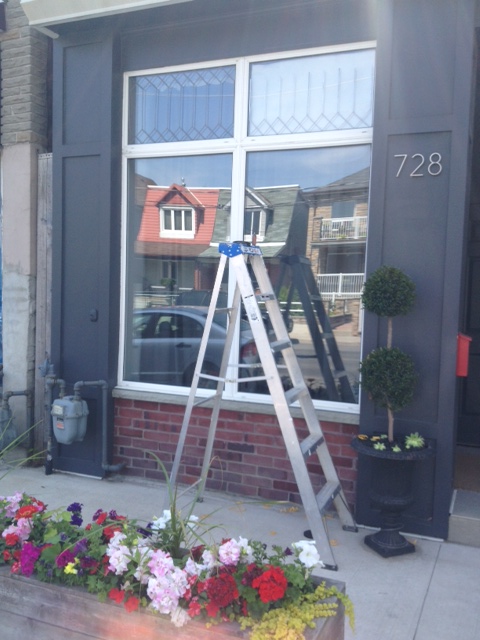
Armed with soap and water, windex and a broom, I headed out to the front of the Storefront and gave everything a thorough cleaning. The windows were washed, porch swept, doors and trim cleaned, and I even managed to clean out the leaf littered garbage room.
While up on the ladder washing the windows, I opted to get out my leaded glass drawing, a roll of Pebeo Vitrail Stained Glass Effect Self Adhesive Lead Strip, and finish the damn leaded glass windows. I taped my template on the inside of the window, and started measuring and cutting strips to length. I applied the lead strips starting with the long tall vertical pieces, then worked my way out from the middle adding the shorter criss-cross strips.
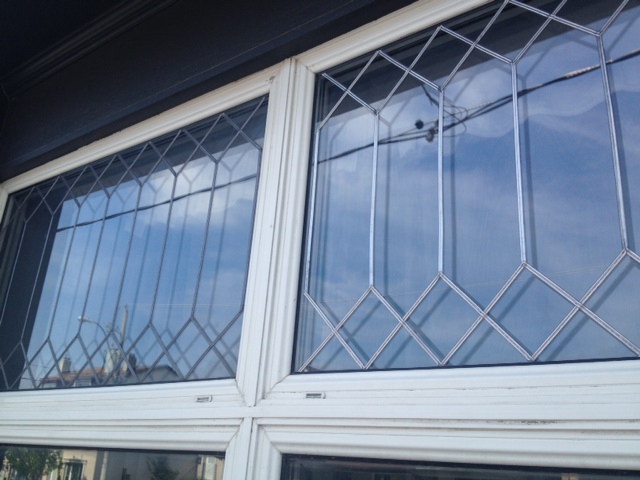
In progress: The vertical lead strips and the bottom criss-cross pattern applied to the right transom window.
The strips are not very adhesive, and don’t really stay on the glass until you burnish them with the provided tool. This project would be a lot easier on the ground. Being up on a 8′ ladder applying the lead to the 12′ tall windows was definitely the hardest part.
The old lead on the left, and the newly applied lead on the right. You can see how the new lead is a bright shiny silver, whereas the old lead has gathered a lovely patina.
All told it took me about an hour and a half to complete the project, and now I can finally knock it off my to-do list!
Leaded Glass Complete!
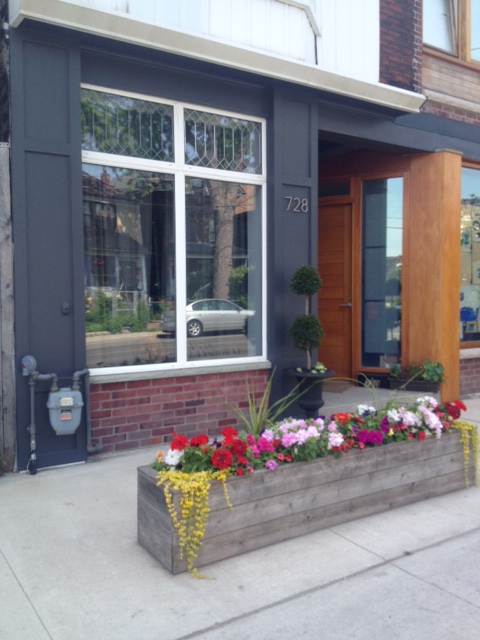
In fact, the exterior of the Storefront now complete!
BEFORE:
Storefront Before
Here is what we have done so far:
Built an 8’x2′ cedar planter box to soften the concrete front “lawn”.
Completed the leaded glass windows in a regent pattern.
AFTER:
Storefront Complete for Now
The only remaining tasks for the Storefront exterior are wish list items, that will likely never get done. We would love to remove the vinyl siding on the second floor, repoint and clean the brick, and have the window & roof overhang re-flashed. Would also love to install a gooseneck light above the house number. This would involve drilling through brick, cutting through spray foam, running new electrical, then patching everything up. So until pigs fly, I hereby pronounce the exterior completed!
P.S. I have had several comments and emails about the lead strips. You can purchase them online from Amazon, or from local art stores. We found ours at Curry’s art store on Queen West in Toronto. The price varies, but is usually about $25-30 per roll. We need two rolls to complete our two windows. Each window is just shy of 24″x48″.
The lead has been exposed to the elements for two years, and has not fallen off the window, or ruined the glass in any way. The only change to the lead was it’s patina. It has not run, rusted, or in anyway discolored the glass.
Most home projects are practical. Fixing something that is broken. Improving something that will make your daily life better. Increasing property value etc.
Then there are projects that are none of the above.
They are the impractical high heels of the home world. Did you need them? No. Are you going to wear them to walk the dog, or get the groceries? Not a chance. But are they absolutely gorgeous, sexy as hell, and so very impractical that they were bought solely out of love? Absolutely.
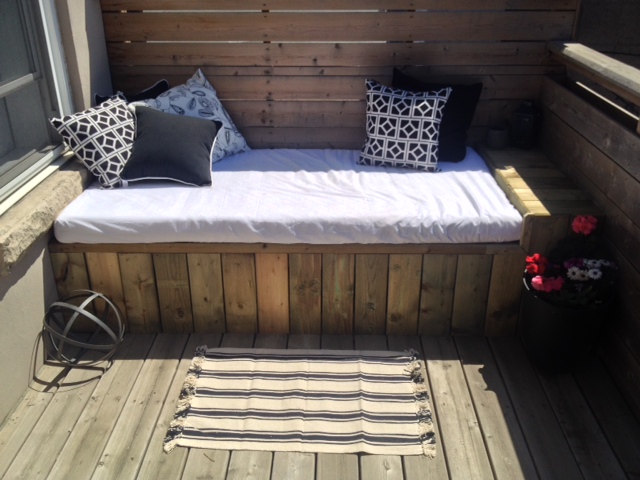
Our outdoor daybed project is the 6″ hot pink stilettos of home improvement.
…and I LOVE IT.
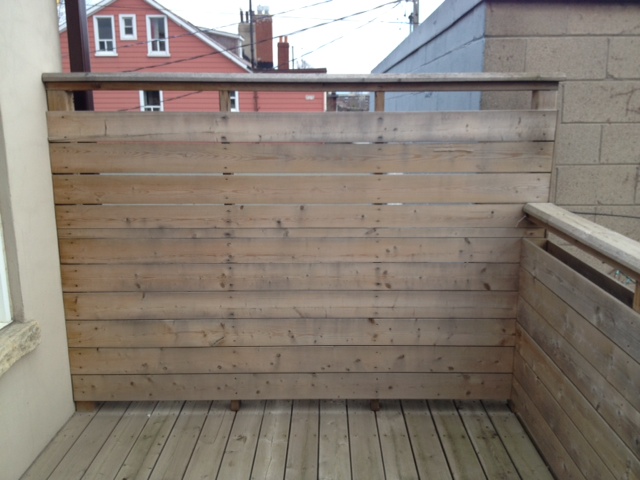
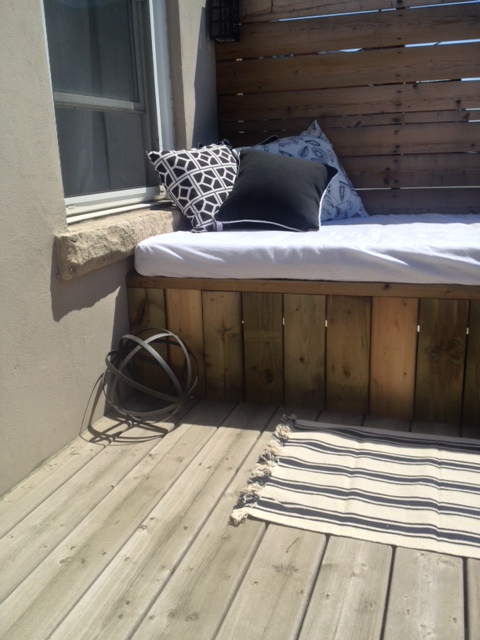
Before:
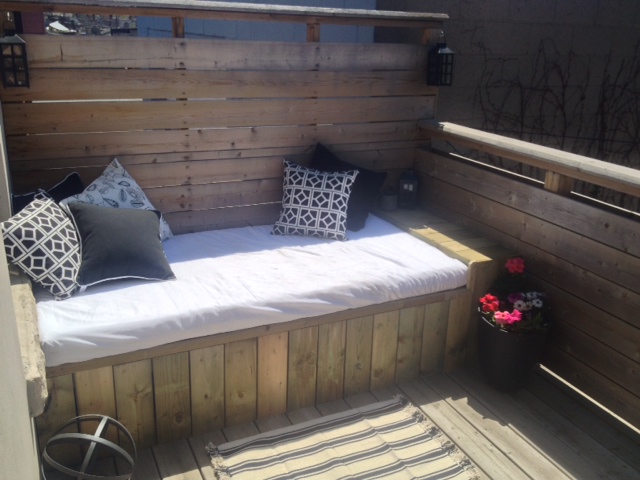
AFTER:
Here is how we did it:
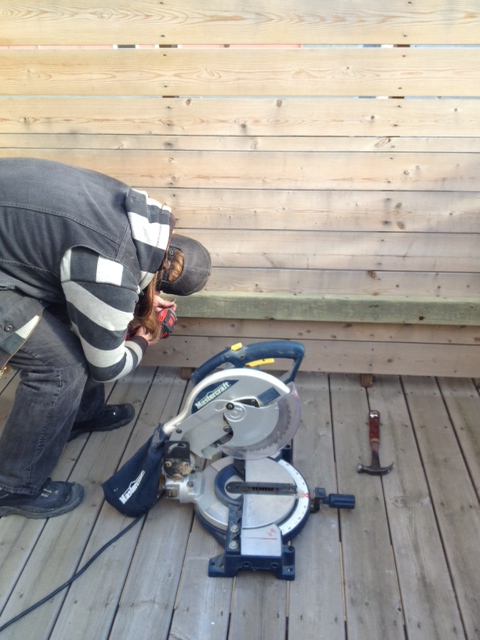
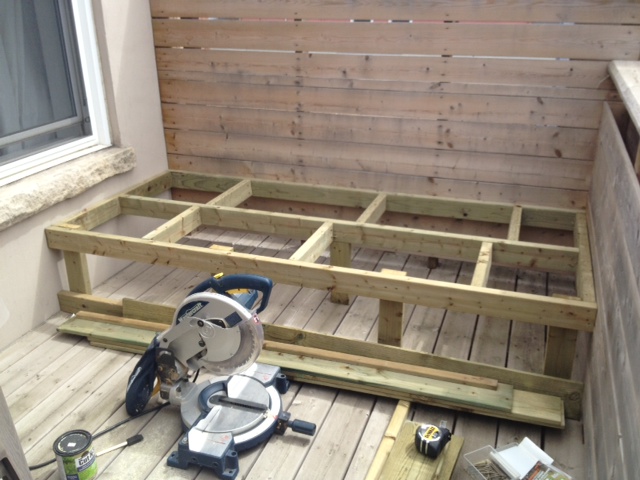
The structure for the daybed was built using pressure treated 2×4’s. The back of the daybed was securely attached to the deck support posts, and the rest of the frame built as a box around it. (similar to how you would build a deck)
It was all assembled with deck screws. It was built to fit a twin size mattress, with a bit of room to spare at one end for a small built-in table.
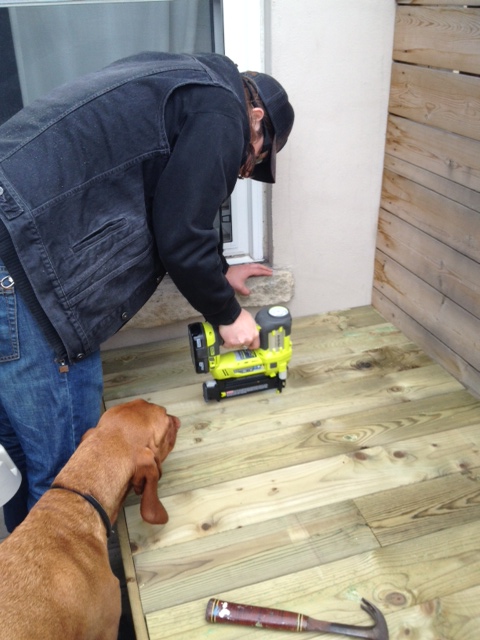
After the frame was built, it was clad with 1×6 fence board. We broke out our new Ryobi cordless brad nailer, and it made quick work of the job.
Even Odin likes new tools
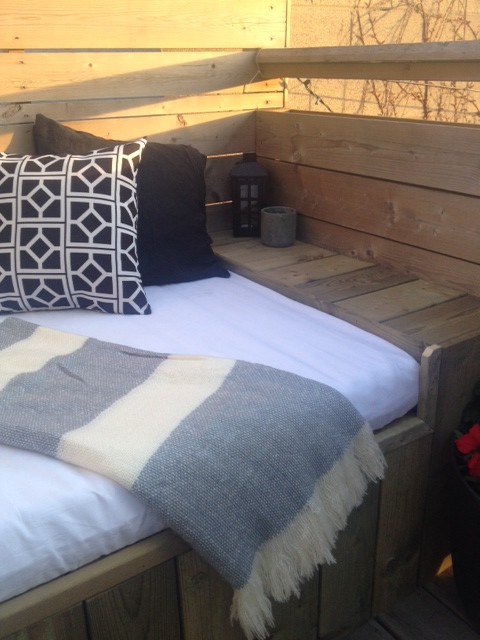
We trimmed the edge where the skirt met the seat of the daybed with a 1×2. This way you would not see any unfinished boards and the edge of the daybed would not be rough against your legs. (Here you an see the trim in progress & Odin helping of course.)
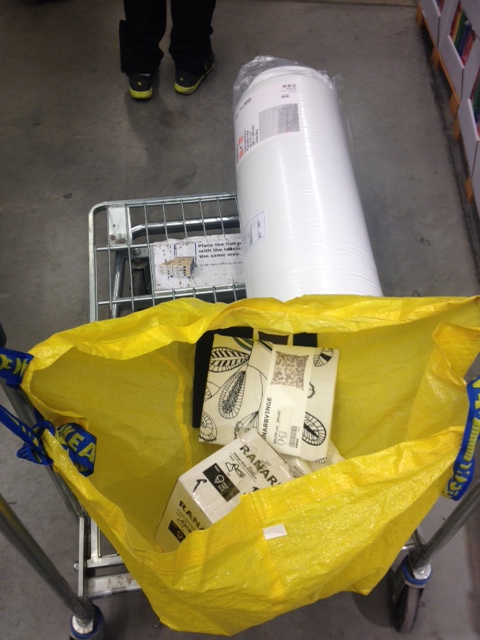
I had lots of trouble finding an economical cushion. So in the end, I headed to Ikea and picked up a twin size 4″ thick foam mattress.
I would love to have a custom cover made for it, but until then an inexpensive twin size fitted sheet works perfectly.
All the linens come in each night, and in the winter, the Ikea mattress can be rolled up for easy storage.
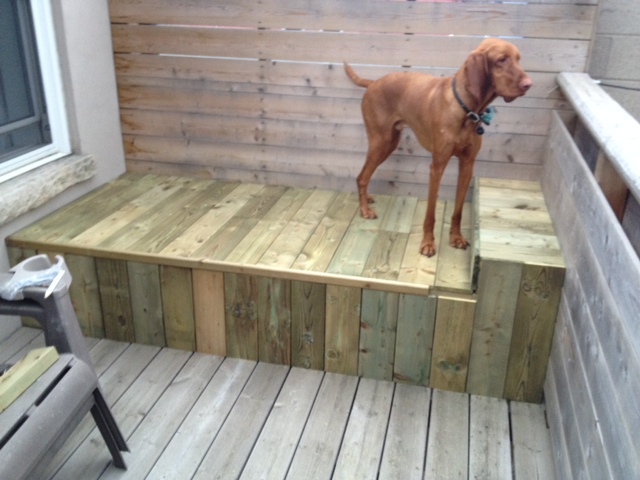
It is incredibly comfortable. Great for lounging or having a nap. It’s my new favorite spot for reading my book with a cold beverage in hand. We are going to get a lot of use out of the daybed this summer!
Do you have an outdoor daybed? Would you try your hand at building one?
SOURCE LIST:
Materialst:
8 – 2×4 8′ pressure treated c/o Home Depot Canada
14 – 1×6 6′ pressure treated fence boards c/o Home Depot Canada
1 – 2×2 8′ pressure treated (cut in half to make a 1×2 as a trim piece) c/o Home Depot Canada
Deck screws
Galvanized brad nails (1 1/2″)Twin size foam mattress
Twin size fitted sheet
Decorative pillows
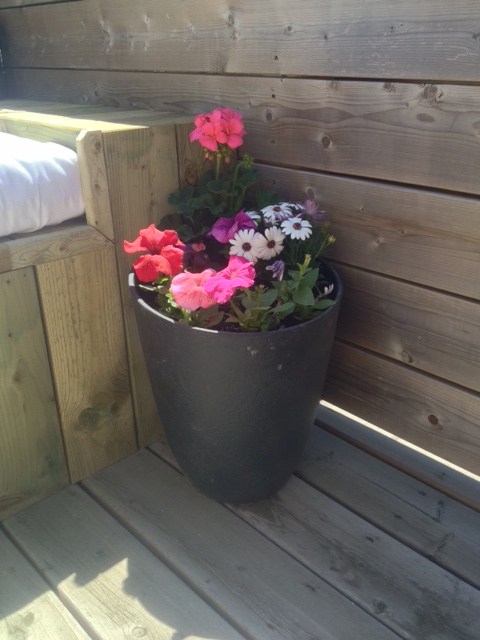
[Plant Pot – Home Depot, Candle holders – Dollarama, Concrete Candle – Loblaws, Mattress – Ikea, Sheet – HomeSense, Pillows – Ikea & HomeSense, Blanket – West Elm]
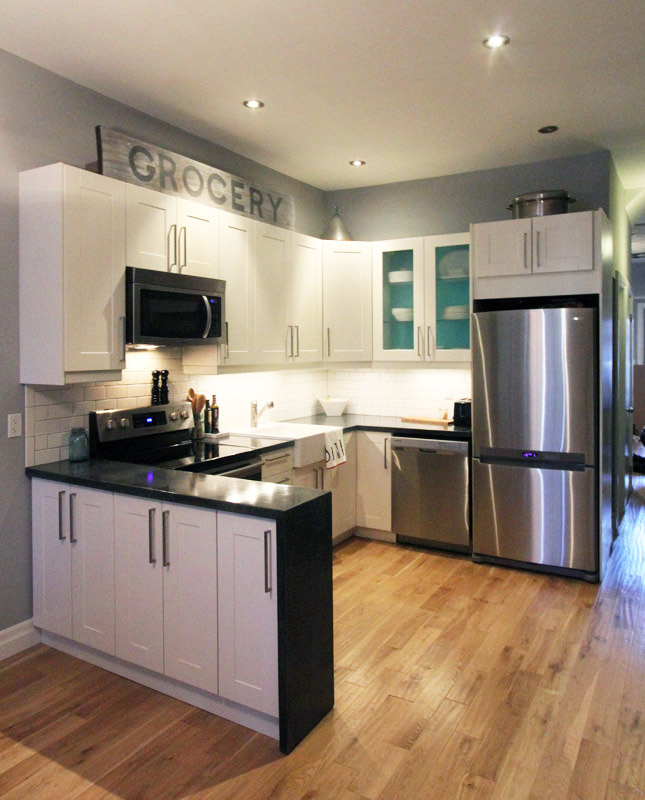
Thanks guys for sticking with us through five yes FIVE posts on concrete countertops. The thing is, this project was BIG. Even with five posts I have probably bored you all to death with my insistence on telling you exactly how we did everything. The thing is, I want you guys to make your own counters too! You CAN do it! Real concrete, solid surface, with professional looking results. So thanks for sticking with me, cause I think it was totally worth it. Wanna see what all our hard work actually looks like?
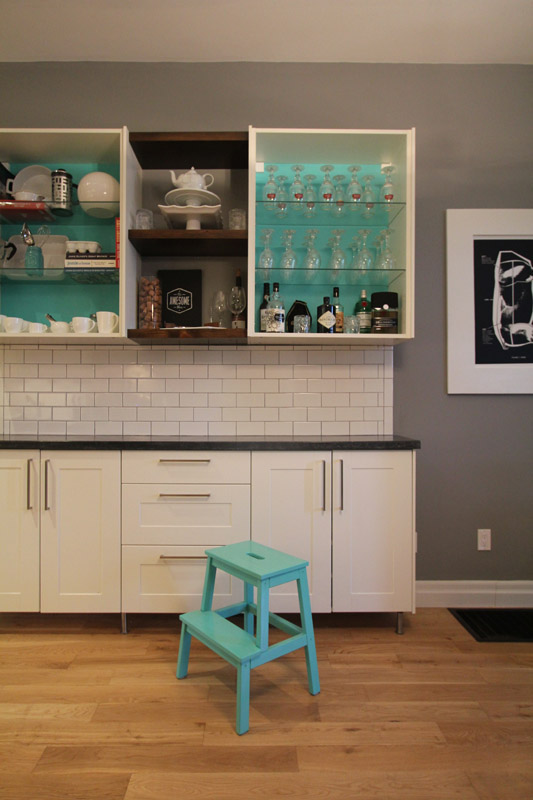
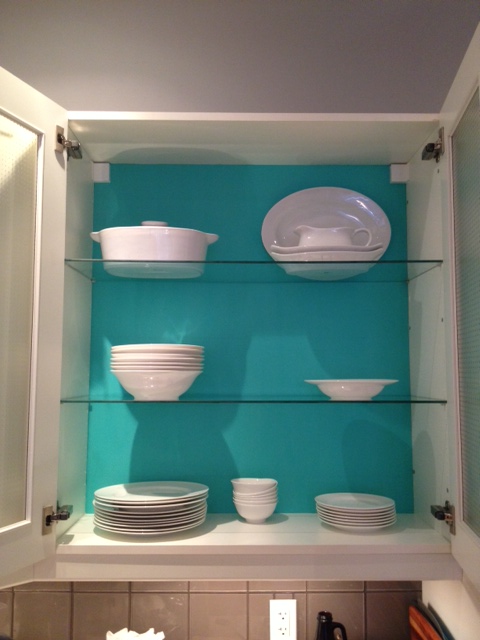
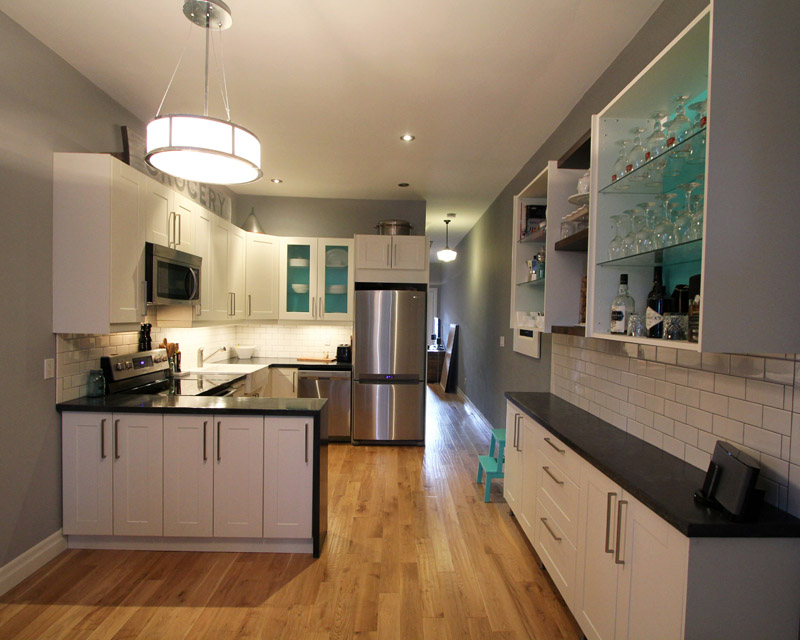
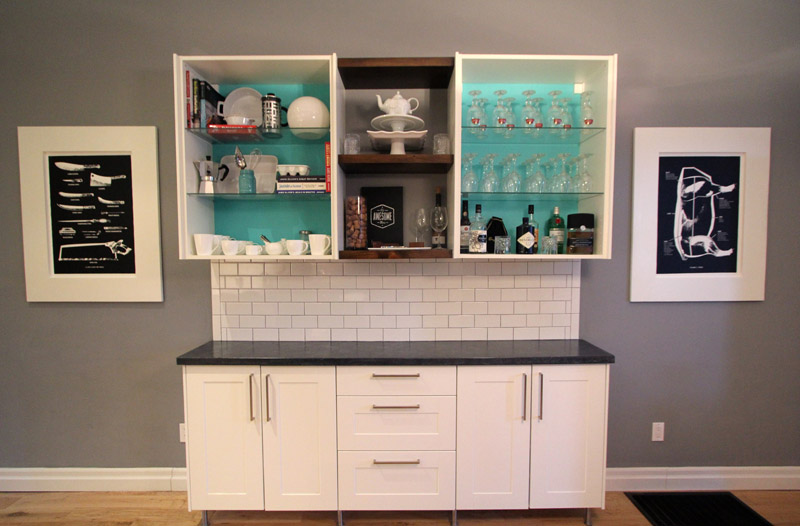
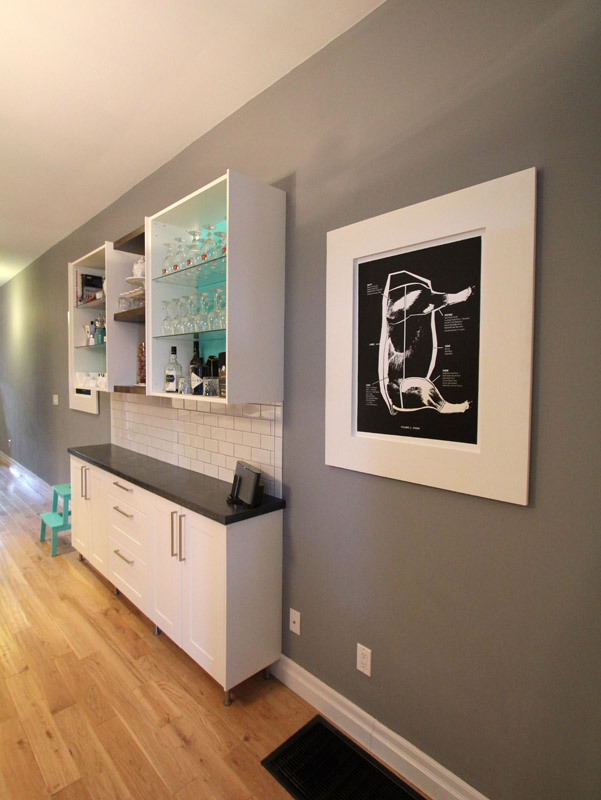
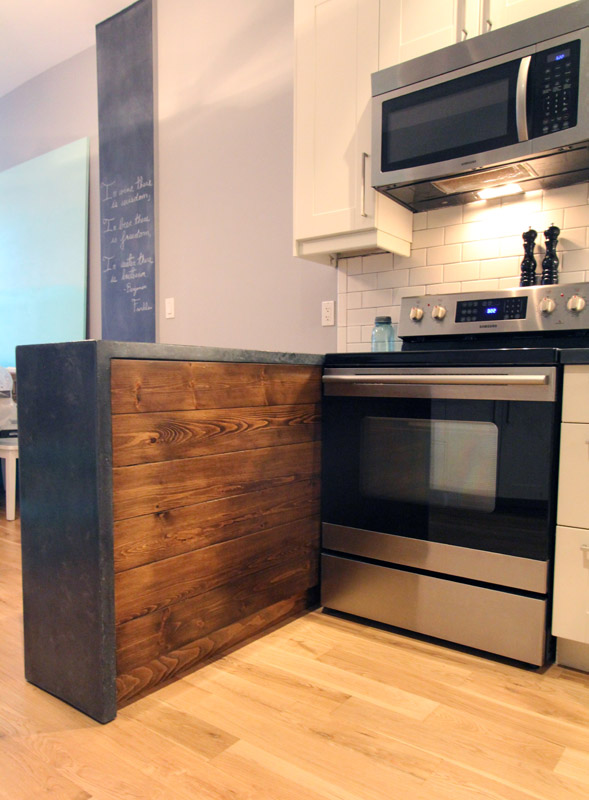
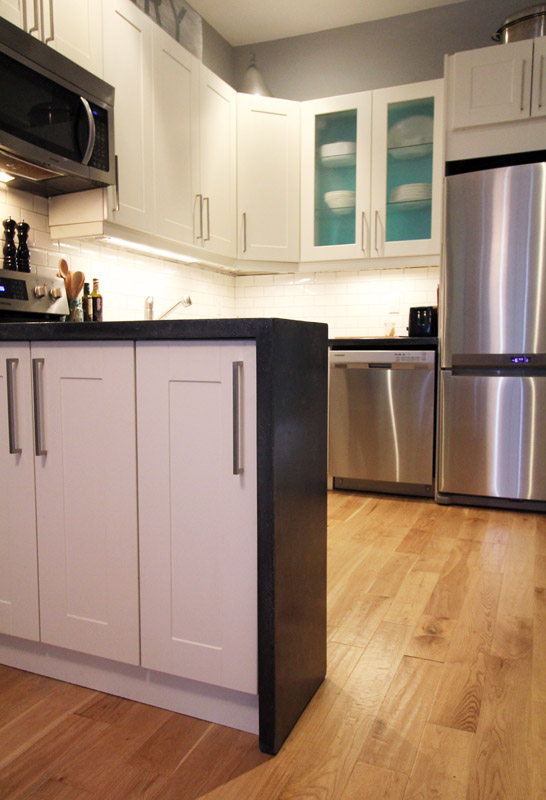
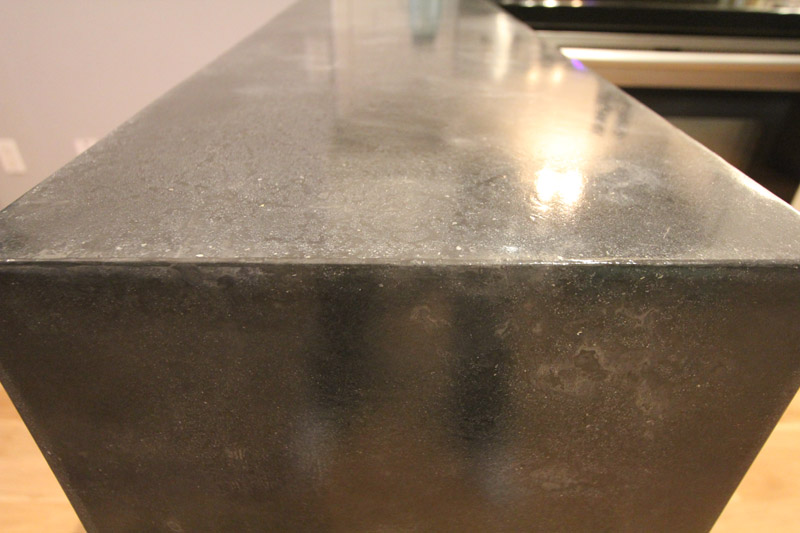
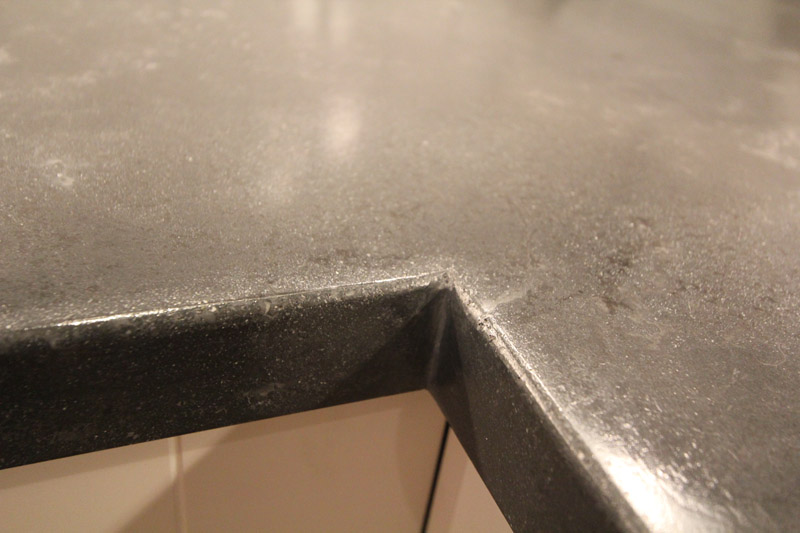
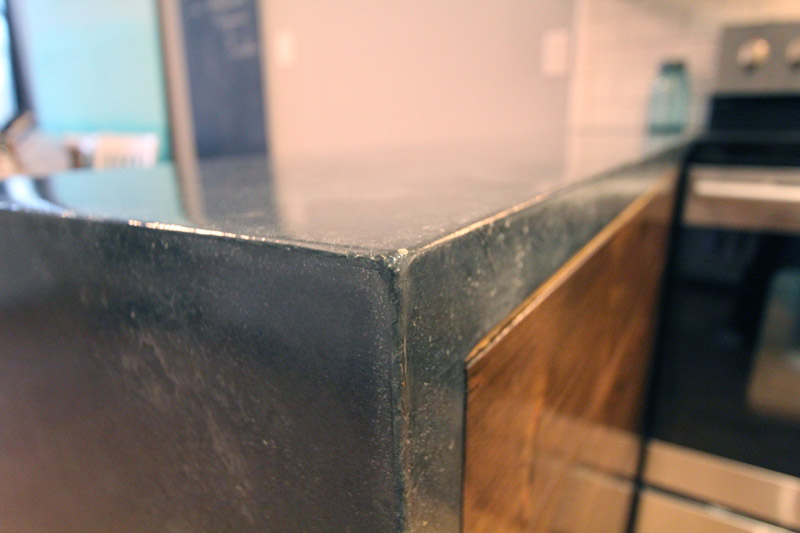
The counters were done in four pieces, including the single piece waterfall, which is by far my favorite piece! The color we used is “coal” but the color of the concrete can look very different at different times of the day. From a medium gray when the light is hitting it to a deep charcoal in the shadows. The color has so much texture and movement. I just love it! We paired the white cabinets with a pop of bright teal, and black and white accents.
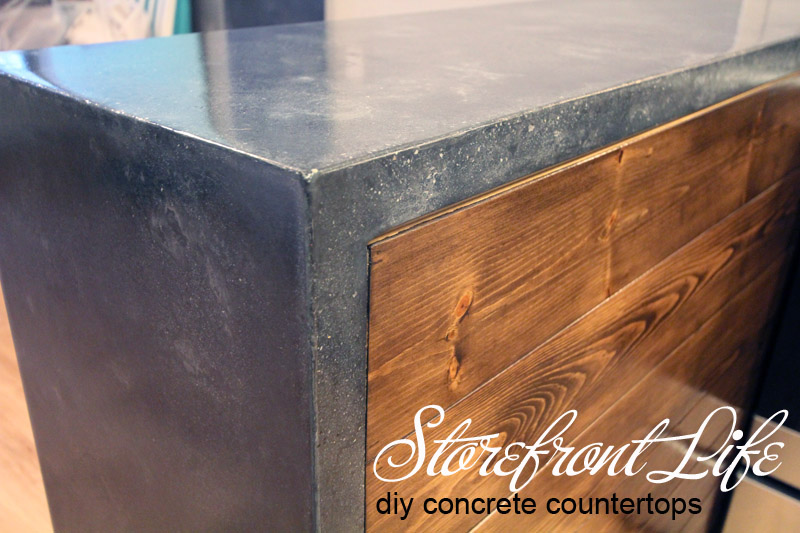
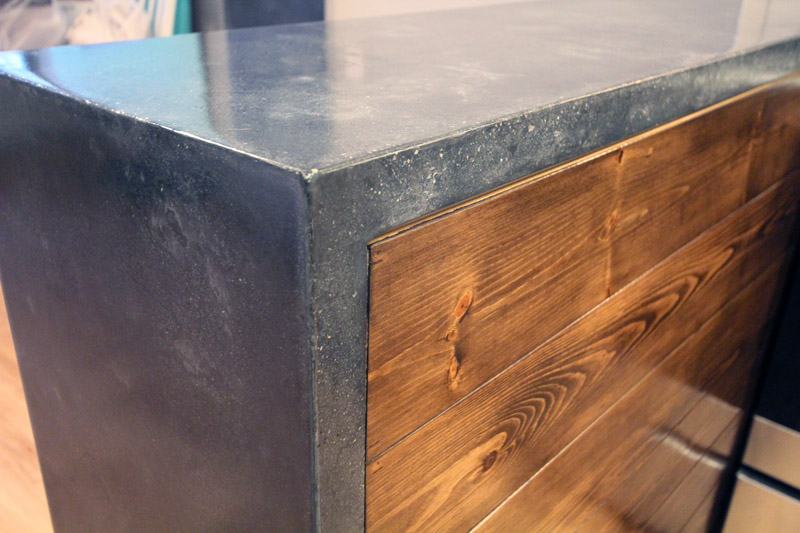
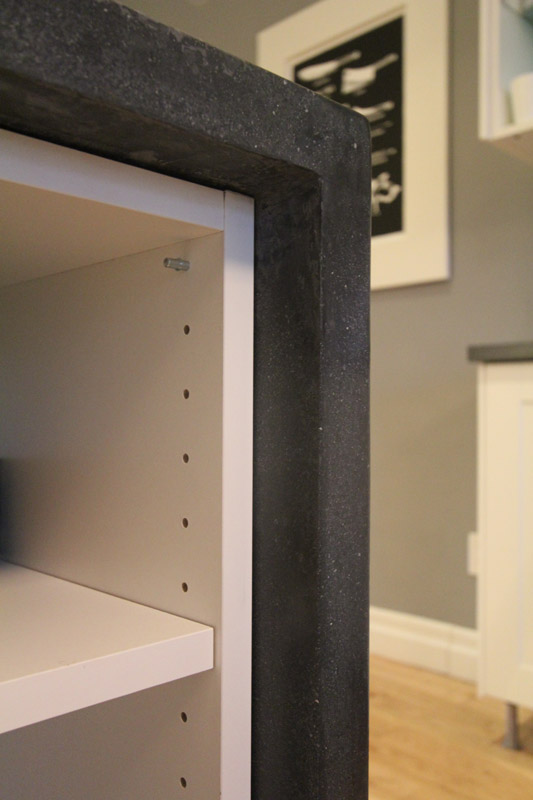
For the back of the peninsula we opted to add a pop of wood. The kitchen already had a lot of white, so adding wood really ties it into the dining room with its wood table & bench. It also matches the floating shelves on the coffee bar.
The waterfall is just sexy! I love how seamless it is. I would never have dreamed that we could do it in one piece. It is simply a work of art.
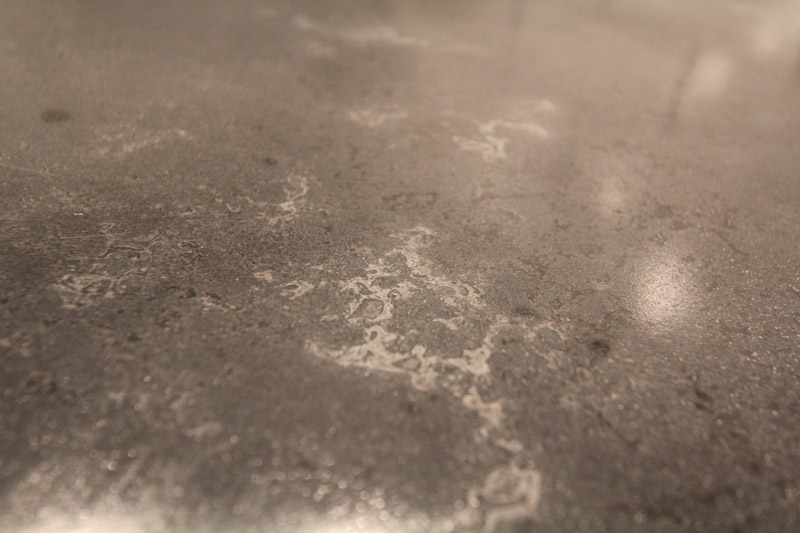
Speaking of the color varying. Here is one of my favorite spots with a lot of texture. This was produced by adding a slightly lighter color slurry for the middle slurry coat. I heart.
The front of the peninsula has cupboards, and when you open them you can see more of the exposed waterfall.
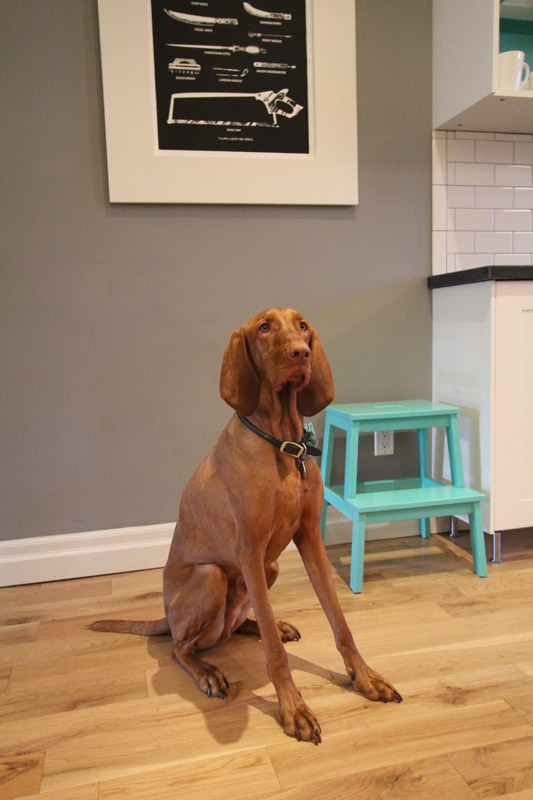
Sorry, had to throw one of Odin in. I can’t have my camera out and not take a photo (or ten) of him.
Do you remember when we hid a 2013 Loonie? Here’s the Queen peeking out from under the coffee bar counter.
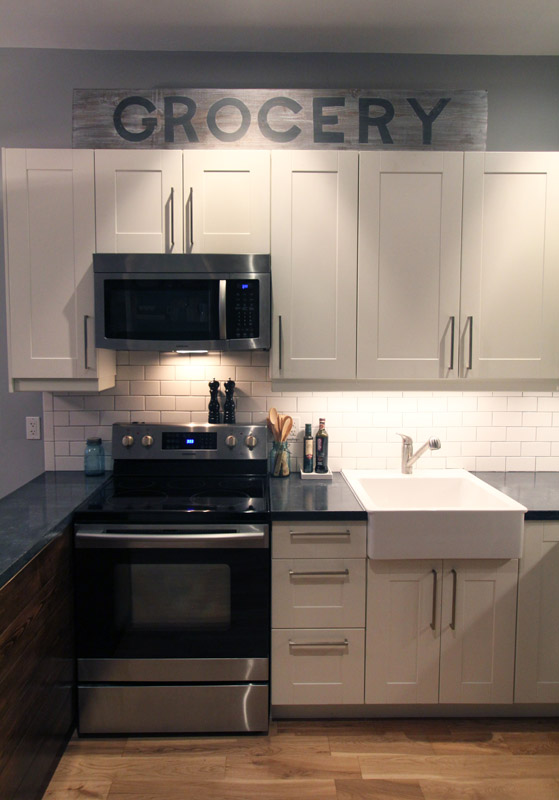
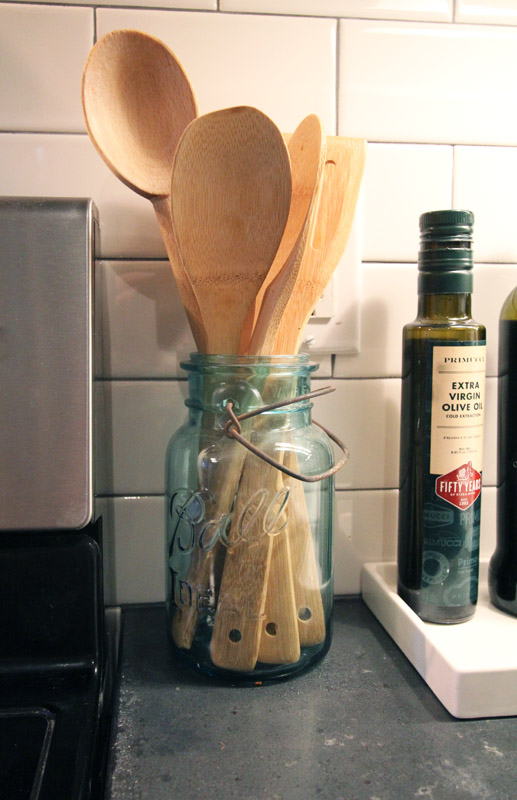
Now for a few of the other kitchen details. El Granto picked me up a couple vintage Bell jars one day at The Junction Flea. I love this one which holds my wooden spoons beside the stove. We also use a small ceramic tray to keep oil and vinegar off the counter (it would stain the tops).
I am still very happy with the wood shelves we added to the coffee bar. Now with the wood clad peninsula, it really pulls the coffee bar into the kitchen.
The inside counter was one piece I worried about a lot, but in the end its imperfectly perfect.
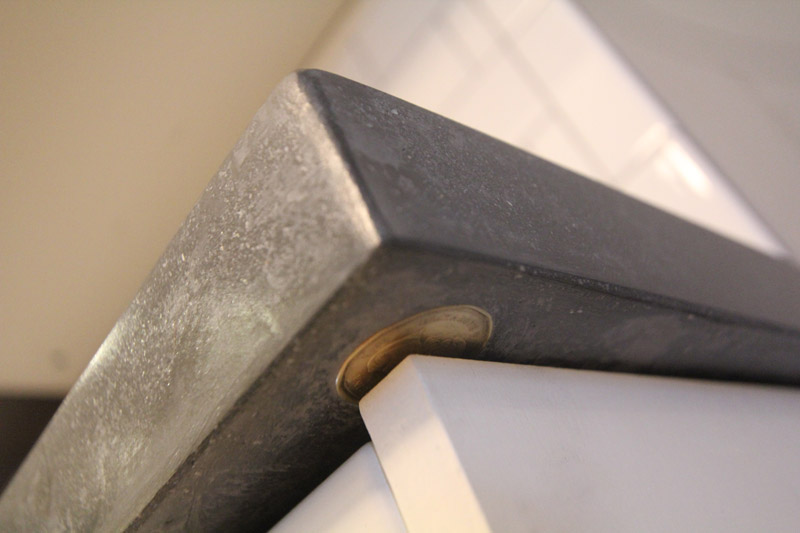
Okay, one more pic of the waterfall! We slightly rounded the counter edges. Littles and dogs wont poke their eyes out, and it makes me swear less when I bump into the counters.
So what do you think?! We’re super happy with them. They turned out better than we ever could have imagined!
I will be back later in the week with a few more kitchen items. Such as the source list, a few more project how to’s, as well as how we installed and sealed the counters. But for now, I am going to go and makeout with my counters. Wha? Uh. I mean stare at them lovingly, and maybe touch them a little. So smooth… and sexy…
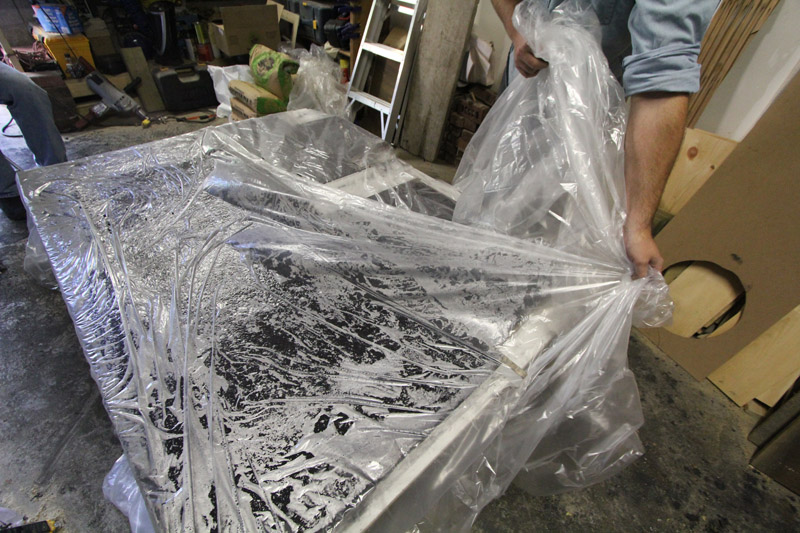
We’re getting so close in finishing our concrete countertop project! I am so very very excited to show you the reveal, (next week!) but before the reveal we still have some work to do! When we left off we had “poured” the concrete into our forms, and left it covered, moist and warm.
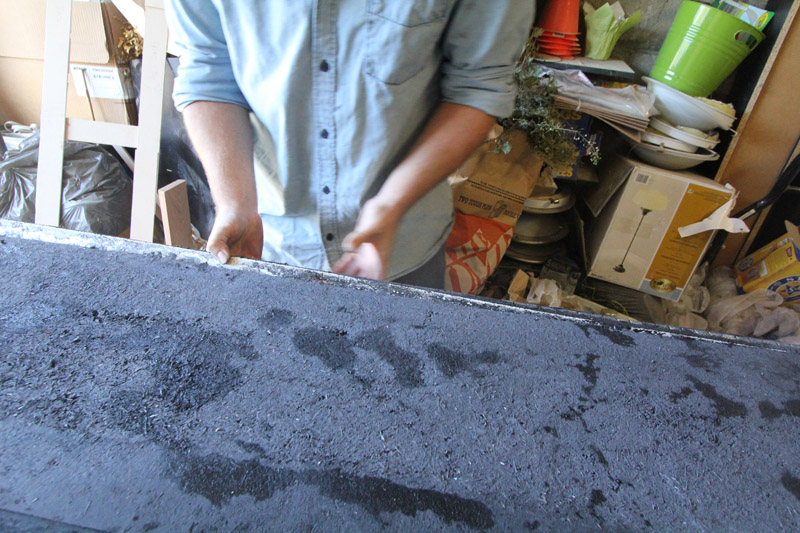
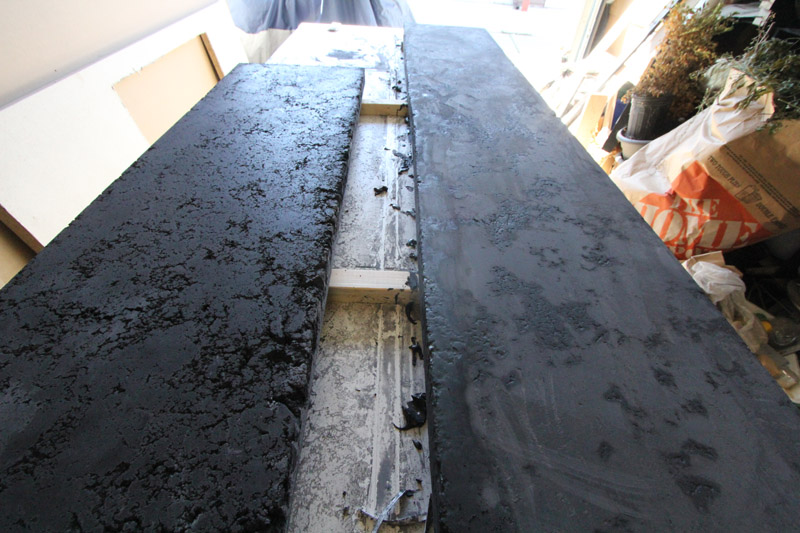
Now it’s time to unmold the forms and see what we’re working with! We removed the blankets and plastic to reveal a nice moist concrete.
Removing Plastic
We then got started pulling away the forms. Using gentle pressure, and ensuring we were not prying against the (still pretty soft) concrete, we removed the form sides.
Removing the form sidesEl Granto removing coffee bar form sidesRemoving Waterfall Form
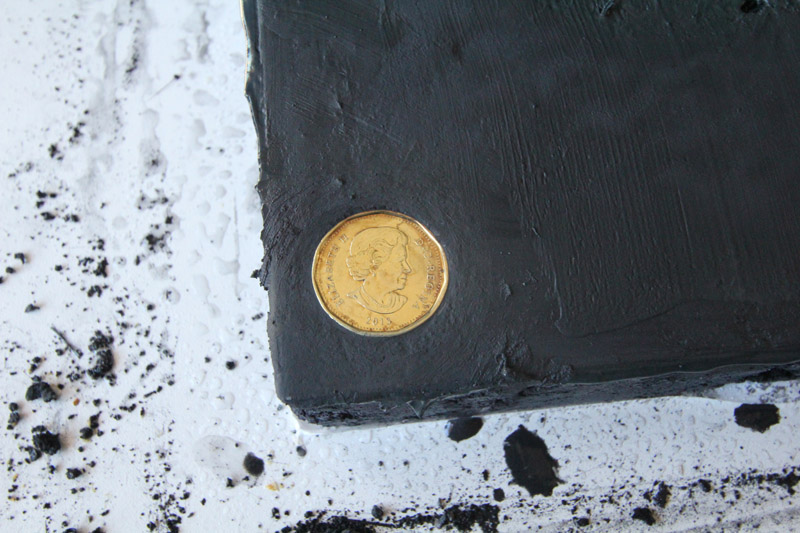
You will note a shiny gold object in the bottom of the coffee bar. We inserted a 2013 loonie into the form under one of the edges. I hope that if someone ever takes the coffee bar apart, or renos the kitchen in the future they will find the coin and know when we built it! It also never hurts to have the queen hanging out in your kitchen. She classes up the joint.
2013 Loonie (for all my Americans; this is our $1 coin)
Before we could flip everything over and see what we were workin’ with (remember we poured our counters upside down) we needed to do a bit of house keeping.
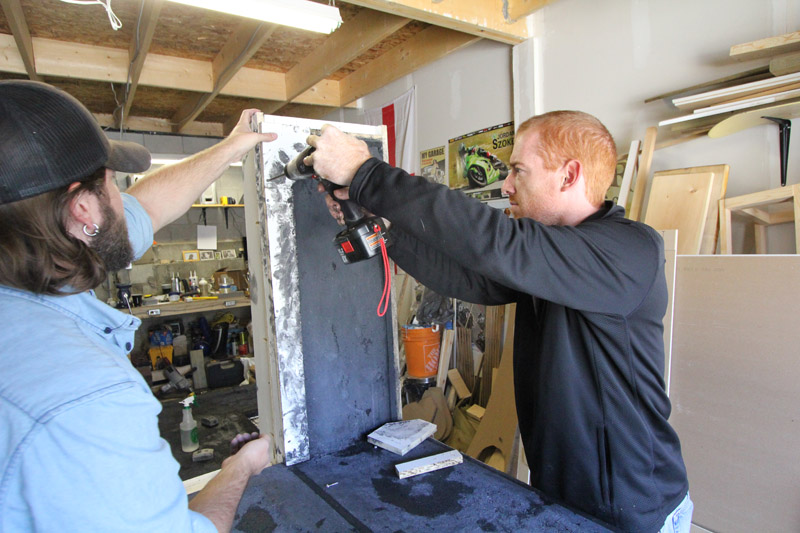
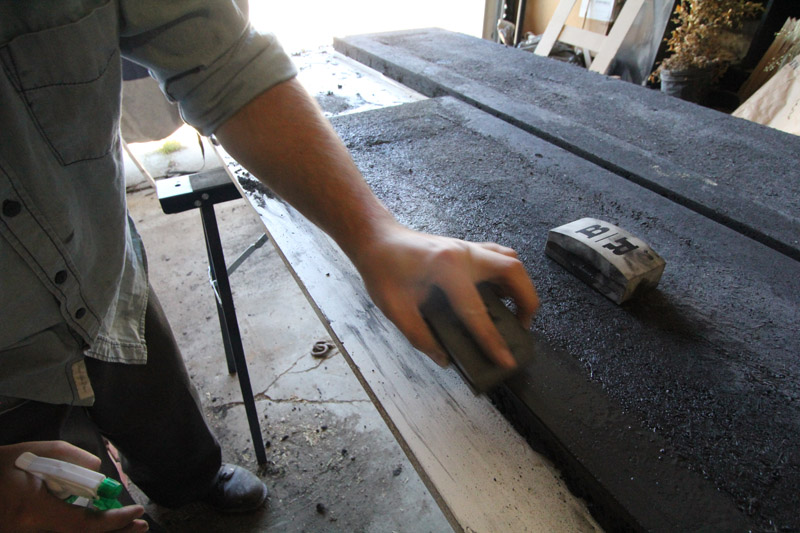
Our concrete mentor Jeremy made a very good point about how we interact with objects. When you go to touch and admire a countertop or a table, what so you do? You kind of grab the edge, placing your thumb on top and four fingers around the edge, touching the underside. If the underside of your table or counter is rough, everybody’s gonna know that you were a lazy sod who skimped on the finishing. Do you want to be the lazy sod? Exactly. So let’s sand the bottom edges of four counters so our friends don’t judge us.
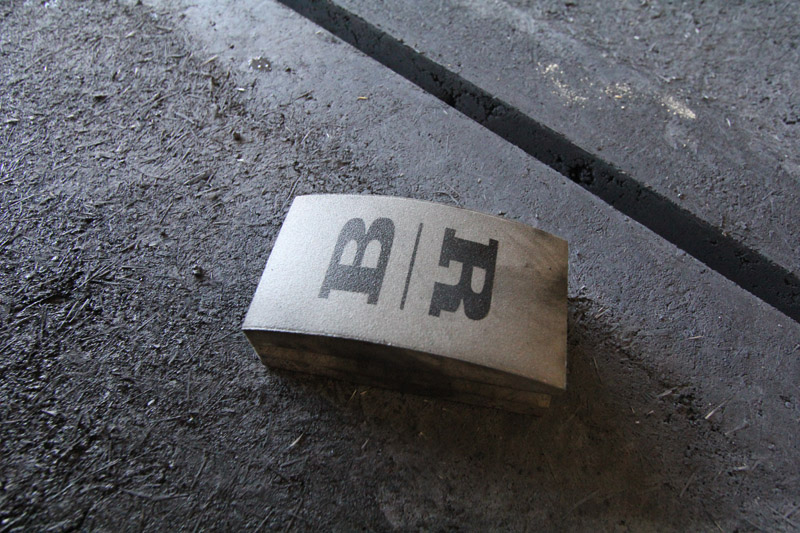
Using buddy Rhodes hand sanding pads, we wet sanded the bottom edges and used a chisel to remove any errant blobs of concrete. A few minutes work, that we will certainly appreciate later!
Buddy Rhodes hand sanding padEl Granto wet sanding the undersides of the countertops
After an excruciating 20 minutes (I want to see my counters!) we were able to flip the countertops over.
El Granto seeing the waterfall counter for the first time
I really love that shot, as it is the first moment El Granto saw our waterfall countertop. I think this is the exact moment he realized how freaking awesome these counters were going to look!
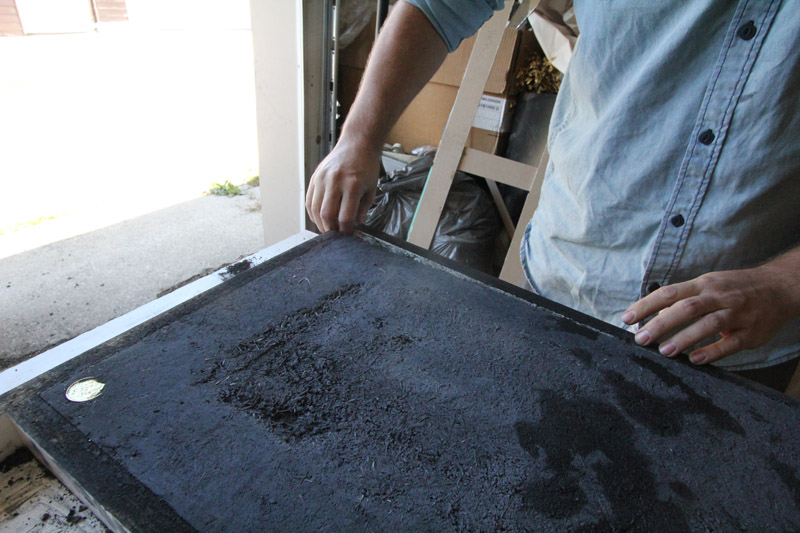
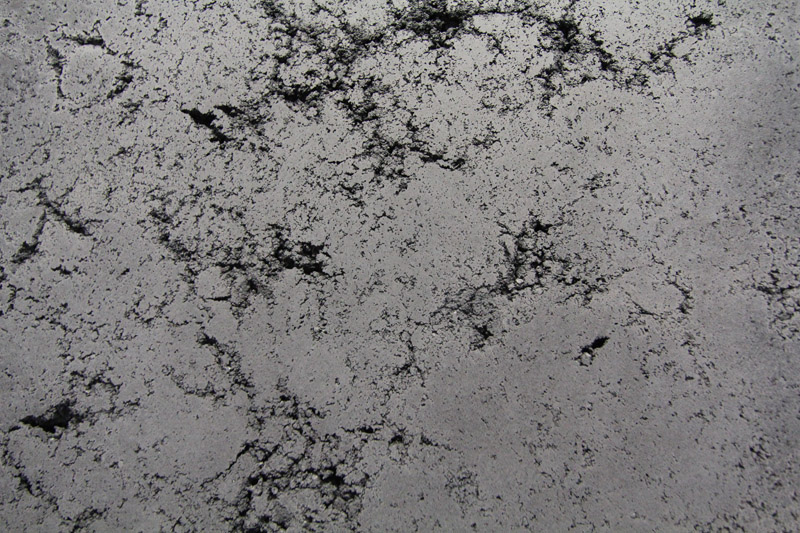
Remember from our last post how we hand packed the concrete in, and purposefully left voids? This is what the result looked like:
Close up of the hand pressed technique right after unmolding
I think it looks amazing (and I will definitely have to do some sort of project soon that looks like that) but obviously for countertops, we need to make them smooth.
To do that, we mix up a slurry of bone paste (really fine concrete) and pigment and push it into the voids. It’s actually a lot like grouting tiles.
You can take this opportunity to add some colour, but in our case we wanted to stick with the same dark grey to keep with an industrial concrete look.
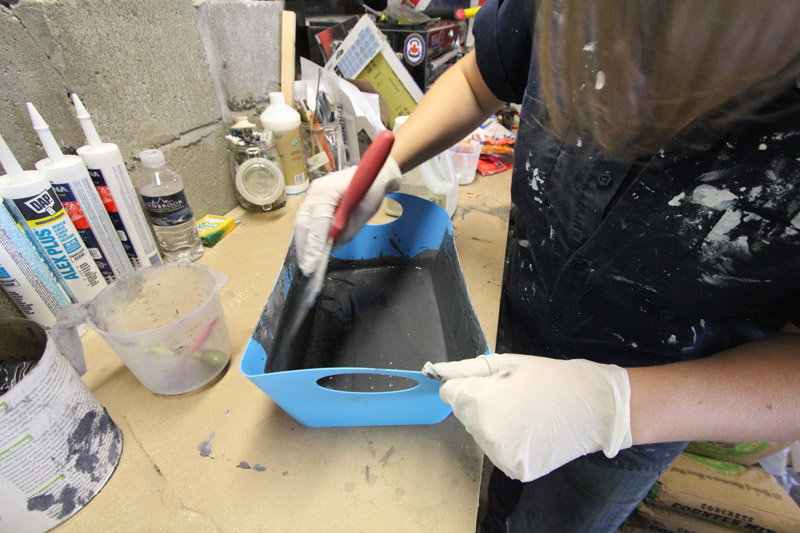
We mixed up a batch of slurry. (Two parts bone paste, one part acrylic additive & your color.)
Using a drywall mud knife & tray mix the slurry very well. Pressing out any clumps of pigment by pushing the knife against the tray. Now you will note that I’m not using a drywall mud tray. That’s because I forgot to buy one, and used some plastic bucket from the dollar store. Get a mud tray! We used a 5″ knife and it worked well.
Mixing up the bone paste slurry
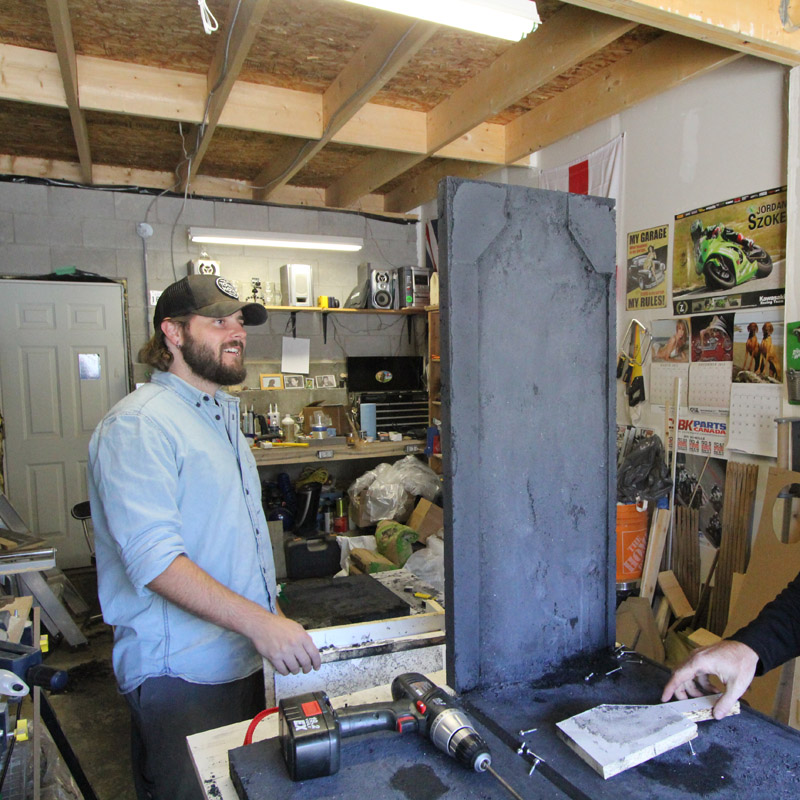
Once your slurry is mixed, start pushing it into the holes in your counter. Using a combination of your putty knife and a grout float. The grout float worked very well and shoving that slurry into the holes. You will need to do three coats of slurry, so don’t try to fill the voids entirely. They will get filled, don’t you worry. Thin coats are better, just give it a pass, scrape off any excess and let it dry.
The piece on the left has not yet been slurried, and the piece on the right has had one coat of slurry
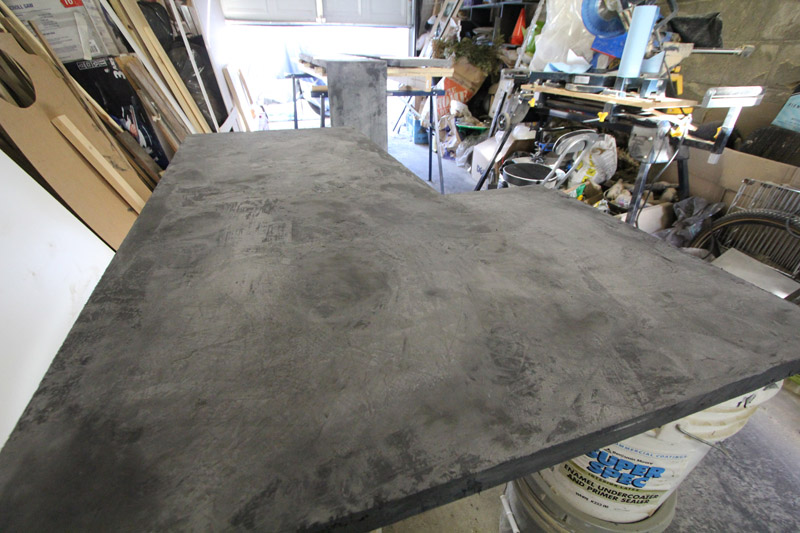
After our first coat was dry, we mixed up a slightly lighter version of our color, and did a second (light) coat with that. Our third coat was back to our original darker color. This will result in a bit of a lighter highlight in our cracks and crevices, giving a lot of texture to the concrete.
Slurried Concrete (is slurried a word?! It is now. BAZINGA!)
After three coats of slurry were applied, we left it to dry overnight (and ate some shawarmas.) Hey, hard work deserves delicious shawarmas, and maybe a samosa or two for good measure.
The next day we set to wet sanding everything. We covered the garage in plastic, donned aprons (and in Jeremy’s case, a drop cloth toga, cause we forgot to get him an apron, oops) and got to work. Ideally you would have a wet sander/polisher for this step, but we didn’t, so we used inexpensive orbital sanders and wet sanded away with the Buddy Rhodes diamond orbital sanding pads. We used the hand pads for the edges and areas that were hard to get to with the orbital.
It was a messy mess day, and we didn’t take many photos. However we did make a super awesome time lapse video for you of all our slurring & sanding fun. Here’s two days hard work in two minutes of video.
I leave you with an American Gothic version of exhausted Kristen & El Granto. Covered in concrete splatter and soaking wet.
As the kitchen is starting to become functional again, we are starting to think about decor and other kitchen accessories. One of the biggest changes in the kitchen will be our new DIY concrete countertops. As concrete is rather hard and unforgiving, we will need to use cutting boards for all our chopping. I love a good cutting board, but they can be expensive, and often are not the size you need for your space.
We did a bit of research, and set out to make some easy & inexpensive cutting boards for our kitchen.
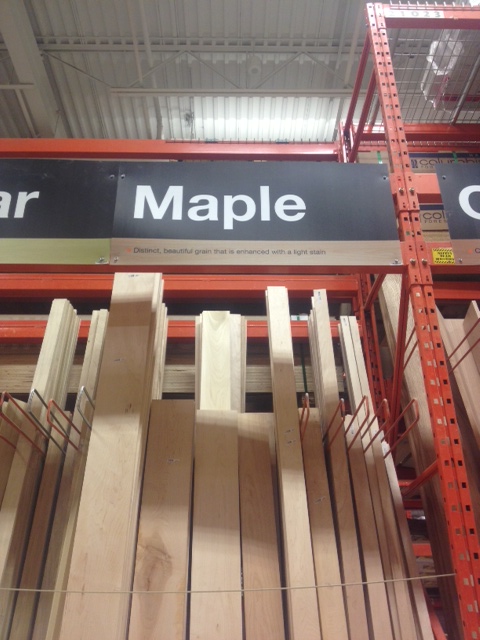
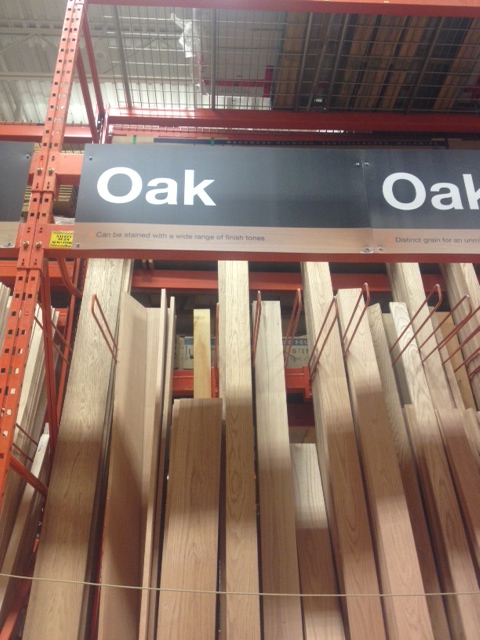
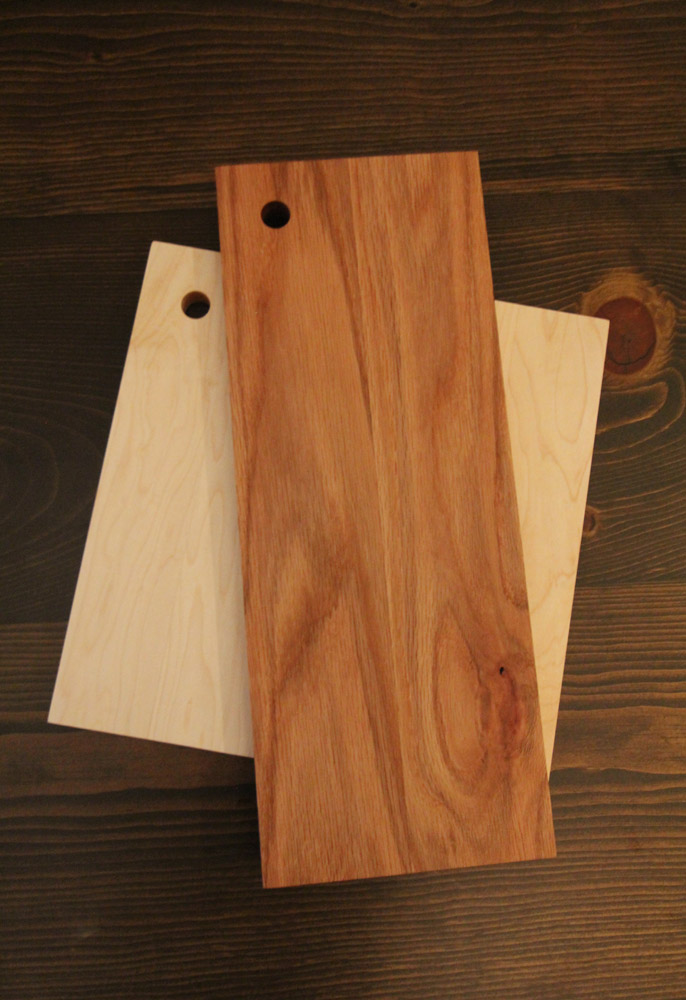
Selecting Material: Hardwood is preferred for a cutting board. Maple or Ash is the perfect material, as it has a nice tight grain. Oak is also usable, but not ideal as it is more of an open pore wood.
We decided to make one maple cutting board for everyday use as well as a red oak board more suitable for serving & veggie cutting (we wont be cutting raw meat on the oak).
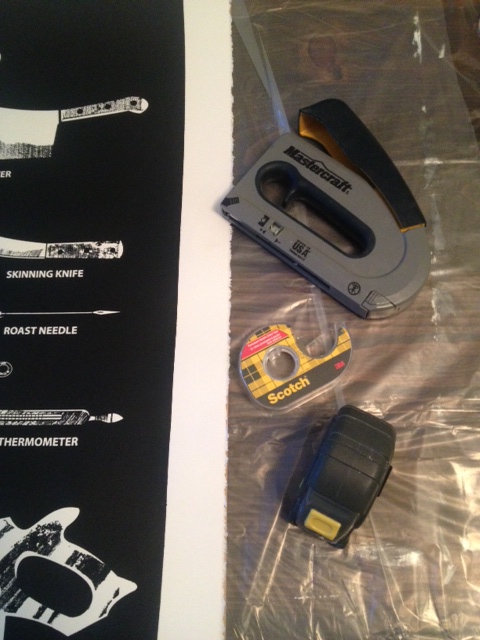
We headed to the Hardware Store for some simple materials.
Here is what you need:
1 – 1×3 piece of Maple (6′ long)
1 – 1×4 piece of Oak (6′ long)
Saw – Table saw preferred, but a Miter or circular saw will work
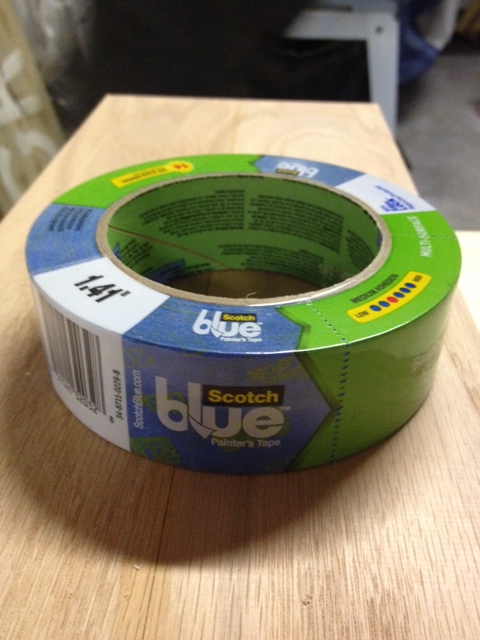
Drill bit – We used a 3/4″ spade drill bit
Drill – Cordless or in our case we used a drill press (but that’s not necessary)
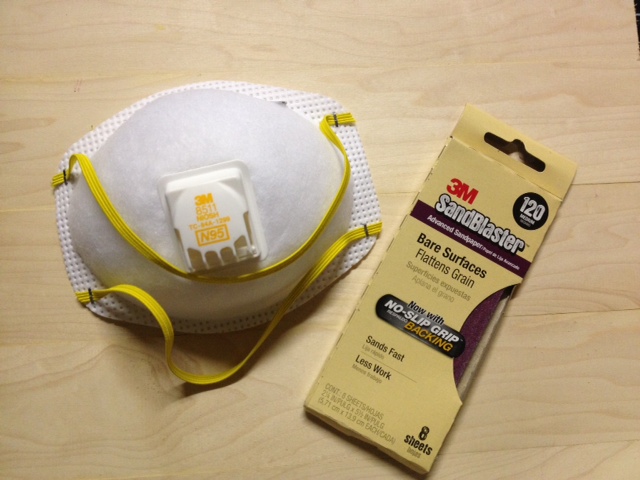
3M Advanced Abrasives sandpaper in 80, 120 & 220 grits (palm or orbital sander optional)
Wood Glue
Mineral Oil
We headed to our local lumber store and picked up a piece of 3″ wide Maple, and 4″ wide red Oak.
MapleOak
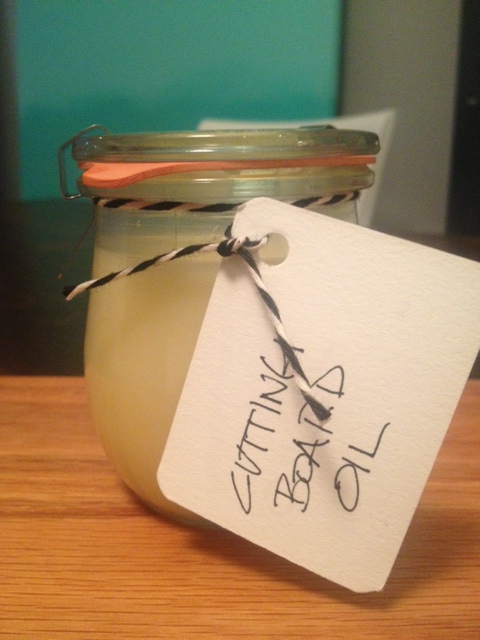
I also made a stop at my local drug store for some Mineral Oil. Mineral oil is used to protect your cutting board. You can find Mineral Oil at Kitchen Supply stores, Ikea, and your drug store. Mineral Oil is (apparently) used as a laxative, and can be found in the digestive aid section of your drug store. Yep, it’s true!
Mineral Oil – Three bottles to the right of the rectal syringe…eeep
Ignore the strange look the cashier gives you when you purchase your mineral oil while carrying two pieces of lumber.
*It is important to use Mineral Oil or an oil specifically marked as a cutting board/butcher block oil. Do NOT use olive or vegetable oil, as those will go rancid. Mineral Oil is food safe and will not spoil.
Now its time to make some cutting boards!
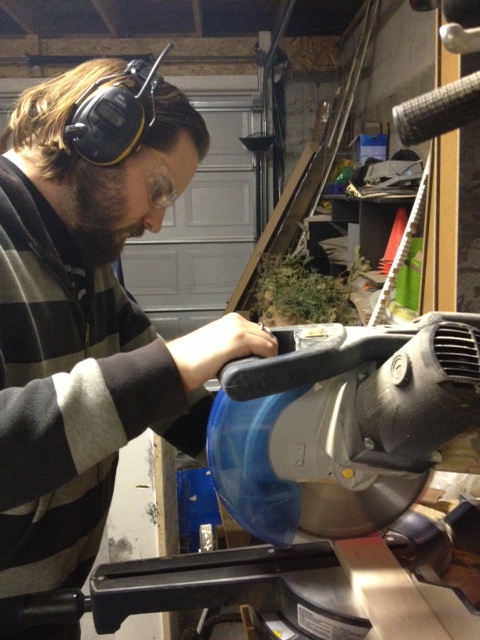
El Granto cutting the wood to length
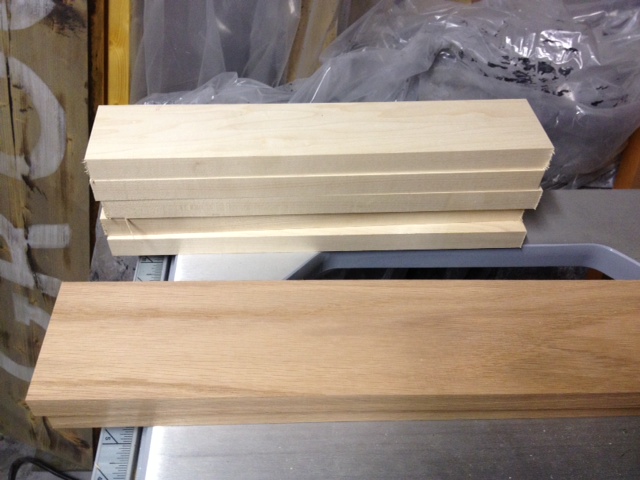
Cut your maple into 5, 13″ long strips (does not need to be exact)
Cut your oak into 2, 20″ long strips (again doesn’t have to be perfect, we will be trimming the boards later.)
Make sure to use safety equipment! Eye & ear protection are a must. Cutting hardwood can get very loud.
Hearing ProtectionSafety Glasses
Once all your wood is cut, sand off any imperfections and get ready for gluing.
Wood cut to length
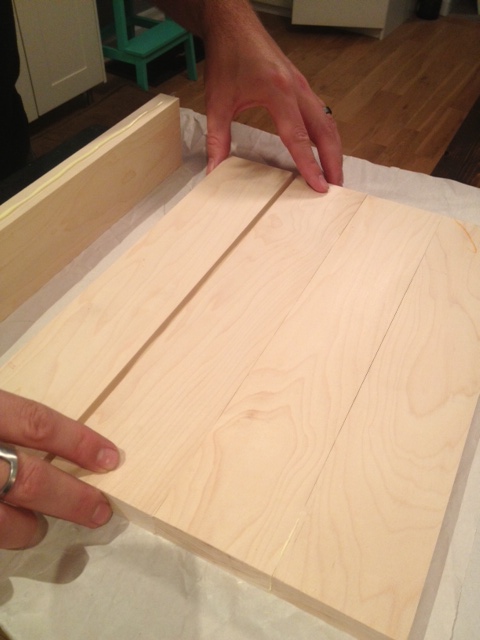
Make sure you have a nice flat surface to glue your boards together. We went inside and laid all our boards out deciding how we wanted them to look. Grain is important in the outcome of your piece. Make sure you take it in to account and lay out your boards to maximize the visual appeal of the grain markings in your wood.
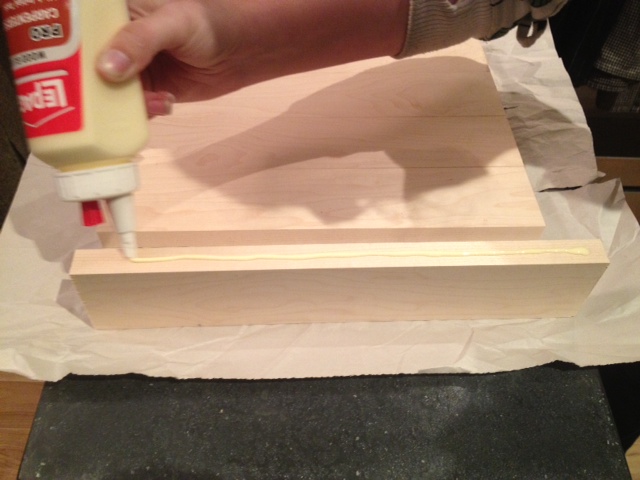
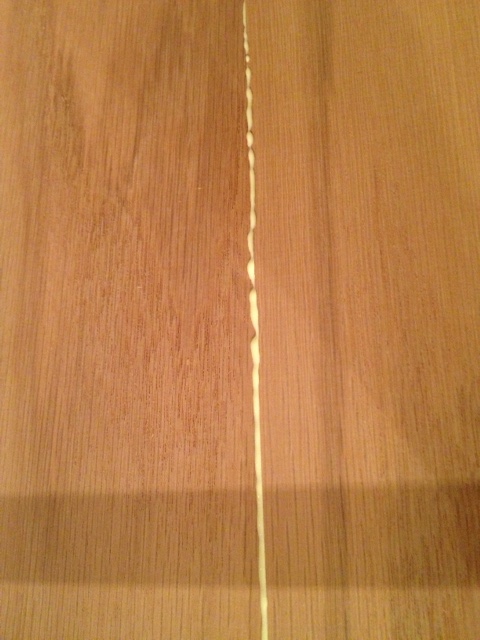
Next up, run a bead of wood glue on the edges of your boards (one board at a time) and glue them all together. When you’re pressing your boards together wiggle them lengthwise to spread the glue and work out any air bubbles.
Applying GlueAttaching boards together
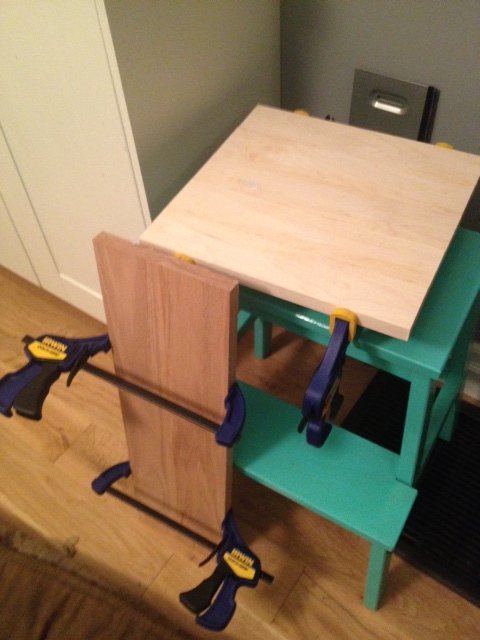
Once all your boards are glued together, clamp them, and wipe off any excess glue.
When you clamp the boards together, sometimes excess glue seeps out. Quickly clean this off before it dries (it is a pain to sand off)
After your boards are clamped, leave them to dry overnight.
Clamped & Drying
The next day, un-clamp your boards, and it’s time to drill & sand!
I like my cutting boards to have a handle or a hole to hold onto. It makes it easier to grip and to store (they can be hung up.)
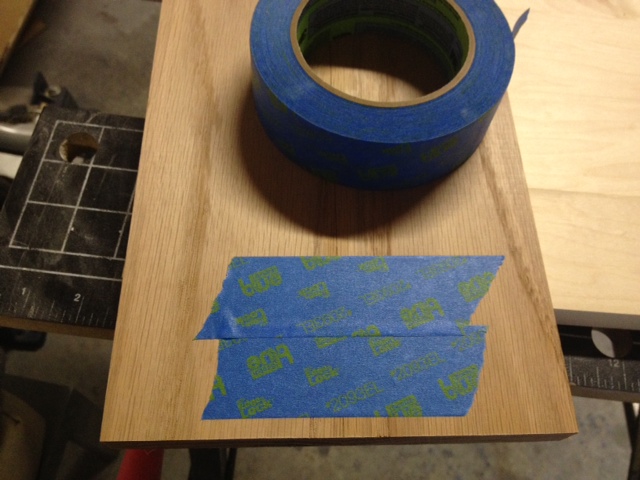
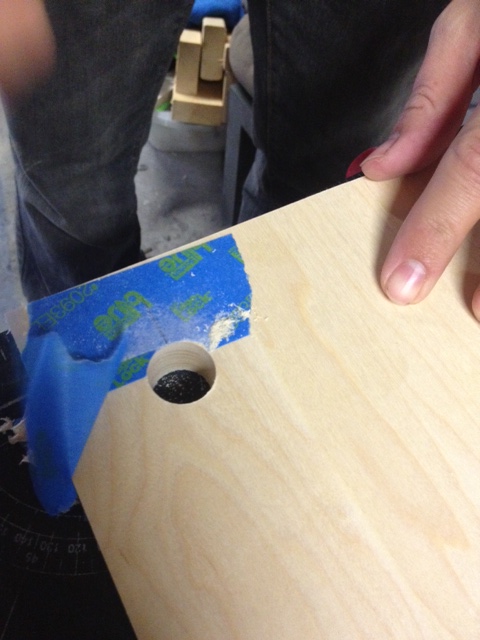
We added a 3/4″ hole to the corner of each board. To do this we taped off both sides of the board using ScotchBlue Painter’s tape. Applying tape before drilling reduces the amount of tear out (when the wood chips and splinters). Applying the tape also makes a great surface to mark your drilling location. We measured in a 1 1/2″ from either side for our holes.
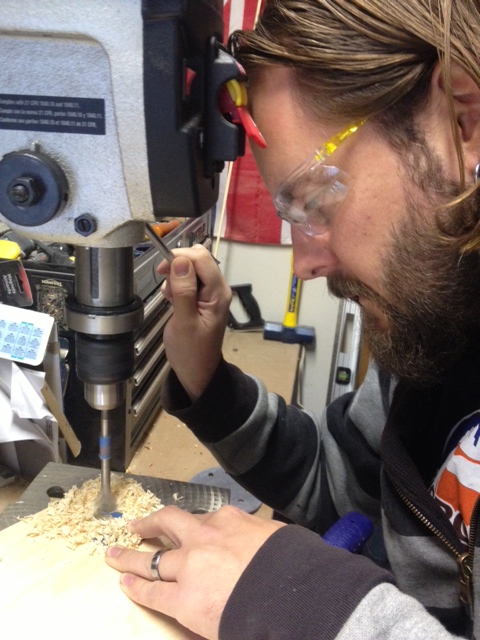
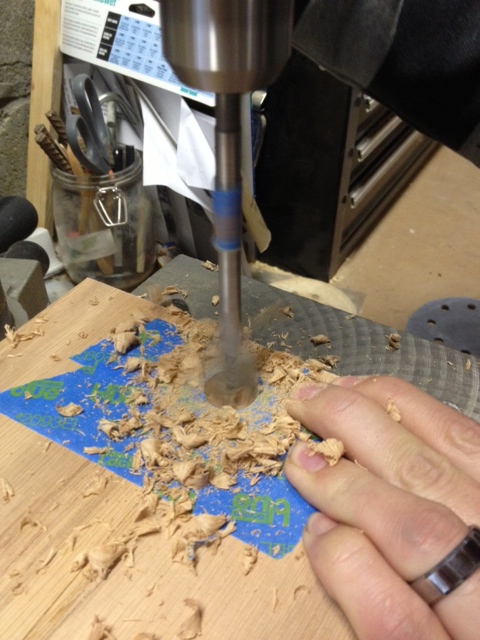
Next up, ready your drill with a 3/4″ bit, and drill your hole. We have a drill press, so we used that for an even more precise hole, but you can use your cordless drill. Just take the time to ensure you’re drilling straight. Place a piece of scrap wood under your cutting board so you don’t drill into your table! (It also makes the cut cleaner.)
El Granto drilling the holesEl Granto drilling the holes
After your holes are drilled, remove the tape and check out your perfect hole!
Perfectly drilled hole
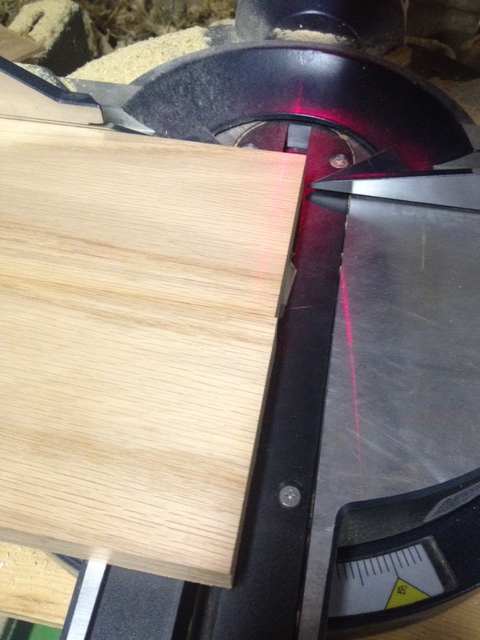
You may notice that the ends of your cutting board are not perfectly straight. You could spend hours trying to sand them, or the easy way is to head over to your sliding miter saw and trim up the ends. A couple quick cuts and your boards are nice and square and true. (If you don’t have a sliding miter saw, you can use your circular saw.)
See how the ends are uneven? No problem, a quick run through the saw will have everything perfect
Now its time to sand. Using a palm sander or an orbital sander will make this process a lot quicker, but you can do it by hand.
Remember to wear a dust mask while sanding. Aint nobody got time for sawdust in the lungs!
Starting with 80 grit sandpaper, sand off any imperfections, and make sure your board is nice and flat. Once you are happy with how flat everything is, step up to 120 grit and sand the whole piece making everything smooth.
Lastly, take a pass with the 220 grit to make everything perfectly smooth and buttery soft.
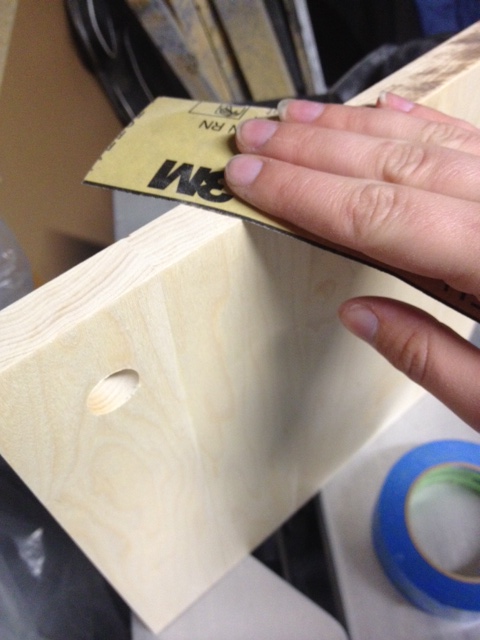
Sand the edges by hand, and gently round the corners ever so slightly so that they are not sharp.
Hand sanding the edges
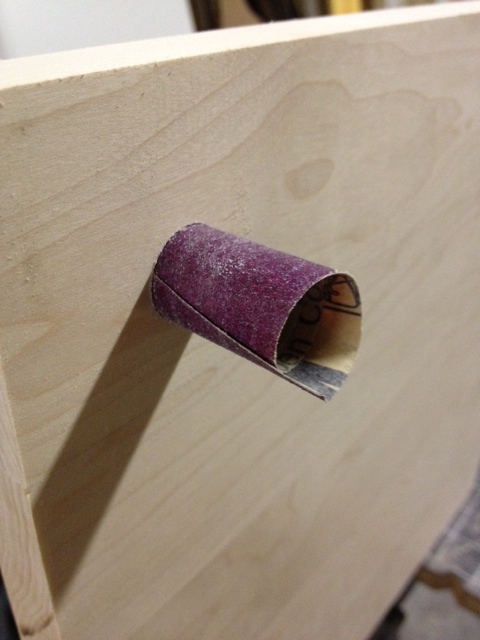
Roll your sandpaper into a tube shape, and insert it into the hole. Rotate it around sanding the inside of the hole.
Roll sandpaper into a tube to sand the hole
Once everything is sanded, wipe your boards off with a dry cloth.
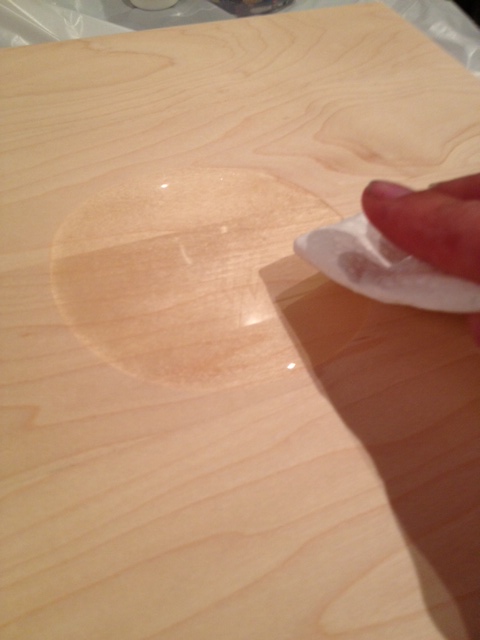
Now the next part may sound counter intuitive, but take a damp cloth and wet your cutting board (don’t saturate it, but get the whole surface damp.) Let it dry, and rub your hand along the wood. You will notice that it feels rough again. The water has raised the grain (better now then after you wash it for the first time!) Take your sandpaper and knock down the grain until it is smooth again, wipe your board again and get ready to oil!
Using a lint free rag or paper towel, apply a generous amount of mineral oil to your cutting boards. Rub it in, and let it sit for an hour or so. Come back and wipe off any excess. Repeat this 2-3 times until you notice your board stops absorbing oil. Let dry.
Applying Mineral Oil
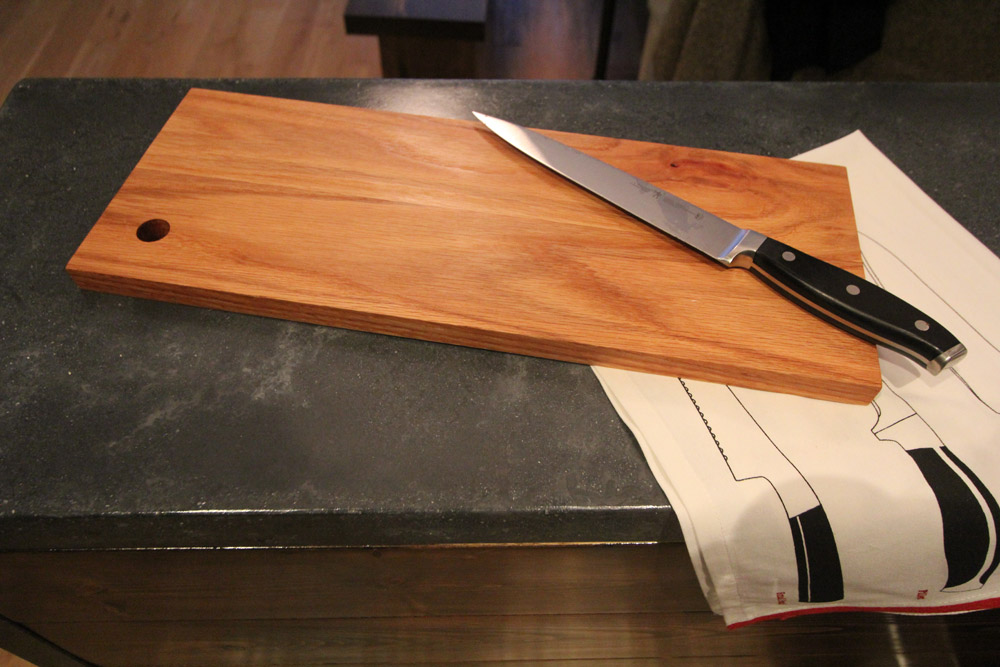
AND YOU’RE DONE! Enjoy your gorgeous new cutting boards!
12 1/2″ x 12 1/2″ Maple Cutting Board & 7″ x 19″ Oak Cutting BoardDetail of Cutting Board HolesOak Cutting Board
Make sure to re-oil your boards when you notice them looking a bit dry. Never put boards in a dishwasher, or let them sit in water. You can also use a mixture of 5 parts mineral oil to one part all natural beeswax, heated over low on the stove, then rubbed into your board for added protection.
***UPDATE: Check out our post on Wood Oil/Wax here***
What do you think? Wouldn’t these make perfect holiday gifts?
I’m not a short girl. My Danish heritage has afforded a rather large frame of 5’10” however I am still completely unable to reach the top cabinet in our kitchen without standing on something. We have tall ceilings, and 39″ upper cabinets and those things are tall! For two years I have dragged over a kitchen chair, or straight up hopped up on the countertop to reach that top shelf.
I know what you’re thinking, why on earth have I not bought a kitchen step stool yet? You know those things MEANT for standing on to reach a cupboard?! Well, I just never thought about it when I was someplace that sold step stools.
That was until last week, when I was stuck at the Ikea kichen lineup, and noticed their basic Bekvam step stools situated behind the counter. For a whopping $16.99 I decided then and there that I would cure my inability to reach the top shelf! I wrote down the isle and bin number and when I (finally) reached the warehouse I added the stool to my cart, and was on my way to being able to reach whatever I wanted, whenever I wanted it. (It’s the small things people.)
I brought home my new prize, named him Sultan* and assembled it.
Sultan the Stool
Hrm, its okay, but its a bit boring right?
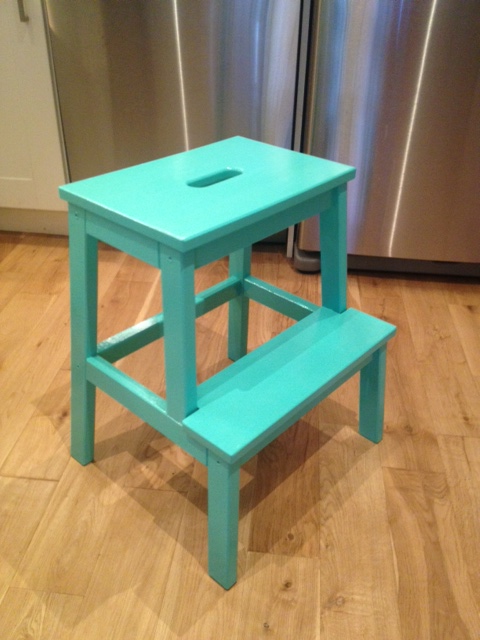
So I got out the cabinet paint, and gave Sultan a couple coats of Thai Teal, then a couple coats of poly.
Teal Sultan
Isn’t he more handsome now?
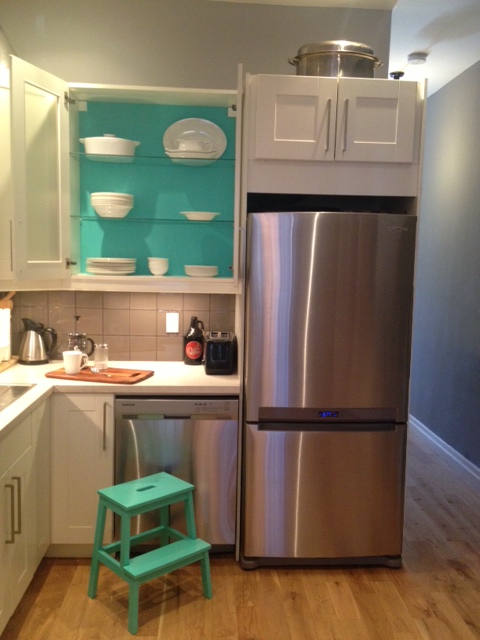
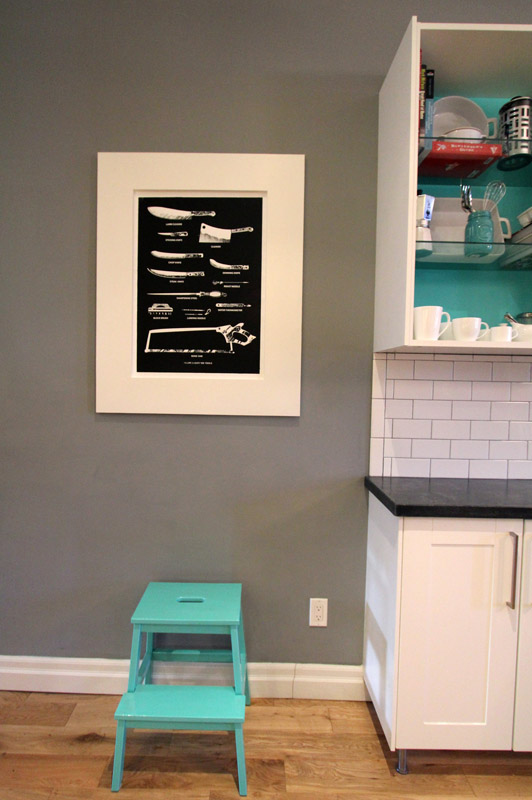
Stool & Cabinet
He matches the cabinet backs, so he fits right in. For now I have made beside the coffee bar his new home, where he can quickly be accessed to reach a cookbook or a casserole dish.
Completed Stool
Not bad for a $17 stool and a bit of sample paint, eh?
* For those of you who don’t get the Sultan reference, clearly you didn’t watch enough Beauty and the Beast in your childhood. Sultan is the pet pooch who was turned into a foot stool. Now I am off to watch Beauty and the Beast, and maybe a bit of Aladdin…


 Digital WorkTunes™ Hearing Protector, Holmes Workwear™ Premium Safety Eyewear & 3M tekk Paint Sanding Valved Respirator
 sandpaper in 80, 120 & 220 grits (palm or orbital sander optional)