My hair you say? How great my ass looks in these jeans? Why shucks, you are too kind, but I was talking about the site design.
It’s been a while in the making, but we finally have a responsive site! For those of you visiting on a mobile device or tablet, things are gonna look a whole lot different, and hopefully be a lot easier to use.
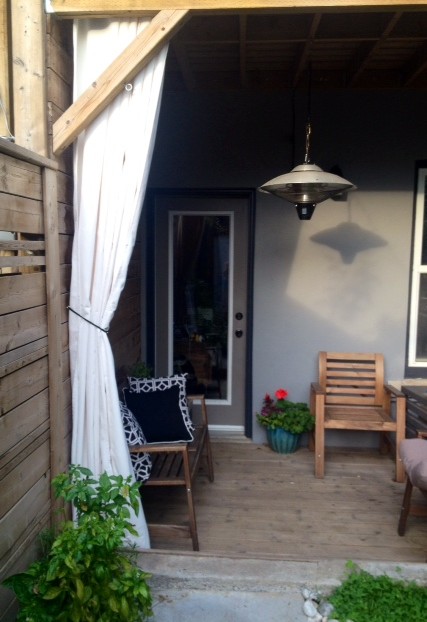
Before I get to that, do you remember our budget friendly DIY outdoor drape project from a couple summers ago? They were cheap, quick and easy….but that’s about it. One summer of use, and they became stiff, riddled with mildew, and a haven for spiders. Awesome right? NOT! (FYI, I’m totally trying to bring back “NOT” as a hip thing to say. You with me?)
We took them down, washed and bleached them, only to have them shrink 12″ and still be covered with mildew. All in all, not one of my best DIY’s. I certainly got what I paid for. Aka about $50 (and most of that was spent on the curtain “rod”.) Continue reading “NEW Outdoor Drapes!”
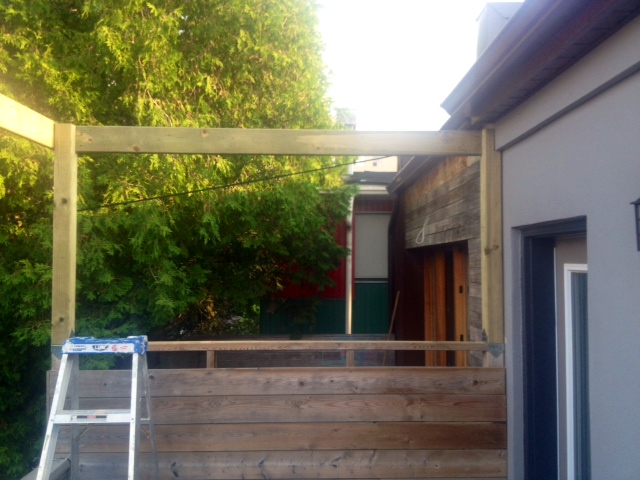
Our weekend pergola build is finished! AND it only took us a month.
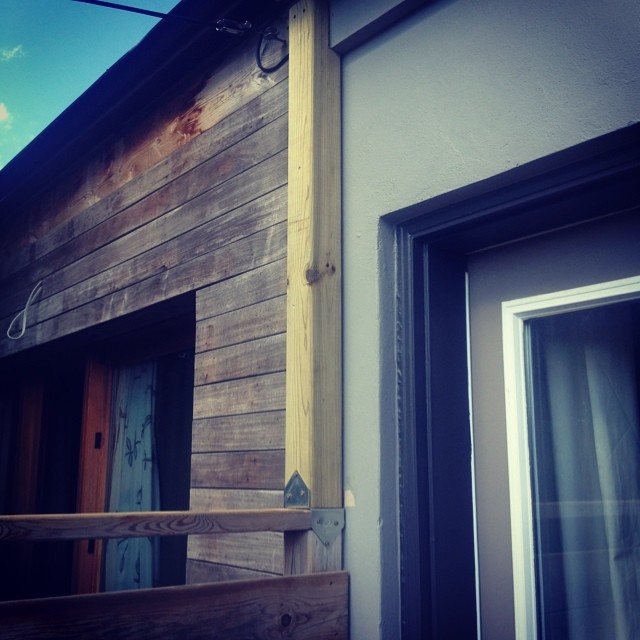
Well technically it took us two afternoons, they just happened to be a month apart. Why did a weekend project turn into a month long ordeal? Life. Weather. Summer. Family. Motorcycles. Friends. Birthdays. Fun. Oh and new tools. Life took over as a priority, and work came to a standstill on the backyard. But this weekend, we were back in action.This is how it went down. In the first stage we built up the existing corner posts (they needed to be extended a few feet taller). The ones beside the house needed to be notched to fit over the rim board on the house, and everything was attached with brackets and deck screws. Then up went the outside beams of the pergola.
That went well-ish, but after the last beam (the big front one) went up, it pulled the rest slightly out of square. Ugh. So we started off yesterday making everything as square and level as possible considering the unsquare and unlevel deck we were building off. I just want to point out, we did not build the deck. It was here when we bought the house. Building a nice square and level pergola off a crooked deck is an exercise in patience.
Knowing this, we took a bit of a U turn in on how we were going to do the cross beams. I wanted to notch out the beams so that they all fit together in a basket weave. That would involve pretty accurate measurements and cuts, and if we were a hair off, nothing would fit. El Granto sat me down and had a little talk about biting off more than I could chew, the inability to get more lumber should I wreck it all, and how were we going to raise the beams up and install it. All very valid and reasonable points.
But… I didn’t want to use ugly joist hangers, and I needed the joints to be strong. (I am not to confidant with toe nailing, it never seems to tighten up the joint enough for me.) We brainstormed a bit, and broke out the Kreg jig. That thing tightens up butt joints like nobody’s business. (El Granto’s note: hee hee tight butts)
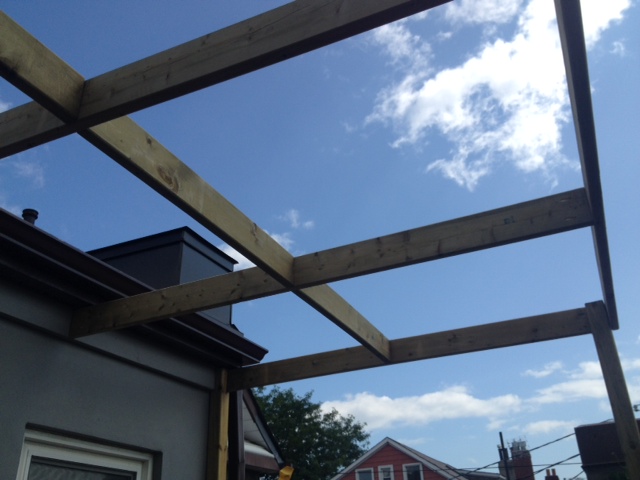
Yes, it took a bit longer, but those butt joints are nice and strong. Did you spy one of our new tools in the pic? Yeah dude, we upped our drill game a bit. At Christmas El Granto bought me a Milwaukee Drill and an Impact Driver. We loved them so much, that this summer we added a few new Milwaukee tools to the arsenal. That’s our badass new hammer drill in the photo above. We had all three drills going for pergola install. The hammer drill was on pocket hole duty (yes a bit overboard, but he made short work of the holes) the drill and impact driver were stationed on the ladders so we could each drive in the screws on our ends of the joists. Can I just say how amazing it is not to have to change from a drill bit to a driver for… Every. Damn. Piece?
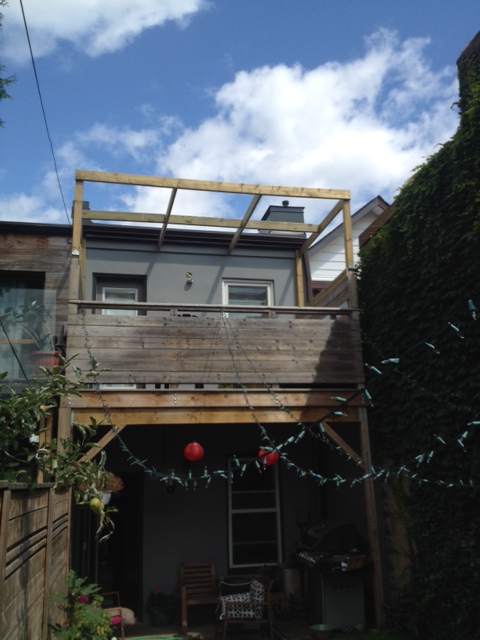
After all the joists were cut and pocket holed, up on the ladders we went and installed. No pics of this part, cause well, we were both up on ladders holding beams over our heads, but here is what it looked like when all was said and done.
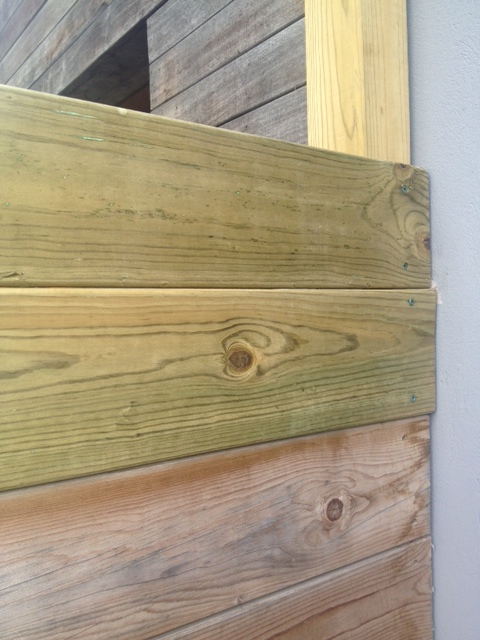
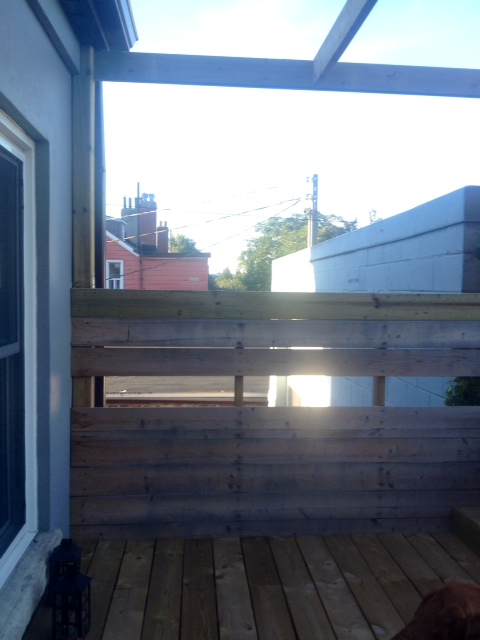
We also added a few more boards to our privacy screen. It was a bit low, and meant that if you looked over from our neighbours house you could see right into our bedroom. Frankly I think they were sick and tired of being blinded by my nakedness, so we upped the height of the screen. It also did double duty of covering up the brackets on the posts. We added another board to the opposite side of the deck to make things look a little more polished as well.
So whats next? Sewing! We laid out and measured for the Sunbrella fabric shade canopy, and I can get started sewing it this week. I am also thinking of taking down the twinkle lights in the backyard (it looks a bit too busy now, those solar lanterns also have to go.)
Already the shade structure is making the upstairs deck seem more cozy. Cant wait for the shade canopy! What do you think about the backyard twinkle lights, should they go?
When selecting a title for a blog post I like to score it on the Morgan Freeman scale. What’s that you ask? It’s how good the title sounds when read aloud in my mock Morgan Freeman voice. You know, the movie voice of God? Some post titles just can’t possibly score well. “DIY Concrete Table” for instance sounds rubbish in Morgan Freeman’s voice. However “The Man Behind the Name” gets a score of “epic” on a scale of 1-10. Note, this theory also works well using Dumbledores voice and Iron Man. The Stark sarcasm adds a little je ne sais quoi.
Back to the namesake of this post. The one and only El Granto. You might have wondered in the past why he uses this name? Is it a nom de plume, a pseudonym? Just a way of staying anonymous on the web? None of the above.
While not his given name, El Granto has been an oft used nickname for the last 8 years or so. Let me paint the scene for you.
Grant wasn’t such a popular name in Canada, and his whole life he stood forlorn at the gift store checkout, unable to find anything on the souvenir racks with his name on it. No key chains from Disney, beach towels from Florida, or Christmas tree ornament from Santa’s Village. No tourist souvenirs held his name. The odd man out, the lone wolf without his name on a souvenir tchotchke. Every other kid had them! Even BORT got souvenirs with his name on it!
It was a young Grant’s birthday. He was a mid twenty something ready to blow some candles out on his cake and hit the town with his buds for some beers. We were underpaid, overtaxed young-uns living in our first apartment in the city. We had convinced Grant’s childhood friend Chris to move in down the street with his then girlfriend. This meant we perpetually had friends to party with who lived stumbling distance from home. Much fun was had with such close pals, and on the fine evening of Grant’s birthday, Chris came bearing gifts.
Chris handed Grant his birthday gift with a “Happy Birthday Buddy” and a big grin on his face. Grant opened the box and pulled out a t-shirt, and broke out into a string of words I won’t put in print. The shirt was white, and had some writing on it, but I couldn’t see it clearly as Grant was too busy fawning over it. Finally he turned it around, and shared it with the room. It was an illustration of a fat man, dressed as a Mexican wrestler. Complete with man boobs and a cape. Beside this Adonis was written “El Granto”.
It was Grants dream come true. His name (albeit with a Latin flare) emblazoned on a t-shirt, complete with a fat man in spandex pants. Had Chris gotten this t-shirt custom made? If he did, I may have a word with him about encouraging (not bashing) El Granto’s self image.
Alas no, Chris had been strolling through the mall when he spied this work of art in a clothing store. An expensive gift for a bud, but Chris knew he needed to purchase this once in a lifetime find for his friend. The shirt was designed by an illustrator for Volcom (a snow & skateboard company and one of Grant’s favorite brands). Once Grant set his eyes on this magnificent shirt, his world was eternally changed. He was now forever to be known not as Grant, but EL GRANTO! Maybe his Mum and his bosses would still refer to him as his birth name, but to the rest of the world a new hero is born.
Or…after wearing the shirt, the nickname stuck, and he started using it for his online presence.
El Granto only wears the shirt sporadically and on special occasions as to not wear it out (it has already suffered a hole but this does not discourage him.) He does however don it religiously every year on his birthday. Wouldn’t you?
This post is brought to you by Waste Management’s Bagster Dumpster in a Bag.
As carless urban DIY’ers, with strict limited city garbage pick-ups, getting rid of our renovation junk can we pretty darn problematic.
In fact, we just kinda stockpiled all of it until we could figure out how to get rid of it. I promise we’re not into hoarding territory yet, but dammit the junk is piling up. In the last year we have completed a kitchen mini-reno, a basement reno, decking re-vamp, general projects, and woodworking. All of this has created a lot of debris. We could just get a dumpster, but they’re expensive, and the biggest problem we have is access. We have no front yard or laneway, and our backyard access is blocked by our garage. When we had the house fixed my Mike Holmes, they actually put a dumpster in our neighbors yard (thanks best neighbors ever!), and took down our fence for access.
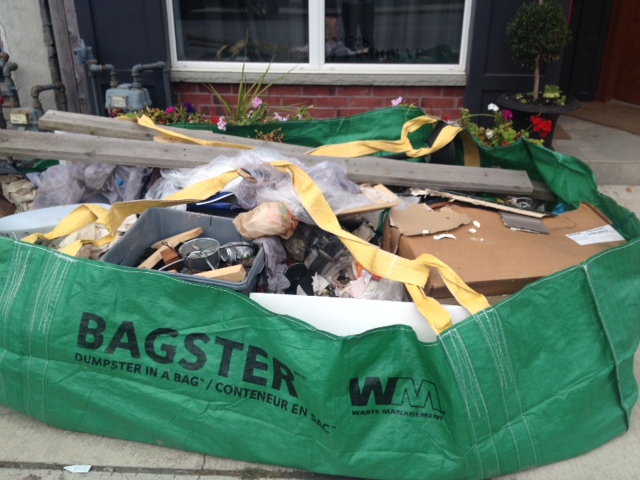
So I think you can see our issues. No place for a dumpster, and no way to get rid of our non-recyclable renovation junk. Enter Waste Management’s Bagster dumpster in a bag. It’s a fold out portable dumpster made with tarp like fabric. It can hold a crazy amount of stuff. 3300lbs or 20 garbage bags of renovation debris. Perfect. So we ordered our bag online, and got it shipped to our house. You can also pick them up at the Hardware Store. See thebagster.com for your closest retail locations. You don’t have to pay for the collection of the bag until you schedule the pick-up.
Bagster Dumpster in a Bag well really, it’s a Bagster bag IN another bag 😉
Now, where do we put it up? We can set it up on the 4′ of concrete behind our garage that is technically our property between the garage and the alleyway. Except…. I called Waste Management, and you need to have 16′ of clearance above the pick-up site, and our garage has a roof overhang (of about 2′). This complicates things, as the arm from the pick-up vehicle won’t be able to reach the bag without hitting the roof overhang. Oops.
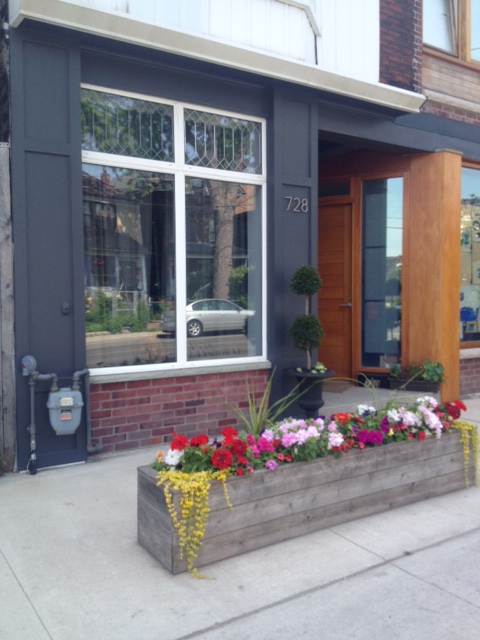
Time for plan B: Pushing back our front planter box, and placing the Bagster dumpster bag on the concrete in between the sidewalk and the Storefront. The problem here, is that the planter box is about oh… a thousand pounds. We can either dig up a bunch of the dirt/flowers to lighten the load to move it, or push it Worlds Strongest Man style.
Large, HEAVY planter!
Guess which one we choose? OH THAT’S RIGHT, muscles baby!
El Granto and I heaved and hoed and pushed that planter out of the way!
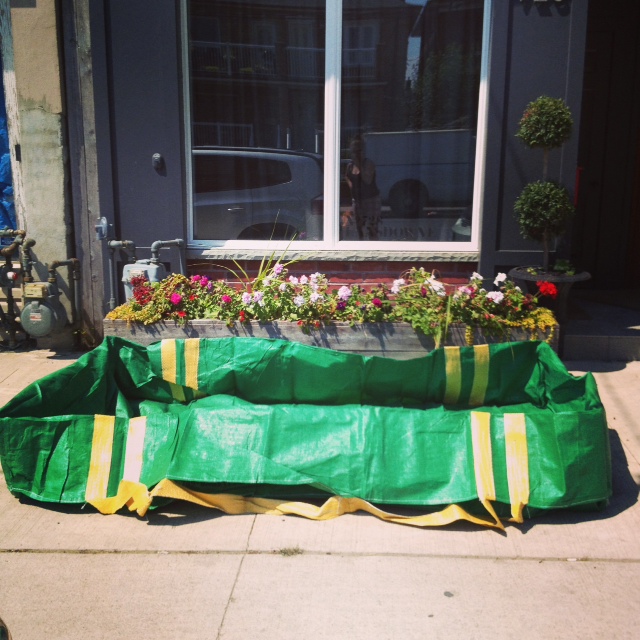
Now we could assemble the Bagster bag. The bag came with assembly instructions. Basically you open it up, then fold the sides down so that it stays open. When you start to fill it up, you can lift the sides up and put more stuff in.
Bagster Dumpster in a Bag set up and ready to go
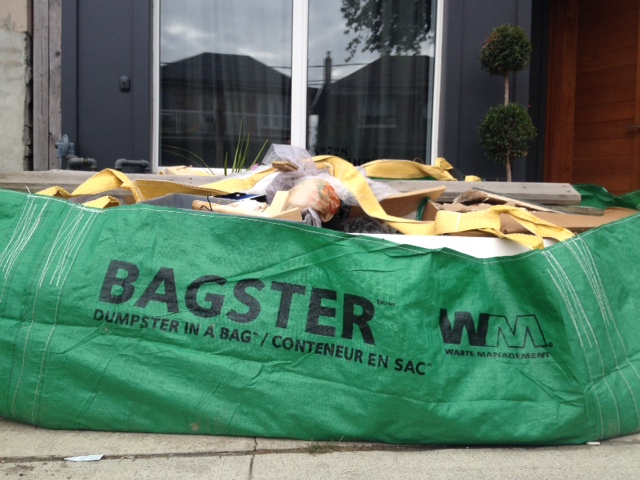
Let the junk cleaning begin! We stored our construction debris in large bins, boxes and bags, and we started carting out the junk and dumping it into the bag. A few hours work later, and the Bagster dumpster bag was really filling up.
Construction Debris be gone!
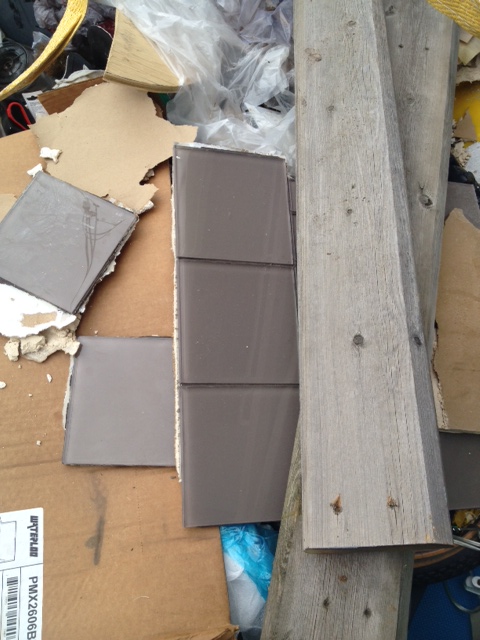
These are some of the things we tossed in the Bagster bag:
Tile, whole & broken
Drywall, small and large pieces
Old laminate kitchen counters
Melamine molds that we used for our concrete countertops
Used buckets coated in concrete (unrecyclable)
Pressure treated deck railings
Paint & stain covered drop cloths
Wood offcuts
Old and Broken Bicycle and Snowboard Parts
WOWZA! That’s a whole lotta junk in the dumpster bag!
LOOK AT ALL THAT JUNK!
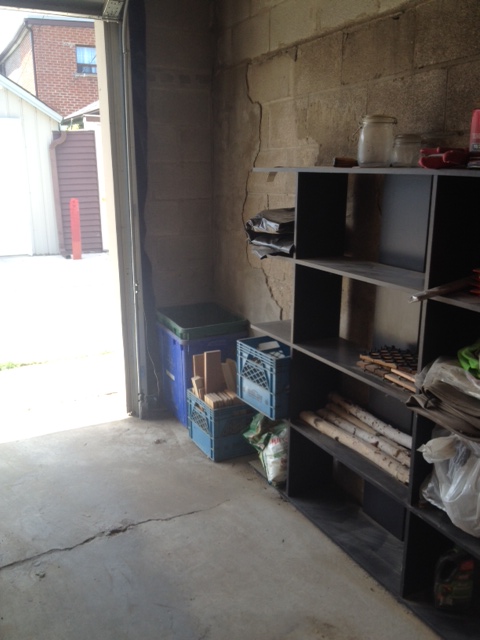
We were able to fit in way more than we anticipated, removing all the junk from our garage.
This used to be a storing ground for renovation debris. So nice to have the space back!
After we finished, we went online and scheduled a pick-up and made payment for our order. They will come and pickup within 3 days. Our pick-up actually came the next day, which was awesome.
The one thing we had to deal with for pick-up was that parking is allowed in front of our house. If cars were parked there, they wouldn’t be able to access the Bagster Bag. I called and spoke with a Waste Management Bagster rep, and they said they could call me an hour before pick-up, so that I could ensure no cars were in the way. After I got the call, I ran out and placed some temporary pylons in the way, so that the truck could easily collect. Within the hour they had picked it up, and even sent me a confirmation email saying everything went as planned.
The Bagster Dumpster in a Bag seems like it would be perfect for a small bathroom or kitchen reno, flooring project, spring cleanup or if mother nature strikes and you need to clean up after a flood. We are tackling our bathroom renovation next, and this will be perfect for carting away the old tiles & subfloor. If you were doing a whole house renovation, a traditional dumpster will still be the way to go, but for small renovations and cleanup projects this works perfectly.
The Bagster Dumpster in a Bag
Have you ever used a Waste Management Bagster Dumpster in a Bag? How did you like it?
Disclosure: This project was brought to you by Waste Management Bagster Dumpster in a Bag, but all opinions and junk are our own.
As we continue to push ahead with the backyard reno, I am starting to think about the smaller details. Accessories, lighting, flowers, furniture etc. We are currently happy with our outdoor chairs, but the rest of our outdoor furniture leaves a lot to be desired. We were using a old chipped green table with a cigar burn as a side table. Not the best looking piece of furniture…
As a place to set a drink and small plate of food is a must have in any backyard, I did what any DIY’er would do. I set out to make a useful, stylish new side table.
Back before we embarked on our concrete countertop project I made a small concrete test slab with some cheap big box store concrete mix. It had some big flaws, and I cringe when looking at it now. I used the wrong mix, did some sketchy form caulking, used a product with too large aggregate, and didn’t get out all the bubbles! None the less, I had created it, and rather than throwing it into landfill, I opted to re-use it.
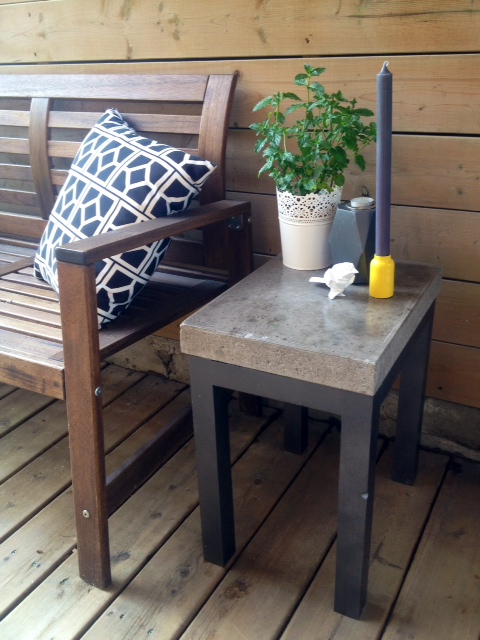
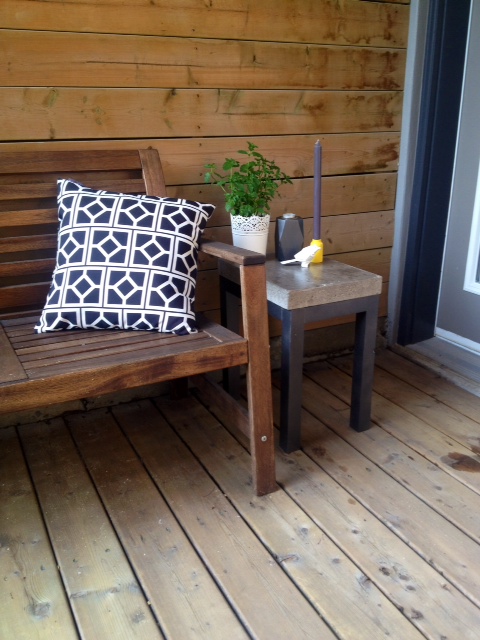
I fabricated some simple modern table legs, and this is the end result.
DIY Concrete Side TableCompleted Table
The legs are made with some kiln dried 2×2 pine from our local lumber yard. It was assembled with some simple pocket holes and screws.
Drilling Pocket Holes with a Kreg Jig
DIY TIP! I like to have two drills (or a drill and a driver) for working with pocket holes. One for drilling, and one for driving the screws. It saves having to change the bit every few minutes!
One for Drilling the Holes and one for Driving the Screws
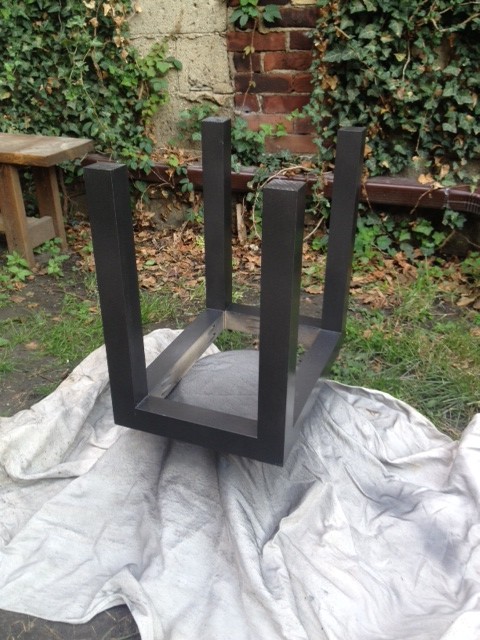
Legs Fabricated with 2×2 pineTable Legs Primed with Exterior PrimerLegs Painted with Rustoleum Universal Metallic Flat Soft Iron spray paint
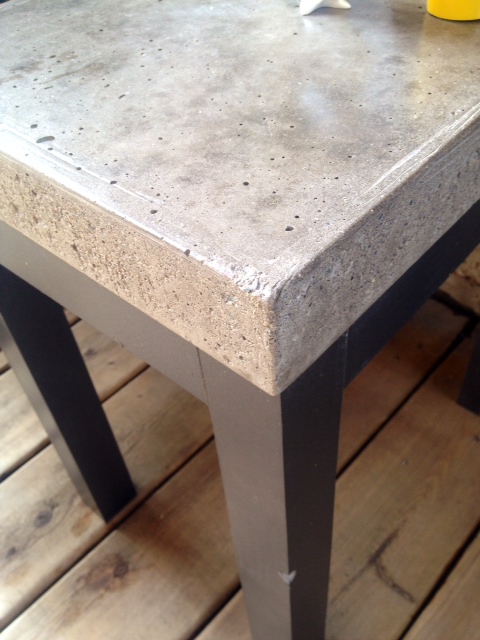
We topped the legs with our recycled concrete slab and sealed the concrete with the Buddy Rhodes concrete countertop sealer. If was to do this project again, I would have used the Buddy Rhodes mix instead of the cheap big box mix (the BR mix is lot lighter and easy to use.)
Sealed with Buddy Rhodes Satin Sealer
If you were to do this project, you could easily pour the concrete top yourself, or buy a prefab concrete patio stone at the big box store. If your patio stone has a texture on it, consider flipping it upside down so the raw concrete side is exposed. Make legs to fit your slab, seal it and you’ve got an inexpensive industrial table!
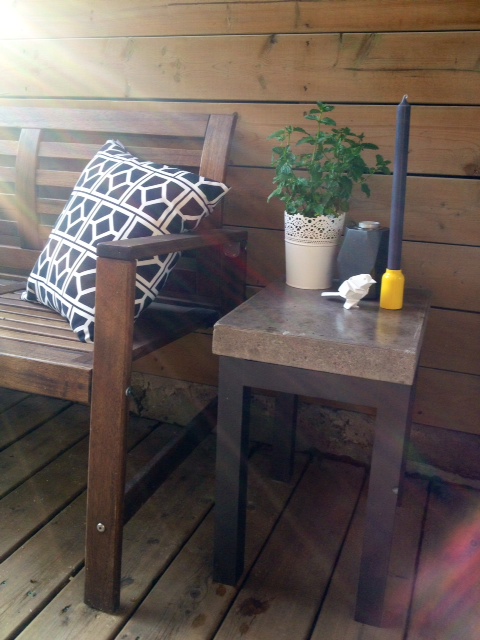
Here’s a few more shots of our finished table.
DIY Concrete Side TableConcrete Side TableCompleted Table
SOURCE LIST:
Materialst:
Concrete – Hardware Store
Concrete Sealer – Buddy Rhodes
1 2x2x10 kiln dried pine – Downtown Lumber
2 1/2″ pocket hole screws – Lee Valley Tools
Zinnser Primer – Home Depot
Rustoleum Universal Flat Metallic Soft Iron spray paint – Home Depot
Tools
Drill & Driver – Milwaukee
Measuring Tape
Kreg Jig – Lee Valley
Difficulty Level (on a scale of 1-5):
two out of five
Total Cost $40
Beats spending $1155 at Restoration Hardware for this, doesn’t it?!
Restoration Hardware Belgian Trestle Weathered Side Table
What do you think of our new table? Would you give a try at making one?
Not quite sure where this week went. Last time I checked it was somewhere around Tuesday, and then BAM! Friday!
Hey, I’m not complaining, but I sure do wish I got more accomplished around the house this week.
Here is what we’ve been up to.
The pergola started creeping off paper and into fruition. We made a stop at our local lumber yard and picked up all the wood, including the 12′ pieces. Thanks again goes to El Granto’s Mum and Dad for the car loan.
After some demolition of the current deck’s fence/top posts, a big shout out goes to the previous owner for stripping Every. Single. Screw he used to assemble the deck. Really awesome work… A sawzall with a nail cutter blade later, and a pry bar, and we were rid of them, busted screws and all.
With demo complete, we started building anew.
The new posts were measured, kerfed (to go around the ledger on the wall), and up they went.
Then the front and side beams followed suit.
This was a bit of a scary ladder moment (14′ drop to our new concrete walkway with hands above head holding a 2x6x12), but El Granto took over for me, and got it done.
Decent progress, but still a ways to go. We have to add the cross beams, which overlap each other, so some careful math and half lap joints are in our future. Then we have to add some more fence boards. This kinda sucks. As our new pressure treated lumber is greener than a 19 year old after St. Paddy’s Day and our current fence/privacy screen has faded nicely. I know you’re going to lay into me about staining the deck. That is a ton of upkeep, and I’d like to ride the bare wood train as long as we can. I bought some Cabot deck wash, so here’s hoping I can brighten up the old bits a little, and that those new PT boards will fade quickly.
Back to the pergola. Our plan for the is to have a large open pergola like our inspiration:
This means not a lot of cross beams for shade, but what it does mean is that we are adding a fabric shade canopy.
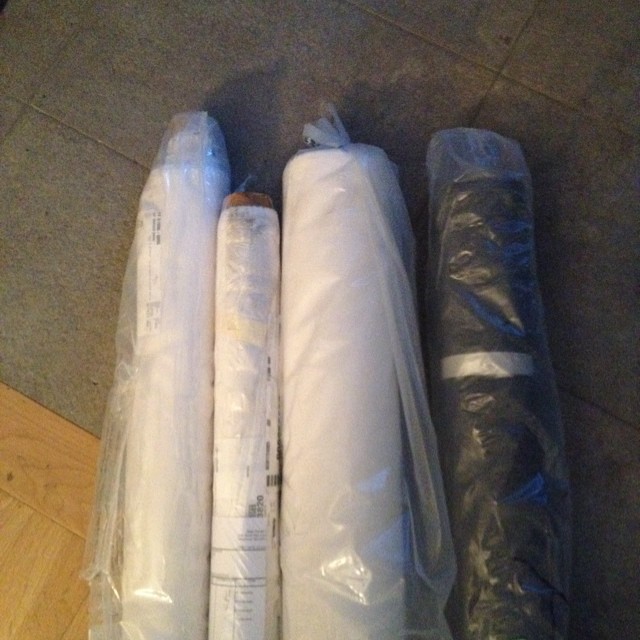
We selected a Sunbrella sheer outdoor fabric for the canopy, Shadow Snow. It will filter out the harsh sunlight, but not block it completely. The last thing we wanted to do is remove all the beautiful natural light from our bedroom. The canopy will be loosely draped over the frame, and removable for winter. (Thinking corner grommets and hooks on the top of the pergola.)
Speaking of fabric. Our whole Sunbrella order arrived this week, and I’m super stoked.
Looks like I’ve got a hell of a lot of sewing to do! Anyone want to come help? I’ve got two machines! That or I teach El Granto. I think that’s a damn good idea actually! He’s a great hand sewer. He’s the king of sewing motorcycle patches to his denim jacket and vest. No, not the gang variety. We’re friendly neighbourhood bikers, not Sons of Anarchy bikers.
Where was I? Busying myself with projects apparently. Looks like we’re going to have another full weekend.
P.S. It was my birthday yesterday, and my awesome husband baked me a gluten free cake. The dog was a bit jealous, but man was it good. Best. Husband. Ever.
Have a great weekend, and follow us on Instagram to see what we get up to!
I completely missed our Blog Anniversary last week!
On July 5th, we officially turned two!
I had plans of a whole Blogaversary week with my fave stuff, behind the scenes etc, but heck, summer happened, and so did work in our backyard. However, I will give you one flash back post!
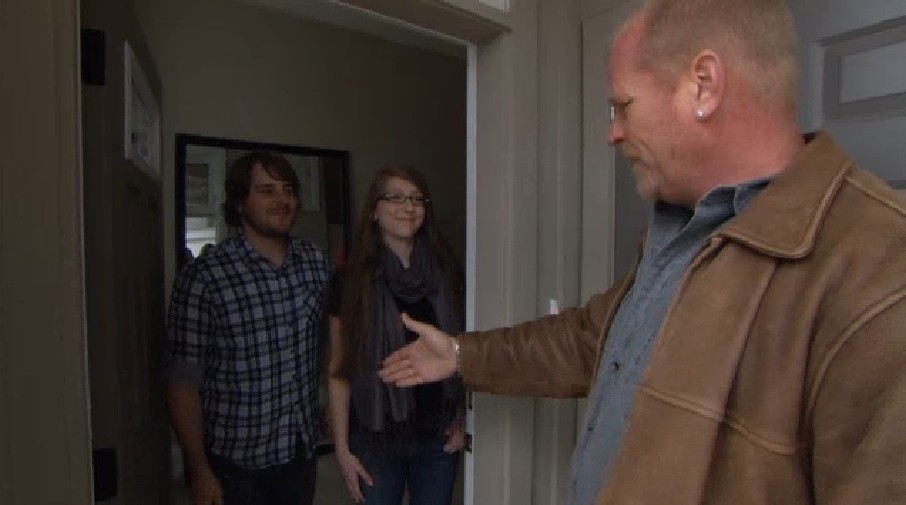
I was talking to a good blog friend a few weeks ago, and mentioned that my lifelong dream was to have my own show on HGTV, and that we had loved being on Holmes Inspection. She gave me the WAIT WAIT WAIT, you were on HOLMES INSPECTION? And I was all like “yeah dude, Mike Holmes fixed our house! It’s on my blog!”. Then I realized I posted about being on the show on my 2nd ever blog post. Back when…oh about two people read the blog (Thanks Moms!)
So I said to myself. “Maybe my new readers don’t know about the time I cried on international TV, and Mike Holmes saved our butts”.
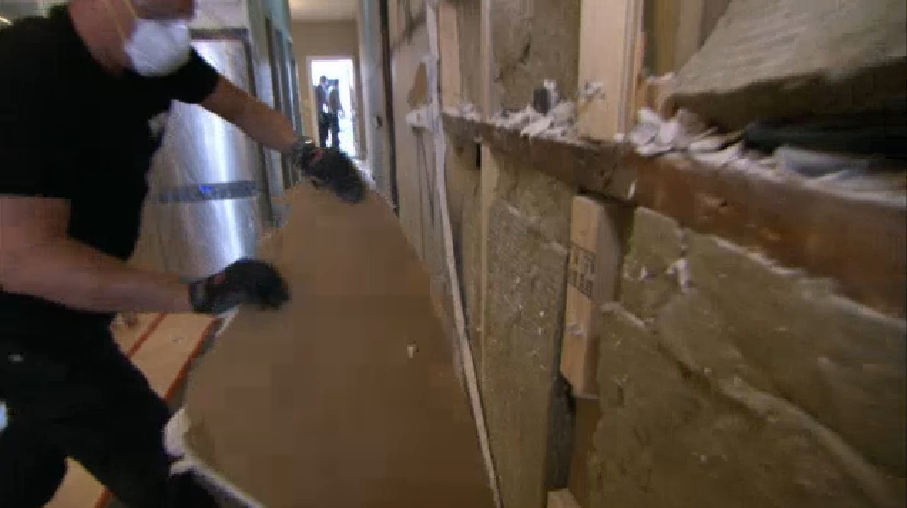
Here’s the scoop. We moved into our place, and had big problems from day one. We were in over our heads, and had spent ALL our money on buying the place. We had a home inspection (from a VERY reputable company) but a lot of things were missed.
Mike, Damon & the team stepped in, and fixed all the problems hiding behind the walls of the Storefront.
I wont spoil the show for you, so head on over to HGTV and give it a watch!
Watch our episode “Moisture Madness” on hgtv.ca
For my American & International readers, I don’t think it will let you watch it on the Canadian site, and I do not see whole episode listed as streaming on hgtv.com. Keep an eye out for our episode on your local listings, or give it a google and see if you can find it.
We get a ton of questions about the show. Here are answers to your most asked questions!
Whats Mike Like? Exactly as you see him on TV! He is kind, friendly, funny, and cares sooo much about quality construction, and helping people! The first time we met him was literally when he knocked on our door in the show. Nothing is scripted. He is genuine, and it was awesome to have Mike and his team come to our rescue.
Did we have to move out? Yep! We had a lot of construction going on, and some safety concerns, so we moved out for the duration of the show. We stayed at Grant’s Mom & Dad’s place, and the only time mid construction that we came back to the house was when you see us come back in the show.
How did we get on the show, and why did we apply? It was Christmas time, the house was falling apart around us, and no contractors were returning our calls as it was the Holidays. Defeated, we were sitting on the sofa watching TV, and a Holmes Inspection marathon was on HGTV. El Granto turned to me and said we should apply. I said, oh our house isn’t THAT bad, is it? He said…well, yeah it is. We emailed them our story via their casting call on hgtv.ca. I drafted the email, read it back aloud to El Granto, and burst into tears, as yeah, it did sound pretty terrible when you put it all on paper. Our story must have been compelling, as they picked us!
When did the show air? It aired in September 2011, a week and a half before our wedding! Don’t worry, we still got married, although we did have to postpone our honeymoon, and never did get to go to Europe. Instead we took a short tropical honeymoon six months later.
Did you have to pay? How much? Sorry guys, we’re not discussing anything about money. That’s private!
Would we do it again? OF COURSE! They saved our butts! We owe Mile & the team a world of gratitude and I don’t know where we’d be without them. We now have an awesome home, that we are loving putting our own stamp on.
Let me know if you have any more questions, and I will do the best to answer them.
Have you ever be on TV? Have any television aspirations? What did you think of our episode?