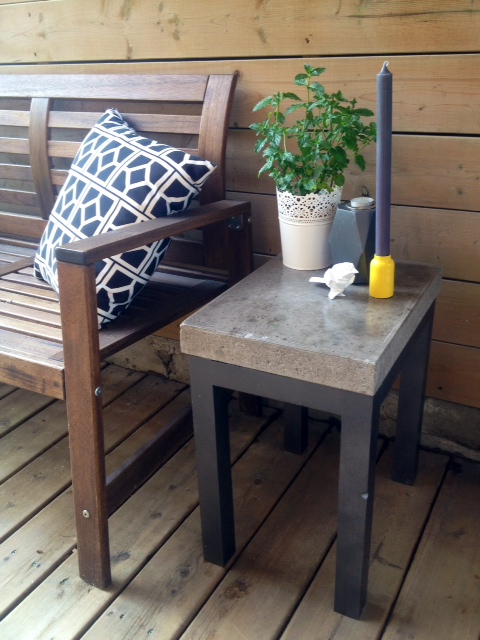
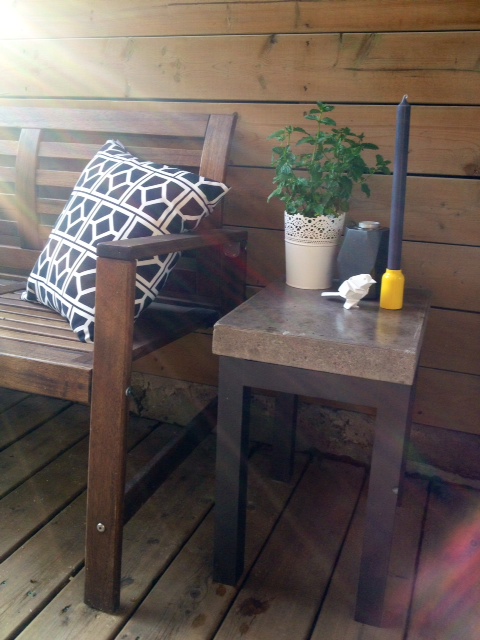
As we continue to push ahead with the backyard reno, I am starting to think about the smaller details. Accessories, lighting, flowers, furniture etc. We are currently happy with our outdoor chairs, but the rest of our outdoor furniture leaves a lot to be desired. We were using a old chipped green table with a cigar burn as a side table. Not the best looking piece of furniture…
As a place to set a drink and small plate of food is a must have in any backyard, I did what any DIY’er would do. I set out to make a useful, stylish new side table.
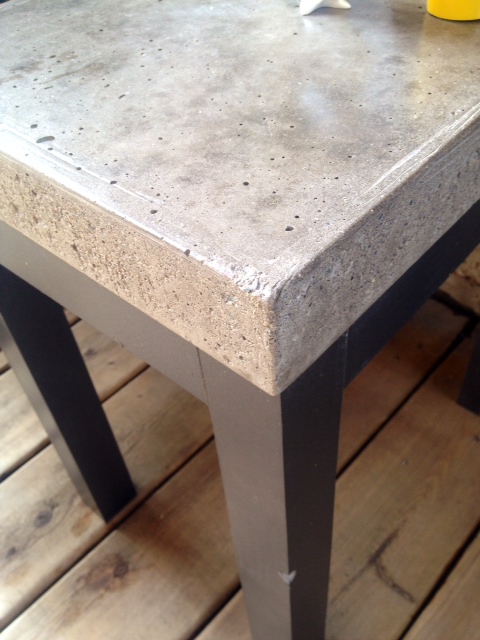
Back before we embarked on our concrete countertop project I made a small concrete test slab with some cheap big box store concrete mix. It had some big flaws, and I cringe when looking at it now. I used the wrong mix, did some sketchy form caulking, used a product with too large aggregate, and didn’t get out all the bubbles! None the less, I had created it, and rather than throwing it into landfill, I opted to re-use it.
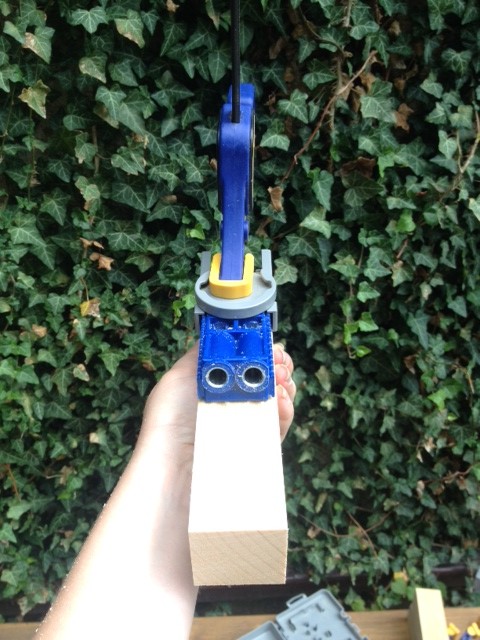
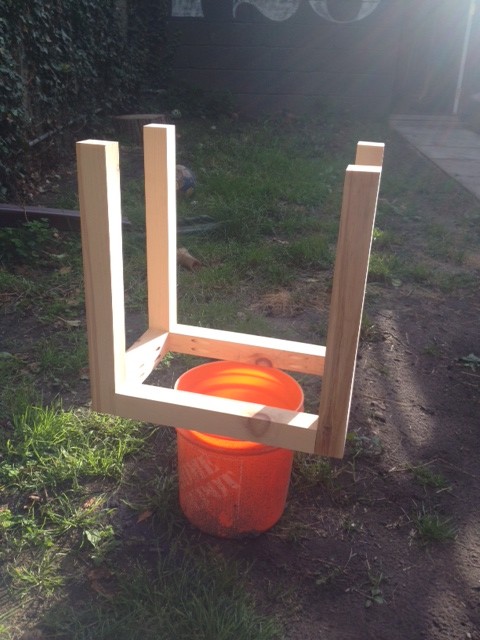
I fabricated some simple modern table legs, and this is the end result.
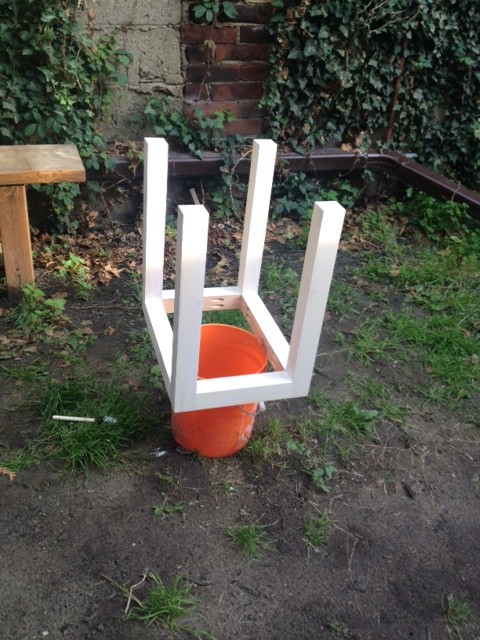
The legs are made with some kiln dried 2×2 pine from our local lumber yard. It was assembled with some simple pocket holes and screws.
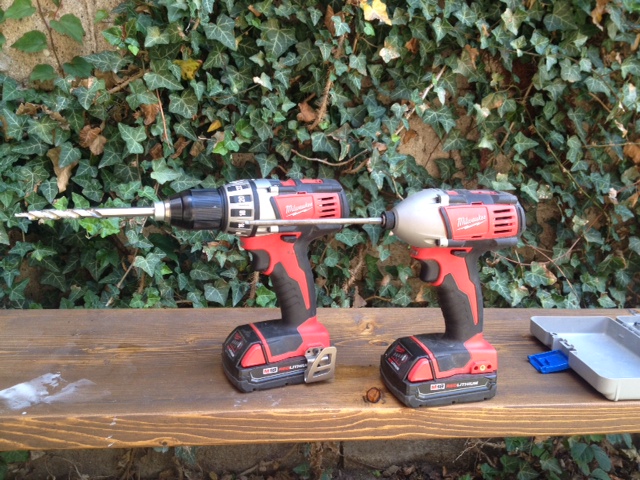
DIY TIP! I like to have two drills (or a drill and a driver) for working with pocket holes. One for drilling, and one for driving the screws. It saves having to change the bit every few minutes!
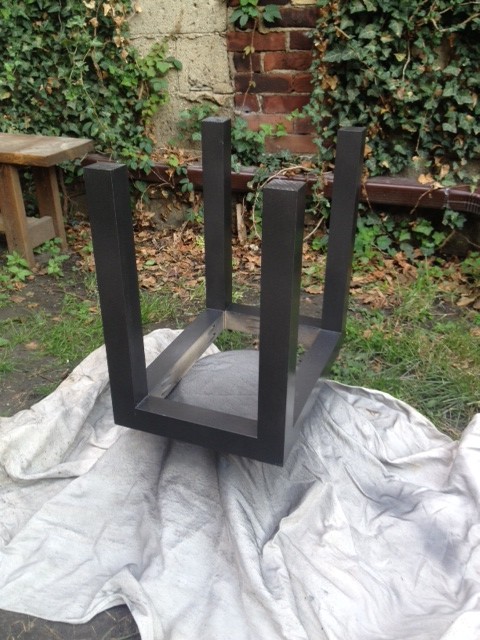
The legs were primed and then painted with Rustoleum Universal Flat Metallic Soft Iron spray paint (looove this paint and colour).
We topped the legs with our recycled concrete slab and sealed the concrete with the Buddy Rhodes concrete countertop sealer. If was to do this project again, I would have used the Buddy Rhodes mix instead of the cheap big box mix (the BR mix is lot lighter and easy to use.)
If you were to do this project, you could easily pour the concrete top yourself, or buy a prefab concrete patio stone at the big box store. If your patio stone has a texture on it, consider flipping it upside down so the raw concrete side is exposed. Make legs to fit your slab, seal it and you’ve got an inexpensive industrial table!
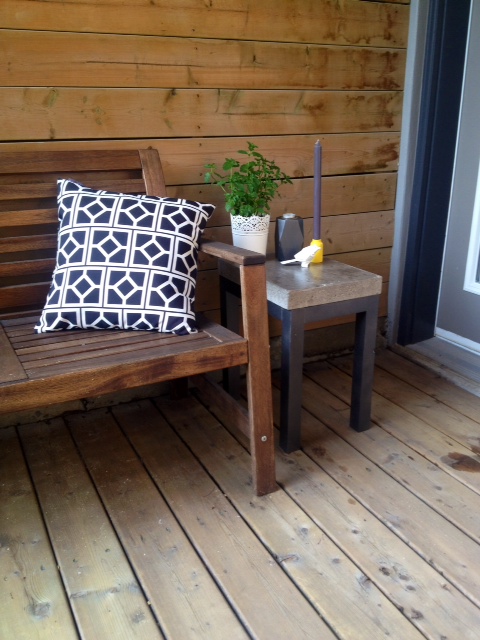
Here’s a few more shots of our finished table.

SOURCE LIST:
Materialst:
Concrete – Hardware Store
Concrete Sealer – Buddy Rhodes
1 2x2x10 kiln dried pine – Downtown Lumber
2 1/2″ pocket hole screws – Lee Valley Tools
Zinnser Primer – Home Depot
Rustoleum Universal Flat Metallic Soft Iron spray paint – Home Depot
Tools
Drill & Driver – Milwaukee
Measuring Tape
Kreg Jig – Lee Valley
Difficulty Level (on a scale of 1-5):
Total Cost $40
Beats spending $1155 at Restoration Hardware for this, doesn’t it?!

What do you think of our new table? Would you give a try at making one?
this is so cool and I really want to try it, I just have one question. Is the concrete base anchored at all to the legs or is it simply resting a top of them?
It is not anchored but you could use some construction adhesive if you wanted.
Wow that looks great and such a great idea for using your test slab. Great use of recyclable materials!
Hi Kristen, I love your concrete tabletop! I bugged my husband for several years and when we remodeled our kitchen he finally gave in. With the help of our 2 boys we now have a concrete countertop without any seams. He framed and poured the concrete over the original countertop. It turned out really well. He added black sand, graphite color and some pieces of iridescent glass shards. We both wished we had added more glass pieces, but he wasn’t sure what the look would be, but all in all we love it.
Just stopping by to let you know that I featured this project on my site! Check it out here:
http://www.diylookbook.com/concrete-side-table/
Wow! What a classy table. Love it. It looks gorgeous with the warm wood.
Looks great! It got me to wondering how your kitchen counters are holding up to stains, chips, etc? Would you consider a follow up post after enough time has passed living with them?
Hi Lynne,
They’re holding up amazingly! No cracks or chips. A few stains (all my fault), but the stains are pretty easy to deal with (a light sand, and re-seal) I will for sure give an update post sometime soon!
oooo excellent! I was wanting to second the concrete counter update post, esp since after reading about yours, it’s one of the choices we’re thinking of for our kitchen redo.