Paint those Knobs

When we bought the Storefront there was an overwhelmingly large amount of stuff that needed purchasing. The house came without closet rods, window coverings, shower curtain or rod, or even a bathtub plug. So when we moved in, we took a big trip to Ikea and Home Depot and bought the things we needed. It all started to add up very quickly. We tried to save money anywhere we could, and new locking door sets was one place we saw the ability to save a lot of coin. We needed four locking doors. Two dead bolts & two locking handles for our exterior doors (front door, back door, garage & our master balcony). We spied a 4 pack of deadbolts & handles for a great price in stainless steel, brought it home and installed.

s door knob
Stainless door knob

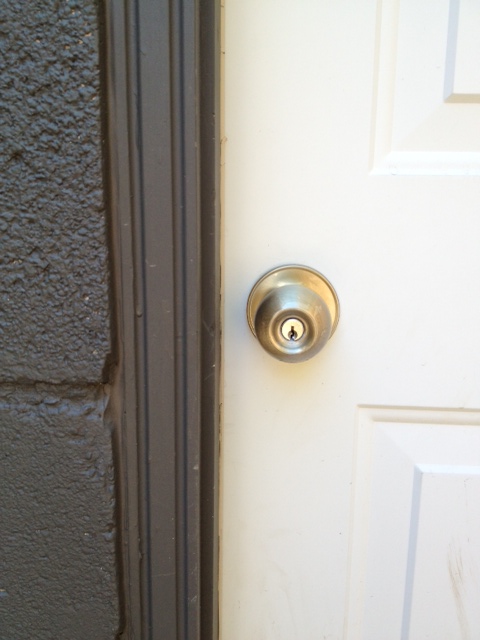
Two years later, and they’re looking shabby. They were covered in some sort of protective covering, which is peeling and looking pretty haggard. Something needed to be done. So what would it be, buy new ones, or try to refurb the ones we have? Time for some spray paint.

Practically everyone on the entire internet has painted doorknobs (don’t believe me? Do a google search for “spray painting door knobs”, or look on Pinterest.) See? The whole internet. Some with better results than others.

So I decided to jump on the bandwagon. I had previously spray painted closet handles with RustOleum Universal Oil Rubbed Bronze, and they are still in perfect condition, so I figured that was the way to go.

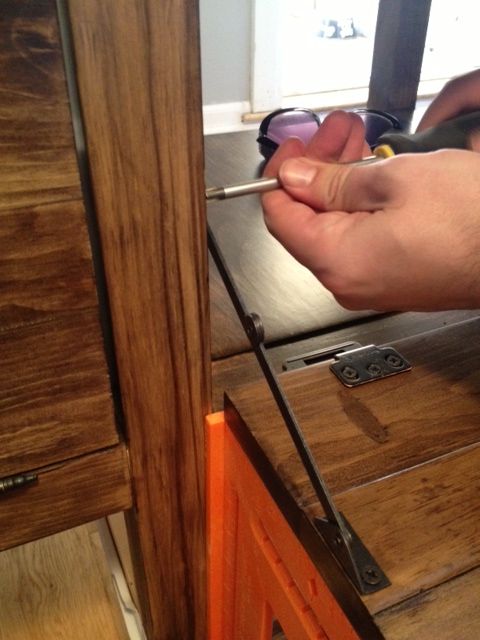
The problem is, (as most know) we live in a very urban environment. We live in a converted Storefront, on a very busy street, steps from the subway. While we have plenty of lovely neighbors, there is still a bit of crime, drugs, prostitution, and generally we try to be very aware of our surroundings, and try to keep our house (and us!) as safe as possible. SO, taking off all the door handles and locks for two days while we spray painted them, was not an option. Each of our doors has both a deadbolt and a locking handle. Overkill I know, but it came in handy for this project, as we were able to take off either the handle or the deadbolt and paint it, while the other stayed on the door keeping the ability to lock it.

door knob
Doorknob removed, prepped and waiting for paint

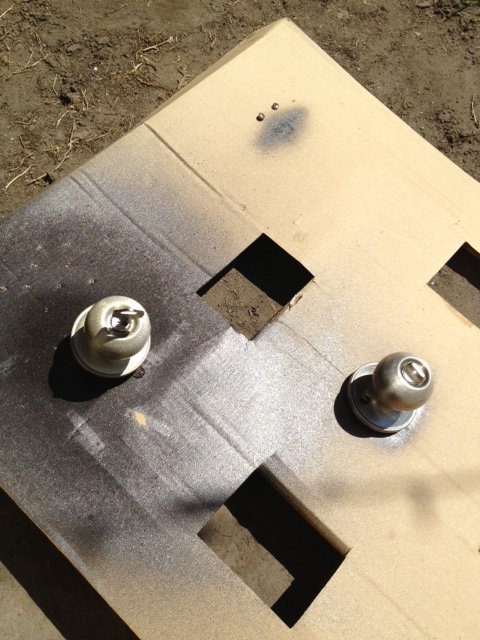
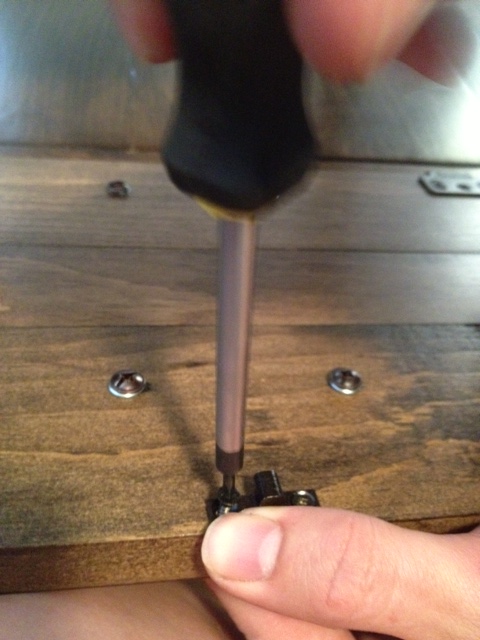
So off came the locks, one at a time. They got lightly sanded (using 320 sandpaper), cleaned with a degreaser and dried. I then placed an old key in the lock and sprayed with several thin coats of spray paint. They dried for 24 hours, and then were re-installed.

Painted door knob
Painted door knob
Painted door knob
Painted door knob

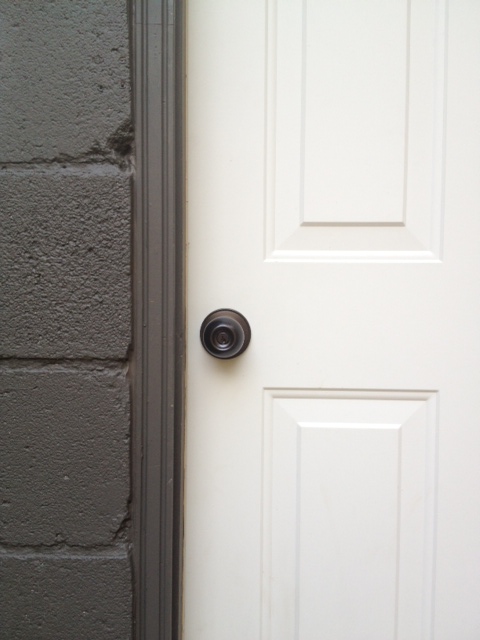
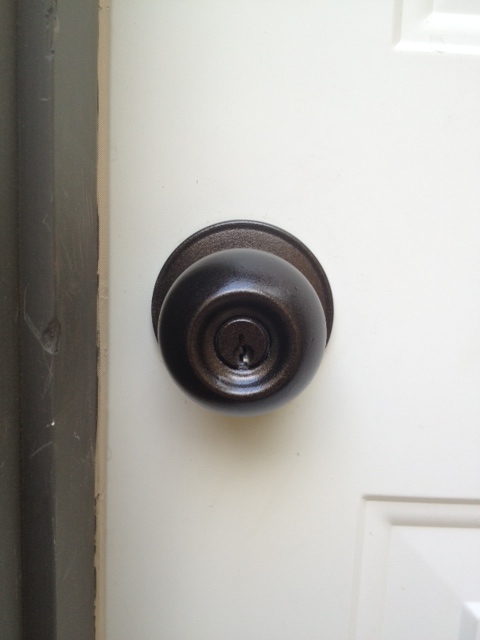
We still have a few remaining knobs around the house, but so far the garage and back doors are looking snappy in their new ORB clothes.


Benched

Daniel & Adelle’s Farmhouse Table project is coming along. The tabletop is built, stained and ready for polyurethane. We still need to make the legs & aprons, but its getting there! We also managed to knock off some progress on the matching benches.

The benches are 77″ long, which means they will just fit underneath the table. The reason they went with this design was so that the benches could completely fit under the table when not in use. This will work well in Daniel & Adelle’s long but narrow dining space. Being able to get rid of the benches also means the dining room can quickly be turned into an impromptu dance floor when a dance party just happens to break out. What, you don’t have surprise dance parties in your dining room? Psssht, you’re not living until you dance like Elaine, or break out a Tom Cruise pantsless dance routine in your dining room. Impromptu dance sessions happen all the time with our friends.

The benches are simple, but needed a bit of cutting, sanding and a load of pocket holes. We got started by sanding the bench top, and cutting the legs, aprons, stretcher and stretcher support.

Sanding the Bench Top
Adelle cutting the legs & support pieces
Adelle cutting the legs & support pieces.

All the support pieces are made from spruce and the bench top is from 2×12 pine. For the aprons, straight up 2×4’s would have been a bit bulky and heavy, so we ripped down 2×4’s to 1 1/2″ x 2″ on the table saw for the side & end aprons.

ripping boards
Ripping the apron boards.

The assembly of the bench was a bit tricky due to the limited space for the pocket holes. The pocket holes for the apron supports actually intersected each other. Good thing all of this will be hidden! We also broke out the corner clamps again (they are getting a lot of use!)

Stretcher & legs
Attaching the stretcher support to the legs

We used a ratchet and driver bit to manually drive all the screws for the bench legs. At this point in time I believe I felt it necessary to check on the dog, or tie a shoe, or any task that got me out of screwing in all those difficult screws.

Once the legs were assembled we attached the aprons (insetting them by 1/8″ for a little flair) and the bench was made.

Attaching Aprons
Attaching Aprons


Bench Complete
Bench Complete

Awesome, complete, woot!

Wait…why does the bench top look so long??? Oh CRAP! I got so carried away at the start, I forgot we needed to cut the bench tops down to size! Woopsies! This bench was 7 feet long, when it was only supposed to be 77″. Now what? We do disassemble the whole thing and cut down the top?(Remembering all those screws put in by hand….) That doesn’t sound like fun…

OR we could lift the whole bench upside down and cut the top on the miter saw. Seriously?!

cuttingdownbench
Cutting the bench top

YEP. It happened. The miter saw table rollers & two people held up the bench, while Daniel cut the bench top down to size. Phew, crisis averted. At least I didn’t screw up the whole project. With a few minutes work, we were back on track. I am very thankful I realized before staining!

Speaking of staining, after all that sanding was done we applied wood conditioner and then stained away. Talk about a staining party. The four of us were staining away in our tiny garage on a Tuesday night. (Even El Granto picked up a brush and he doesn’t do that often!)

Aint no party like a staining party
Aint no party like a staining club party

One bench built & stained, one more bench to go!

bench stained
Bench Stained

Farmhouse Table – Making the Table Top

We made some headway with Daniel & Adelle’s Farmhouse Table in the last week. We put in one solid days work on the weekend, as well as one weekday evening.

Our work was a bit all over the map, as there was four of us we decided it was best to go our separate directions and knock off different tasks. I will try to focus my posts on each specific topic, and today we’ll get down with how we made the table top.

The Table Plans
The Table Plans

Bright and early we headed to the lumber yard, bought all the lumber & supplies, and rented a Zipcar van to get them all to the garage. We are using spruce for the legs & supports and gorgeous 2″ thick pine for the table and bench tops.

Lumber
Lumber purchased (and no, we did not plan to bring it home on that scooter)

We inspected the tabletop boards, and decided on layout. We attached the tabletop boards together using the Kreg Pocket Hole system, 2 1/2″ screws and glue.

boards
Deciding on board layout
marking
Daniel marking the Kreg pocket hole locations
pocket holes
Daniel drilling the pocket holes (Dan is now a Kreg expert)
glue
Glue baby glue

We added support pieces to the underside of the table to try to curb any warping the table may want to do (we are not using breadboard pieces on the table, so we wanted some extra assurance that things would stay put.)

cross supports
Adelle attaching supports under the table top

After that, we clamped on a guide (we used a level) and cut the ends flush on the tabletop with a circular saw. The poor saw had a bit of a tough time with the thick wood

Cutting ends
Cutting off the ends of the table top so everything is perfect

Sanded, sanded and sanded some more. While two people were power sanding, the other two were alternately cutting the rest of the lumber we needed, and hand sanding.

sanding
Sanding, sanding, sanding…

After we could just sand no more, we decided to give the table top a coat of wood conditioner, then a coat of stain.


wood conditioner
Applying wood conditioner
stain
One coat of stain applied

We let the stain dry, and applied a second coat a few days later.

Two coats of stain
Two coats of stain
Details
Close up of the table top

The table top is now ready for poly, and we can move on to making its legs.

We are not going to assemble everything until we’ve moved it to Daniel & Adelle’s new place, as this huge table would never fit through doors assembled!

This weekend is a holiday weekend in Canada. I think we will be turning our attention to gardening, bbq’s and drinks on the deck. I fear we will not be very productive this weekend!

Any big plans for the weekend? BBQ’s, cottages, fireworks?

Project Modern Farmhouse Table

Our friends Daniel & Adelle are moving into a new place, and have asked us to help them build a table and benches for their dining space. We jumped at the opportunity. We love building things, we get to try some new techniques, and we get to help out friends. Win win situation.

They have been scouring the web for inspiration for the past few weeks, and decided on a modern farmhouse table and two benches. Their space is large, but narrow.  We took a basic farmhouse table, stretched it out to be 8 feet in length, and shrunk the width. We also designed skinny long benches that will tuck under the table on either side. The table has similar dimensions to an 8 foot long banquet table, and will be able to comfortably seat 8-10 people.

Want to see the plans?

The Table Plans
The Table Plans

My hand drawings just are not as pretty as CAD blueprints, but you’ve gotta work with whatcha got, right?!

Here’s the details:

  • The top is made from kiln dried pine 2×10’s, and the frame is made from spruce 4×4’s and 2×4’s. They decided to omit the “breadboard” ends seen on many farmhouse tables, and instead using three wider planks the length of the table.
  • The benches are similar to the table, except their tops are pine 2×12’s and the legs are 2×4’s.
  • The table and bench tops will be stained dark and polyurethaned, and the bases will be painted white.
  • We will be using the Kreg jig for quick and easy assembly.

The plan is for the four of us to work together and knock out as much as possible this Saturday.  I foresee having someone measuring everything, another person cutting, one operating the drill, and one sanding. Hopefully we can knock out this big (but fairly simple) project in a day!

I will check back in next week with our progress, and a full tutorial & cut list when we’re finished. Wish us luck! Do you have any big projects planned for this weekend?

Fancy Pants Drawer Liners

The bottoms of the drawers for our media cabinet were a bit, well…not living up to their potential. We used hardboard & chipboard as the drawer bottoms and compared to the stained wood on the rest of the piece, they look a bit shabby and out of place.

drawer bottom
The poor shabby little drawer bottom, covered in stain and looking sad.

I knew all along that my anal retentive personality wouldn’t let the drawer bottoms live in such a state. Not only were they not up to par, but they were an excuse to add a bit of fun to an unexpected place. I love adding colour/drama where you least expect it (like my purple wallpapered closet doors.)

For the drawer bottoms, I narrowed it down to either paint or paper. While paint could be fun in a nice bright colour, I decided on paper in the end to add a bit of a graphic punch.

There is a newly opened store in my neighbourhood called TOWN that I knew would have some lovely papers. (They also have the best selection in cute cards!). The selection at TOWN did not disappoint, and we spent several minutes trying to decide on just one pattern (would have bought them all!) We took our sheets of heavy weight wrapping paper home, cut out squares to fit the drawer bottoms, and got to gluing. I used Elmer’s extra strong spray adhesive (the same spray adhesive I use to attach foam for upholstery projects). A few quick sprays of adhesive, and careful application onto the drawer bottom, and we had a much nicer looking drawer.

drawer
Drawer bottom lined with paper
Media Cabinet Drawer
A little pop of sunshine every time you open one of the drawers
Drawer
Ahhh, isn’t that much nicer?

I bet you’re wondering how much use we get out of those skinny little drawers. LOTS, they hold remotes, video game controllers and all sorts of little things that you don’t want out all the time, but would get lost in the big drawers. I am LOVING not having the XBOX and PlayStation controllers hanging out on my end table!

Controllers
Yay! Controllers and USB keys are happily hidden away.

The drawers are lined, now I can sleep again. (Isn’t everyone kept up at night by the thought of an unsightly drawer bottom. Wait, that’s not normal?)

SOURCE LIST:

Materials:

Wrapping Paper (3 sheets) – TOWN the Store
Elmer’s Spray Adhesive

Tools Used:

Ruler
Pencil
Scissors

Difficulty Level (on a scale of 1-5):

one out of five

Total Cost: $16

Printmakers Media Cabinet – The Reveal

Its been six weekends of hard work, but we finally reached the final stretch of the printmakers media cabinet project.

This is where we left off. The cabinet was built and sanded and ready for finishing. If you missed it, check out part one, two, three, four, and five of the project.)

Cabinet built
Cabinet built and ready for stain & hardware

Next up we took all the drawers outside, and set up a staining station, and gave everything a coat of wood conditioner.

Wood Conditioner
The drawers & doors ready for wood conditioner
DIY Tip: Put your cabinet on scrap wood to make it easier to stain the bottoms of the legs

After letting the wood conditioner sit for half an hour, we set out to staining. We had done many a test on stain, and came across a cool technique we wanted to try on the cabinet. It involved wetting the wood, then putting on oil based stain on top of the water, then quickly wiping away. It left an almost zebra like effect. We knew it was going to be a risk, but decided to give it a try none the less. It involved several hours staining, many a swear word, lots of teamwork, and a whole lot of second guessing.

Cabinet stained
Cabinet stained

We took two days to stain everything, the first day we did the cabinet and all the drawer & door fronts. The next day we stained the interior of the cabinet and the drawer boxes. For the interior, we didn’t bother doing our stain technique, and instead just used the stain traditionally.

After the stain dried, we applied several coats of polyurethane, sanding with a 320 grit sandpaper in between coats. We put a total of 5 coats on the top of the cabinet, and three everywhere else.

We use Oil-Modified Polyurethane with a foam brush
Drawers & doors mid-polyurthaning
Drawers & Doors mid-poly

Once the poly had dried, we set to installing hardware. The screws that came with our cup pulls were too short for the double thick drawers, and too long for the single thickness doors. So we headed to the hardware store and picked up longer screws for the drawers, and El Granto cut down the screws with the dremel for the doors.

Ready for Hinges
Pulls attached to door fronts, and ready for hinge installation

After the handles were installed, we set to installing the hinges, stays and clasps for the doors.

Installing hinges on the doors

This involved a whole load of finikity work, lots of tiny screws, and stubby little screw drivers to fit into the cabinet.

Attaching hinges to the cabinet
Attaching claps to keep the doors closed

Next up, we needed to add the lid stays to make sure the doors dont open too far. We wanted them to stop at 90 degrees.

Installing lid stays

We used a square to hold the door at 90 degrees and attached the stays with small screws.

Now we could set to putting all our electronics into the cabinet. To keep things neat, we installed power bars to underneith the back of the shelves. This keeps the cords off the ground, and makes it so that the cabinet can sit flush with the wall.

The view of underneath the shelf in the cabinet showing the power bar.

We routed all the cables and electronics as best we could through the cabinet, and its so much more organized than our old media center!

The electronics all tucked into the cabinet

Enough with the technical stuff, are you ready to see what it looks like all finished?

DRUMROLL PLEASE

photo 3(6)

photo 5(2)

Drawer

photo 1(4)

photo 2(3)

photo 5(4)

Now a little comparison between our cabinet and our inspiration: the Restoration Hardware Printmakers Media Cabinet. (ours on top, the RH cabinet below)

image

What do you think?!

SOURCE LIST:

Plans:
DIY Plans for an RH Inspired Printmakers Media Console – Design Confidential *(a BIG Thanks to Rayan @ Design Confidential! Her plans are awesome!)

Materials:

Hardware: ($130)
15 cup pulls – Lee Valley
6 inset hinges – Lee Valley
6 sets drawer slides – Lee Valley
3 lid stays – Lee Valley
3 cabinet clips – Lee Valley
8 1 1/2″ felt furniture pads – Dollarama

Lumber: ($100)
8 – 2x2x8 – Downtown Lumber
2 – 1x6x8 – Downtown Lumber
5 – 1x10x6 pine shelves – Home Depot
3 – 1x2x8 Downtown Lumber
6 – 1x4x8 – Downtown Lumber

Finishing/Misc: ($50)
Wood conditioner (already owned)
Stain – Varathane “Kona” – Home Depot
Polyurethane – Minwax Oil Modified in Satin
Minwax Stainable wood filler – Home Depot
Kreg Screws – Lee Valley & Home Depot
Foam brushes – Dollarama
Shop rags
Sand paper

Tools Used:
Kreg Jig
Drill
Mitre saw
Table saw
Palm sander
Square
Level
Wood clamps
Corner clamps
Short Kreg drill bit
Stubby screw drivers

Stats:

Trips to lumber yard -4
Trips to hardware stores -10+
Coats of polyurethane – 5 on the top, 3 everywhere else
Stain samples made before deciding on one – 11
Time involved – 6 weekends, 70-80 hours total
Number of electronics in the cabinet – 11
Number of screw-ups – 3
Number of arguments – 2
Total pieces of wood – 119
Screws – about 300
Injuries – 0!
Swear words – more than I’m proud of

Difficulty Level (on a scale of 1-5):

five out of five

Total Cost: $280

Media Cabinet – The Final Steps

I feel like we’ve been working on the media cabinet forever (check out part one, two, three, and four). The whole being a grown up and having to work 40 hours a week really gets in the way of project time. The end is however finally in sight. In fact, this will be my last update before the reveal.

Where we left off, we had made the drawer boxes for the upper and lower drawers. We then had to cut down the upper drawers as they were too tall. Oops.

Cutting the sides
Trimming the height of the drawer boxes.

We used our new table saw to cut everything down to size (setting the fence and ripping each side of the drawer until they were all the proper height.) After a quick sand, we installed the drawer slides and had operating upper drawers! (woot!)

All the drawer boxes installed (the drawers will have fronts on them to make them look all fancy like)

The way this cabinet is designed, the drawer boxes are fabricated and installed,  then drawer fronts are attached to them (to cover the unsightly visible hardware and gaps.)

The center portion of the cabinet also gets fold down doors to hide all the electronics.

Now we needed to make the drawer fronts & doors. We headed to the garage and ripped down a bunch of lumber to size, then did all our length cuts on the miter saw.

All the wood cut and ready to assemble

The larger doors & drawers are actually made up of three pieces attached together so that they look like two small drawers and a spacer. (as its supposed to be a printmakers cabinet that looks like it has lots of little drawers.) To attach them together, we used pocket holes and screws.

Assembling the drawer fronts using the pocket hole system. (also note the use of a square to keep everything all nice and straight & square.)

After everything was assembled I spent the afternoon filling and sanding everything.

small drawer fronts
The three small drawer fronts ready to go
large drawer front
One of the large drawer fronts. You can see how its made up of three different pieces.

Then we used our Ikea Fixa drill template to mark where we needed to drill holes for all the handles. We have gotten so much use out of that darn template. Worth every penny.

Fixa template
Marking holes for the cabinet hardware
Drilling the cabinet hardware holes

Next up we needed to install the fronts. The plans call for a very ingenious way to do this. (Sorry for the lack of pictures, this was an all hands on deck kind of task.) Essentially you space the drawer fronts perfectly in the cabinet, and attach it temporally with two screws through the cabinet hardware holes.

temp screws
Temporary screws through the hardware holes holding the drawer front in place until it can be attached from inside the drawer

Then you take the drawer out, and attach the front permanently by putting a few screws through from the inside of the drawer.

attacing drawer fronts
Attaching the drawer fronts with some screws inside the drawer

Then you can remove the temporary screws from the hardware holes, and drill all the way through for the hardware. We continued on and attached all the drawer fronts this way. (Note, we didn’t attach the fold down doors, as we didn’t want to do that until everything was stained & finished.)

Now the whole cabinet is built, sanded and ready for finishing.

Cabinet built
Cabinet built and ready for stain & hardware

Ta da! All that’s left is stain, poly & hardware! Stay tuned for (hopefully) the big reveal next week.

Ikea Hack – Vittsjo Laptop Table

I was wandering through Ikea the other day, when I ended up in the office section. I didn’t need anything for the office (much less furniture!) but I browsed none the less. Out of nowhere, I spied this little table. Continue reading “Ikea Hack – Vittsjo Laptop Table”

Custom Framing Mats

Have you purchased any Ikea (or similar) frames only to have the provided mat be completely the wrong size for your art? You could go to an art or framing store and pay (heavily) for custom cut mats, or if you’ve got a few dollars and some time and patience you can do it yourself.

Back in my art school days, sick of trying (and failing) to cut mats with a straight edge, I broke down spent $50 of my poor ass college budget on a mat cutting kit. I then proceeded to cut all my art school project mats, as well as did a pretty handsome black market trade in cutting mats for my fellow students.

Mat Cutting Kit
Mat Cutting Kit

That (old battered) mat cutting kit still gets used several times a year, and has paid for itself many times over. If you are in need of several mats cut (doing a gallery wall any time soon?) If so, this may be the tool for you. Let me show you how it works.

A few weeks ago we purchased a beautiful print from a great local shop Town Moto. This vintage inspired motorcycle gear shop is one of El Granto’s favorite places. They have great gear & accessories as well as an in house design & print shop. They produce some beautiful motorcycle themed prints, and we brought a purdy new Moto print home. The print is gorgeous. Its printed on a lovely heavy paper, and its signed, stamped and numbered. A print like this needs to be presented in a way that equals its awesomeness. So I went frame hunting in the basement and found a great big Ikea Ribba frame previously used for an old highschool drawing. I ousted the drawing from its frame and stole the mat to use with the Moto print.

Reclaimed Mat
Reclaimed Mat

Problem is, the mat hole is MUCH too small for my print. The easiest thing to do here is flat mount the print, but that doesn’t look as nice.

Print much too big for the old mat

So I got out my mat cutting kit and set to work.

You need to figure out how big you want the new mat hole to be, and you need to draw the location of the new hole on the back of the mat so you can cut it. There are several different ways to do this. We wanted our print centered, so we did a bit of math (minusing the size of the new cut hole from the overall size of the mat to figure out how far from each side the cut hole needed to be.) Measure twice, if not three times before you cut, its easy to go astray especially if you’re dealing with 16ths of an inch etc. If you’re having problems with this step, feel free to ask questions and I will try (as best I can!) to explain in greater detail.

New cut lines drawn on mat

Place the mat (still upside down) into the mat cutter, and align one of your lines to the straight edge of the cutter.

See how theres a line on the cutter? Match that up to your cut line. It will ensure that you start & stop the cut right where you need to
Your vertical cut line is aligned with the straight edge and see how there’s a line on the cutter? Match that up to your horizontal cut line. It will ensure that you start & stop the cut right where you need to

Now starting at the bottom of the mat, place your cutter onto the mat, matching up the starting line on the cutter with the corner of the intersecting cut line. Push the blade into the mat, while holding the straight edge steady, and push the cutter along the straight edge, stopping at the top line of your cut hole. The key to this step is using a steady hand and pressure. Proceed to do all four sides of the mat, and ta da! Beautifully cut mat.

Newly cut mat with larger hole for our print
Testing to see how our new mat fits. Its perfect!
We framed the print so you could still see the signature and the embossed stamp on the print

Now insert your print, attach the back and hang your professional framed print on your wall.

Print framed
Print framed
The new print is hanging out on our back livingroom wall

*If my instructions are confusing, let me know. This may be a situation where its easier explained by a video tutorial*

SOURCE LIST:

Materials:

Print – Town Moto
Frame – Ikea
Mat – Art Store

Tools Used:

Mat Cutting Kit (we have the Logan one, you can pick up a basic mat cutting kit for about $50 at art stores)
Measuring tape or ruler
Hammer & Nail (to hang)
Old Butter Knife (my secret for prying up the tabs on the back of the frame)

Difficulty Level (on a scale of 1-5):

one out of five

Total Cost: $30