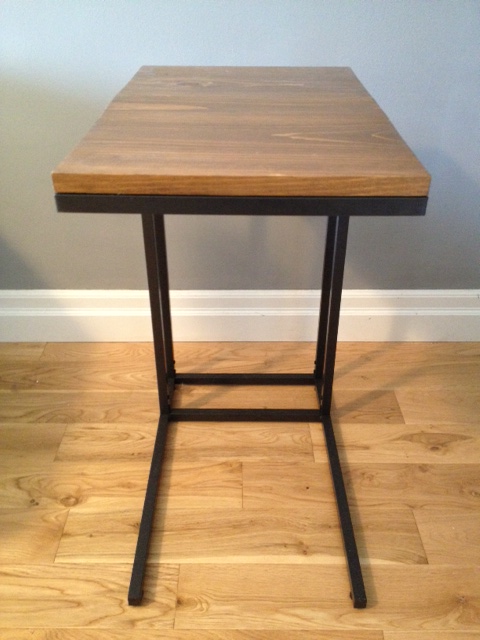
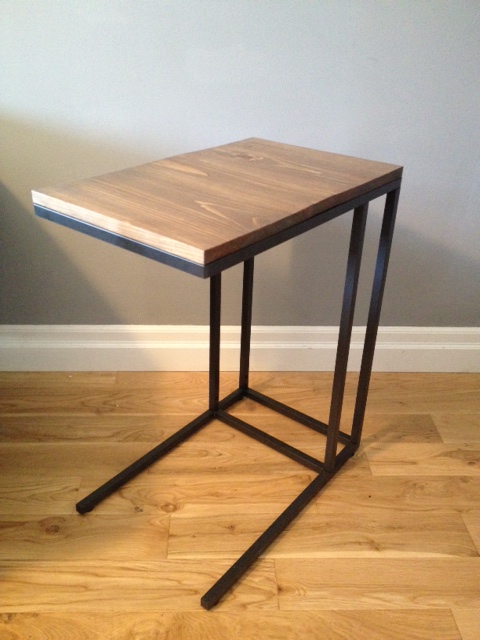
I was wandering through Ikea the other day, when I ended up in the office section. I didn’t need anything for the office (much less furniture!) but I browsed none the less. Out of nowhere, I spied this little table.
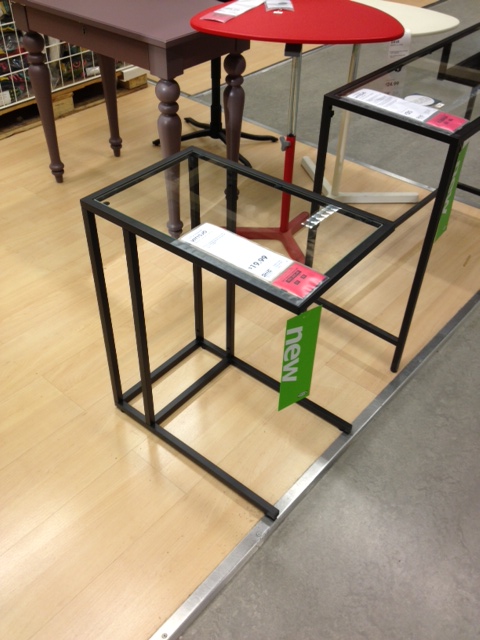
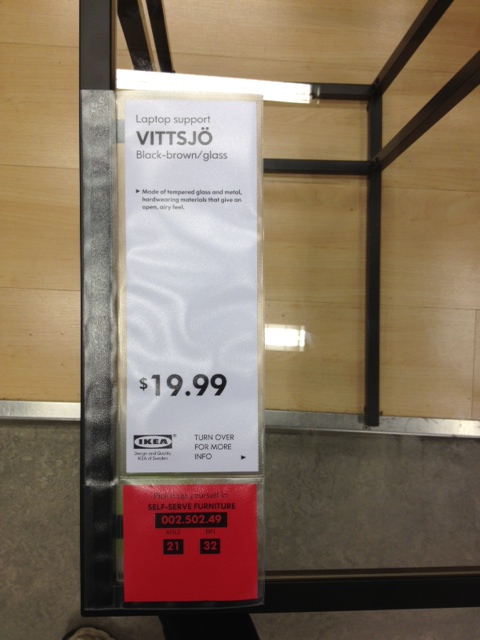
It’s part of the Vittsjo line. It’s a small table meant to sit over the sofa so you can work on your laptop. It’s new (so new in fact that I couldn’t find it online). I saw it and instantly thought it would be great as a side table in our living room (with a new top, I hate glass topped tables).
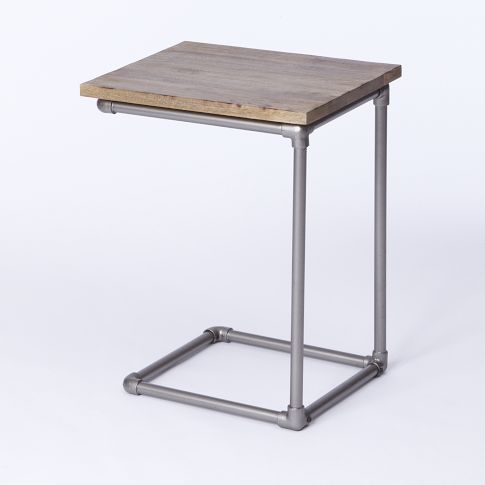
In fact I had pinned this pin a few weeks ago with the intent to make a side table out of copper piping & wood top.
The little Vittsjo Laptop table was a smashing good deal at only $19.99. I promptly texted it to El Granto to get his thumbs up before buying.
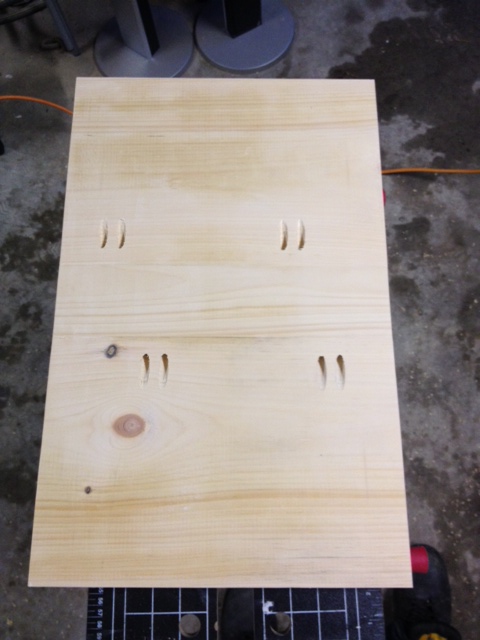
After I got it home, I set to assembling everything except the glass top. I decided I wanted to replace the glass with some wood (like from my West Elm Inspiration). I measured how big I wanted the top to be (I decided I liked the look of the wood siting on the frame, rather than inset like the glass was.) After I measured things up, we walked to HD and picked up a cheap $6 pine shelf board. I came home, cut pieces to size and attached them together using our Kreg jig and screws.
We finished the top with a coat of wood conditioner, two coats of chocolate stain, and three coats of furniture wax. We attached it with a few screws to the table using the tabs that once held the glass. We drilled holes in each of the tabs, then using small screws screwed through the tabs into the bottom of the wood top.
This is what we had after $26 and a couple hours work.
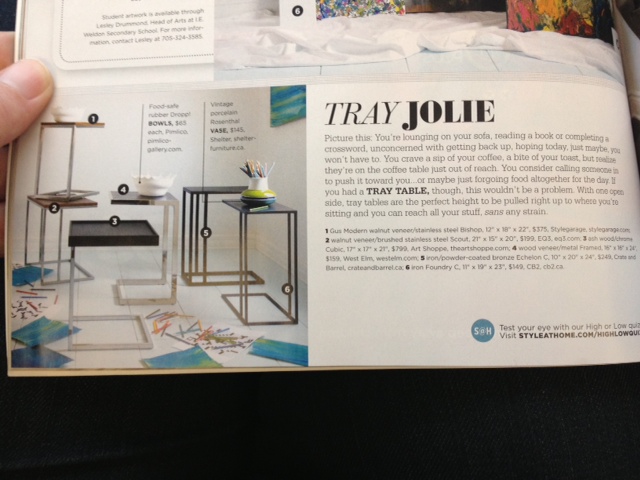
*Two days after we completed the table, I picked up a copy of the April issue of Style at Home and saw this article on similar side tables. At $26 ours comes in waaaay under the cost of all the tables in the article. Yay for style on a budget!
SOURCE LIST:
Materials:
Table Frame – Ikea Vittsejo Laptop Table – Ikea
Wood – Pine Shelf board – Home Depot
Varathane stain in Chocolate – Home Depot
Varathane wood conditioner – Home Depot
Minwax Paste Finishing Wax – Home Depot
Kreg Screws – Lee Valley Tools
Tools Used:
Miter Saw
Sandpaper
Rag
Kreg Jig
Difficulty Level (on a scale of 1-5):
Total Cost: $26
I’m tempted to get this table and replace the glass with a piece of wood inside the frame, like the way the glass fits; but also put a second cut-to-size piece of wood across the “back”, so that it could be turned over to act as a slightly longer, slightly lower coffee table, as well as its regular use as a laptop / side table…
Haven’t figured out how to attach the second longer piece to the back, but I’ll be passing IKEA on the way to my brother’s house tomorrow, and they sometimes have scrap offcuts of wood for free at the exit door, so fingers crossed!
That is just great! I really love it!
Amazing! what was the dimension of the glass? I’m hoping I can have the wood piece sit inside the metal frame.
Cheers
Is it possible to attach the wood with wood glue instead of a kreg jig?
love your spin on the table! Can you tell me a little more about how you attached your wood top to the table?
Morgan
Hi Morgan,
There are metal braces on the table for the glass to rest on. You can either drill a hole through them to screw into the wood, or use some glue to attach the wood.
This is genius- I love the idea of the VITTSJO but the glass top gives me pause (we have small children who will surely knock it over).
I love the color. What stain did you use?
What is the width and the length measurement of the wood please?
Thanks!
You can measure the glass for reference before you cut your wood. I got a piece that was 20″ x 12.25″, and it was only a teeny bit short in the length, so you could probably do something like 20.125″ for perfection.
This looks awesome. What were the dimensions of the piece of wood?
Hey I just wanted to say the table looks awesome! Just wondering though, what did you need the Kreg Jig/Screws for?
Thanks,
Andrew
Hi Andrew,
I used three pieces of pine for the table top (you could use one piece of plywood). I used the Kreg to attach the tabletop pieces together. It could have been done with glue + clamps, dowels or biscuits, bit I like the speed of the Kreg!
This table hack is amazing, thank you for the instructions! i’m definitely doing this
Thanks Erica!
Just found you through ikea hackers, this table turned out beautifully! Could you tell me the total height of the finished piece please? Thanks.
Hi Callie,
Thanks for the kind words! The finished height is 26 1/4″ (we used 3/4″ thick wood)
Great. Thanks for the info!
I just found your blog via rambling renovators and I love it! this is such a great project- thanks for the inspiration!
Thanks for the kind words Robyn, and we’re happy to have you as a new visitor!
Well done! I love a good Ikea hack! Especially when they turn out as nice as this one. 🙂