We’re selling the Storefront and moving to Paris! Not. Well unless the unchecked lottery ticket in my purse pays out.
Nah, we are not selling our house. We’re still madly in love with it, and have many more plans and projects to finish yet. However if you are looking for a storefront conversion of your own, one just came up for sale in the neighborhood. Since we moved into our house, I have become a little obsessed with other converted storefronts. Its the same way when you own a unique model car or motorcycle, every other person who owns similar make or model is a friend. You wave at each other on the street and there’s just this untold bond. Or again, maybe that’s just me.
If you’d like to join the Storefront club (by the way, it’s awesome, and full of super cool attractive people.) There is a recently completed modern storefront conversion for sale in our hood.
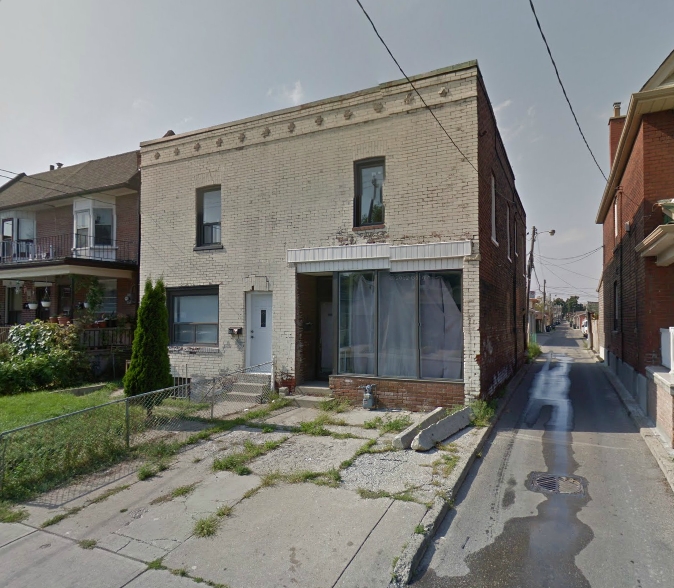
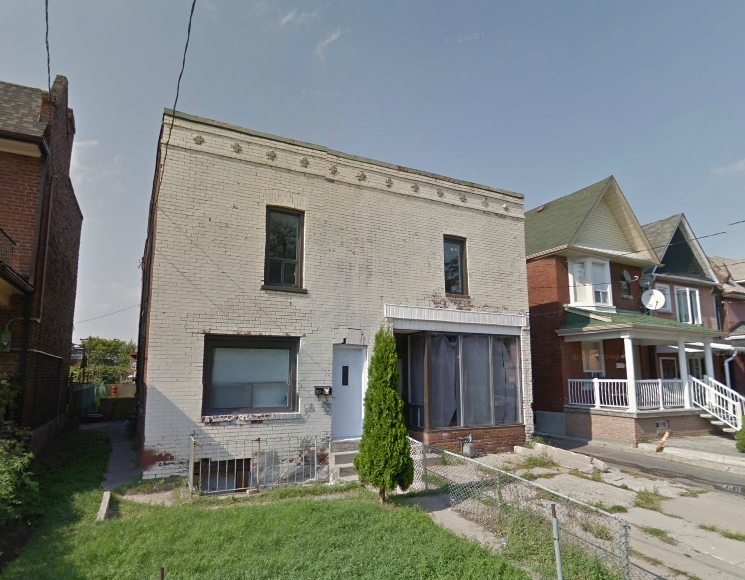
I have been following the renos of these two semidetached storefronts. They happen to be located on our evening dog walking route, so we have seen them go from structurally questionable uninhabited structures to pretty awesome modern conversions.
Before – Google Streetview undated imageBefore – Undated Google Streetview
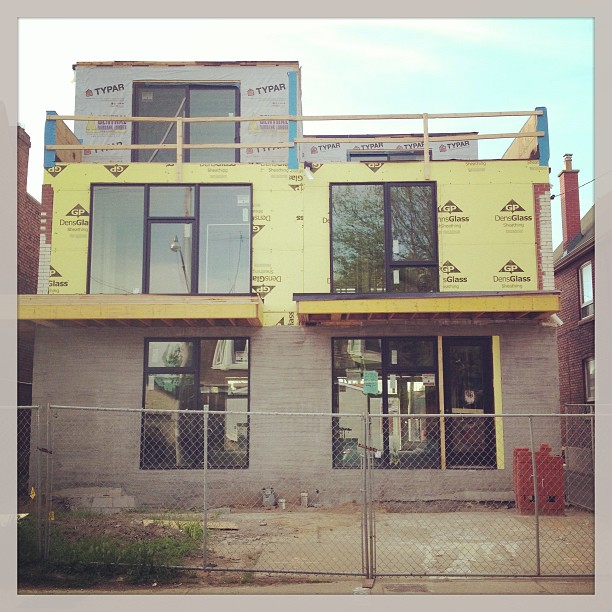
Here’s an image from my post on Storefront Conversions showing midway progress on the two storefronts.
Mid Conversion (Summer 2013)
In the last few weeks the finishing details really have been coming together. Last week when walking past I noticed a for sale sign on one of them, and of course I just had to check it out. In the name of Storefront love, not just being a nosy neighbour.
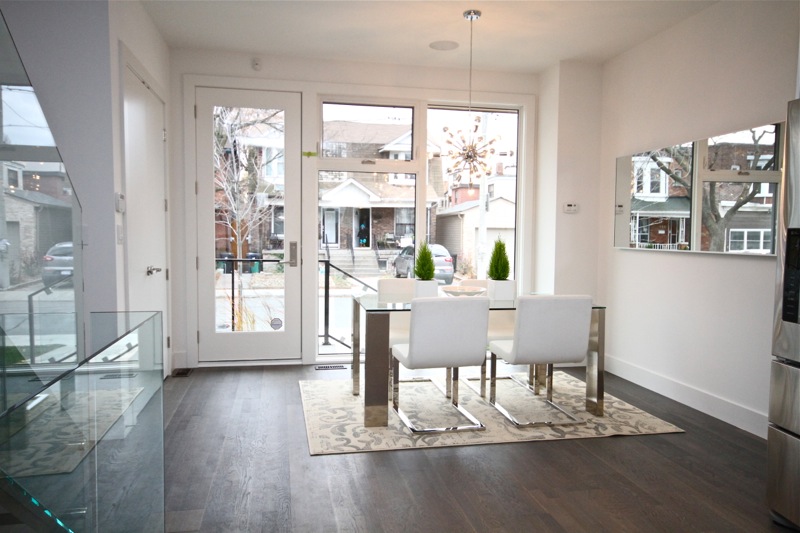
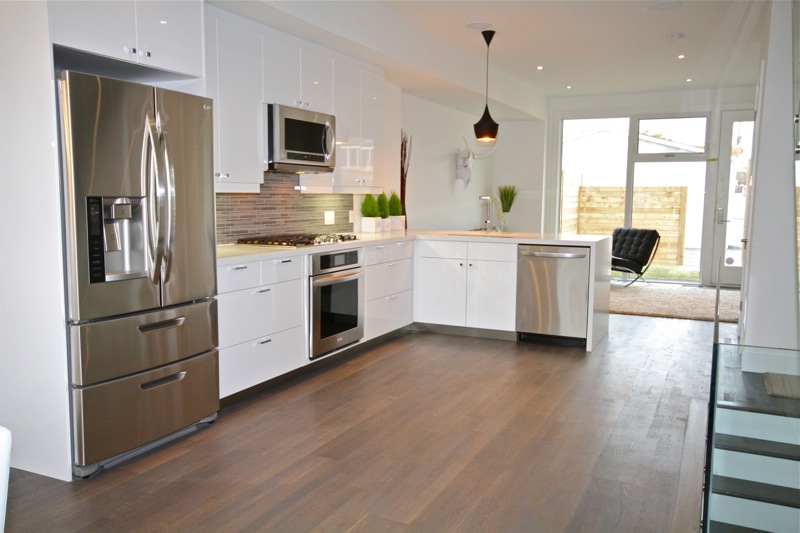
So kids, if you’ve got $895,000 in the bank and would like to live in a converted storefront in my neighbourhood, this place may be for you.
Specs: 3 story semidetached, 3 bedroom, 4 bath, 1920 square foot. Lot size 16.67×92 feet. (Its the house on the right in these photos)
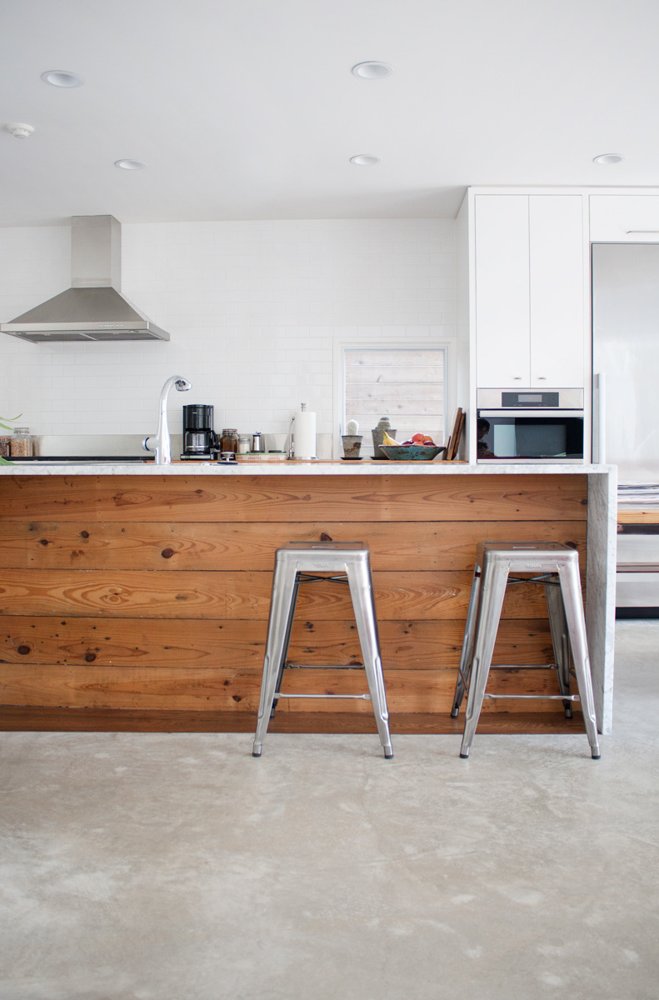
I like the use of black windows and a mix of materials. The pop of cedar is a nice touch.
The open concept house opens into the diningroom.
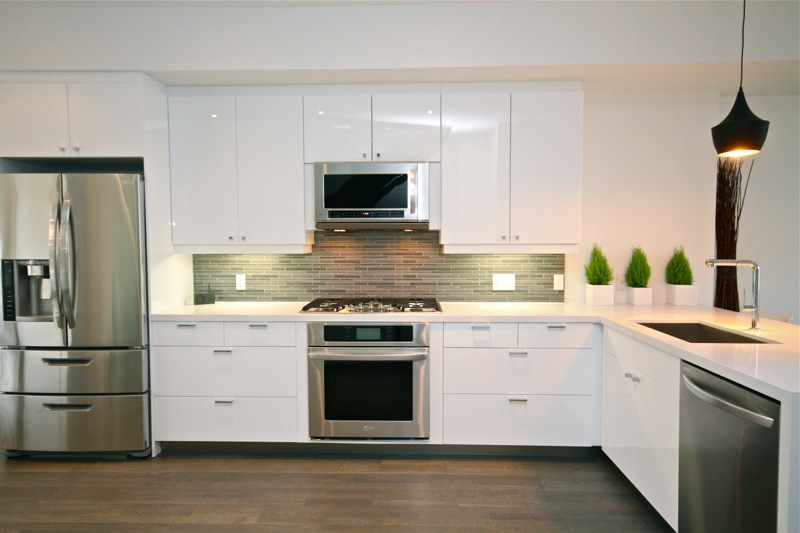
Then heads into the open plan kitchen with high gloss white cabinets. A staircase leading upstairs is on the right.
The large kitchen features high end appliances. I believe the cabinets are Ikea.
The glass wall & staircase keep with the open plan.
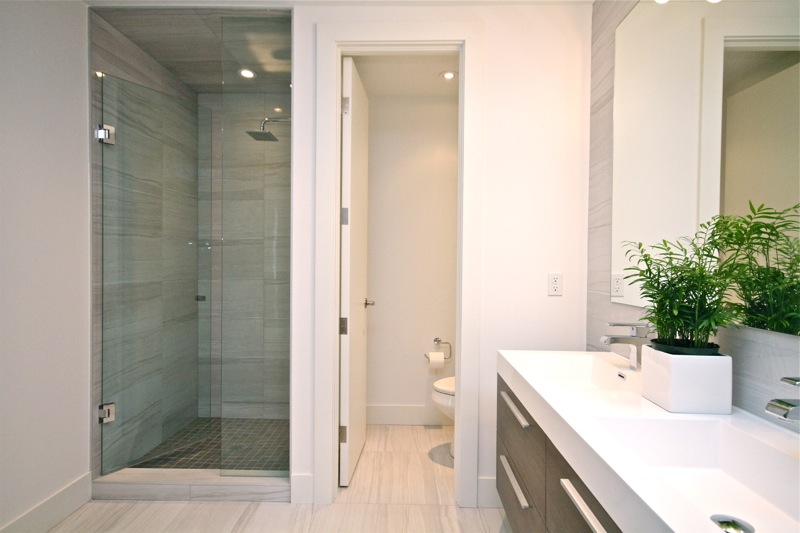
The bathroom finishes are all sleek and modern.
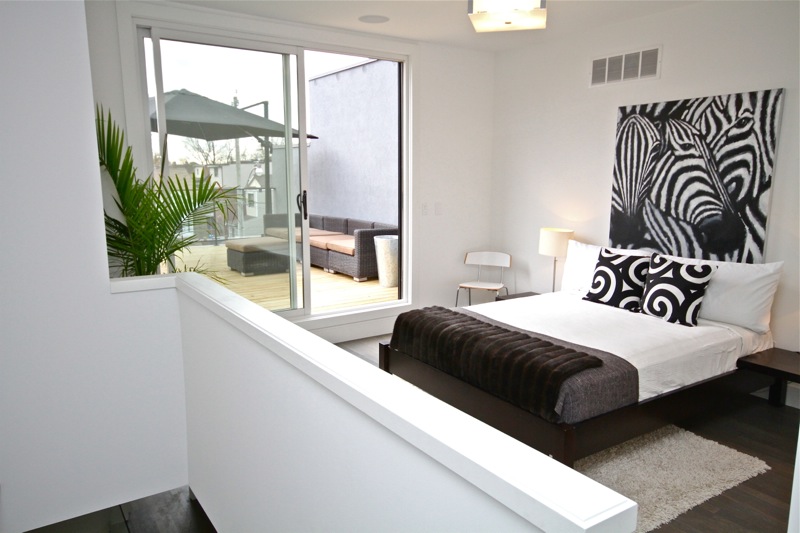
The master is located all by itself on the third floor. Complete with ensuite bathroom and master rooftop deck.
I’m going to take a page out of Old Town Home’s book and weigh the pros and cons of our house and this one.
STOREFRONT VS. STOREFRONT
Pro’s: With the third floor addition, this house has about 400 square feet of space more than our house. I love the addition of the third floor master & deck (I am lusting after a rooftop deck big time). We have a private master deck, but its not half as big. I love that they kept a lot of windows, and the place is light and bright. It is also 4 feet wider than our place, so it seems a lot bigger. They waterproofed & finished the basement. This is something that would never happen with our place, so it gets me a bit jealous. They also managed to cram 4 bathrooms into the house. With our 1.5 bath, this has me super envious. Not to mention a master en-suite. Want.
Con’s: No garage. This one would be a deal breaker. Motorcycles don’t really fit in basements very well. Not to mention an ever growing list of wood working tools. The backyard is also a bit small. As you may have noticed, I am also a bit of a traditionalist. Although I do like a modern home, I cant help but wish they’d kept a few of the older features. Mainly the brick. They painted the exposed brick on the sides, but stuccoed the front and back. Me no like stucco. There was also a nice brick detail pattern that was removed. The kitchen is a bit of an odd layout. It is a huge kitchen, but seems fairly empty with cabinets along one side. The living area is small in comparison, and I feel like they could have used a better kitchen layout, and given some of the space to the living room. Although that roof top deck is awesome, it’s also the main outdoor entertaining spot. So guests will have to traipse through your master bedroom to get to the deck. If you are bbqing out there, it also means getting your food & dishware up two flights of stairs and through your bedroom.
Conclusion: It’s a great house. Perfect for a young couple. Would we sell our place and make the move? I would consider it if it had a garage! But alas, without a garage we are staying put in our beloved storefront.
What do you think? Is this storefront conversion up your alley?
(I am in no way affiliated with the owners or agent of this property, I am just a nosy neighbour!)
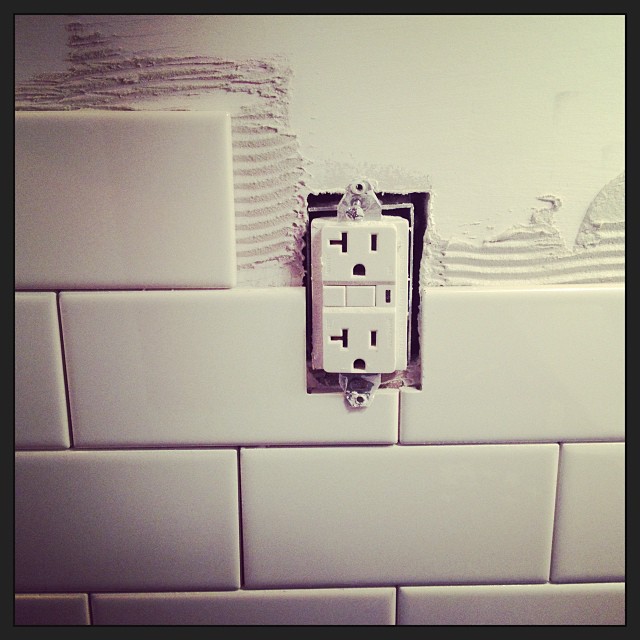
If you follow us on Instagram, you will have seen a little flurry of progress.
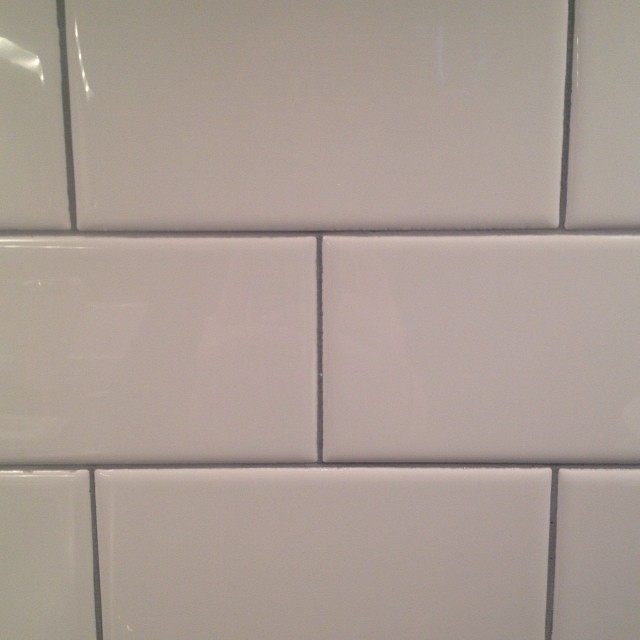
We weighted all our options, and decided to stick with our gut instinct and do a brick (or running bond) layout. I think what swayed our decision the most was that we would only have 18″ of tile total, and three inches of that would be covered by our under counter lighting molding. So 15″ wasn’t a lot of room to do a busy patterned backslash.
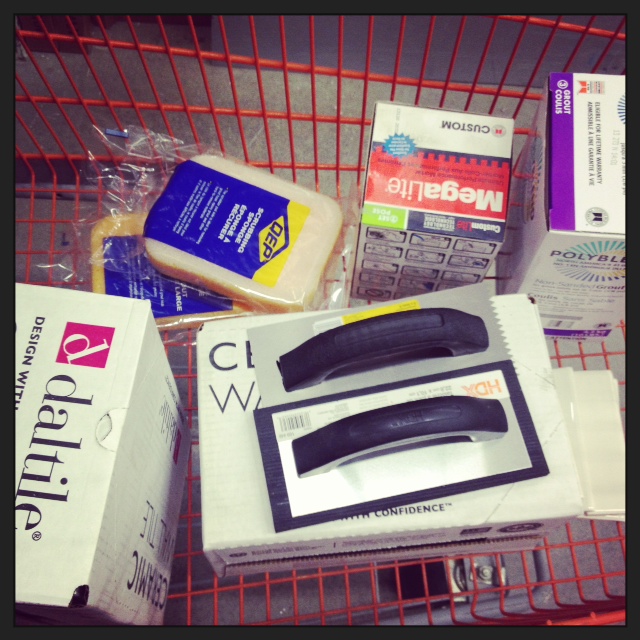
Tile SuppliesRunning Bond Pattern
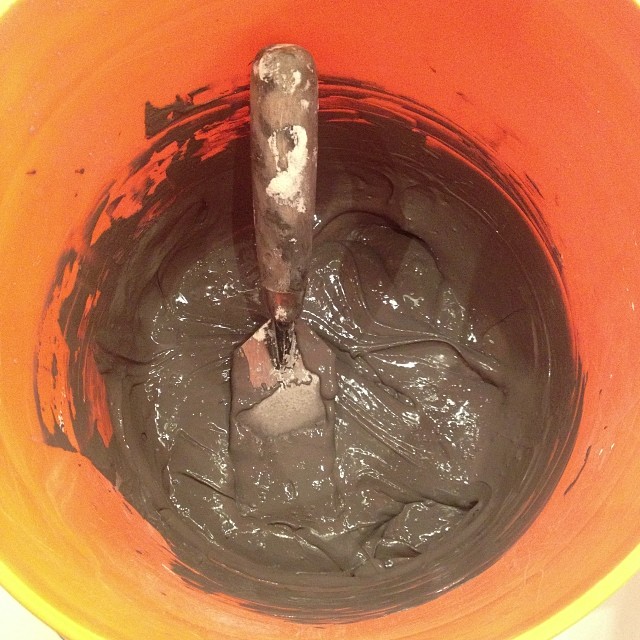
As for grout, we also decided to stick to a pretty traditional choice an go with gray. We picked out “Delorean Gray” and got it home only to look at it under our (bright!) under counter lighting, and decide it was too light.
Back to the store I went, and came back with Pewter gray. After mixing up a batch we both sighed with relief at how much we liked the color.
Pewter Grout
It looked good in the bucket, but how about on the walls?
Pewter = Perfect!
We are still working away on the backsplash. The main part of the kitchen is tiled and grouted, but the coffee bar is still naked. Hopefully we can make some more progress on it this weekend!
What are you working on this weekend? Any tiling projects planned?
The title of this post lies. Such a dirty little liar.
The concrete product we are using; Buddy RhodesCraftsman Mix and the way were mixing it: “Buddy’s hand pressed technique” is not poured at all. However “DIY Concrete Countertops – The Day We Made Mud Pies” doesn’t have the same ring to it, or credibility.
All joking aside, I want you guys to take me seriously now, because things are about to go down. It’s getting hot in here, and someone may have let the dogs out (oops!).
It’s time to make the countertops!
Like really truly put stuff in molds!
If you’re new (hi!), and haven’t yet read my previous posts on this project, well then get to it! You’ve got a lot to catch up on before this sh%t goes down!
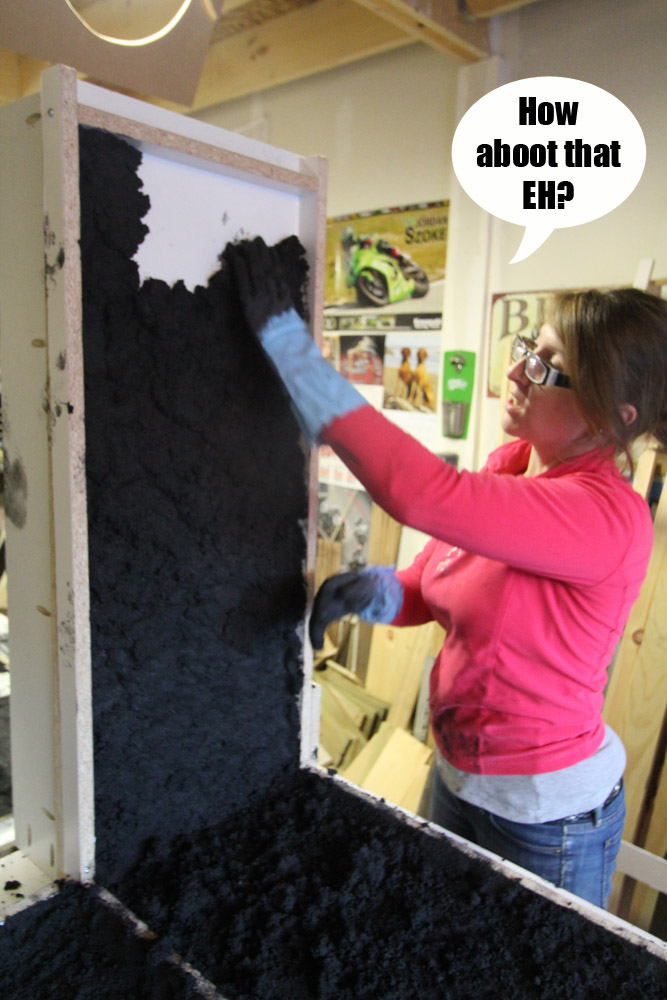
Jeremy from Buddy Rhodes flew into Toronto, all the way from the Southern US to help us Canucks “pour”. You will note a continuing theme throughout our time with Jeremy. He was convinced all Canadians said nothing but “aboot” and “eh”. While El Granto & I had a good laugh every time he said “y’all”. While I tried very very hard not to let an “Eh!” drop. They regrettably slipped out, and I will never ever live it down.
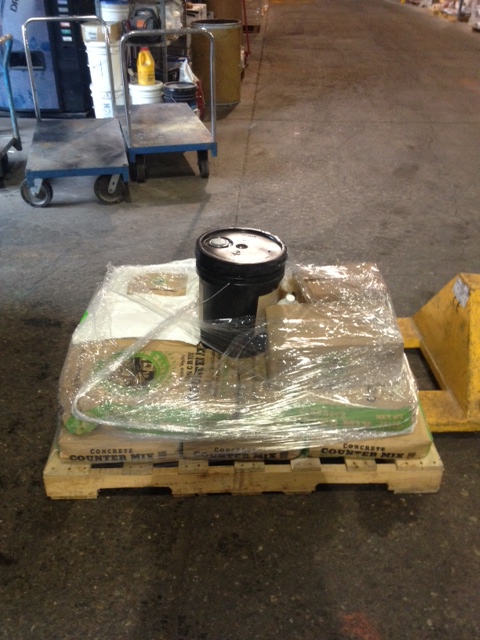
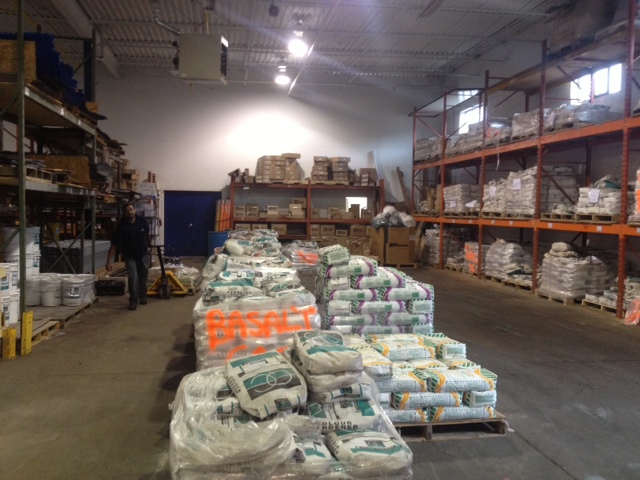
While Jeremy was making his way to Canada, EL Granto’s Mum and I headed to Form & Build in Mississauga to pick up our supplies. After much humorous banter with the Form & Build guys (including them playing a trick on the new kids, telling us the SUV wouldn’t hold the weight of everything!) we had all our supplies loaded and ready to go. (Thanks Form & Build warehouse guys, that stuff is HEAVY!)
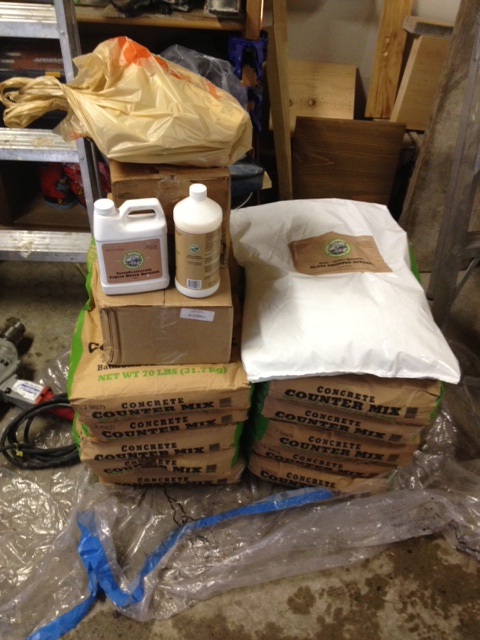
The pallet full of our supplies at Form & BuildForm & Build Warehouse – it’s like a concrete candy storeWhat do you think, is it all gonna fit? It did (and the CRV was fine!)All the Buddy Rhodes supplies safe and sound back at the Storefront Garage
Back at the Storefront we laid out our previously built forms on perfectly flat sturdy surfaces (you CAN put them on the ground, but it’s much much easier if you’re working at waist height and our garage floor is anything but flat). We used saw horses for one of the forms, and we made a work surface out of 5 gallon buckets and some 2×4’s for the other.
Jeremy building a work platform for our forms
This was all happening in our 240 square foot garage. (Which is full of tools eh!) This is urban DIYing at its finest! You gotta make do with what you’ve got.
Once we had everything ready to go, we started mixing. Jeremy had previously suggested we get a mortar mixer like this:
Harbor Freight Tools Mortar Mixer
They are readily available in the US but apparently in Canada they are hard to find. Home Depot carries one for sale online only, but unfortunately we didn’t have enough time for the shipping before Jeremy got into town. I called every tool rental place in the city, and alas no one rented them.
We settled for a rental mixing drill, and this thing was a beast. It was HEAVY, unwieldy, mixed too much air into the mix, and took forever to mix. Not ideal, but in the end it did get the job done. We all struggled with it, ended up cutting our mixing paddle shorter, and took turns. Next time, I am buying the right tool for the job! If you are thinking of doing this project, get a mortar mixer!!
We were mixing the Buddy Rhodes Craftsman Mix according to Buddy’s hand pressed recipe. This mix is not your normal concrete. It’s more the consistency of cookie dough, and truthfully mixing it is just like making cookie dough!
“Pouring” this mixture is a two stage process, you put a first coat of hand pressed craftsman mix in to your forms about a half inch thick, then you fill in the form with a backer coat of fiber reinforced craftsman mix. Use the Buddy Rhodes project calculator to determine how much of each product you will need.
Here are the quantities we used for Stage One:
2 bags Buddy Rhodes Craftsman Mix
8 quarts water
2 quarts polymer
1 can pigment (coal in our case)
Water reducer to get the consistency we are after (only a little, about a cap full)
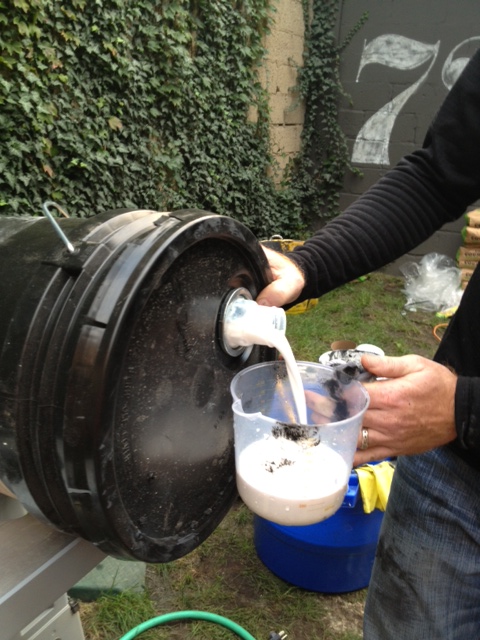
DIY TIP: Ever poured something out of a 5 gallon pail? Sucks right? It’s heavy and hard to control and slops all over the place! Here’s a tip, place the pail on its side on a work surface. Start with the spout facing up, and remove lid. Place your container below the spout, and slowly roll the pail. It will start gently pouring out of the spout into your container, and you wont spill anything! When you’re done, roll the pail back and put the lid back on. No heavy lifting and spilling required!
Easy Peasy Lemon Squeezy
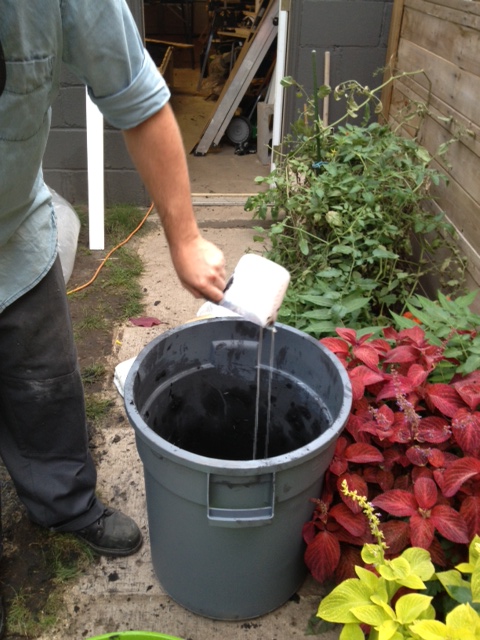
Just like baking, we mixed all the liquids together first, and added in the pigment to get it evenly dispersed.
Add liquids first, then mix
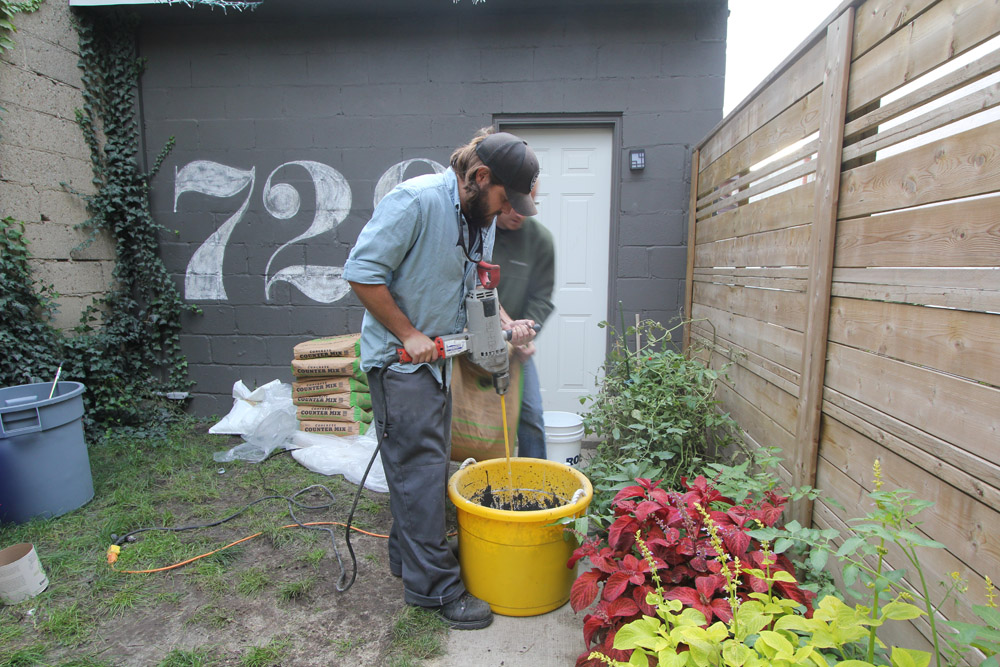
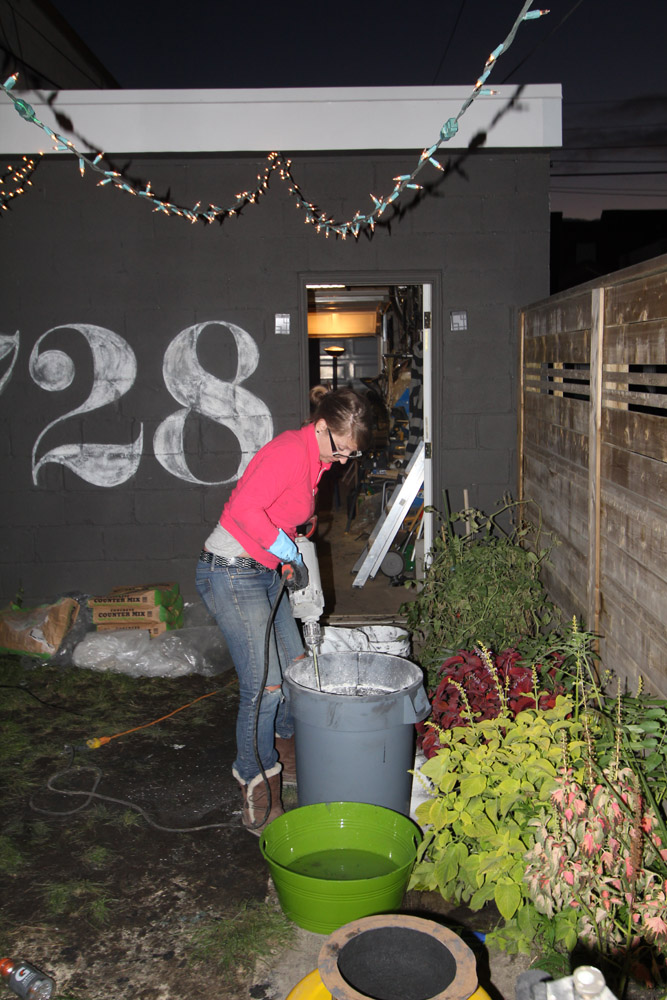
Then we slowly added one bag of craftsman mix. If you’re doing this project, wear a dust mask, you do not wanna breathe in that dust!
Mixing everything together
Lifting the mixer up and down, and round and round helped everything mix more evenly.
Everyone pulled together to mix. This was hard work! Especially me with my girly muscles.
Everything is ready once the mixture reaches cookie dough consistency. It’s like play-dough for big kids who want new kitchens!
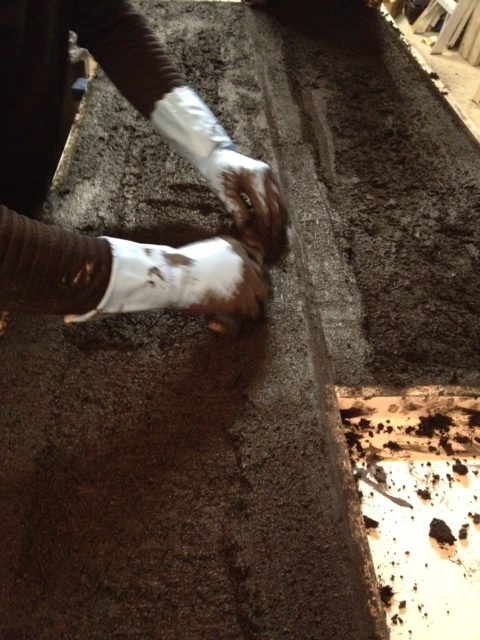
Now it’s time for the fun!
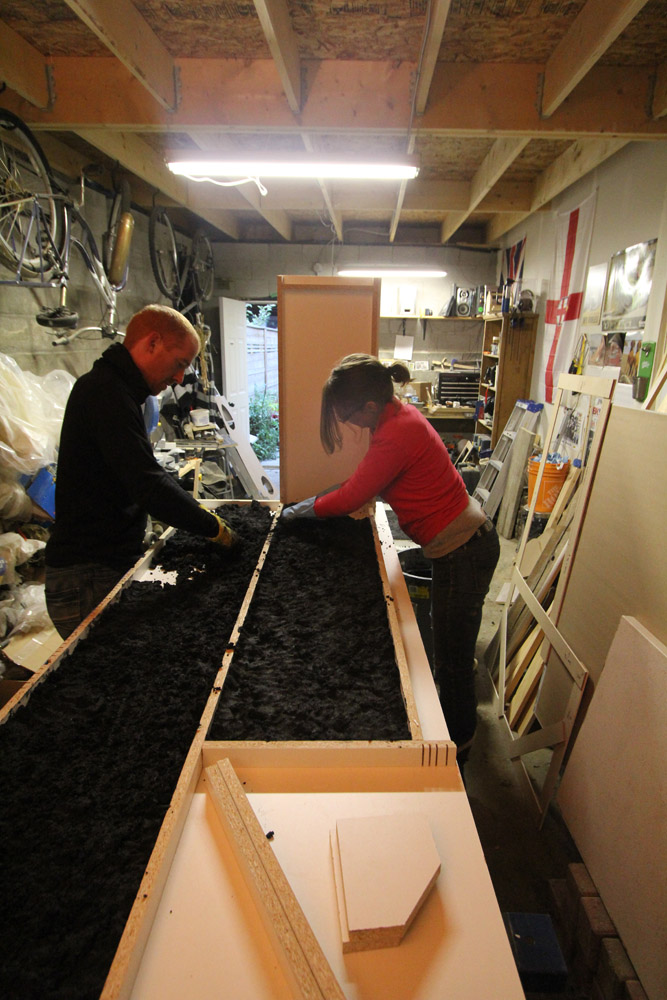
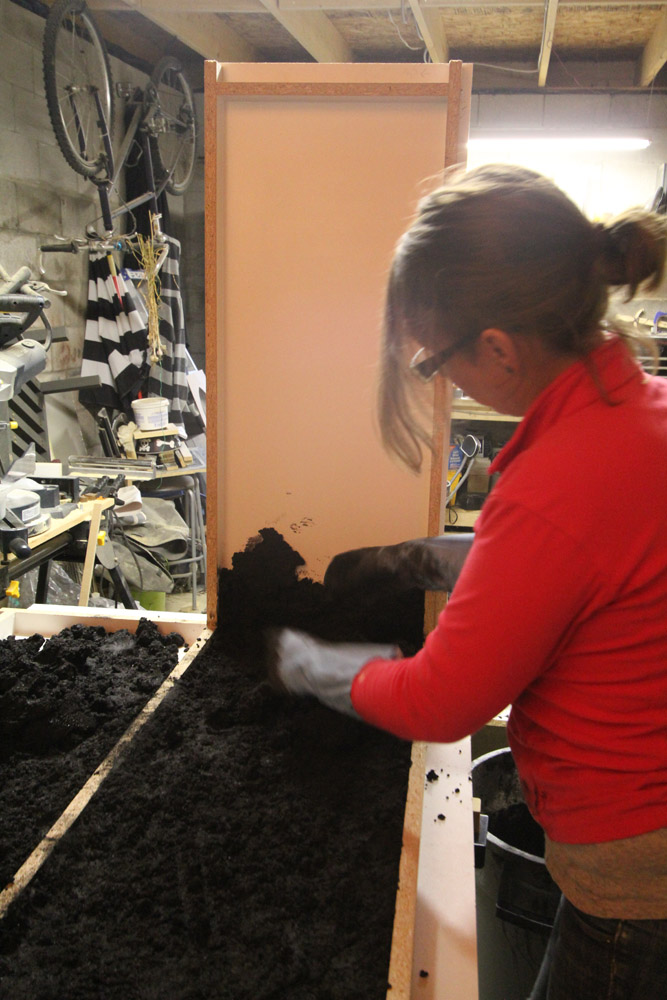
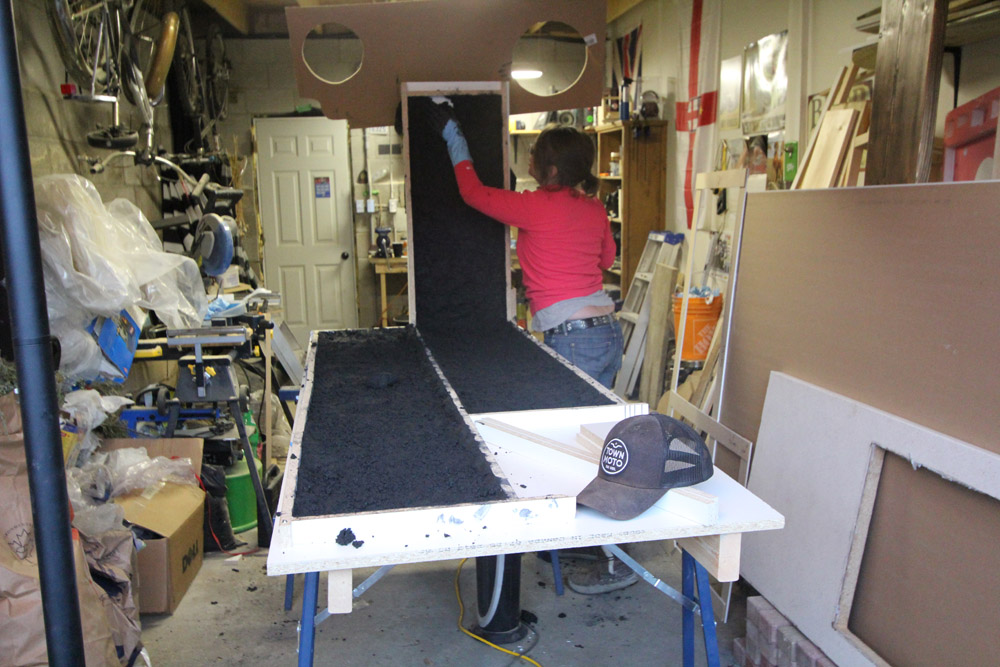
We donned gloves, and took handfuls of the mix and packed it (gently) into the forms. With this technique we actually want to leave some voids, so that the concrete will have a more organic look to it. If you pack it too hard you’ll squish out all the air and have no voids to fill later. We want voids because we will fill the voids with a bone paste colored slurry, which will give some character and depth to the finish. So this task meant that we were to do a bit of a crappy job in order to make it awesome.
We made handfulls of what I lovingly called mud pies, and placed them in the forms, making sure we got up the sides and all along the flat parts about 1/2″ thick.
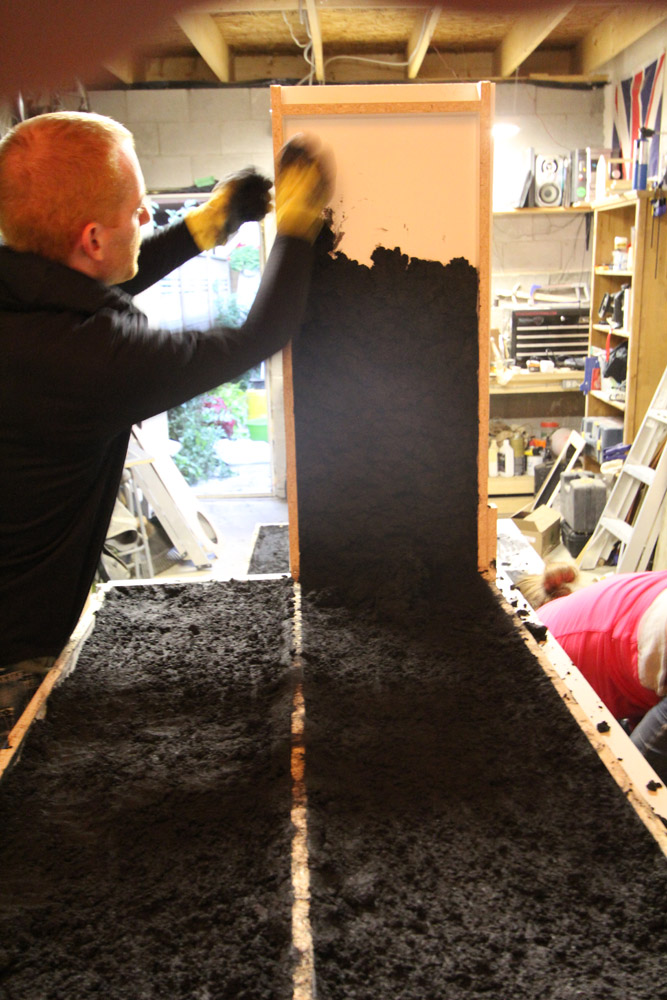
When we got to the waterfall countertop form, we did the flat part first, then started up the vertical. As the mix is nice and thick, it stuck to the form no problem.
Packing the bottom of the formsBuilding the mix up the vertical form
Up and up the form we went.
Build that wall y’all!Am I doing it right?Almost there!
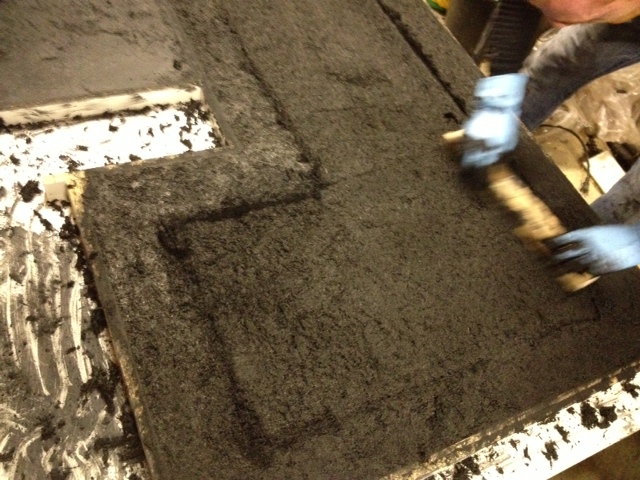
After the forms had their 1/2″ of Stage One mix, we gently raked everything with our fingers making sure things were pretty well evenly dispersed and there weren’t any huge voids. Next up is Stage Two, the reinforced backer.
Here are the quantities for Stage Two – The Backer:
2 bags Buddy Rhodes Craftsman Mix
8 quarts water
2 quarts polymer
1 can pigment (coal in our case)
Water reducer to get the consistency we are after (a little bit more than Stage One)
2 1/2 lbs of glass fibers
Stage Two gets mixed exactly the same way as stage one, except the glass fibers are added (and mixed in gently) right at the very end. It’s important not to break all the fibers or they wont do their job. You don’t want lazy slacking fibers.
After the backer was all mixed up, we added it to the molds, filling it up entirely near the edges, and leaving it a bit less full in the middle of the forms (you don’t need to fill them all the way up in the middle, its just wasting concrete!). You want the forms completely full where they are going to touch the front and the back of your cabinets (so that everything lies nice and flat). You also want it to ensure your overhang is completely full.
We then used a small piece of wood to screed the parts of the countertop that will touch the cabinets & the overhangs making everything nice and flat.
Jeremy using a piece of wood to screed and make flat the bottom of the countertopJeremy hollowing out the center of the large countertop piece. You dont need the form to be full in the middle. This way you can cut down on material and weight
On our waterfall, we made some smaller pieces to act as the backs of the mold where our toe kicks and overhangs were. This will ensure we get a nice pretty back side of our counter (as it will be visible.)
Check out the small pieces of melamine on the vertical of the waterfall mold. Also note the exhausted look on El Granto’s face and the sheer amount of mess everywhere.
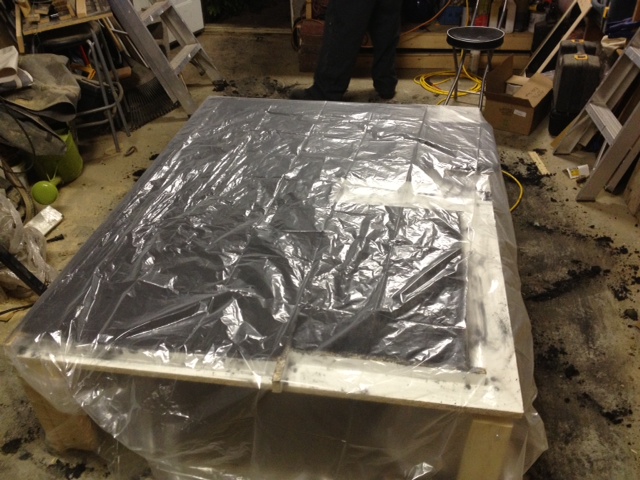
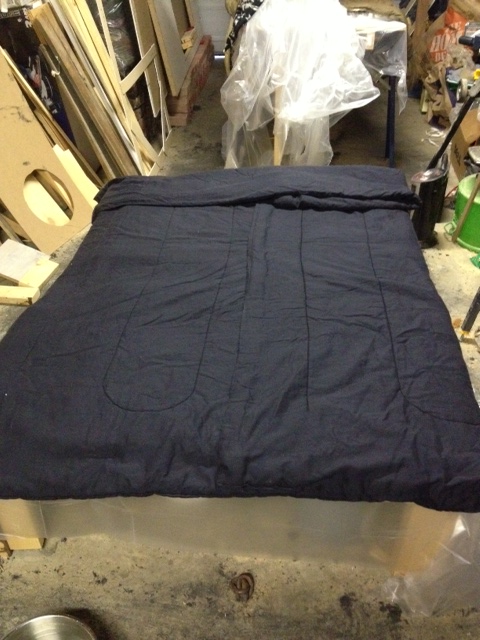
Once we were done, we covered our counters with plastic sheeting, then blankets to keep them warm. Heat is important to the curing process (in his shop Jeremy puts industrial heating blankets on his forms while they cure to keep them as hot as possible), and as it was fall in Canada, it was even more important to keep everything warm. We put all the concrete to bed with blankets and left the heat on high in the garage overnight.
Covering forms with plastic to keep in moistureWe covered the concrete with blankets and tucked it in for the night.
We occasionally went out and wet down the concrete with warm water and a cloth, then recovered. If you are doing this yourself, I would recommend doing your pour one weekend, then keep your concrete damp and warm for a week (this will ensure the strongest concrete possible), and unmold the next weekend. We were on a tighter timeline, and unmolded the next day.
It was a hard days work, but we actually made countertops! Next step is to unmold everything, make a bone paste colored slurry to fill any voids, and then sand. We’re getting closer!!
***UPDATE – Check out the next stage in the project here ***
We have a good assortment of tools in the Storefront Garage, but one tool we were missing was a tile saw. I mean a tile saw of any kind. We didn’t own a wet saw, or even a simple tile break.
I know I know, you’re shaking your head at me. We have a drill press, a table saw, TWO miter saws, a scroll saw, and a plethora of other tools but we don’t have a simple tile saw? You see we haven’t had to do any tiling in the Storefront. When we moved in, everything was freshly tiled, and thus, no need.
Well kids, that was until we tore off the kitchen backsplash. We drywalled, taped, mudded, primed & painted the backsplash so that it was usable, but it really needs some tile (both for aesthetics & durability).
As you know, I am a very budget conscious lady, and to run out and buy a bunch of new tile, mastic, grout, spacers, float, trowel AND a new saw, it was quite a bit of coin to drop when we had a lot of other things on our kitchen wish list.
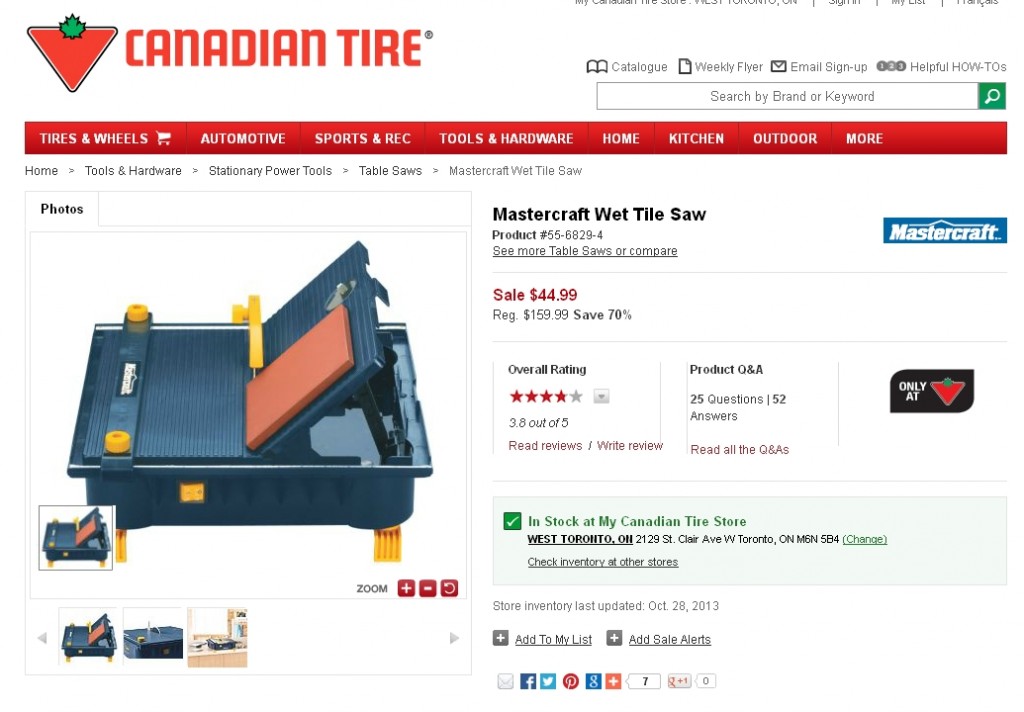
So I waited…for a sale…and THIS came on sale this week at Canadian Tire.
Mastercraft Wet Tile Saw
$159 wet saw on sale for $44? 70% off??
HELLS YEAH. I love you Canadian Tire.
(For my American friends, Canadian Tire is this crazy store that carries automotive parts, has an auto repair shop, a gas station, sells their own brand of tools, lighting, plumbing, kitchen wares, work boots and dog food to name a few things. It’s a Canadian staple, and El Granto even has a coffee mug that says I (heart) Canadian Tire. )
So a new wet tile saw will be making its way to our home this week, which consequently makes me want to get off my butt and start tiling.
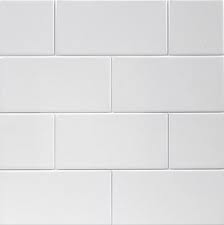
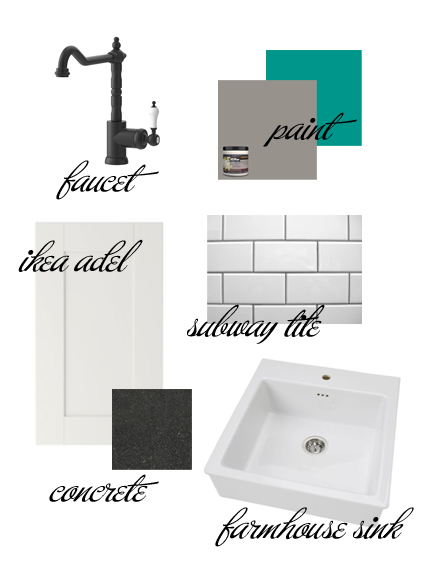
In my kitchen mood board you will notice that I have subway tile listed.
We decided early on to do a basic white subway tile for a couple of reasons. It was timeless (which worked well in our Edwardian home) as well as it was a nice neutral backdrop for other things in our kitchen (like the concrete counters), and would brighten up the kitchen.
We have lived with a showy (albeit ugly) backsplash for the last two years, and want something a bit more classic.
Lucky for us, white subway tile is also one of the cheapest options.
Now we will soon have a saw, have decided on a tile, there are only two decisions left.
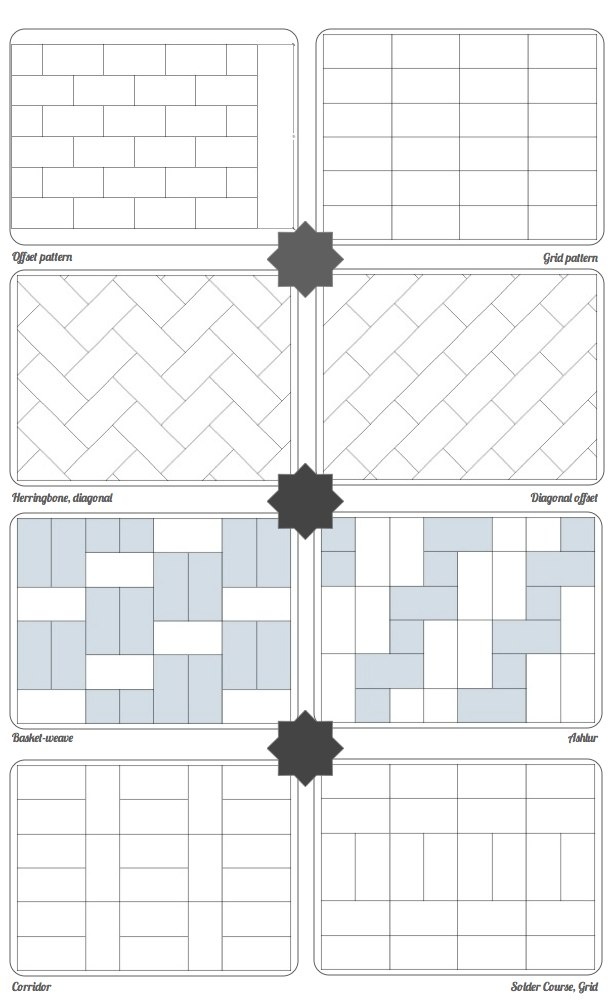
Tile Pattern & Grout Color
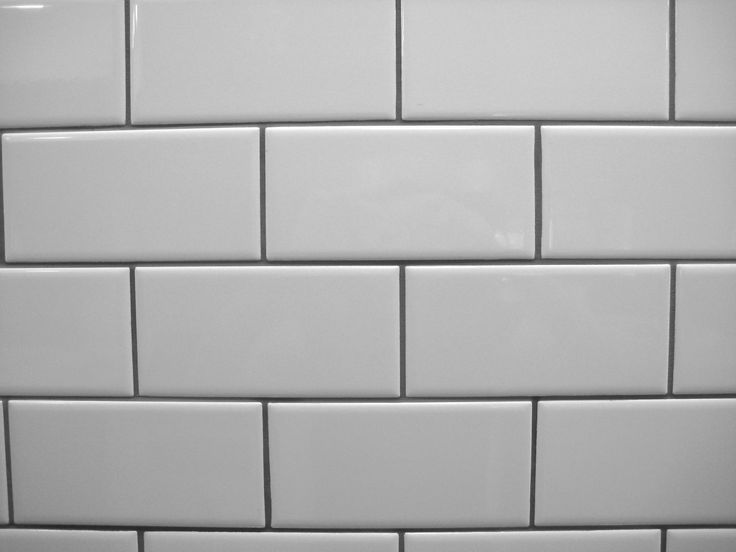
Traditionally a subway tile would have been laid in a brick pattern. Which I love. It’s classic and would have been what the Storefront had when it was built (although probably in a colored glazed finish of green, orange or brown.)
I love the brick pattern, and that’s what I’m leaning towards, but what do you think? Should we break out of our box and try something new?
Which pattern is your favorite?
Subway tile patterns (Source unknown)
Then the next big decision is grout color. Do we go white, or something a bit more fun like a gray or black?
White will make the backsplash all one tone and visually it will fall to the back a bit. Gray or black will make the tile stand out, and really make a statement.
White GroutGray Grout
Do I want a statement? Or do I want the tile to play a supporting role to the concrete counters and the farmhouse sink? What are your thoughts?
As the kitchen is starting to become functional again, we are starting to think about decor and other kitchen accessories. One of the biggest changes in the kitchen will be our new DIY concrete countertops. As concrete is rather hard and unforgiving, we will need to use cutting boards for all our chopping. I love a good cutting board, but they can be expensive, and often are not the size you need for your space.
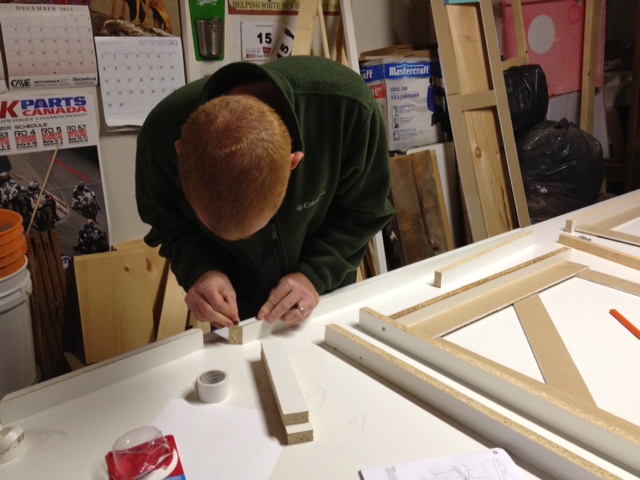
We did a bit of research, and set out to make some easy & inexpensive cutting boards for our kitchen.
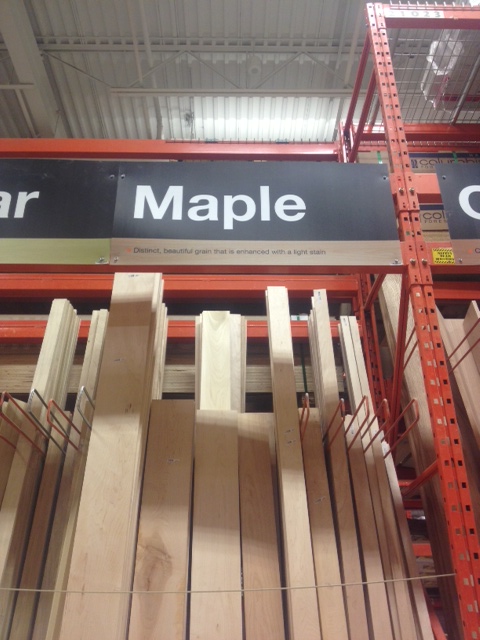
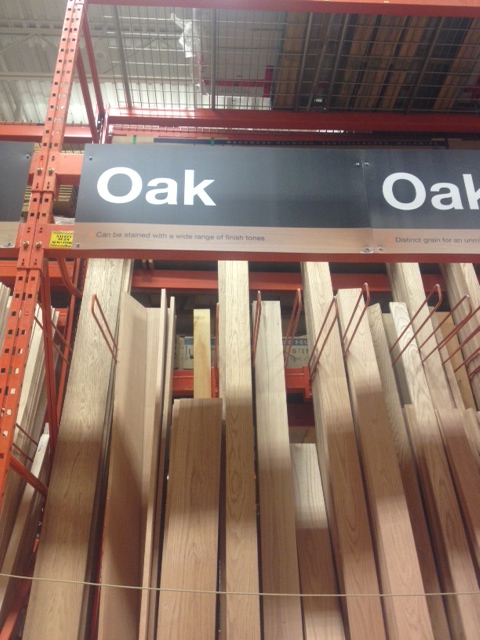
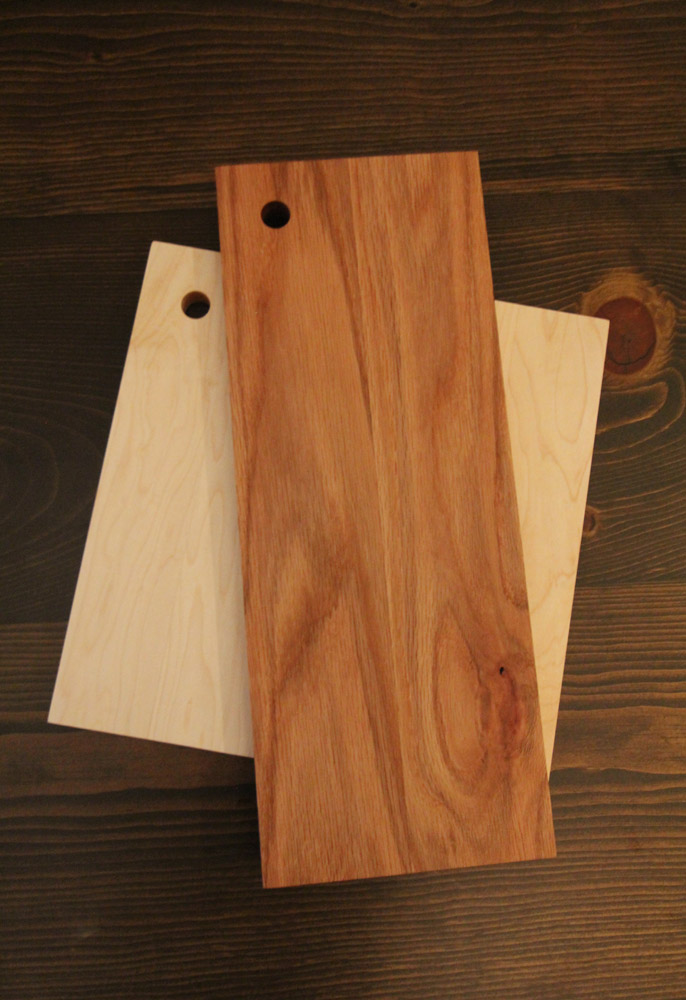
Selecting Material: Hardwood is preferred for a cutting board. Maple or Ash is the perfect material, as it has a nice tight grain. Oak is also usable, but not ideal as it is more of an open pore wood.
We decided to make one maple cutting board for everyday use as well as a red oak board more suitable for serving & veggie cutting (we wont be cutting raw meat on the oak).
We headed to the Hardware Store for some simple materials.
Here is what you need:
1 – 1×3 piece of Maple (6′ long)
1 – 1×4 piece of Oak (6′ long)
Saw – Table saw preferred, but a Miter or circular saw will work
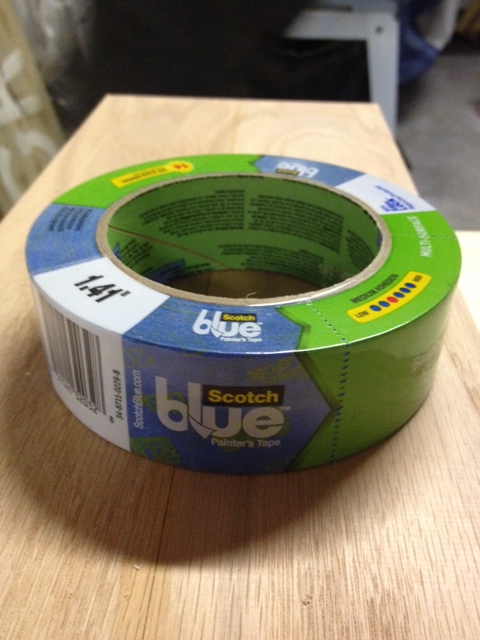
Drill bit – We used a 3/4″ spade drill bit
Drill – Cordless or in our case we used a drill press (but that’s not necessary)
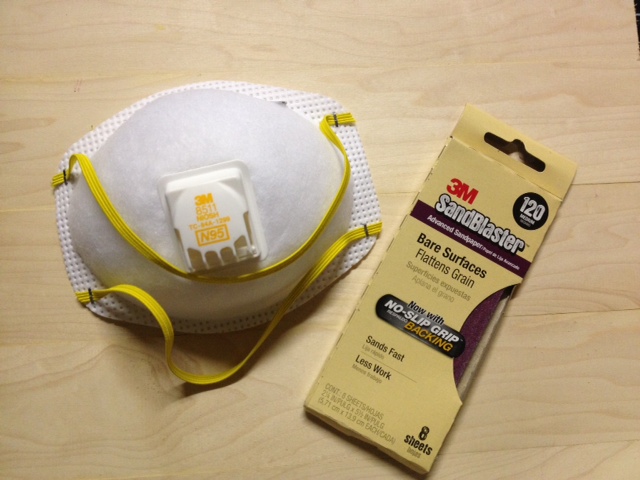
3M Advanced Abrasives sandpaper in 80, 120 & 220 grits (palm or orbital sander optional)
Wood Glue
Mineral Oil
We headed to our local lumber store and picked up a piece of 3″ wide Maple, and 4″ wide red Oak.
MapleOak
I also made a stop at my local drug store for some Mineral Oil. Mineral oil is used to protect your cutting board. You can find Mineral Oil at Kitchen Supply stores, Ikea, and your drug store. Mineral Oil is (apparently) used as a laxative, and can be found in the digestive aid section of your drug store. Yep, it’s true!
Mineral Oil – Three bottles to the right of the rectal syringe…eeep
Ignore the strange look the cashier gives you when you purchase your mineral oil while carrying two pieces of lumber.
*It is important to use Mineral Oil or an oil specifically marked as a cutting board/butcher block oil. Do NOT use olive or vegetable oil, as those will go rancid. Mineral Oil is food safe and will not spoil.
Now its time to make some cutting boards!
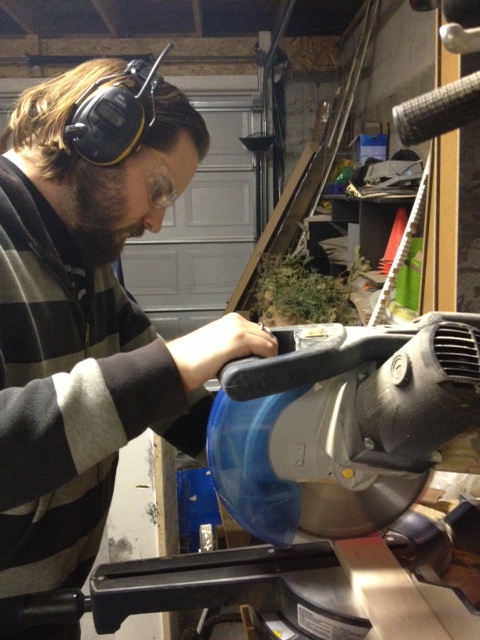
El Granto cutting the wood to length
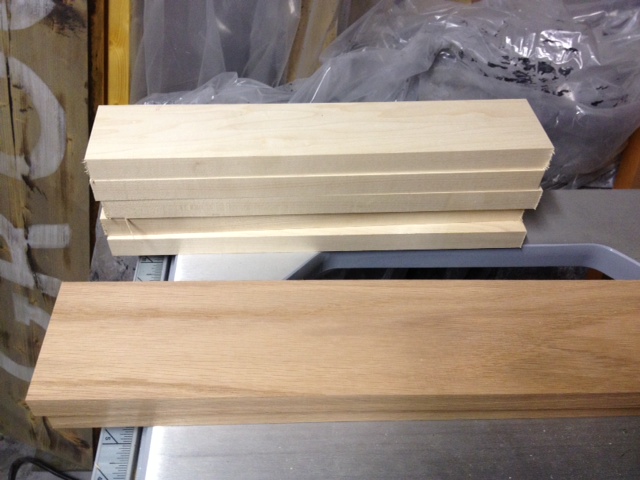
Cut your maple into 5, 13″ long strips (does not need to be exact)
Cut your oak into 2, 20″ long strips (again doesn’t have to be perfect, we will be trimming the boards later.)
Make sure to use safety equipment! Eye & ear protection are a must. Cutting hardwood can get very loud.
Hearing ProtectionSafety Glasses
Once all your wood is cut, sand off any imperfections and get ready for gluing.
Wood cut to length
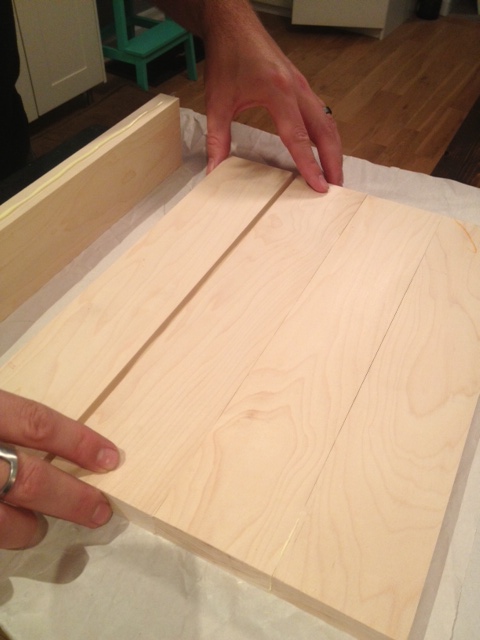
Make sure you have a nice flat surface to glue your boards together. We went inside and laid all our boards out deciding how we wanted them to look. Grain is important in the outcome of your piece. Make sure you take it in to account and lay out your boards to maximize the visual appeal of the grain markings in your wood.
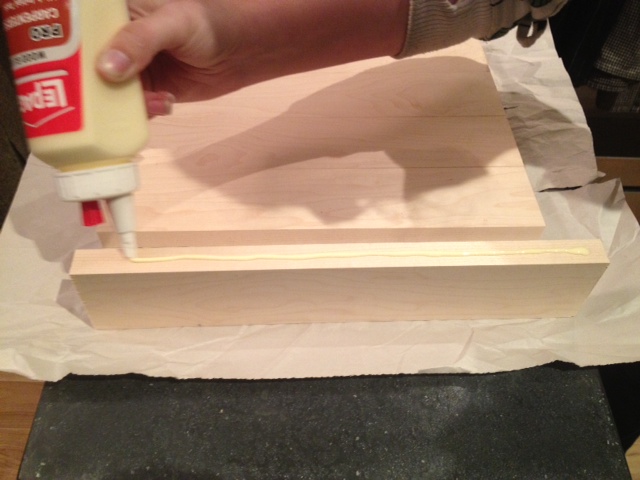
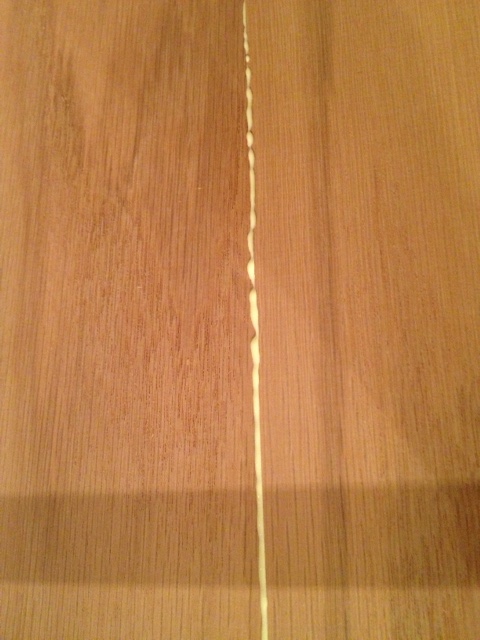
Next up, run a bead of wood glue on the edges of your boards (one board at a time) and glue them all together. When you’re pressing your boards together wiggle them lengthwise to spread the glue and work out any air bubbles.
Applying GlueAttaching boards together
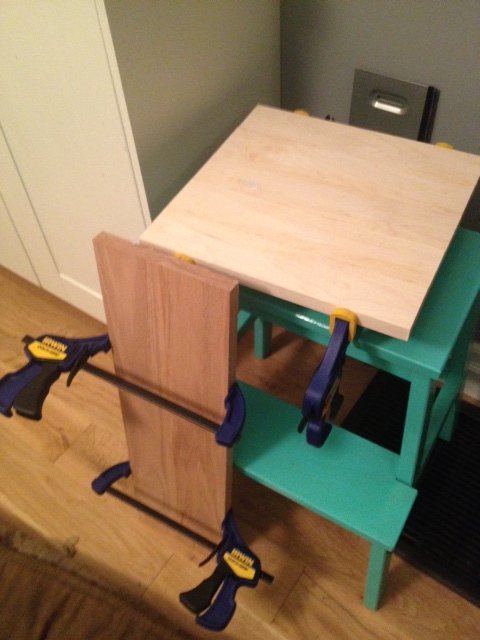
Once all your boards are glued together, clamp them, and wipe off any excess glue.
When you clamp the boards together, sometimes excess glue seeps out. Quickly clean this off before it dries (it is a pain to sand off)
After your boards are clamped, leave them to dry overnight.
Clamped & Drying
The next day, un-clamp your boards, and it’s time to drill & sand!
I like my cutting boards to have a handle or a hole to hold onto. It makes it easier to grip and to store (they can be hung up.)
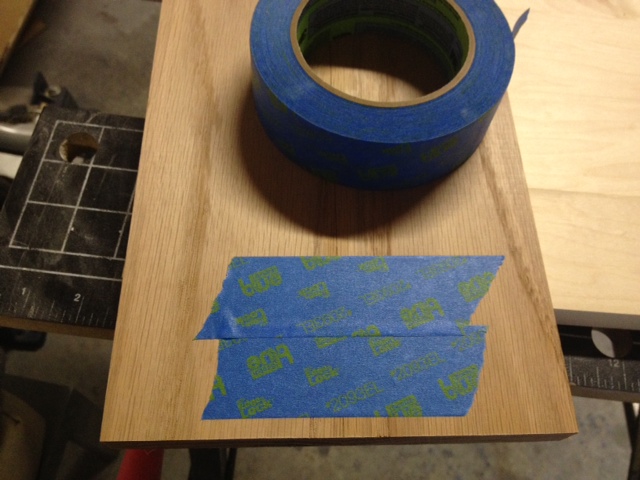
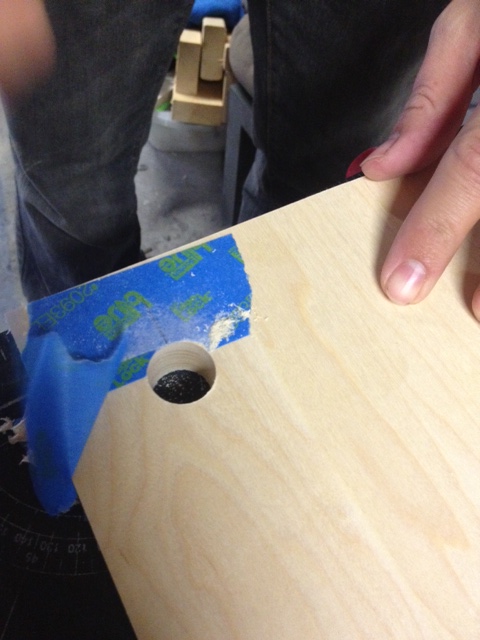
We added a 3/4″ hole to the corner of each board. To do this we taped off both sides of the board using ScotchBlue Painter’s tape. Applying tape before drilling reduces the amount of tear out (when the wood chips and splinters). Applying the tape also makes a great surface to mark your drilling location. We measured in a 1 1/2″ from either side for our holes.
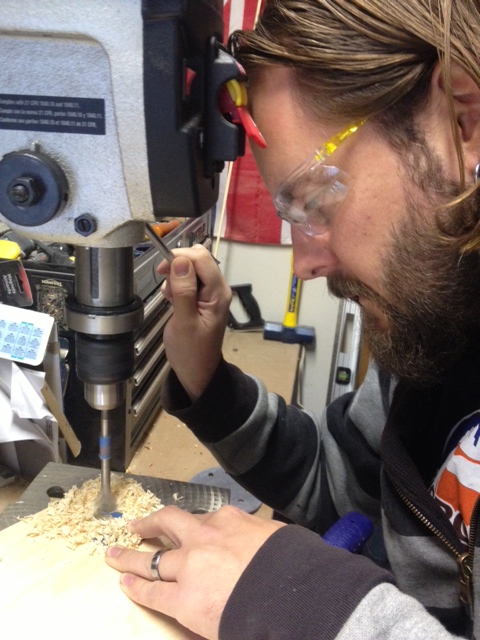
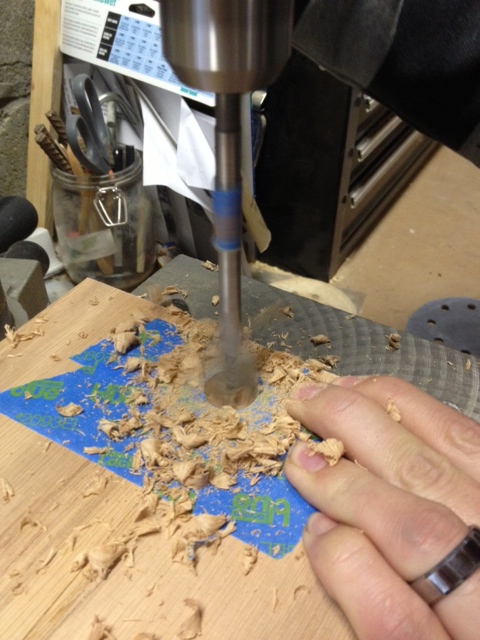
Next up, ready your drill with a 3/4″ bit, and drill your hole. We have a drill press, so we used that for an even more precise hole, but you can use your cordless drill. Just take the time to ensure you’re drilling straight. Place a piece of scrap wood under your cutting board so you don’t drill into your table! (It also makes the cut cleaner.)
El Granto drilling the holesEl Granto drilling the holes
After your holes are drilled, remove the tape and check out your perfect hole!
Perfectly drilled hole
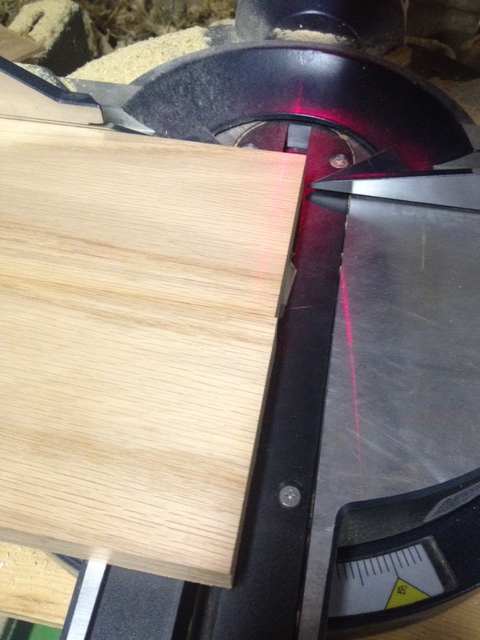
You may notice that the ends of your cutting board are not perfectly straight. You could spend hours trying to sand them, or the easy way is to head over to your sliding miter saw and trim up the ends. A couple quick cuts and your boards are nice and square and true. (If you don’t have a sliding miter saw, you can use your circular saw.)
See how the ends are uneven? No problem, a quick run through the saw will have everything perfect
Now its time to sand. Using a palm sander or an orbital sander will make this process a lot quicker, but you can do it by hand.
Remember to wear a dust mask while sanding. Aint nobody got time for sawdust in the lungs!
Starting with 80 grit sandpaper, sand off any imperfections, and make sure your board is nice and flat. Once you are happy with how flat everything is, step up to 120 grit and sand the whole piece making everything smooth.
Lastly, take a pass with the 220 grit to make everything perfectly smooth and buttery soft.
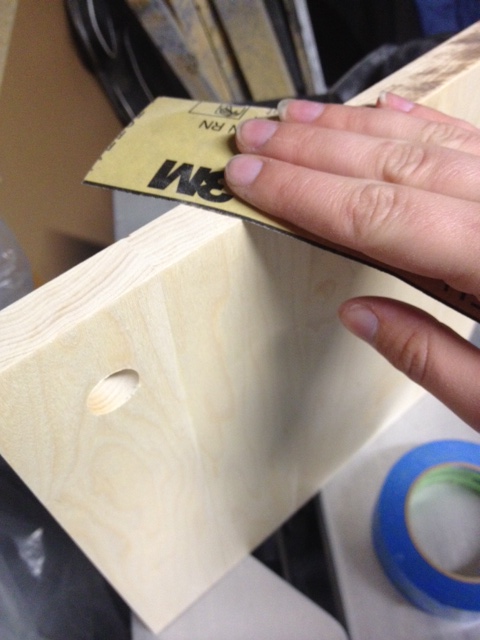
Sand the edges by hand, and gently round the corners ever so slightly so that they are not sharp.
Hand sanding the edges
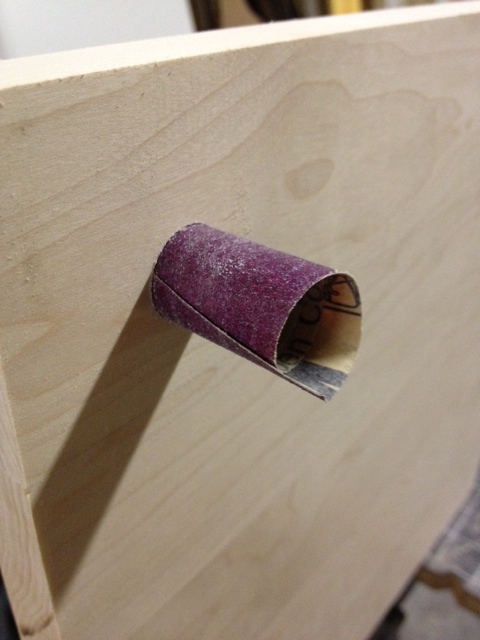
Roll your sandpaper into a tube shape, and insert it into the hole. Rotate it around sanding the inside of the hole.
Roll sandpaper into a tube to sand the hole
Once everything is sanded, wipe your boards off with a dry cloth.
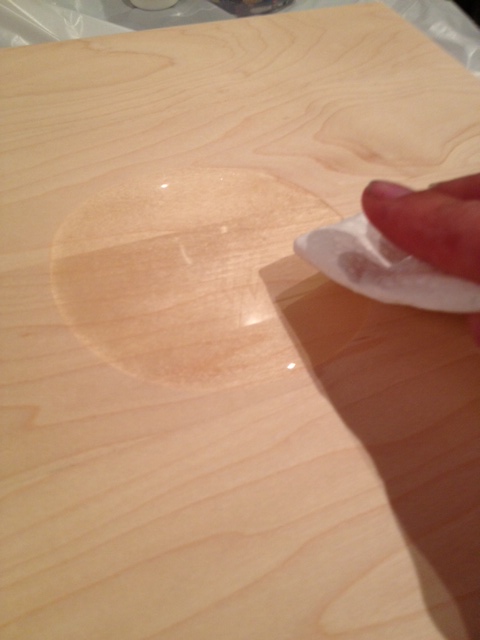
Now the next part may sound counter intuitive, but take a damp cloth and wet your cutting board (don’t saturate it, but get the whole surface damp.) Let it dry, and rub your hand along the wood. You will notice that it feels rough again. The water has raised the grain (better now then after you wash it for the first time!) Take your sandpaper and knock down the grain until it is smooth again, wipe your board again and get ready to oil!
Using a lint free rag or paper towel, apply a generous amount of mineral oil to your cutting boards. Rub it in, and let it sit for an hour or so. Come back and wipe off any excess. Repeat this 2-3 times until you notice your board stops absorbing oil. Let dry.
Applying Mineral Oil
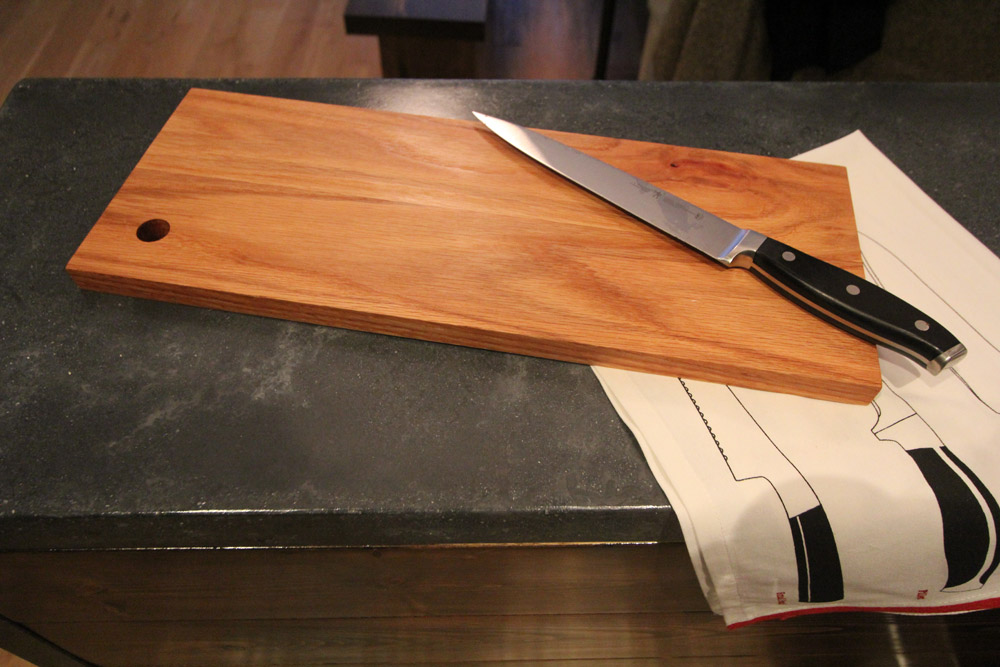
AND YOU’RE DONE! Enjoy your gorgeous new cutting boards!
12 1/2″ x 12 1/2″ Maple Cutting Board & 7″ x 19″ Oak Cutting BoardDetail of Cutting Board HolesOak Cutting Board
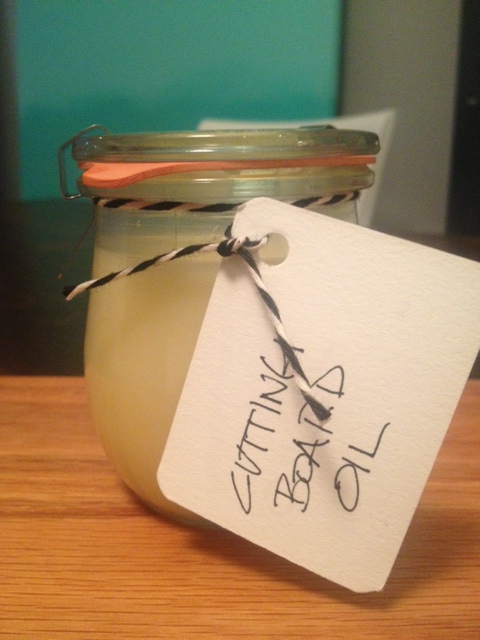
Make sure to re-oil your boards when you notice them looking a bit dry. Never put boards in a dishwasher, or let them sit in water. You can also use a mixture of 5 parts mineral oil to one part all natural beeswax, heated over low on the stove, then rubbed into your board for added protection.
***UPDATE: Check out our post on Wood Oil/Wax here***
What do you think? Wouldn’t these make perfect holiday gifts?
I took a quick business trip to New York last week. It was a busy three day trip, with not much time to take in the city. However, I did manage to pop into a few home decor shops, and did some walking, eating and enjoying New York in the fall.
My hotel was in a fantastic location, West 23rd between 5th & 6th avenue. When I walked east from my hotel I walked right onto 5th Avenue. With Eataly on one corner, the Flatiron building in the background, and tons of shopping and restaurants.
Flatiron BuildingEataly
The night I arrived in town I was able to pop out to a few shops before they closed.
Restoration Hardware had some holiday decor up, and some generally lavish and fantastic decor pieces (but nothing that I fell head over heels for.)
Restoration Hardware – Lights under glass – great for a Holiday tableRestoration Hardware – Great Headboard
West Elm was surprisingly small, and I felt it had less to offer than my Toronto location.
Fishs Eddy’s was my favorite stop, and I brought home two pieces from there (in my small carry on luggage!) Thanks to a twitter friend Abby @crabigail for the Fishs Eddy & ABC Carpet tip! (no pics of Fishs Eddy, as they asked me not to take photos, but imagine a kitchen supply heaven.)
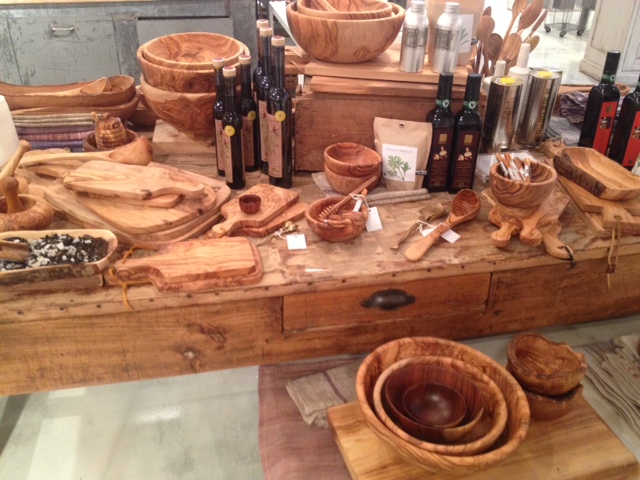
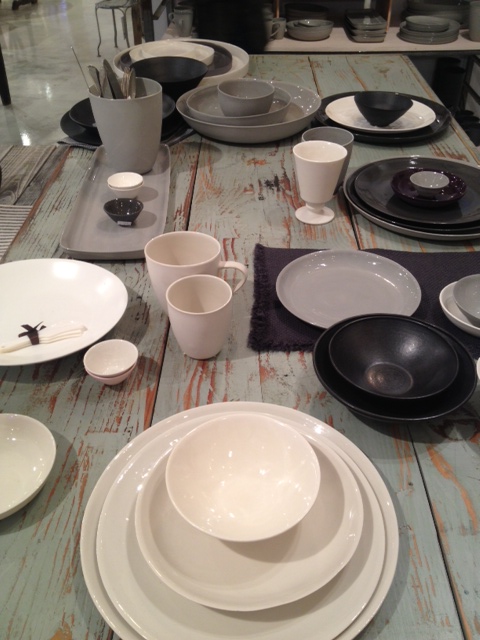
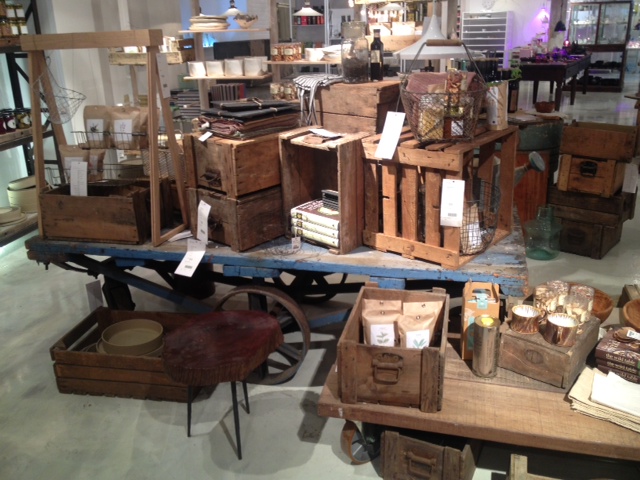
ABC Carpet & Home. Although the carpets & lighting were gorgeous, I sadly could not fit anything that large in my suitcase, however ABC just opened ABC Kitchen with tons of fab kitchen serving pieces. I loved their wood cutting & serving pieces (umm olive wood anyone?!). They also had some great matte ceramic pieces in whites and grays that were gorgeous.
ABC – Olive WoodABC Ceramic DinnerwareABC
I tore myself from ABC Kitchen and only left with a large wooden spoon from France.
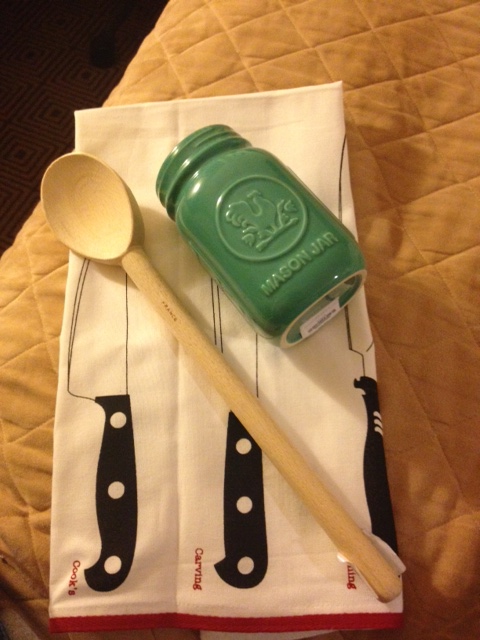
My New York Purchases – Ceramic Mason Jar & Tea Towel from Fishs Eddy & a wooden spoon from ABC Kitchen
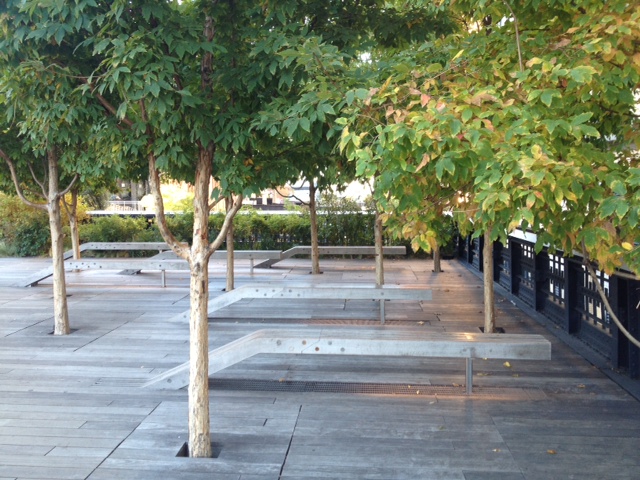
On my last morning in New York, I got up bright and early to walk down to the High Line. I love what New York has done with the space, and its a great urban walkway. I wish the West Toronto Railpath was half as nice (and integrated) as the High Line! They even have elevators for accessible access. Awesome! If you are visiting New York I highly recommend taking a nice walk on the High Line.
The High LineView from a bridge on The High Line
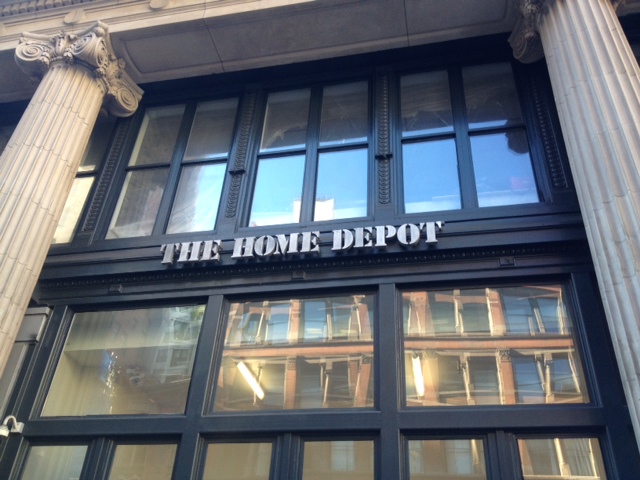
As I was heading back to my hotel, I noticed a Home Depot on 6h Avenue. I thought at first it was a head office but when I got a little closer I realized it was an actual retail store! A Home Depot on 6th Ave? New York, I love you!
The Home Depot – 6th Ave NYCThe Home Depot – 6th Ave NYC
Of course I had to pop in (I couldn’t resist) and they surprising had a very good selection.
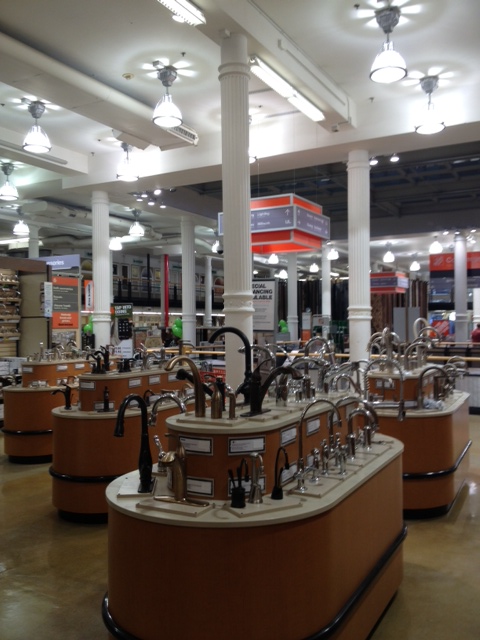
Home Depot 6th Ave – Faucet Department
While wandering around Chelsea I also noticed a large lumber yard near the Chelsea Market. I could certainly DIY in New York!
I love the city, but next time I visit I need to stay a little bit longer. It was too much a whirlwind visit (but business travel is always that way!) Whats your favorite stop in New York City?
If you’re making DIY concrete countertops, one of the most important parts of the process is the forms. Your forms are your molds, and if they’re not done right, your end product won’t look professional and you’ll constantly be bothered by those little bits that are “off” (or just straight up wrong).
Before taking on this project, I researched a LOT about the forms, and got a bit freaked out. Most of the things I’d read about the forms involved making a completely level work surface for the forms, (which would be a problem in our tiny unlevel garage) and a whole lot of pre-drilling, countersinking and screws screws screws. Then comes the stressful part about making your perfect edges with caulking.
Then Jeremy from Buddy Rhodes Concrete Products entered our life, and told me to chill out about the forms. They really weren’t that hard. We should build them with tape instead of screws, and not to worry cause if we mess something up it doesn’t matter, as we can just pull the tape up and do it again. They also don’t have to be level, just flat. Because OUR Buddy Rhodes concrete wouldn’t be poured, and therefore didn’t have to fill the forms completely, and thus no need for level.
As for the edges, Jeremy told us to pick up some Vaseline and Popsicle sticks, and he’d show us how to do the edges the easy way.
So Jeremy took a stressful, detail orientated task and made it a whole lot simpler.
So here’s what you need to make your forms:
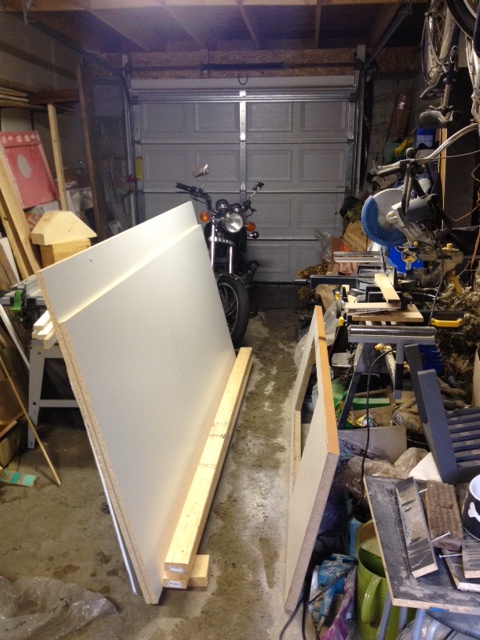
Concrete Form Materials (motorcycle optional)
3/4″ 4×8 melamine sheets (we used 2) $38/each
Strips of melamine cut to the desired depth of your countertop. In our case we were building a 1 1/2″ thick countertop, and therefore got our strips cut to 1 1/2″. You CAN do this yourself on a table saw, however it is a hard task to push 4×8 sheets onto a table saw getting perfectly straight strips. It is much easier to have Home Depot or Lowes cut them down with their panel saw. Get more strips cut than you think you’ll need. We got 4. Not enough.
Double Sided Duct Tape (*This can be hard to find. In the US check Walmart or Lowes. In Canada we did not find it anywhere, and resorted to double sided Scotch carpet tape (which did work). We ended up using 5 rolls of carpet tape, so make sure you have a bunch on hand. We started with 3 and had to make a trip back to HD.)
Off cuts of your 3/4″ thick melamine to use as spacers for your countertop overhang
100% white silicone caulking. The white dries harder than the clear, so go for white. Again get more than you think you need.
Caulking gun
Disposable rubber gloves
Shop Towel (or heavy duty paper towel)
Vaseline
Popsicle Sticks
Miter saw
Flat work surface (we used saw horses with 2×4 vertical stretchers between to stop sagging for one work surface, and a bunch of 5 gallon paint buckets for the other.)
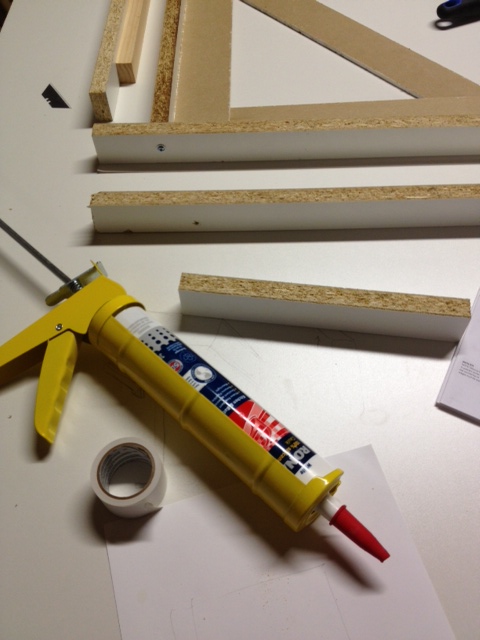
Form Supplies: 1 1/2″ strips of melamine, double sided tape, silicone caulkDouble Sided Tape
HOW TO MAKE CONCRETE COUNTERTOP FORMS
Step One:
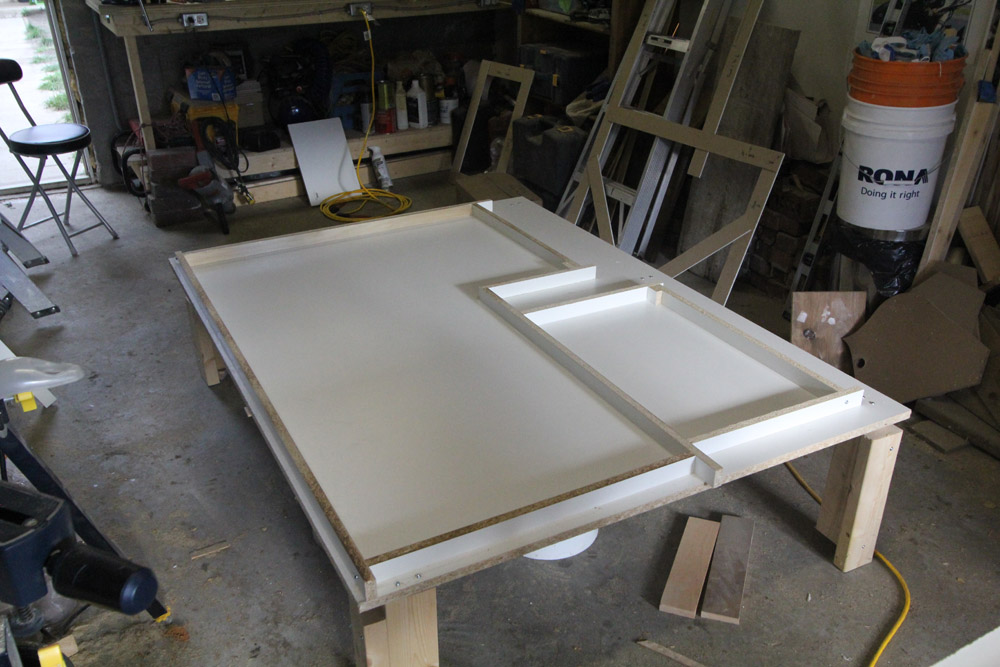
Make your flat work surface, ensuring you can get to all sides of the work surface, and you’re not going to trip over anything. Place a 4×8 sheet of melamine on your work surface, ensuring the melamine is in good condition. The surface has to be flat because you’re making your countertops upside-down. If there’s sag your countertops won’t be flat!
Step Two:
FLIP YOUR TEMPLATES UPSIDE DOWN, and transfer any imperative markings such as overlaps and sink holes to the bottom. The flipping your templates upside down is CRITICAL! (Yes, we did learn this one from making a BIG mistake. We got so excited to start building the forms that we forgot to flip them and had to start all over again.)
Place your (upside down) templates onto your melamine and lay them out to maximize your space. (a.k.a. don’t put one big template smack dab in the middle, fit them around like a puzzle so that you’re not wasting space)
Step Three:
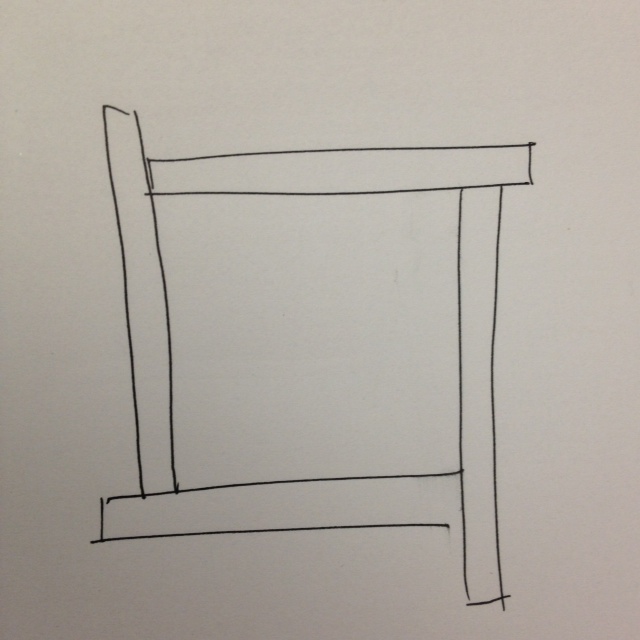
Start building the edges of your forms using your template as a guide. Now you don’t have to measure each piece exactly to build your frame, its actually easier if you cut your sides a bit long, and build the sides of your form like this:
Cut your pieces longer then they need to be and have one end overhanging the next. (sorry for my terrible drawing, I really did go art school…)
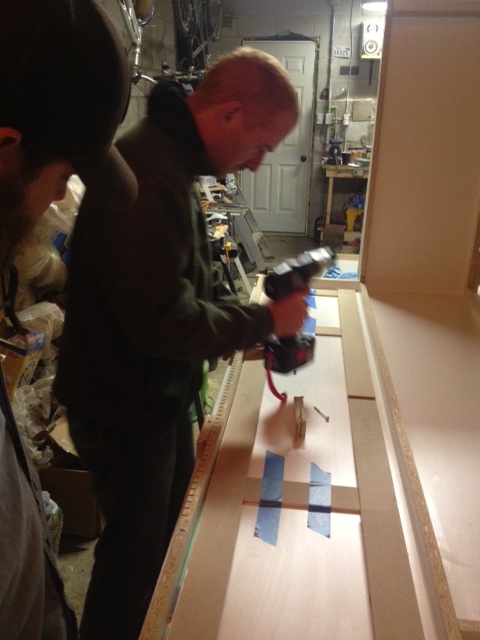
Follow your templates, and where its indicated to add an overhang of 3/4″ inch, place a few offcuts of your melamine between the template edge and your melamine side to create the perfect spacing. Once you have everything laid out, attach the form sides to the melamine sheet base using the double sided tape. For added strength, use a self tapping screw (such as a pocket hole screw) to screw through the corners of your form, attaching the side pieces together. No need to screw into your 4×8 melamine sheet base though, the double sided tape will hold everything good enough. Also if you don’t screw in to your base sheet you can reuse it later on for another project!
Jeremy applying double sided tape to one of the form sides.
Step Four:
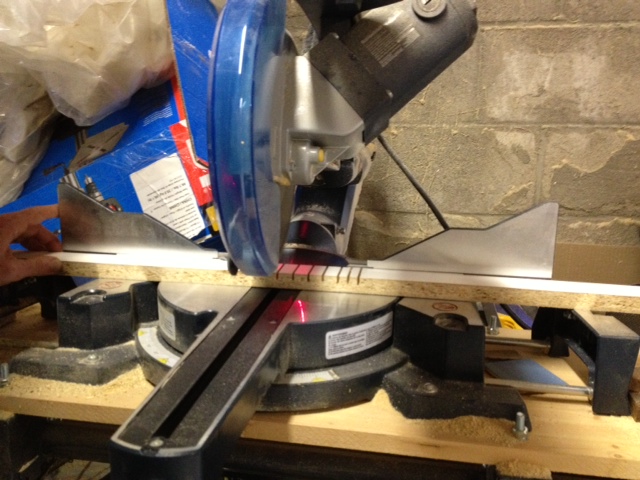
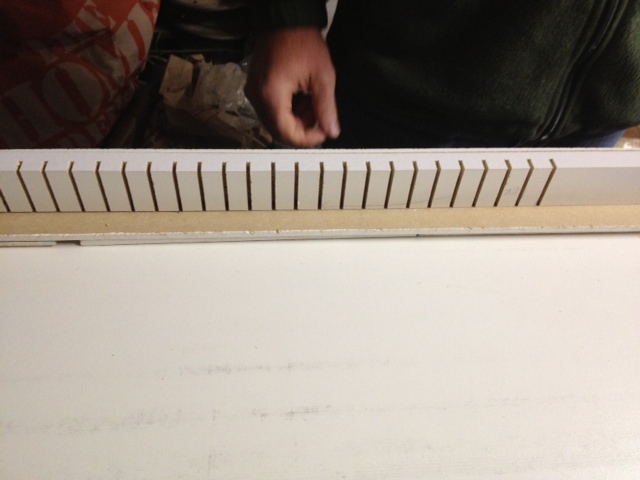
If you have any really wavy/crooked walls, and you needed to make a curved template (like we did for the coffee bar). Now it is time to make your curved form. To make the curve, we made kerf cuts on the back of one of our melamine strips. We first applied the double sided tape to the bottom of the piece, then set our miter saw to only cut through half the material, then kerfed all along where the curve needed to be.
Making the kerf cutsTesting the kerf cut piece to see if it would curve to our template
Once it was kerfed, we checked to see if it would curve to the form, then stuck it down, and added a few screws to keep it in place. A pretty big feat of engineering.
Curving the back piece of the coffee bar mold in place to form to our template (the coffee bar wall is very crooked, and has a hump right in the middle)Jeremy adding a few screws to the coffee bar form, and a sneak peek of our special form for the peninsula.
Step Five:
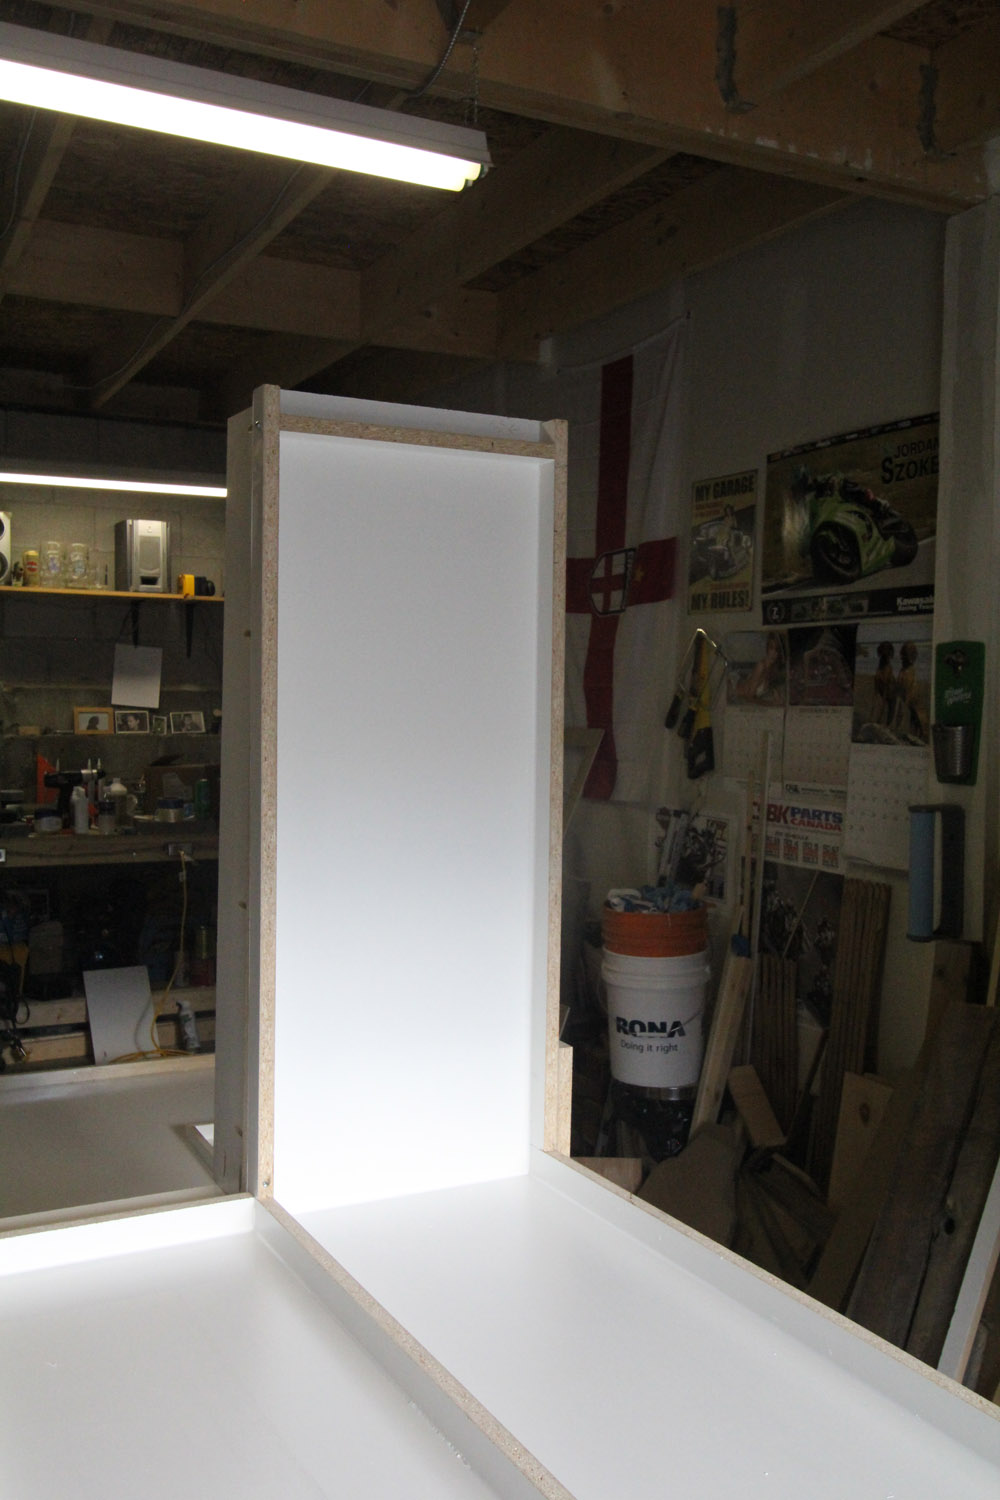
Make any special forms. This will include sink cutouts, and in our case a WATERFALL. Yep that’s right, my dream of a waterfall countertop was happening! Whats a waterfall counter you ask? It’s when the countertop appears to drop off the side of a counter to the floor. Like this:
Waterfall Countertop – Apartment Therapy
I really wanted the countertop on the peninsula to have a waterfall, and Jeremy said it was not only possible, but that we could do it in ONE PIECE. Yeah. Mind blown, right? As we are using the Buddy Rhodes Craftsman Mix in his traditional hand formed technique, we could literally make the concrete go VERTICAL! PSHEEEEEWWW! (That’s the sound of your mind blowing.)
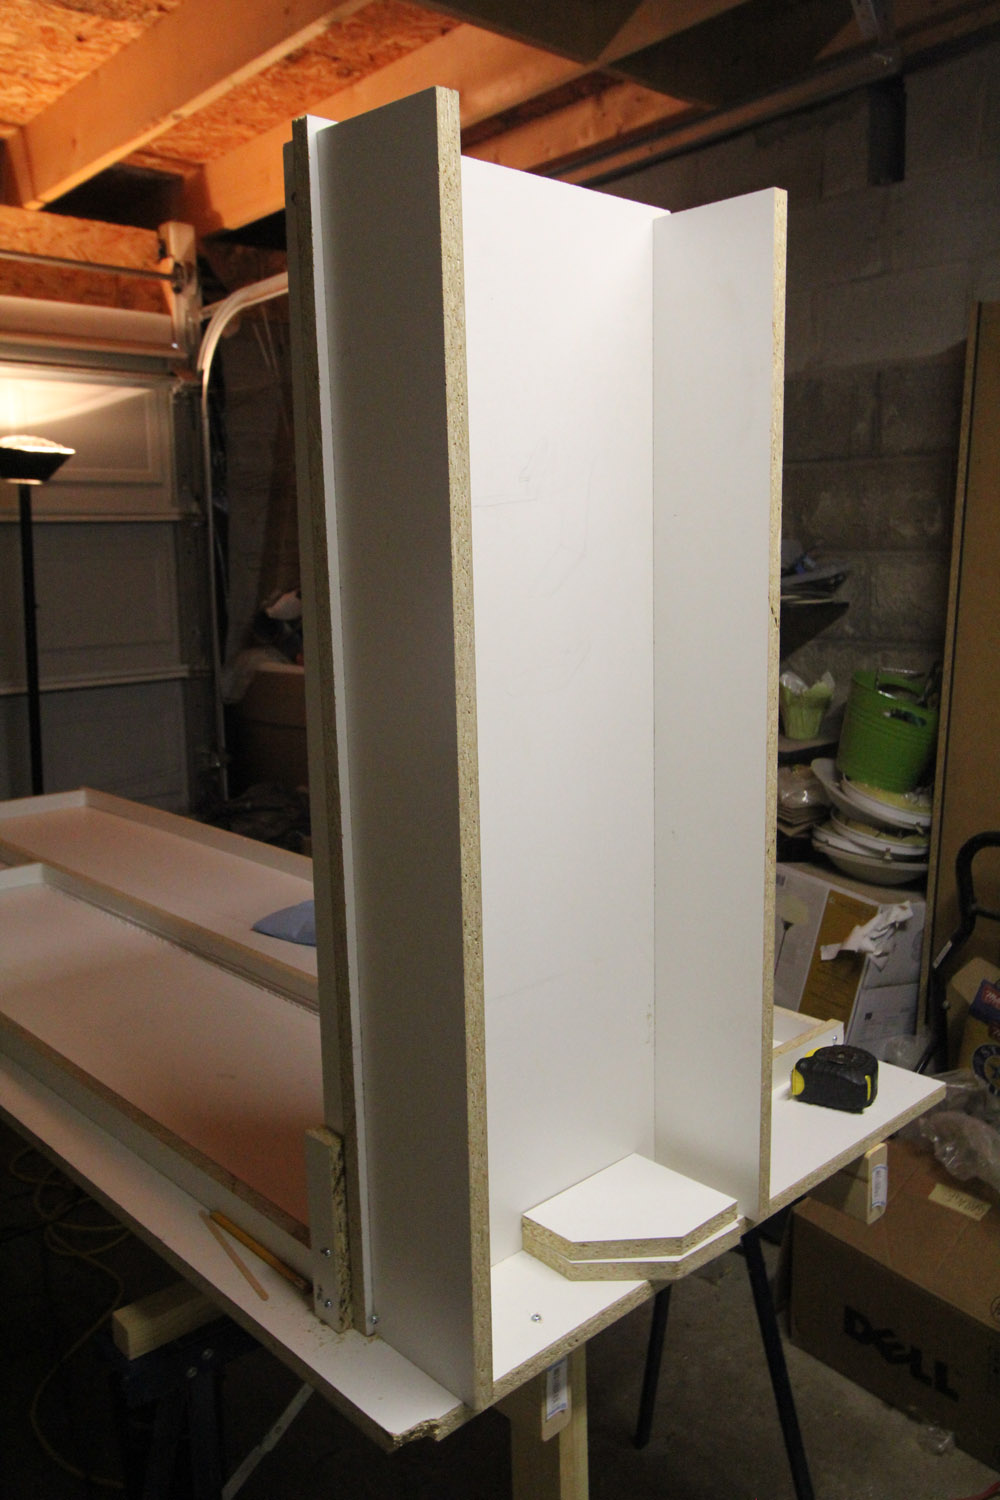
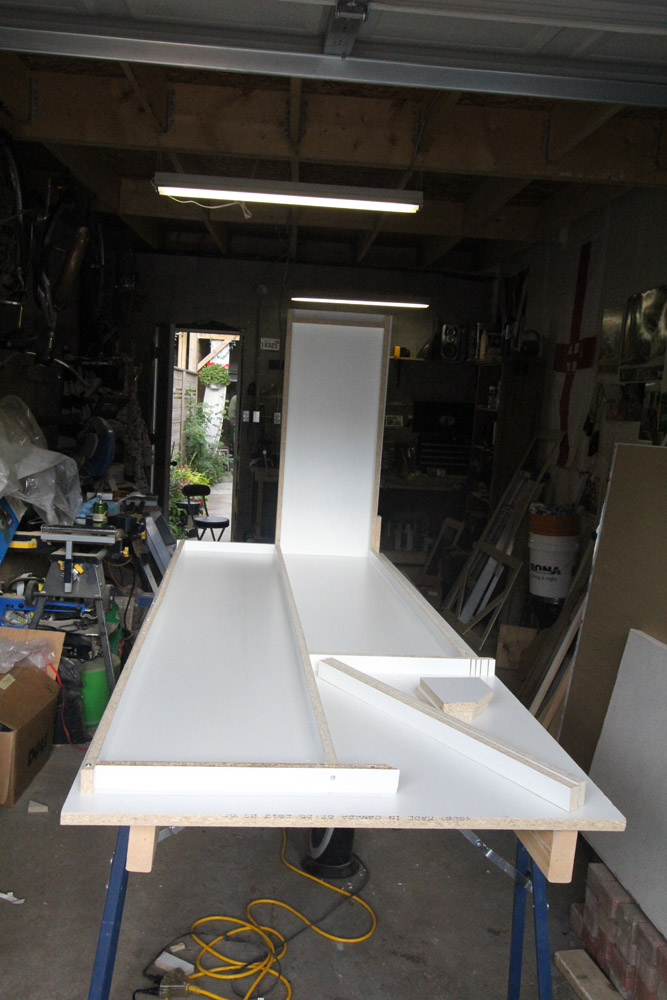
So it was time to make our waterfall mold, and that meant making our upside down form go vertical. We created the form the same way we did the other forms, but instead of a short side we ran another piece of melamine vertical, and then gave it sides. We supported the back with extra pieces of melamine attached with pocket holes (so that it would support the weight of the wet vertical concrete).
Waterfall Countertop FormSupport pieces on the back of the waterfall countertop form
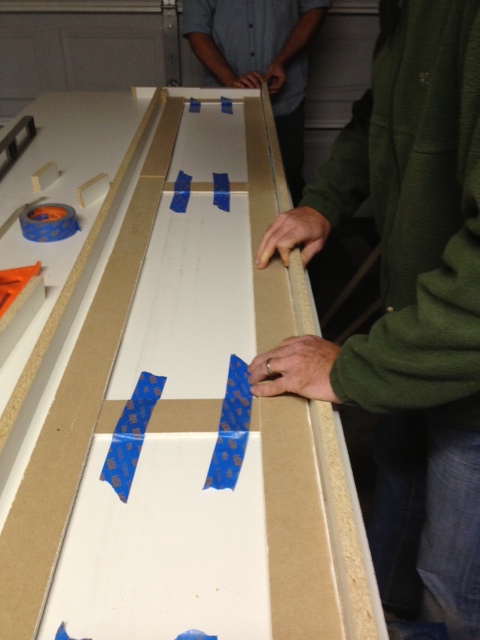
Step Six:
Once all your forms are built, its time to caulk the edges of your form to make it all purdy for your exposed corners. *Note that this step isn’t super essential when making hand pressed countertops using the Buddy Rhodes Craftsman Mix. Edges can easily be rounded and smoothed in the finishing steps, but it doesn’t hurt to have a nice finished edge right off the bat.
If you have ever used silicone caulking, you will know that its a sticky mess, and doesn’t clean up half as nice as latex caulk. I happen to not like silicone caulk much at all. Its unforgiving and finikity. So when Jeremy told us he had a fool proof way to caulk the edges I was in 100%.
Jeremy’s fool proof way to get a perfect round edge:
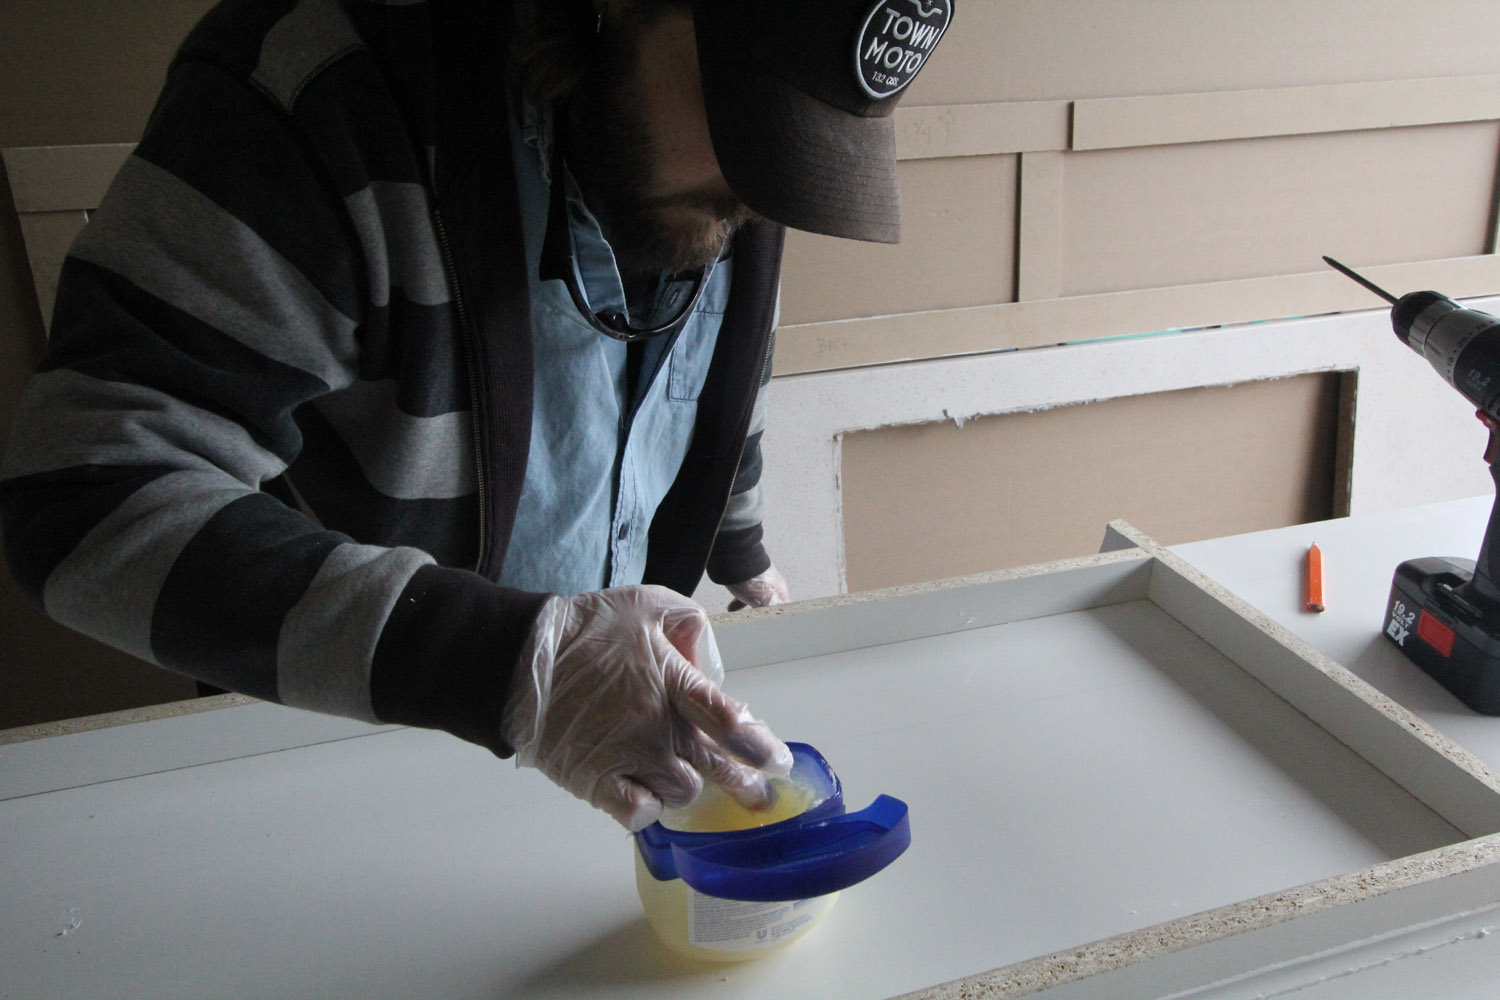
Lay down a very thin layer of Vaseline close to (but not in) your corners and seams. If you have mineral spirits (which we don’t have in Canada) thin your Vaseline down a bit to make it even easier to apply. Cover from right near the seams up the sides and on the base of your form about 1″ away from the seams. You only need a thin film, and ensure you wipe off any excess.
El Granto Applying the Vaseline
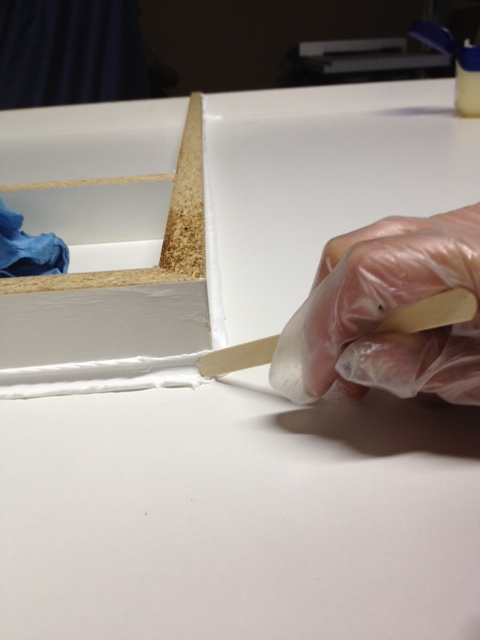
Lay down a bead of white silicone caulking into the seams.
Take a Popsicle stick and push it into the seam and draw it along the seam to make a nice rounded corner. Ignore the excess caulking that is being pushed out to the sides. (no really, don’t even look at it, just let it be.)
Using a Popsicle stick to make a nice rounded corner
Wipe off your Popsicle stick frequently and don’t let excess caulk build up. It is important to push your Popsicle stick against both sides of the form and get a nice clean rounded corner. Now walk away and let it dry. Really. Leave all that gooped over the sides caulking and go get a coffee. Let it dry (ideally overnight) but a couple hours will do.
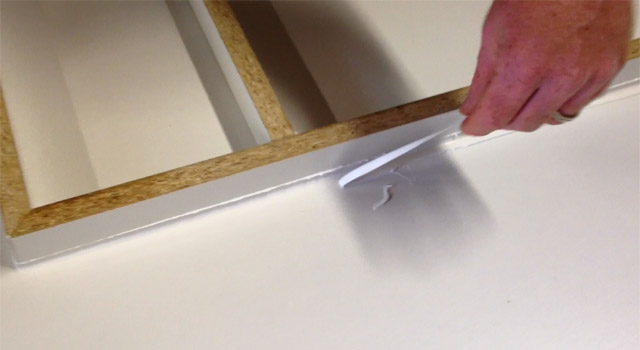
Then just pull off the excess caulking to reveal a perfect edge. (it comes off so easily because of the Vaseline!)
Pull off excess (dried) caulking to reveal the perfect edge
Awesome, right?!
Step Seven:
Pat yourself on the back, cause now you have some awesome Concrete Countertop Forms!
Finished forms (coffee bar form on right, and peninsula form on left)Finished forms (L shaped form for main kitchen, and smaller form for between sink and stove)
The forms are built, everything is ready to go! Next up we POUR!
One of the most important parts of making a new concrete kitchen countertop is the templates. When starting to tackle our DIY Concrete Countertop project, we thought we would just measure our space, and make the forms from our measurements. Our kitchen looked square and true, but once the old counters were out we realized pretty quick that there was nothing square about our kitchen. Thats where templates come in. They are quick and easy to make, and will ensure your counters fit perfectly.
Your templates will recreate your cabinets and wall shape exactly, and ensure your countertops fit your space. It also makes sure your sink, faucet cut outs and anything else special is done in exactly the right spots. How terrible would it be to completely make your counters and realize your faucet hole is 2″ off. Ouch.
So here’s what you need to make your countertop templates:
1/8″ luan or other easily cuttable material cut into straight strips about 2″ wide. Get your hardware store to cut the strips for you on their panel saw. (We had some 1/4″ mdf strips left over from the guest room board & batten, so we used that. Although it wasn’t ideal, as we had to make a trip to the garage for all our cuts.)
Glue gun & glue sticks
Sharpie
Measuring tape
Bare cabinets free of counters and any imperfections. Ensure your cabinets are secured to the wall and level. Once you make the templates, you cant change your cabinets at all, or your countertops may not fit right.
Sink & any integral items to the counters
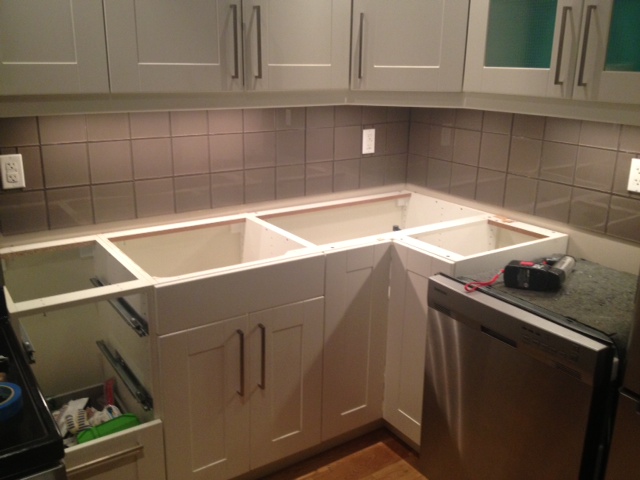
We removed our old countertops & sink, and ensured everything was ready for the templates. We had purchased our new sink, and had it as well as its installation instructions ready.
Cabinets ready for templating
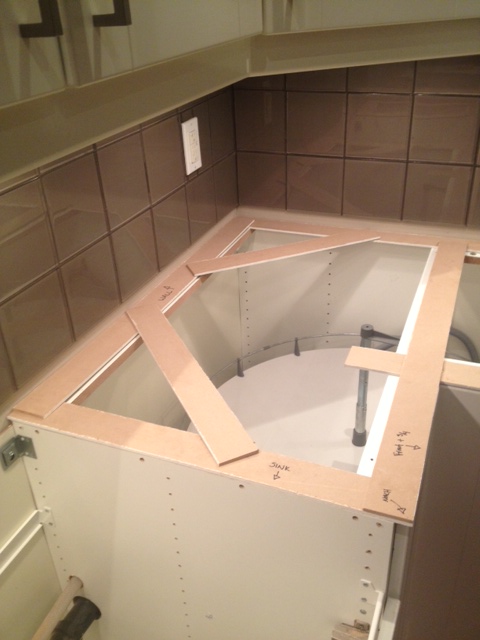
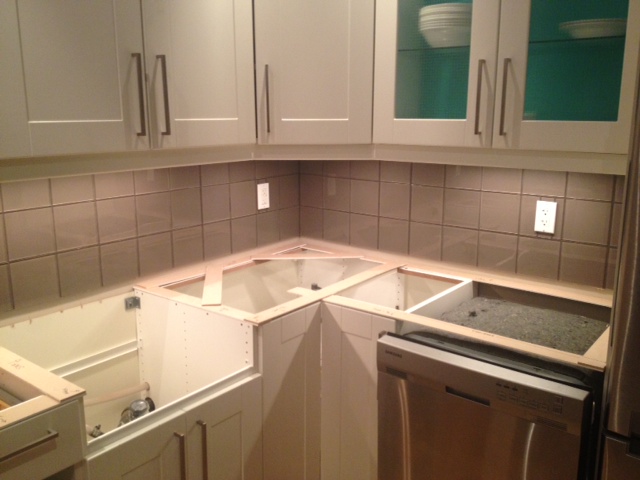
To start the templates lay a long piece of your template material along the backs of the cabinets. Then lay strips along the front of the cabinets cutting them to exactly the same length as your cabinet.
Laying out the first pieces of the template and marking how long they need to be
Join the front and the back strips with shorter strips cut to the depth of your cabinet. Make your way around your counters outlining them with your template strips. Once you have everything laid out, go back and hot glue it all together.
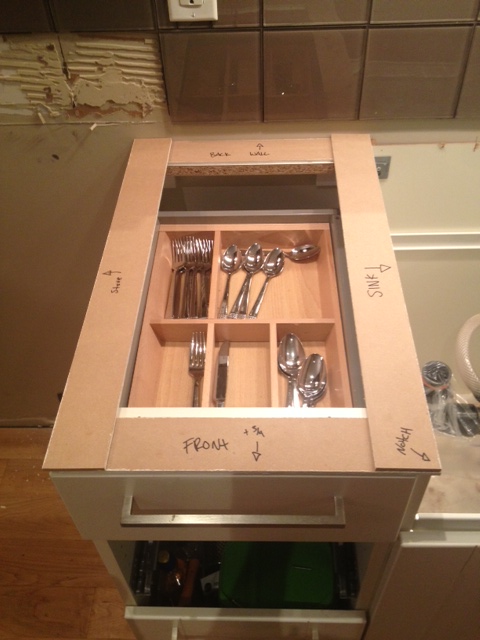
Label all pieces with “front”, “back” and descriptions such where all your appliances are. Mark any areas that will require an overhang. The standard overhang is 3/4″ from the front of your cabinet doors. The back of your counters and areas where it hits walls or appliances will not need an overhang.
Template for small portion of the counter between the sink and stove
Read the installation instructions for your faucet & sink, and mark any special requirements on the template. Your sink may come with a template of its own, if so attach that to your template in the proper place.
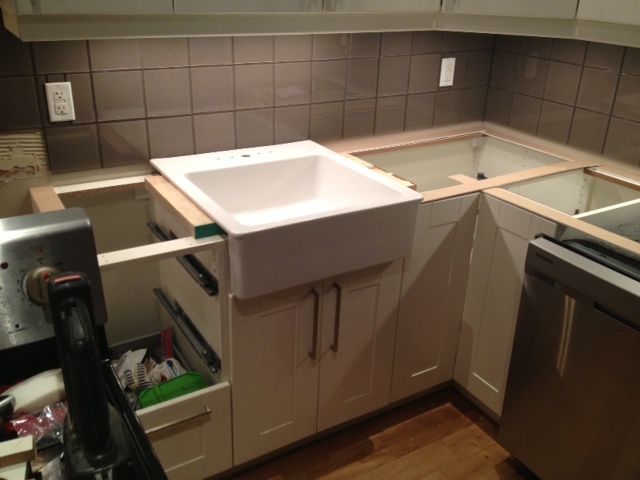
Dry fit your sink & faucet in place around the templates (and make sure everything is going to fit!)
Dry Fitting our sink in place to build the templates around it
Our Ikea Domsjo sink required two notches on the front of our counters to fit the apron front sink. We marked the areas for the notch.
Note the markings for the sink edge and where the notch needs to goMain kitchen templates
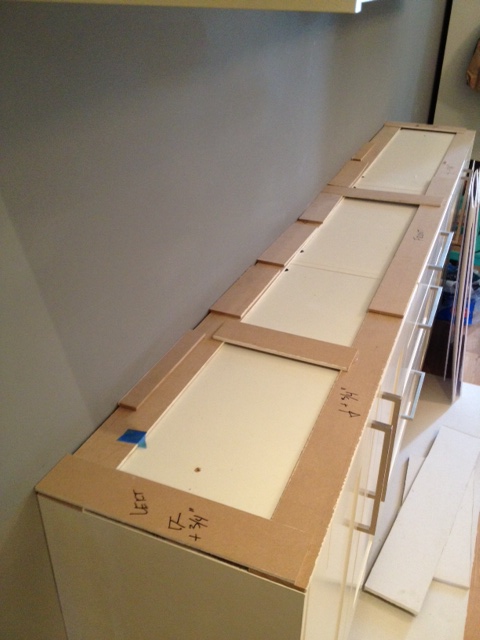
For the coffee bar our counter is 7 feet long and the wall has quite a bow right in the middle. This caused problems for us when installing the coffee bar (it’s actually spaced out from the wall about 1/2″) and we knew a straight countertop wouldn’t be perfect.
To template for the bow in the wall, we cut a bunch of short pieces and laid them against the wall where the curve was. This outlined the curve for us perfectly, and we were able to recreate the bow within the form.
Coffee Bar template. Note all the small pieces forming to the curve in the wall
The entire template process only took us about a half hour, and produced perfect templates to make our forms with. A simple step, but definitely worth the effort for a professional result! You can also use this form of template making for your laminate or butcherblock countertops.
Next up we will be building the forms, and getting one step closer to pouring our concrete!


 Digital WorkTunes™ Hearing Protector, Holmes Workwear™ Premium Safety Eyewear & 3M tekk Paint Sanding Valved Respirator
 sandpaper in 80, 120 & 220 grits (palm or orbital sander optional)