Last week, the awesome folks at Ryobi invited us to check out their power tools, and to hear the awesome Frank Ferragine (aka Frankie Flowers) talk about his new book, and how to spice up our gardens. Did you get it? My gardening pun? Yeah, I know, I’m hilarious.
Kristen & El Granto with Frankie Flowers
We got to try out some awesome tools (I’m in love with this 40v cordless mower, even though I currently have no [living] grass.) Frank also gave us some awesome tips on gardening.
Frank showing us his guns OR how light the mower is 😉
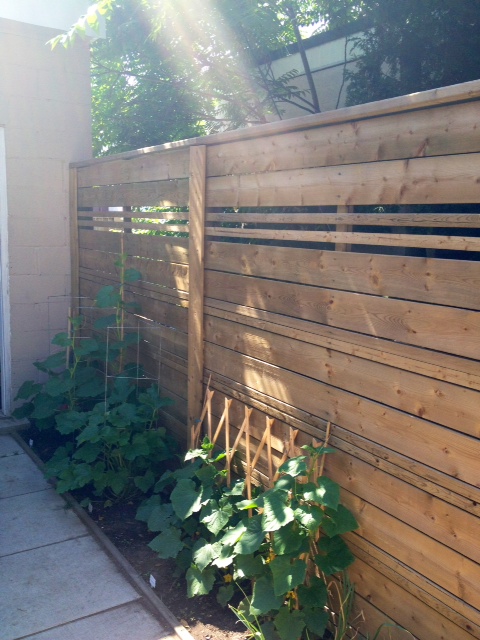
All of this was enough to inspire the heck out of me, and we spent the weekend trying to spruce up the backyard.
Here’s what we got accomplished:
The ivy got pruned by El Granto. Although I’m not sure I agree with his choice of tools, it is looking a heck of a lot better with all the dead branches trimmed.
I did not specify to El Granto what tools were appropriate for trimming ivy…
The dead shrubs came out and a too big rose bush headed to Grants Mum’s garden.
Several trips were made to the garden centers as well as the adorable corner store in my neighborhood.
Seriously, this is my corner store!The corner store even boxes up your plants for you.
We also headed to the local garden center to pick up a bag of triple mix, and a couple bags of black mulch. We brought our old lady shopping card (cause dirt is heavy!) apparently it was too much even for our shopping cart, and one wheel gave out. OOPS!
Oops
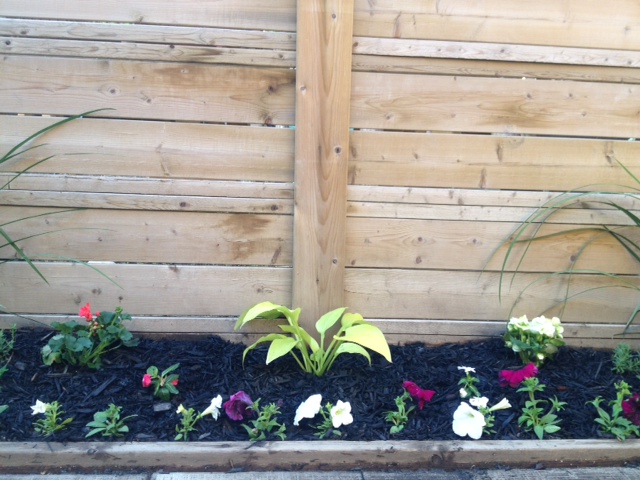
With the mulch and dirt back at home, the planters got filled, baskets were hung, and the flower garden was tilled and planted.
El Granto picked the hanging planter this year.I love how petunias add so much vibrant color.
We added a few perennial Hostas, some grasses, and annuals for color. The black mulch really makes the whole thing look more like a garden, and less like a dirt patch.
Everyone tells me I cant possibly kill a Hosta…we’ll see.
We added a small herb garden next to the deck. I love using fresh herbs in my cooking, and its lovely just to pop outside and cut some as needed.
This year we have rosemary, two types of basil, parsley, thyme, chives and green onions. I have about 2′ left of open garden to add other items as I see fit.
Green onions, basil, chives, parsley & rosemary (poor thyme didn’t even make it in the photo)
Our BBQ & surrounding area got a thorough cleaning, and new boxwoods were planted in the planter box beside the a/c unit. It’s been so cold this spring, that we haven’t even uncovered the air conditioner yet!
Boxwoods hiding the ugly A/C unit
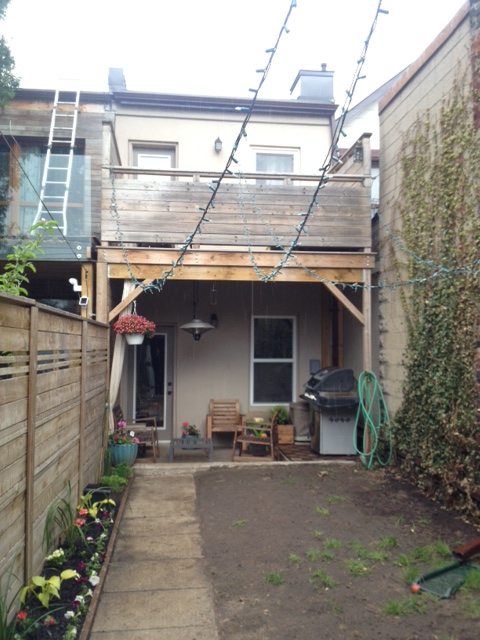
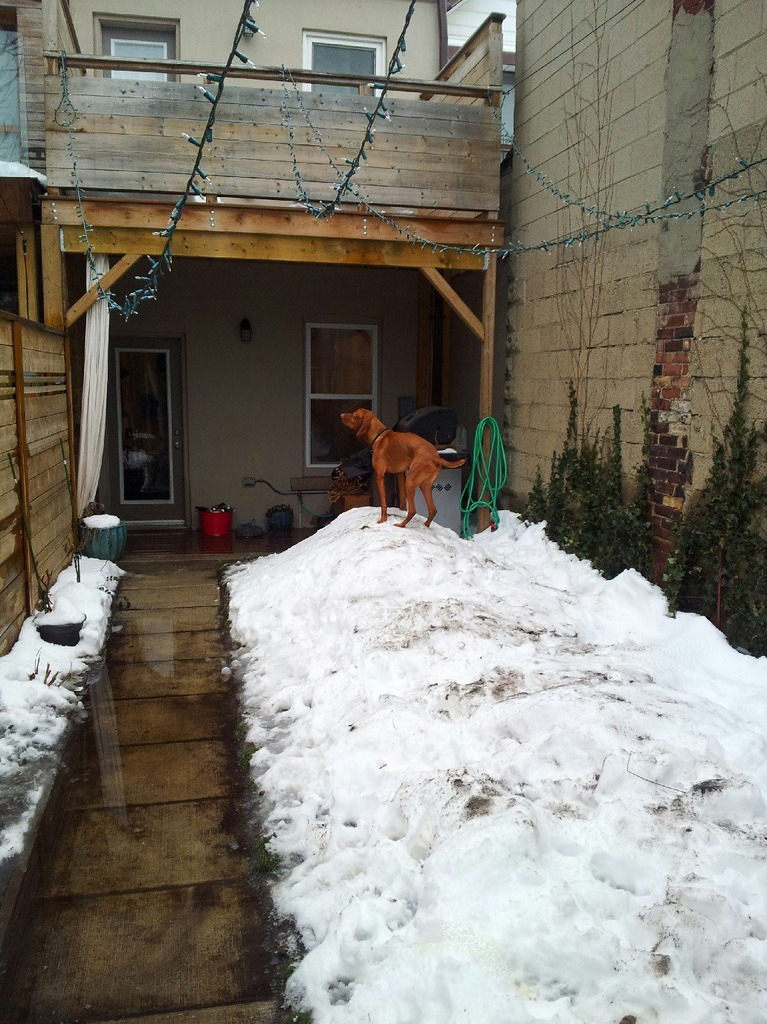
While we worked our butts off, there is still so much to do in the backyard. I will be back later in the week with a Backyard to-do & project list, but I will leave you with a sneak peek of my dirty little secret.
AKA the grass-less backyard.
Embarrassed to even post this photo
HELP! The yard needs so much work, from a lawn, to a new path, and a whole lot of paint & TLC.
Most home projects are practical. Fixing something that is broken. Improving something that will make your daily life better. Increasing property value etc.
Then there are projects that are none of the above.
They are the impractical high heels of the home world. Did you need them? No. Are you going to wear them to walk the dog, or get the groceries? Not a chance. But are they absolutely gorgeous, sexy as hell, and so very impractical that they were bought solely out of love? Absolutely.
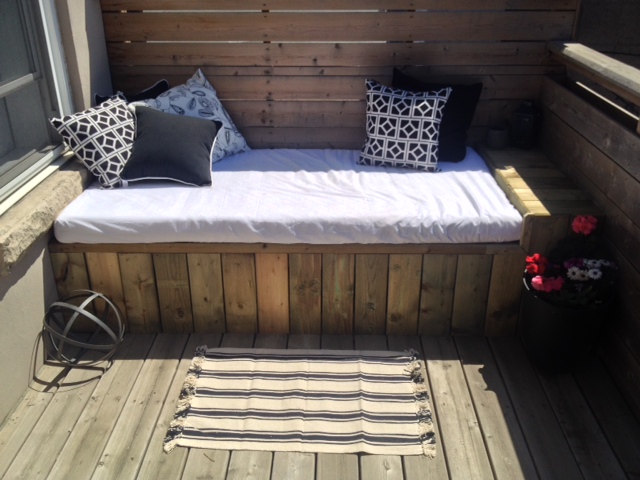
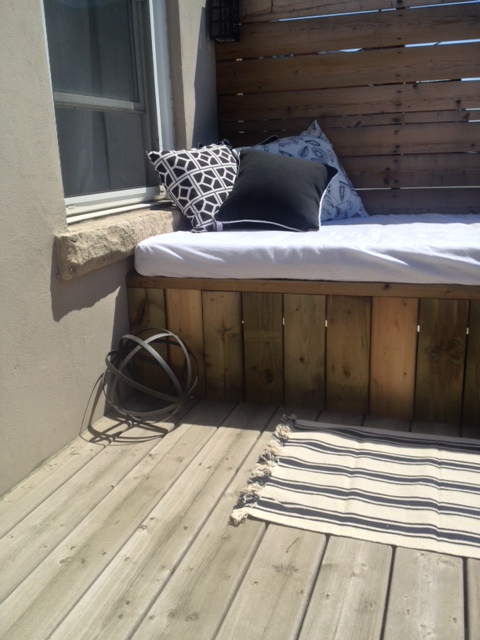
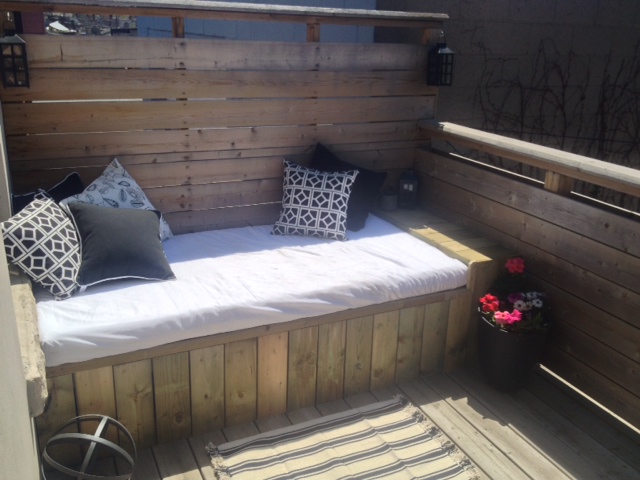
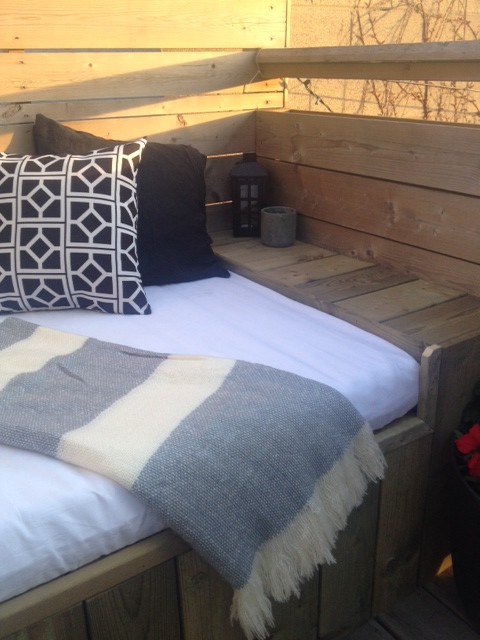
Our outdoor daybed project is the 6″ hot pink stilettos of home improvement.
…and I LOVE IT.
Before:
AFTER:
Here is how we did it:
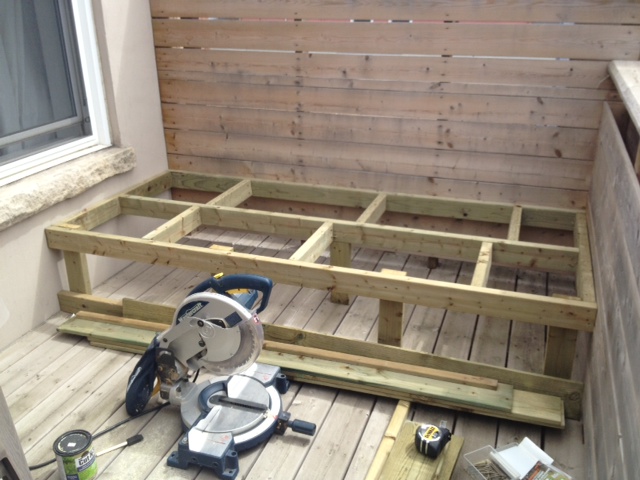
The structure for the daybed was built using pressure treated 2×4’s. The back of the daybed was securely attached to the deck support posts, and the rest of the frame built as a box around it. (similar to how you would build a deck)
It was all assembled with deck screws. It was built to fit a twin size mattress, with a bit of room to spare at one end for a small built-in table.
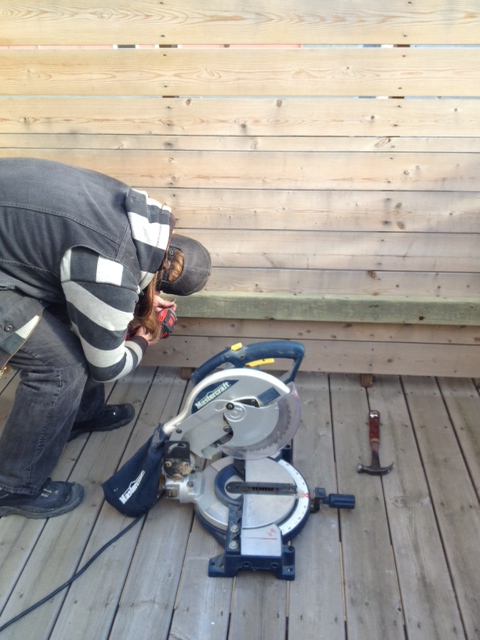
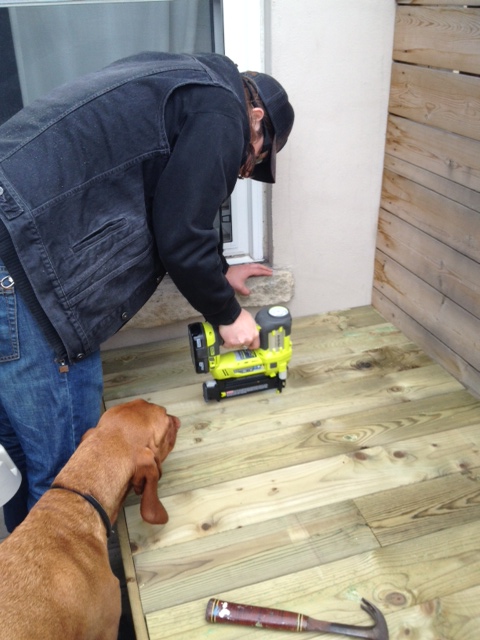
After the frame was built, it was clad with 1×6 fence board. We broke out our new Ryobi cordless brad nailer, and it made quick work of the job.
Even Odin likes new tools
We trimmed the edge where the skirt met the seat of the daybed with a 1×2. This way you would not see any unfinished boards and the edge of the daybed would not be rough against your legs. (Here you an see the trim in progress & Odin helping of course.)
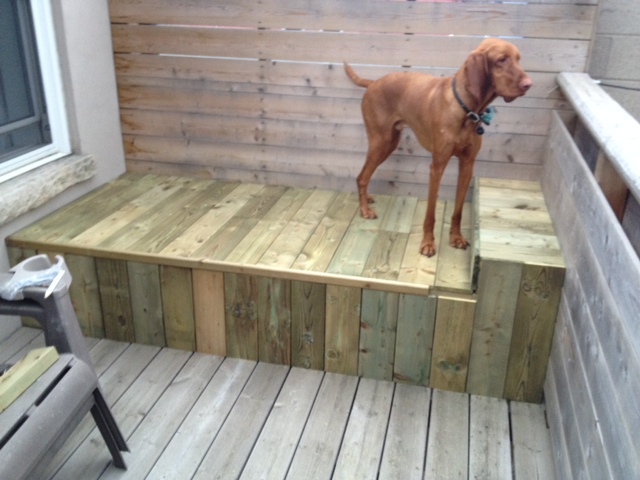
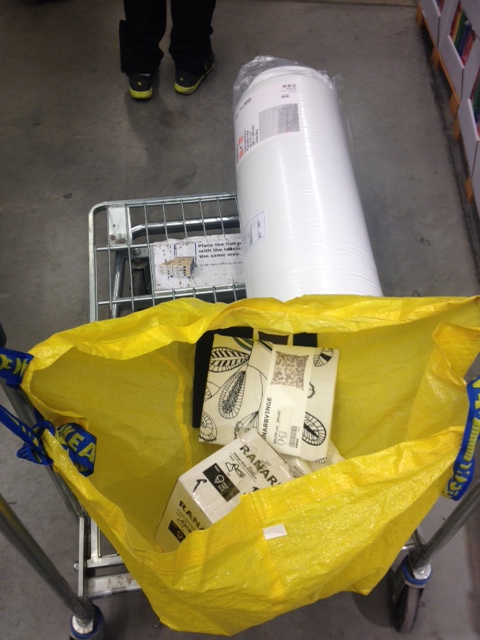
I had lots of trouble finding an economical cushion. So in the end, I headed to Ikea and picked up a twin size 4″ thick foam mattress.
I would love to have a custom cover made for it, but until then an inexpensive twin size fitted sheet works perfectly.
All the linens come in each night, and in the winter, the Ikea mattress can be rolled up for easy storage.
It is incredibly comfortable. Great for lounging or having a nap. It’s my new favorite spot for reading my book with a cold beverage in hand. We are going to get a lot of use out of the daybed this summer!
Do you have an outdoor daybed? Would you try your hand at building one?
SOURCE LIST:
Materialst:
8 – 2×4 8′ pressure treated c/o Home Depot Canada
14 – 1×6 6′ pressure treated fence boards c/o Home Depot Canada
1 – 2×2 8′ pressure treated (cut in half to make a 1×2 as a trim piece) c/o Home Depot Canada
Deck screws
Galvanized brad nails (1 1/2″)Twin size foam mattress
Twin size fitted sheet
Decorative pillows
[Plant Pot – Home Depot, Candle holders – Dollarama, Concrete Candle – Loblaws, Mattress – Ikea, Sheet – HomeSense, Pillows – Ikea & HomeSense, Blanket – West Elm]
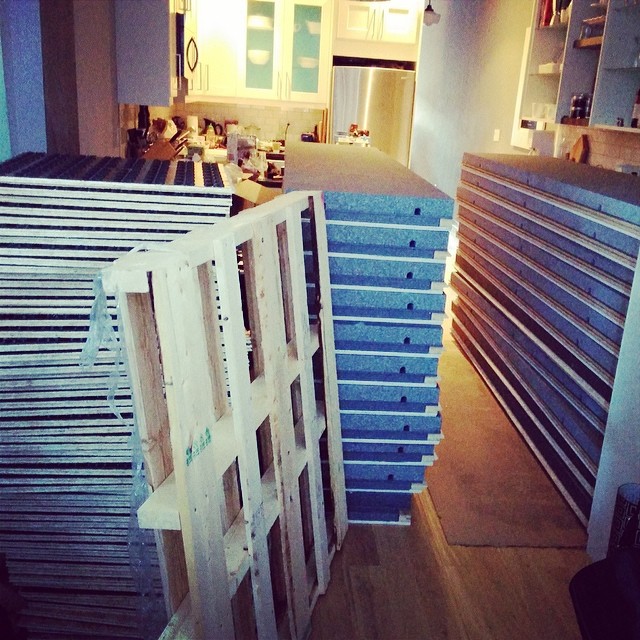
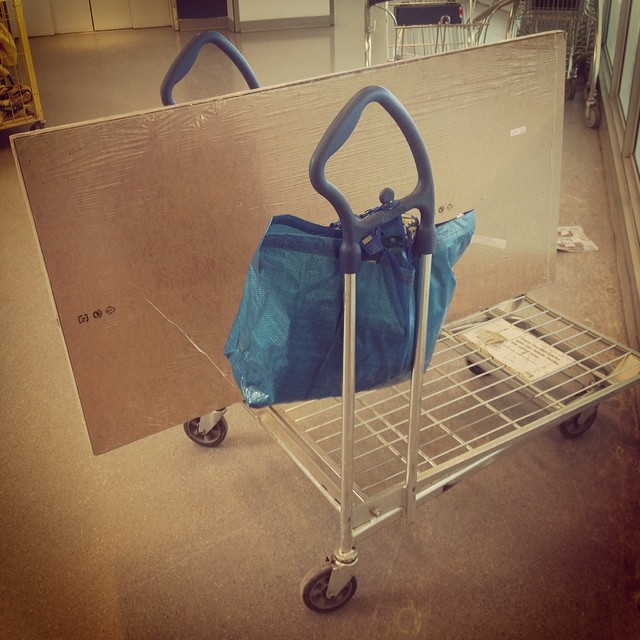
I was really hoping to have a completed DRIcore subfloor to show you guys today, but alas we ran out of leveling shims and left off about 80% done. We are pretty proud of how much we got done though! We got our DRIcore delivery on Friday and El Granto unloaded all the subfloor & SMARTWALL panels into our dining room. Thank goodness for big tough husband muscles. I would have broken down and cried just looking at all that stuff to unload!
DRIcore subfloor and SMARTWALL unloaded into our dining room.
We did knock a few other things off the list since we last spoke (pretend we’re old friends having a lovely chat over tea and scones).
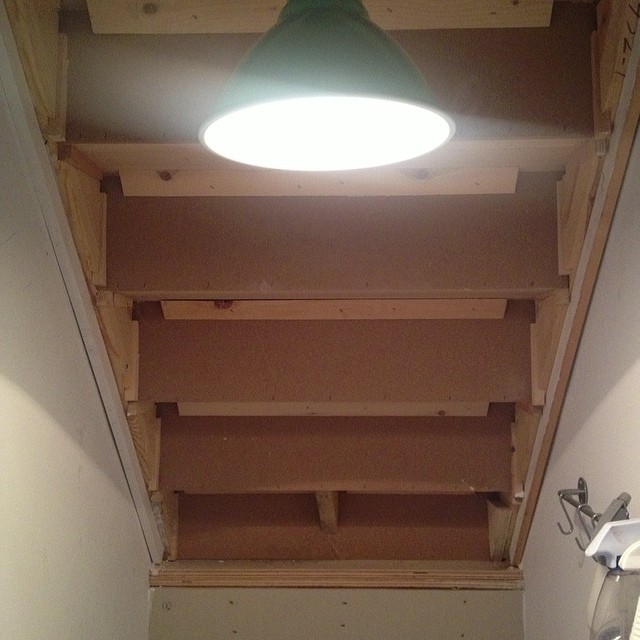
I tried some more wiring scenarios with the basement hall light, and have still come up short. I can only manage to get either the staircase OR the rest of the basement lights to work, not both. Womp womp.
I can only manage to have either the staircase light work OR the basement lights. Not both.
Not to be deterred, I switched gears and set up some DIY scaffolding, which consisted of a leaning ladder and a 2×12.
Kristen’s DIY “Scaffolding”
El Granto didn’t approve, but it actually felt quite sturdy to me! With the “scaffolding” in place I was able to reach most of the basement staircase ceiling (which happens to be the underside of the 2nd floor staircase). Now that we had access I could apply strapping to the staircase ceiling and prep for a new ceiling cladding.
After the strapping was up I could cut my V groove boards that I primed last week. A few cuts and out came the compressor and brad nailer. Most of the time my brad nailer and compressor do the job just fine, but when you’re standing 8 feet over the staircase putting up boards over your head and wrestling with the air cord, I really wish I’d splurged on a cordless brad nailer. This was especially so when my nailer kept misfiring and leaving nail-less holes in my board. Note to Santa, please bring Kristen a cordless brad nailer for Christmas, it will cut down on her volume of profanities exponentially. xox
Up went the first 8 boards and I was incredibly exited to see the transformation. The rest of the boards will have to hold off until I can fix the (insert string of expletives here) new staircase light. Then they need to be caulked, holes filled and painted.
Basement ceiling cladding going up
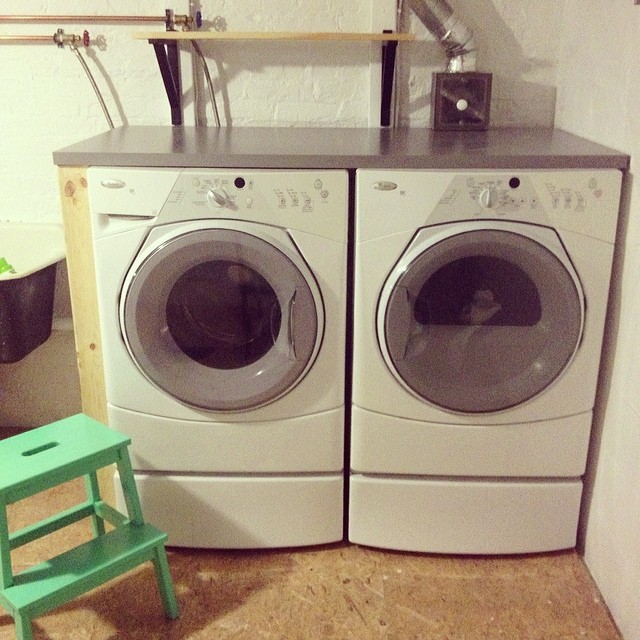
Next up was tackling another one of my problem areas from last weekend: the new washer & dryer countertop. It was too tall to fit under the wall mounted lint trap. So out came the washer & dryer (again!) and we lowered the leveling feet, re-leveled them and re-taped the dryer vent and voila! The counter now fits. To get the counter to slide all the way back to the wall we broke out the jig saw and cut a notch for the dryer vent. The counter slid in perfectly, and we will now have no lost socks behind the dryer! Can I get a woot woot?
Next up on the task list was installing a little shelf over the washer & dryer to hold laundry detergent etc. Two Ikea black shelf bracket and a scrap piece of pine later as we had ourselves a shelf.
Washer & Dryer countertop and new shelf installed
This week we would like to tackle painting the basement stairs, and this weekend finish off the DRIcore subfloor and start tackling the walls!
What project were you working on this weekend? How did it go?
Generally our projects tend to go fairly smoothly. We plan and prep a ton, and usually stay on budget and don’t have many delays. However, it’s not always sunshine and roses. We too can be plagued with reno stress and generally a whole lot of crap that doesn’t go right.
This weekend the basement project fell into the not going so well territory.
Saturday:
El Granto headed to the motorcycle show to see a man about a motorcycle (more on that later) . I saw the sunshine from my bedroom window and thought “oh what a nice day, I’ll go to Ikea”. What a mistake. It was sunny but frigidly cold and windy. I took the subway to Kipling, and waited 45 minutes in the middle of the parking lot for the Ikea shuttle. Bonus points for Ikea making their shuttle stop without any shelter, and not in viewing distance of the station. Good work Ikea. After arriving at Ikea I braved the Saturday crowd and the arguing couples and screaming parents to pick up a (very large) counter for the washer & dryer as well as a few other accessories. I also needed to make a stop at the lighting department, as I had purchased a purported “ceiling light” which was actually a plug in light. I hoped I purchased the wrong version, and that they magically had a hard wired option, but alas no. Nor does Ikea have conversion kits or any easy way to turn their plug in lights to hard wire.
Discouraged I left Ikea with my purchases and carried a 20lbs 5×2.5′ countertop home on the shuttle and subway. By this point I was cursing myself for not renting a car, or at least going to Ikea with a pal to help carry.
How am I going to get this home?
I finally got everything home and went to install the countertop and realized that my lint trap above the dryer was too low and the counter wouldn’t fit. Awesome. I left the counter and called it a day.
Really? That darn lint trap is line 1/2″ too low.
Sunday:
We headed out early to catch brunch at one of our neighbourhood spots only to find that the drunken hipster hockey fans had been up since 6am and were looking for some breakfast to sop up the booze, and all our fave brunch spots has lines out the door. (*Note to all the non-Canadians, our bars don’t usually open at 6am, but because of the early morning gold metal Canada vs. Sweeden hockey match, the government changed the rules for the day to allow bars to be open and serving for the big game. What can I say, Canadians love their hockey and beer.)
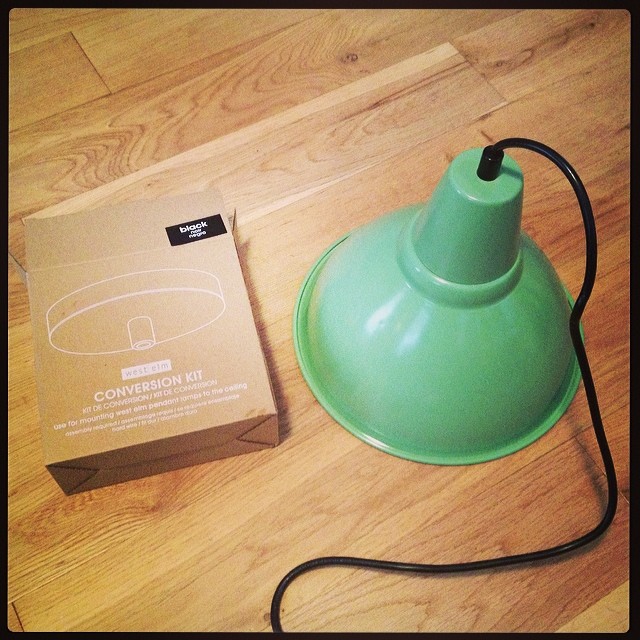
Sad and brunchless I gave up and headed out on some errands. I bused down to West Elm to pick up a light conversion kit. A $25 fix for my $15 Ikea lamp problem, but at least I knew it would work.
The cute (but evil!) $15 Ikea light and the $25 West Elm Conversion kit to fix it
I headed home, dropped off my shopping then headed back out to Home Depot to pick up the cladding for the basement staircase ceiling.
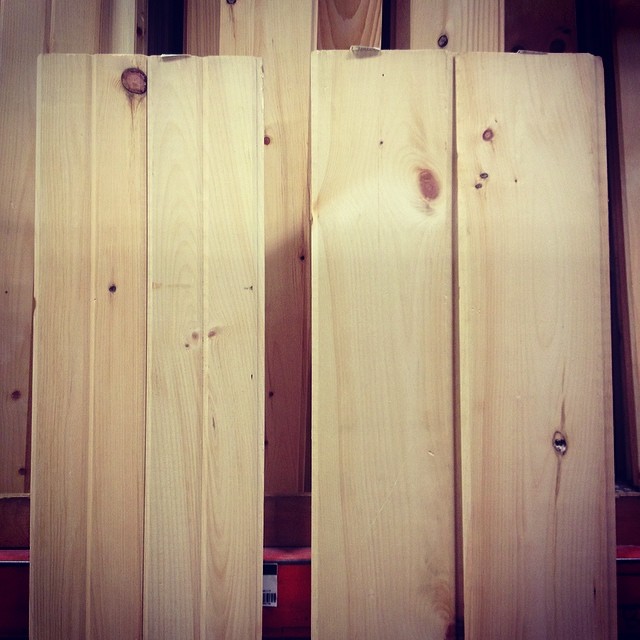
Ceiling cladding options: Beadboard or Barnboard
I decided on pine barnboard planking and proceeded to go through each and every board in stock to find only three acceptable boards. Well that’s not enough to plank a ceiling, so out went the barnboard and in came V groove tongue & groove. Another slog through the pile to find acceptable pieces and then a long hard trip home on public transit with the lumber and supplies.
After arriving home I set out to priming my planks and finish wiring and installing my Ikea light in the basement staircase (there is no light there and it’s pretty dark/sad.)
Priming the Ceiling Planks
After struggling with the wire I’ve discovered that the light switch isn’t wired with two hot wires and meretted neutrals, but alas is wired hot in, neutral out. Uhhhh… how am I going to add a light to this circuit? I tried a few wiring options and wired up the light to test, only to drop the two tiny black screws that hold the light to the ceiling down the stairs bouncing around and getting lost forever. Much swearing, yelling and a slam of a door ensued.
I unwired the light, reattached the existing wiring (so we would have some light in the basement) and left a ladder in the powder room, a compressor in the hall, beadboard covering every surface in the dining room, a nonworking light hanging from an unplanked ceiling and construction debris everywhere and went to bed.
Tonight I am going to try to muster up the courage to take another stab at it, or I may just sit on the sofa with a slice of pizza and hope that a DIY fairy comes to fix my problems.
We didn’t fall on our asses completely with our 2013 DIY goals, but I’d like to do even better this year.
This year my goal is to not fall on my ass.
Likelihood of success: slim to none.
Well there you have it, list done, I’m going back to bed.
Oh… about those real 2014 DIY Goals. Okay okay, here they are.
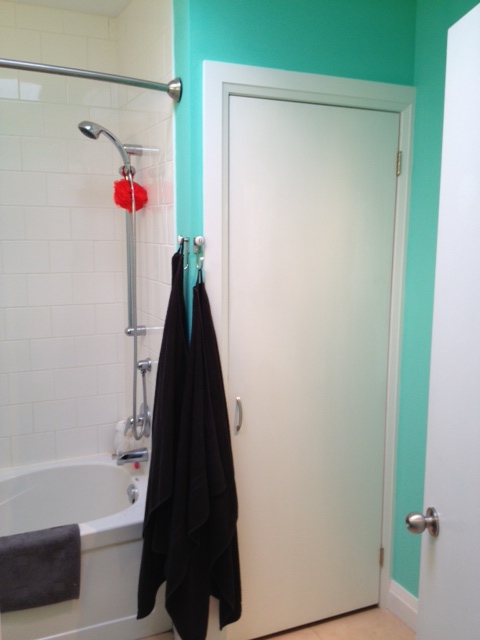
Main Bathroom Makeover: You’ve never even SEEN this room! When we moved in we gave it a coat of Tiffany blue paint, hung a white shower curtain and that’s about it. After living with the bathroom for three years, we’ve noticed it’s a bit lacking in functionality. The vanity is too small for El Granto and I to get ready at the same time (which we do) and the storage is not as useful as it could be. (Aka too little and of the unorganized variety.)
Bathroom Vanity & Mirror (sorry about this terrible picture, I shot it months ago and apparently forgot how awful/out of focus it was)The strange (useless) gap between the vanity and the wall (and hells yeah, we have a happy face nightlight)
Our goal is to build a larger vanity with drawers and his and hers doors and storage. We’d also like to build a new counter with built in trough sink and two faucets. A new mirror and lighting will have to follow as they will be off center and dorky looking after the new vanity.
Old Laundry Closet
When we moved into the Storefront there was a stacked washer/dryer in our main second floor bathroom. This dryer and it’s poorly constructed venting was the start of our water woes that resulted in Mike Holmes coming to fix our house. During the reno, Mike & the crew moved our laundry to a safer location in the basement. What was left is a large (empty) closet in our main bathroom which thus far just holds a laundry basket and some extra TP. We’d like to conquer the closet and custom build a linen closet with glass doors for pretty storage, and drawers for other not so pretty storage (I’m looking at you toilet paper). We’d also like to build in a hidden laundry basket door/drawer system. I really enjoyed making the media cabinet last year and am itching to do some more cabinet making in the bathroom.
To complete the bathroom will be a new shower curtain, towel hooks, art etc. I am also hoping for new tile (but that may be wishful thinking.) It’s a BIG project that we hope to start sometime in the spring.
Staircase/Hallway: The upstairs hallway was on my list last year and it never got done. I would like to finish it off, and continue down the staircase and knock that off the list as well. The staircase is the ONLY remaining beige wall inside. The reason it’s remaining as it’s hella tall, and going to be a pain in the ass to paint. While I’m at it, I’d like to do some trim work in the staircase, and beef up our newel posts to make them more appropriate to the period of the Storefront. Aka less 1990’s more 1910.
The Staircase
Do something with the backyard: The grading is sliding sideways and we’ve lost half the dirt/sand in the backyard in the last year. The pathway is sinking, creating a lake when it rains and the grass refuses to grow in the shifty sandy soil. I would also still like to put in a patio of some sort and build some patio furniture. This looks like an easy task but is HUGE. It may not get done this year.
Backyard Lake created by the sinking pathway.
Garage Love: The garage needs a little TLC. We need to add some lumber storage, make a new workbench for our bench top tools, add some insulation and figure out some sort of sawdust control system. As El Granto got a new belt/disc sander for Christmas, I think this project will be starting sometime soon.
Paint the exterior of the Storefront: I would love love love to remove the siding on the front of the house, re-point the brick, clean it, and re-do all the flashing. Unless I somehow come into a lot of money, this is not going to happen in the next year. To live with the front of the house for now, I would like to prime & paint the siding to give it a new lease on life. While we’re at it, I’d like to de-beige the back of the house with some paint as well. I would also like to try a new paint color on the front door & mailbox. I’m thinking something fun, like green or blue.
I hate the ugly siding
What do you think? Is it a do-able list, or am I going to fail miserably?
As the Holidays are fast approaching, I am rapidly trying to knock a few items off the big old To-Do list, including making a few handmade gifts. This year has been a tough one to produce a lot of homemade gifts. Both El Granto and I have been working long hours at our day jobs, and by the time we get home we’d rather snuggle up on the sofa together than go back out to the garage and get to work.
This past weekend with nothing planned on the calendar, we decided to take a trip to the lumber yard, and start making some cutting boards for holiday host/hostess gifts.
After we had cut up all our wood, I noticed a few spare pieces too small to make into another cutting board, but rather than just toss them into the scrap bin pile, I opted to make a little side project.
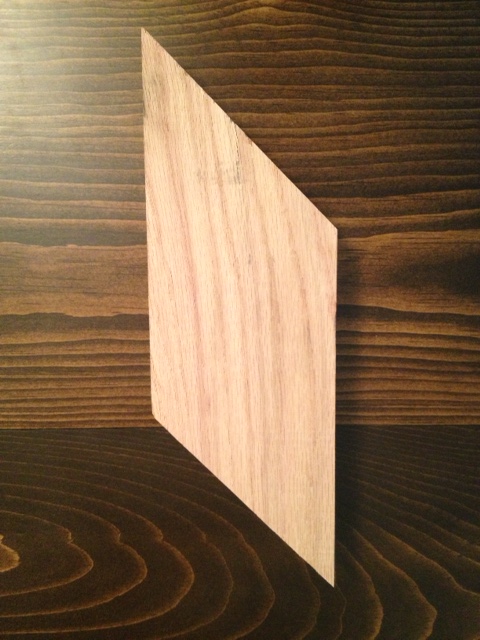
Here’s what I did:
Set the miter saw to a 45. Took two scrap pieces of oak, stacked them on top of each other and cut a 45 through both of them at the same time. I then cut the same 45 at the other end of the pieces, again cutting through both boards at the same time.
Two pieces of wood cut into parallelograms
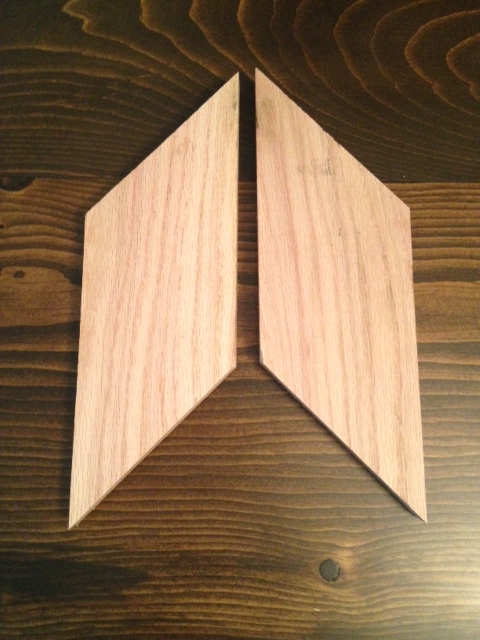
This made two pieces of wood about 9″ long that were EXACTLY the same. (the exactly the same is important.)
Two boards cut exactly the same, then one board flipped over
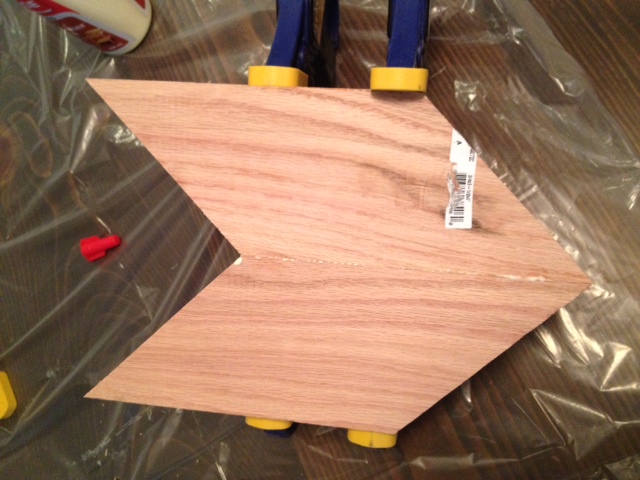
I then took those two boards, added glue, and clamped them together.
Boards glued & clamped
Once they were dry, I sanded, got the wood wet, let it dry, then sanded again. Why get the wood wet? It raises the grain, so you can sand it down again. If you don’t do this, then the first time the board is washed, the grain will raise and the wood will become rough again. It still may raise in the future, but at least you’ve sanded off the worst of it.
After everything is nice and sanded, I gave it a few coats of mineral oil, then followed up with some cutting board oil/wax.
Ta da: Hipster Chevron Cheese Board
Chevron Cheese Board
El Granto had the brilliant idea that we should make a few of these, then we can slide them together at parties to make larger boards. I see another trip to the lumber yard, and more parallelograms in my future.
We’ve got a bit more housekeeping to do on the countertops before we’re done. After we brought them into the house, they needed to be installed, sealed & caulked.
This may sound like the boring parts, but they are the most important (seriously). If you don’t seal the countertops properly, they will stain and mark and you’ll be peeved. I think most people that give concrete countertops a bad rap, have skipped this important step, or didn’t use the right sealer.
Okay, lets get sealing! Now, you do not want to go out and buy a concrete patio sealer from the hardware store. A.) You won’t know how it will turn out, B.) it could wreck your protect and C.) It’s probably not foodsafe. So just buy actual concrete counter sealer, m’kay?
We used Buddy Rhodes Satin Sealer cause its super easy to apply and works well.
Buddy Rhodes Satin Sealer
After our counters dried a few more days (leave it a week if you can). We applied about 7 or 8 coats of sealer with a soft (clean) microfiber cloth.
I made a video of myself applying said sealer, then viewed it, and realized I maybe should have, oh I dunno, washed my hair, or changed out of my work clothes so that I didn’t look like a complete mess. So instead I give you a much better video of Buddy himself applying the sealer.
How do you know when to stop applying the sealer? Essentially when the surface of the concrete looks uniformly coated. Then do a test to see if it repels water (if the water beads up). If the water soaks in, you need more sealer (just wait for it to dry out first).
Our counters were a bit too wet when we first sealed them (and the sealer couldn’t soak in as much as it could have), so we ended up putting a few more coats of sealer on a week or so after when we noticed the counters were starting to absorb water.
You can also finish with a beeswax to add even more protection (only after your counters are super sealed).
Buddy Rhodes Beeswax
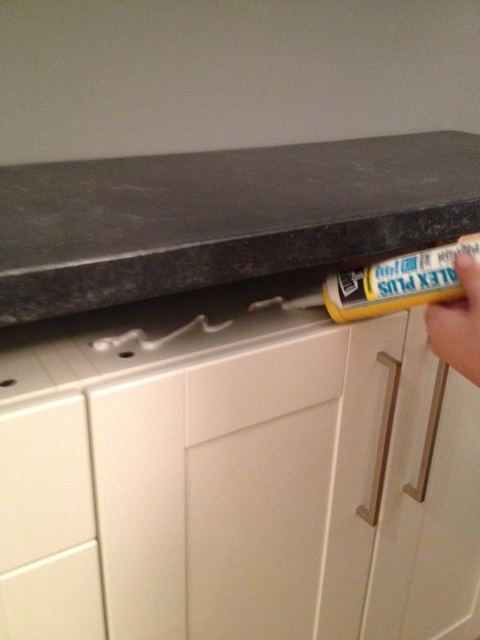
After they were sealed and we were happy as clams, we attached the counters to the cabinets using some latex caulking w/ silicone. We lifted the countertops, squirted in some caulking (we used about a tube for the whole kitchen) and put the countertops in place and let everything dry.
Attaching Countertops to cabinets (sorry for the blurry photo!)
Then we caulked the countertop edges where they met the wall and cabinets.
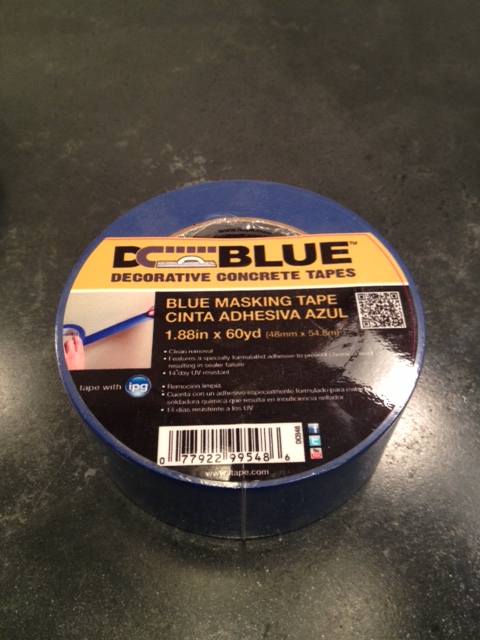
Do NOT put regular masking tape on your countertops while caulking. Regular masking tape can react with your sealer and cause huge problems (aka chemical weld). You NEED to use a concrete sealer safe tape. This one is well priced, works great and easy to find at your local big box hardware store:
DC Blue Concrete Masking Tape (safe for your sealer!)
Why is this so important:
Listen to the tape packaging, it knows its stuff
“Features a specially formulated adhesive to prevent chemical weld resulting in sealer failure”
So yeah, don’t mess up your concrete by being a cheap-o and using regular tape.
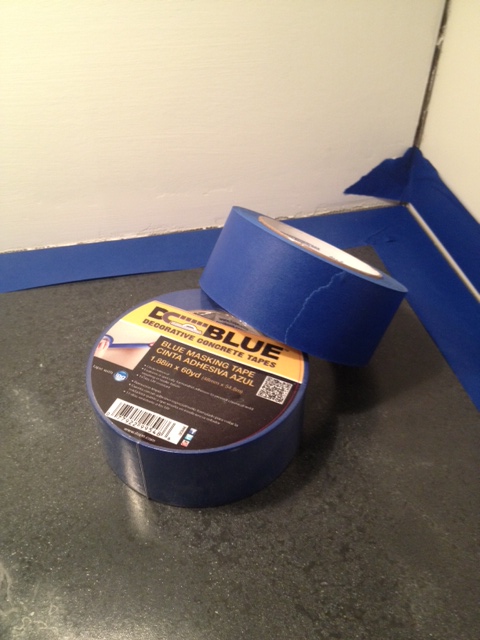
Tape off your countertop & cabinets/sink with the concrete tape, and tape off your walls with regular masking tape, and apply your caulking.
Concrete safe tape applied to countertop & cabinet.
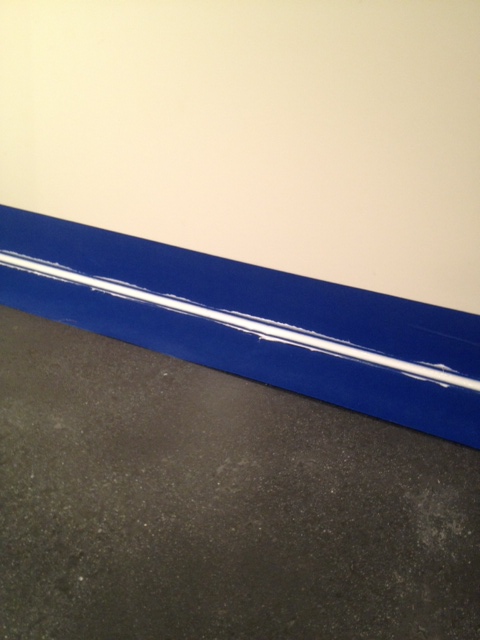
Smooth the caulking out, remove excess caulk, and then remove the tape & let dry.
Caulking AppliedTape removed
At this point in time I actually started letting people touch the countertops, and even look at them!
The concrete is not indestructible. You still need to take care of it, and try to prevent stains. Aka don’t go cutting lemons on the countertop, and clean up oil after it splatters or spills. Oils & acids are the nemesis of almost all natural stone, and concrete is not exempt from that. Clean up spills, and don’t leave things hanging about, and your countertops will do just fine.
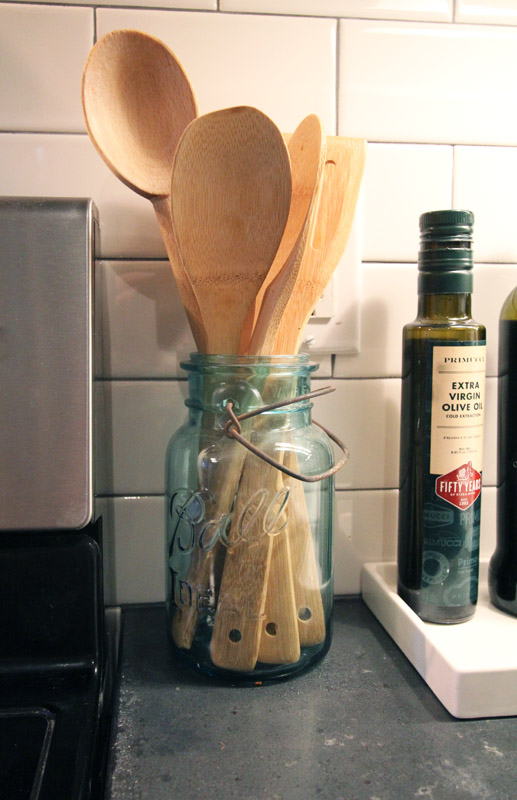
I am an avid cook, and usually have olive oil & balsamic close at hand. I used a small ceramic tray to hold my oft used bottles, to prevent possible rings forming on the countertops over time. (I can never manage NOT to drip oil down the side of a bottle!).
Use a tray to hold oil or vinegar (oil & vinegar are the arch nemesis to stone counters)