Focus on the journey, not the destination. Joy is found not in finishing an activity but in doing it. -Greg Anderson
That is crappy advice. Cause sometimes the journey SUCKS.
Case in point: Gathering supplies for an industrial chandelier project in mid January in Canada without a car.
This is how our weekend went:
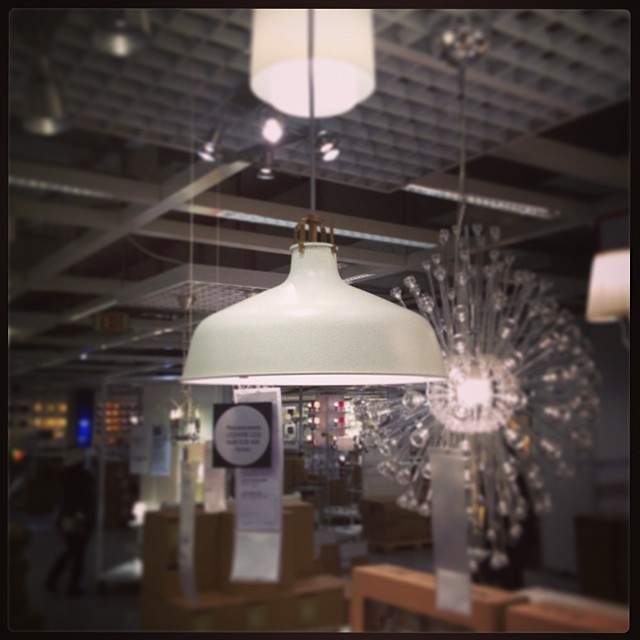
Friday after work I took three buses and a shuttle to get to Ikea North York (aka the Ikea in the opposite end of Toronto from where we live.) Getting two lights (which have been sold out at my local Ikea for months). Then taking a shuttle, three subways and a bus to get home. Three and a half hours later I had my lights, and fro-yo. So there’s that saving grace.
Ikea Ranarp Pendants. I purchased two!
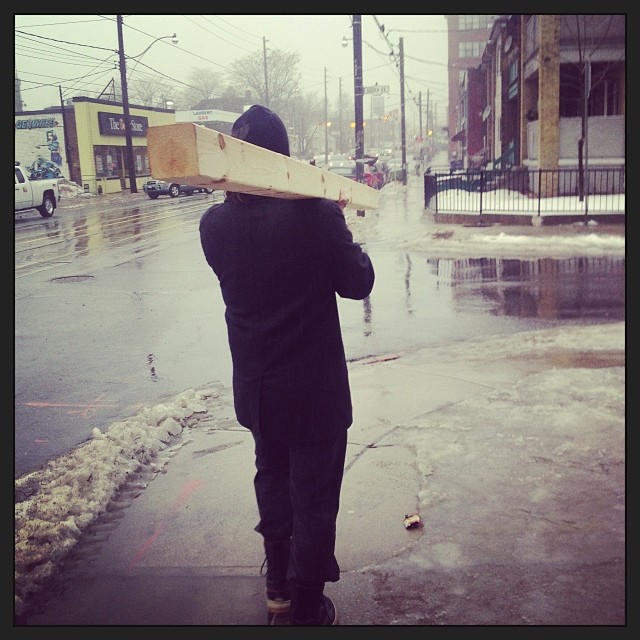
Saturday El Granto, myself and the dog headed out to the lumber yard. We took our favorite route along the West Toronto Railpath only to find halfway along our route the path turned into 2″ of solid ice covered in water. AKA the most slippery walk ever. Then it started to rain. We proceeded on city streets, which weren’t much better. Why cant people with corner lots SHOVEL THEIR SIDEWALKS?! Insert blood pressure rising. We got our needed lumber, and El Granto carried it home while I wrangled the bags of supplies and the pooch.
El Granto carrying home a 4×4 8 foot post.
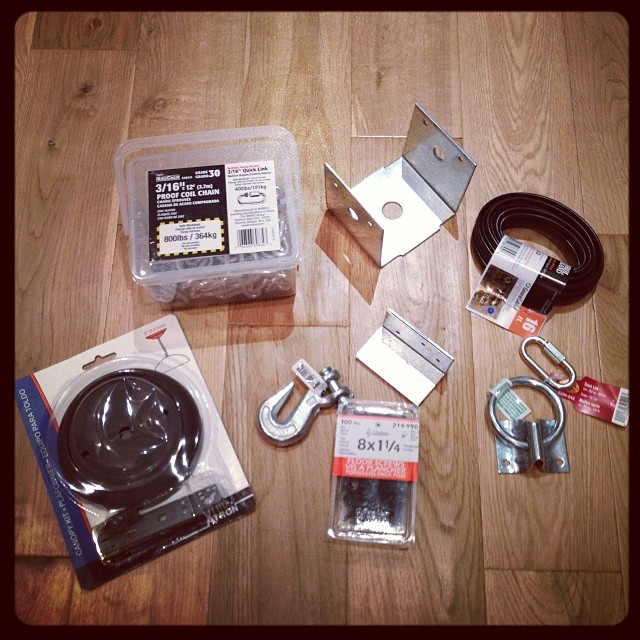
Next we dropped off the dog at home, and took the bus & streetcar to Home Depot to get everything else we needed.
Our menagerie of weird supplies for this project.
I then braved the skating rink which is our backyard, and headed into the garage to spray paint while the weather was warm enough. (It had reached +6 in Toronto, and with the heater on in the garage I could get it to +10, which is the minimum temperature for my spray paint to cure.) I set up my drop cloth and painted three light coats on all my lights & supplies, and left it to dry.
Sunday I went to check on my paint, and discovered that the drop cloth had fallen onto the lights and f@#ked up my paint job. Insert string of expletives. I conquered my anger, sanded down my newly painted lights, and painted another two coats of paint. I then marched them inside to safely dry in the basement. Where no big mean drop cloths could fall on them and make me cry.
Our light(s) after 5 coats of paint. Three would have done it except for the damn drop cloth that decided to fall on it and wreck everything.
SO three days of journey, very little accomplished, and no actual “industrial chandelier” made.
My least favourite part of the kitchen used to be the peninsula. It was short and stubby, too small to use as a prep space and looked awkward.
I had originally hoped to build the peninsula deeper to house a beverage fridge and get full counter depth cupboards & drawers. However it became apparent that to do that we would loose valuable dining room space, and be unable to have a 6 person dining table.
We were not willing to compromise on the dining table (we love to entertain!) so the peninsula needed to stay skinny. If we couldnt make it wider we could at least make it longer. We added only one more cabinet, which not only made the kitchen symetrical, but made so much more work space. Its amazing what a foot can do. Now you can stand comfortably at the peninsula and chop veggies or converse with someone in the diningroom.
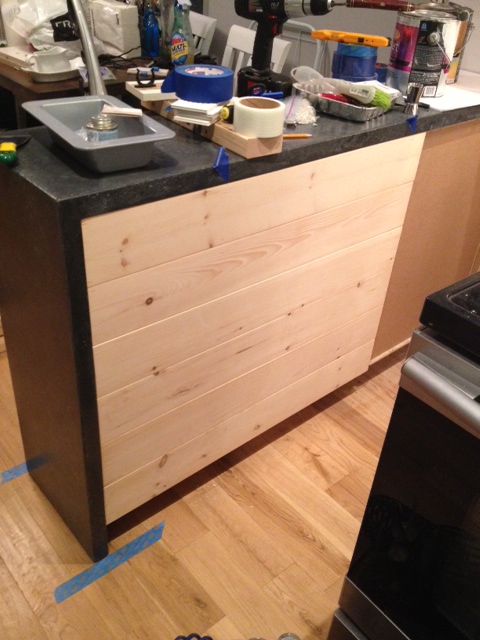
Such a small change, but a world of difference. Now the peninsula is my favourite part of the kitchen. The concrete waterfall is the icing on the cake, but you may have noticed we added a bit of a special touch on the back of the peninsula as well.
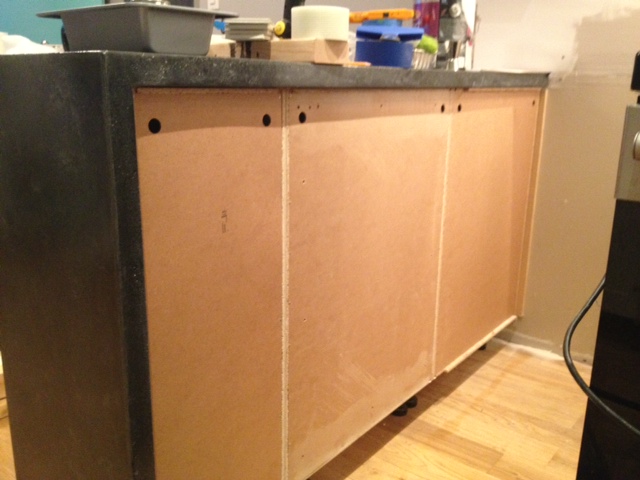
The peninsula used to be backed in an Ikea cover panel that matched the Ikea Adel kitchen cabinets. It worked just fine, but after we added the extra cabinet, the old cover panel wasn’t big enough.
Naked Peninsula Back
We could have went out and bought a larger one, but thought it might be a fun area to add something special, and make our kitchen look a bit more custom. Enter a trip to the hardware store.
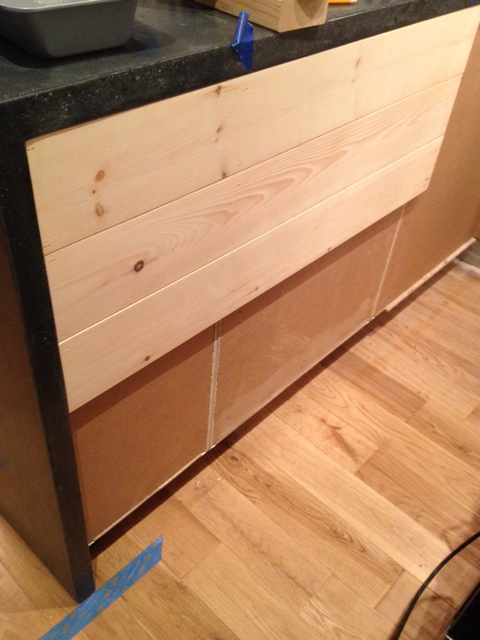
We picked up three 6 foot long pieces of tongue and groove 1×6 unfinished pine flooring from Home Depot along with a 1×4 piece of kiln dried pine. Back in the garage we cut down our lumber to three feet long on the miter saw, and headed into the house armed with some wood glue and a brad nailer.
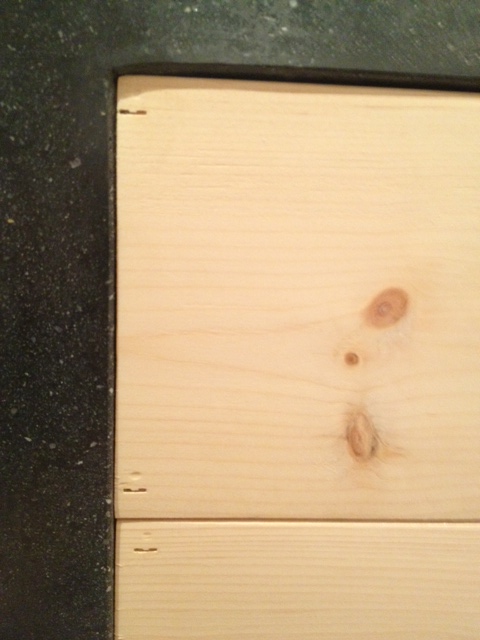
We started at the top of the peninsula with a board facing groove up. We brad nailed it into the cabinets making sure we nailed through the sides of the cabinet frames, not just the backer. When attaching the second board we added a bit of glue to the groove, slid it tightly against the other board, and continued nailing. You will notice that we didn’t run the wood all the way to the wall. The stove is tucked into that corner, and to give the stove a bit more breathing room, we opted to only panel to just past the oven door. It saves on wood, and I will worry less that I will light my house on fire when I run the self cleaning oven.
Nailing up boards
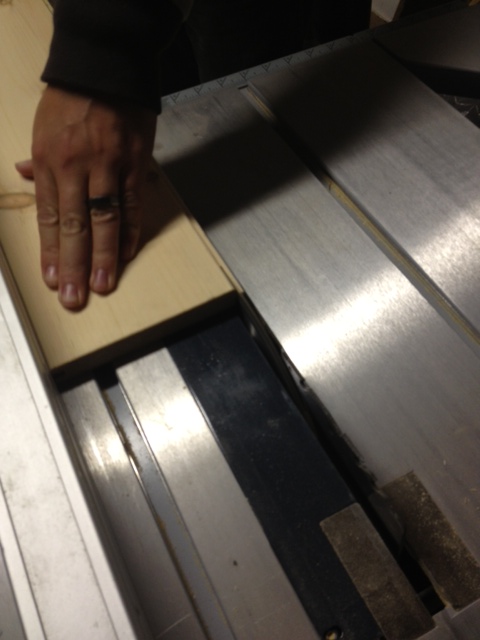
Once we reached the bottom, we went to the garage and cut the groove off the past piece with the table saw so we would end with a nice smooth board.
Cutting off the last tongue with the table sawLast board installed (note the absolute chaos of the kitchen in the background!)
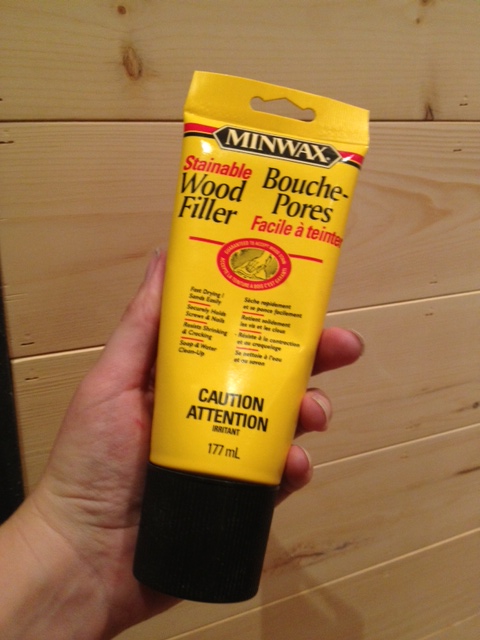
After the boards were installed we got out the wood filler and filled in the brad nail holes.
Wood FillerNail holes (and the stupid little divot my brad nailer leaves)
After letting the filler dry, we took the sander to the boards and gave it a quick finish sand.
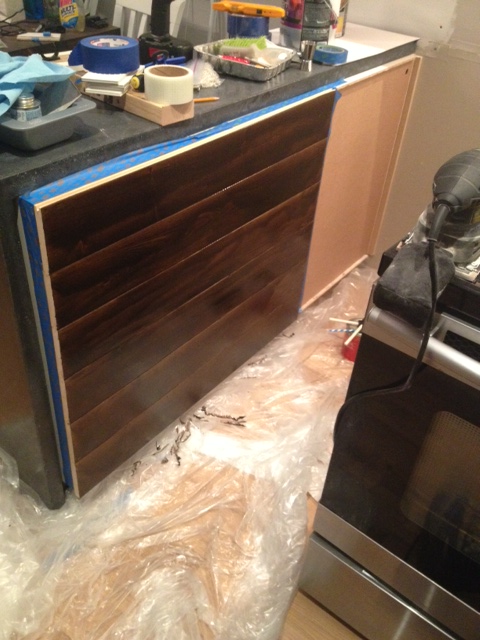
Now we were ready to finish it. We pushed back the countertop (we hadn’t yet adhered it to the cabinets at this point) taped off the area, and added a coat of wood conditioner then two coats of stain (same color as our dining table & coffee bar shelves).
Staining the paneling
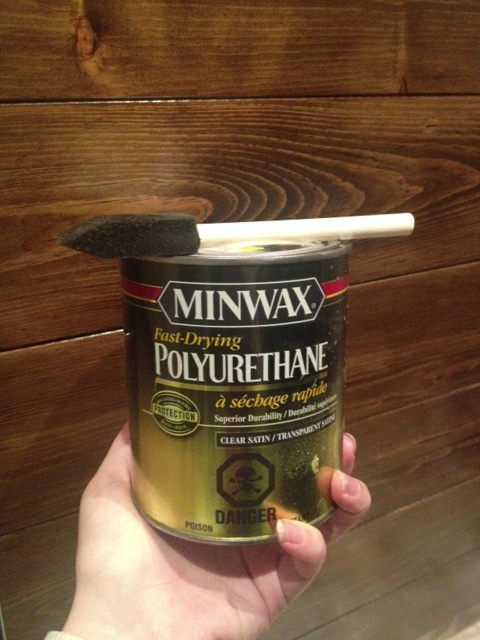
After staining we finished it up with 5 coats of Satin Poly. Five coats may have been a bit of overkill, but its beside the stove and oven, and will get its fair share of abuse.
Poly & foam brush
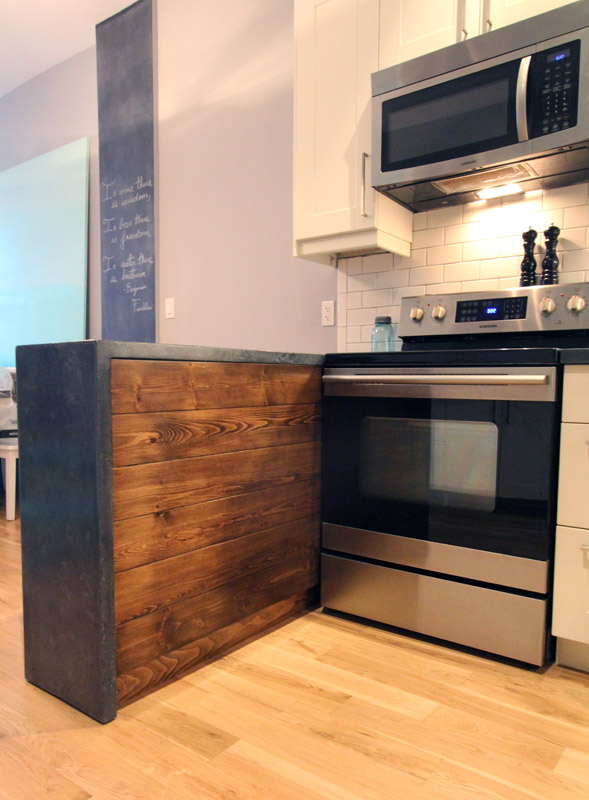
Next up we needed to address the toe kick. For the rest of the kitchen we have plain white toe kicks, but it just seemed weird to carry on the white for the back of the peninsula, so we opted to use a piece of 1×4 pine stained & polyed to match.
We then moved the countertop back in place, making sure the wood was flush with the countertop edge, attached the countertop to the cabinet, and slid the stove back in place.
Making sure the countertop was flush with the panelingPeninsula Back & Toe Kick
We didn’t fall on our asses completely with our 2013 DIY goals, but I’d like to do even better this year.
This year my goal is to not fall on my ass.
Likelihood of success: slim to none.
Well there you have it, list done, I’m going back to bed.
Oh… about those real 2014 DIY Goals. Okay okay, here they are.
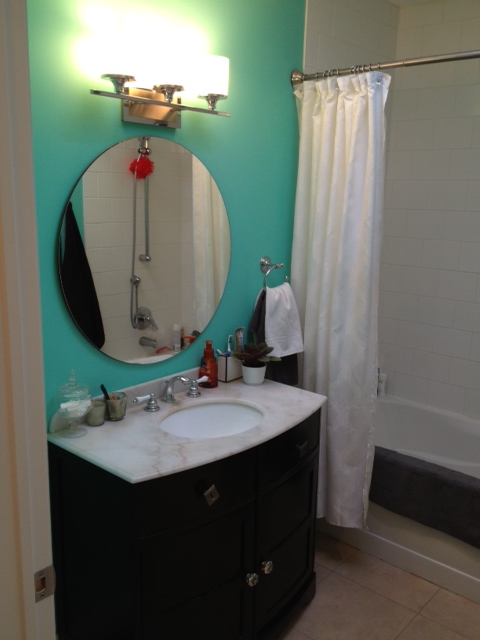
Main Bathroom Makeover: You’ve never even SEEN this room! When we moved in we gave it a coat of Tiffany blue paint, hung a white shower curtain and that’s about it. After living with the bathroom for three years, we’ve noticed it’s a bit lacking in functionality. The vanity is too small for El Granto and I to get ready at the same time (which we do) and the storage is not as useful as it could be. (Aka too little and of the unorganized variety.)
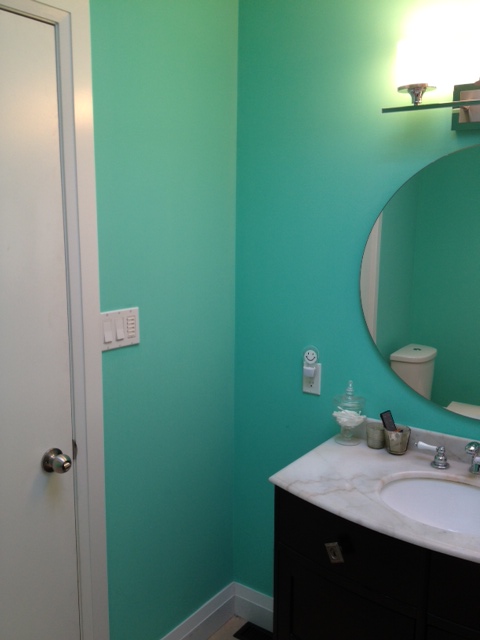
Bathroom Vanity & Mirror (sorry about this terrible picture, I shot it months ago and apparently forgot how awful/out of focus it was)The strange (useless) gap between the vanity and the wall (and hells yeah, we have a happy face nightlight)
Our goal is to build a larger vanity with drawers and his and hers doors and storage. We’d also like to build a new counter with built in trough sink and two faucets. A new mirror and lighting will have to follow as they will be off center and dorky looking after the new vanity.
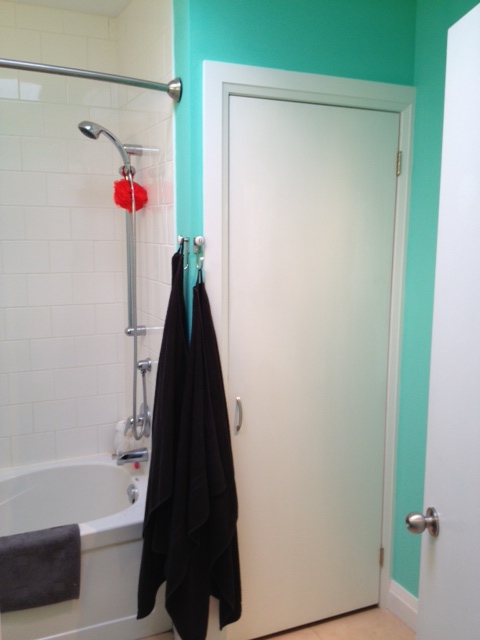
Old Laundry Closet
When we moved into the Storefront there was a stacked washer/dryer in our main second floor bathroom. This dryer and it’s poorly constructed venting was the start of our water woes that resulted in Mike Holmes coming to fix our house. During the reno, Mike & the crew moved our laundry to a safer location in the basement. What was left is a large (empty) closet in our main bathroom which thus far just holds a laundry basket and some extra TP. We’d like to conquer the closet and custom build a linen closet with glass doors for pretty storage, and drawers for other not so pretty storage (I’m looking at you toilet paper). We’d also like to build in a hidden laundry basket door/drawer system. I really enjoyed making the media cabinet last year and am itching to do some more cabinet making in the bathroom.
To complete the bathroom will be a new shower curtain, towel hooks, art etc. I am also hoping for new tile (but that may be wishful thinking.) It’s a BIG project that we hope to start sometime in the spring.
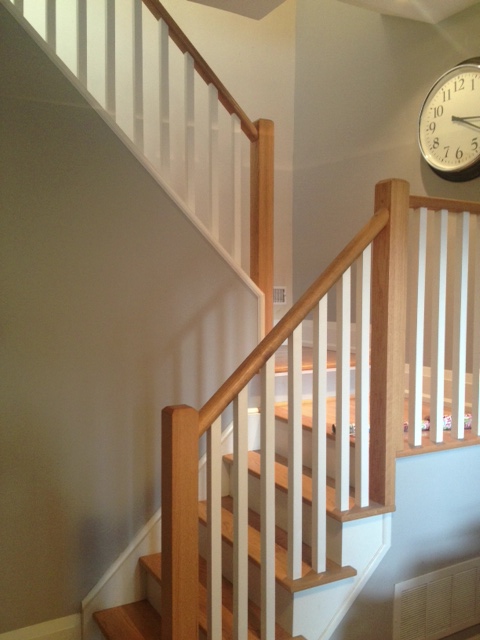
Staircase/Hallway: The upstairs hallway was on my list last year and it never got done. I would like to finish it off, and continue down the staircase and knock that off the list as well. The staircase is the ONLY remaining beige wall inside. The reason it’s remaining as it’s hella tall, and going to be a pain in the ass to paint. While I’m at it, I’d like to do some trim work in the staircase, and beef up our newel posts to make them more appropriate to the period of the Storefront. Aka less 1990’s more 1910.
The Staircase
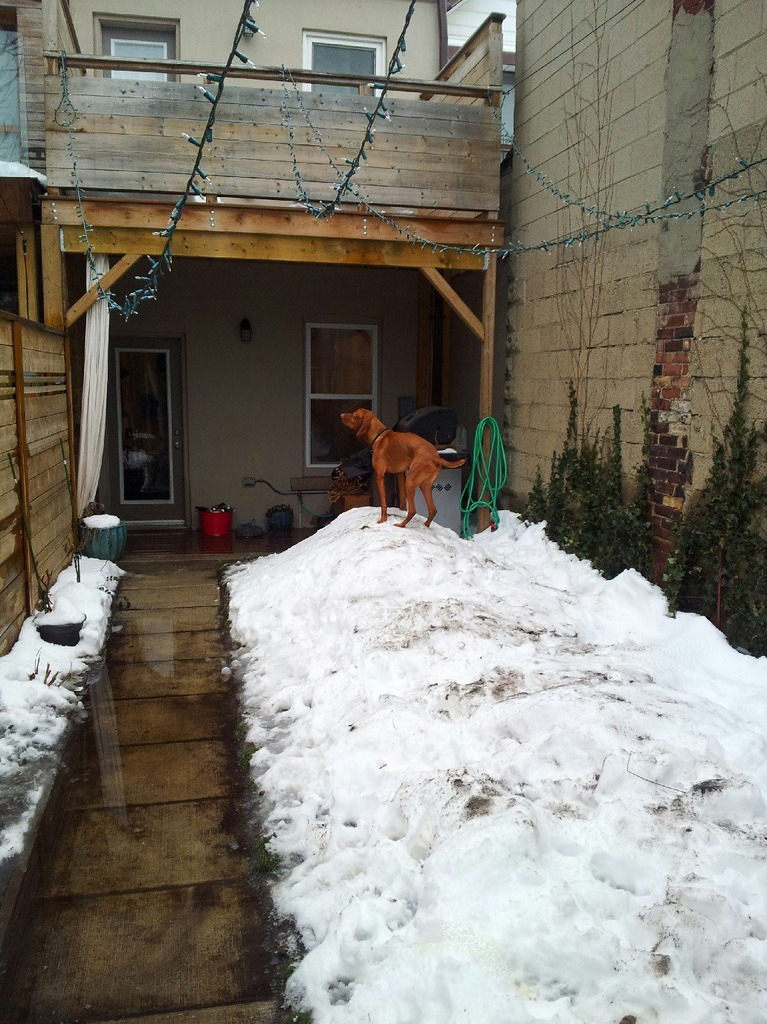
Do something with the backyard: The grading is sliding sideways and we’ve lost half the dirt/sand in the backyard in the last year. The pathway is sinking, creating a lake when it rains and the grass refuses to grow in the shifty sandy soil. I would also still like to put in a patio of some sort and build some patio furniture. This looks like an easy task but is HUGE. It may not get done this year.
Backyard Lake created by the sinking pathway.
Garage Love: The garage needs a little TLC. We need to add some lumber storage, make a new workbench for our bench top tools, add some insulation and figure out some sort of sawdust control system. As El Granto got a new belt/disc sander for Christmas, I think this project will be starting sometime soon.
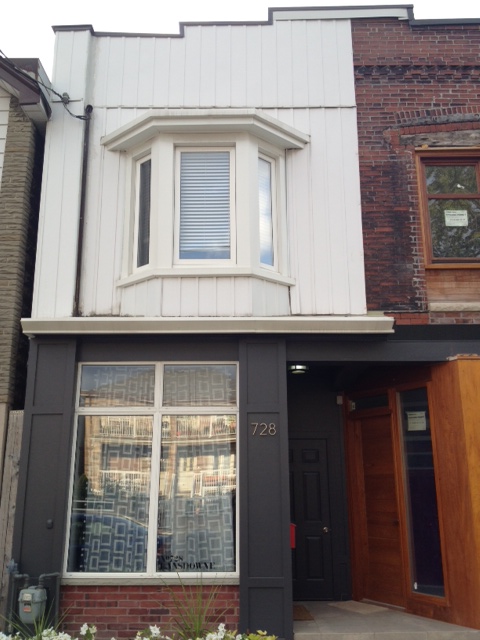
Paint the exterior of the Storefront: I would love love love to remove the siding on the front of the house, re-point the brick, clean it, and re-do all the flashing. Unless I somehow come into a lot of money, this is not going to happen in the next year. To live with the front of the house for now, I would like to prime & paint the siding to give it a new lease on life. While we’re at it, I’d like to de-beige the back of the house with some paint as well. I would also like to try a new paint color on the front door & mailbox. I’m thinking something fun, like green or blue.
I hate the ugly siding
What do you think? Is it a do-able list, or am I going to fail miserably?
As the Holidays are fast approaching, I am rapidly trying to knock a few items off the big old To-Do list, including making a few handmade gifts. This year has been a tough one to produce a lot of homemade gifts. Both El Granto and I have been working long hours at our day jobs, and by the time we get home we’d rather snuggle up on the sofa together than go back out to the garage and get to work.
This past weekend with nothing planned on the calendar, we decided to take a trip to the lumber yard, and start making some cutting boards for holiday host/hostess gifts.
After we had cut up all our wood, I noticed a few spare pieces too small to make into another cutting board, but rather than just toss them into the scrap bin pile, I opted to make a little side project.
Here’s what I did:
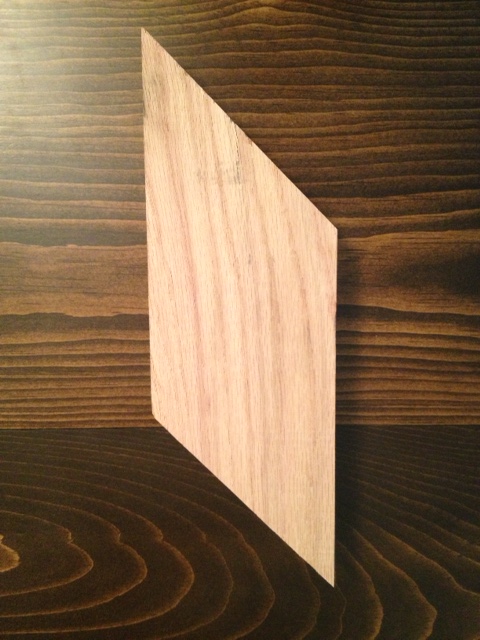
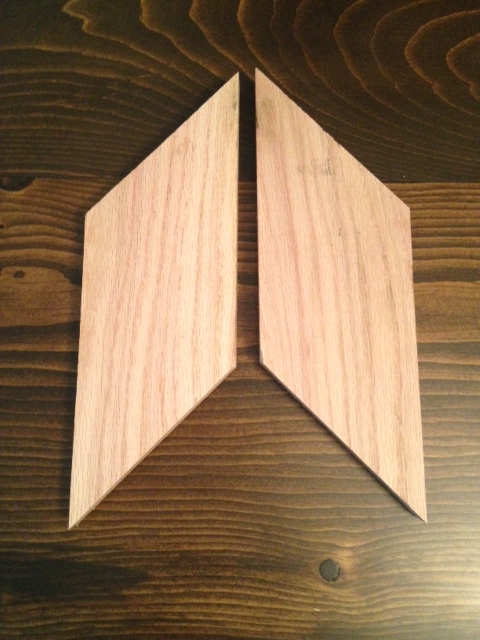
Set the miter saw to a 45. Took two scrap pieces of oak, stacked them on top of each other and cut a 45 through both of them at the same time. I then cut the same 45 at the other end of the pieces, again cutting through both boards at the same time.
Two pieces of wood cut into parallelograms
This made two pieces of wood about 9″ long that were EXACTLY the same. (the exactly the same is important.)
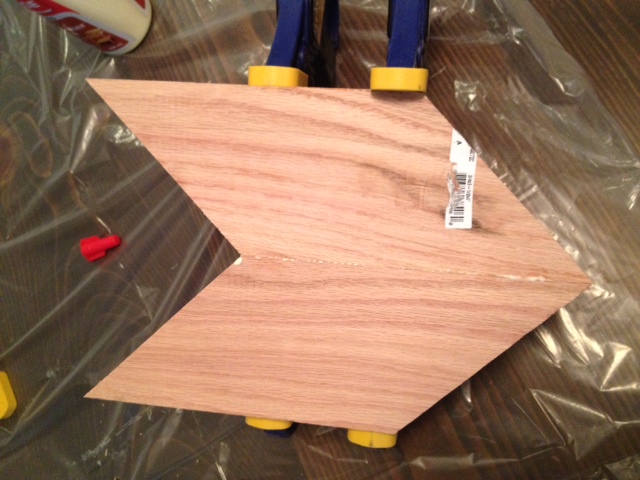
Two boards cut exactly the same, then one board flipped over
I then took those two boards, added glue, and clamped them together.
Boards glued & clamped
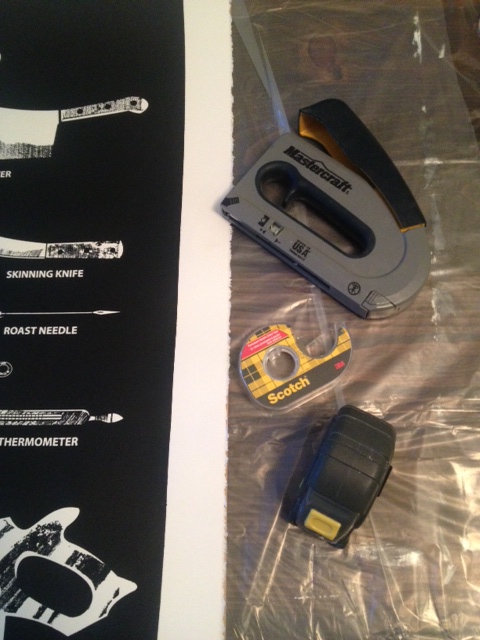
Once they were dry, I sanded, got the wood wet, let it dry, then sanded again. Why get the wood wet? It raises the grain, so you can sand it down again. If you don’t do this, then the first time the board is washed, the grain will raise and the wood will become rough again. It still may raise in the future, but at least you’ve sanded off the worst of it.
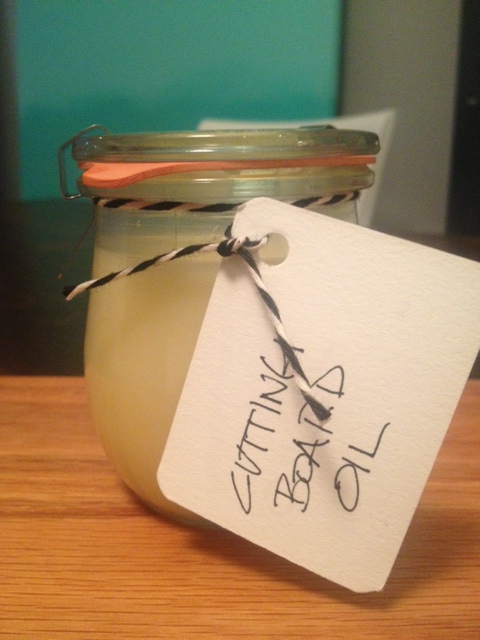
After everything is nice and sanded, I gave it a few coats of mineral oil, then followed up with some cutting board oil/wax.
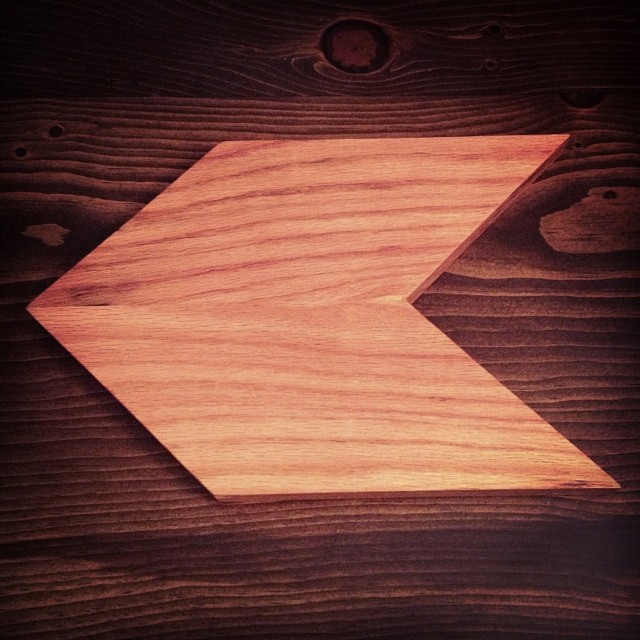
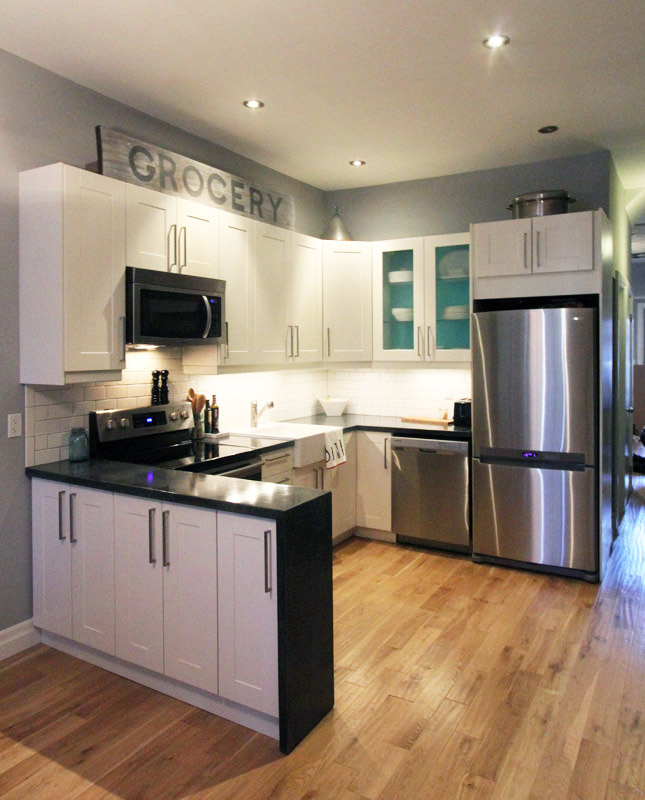
Ta da: Hipster Chevron Cheese Board
Chevron Cheese Board
El Granto had the brilliant idea that we should make a few of these, then we can slide them together at parties to make larger boards. I see another trip to the lumber yard, and more parallelograms in my future.
Thanks guys for sticking with us through five yes FIVE posts on concrete countertops. The thing is, this project was BIG. Even with five posts I have probably bored you all to death with my insistence on telling you exactly how we did everything. The thing is, I want you guys to make your own counters too! You CAN do it! Real concrete, solid surface, with professional looking results. So thanks for sticking with me, cause I think it was totally worth it. Wanna see what all our hard work actually looks like?
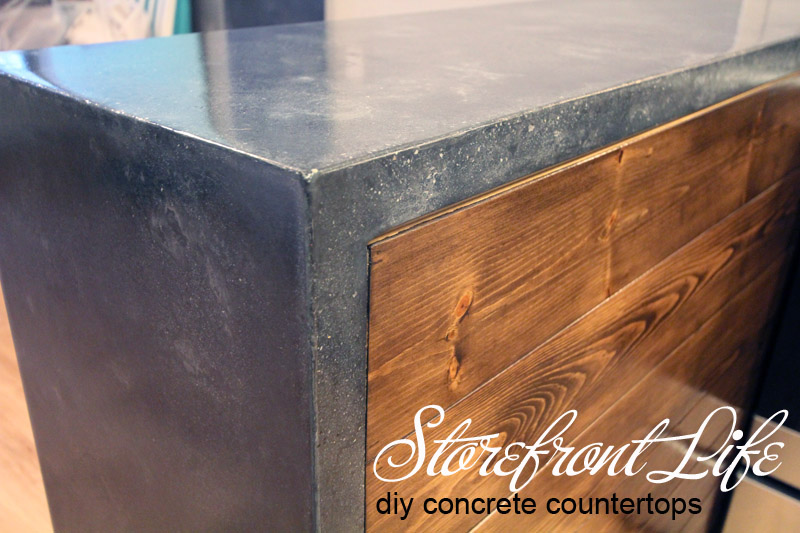
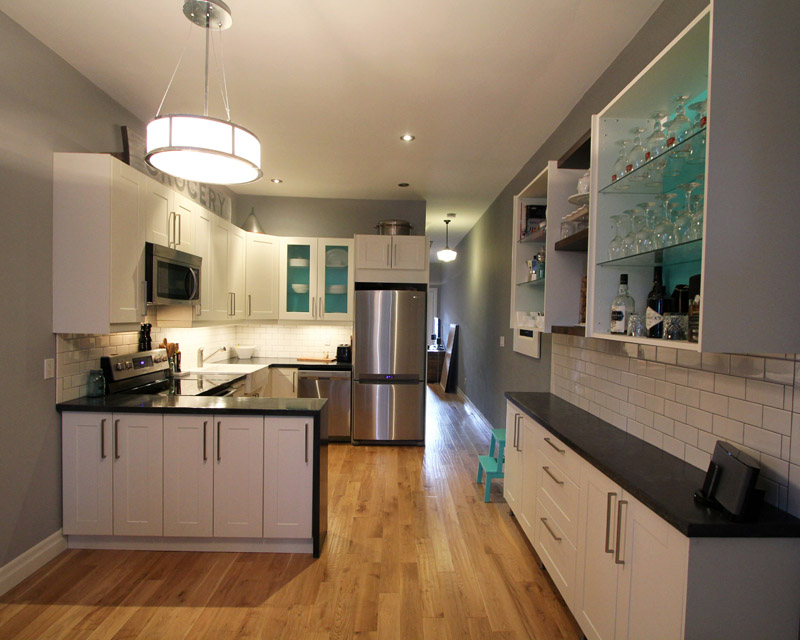
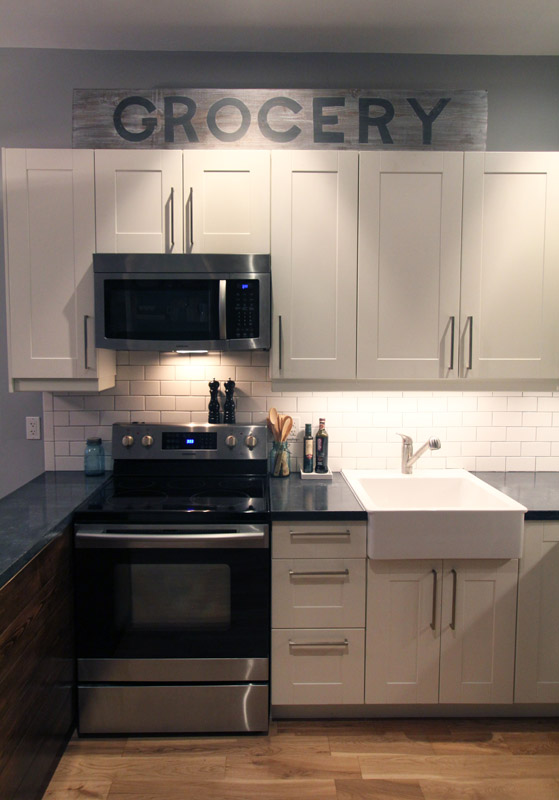
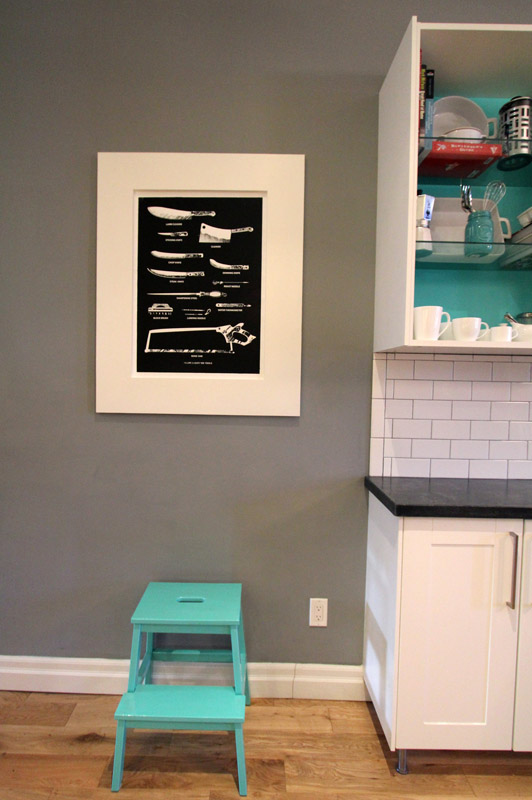
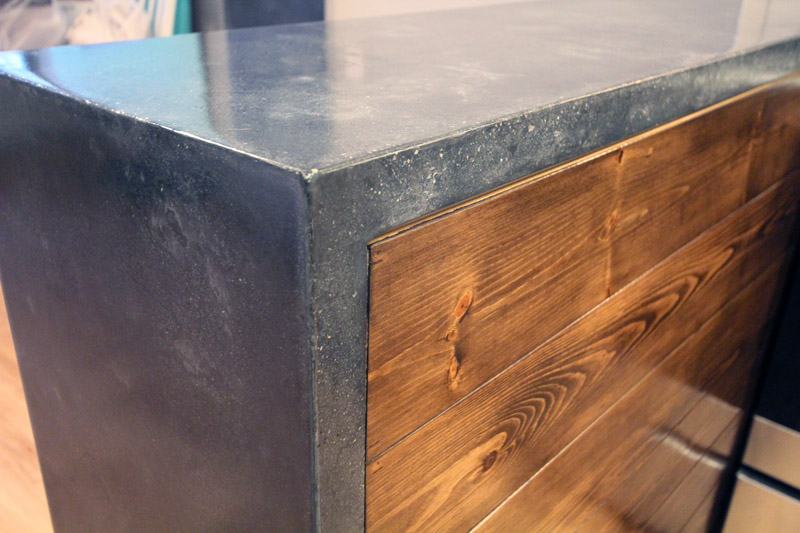
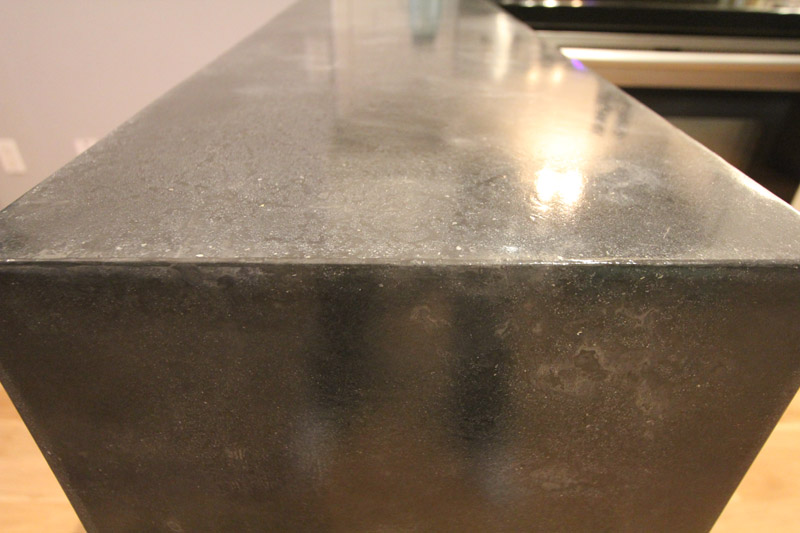
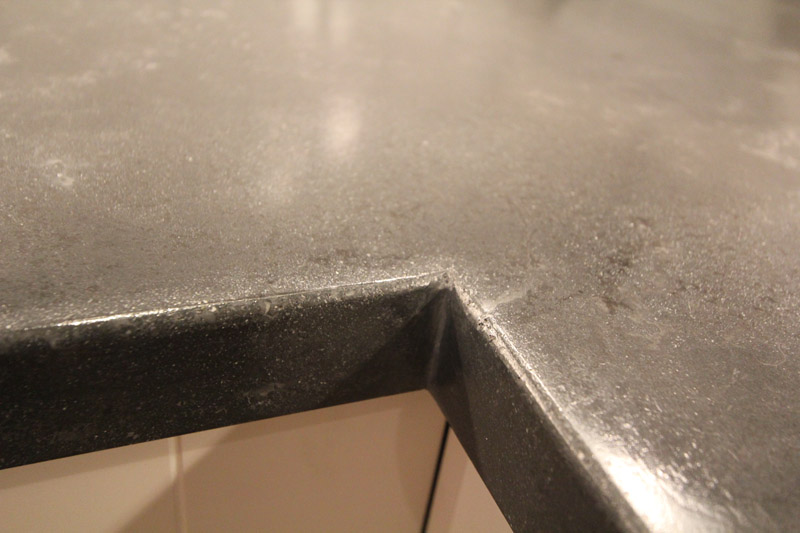
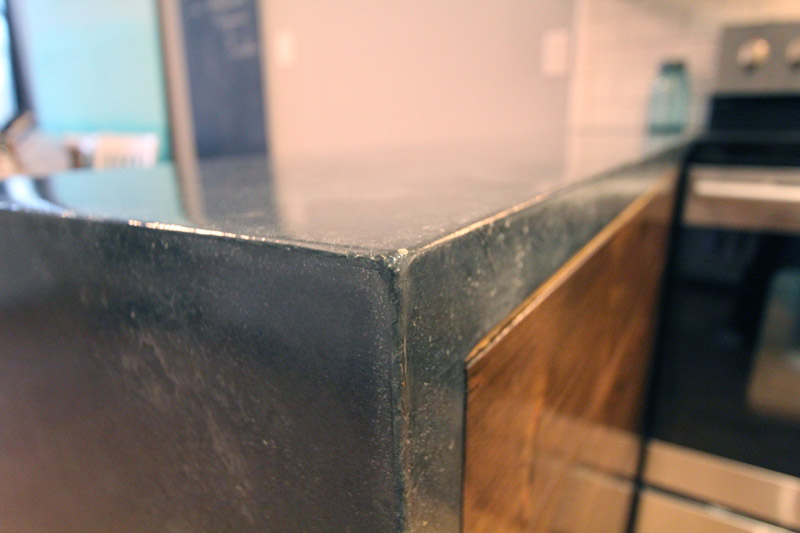
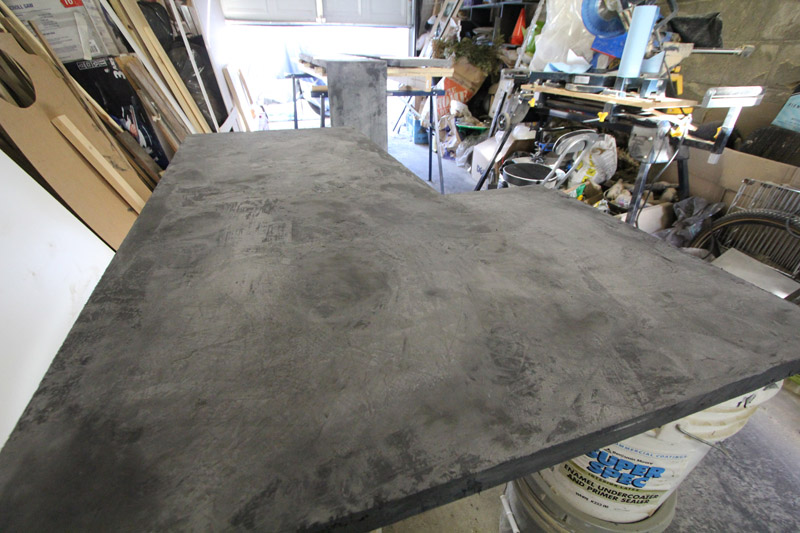
The counters were done in four pieces, including the single piece waterfall, which is by far my favorite piece! The color we used is “coal” but the color of the concrete can look very different at different times of the day. From a medium gray when the light is hitting it to a deep charcoal in the shadows. The color has so much texture and movement. I just love it! We paired the white cabinets with a pop of bright teal, and black and white accents.
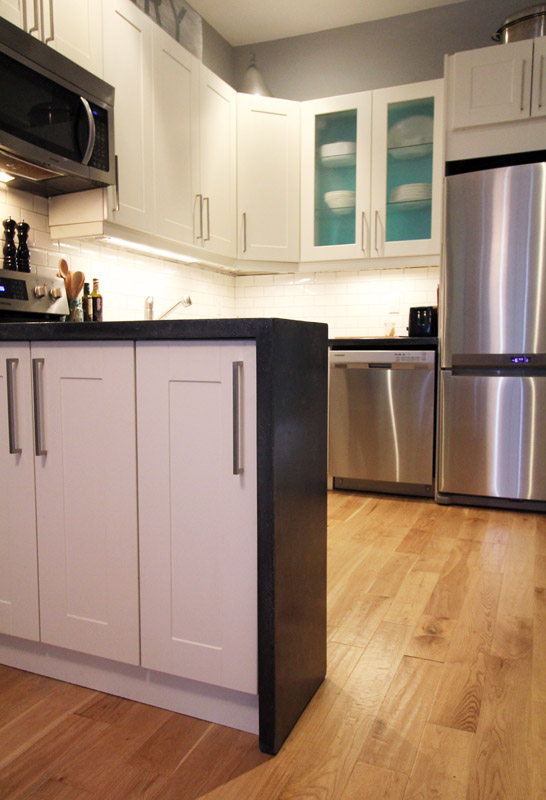
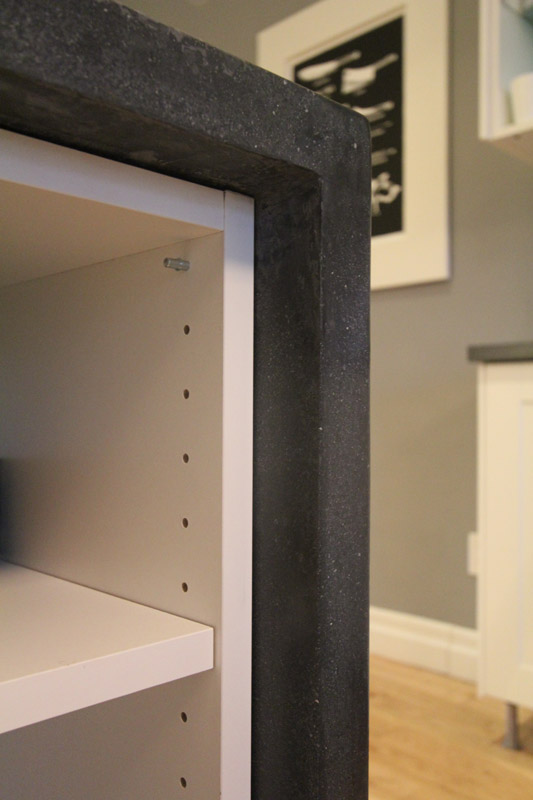
For the back of the peninsula we opted to add a pop of wood. The kitchen already had a lot of white, so adding wood really ties it into the dining room with its wood table & bench. It also matches the floating shelves on the coffee bar.
The waterfall is just sexy! I love how seamless it is. I would never have dreamed that we could do it in one piece. It is simply a work of art.
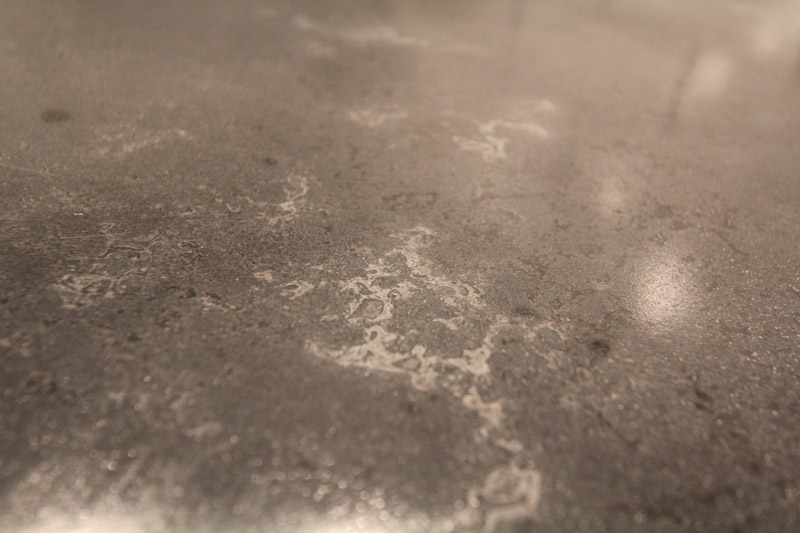
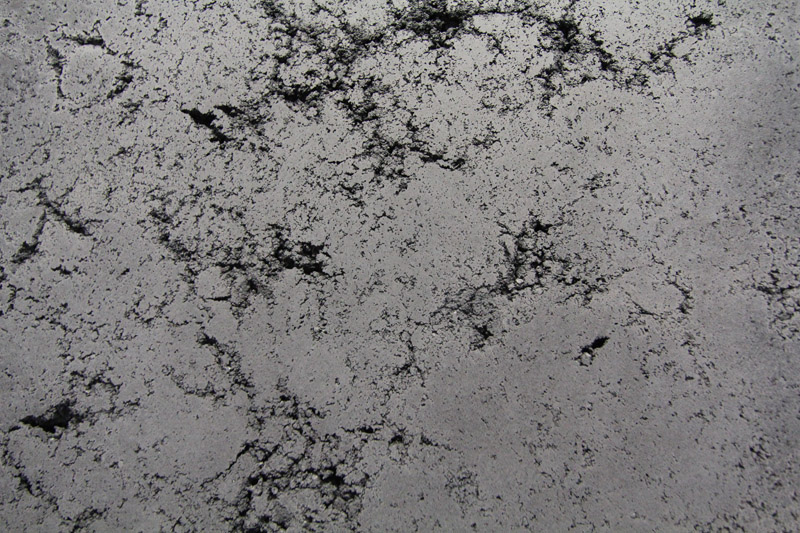
Speaking of the color varying. Here is one of my favorite spots with a lot of texture. This was produced by adding a slightly lighter color slurry for the middle slurry coat. I heart.
The front of the peninsula has cupboards, and when you open them you can see more of the exposed waterfall.
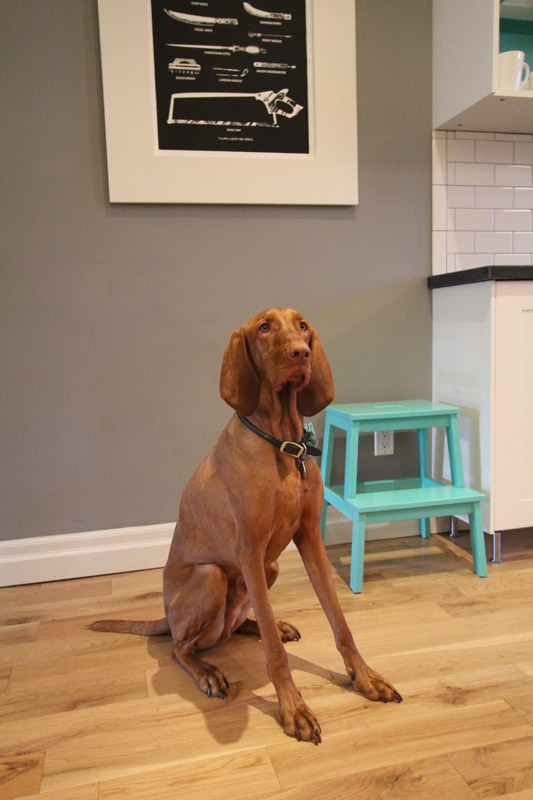
Sorry, had to throw one of Odin in. I can’t have my camera out and not take a photo (or ten) of him.
Do you remember when we hid a 2013 Loonie? Here’s the Queen peeking out from under the coffee bar counter.
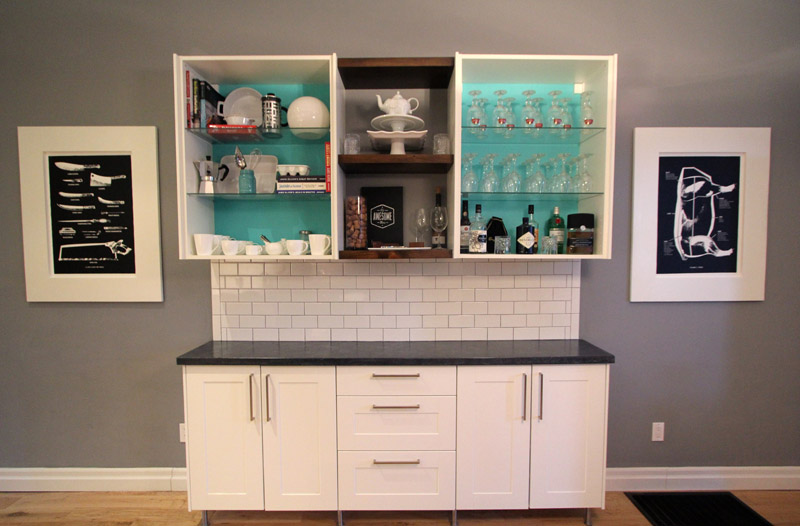
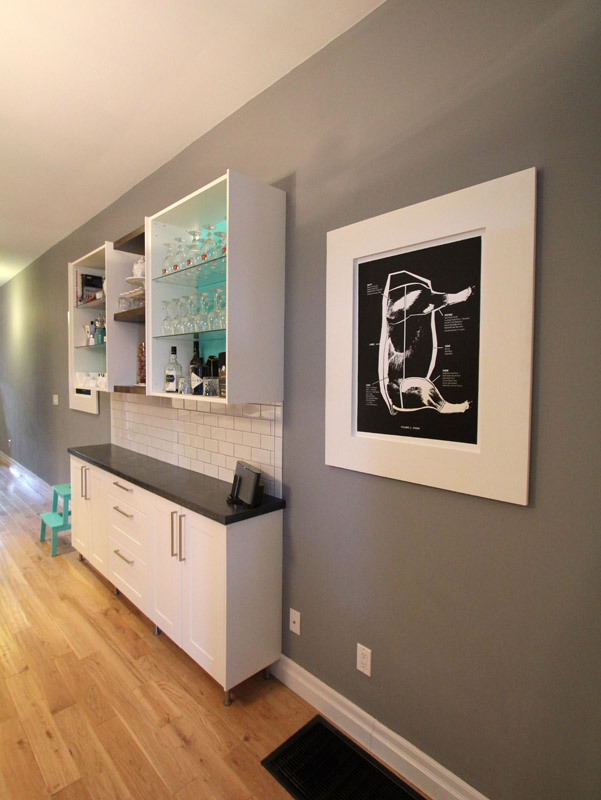
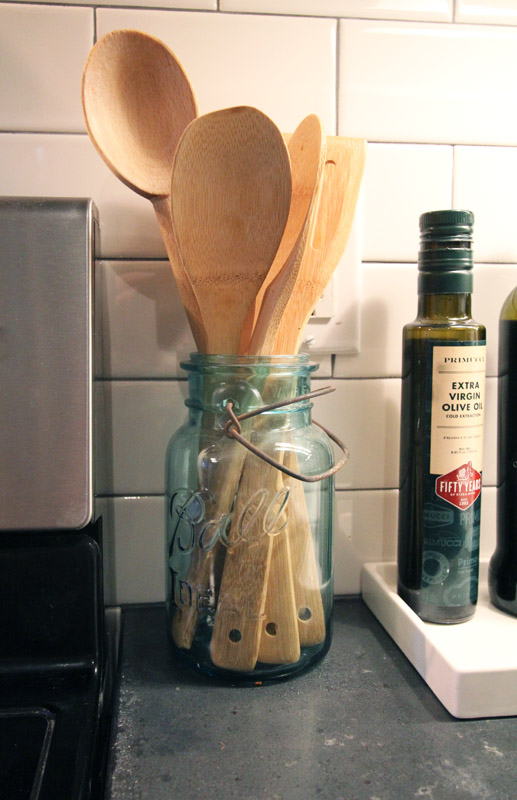
Now for a few of the other kitchen details. El Granto picked me up a couple vintage Bell jars one day at The Junction Flea. I love this one which holds my wooden spoons beside the stove. We also use a small ceramic tray to keep oil and vinegar off the counter (it would stain the tops).
I am still very happy with the wood shelves we added to the coffee bar. Now with the wood clad peninsula, it really pulls the coffee bar into the kitchen.
The inside counter was one piece I worried about a lot, but in the end its imperfectly perfect.
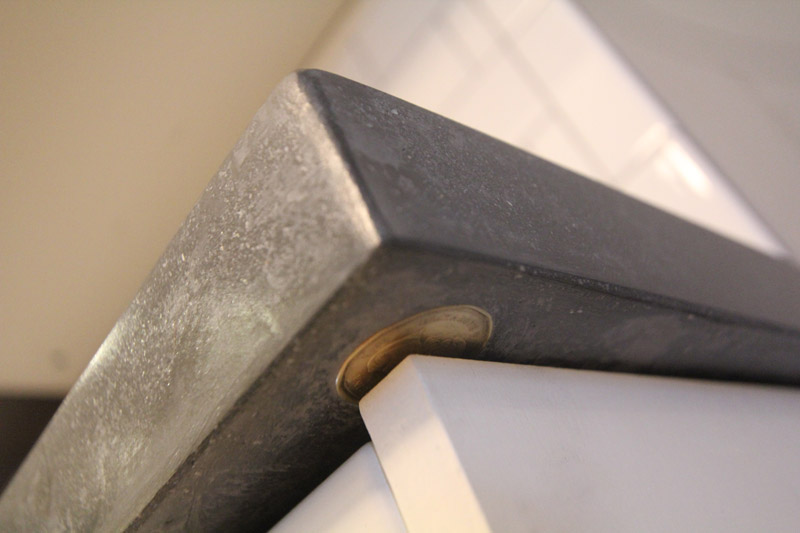
Okay, one more pic of the waterfall! We slightly rounded the counter edges. Littles and dogs wont poke their eyes out, and it makes me swear less when I bump into the counters.
So what do you think?! We’re super happy with them. They turned out better than we ever could have imagined!
I will be back later in the week with a few more kitchen items. Such as the source list, a few more project how to’s, as well as how we installed and sealed the counters. But for now, I am going to go and makeout with my counters. Wha? Uh. I mean stare at them lovingly, and maybe touch them a little. So smooth… and sexy…
We’re getting so close in finishing our concrete countertop project! I am so very very excited to show you the reveal, (next week!) but before the reveal we still have some work to do! When we left off we had “poured” the concrete into our forms, and left it covered, moist and warm.
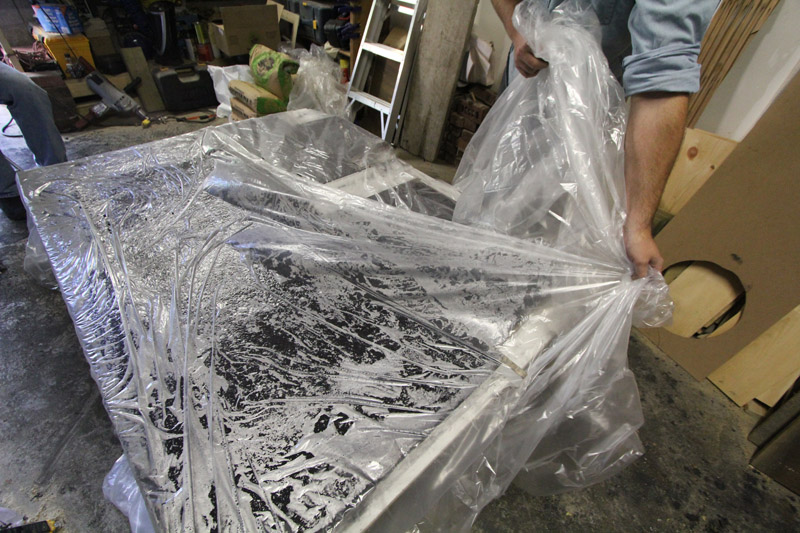
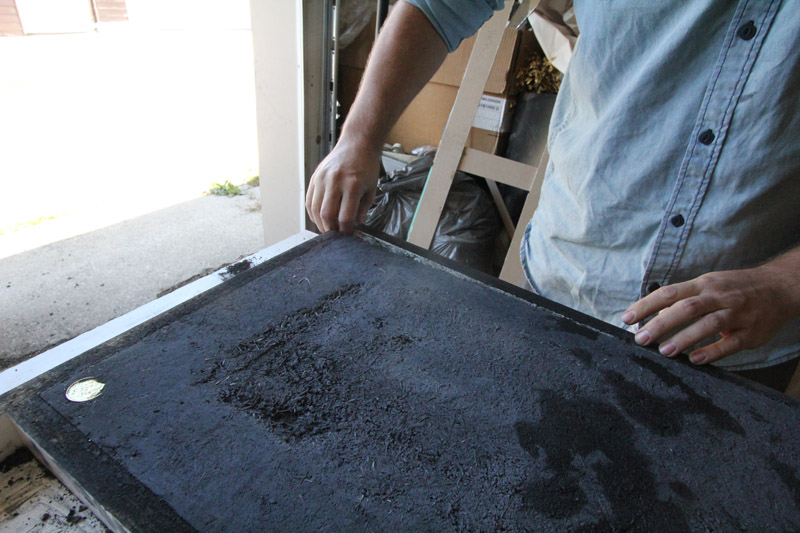
Now it’s time to unmold the forms and see what we’re working with! We removed the blankets and plastic to reveal a nice moist concrete.
Removing Plastic
We then got started pulling away the forms. Using gentle pressure, and ensuring we were not prying against the (still pretty soft) concrete, we removed the form sides.
Removing the form sidesEl Granto removing coffee bar form sidesRemoving Waterfall Form
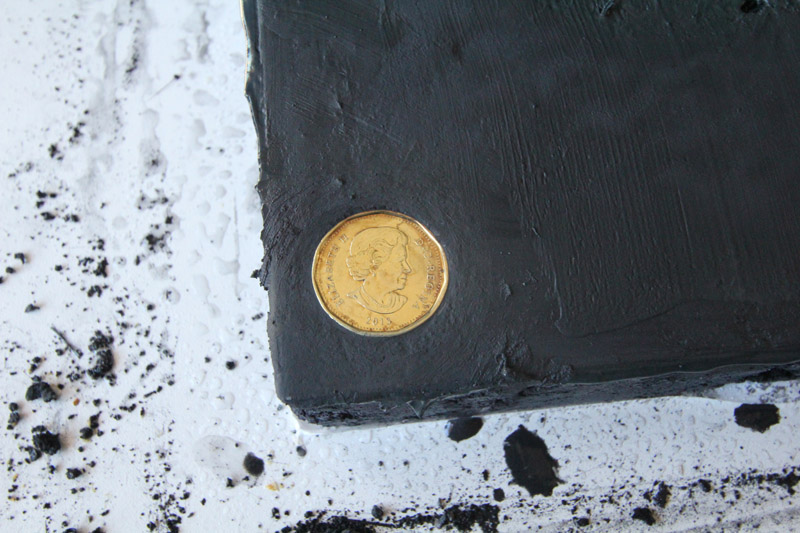
You will note a shiny gold object in the bottom of the coffee bar. We inserted a 2013 loonie into the form under one of the edges. I hope that if someone ever takes the coffee bar apart, or renos the kitchen in the future they will find the coin and know when we built it! It also never hurts to have the queen hanging out in your kitchen. She classes up the joint.
2013 Loonie (for all my Americans; this is our $1 coin)
Before we could flip everything over and see what we were workin’ with (remember we poured our counters upside down) we needed to do a bit of house keeping.
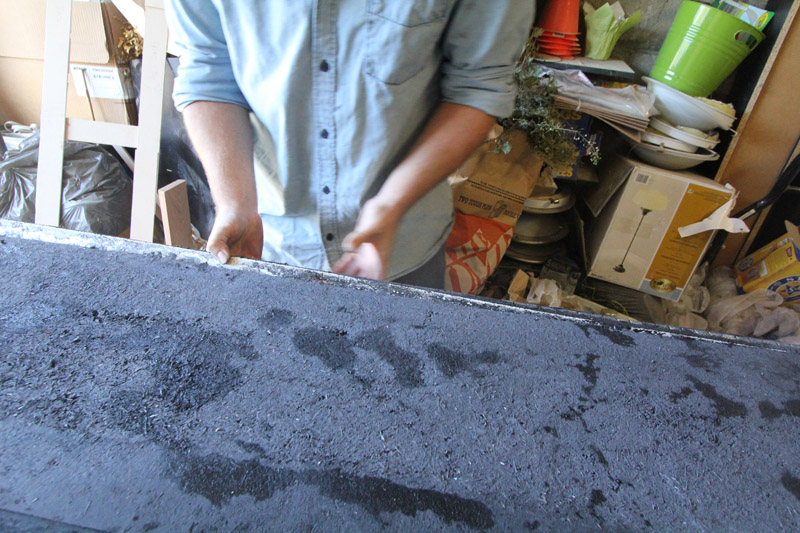
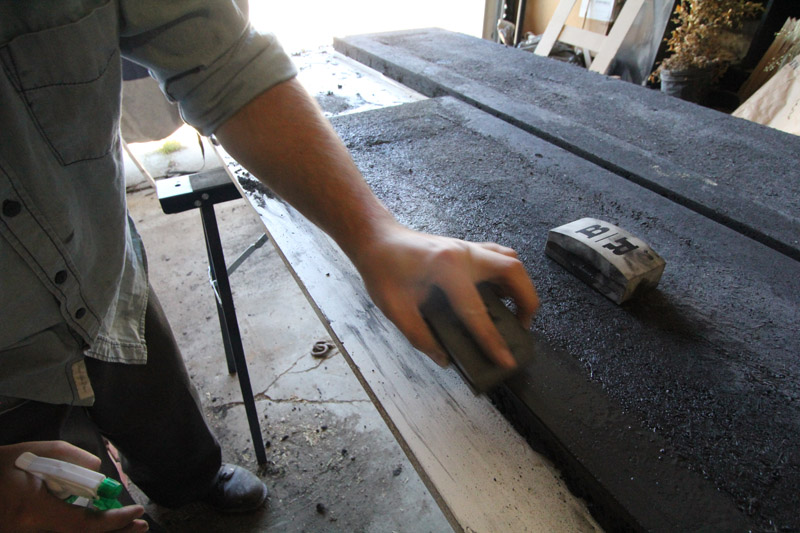
Our concrete mentor Jeremy made a very good point about how we interact with objects. When you go to touch and admire a countertop or a table, what so you do? You kind of grab the edge, placing your thumb on top and four fingers around the edge, touching the underside. If the underside of your table or counter is rough, everybody’s gonna know that you were a lazy sod who skimped on the finishing. Do you want to be the lazy sod? Exactly. So let’s sand the bottom edges of four counters so our friends don’t judge us.
Using buddy Rhodes hand sanding pads, we wet sanded the bottom edges and used a chisel to remove any errant blobs of concrete. A few minutes work, that we will certainly appreciate later!
Buddy Rhodes hand sanding padEl Granto wet sanding the undersides of the countertops
After an excruciating 20 minutes (I want to see my counters!) we were able to flip the countertops over.
El Granto seeing the waterfall counter for the first time
I really love that shot, as it is the first moment El Granto saw our waterfall countertop. I think this is the exact moment he realized how freaking awesome these counters were going to look!
Remember from our last post how we hand packed the concrete in, and purposefully left voids? This is what the result looked like:
Close up of the hand pressed technique right after unmolding
I think it looks amazing (and I will definitely have to do some sort of project soon that looks like that) but obviously for countertops, we need to make them smooth.
To do that, we mix up a slurry of bone paste (really fine concrete) and pigment and push it into the voids. It’s actually a lot like grouting tiles.
You can take this opportunity to add some colour, but in our case we wanted to stick with the same dark grey to keep with an industrial concrete look.
We mixed up a batch of slurry. (Two parts bone paste, one part acrylic additive & your color.)
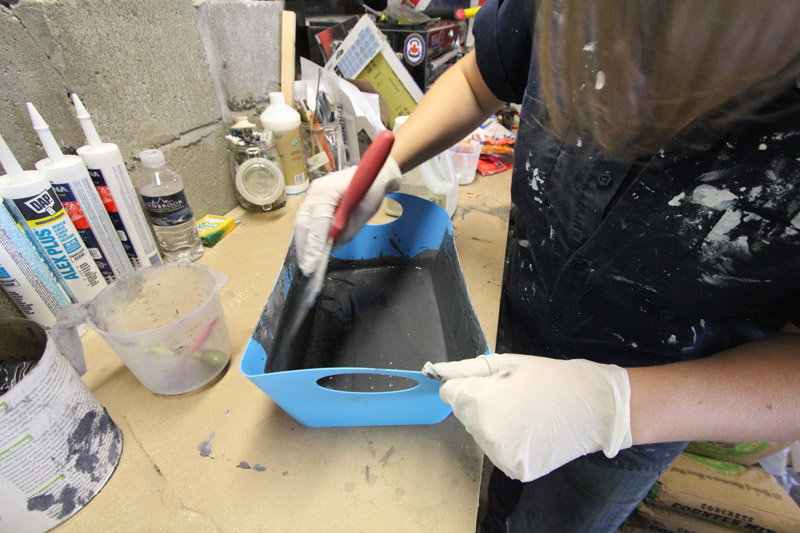
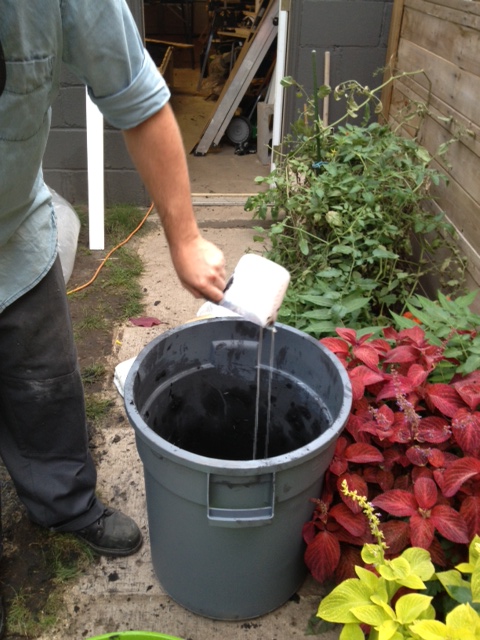
Using a drywall mud knife & tray mix the slurry very well. Pressing out any clumps of pigment by pushing the knife against the tray. Now you will note that I’m not using a drywall mud tray. That’s because I forgot to buy one, and used some plastic bucket from the dollar store. Get a mud tray! We used a 5″ knife and it worked well.
Mixing up the bone paste slurry
Once your slurry is mixed, start pushing it into the holes in your counter. Using a combination of your putty knife and a grout float. The grout float worked very well and shoving that slurry into the holes. You will need to do three coats of slurry, so don’t try to fill the voids entirely. They will get filled, don’t you worry. Thin coats are better, just give it a pass, scrape off any excess and let it dry.
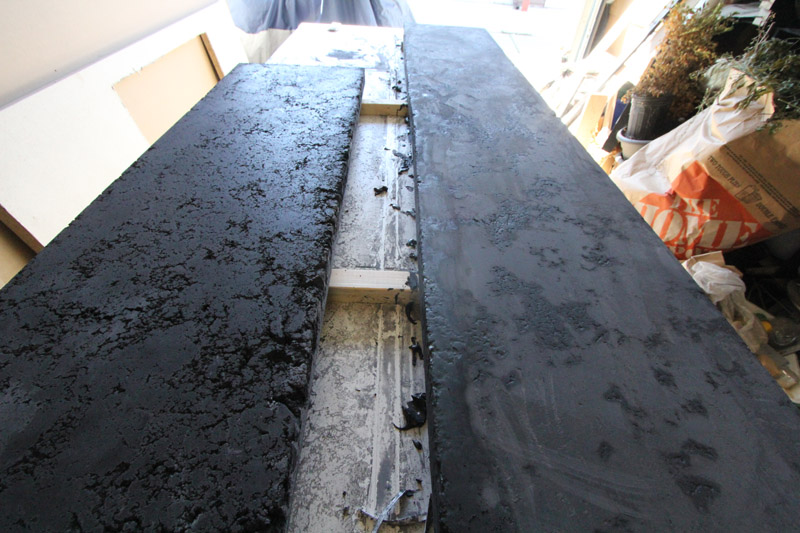
The piece on the left has not yet been slurried, and the piece on the right has had one coat of slurry
After our first coat was dry, we mixed up a slightly lighter version of our color, and did a second (light) coat with that. Our third coat was back to our original darker color. This will result in a bit of a lighter highlight in our cracks and crevices, giving a lot of texture to the concrete.
Slurried Concrete (is slurried a word?! It is now. BAZINGA!)
After three coats of slurry were applied, we left it to dry overnight (and ate some shawarmas.) Hey, hard work deserves delicious shawarmas, and maybe a samosa or two for good measure.
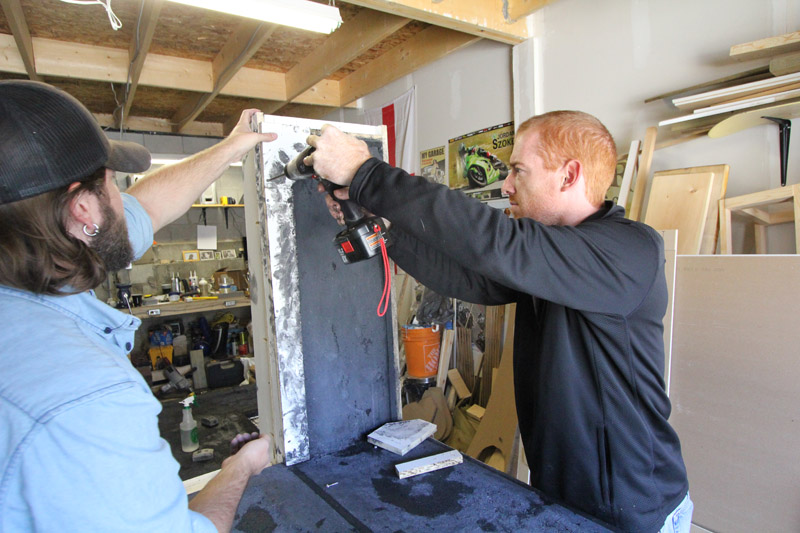
The next day we set to wet sanding everything. We covered the garage in plastic, donned aprons (and in Jeremy’s case, a drop cloth toga, cause we forgot to get him an apron, oops) and got to work. Ideally you would have a wet sander/polisher for this step, but we didn’t, so we used inexpensive orbital sanders and wet sanded away with the Buddy Rhodes diamond orbital sanding pads. We used the hand pads for the edges and areas that were hard to get to with the orbital.
It was a messy mess day, and we didn’t take many photos. However we did make a super awesome time lapse video for you of all our slurring & sanding fun. Here’s two days hard work in two minutes of video.
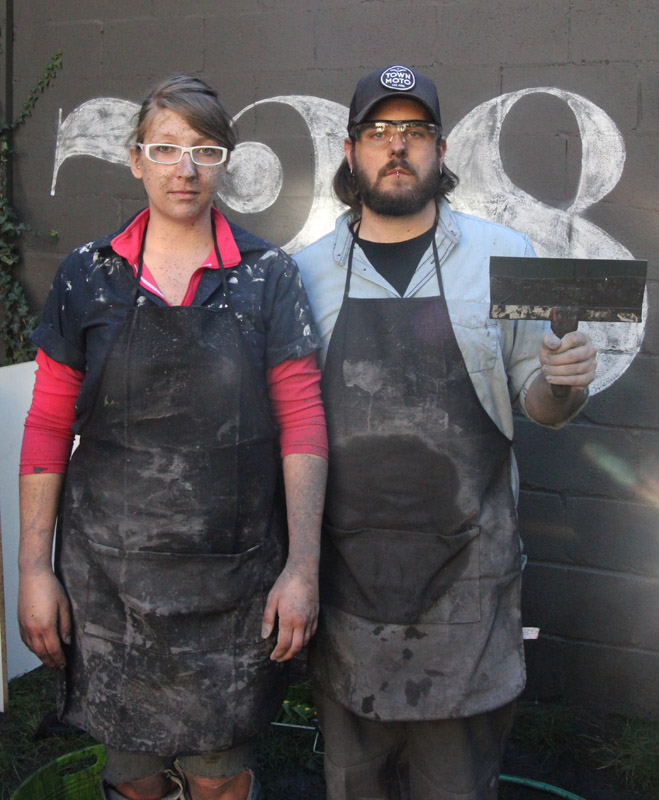
I leave you with an American Gothic version of exhausted Kristen & El Granto. Covered in concrete splatter and soaking wet.
If you follow us on Instagram, you will have seen a little flurry of progress.
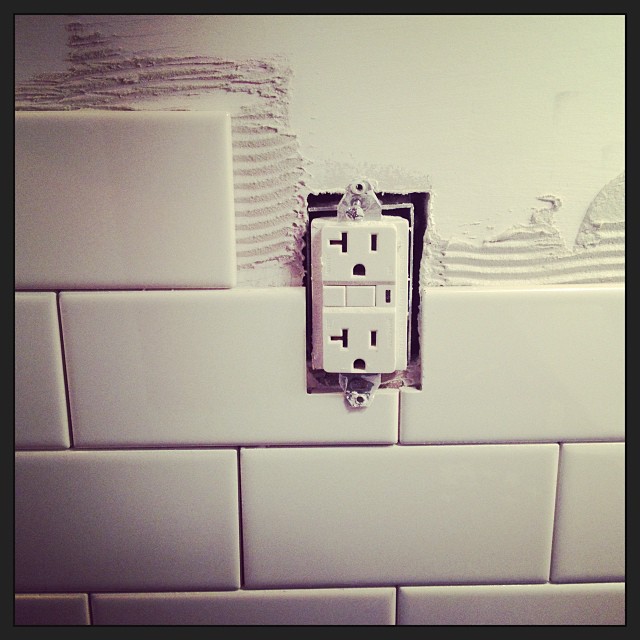
We weighted all our options, and decided to stick with our gut instinct and do a brick (or running bond) layout. I think what swayed our decision the most was that we would only have 18″ of tile total, and three inches of that would be covered by our under counter lighting molding. So 15″ wasn’t a lot of room to do a busy patterned backslash.
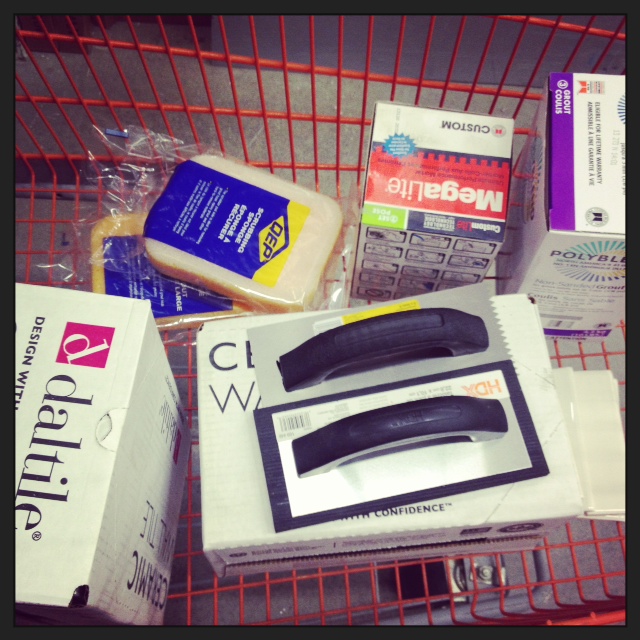
Tile SuppliesRunning Bond Pattern
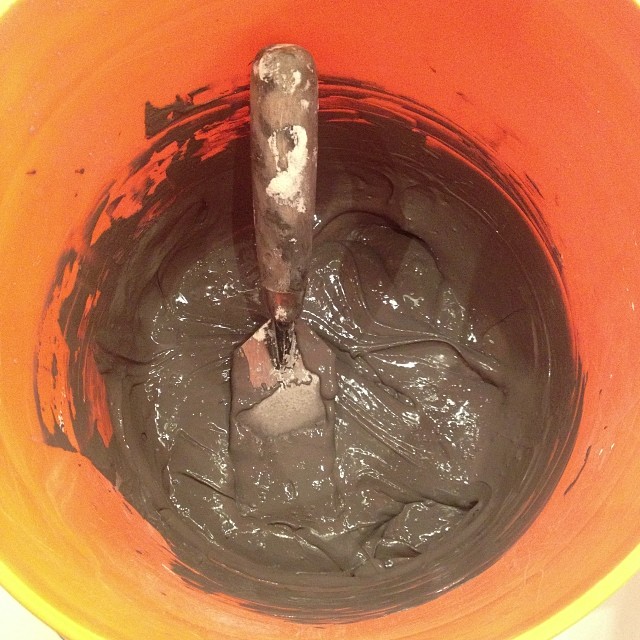
As for grout, we also decided to stick to a pretty traditional choice an go with gray. We picked out “Delorean Gray” and got it home only to look at it under our (bright!) under counter lighting, and decide it was too light.
Back to the store I went, and came back with Pewter gray. After mixing up a batch we both sighed with relief at how much we liked the color.
Pewter Grout
It looked good in the bucket, but how about on the walls?
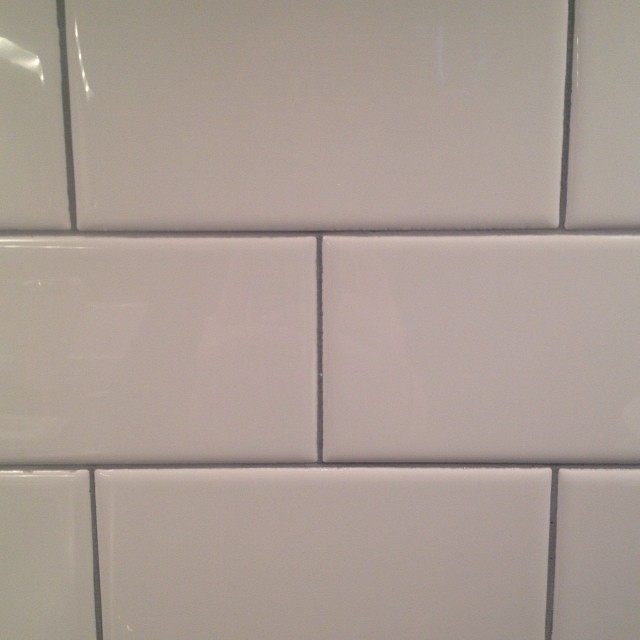
Pewter = Perfect!
We are still working away on the backsplash. The main part of the kitchen is tiled and grouted, but the coffee bar is still naked. Hopefully we can make some more progress on it this weekend!
What are you working on this weekend? Any tiling projects planned?
The title of this post lies. Such a dirty little liar.
The concrete product we are using; Buddy RhodesCraftsman Mix and the way were mixing it: “Buddy’s hand pressed technique” is not poured at all. However “DIY Concrete Countertops – The Day We Made Mud Pies” doesn’t have the same ring to it, or credibility.
All joking aside, I want you guys to take me seriously now, because things are about to go down. It’s getting hot in here, and someone may have let the dogs out (oops!).
It’s time to make the countertops!
Like really truly put stuff in molds!
If you’re new (hi!), and haven’t yet read my previous posts on this project, well then get to it! You’ve got a lot to catch up on before this sh%t goes down!
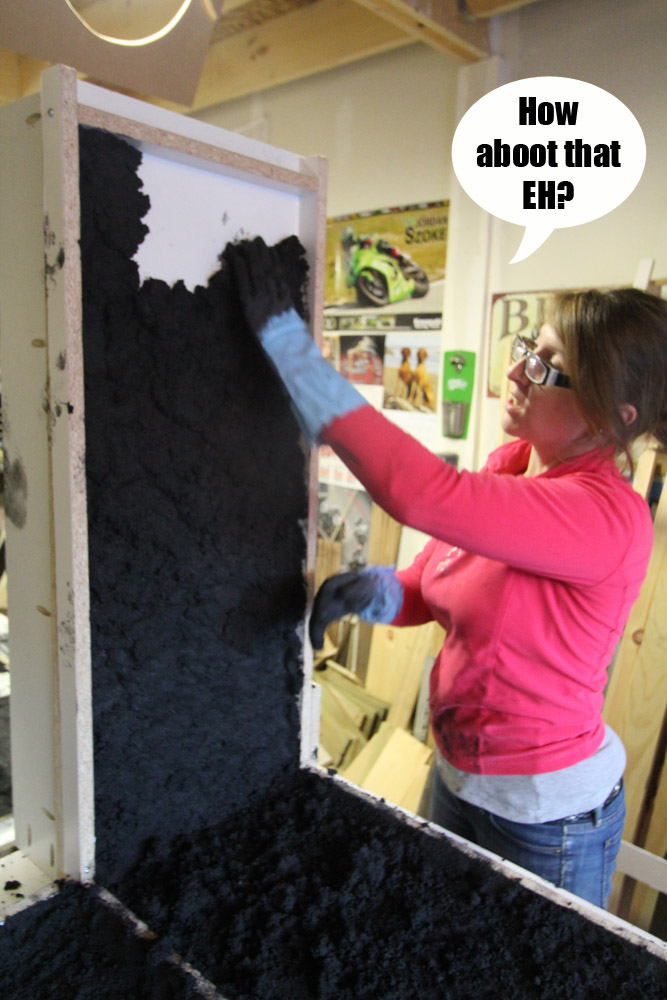
Jeremy from Buddy Rhodes flew into Toronto, all the way from the Southern US to help us Canucks “pour”. You will note a continuing theme throughout our time with Jeremy. He was convinced all Canadians said nothing but “aboot” and “eh”. While El Granto & I had a good laugh every time he said “y’all”. While I tried very very hard not to let an “Eh!” drop. They regrettably slipped out, and I will never ever live it down.
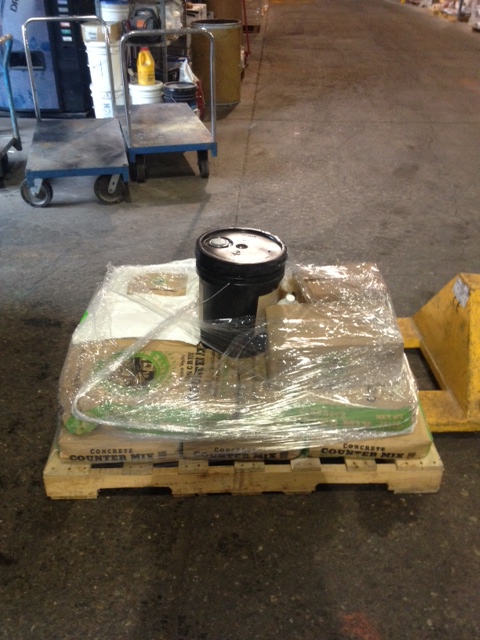
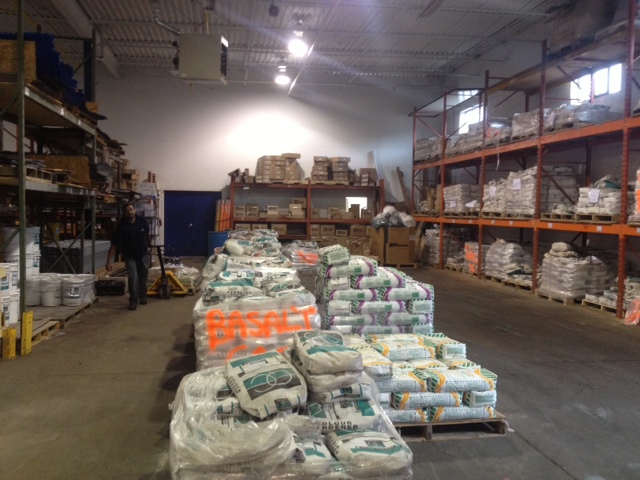
While Jeremy was making his way to Canada, EL Granto’s Mum and I headed to Form & Build in Mississauga to pick up our supplies. After much humorous banter with the Form & Build guys (including them playing a trick on the new kids, telling us the SUV wouldn’t hold the weight of everything!) we had all our supplies loaded and ready to go. (Thanks Form & Build warehouse guys, that stuff is HEAVY!)
The pallet full of our supplies at Form & BuildForm & Build Warehouse – it’s like a concrete candy storeWhat do you think, is it all gonna fit? It did (and the CRV was fine!)All the Buddy Rhodes supplies safe and sound back at the Storefront Garage
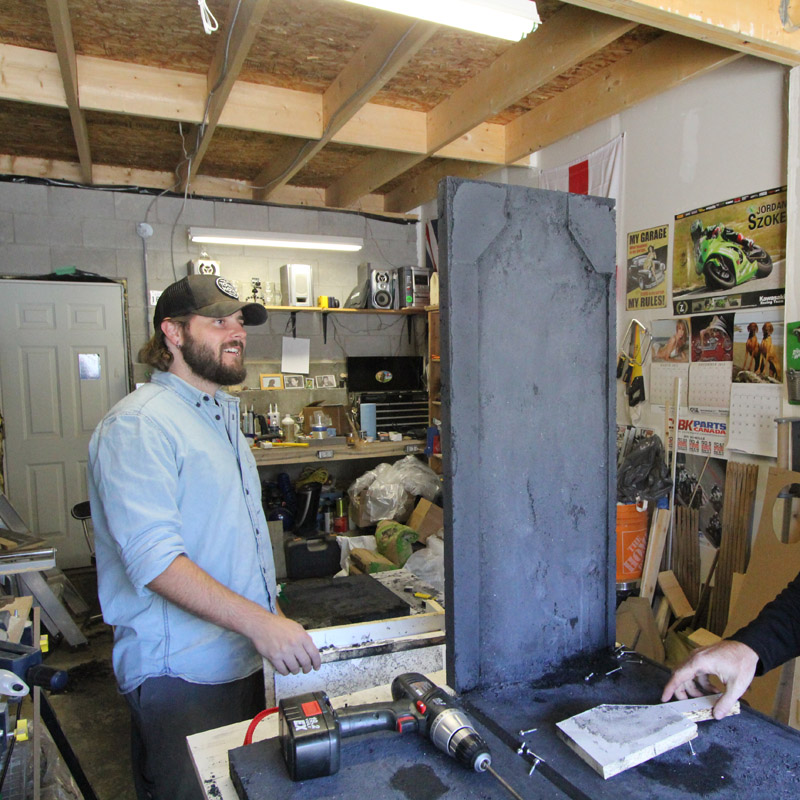
Back at the Storefront we laid out our previously built forms on perfectly flat sturdy surfaces (you CAN put them on the ground, but it’s much much easier if you’re working at waist height and our garage floor is anything but flat). We used saw horses for one of the forms, and we made a work surface out of 5 gallon buckets and some 2×4’s for the other.
Jeremy building a work platform for our forms
This was all happening in our 240 square foot garage. (Which is full of tools eh!) This is urban DIYing at its finest! You gotta make do with what you’ve got.
Once we had everything ready to go, we started mixing. Jeremy had previously suggested we get a mortar mixer like this:
Harbor Freight Tools Mortar Mixer
They are readily available in the US but apparently in Canada they are hard to find. Home Depot carries one for sale online only, but unfortunately we didn’t have enough time for the shipping before Jeremy got into town. I called every tool rental place in the city, and alas no one rented them.
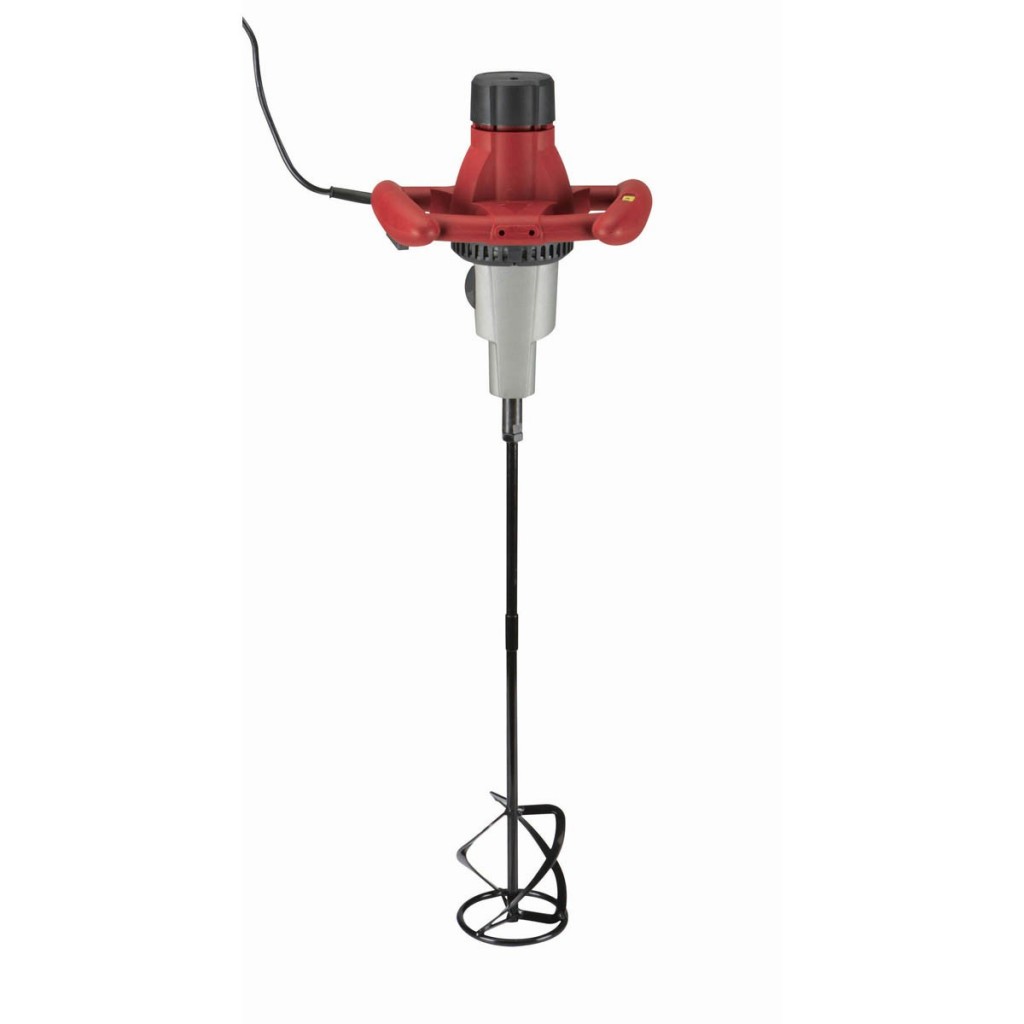
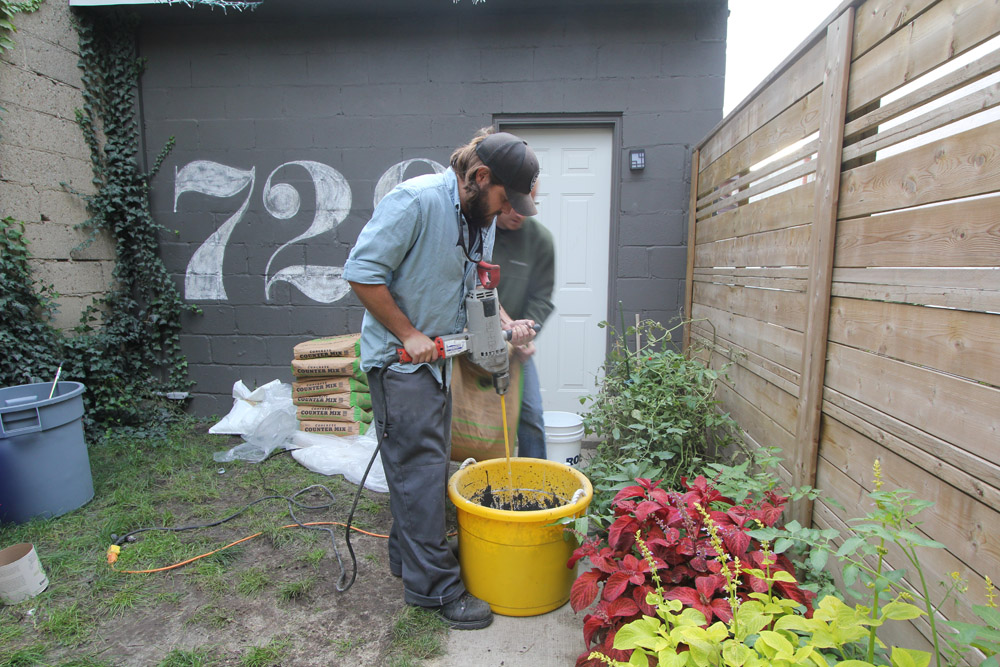
We settled for a rental mixing drill, and this thing was a beast. It was HEAVY, unwieldy, mixed too much air into the mix, and took forever to mix. Not ideal, but in the end it did get the job done. We all struggled with it, ended up cutting our mixing paddle shorter, and took turns. Next time, I am buying the right tool for the job! If you are thinking of doing this project, get a mortar mixer!!
We were mixing the Buddy Rhodes Craftsman Mix according to Buddy’s hand pressed recipe. This mix is not your normal concrete. It’s more the consistency of cookie dough, and truthfully mixing it is just like making cookie dough!
“Pouring” this mixture is a two stage process, you put a first coat of hand pressed craftsman mix in to your forms about a half inch thick, then you fill in the form with a backer coat of fiber reinforced craftsman mix. Use the Buddy Rhodes project calculator to determine how much of each product you will need.
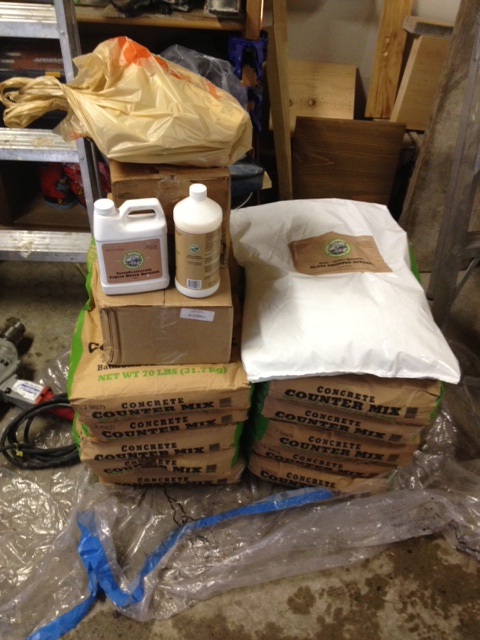
Here are the quantities we used for Stage One:
2 bags Buddy Rhodes Craftsman Mix
8 quarts water
2 quarts polymer
1 can pigment (coal in our case)
Water reducer to get the consistency we are after (only a little, about a cap full)
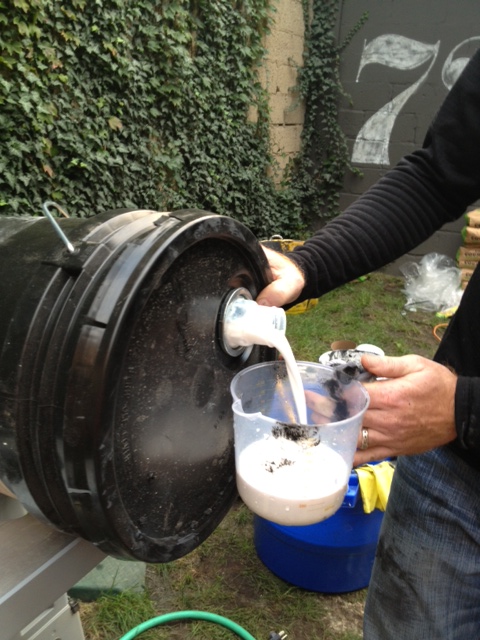
DIY TIP: Ever poured something out of a 5 gallon pail? Sucks right? It’s heavy and hard to control and slops all over the place! Here’s a tip, place the pail on its side on a work surface. Start with the spout facing up, and remove lid. Place your container below the spout, and slowly roll the pail. It will start gently pouring out of the spout into your container, and you wont spill anything! When you’re done, roll the pail back and put the lid back on. No heavy lifting and spilling required!
Easy Peasy Lemon Squeezy
Just like baking, we mixed all the liquids together first, and added in the pigment to get it evenly dispersed.
Add liquids first, then mix
Then we slowly added one bag of craftsman mix. If you’re doing this project, wear a dust mask, you do not wanna breathe in that dust!
Mixing everything together
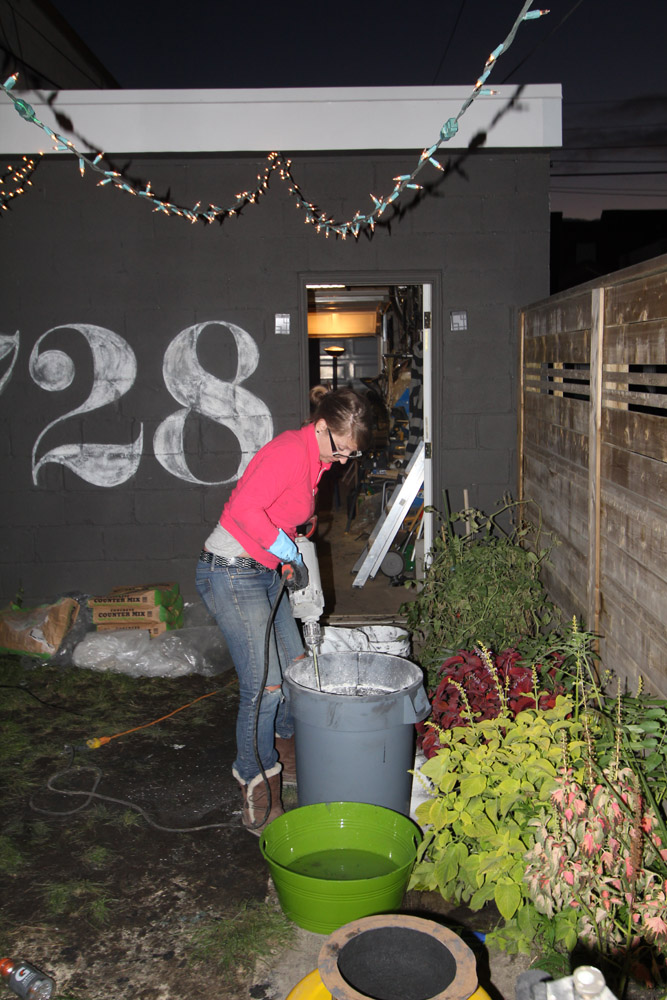
Lifting the mixer up and down, and round and round helped everything mix more evenly.
Everyone pulled together to mix. This was hard work! Especially me with my girly muscles.
Everything is ready once the mixture reaches cookie dough consistency. It’s like play-dough for big kids who want new kitchens!
Now it’s time for the fun!
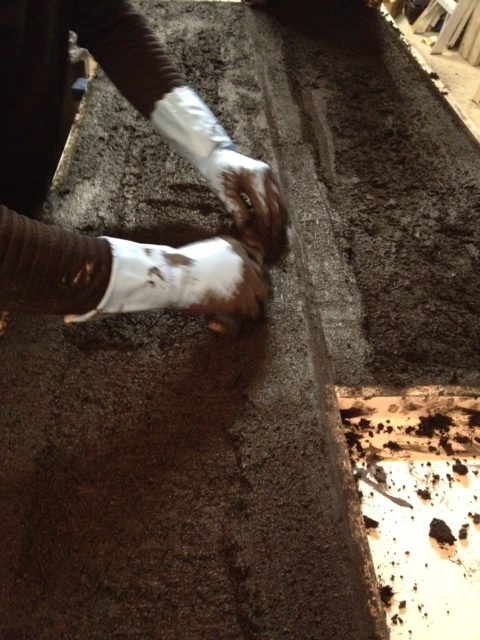
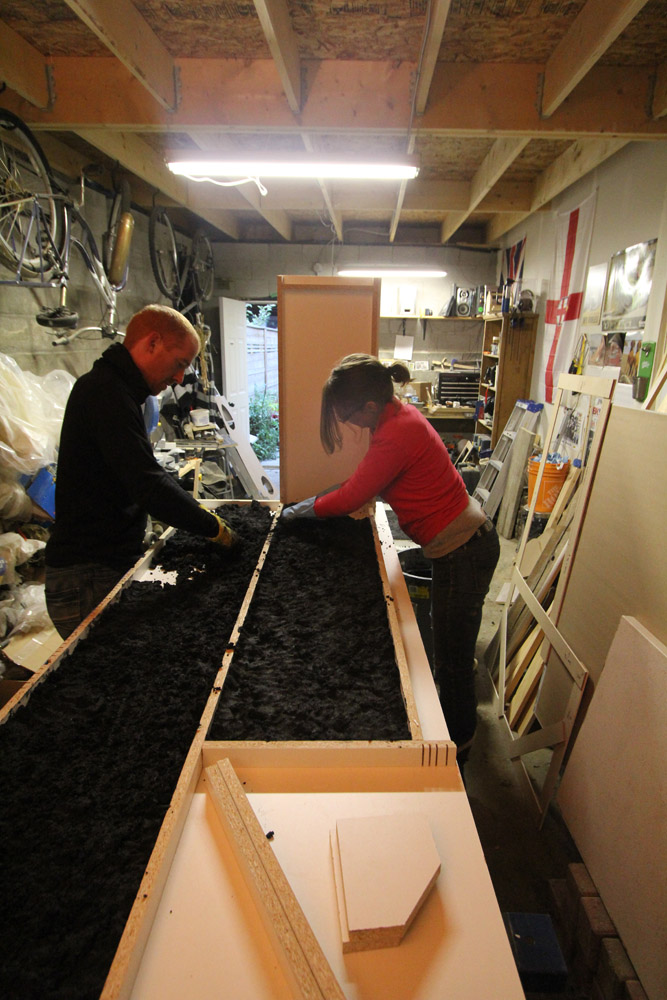
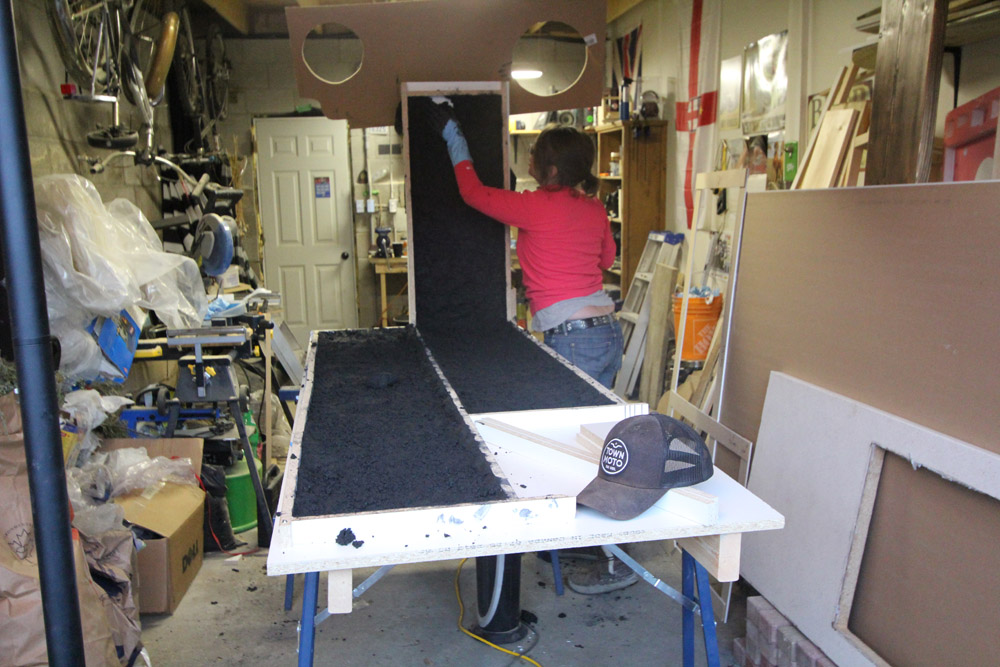
We donned gloves, and took handfuls of the mix and packed it (gently) into the forms. With this technique we actually want to leave some voids, so that the concrete will have a more organic look to it. If you pack it too hard you’ll squish out all the air and have no voids to fill later. We want voids because we will fill the voids with a bone paste colored slurry, which will give some character and depth to the finish. So this task meant that we were to do a bit of a crappy job in order to make it awesome.
We made handfulls of what I lovingly called mud pies, and placed them in the forms, making sure we got up the sides and all along the flat parts about 1/2″ thick.
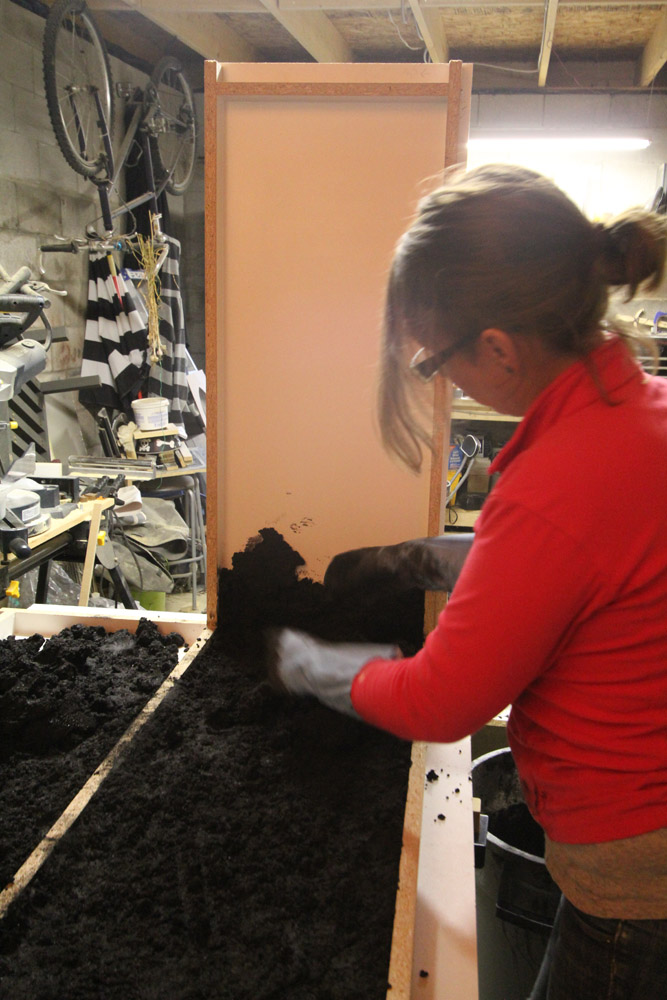
When we got to the waterfall countertop form, we did the flat part first, then started up the vertical. As the mix is nice and thick, it stuck to the form no problem.
Packing the bottom of the formsBuilding the mix up the vertical form
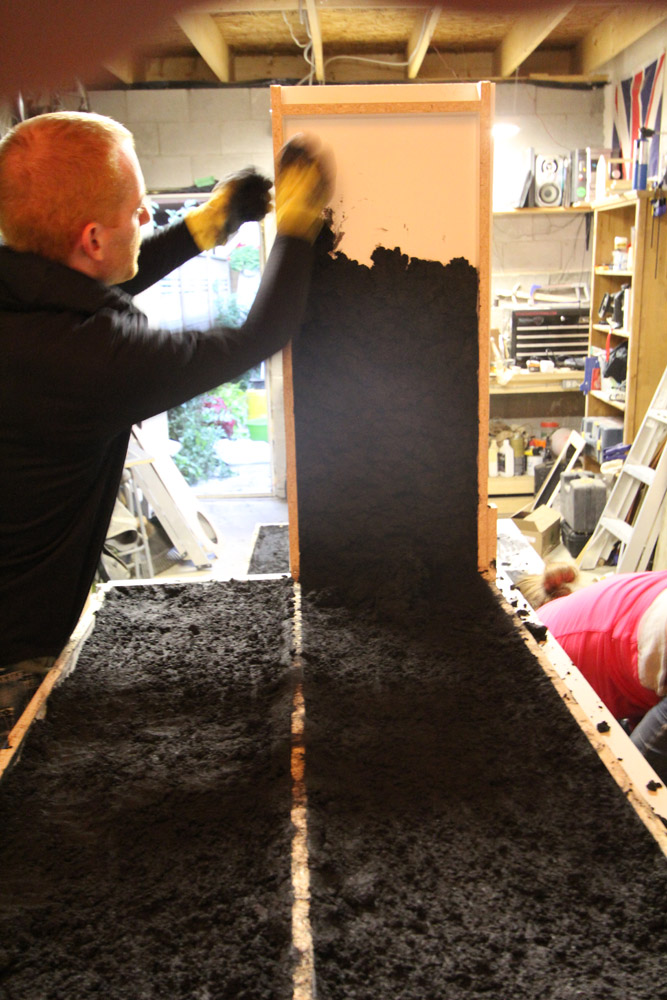
Up and up the form we went.
Build that wall y’all!Am I doing it right?Almost there!
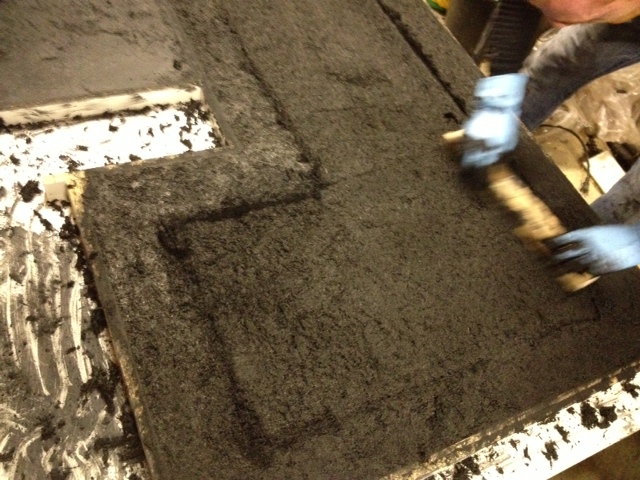
After the forms had their 1/2″ of Stage One mix, we gently raked everything with our fingers making sure things were pretty well evenly dispersed and there weren’t any huge voids. Next up is Stage Two, the reinforced backer.
Here are the quantities for Stage Two – The Backer:
2 bags Buddy Rhodes Craftsman Mix
8 quarts water
2 quarts polymer
1 can pigment (coal in our case)
Water reducer to get the consistency we are after (a little bit more than Stage One)
2 1/2 lbs of glass fibers
Stage Two gets mixed exactly the same way as stage one, except the glass fibers are added (and mixed in gently) right at the very end. It’s important not to break all the fibers or they wont do their job. You don’t want lazy slacking fibers.
After the backer was all mixed up, we added it to the molds, filling it up entirely near the edges, and leaving it a bit less full in the middle of the forms (you don’t need to fill them all the way up in the middle, its just wasting concrete!). You want the forms completely full where they are going to touch the front and the back of your cabinets (so that everything lies nice and flat). You also want it to ensure your overhang is completely full.
We then used a small piece of wood to screed the parts of the countertop that will touch the cabinets & the overhangs making everything nice and flat.
Jeremy using a piece of wood to screed and make flat the bottom of the countertopJeremy hollowing out the center of the large countertop piece. You dont need the form to be full in the middle. This way you can cut down on material and weight
On our waterfall, we made some smaller pieces to act as the backs of the mold where our toe kicks and overhangs were. This will ensure we get a nice pretty back side of our counter (as it will be visible.)
Check out the small pieces of melamine on the vertical of the waterfall mold. Also note the exhausted look on El Granto’s face and the sheer amount of mess everywhere.
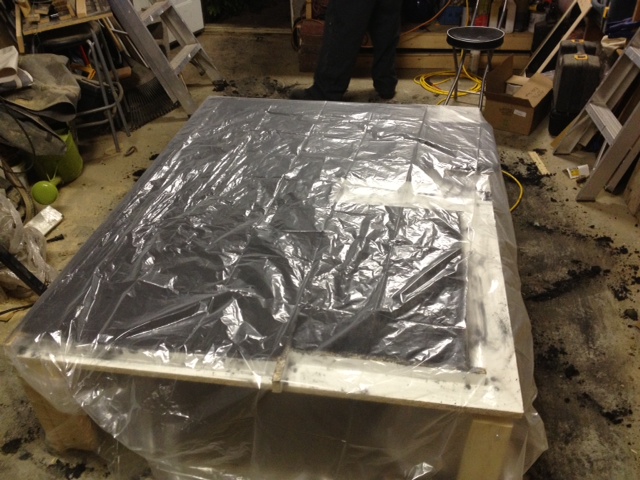
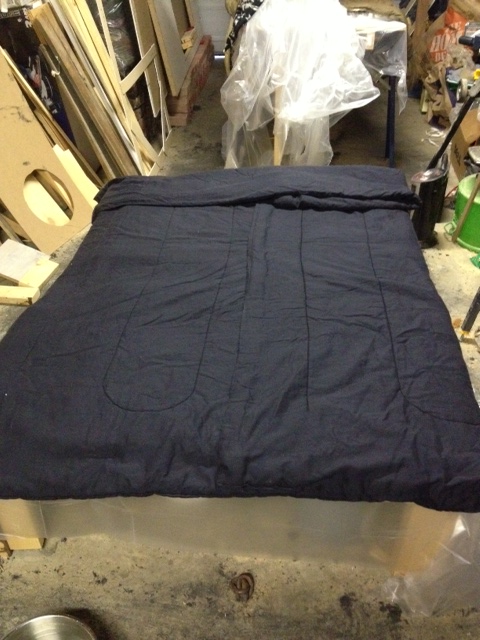
Once we were done, we covered our counters with plastic sheeting, then blankets to keep them warm. Heat is important to the curing process (in his shop Jeremy puts industrial heating blankets on his forms while they cure to keep them as hot as possible), and as it was fall in Canada, it was even more important to keep everything warm. We put all the concrete to bed with blankets and left the heat on high in the garage overnight.
Covering forms with plastic to keep in moistureWe covered the concrete with blankets and tucked it in for the night.
We occasionally went out and wet down the concrete with warm water and a cloth, then recovered. If you are doing this yourself, I would recommend doing your pour one weekend, then keep your concrete damp and warm for a week (this will ensure the strongest concrete possible), and unmold the next weekend. We were on a tighter timeline, and unmolded the next day.
It was a hard days work, but we actually made countertops! Next step is to unmold everything, make a bone paste colored slurry to fill any voids, and then sand. We’re getting closer!!
***UPDATE – Check out the next stage in the project here ***