Do you have something in your house that works perfectly well, it looks fine, and you have no justification what so ever to replace it, but you HATE IT? Yeah…that was my living room light fixture. It was fine…I just didn’t like it. It was also big, and costly to replace with anything I like. So it had no hope of getting replaced anytime soon. I had come to terms that our whole living room is in fact an epic fail (sofas don’t fit the space, the tv console is hideous, the dogs crate lives in the living room, and there’s no place to set down a drink.) So you think I would just concede the light failure and learn to live with it. Like the way hoarders seem to have come to terms with crawling over their belongings to get to the bathroom. Not so. I my friend am what you would call anal retentive, and if I can possibly change something I hate; I will.
This weekend I had enough of that light fixture, so I got El Granto to take it down, and I marched it outside and I spray painted that light. Take that heinous light. Now you are the same heinous light with a prettier color! Nah, I’m not giving it enough credit, I think it looks much better, and definitely good enough to get it off my hit list for a few months.
So here’s what we did.
Took the light apart (the bowl came attached from the rods, and the rods from the light fixture). It’s hard to see the lights terrible color from my before pic. It was white with gold brush strokes and a hint of green. Waaaay to country for this city house.
Close up of strange gold faux finish
I cleaned everything, then dragged a few saw horses outside, and made myself a little work station. I hung the rods and the hoop that the bowl sits in from an old piece of wood with some nails in it. I sat the light on some cardboard. In hindsight I should have hung the light as well as it would have been easier to paint. I made sure to mask off the light socket with tape. I painted with my favorite spray paint; Rustoleum Universal. This time with some left over Oil Rubbed Bronze. I painted with several light coats, ensuring I got into the nooks and crannies of the light. Sorry grass, you were collateral damage in this project.
Painting the light in the backyard
After it dried we took it back inside and re-hung. Easy peasy lemon squeezy.
SOURCE LIST:
Materials:
Rustoleum Universal Spray Paint in Oil Rubbed Bronze – Home Depot
Tools Used:
Screw Driver, Ladder, Husband
Difficulty Level (on a scale of 1-5):
One out of five
Total Cost: $0 (already owned the paint, $10 if you needed paint)
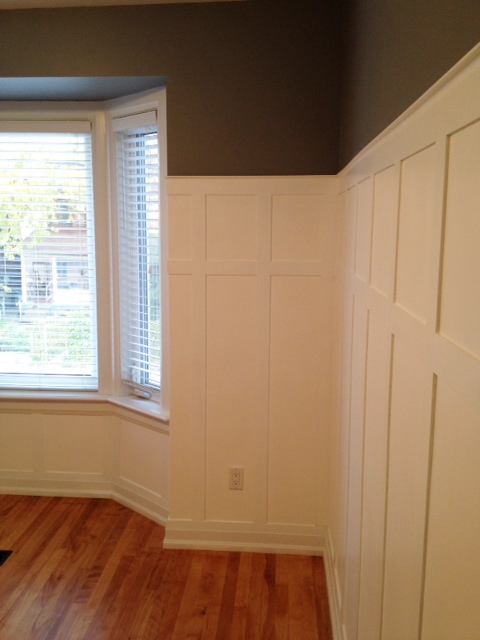
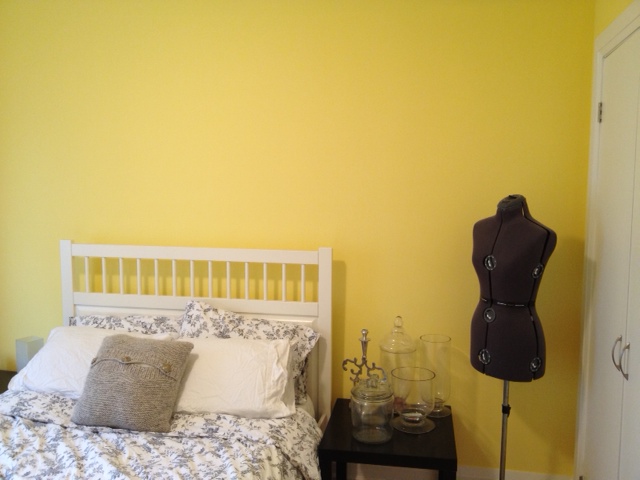
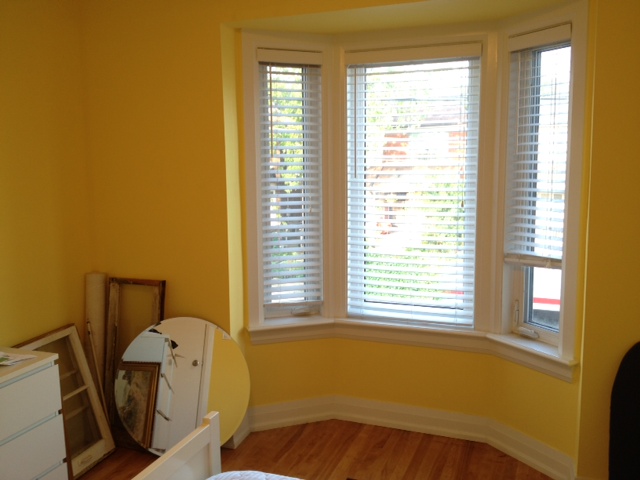
It was time to add some charm to our guest bedroom in the form of board & batten on the walls & some new (not yellow) paint. The room is big in the scope of our house at 12’x12′. It has a lovely bay window, double closet and original 100 year old ash floors. It also has amazing baseboards & trim (as does most of our house). When starting the board & batten the last thing I wanted to do was change, futz or in anyway do anything to the trim work. I wanted it to stay where it was, and do the board & batten up to it. Problem is, the baseboards are sloped and hit the wall with only 1/4″ space from the wall. This means that the material for my battens could only be 1/4″ thick, or else I’d have an unsightly overhang.Eeep…that doesn’t leave a lot of options.
BeforeBefore
These were the possibilities that I could find:
1/4″ x 4 foot long poplar lattice at almost $5 each…hurmph
1/4″ x 8 foot vynal trim pieces at almost $6 each…ack
1/4″ thick 4×8 sheet of hardboard for $17
The hardboard was looking to be the best option, but we don’t have a table saw yet (it’s still on my wish list). So we’d have to get the Home Depot guys to cut it down for us at $1 a cut, then somehow get it home. It could work, but it also wasn’t the best case scenario…I needed to think this one out.
I then called my local lumber yard Downtown Lumber. They’re always really helpful and I thought they may have some ideas. Turns out Downtown Lumber carries 1/4″ MDF in 4×8 sheets for $15, and they make custom cuts for 50 cents each. I like using mdf much better than hardboard (as it doesn’t have that glossy surface), and the lumber store is waaay closer to our house, and easier to walk home with big lumber.
So better + cheaper + less work = happy Kristen.
So I did my math, settled on 2.5″ battens, and placed the order to have 2 mdf sheets cut into 2.5″ strips. We headed over after work to pick it up and lugged it all home along with some trim. The getting it home was an epic fail (I’m talking all of it almost falling off a dolly, practically killing a cyclist and an epic argument) dammit we should just get a car already…
So after we got the wood home, and had a few drinks to forget the ordeal, I set out sanding the edges of the mdf for a nice smooth finish, and putting a coat of Behr Premium Plus Ultra in pure white on the edges. I didn’t paint the flat part of the battens for one main reason; I was going to have to fill & touch them up anyways, and to get a smooth finish I would really need to re-paint them entirely. Rather than make myself more work. I decided to paint them once they were on the wall with a small foam roller.
I did however paint the bottom of the wall so it would save me trying to paint in between the battens (yuck). Deciding where the paint would stop (where the top rail would go) was the hardest part. The storefront is not the least bit straight or level, and when I drew a level line on the wall it looked like I had done it drunk. So we fudged it, and made it kinda sorta parallel to the ceiling and floors. We used a chalk line to line it up, then used tape to mark the line, and to keep me from painting willy nilly everywhere.
Bottom of Wall Painted White
After the paint had dried (the next day) we installed the top rail out of the 2.5″ mdf battens on the nice line we’d made with the tape the day before.
Top Rail Installed
Then the vertical battens got added. We had to custom cut each and every one, as they were all different heights. I would measure a few, and head out to the garage to do the cutting, then lug them all back upstairs, over a baby gate (that was keeping the dog from free roaming and destroying the house) and then back into the guestroom. I made countless trips up and down those stairs.
Vertical Stiles Installed
We went with 12″ of space between battens, cause, well it looked good. The front wall under the bay window the spacing is fudged so that battens framed the windows (technically they should have not two battens touching eachother, but it looks correct once its all painted).
Under the Bay Window the Spacing is “Fudged”
We did have one instance where hitting an electrical outlet was unavoidable. It was on a small wall that had 2 switches, an outlet and an a/v outlet. The battens were almost the same size as the outlets, so we placed one batten directly centered on the outlet, so we could make flush cuts against it. We then measured out our 12″ on either side. The wall is not perfectly symmetrical, but you wouldn’t second guess it.
Where we couldn’t avoid hitting an electrical outlet, we changed the spacing so that a batten would hit it square so that our cuts would be easier
To make the spacing easier, we made a spacing jig out of some old lumber, and spaced & leveled then brad nailed each batten.
Our Spacing Guide (sorry for the out of focus shot, I was trying to shoot and hold)
It went very quick, the most time consuming part being the measuring and cutting (especially if I’d measured wrong, and had to go re-cut). We labeled each batten corresponding to what wall the were working on (Left, Right, Front, Back) and gave them a letter (i.e. Left-A was the first board on the left side, whereas Right-I was the last board on the right). This made it so much easier as you couldn’t loose track of what board went where.
After we fished installing all the vertical battens, we also decided to add some horizontal battens about a foot from the top to add a bit more visual appeal, and it matches the shaker paneling on the front of the storefront. We had lots of off cuts from the vertical battens, so we cut down a bunch of 12″ battens and brad nailed them in place. (and of course custom cut ones for the odd places.)
All the Rails & Stiles Installed
Next up was to fill all the damn holes from the brad nails. I filled the nail holes with spackle, and the cracks and seams with paintable caulking. I used the spackle this time so that we could easily sand to get a perfect finish on the flat battens.
Spacking
We then added some cove moulding on top of the top rail. I was going to add a small plate rail above that as well, but that proved to be too difficult with our wonky walls. Our walls just bowed and dipped so much that there were huge gaps at points. So we decided to call it done with the cove moulding.
After all that filling, sanding and caulking, I got to painting. I cut in the edges of the battens where they met the wall. I had given one coat of paint to the battens before I had installed them, but this second coat covered all the caulking and finished the sides beautiful. I painted the flat part of the battens using a small foam roller. I made sure not to use too much paint so that it didn’t overflow into the “board” part, and it went quite quickly. I was running extremely low on paint (had only bought one gallon) and decided to brush on my second coat. The foam roller gives a beautiful finish, but it was looking like it was going to take three coats (which I did not have enough paint for) So I switched it up and painted the entire second coat with a brush. The trick to painting a flat surface with a brush without leaving brush marks is a light touch. You want to evenly distribute the paint without pulling any back up. I paint the whole piece, and then go back over it quickly with a light brush. When the paint dries this should leave you with a nice smooth finish.
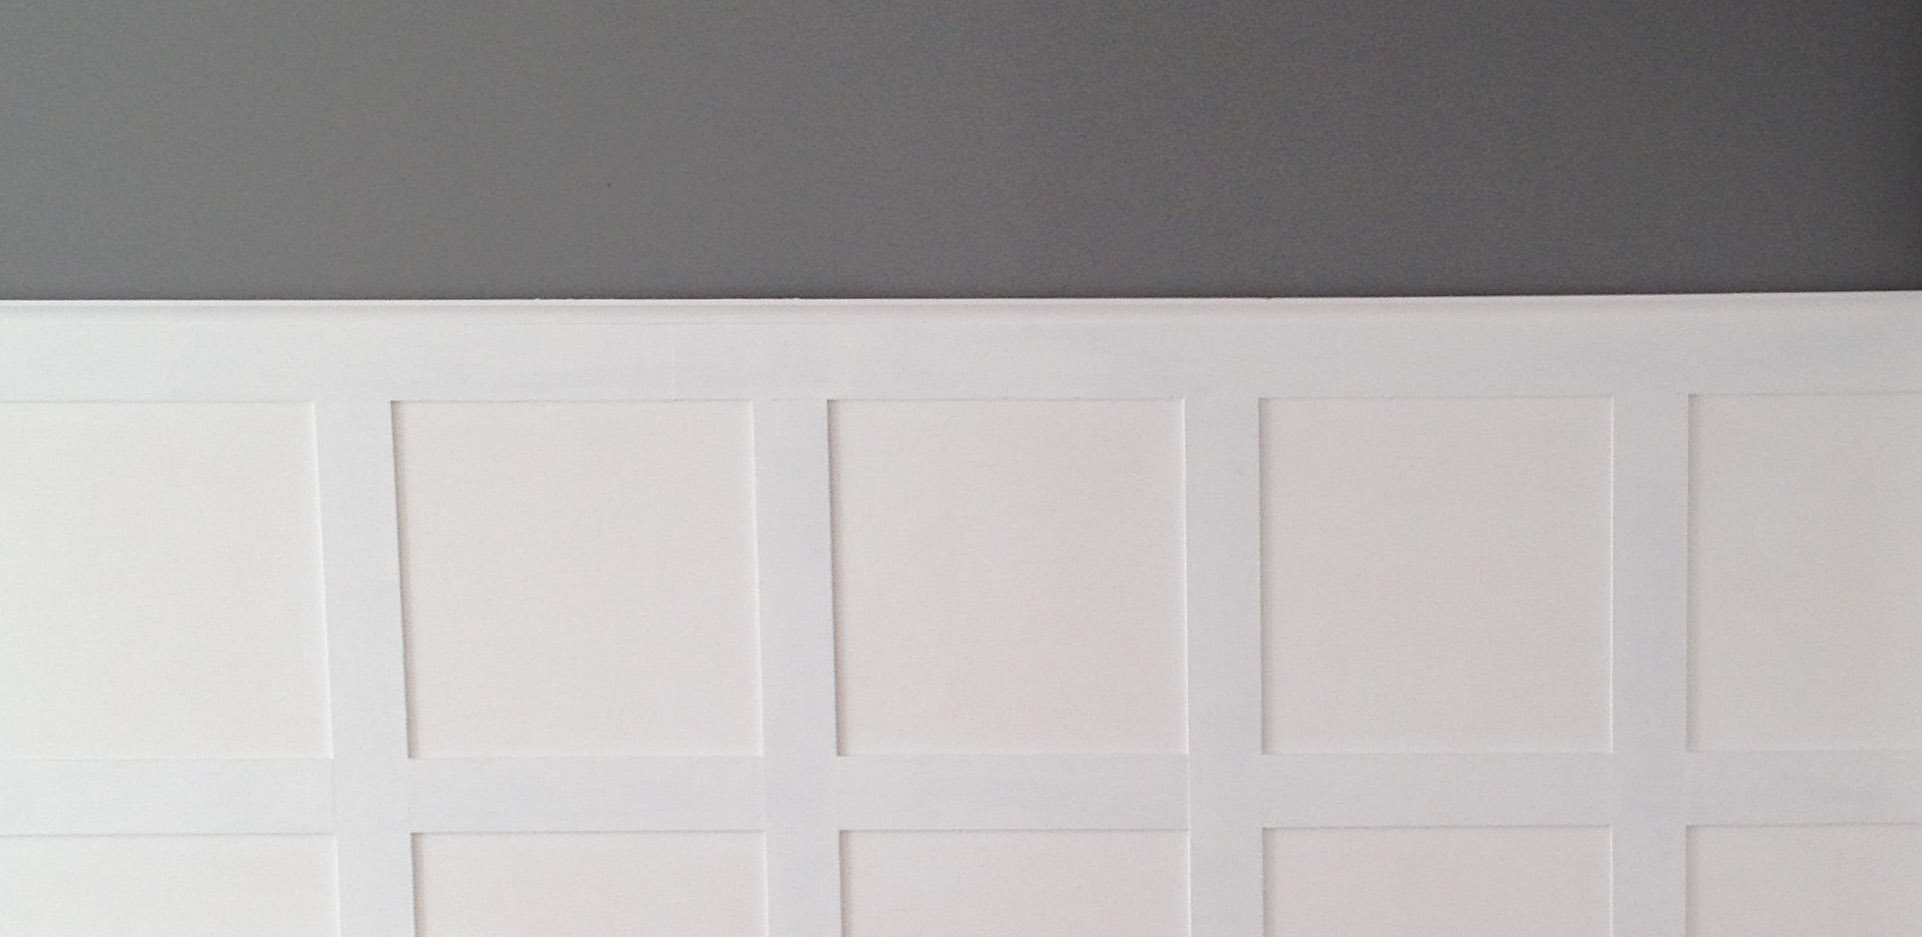
Board & Batten Painted (wall still yellow)
After it dried for a day, I went back and painted the rest of the wall with a nice medium grey, which really made the board & batten pop!
Materials:
2 – 1/4″ 4×8 sheets of mdf cut into 2.5″ strips: Downtown Lumber
1/2″ cove moulding: Downtown Lumber
DAP Spackle : Home Hardware
DAP Alex Plus Paintable Caulking: Home Depot
Paint (Board & Batten)- Behr Premium Plus Ultra Pure White in Satin: Home Depot
Paint (Wall) – Behr Premium Plus Ultra in Anonymous in Eggshell: Home Depot
After measuring and planning, and cutting and nailing, and caulking and painting, its finally done. Our guest room now has a board & batten wall treatment (althou I think its more shaker paneling…but tomato tomato)
Without further adieu, here is our completed Board & Batten treatment in our Guest Room.
Have you checked out Craft Fail yet? It’s great, it chronicles peoples adventures epic screw-up’s in crafting/DIYing/cooking things they found on internet tutorials.
As you may know by now, I often get an idea in my head and insist on trying it out. (Like when I cut a hole in the wall.) Sometimes it turns out to be an awesomsauce idea and sometimes not so much…
So this weekend I wanted some bedside table lamps for the Guest Room, but I couldn’t find what I wanted for the price I wanted. So I started looking around the house for stuff to make lamps with. We have two of these $9.99 Ikea Grono table lamps just sitting around collecting dust. It’s like the sad Ikea lamp commercial all over again…
Ikea Grono Table Lamp
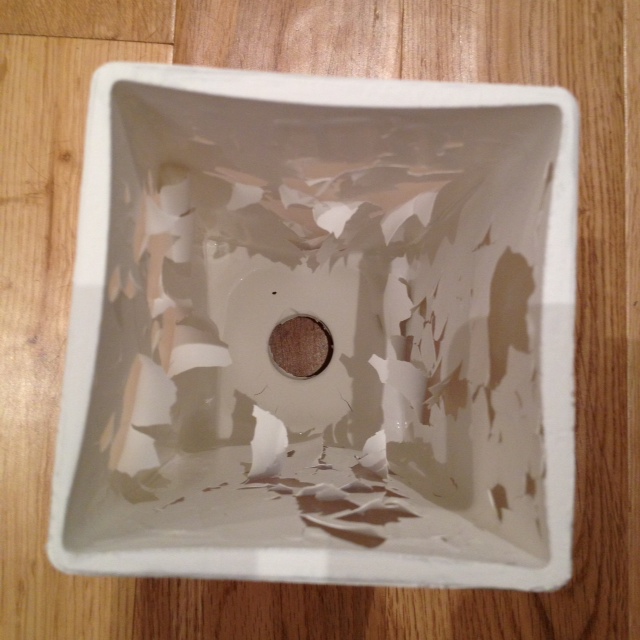
I also happened to have two of these pretty white vases.
I thought it would be a brilliant idea to make lamps out of my vases using the lamp hardware from my Grono’s. All I needed to do was cut a hole in the bottom of the vases…
Turns out, glass drill bits are EXPENSIVE. And both El Grant & I were convinced I would bust the vases all to hell while trying to drill holes in them. So Instead I thought of all the hipster ahhem cute painted mason jars out there, and decided I should just PAINT the inside of my Ikea Grono lamps with white paint instead.
So I broke out my white chalk paint and gave it two coats. It looked.like.crap. It was all uneven and streaky. I then thought I maybe should have poured the paint into the lamp instead of painting it. So I taped off the bottom hole, poured some chalk paint inside, swirled it around, then tipped it upside down and let it dry.
THIS is what I found the next day.
Whats that? Oh its all my paint PEELING offAn aerial view to show more of the epic failing going on
To kick off Mike Holmes’ new show Holmes Makes It Right which premiers tonight at 9pm on HGTV, Mike Holmes & some Holmes “look-alikes” will be gallivanting around Toronto in capes between 11am-4pm today. Spot a Super Holmes or a Holmes Look Alike and enter to win $5,000 cash or prizes from Milwaukee Tools and Roxul!
As you may know Mike saved us from our leaky mess of a home when he fixed our house as part of a Holmes Inspection episode. Check it out here. We owe the world to Mike & his team, and we’re excited to see the families and homes he’s going to help this time around!
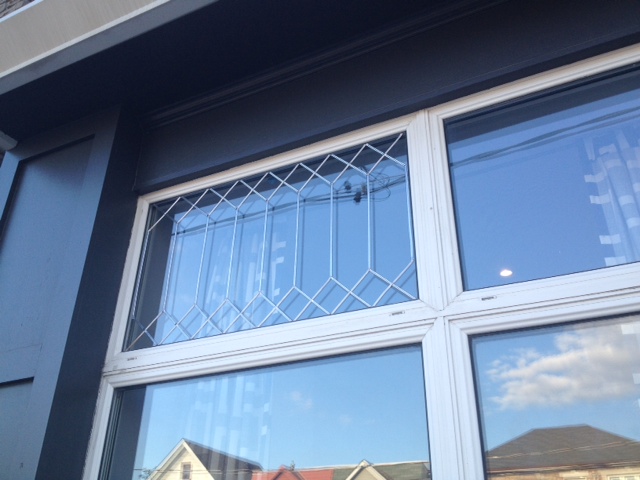
I love leaded glass, especially in exterior transom windows of old storefronts. The transom above our front door is a leaded glass window (albeit new) and I love it. I WISH our house had some original leaded glass, but alas all we have are energy efficient double pane windows. I know, I am the only person on earth who complains about how energy efficient her house is…
The Storefront Window
We looked into getting some real leaded glass for the storefront window transoms, but it was darn near impossible, and pretty much a huge waste of money as our current windows are perfectly fine. The problem is however, that once I get an idea into my head I am not easily dissuaded. So I started researching for a solution and came across this:
Pebeo Vitrail lead adhesive strips. It’s used for faking your own stained glass. They have a line of glass paints, and you literally make your design out of this tape, then fill it in with the glass paint.
I didn’t want the stained glass look, but the lead looked like a pretty cool idea. So I popped into every art store I came across, and on my third try I managed to find a package. It was $24 for 33 feet. I thought that would be plenty for my project and headed home.
I then did some research for leaded glass patterns.
We narrowed it down to either a Diamond pattern, or a Regent pattern. I drew both out to the size of our transom windows, and once drawn out, we liked the Regent the best.
I headed outside and thoroughly cleaned the windows and then taped my drawn out pattern on the inside of the window. I then set to re-create the pattern on the outside of the window. It was a bit tricky due to the space between the front pane of glass and the back one where the pattern was. If I change the angle I was looking at the window it changed the pattern. I tried hard to keep it straight and true but alas its a bit crooked. Shh don’t tell.
The adhesive leaded glass was very easy to cut, but the backing wasn’t that sticky. You really need to burnish it in place with the provided application tool to make sure it stays where its supposed to. Once I got into the swing of things my lines became straighter and my cuts more precise. Just as I was fining the first of two windows I noticed that I was dangerously low on adhesive lead! Eeep. Apparently 33 feet doesn’t go that far when you have an intricate pattern. So I was unable to finish both windows, so for now I have one leaded glass transom window. What do you think?
“Leaded” Glass Window (view from outside)“Leaded” Glass Window (view from inside)
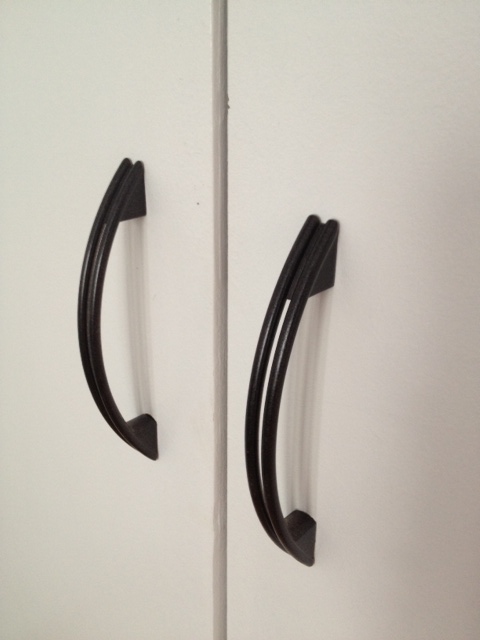
The guest room has one entry door and two closet doors. I have been trying to convince El Granto to let me paint all the door knobs and hinges in the house with Oil Rubbed Bronze Spray paint (like I used on my DIY “Cast Iron” Heat Registers) but it’s been a tough sell. The problem is all our door knobs are almost brand new brushed metal. So they are in fine shape…they’re not super dated, and they look fine…I just want them oil rubbed bronze. But what if I paint a house load of perfectly fine knobs only to have them peel or chip or look like crap? Then it would be death to wife.
So untill I am able to convince El Granto that oil rubbed bronze is the way to go, I will have to satisfy myself with change all the other hardware in the guestroom. For the closet we have two brushed stainless pull handles. They are a strange size, and until I find some oober nice handles, I figured I’d give them a coat of paint of my favourite paint; RustOleum Universal in Oil Rubbed Bronze.
Handles BeforeHandles After
Then we added a cast iron coat hook to the back of the door for guest robes or wet towels. This I think is a necessary in all guestroom, else your guests put sopping wet towels on the floor and/or furniture.
I had just bought some cast iron hooks for the front entry coat rack. They cost around $6 a hook. So when El Granto found this hook at our local dollar store for $1.50 I jumped and got him to buy two.
I played around with Annie Sloan Chalk Paint for the Backyard Mural and loved it. It is like painting with artist paint.
I built a few bedside tables for our guest room and it struck me that I would love to use chalk paint on them. Problem is, that I am a very impatient person, and when I get an idea in my head, I need to do it NOW. My closest stocklist for Annie Sloan paint is 2 hours away, and I don’t own a car…harrumph.
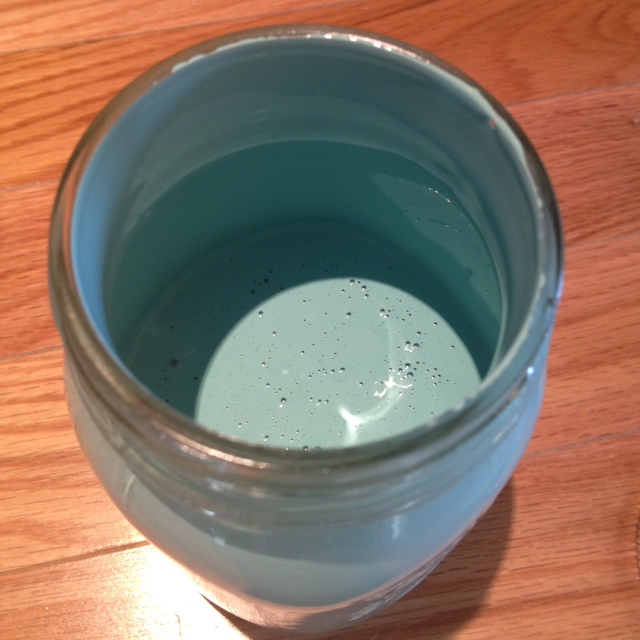
So I did the next best thing, and started googling. Hoping magically that in the last month a Toronto AS stocklist had opened up…no such luck. But then I found a bunch of recipes for DIY chalk paint. I am a bit of a disbeliever, but thought I had nothing to loose, so I set out to try to make some chalk paint of my own. I picked up a $3 container of plaster of paris from the hardware store, eyeballed some into an old jar, added the same amount of water as plaster, gave it a stir and then added about 1.5 times as much latex wall paint. I played with the color mixing some turquoise and some blue that I had laying around. I gave it all a stir, then paint it on some scrap wood. IT LOOKED JUST LIKE CHALK PAINT. No, seriously. It went on the same way, covered the same way, and cleaned up the same way. I let it dry overnight thinking I would come back to it spontaneously combusting in the morning, or that it would all peel off or do something terrible. But… It did. just. fine.
Still looking at it rather speculatively, I put on a coat on my newly fabricated bedside tables, and it looked just like chalk paint. Again I waited for the other shoe to drop, only to put on a second coat, and distress it, and wax it and have it behave exactly the same way as the Annie Sloan chalk paint…
So here’s the game changer folks:
DIY CHALK PAINT
1 part plaster of paris
1 part hot water
3 parts paint
Mix plaster & water together until all the plaster is incorporated. Add paint. Stir.
(I put my chalk paint in a mason jar and added a label.)
I was going to post today about how to make your own chalk paint, but I forgot to take a photo of my chalk paint, so yeah, that post will have to wait. But dont you worry, I wont leave you empty handed today.
This weekend is Thanksgiving in Canada. I know what you’re thinking: already? Yeah me too, I’m not quite sure where September went, but holy crap its October.
This year we’re having Thanksgiving at our house. Its a small group (6 total) so its not a big affair, but we still like to have all the trimmings! So I thought I’d share with you my Thanksgiving menu and some of my tips and tricks.
Thanksgiving Menu
Appetizer:
Brie and Lingonberry Puff Pastries
Main:
BBQ Roast Turkey Jamie Oliver’s Bacon Stuffing (although I don’t use sage or celery, I prefer Rosemary)
El Granto’s Mum’s Squash Casserole
Spiral Cut Ham with Maple Glaze
Garlic Butter Green Beans
Balsamic Roasted Potatoes, Carrots, Pearl Onions, Beets, Parsnips and Garlic
Fresh Rolls and Homemade Butter
Fresh Cranberry Sauce
Gravy
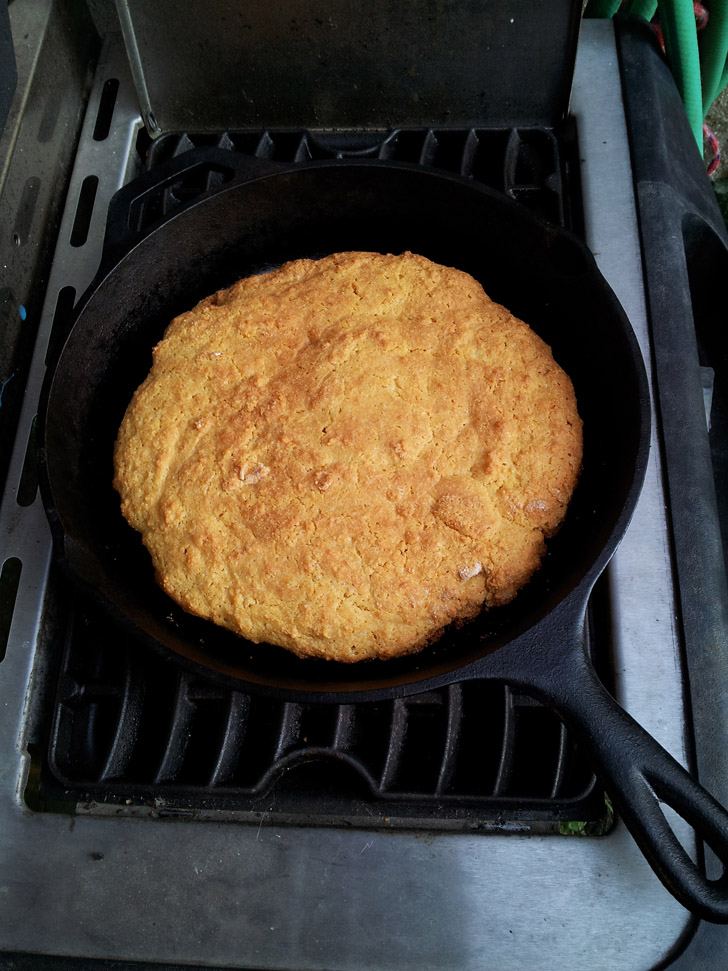
You may have noticed we will be BBQ’ing our turkey. If you have a BBQ with a natural gas line (or have a couple ready propane tanks) I HIGHLY advise you to BBQ your turkey. You cook it in the bbq like you would the oven. In a pan (albeit a cheap disposable one) but in a pan none the less. You get a lovely browned turkey AND your oven is left open for everything else. The one thing to note about a cooking your turkey on the BBQ is that it does cook a bit quicker. Also make sure you use a meat thermometer, you don’t want that turkey overcooked and dry (yuck!).
Speaking of keeping your turkey moist, don’t stuff the main cavity with bread stuffing. Why? Cause that bread sucks up all the turkeys juices. It also makes the turkey breasts cook slower, making the rest of your turkey overcooked before those thick breasts are done. Instead place some halved lemons and herbs in the cavity, and cook your stuffing in the oven. Put some butter under the skin of the turkey and enjoy the most delicious turkey ever!
HOMEMADE BUTTER!
Do you want to impress your mother in law? Fresh made butter is your party trick. All you need is some whipping cream and a container than seals air tight and that you can see through (like a jar).
Now I find that a really good whipping cream works best, I like to use Harmony Whipping Cream. If you wanna make extra fancy butter you also will need some fresh herbs.
So here goes. Put your whipping cream on the counter to come up to room temperature. Leave it there for a couple of hours.
Pour your cream into your airtight container. Make sure you don’t fill the container more than half full. Seal your container and make sure it doesn’t leak.
Now take the container in one hand and gently shake it. By gently shake, I really mean rock it Continue doing this for 5-10 minutes (it takes longer if your cream is colder). Until magically your cream that was once completely liquid will now start to separate and create a lump of butter in your jar. Keep shaking it for a few minutes so the butter stiffens up a bit more, then pour off the liquid (now buttermilk) and the solid. The solid mass of butter will have some buttermilk left in it, so I find its easiest to pour out the butter onto a plate/bowl getting rid of the buttermilk (although you can save it and use it for another recipe such as corn bread) Mash up your butter with a fork, trying to get rid of all the excess buttermilk. Give it a rinse with water. Once you’re left with only butter, add some salt and mix it up again. This will be your plain butter, but its anything from plain, its light, fluffy and delicious! Now what I like to do is crank it up a notch and make a few herbed butters. I like to mix in a couple herbs and seasonings. Like Rosemary and lemon, chive, roasted garlic or chili lime. Anything you can think of! Now go impress your in-laws with your bbq turkey and your homemade butter.
HOMEMADE CRANBERRY SAUCE!
This is waaaay simpler than you’re thinking. Grab a bag of fresh or frozen cranberries from your grocery store. To a medium sized pot, add a cup of water and a cup of sugar and add your bag of cranberries. Simmer at medium heat for 10-15 minutes until your cranberries have softened and start to break down. You can also add cinnamon, orange zest or any other flavors you like. Another tip is to keep your extra cranberry sauce and serve it over some brie for a yummy snack!

")


")
")


")
")
")